3524. Creating Tomcat Image with Docker FileDocker, Dockerfile, and Tomcat
Tutorial for how to create tomcat image with Dockerfile.
1. What is Dockerfile?
Docker can build images automatically by reading the instructions from a Dockerfile. A Dockerfile is a text document that contains all the commands a user could call on the command line to assemble an image. Using docker build users can create an automated build that executes several command-line instructions in succession.
2. What We’ve Done Until Now?
In posting Serving JSP Application With Tomcat In Docker and Enabling Tomcat Debugging in Docker for Eclipse, we deployed the JSP Tutorial application to Tomcat container with enabling the remote debugging. Below is the command we used.
$ docker run --name=jsptomcat -d -v ~/Documents/jsptomcat:/usr/local/tomcat/webapps/jsptutorial -p 31020:8080 -p 8000:8000 -e JPDA_ADDRESS=8000 tomcat catalina.sh jpda run
What is this command doing?
- Create a tomcat container named
jsptomcat. - Map local folder
~/Documents/jsptomcatto/usr/local/tomcat/webapps/jsptutorialin Tomcat container. - Expose
8080for outside world to connect to the website. - Expose
8000to enable remote debugging for tools like eclipse. - Set environment variable
JPDA_ADDRESSto 8000. - Start tomcat via command
catalina.sh jpda run.
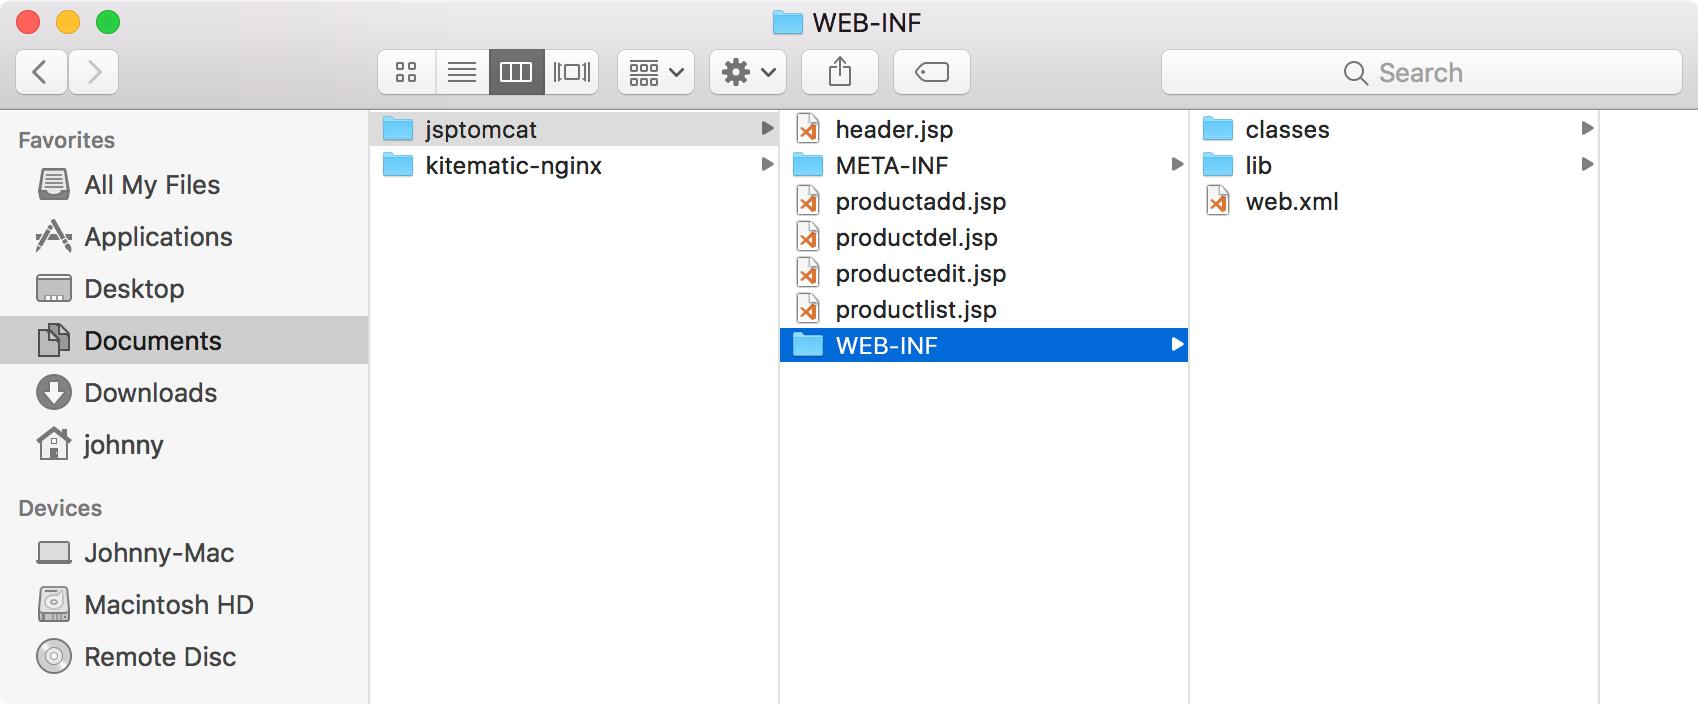
In this posting, we will use Dockerfile to create a tomcat image with the same configuration mentioned above. Before moving forward, make sure you’ve already setup folder ~/Documents/jsptomcat in local machine, which will be volumed to tomcat container later. And all jsp and class files have been deployed into this folder.
3. Creating Tomcat Image with Dockerfile
3.1 Creating Docker File
Create one file named Dockerfile in any directory on local machine.
$ cd ~/Johnny
$ mkdir DockerTomcat
$ cd DockerTomcat
$ vim Dockerfile
Edit Dockerfile, fill with following content.
#Create Tomcat Image for JSP Tutorial Application
FROM tomcat
MAINTAINER csgeek@mail.com

ENV JPDA_ADDRESS 8000
EXPOSE 8000
EXPOSE 8080
ENTRYPOINT ["catalina.sh", "jpda","run"]
CMD echo "jsptomcat is launched"
The following points need to be noted about the above file.
- The first line is a comment. You can add comments to the Docker File with the help of the # command
- The FROM keyword tells which base image you want to use. In our example, we are creating an image from the tomcat image.
- The next command is the person who is going to maintain this image.
- The ENV command is used to set environment variable. We set JPDA_ADDRESS to 8000 to enable remote debugging in tomcat container.
- The EXPOSE command exposes port of the image.
- The ENTRYPOINT command launch tomcat with running jpda for remote debugging. Notice, ENTRYPOINT only executes for container not image. To run command when creating image, use CMD keyword.
- The last line prints message to screen indicating container is running.
2.2 Creating Image with Dockerfile
Open Docker terminal, navigate to the folder where the Dockerfile locates. Run the following command.
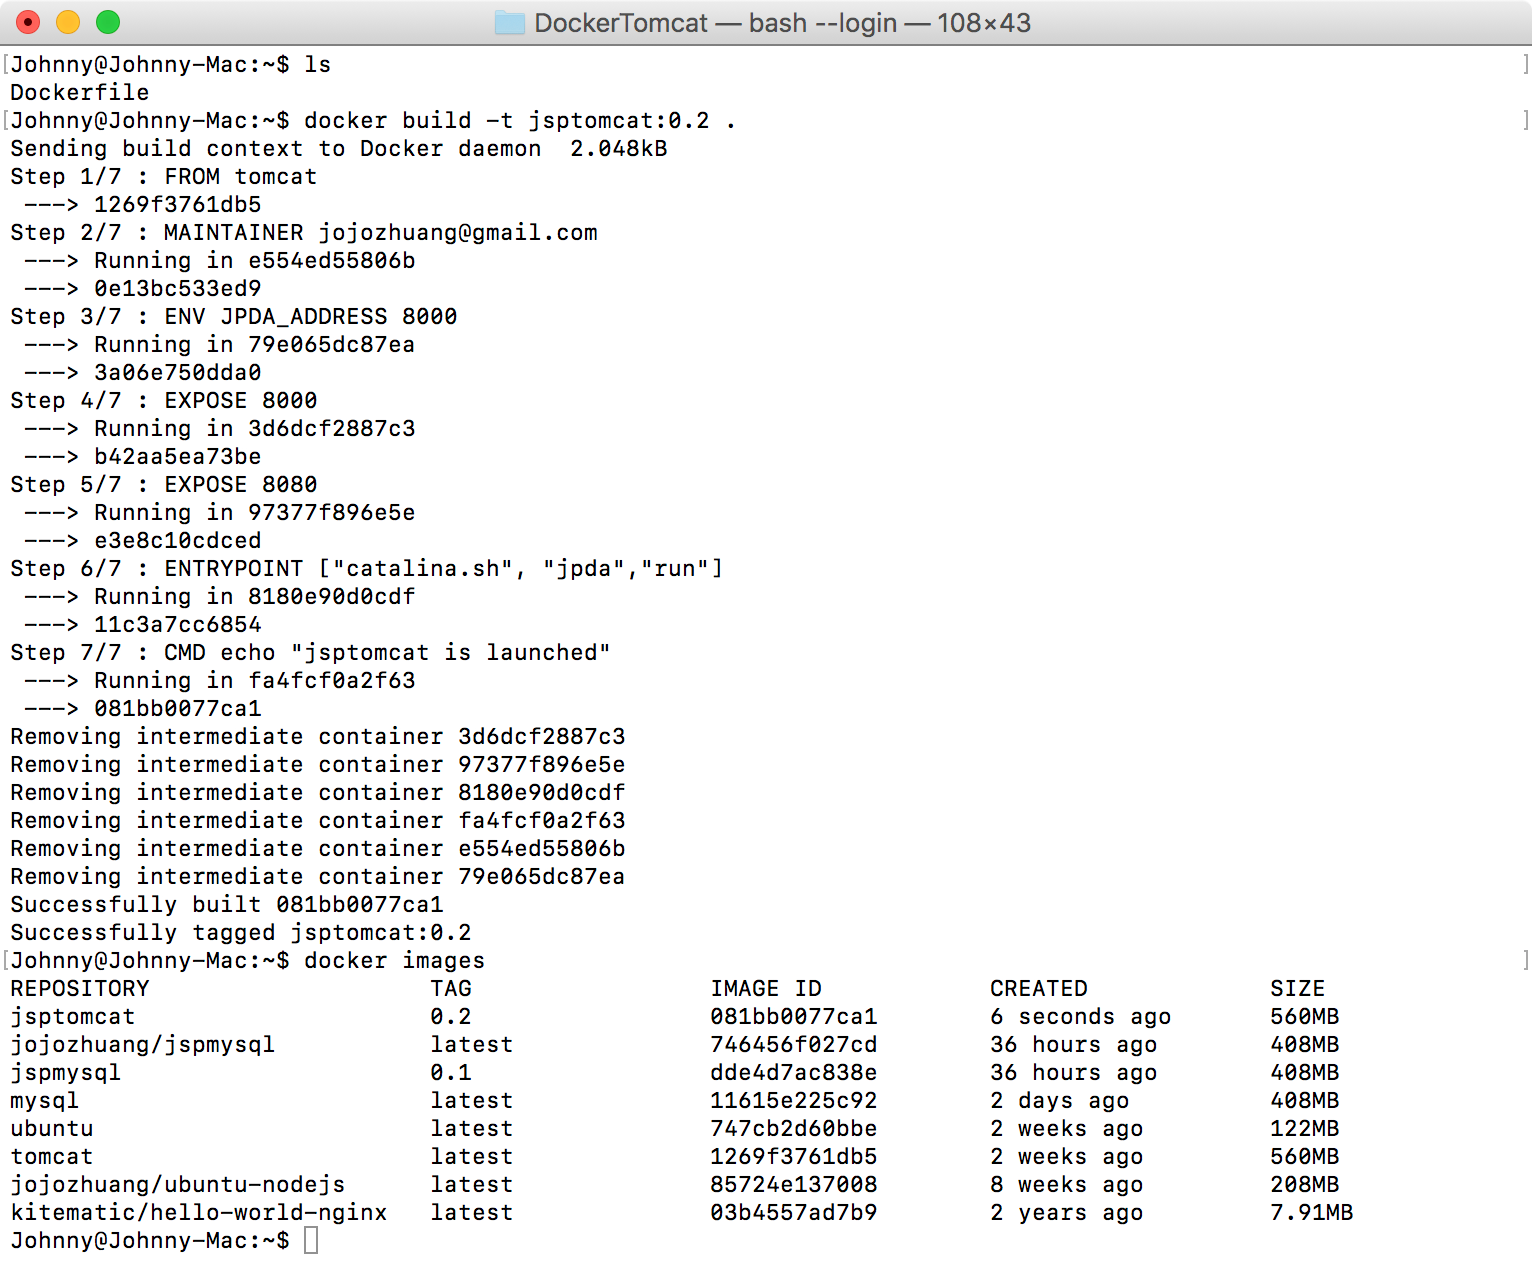
$ docker build -t jsptomcat:0.2 .
Here, jsptomcat is the name we are giving to the Image and 0.2 is the tag number. The last dot . indicates the current location. Check whether the image is created.
$ docker images
As you see, the new image is created with tag 0.2.
3. Testing Tomcat Image
3.1 Running Container
In docker terminal, run the following command. (Make sure remove the tomcat container we created before.)
$ docker run --name=jsptomcat -d -v ~/Documents/jsptomcat:/usr/local/tomcat/webapps/jsptutorial -p 31020:8080 -p 8000:8000 jsptomcat:0.2
Notice we don’t need to set the environment variable JPDA_ADDRESS, and execute catalina.sh jpda run any more. They are already set in the Dockerfile.
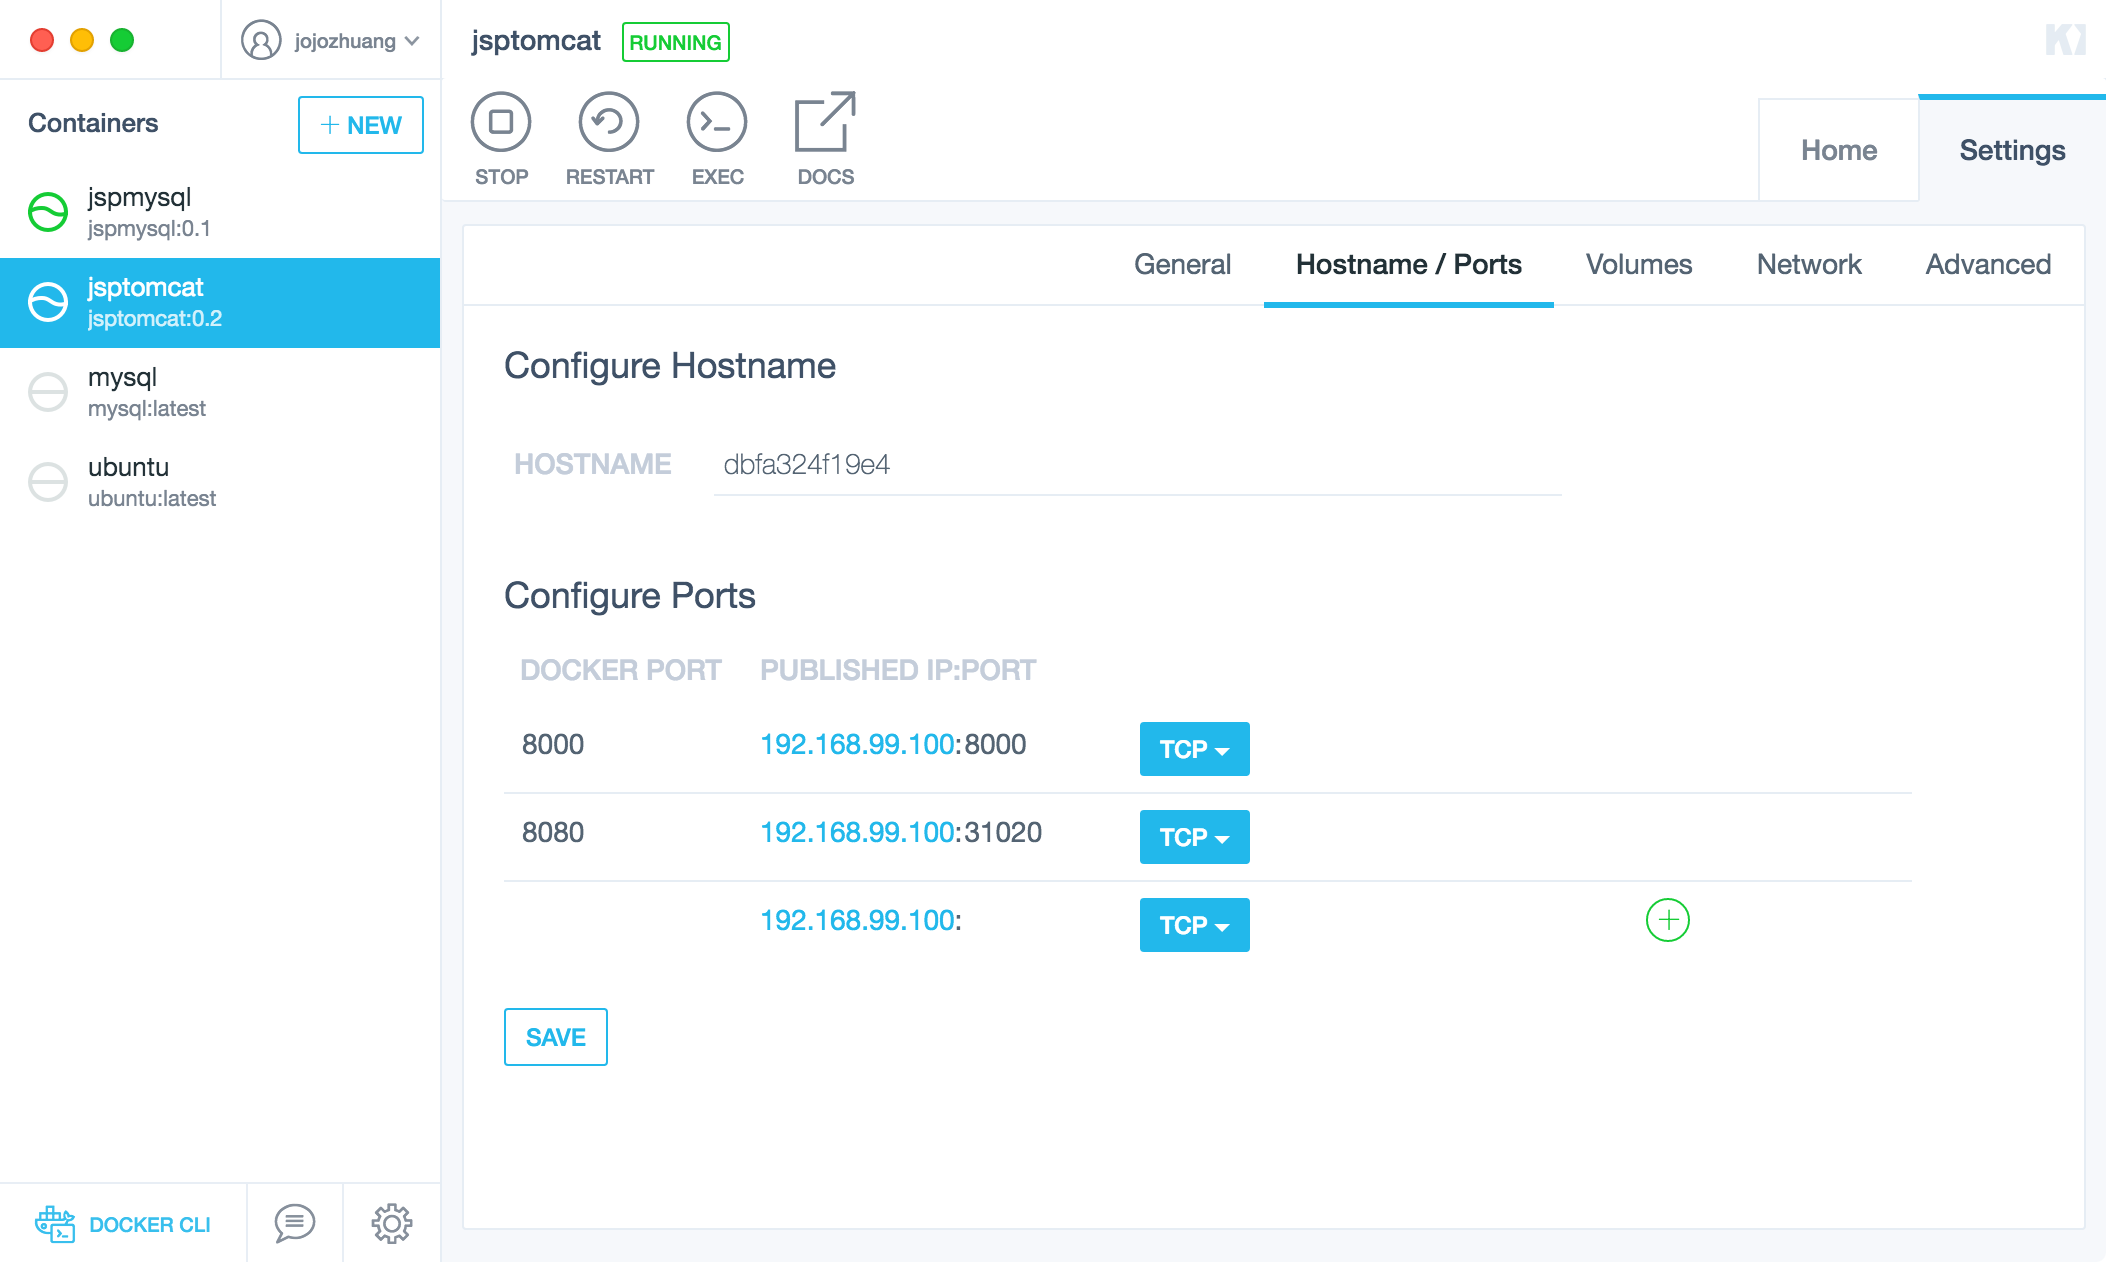
3.2 Verifying Container in Kitematic
A tomcat container named jsptomcat is running now. Notice, its source image is ‘jsptomcat:0.2’. And environment variable JPDA_ADDRESS has been added to the container.
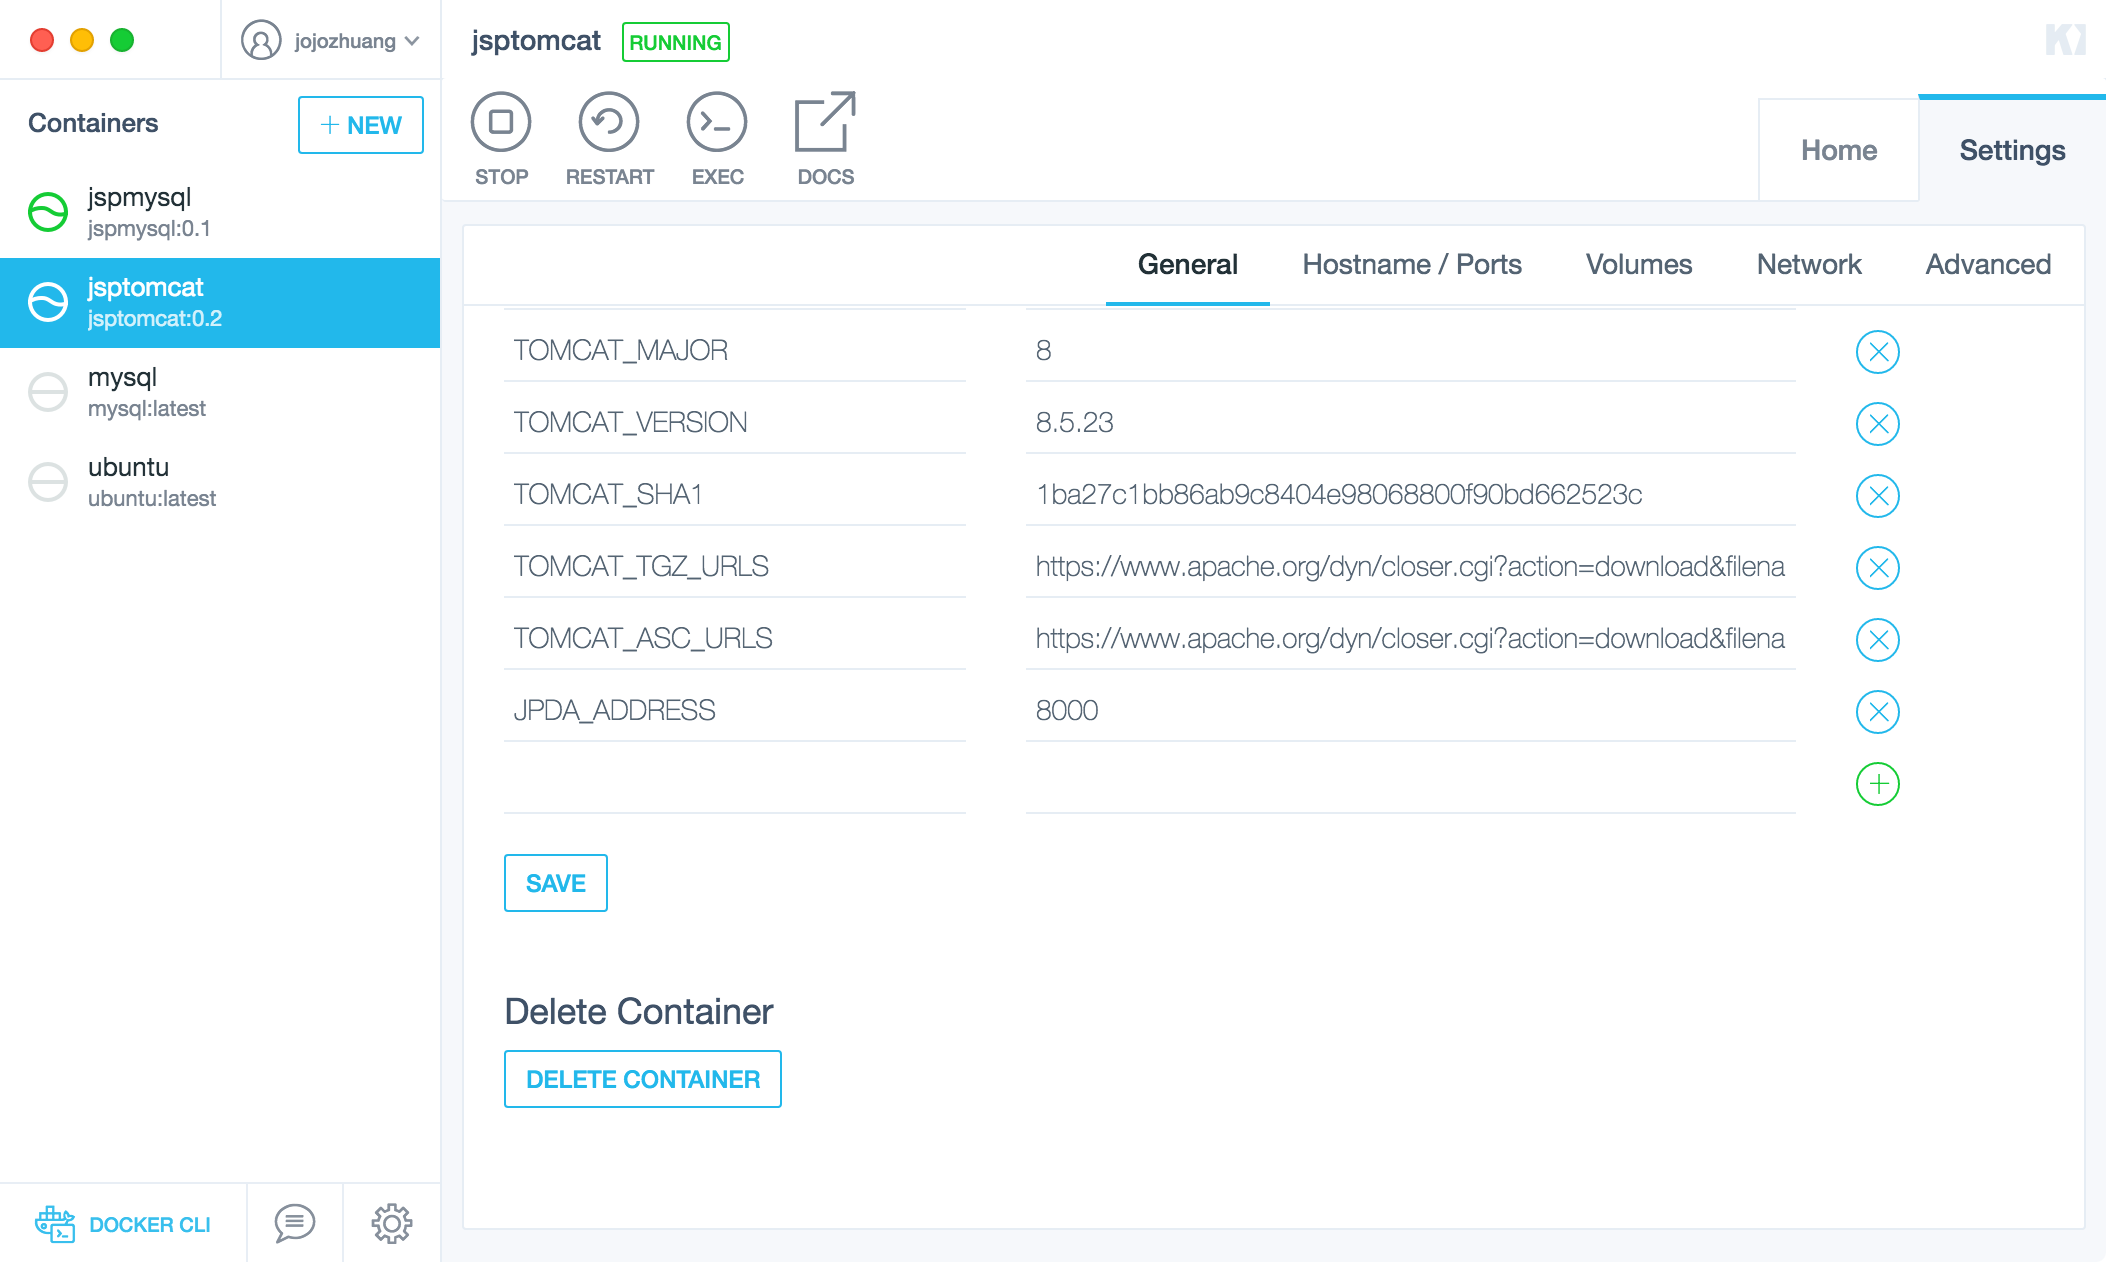
Port 8000 and port 8080 are also exposed.
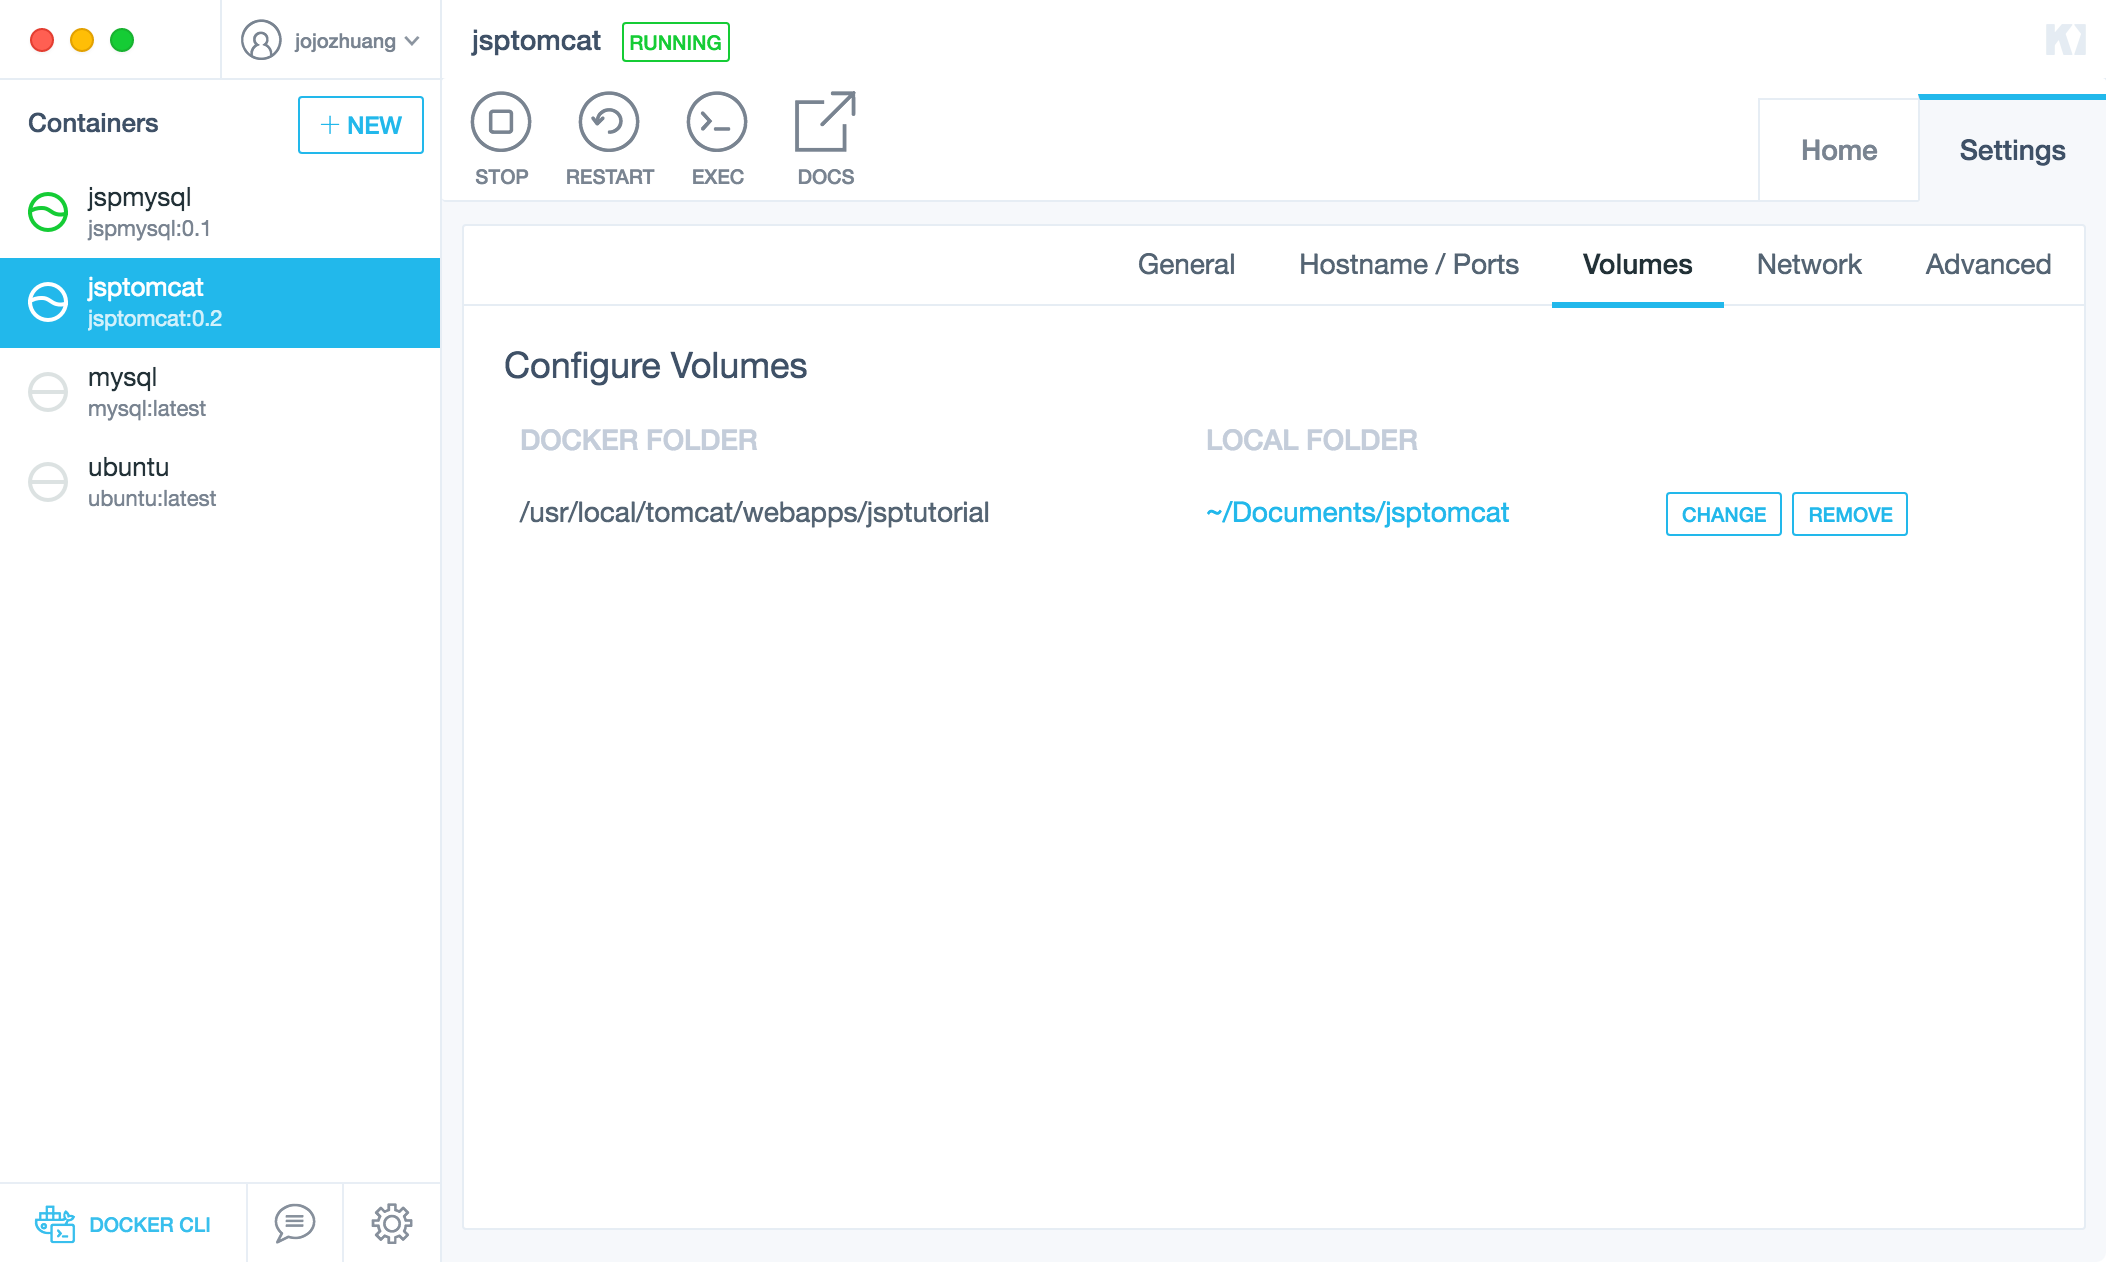
Volume is also configured correctly.
3.3 Verifying JSP Tutorial Website
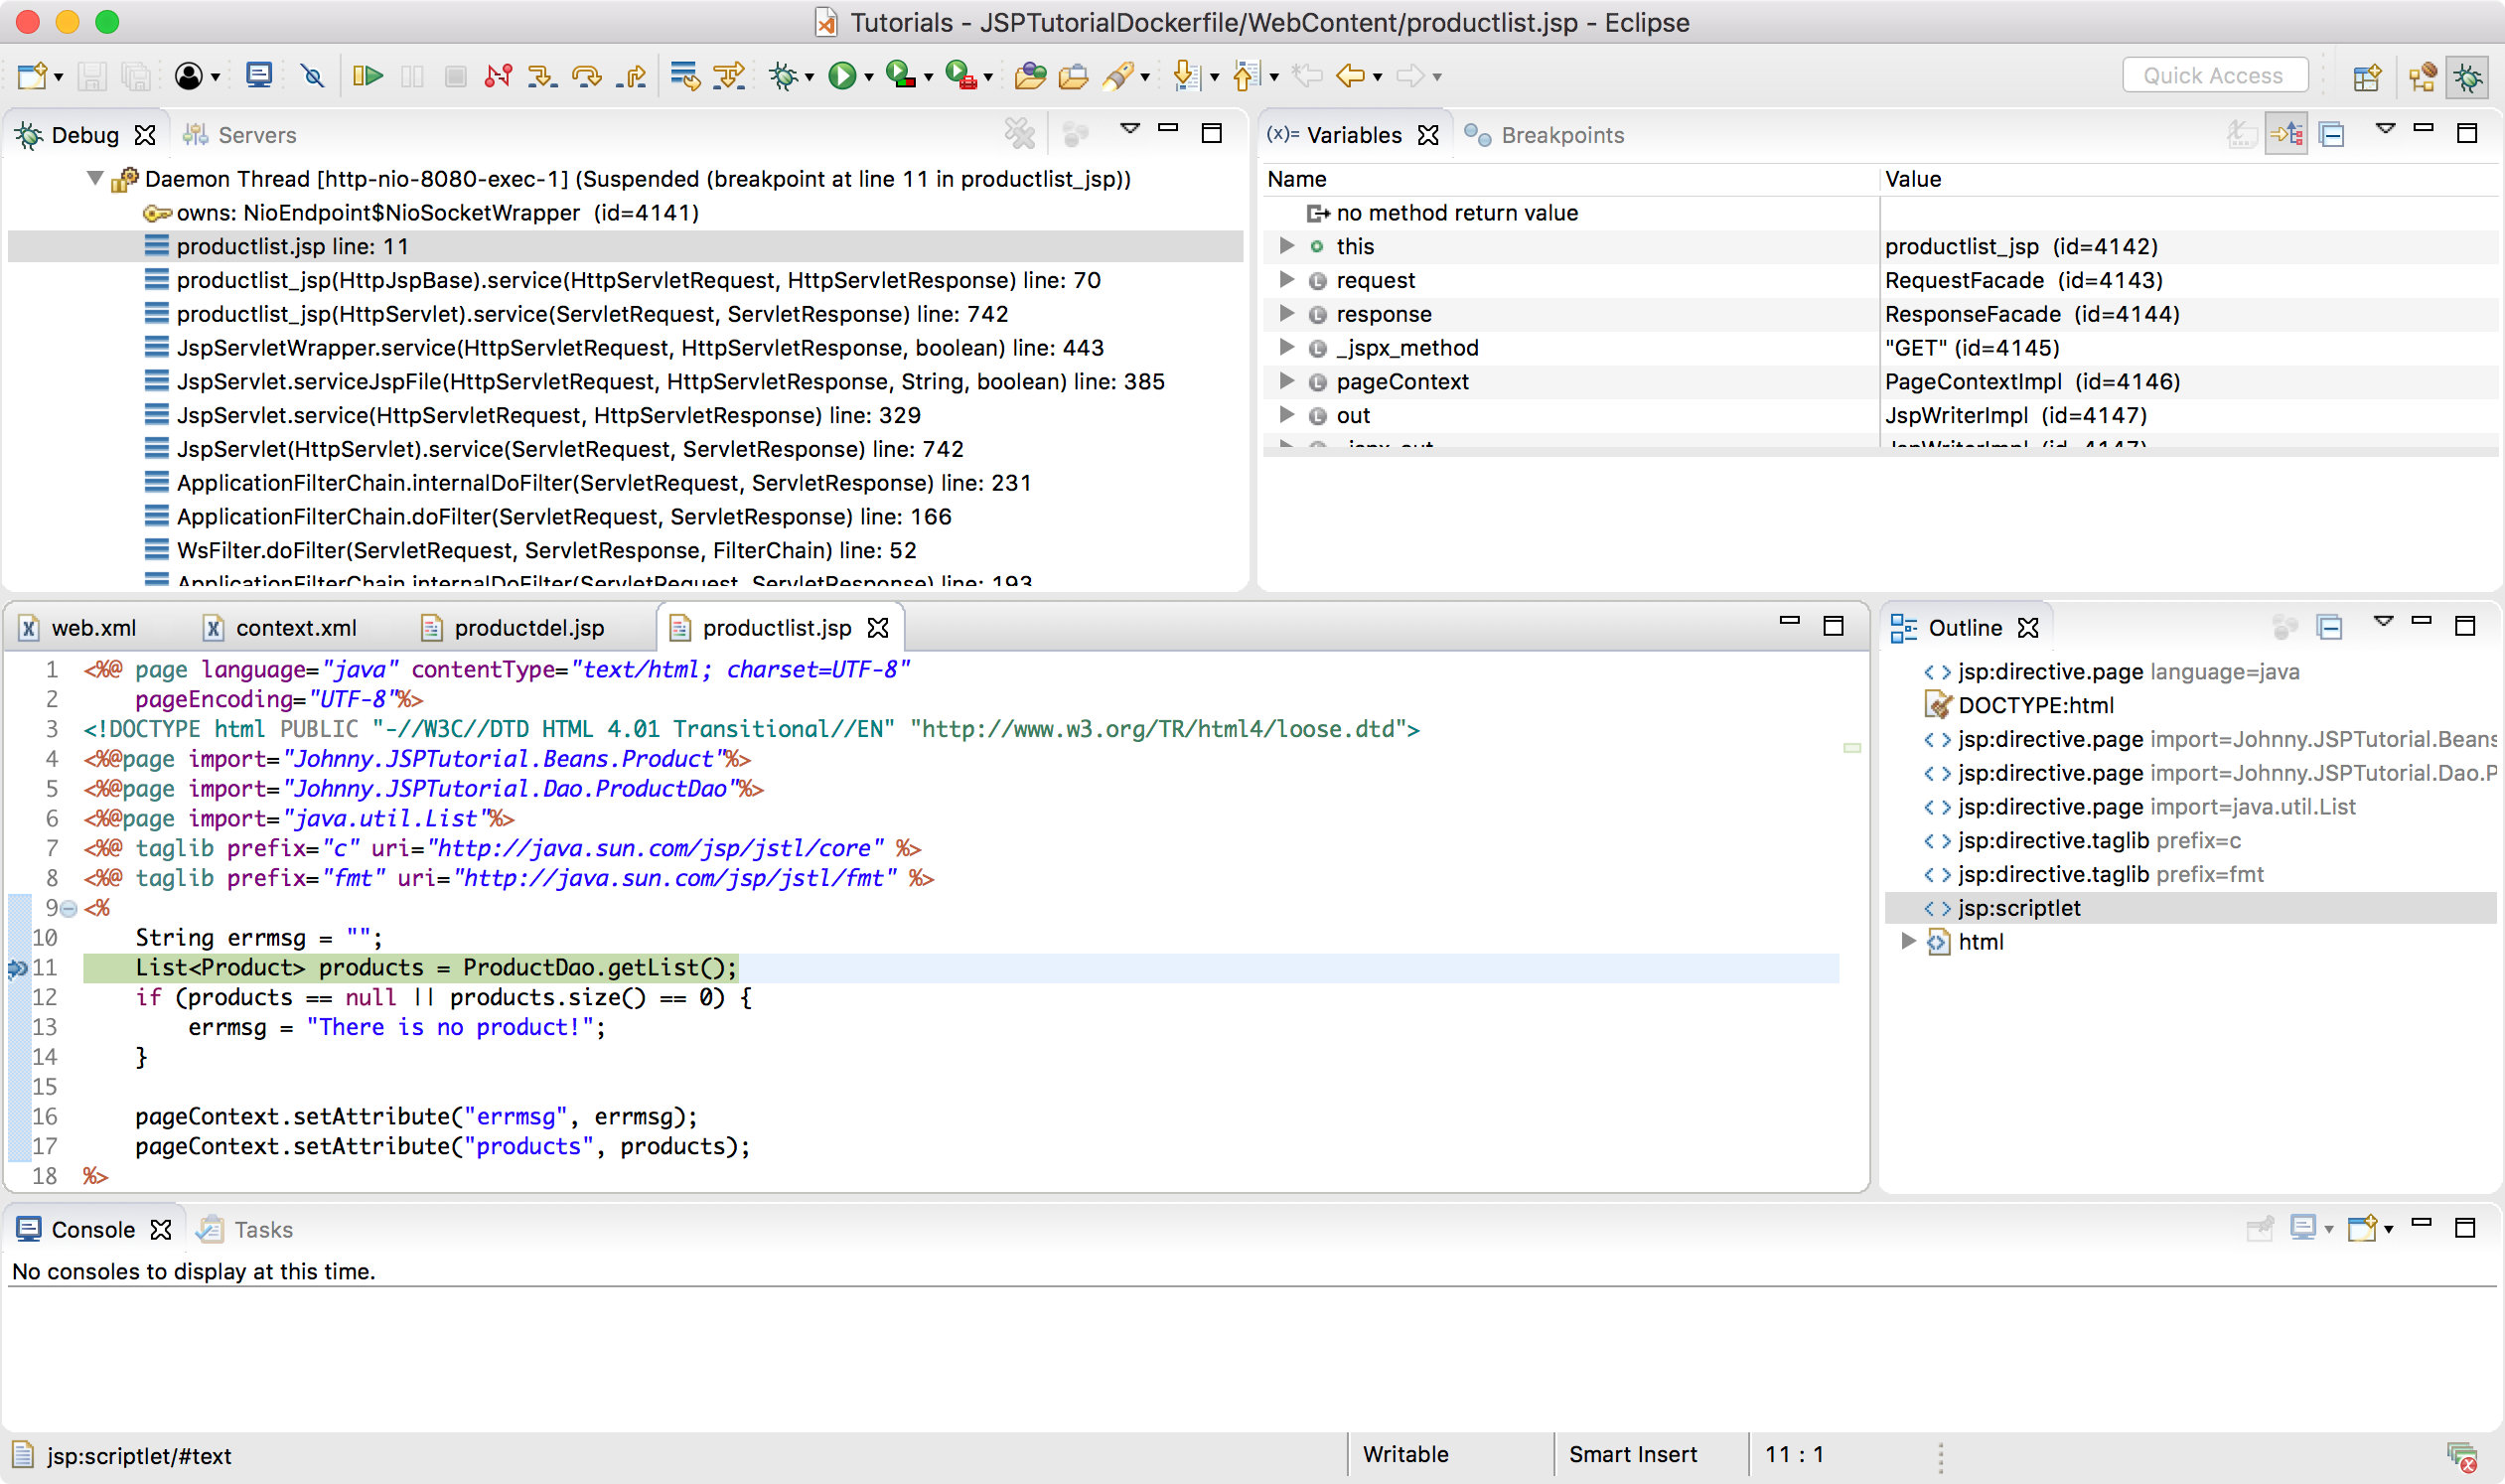
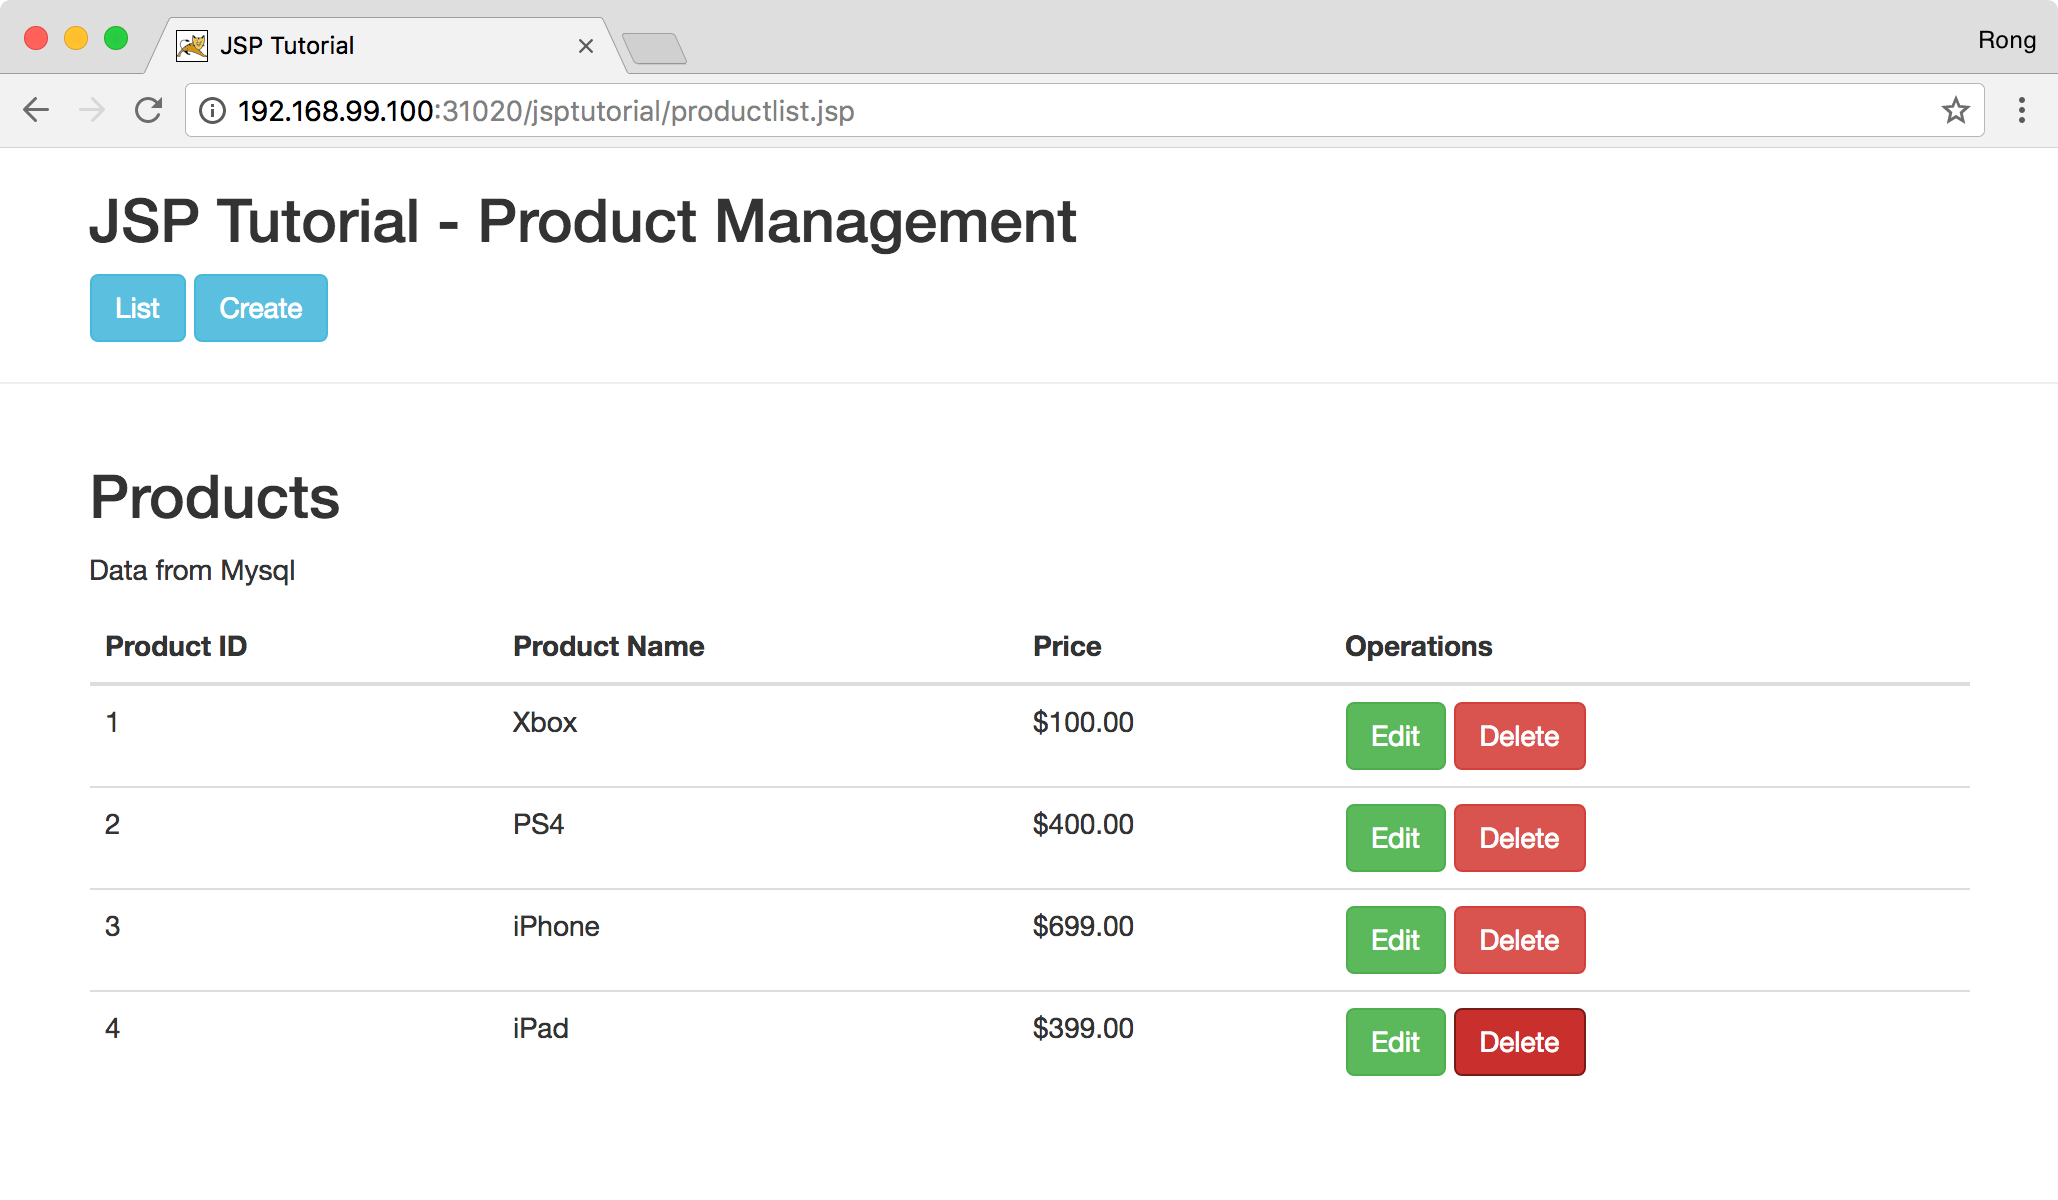
Access http://192.168.99.100:31020/jsptutorial/productlist.jsp in web browser. JSP Tutorial application is launched successfully!
In Eclipse, enable debugging and set breakpoint to productlist.jsp. Refresh the page in web browser. Switch back to Eclipse, the breakpoint is activated. The remote debugging function is working now.