8631. Building RESTful API with Express And MongoDBRESTful, Express, and MongoDB
Introduce how to create RESTful Web Service with Express and MongoDB.
1. MongoDB on mLab
We will use MongoDB to store data for our RESTful APIs. Our database will be hosted remotely on mLab, so we don’t need to install and setup MongoDB locally. mLab offers a nice free tier that we can use to test our application.
1.1 Signup
Go to https://mlab.com/signup/ to register a free account.
1.2 Creating Database
After login, click ‘Create new’ button.
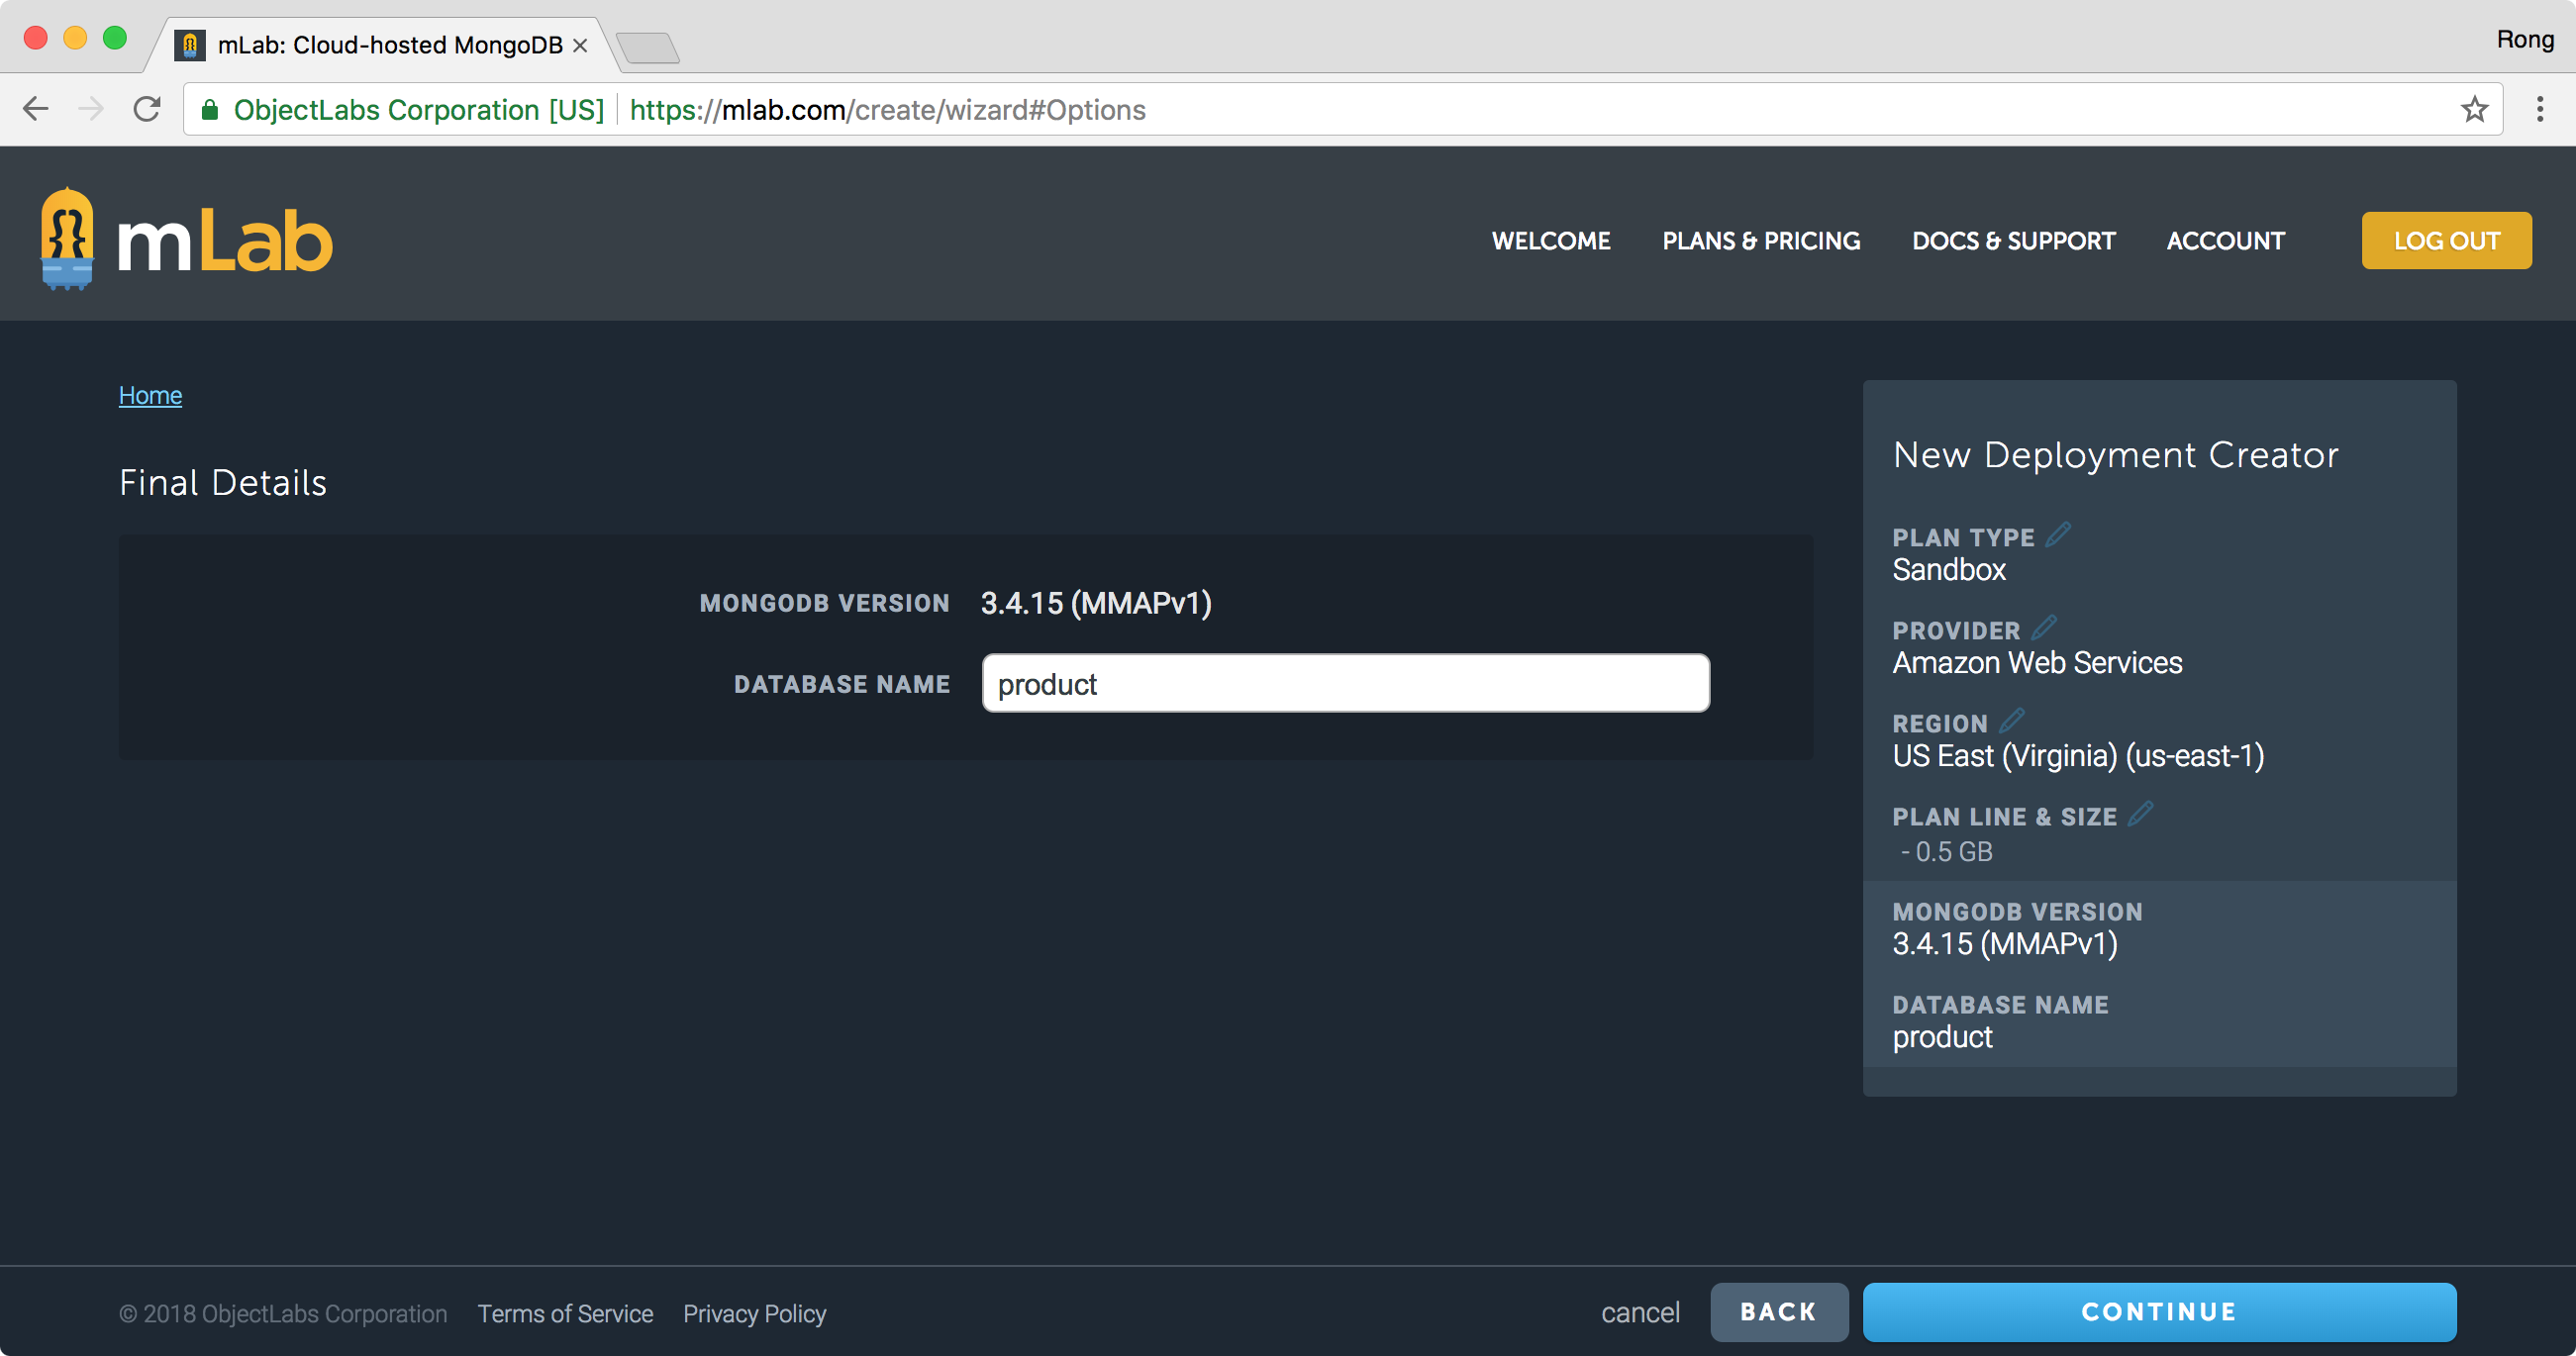
 Input the database name, eg. ‘product’, continue.
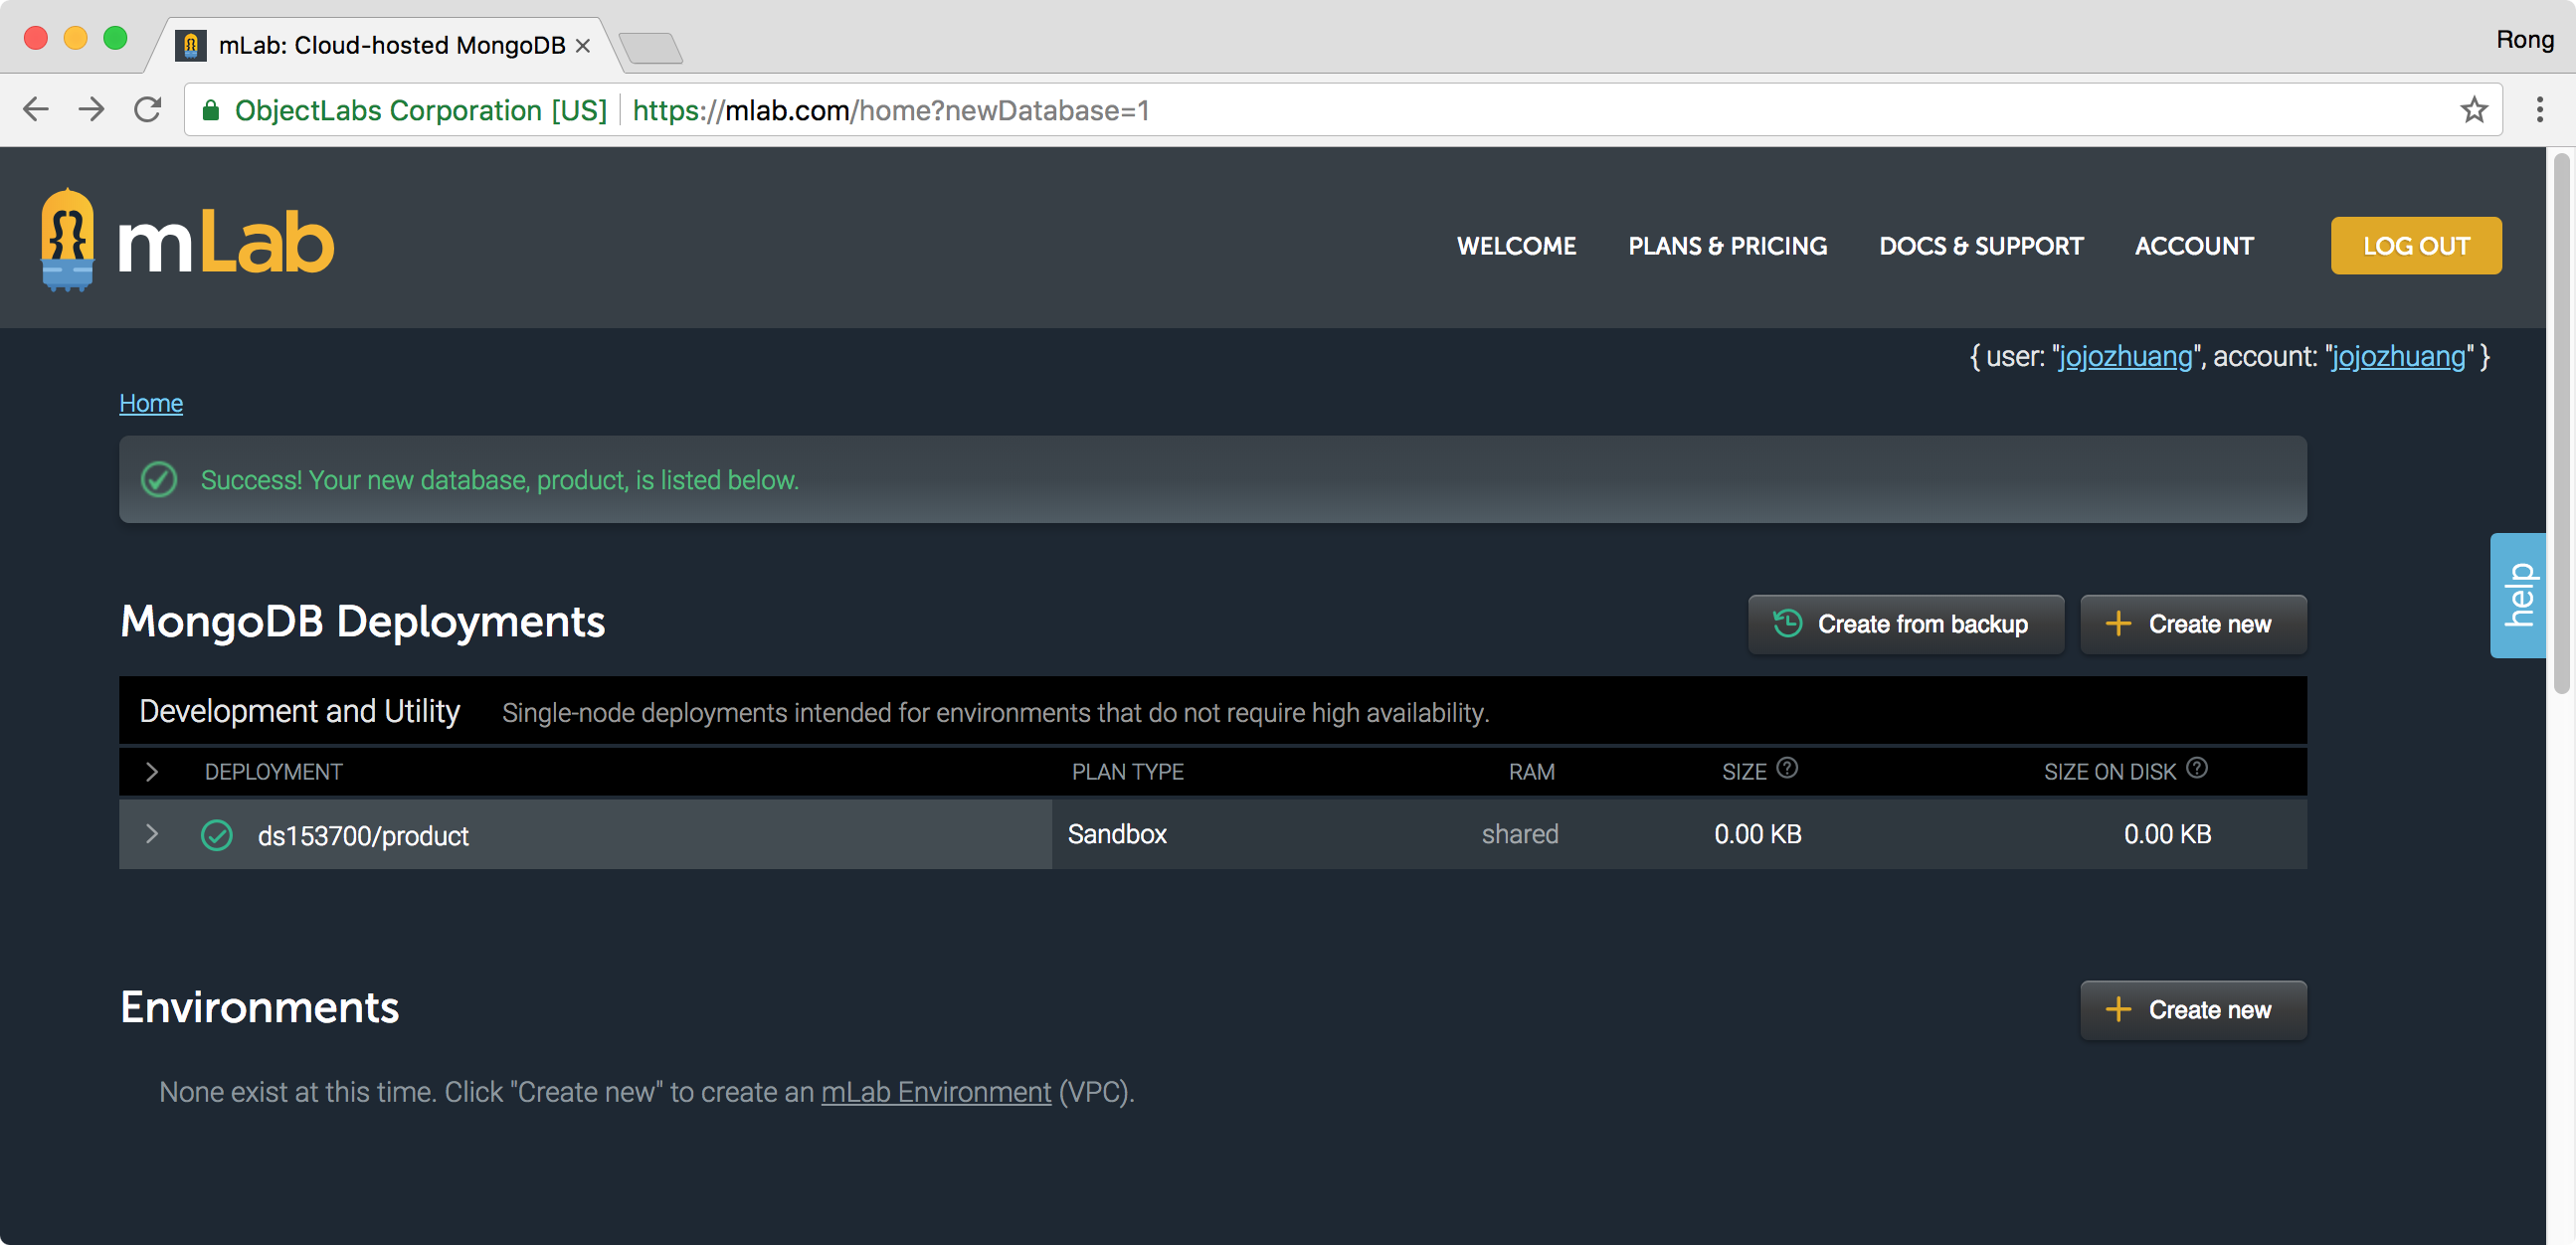
 It should be successfully created.
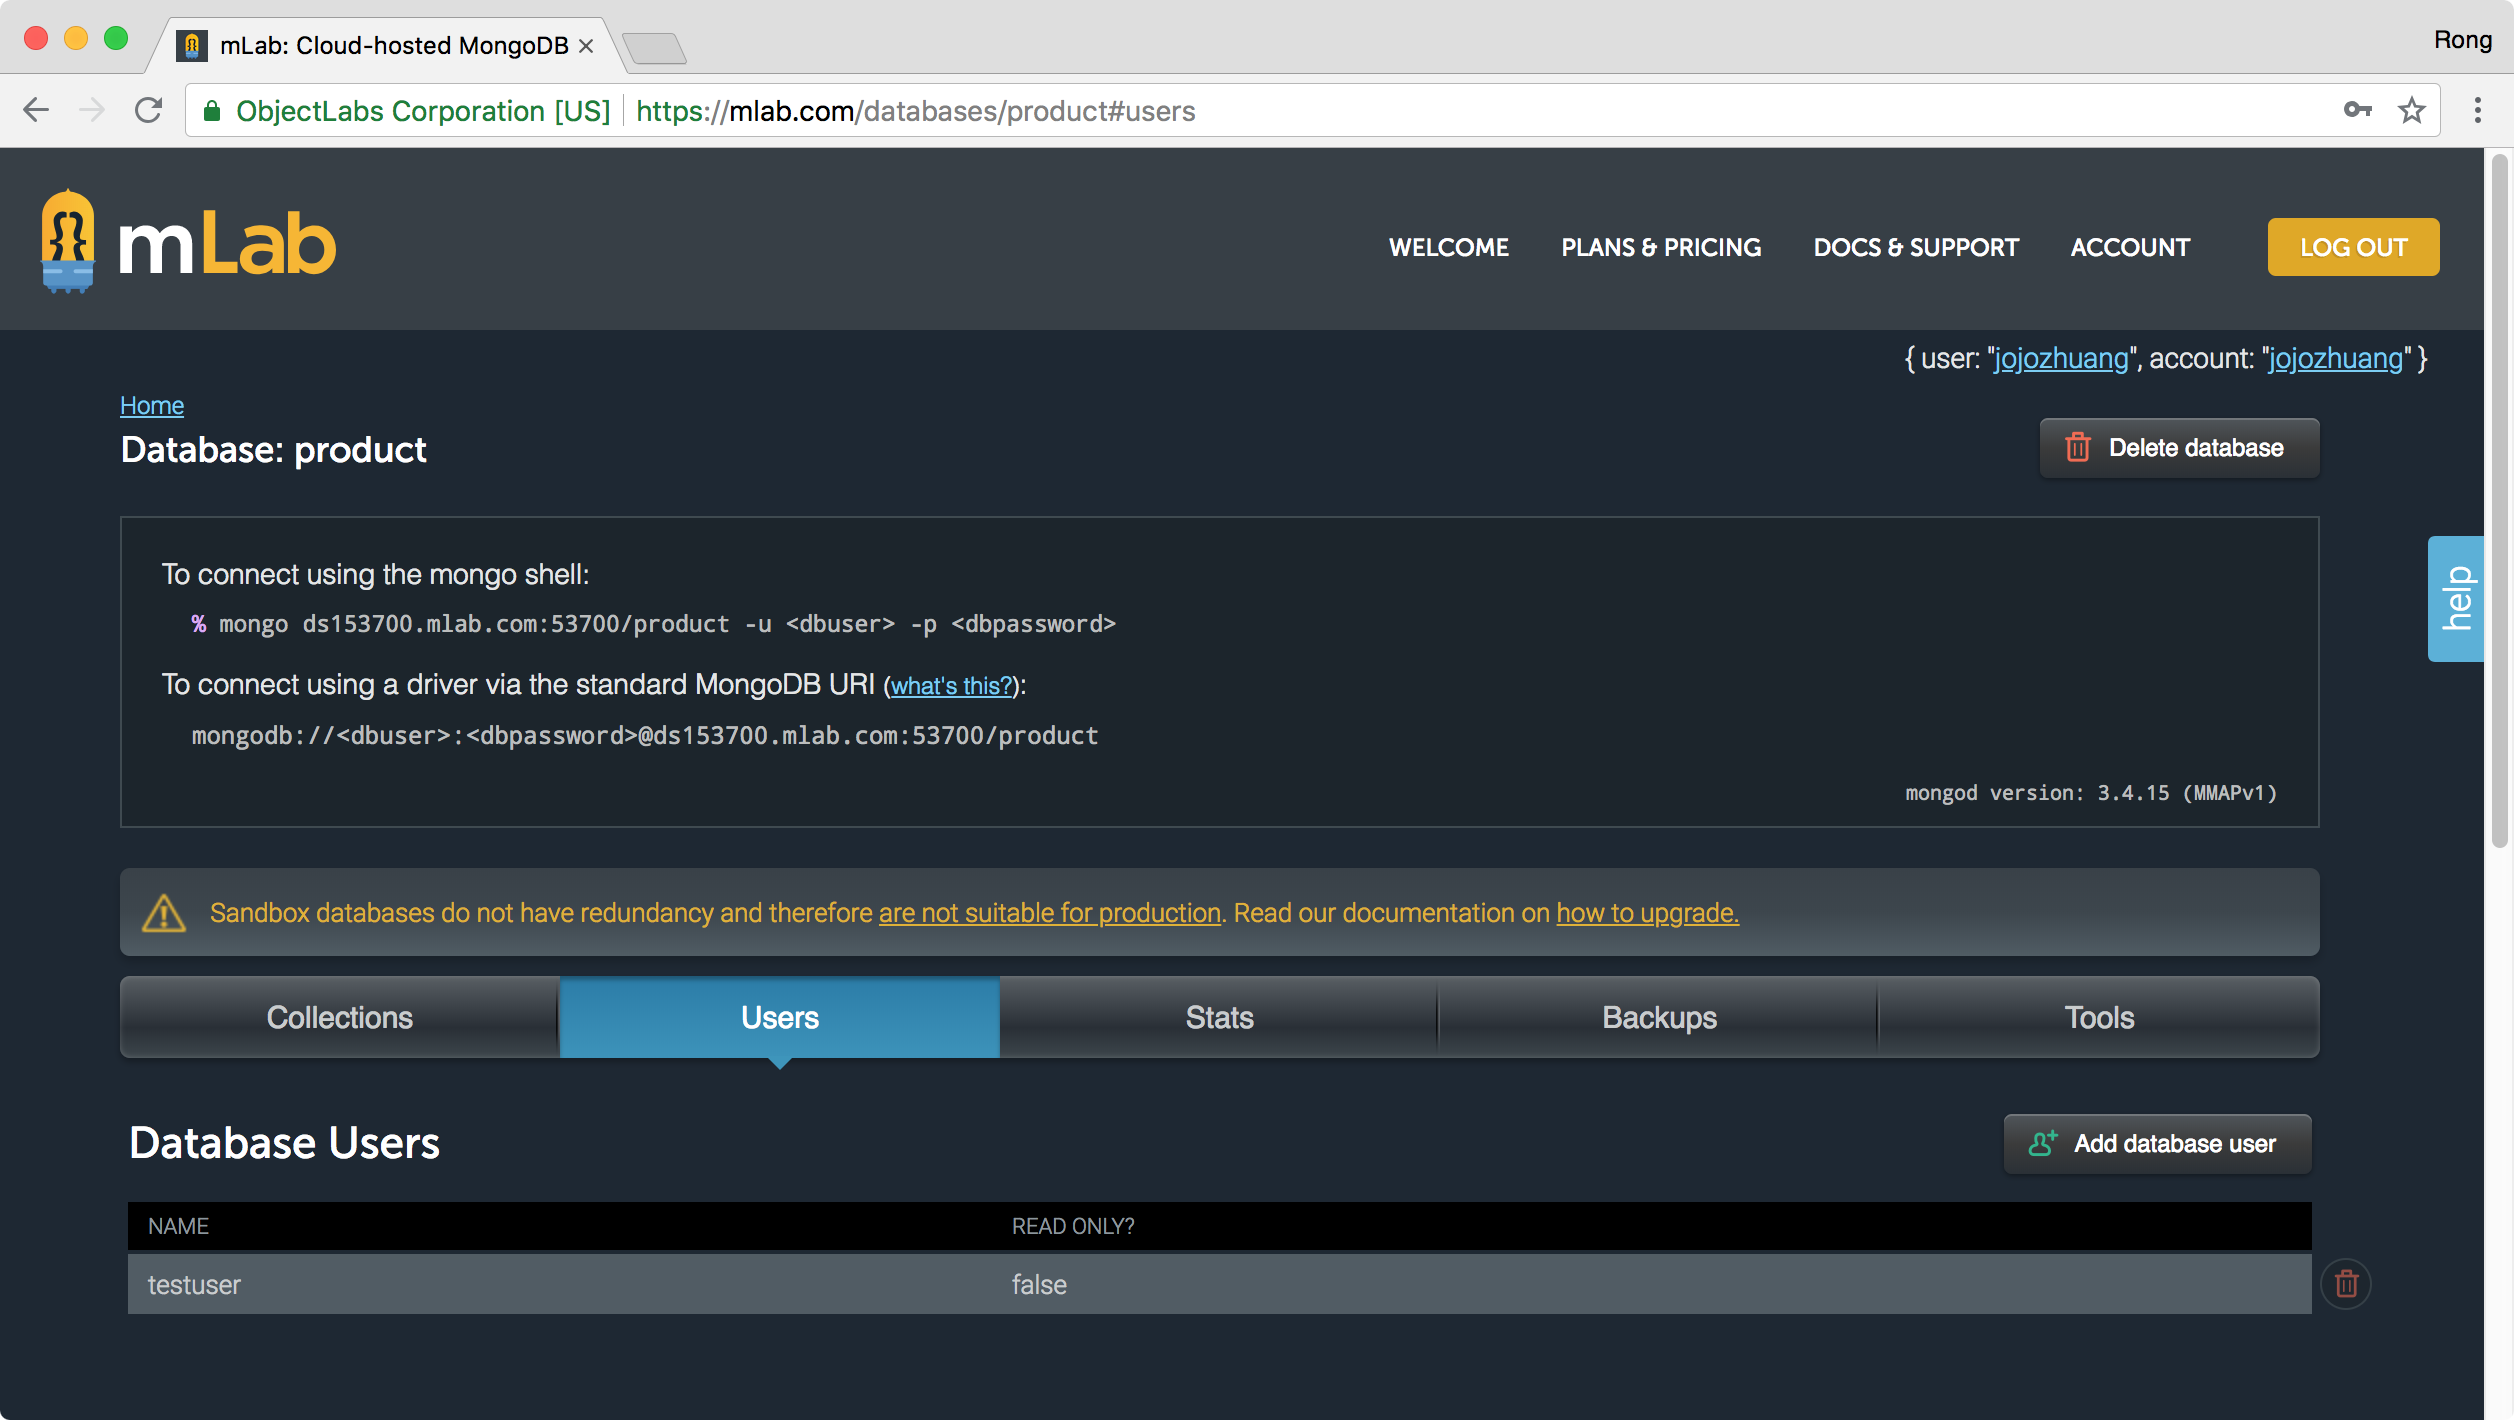
1.3 Creating User
Select the database we just created, eg. ‘ds153700/product’.
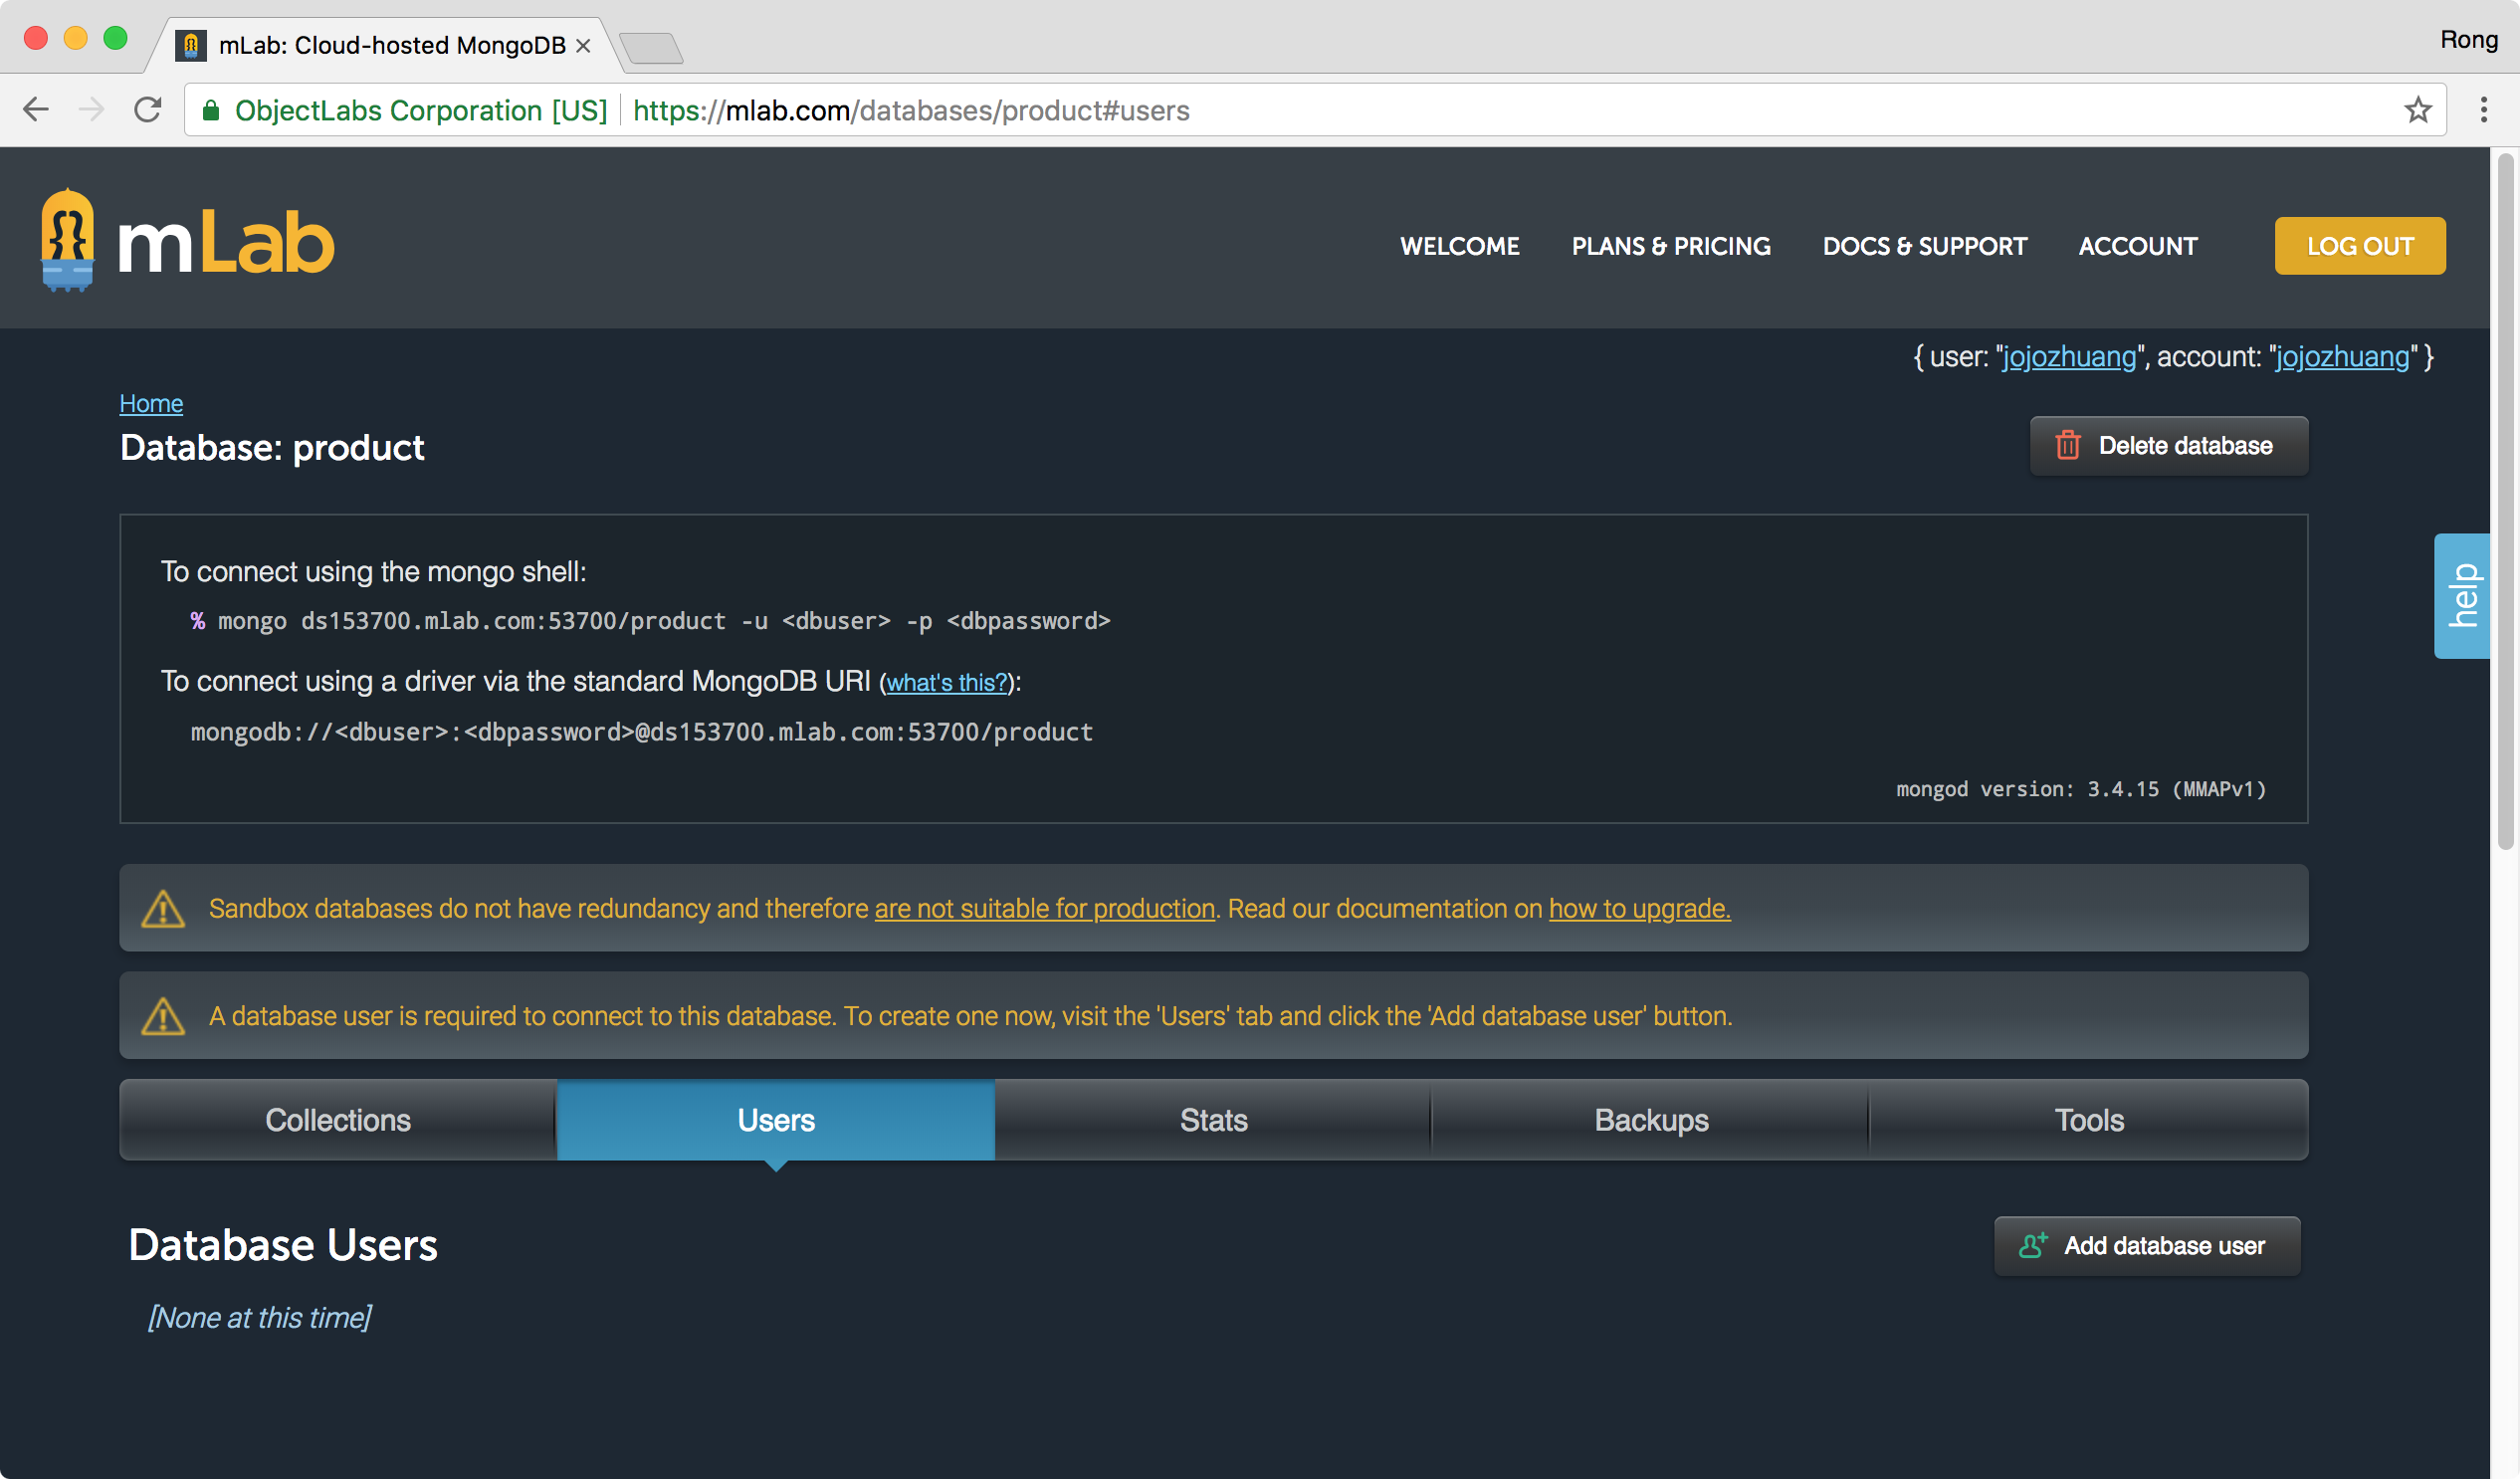 Click the ‘Add database user’ button. Specify the user name and password, eg. testproduct/abc123.
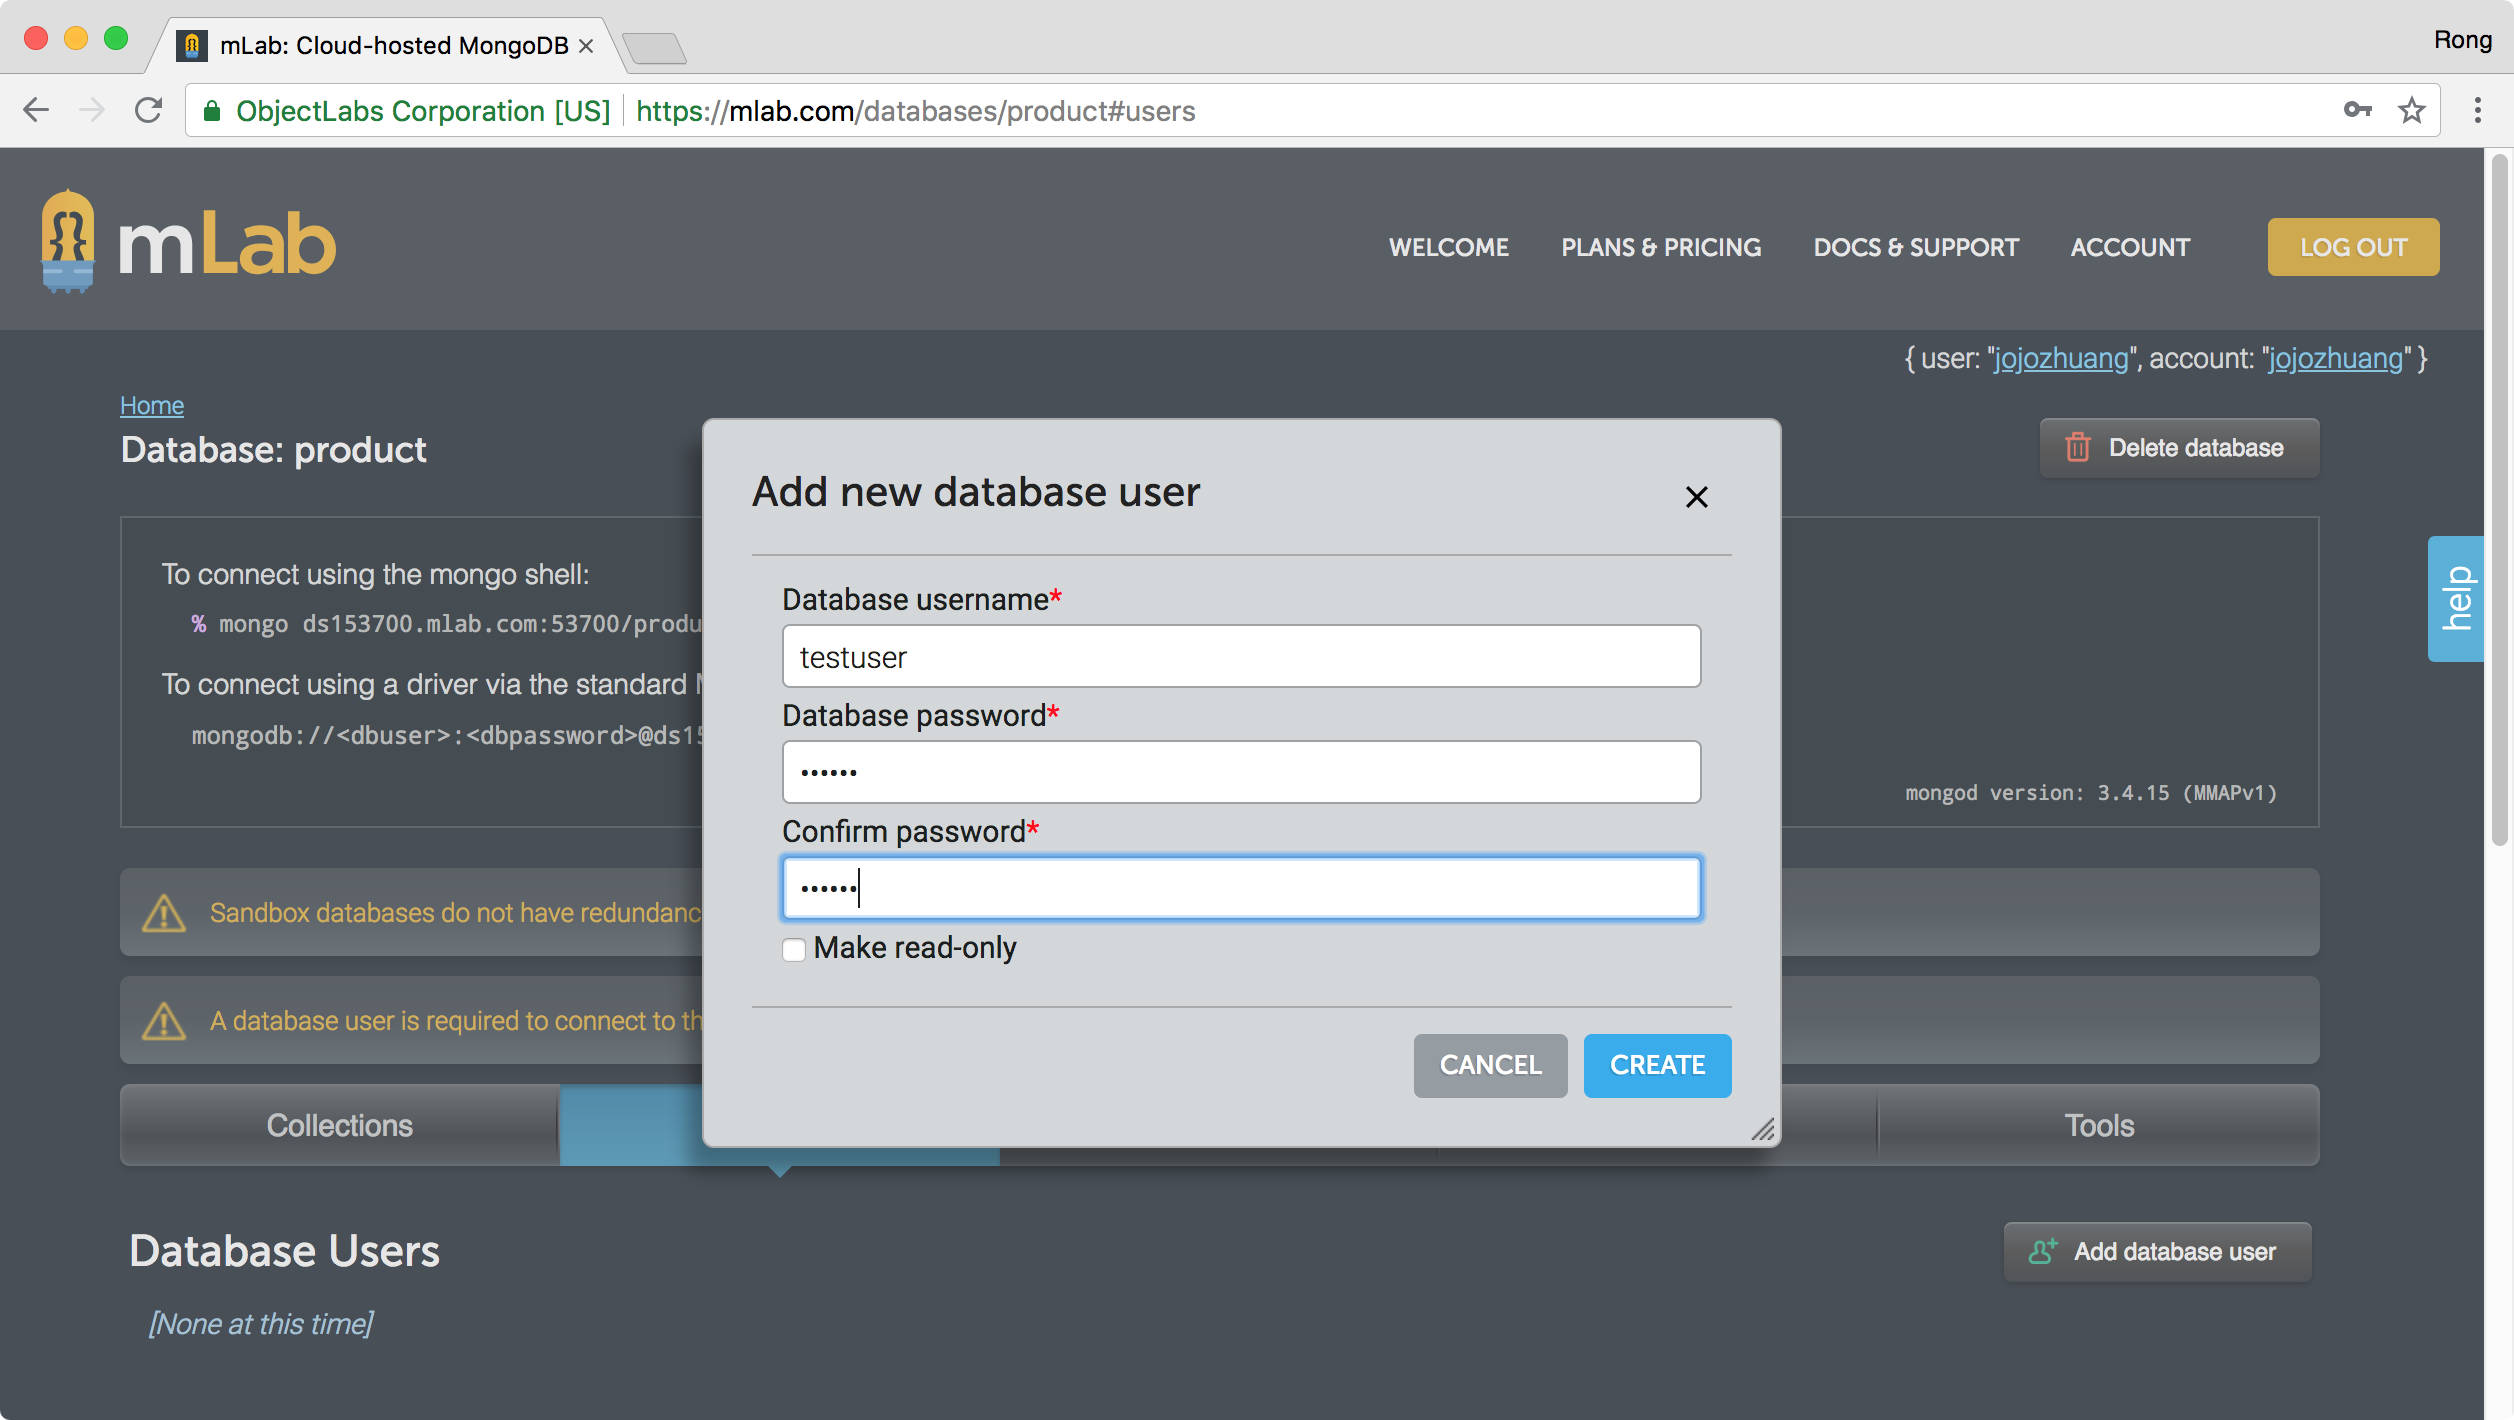 Click ‘Create’ button, done!
1.4 Connection String
Syntax:
mongodb://<dbuser>:<dbpassword>@<server>:<port>/<database>
Example:
mongodb://testuser:abc123@ds153700.mlab.com:53700/product
2. RESTful APIs
We will create the following RESTful APIs.
| API | Description | Request body | Response body |
|---|---|---|---|
| GET /api/product | Get all products | None | Array of Products |
| GET /api/product/{id} | Get a product by ID | None | Product |
| POST /api/product | Create a new product | Product | Product |
| PUT /api/product/{id} | Update a product | Product | None |
| DELETE /api/product/{id} | Delete a product | None | None |
3. Node.js Project
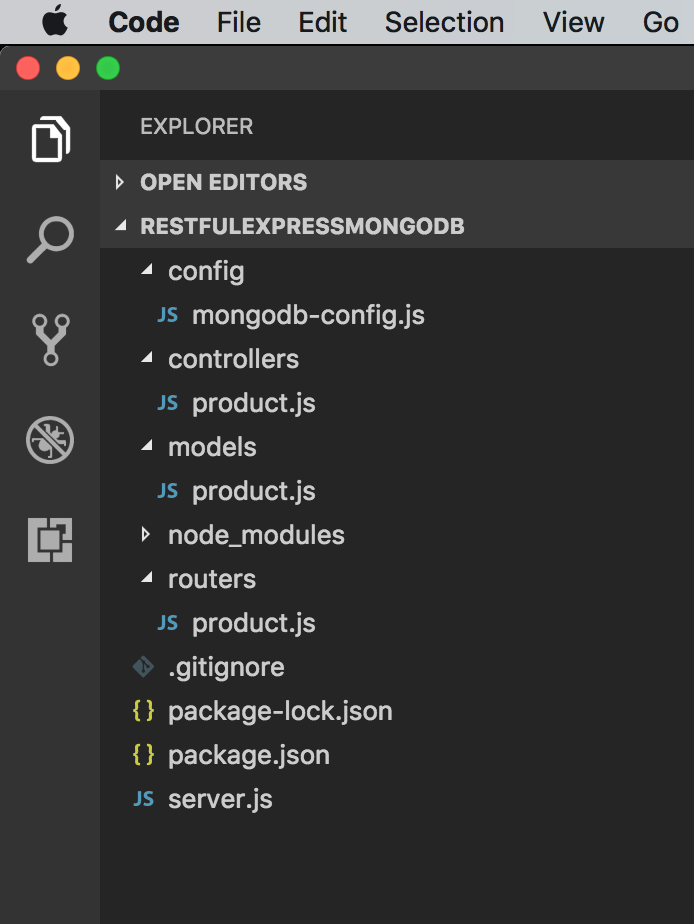
3.1 Organizing Project
We will be working with the MVC design pattern. We will create model and controller for product. But we will not create view for it, as we are designing an API. Besides, we will create router for product to guide client request to proper controller. Inside the project directory, I will create the following four subdirectories
- controllers
- models
- routers
- config
3.2 Packages
We will use the following three packages.
- ExpressJS: It’s a flexible Node.js web application framework that provides a robust set of features for web and mobile applications.
- mongoose: It’s an Object Data Modeling (ODM) library for MongoDB and NodeJS.
- body-parser: It’s a Node.js body parsing middleware.
3.3 Creating Project
mkdir RESTfulExpressMongoDB
cd RESTfulExpressMongoDB
npm init
npm install --save express mongoose body-parser
I also highly recommend installing nodemon as a dev dependency. nodemon is a simple little package that automatically restarts your server when files change.
npm install --save-dev nodemon
You can then add the following script to package.json. We start our server with ‘nodemon server’ instead of ‘node server’.
// package.json
  "scripts": {
    "start": "nodemon server.js"
  },
The complete package.json should look like this:
// package.json
{
  "name": "restfulexpressmongodb",
  "version": "1.0.0",
  "description": "RESTful API with Express and MongoDB",
  "main": "server.js",
  "scripts": {
    "start": "nodemon server.js"
  },
  "author": "",
  "license": "ISC",
  "dependencies": {
    "body-parser": "^1.18.2",
    "express": "^4.16.3",
    "mongoose": "^5.0.11"
  },
  "devDependencies": {
    "nodemon": "^1.17.5"
  }
}
3.4 API for Product
MongoDB configuration.
// ./config/mongodb-config
module.exports = {
  url: "mongodb://testuser:abc123@ds153700.mlab.com:53700/product"
};
Model for product. We define two fields, name and price for collection product.
// ./models/product
var mongoose = require("mongoose");
var Schema = mongoose.Schema;

var ProductSchema = new Schema({
  name: { type: String, required: true, max: 100 },
  price: { type: Number, required: true }
});

// Export the model
module.exports = mongoose.model("Product", ProductSchema);
Controller for product. We defined 5 methods here.
// ./controllers/product
var Product = require("../models/product");

exports.product_create = function(req, res, next) {
  var product = new Product({
    name: req.body.name,
    price: req.body.price
  });

  product.save({ new: true }, function(err, product) {
    if (err) {
      return next(err);
    }
    res.status(200).send(product);
  });
};

exports.product_readone = function(req, res, next) {
  Product.findById(req.params.id, function(err, product) {
    if (err) {
      return next(err);
    }
    res.status(200).send(product);
  });
};

exports.product_update = function(req, res, next) {
  Product.findByIdAndUpdate(
    req.params.id,
    { $set: req.body },
    { new: true },
    function(err, product) {
      if (err) return next(err);
      res.status(200).send(product);
    }
  );
};

exports.product_delete = function(req, res, next) {
  Product.findByIdAndRemove(req.params.id, function(err, product) {
    if (err) return next(err);
    res.status(200).send(product);
  });
};

exports.product_all = function(req, res, next) {
  Product.find({}, function(err, products) {
    if (err) return next(err);
    res.status(200).send(products);
  });
};
Router for product. Similar with controller, we defined 5 routes here.
// ./routers/product
var express = require("express");
var router = express.Router();

var product_controller = require("../controllers/product");

router.post("/", product_controller.product_create);

router.get("/:id", product_controller.product_readone);

router.put("/:id", product_controller.product_update);

router.delete("/:id", product_controller.product_delete);

router.get("/", product_controller.product_all);

module.exports = router;
3.5 Server
// server.js
var express = require("express");
var bodyParser = require("body-parser");
var mongoconfig = require("./config/mongodb-config");
var product = require("./routers/product"); // Imports routes for the products

var port = process.env.PORT || 5000;

var app = express();

// Set up mongoose connection
var mongoose = require("mongoose");
var mongoDB = process.env.MONGODB_URI || mongoconfig.url;

mongoose.connect(mongoDB);
mongoose.Promise = global.Promise;
var db = mongoose.connection;
db.on("error", console.error.bind(console, "MongoDB connection error:"));

// configure app to use bodyParser(), this will let us get the data from a POST
app.use(bodyParser.json());
app.use(bodyParser.urlencoded({ extended: false }));

// Enable CORS
app.use(function(req, res, next) {
  res.header("Access-Control-Allow-Origin", "*");
  res.header(
    "Access-Control-Allow-Headers",
    "Origin, X-Requested-With, Content-Type, Accept"
  );
  res.header("Access-Control-Allow-Methods", "*");
  next();
});

// routes
var router = express.Router();

// test route to make sure everything is working (accessed at GET http://localhost:5000/api)
router.get("/", function(req, res) {
  res.json({ message: "Hello! welcome to our api!" });
});

// chain routers
// all of the routers will be prefixed with /api
router.use("/product", product); // /api/produce

// Register the 'root' router
app.use("/api", router);

app.listen(port, () => {
  console.log("Server is up and running on port number " + port);
});
- Use mongoose to setup connection with remote mongoDB.
- Prepare to accept client request with router. Notice all the valid api URL contains ‘api’ prefix. For example, send GET request to http://localhost:5000/api/product to get product list.
- Enable CORS to support cross domain access.
3.6 Final Project Structure
The final structure of the express server project.
4. Running and Testing
Start the server and begin to test with Postman.
$ npm start
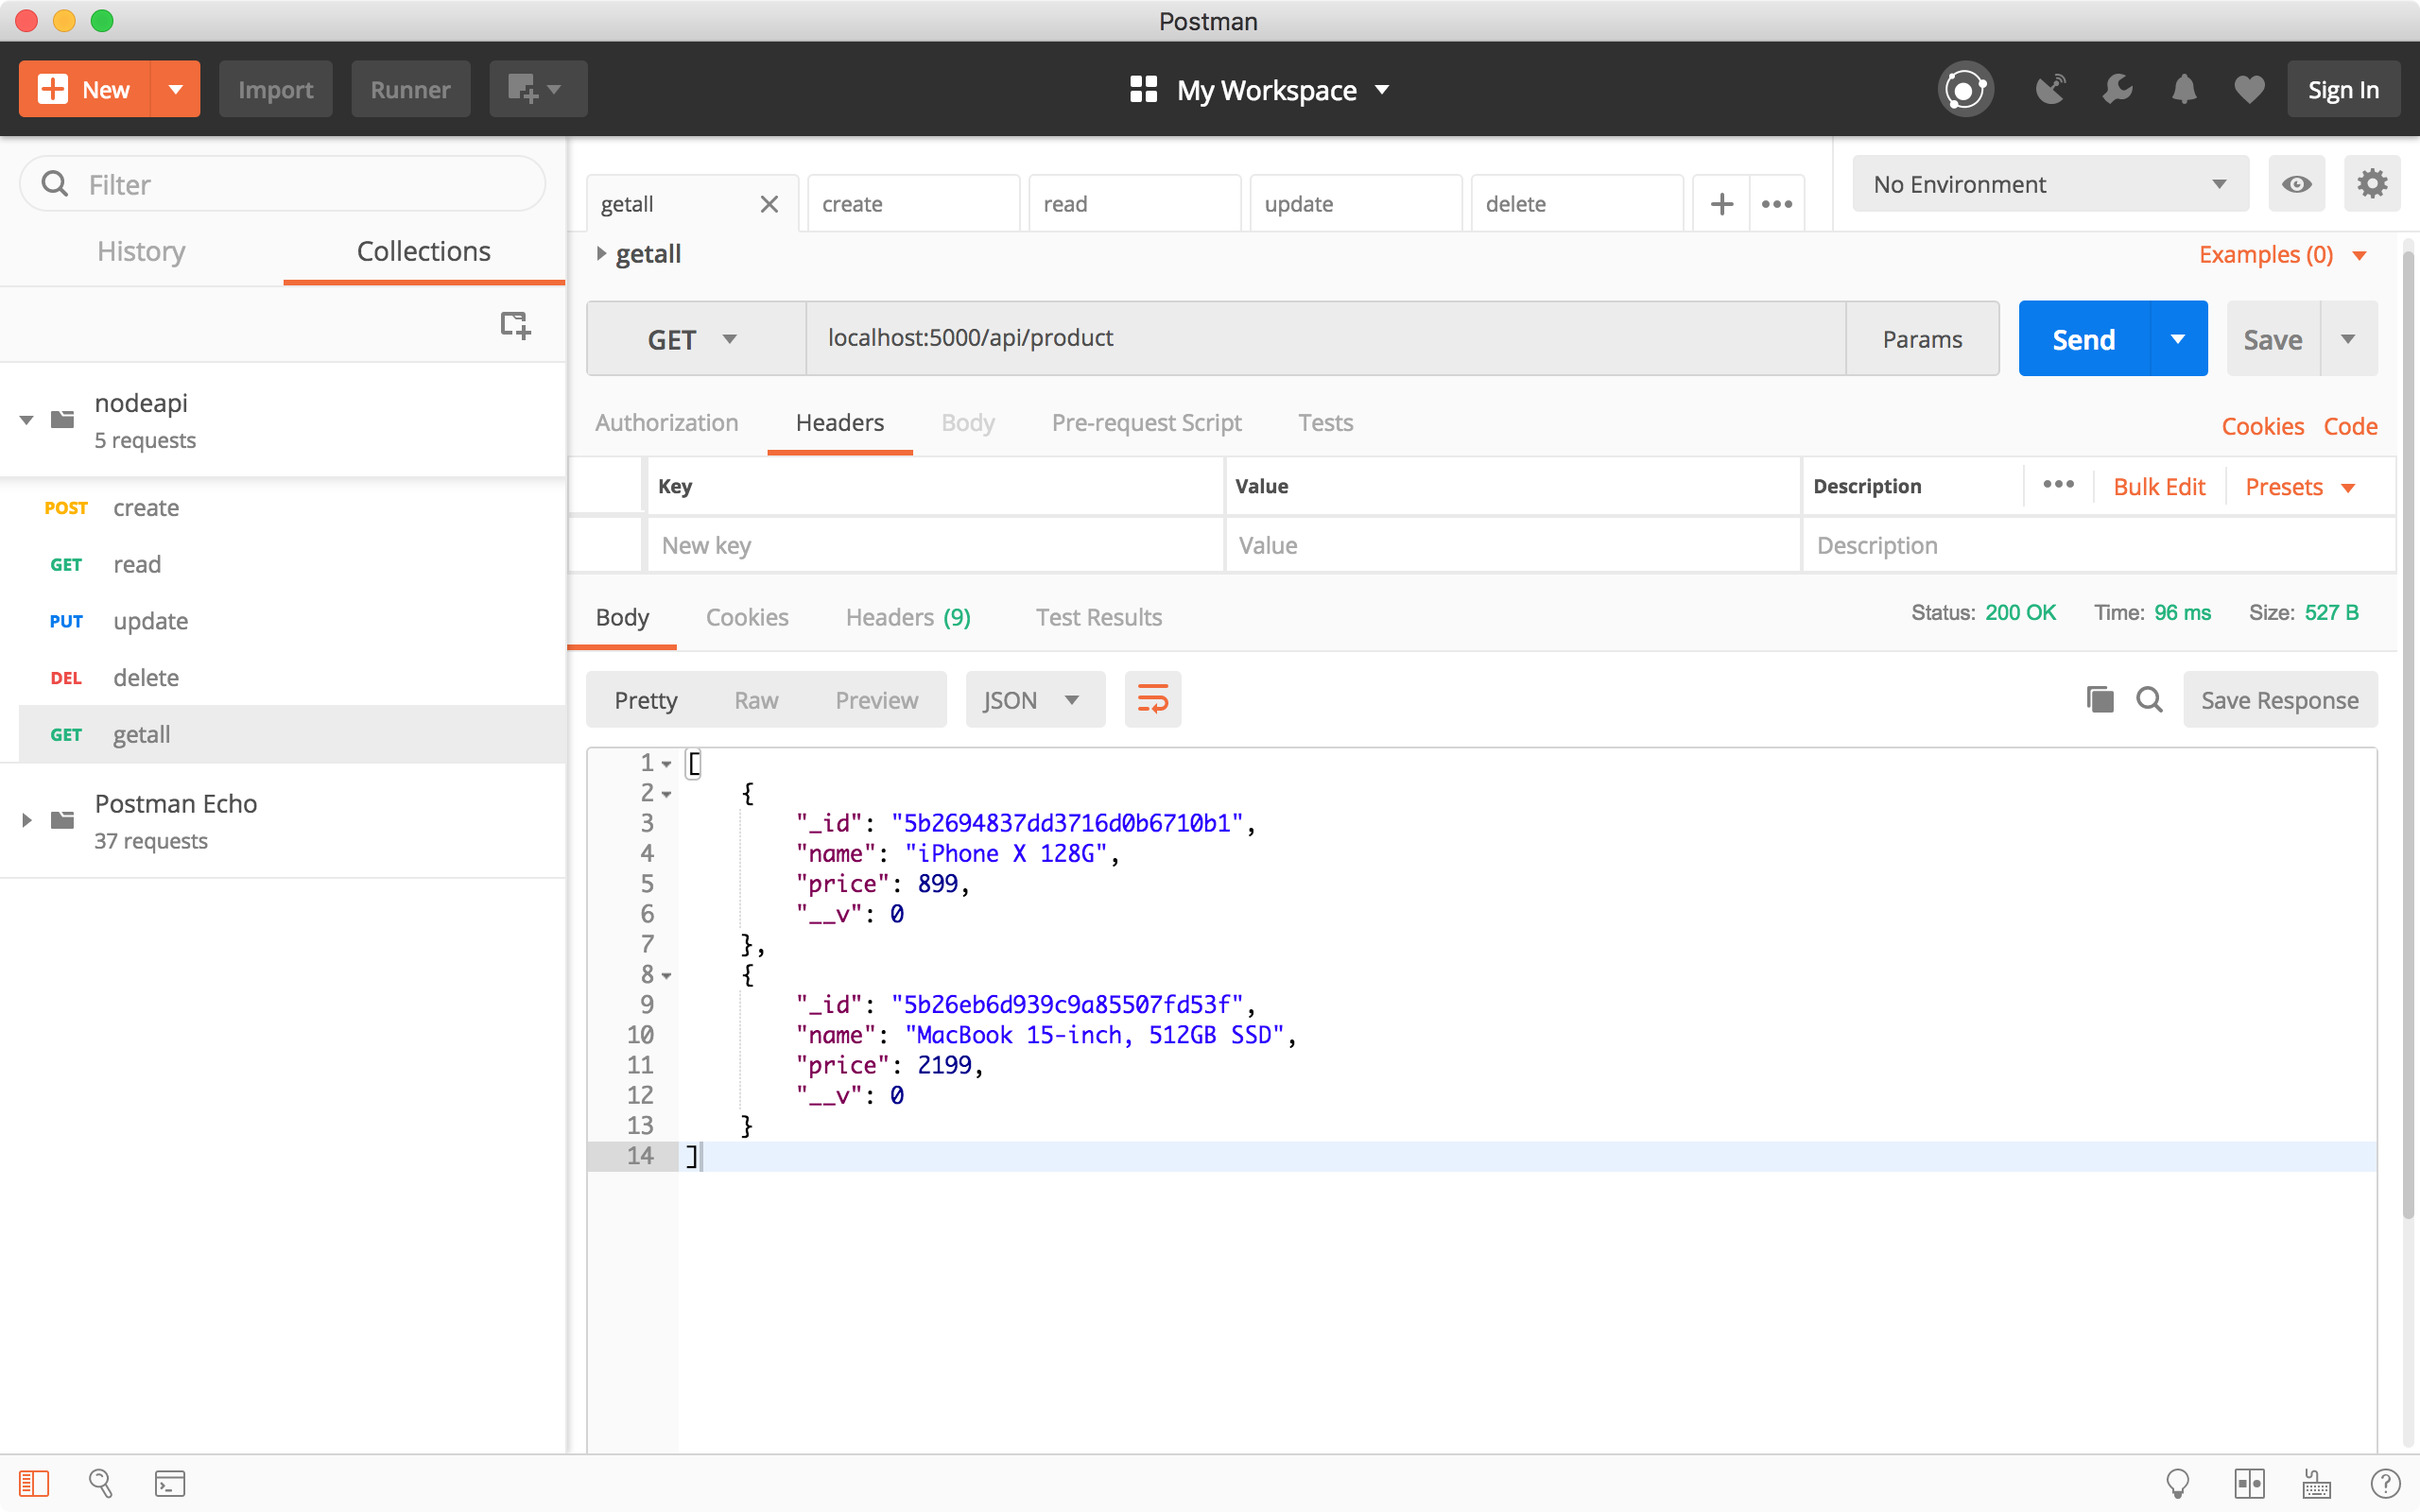
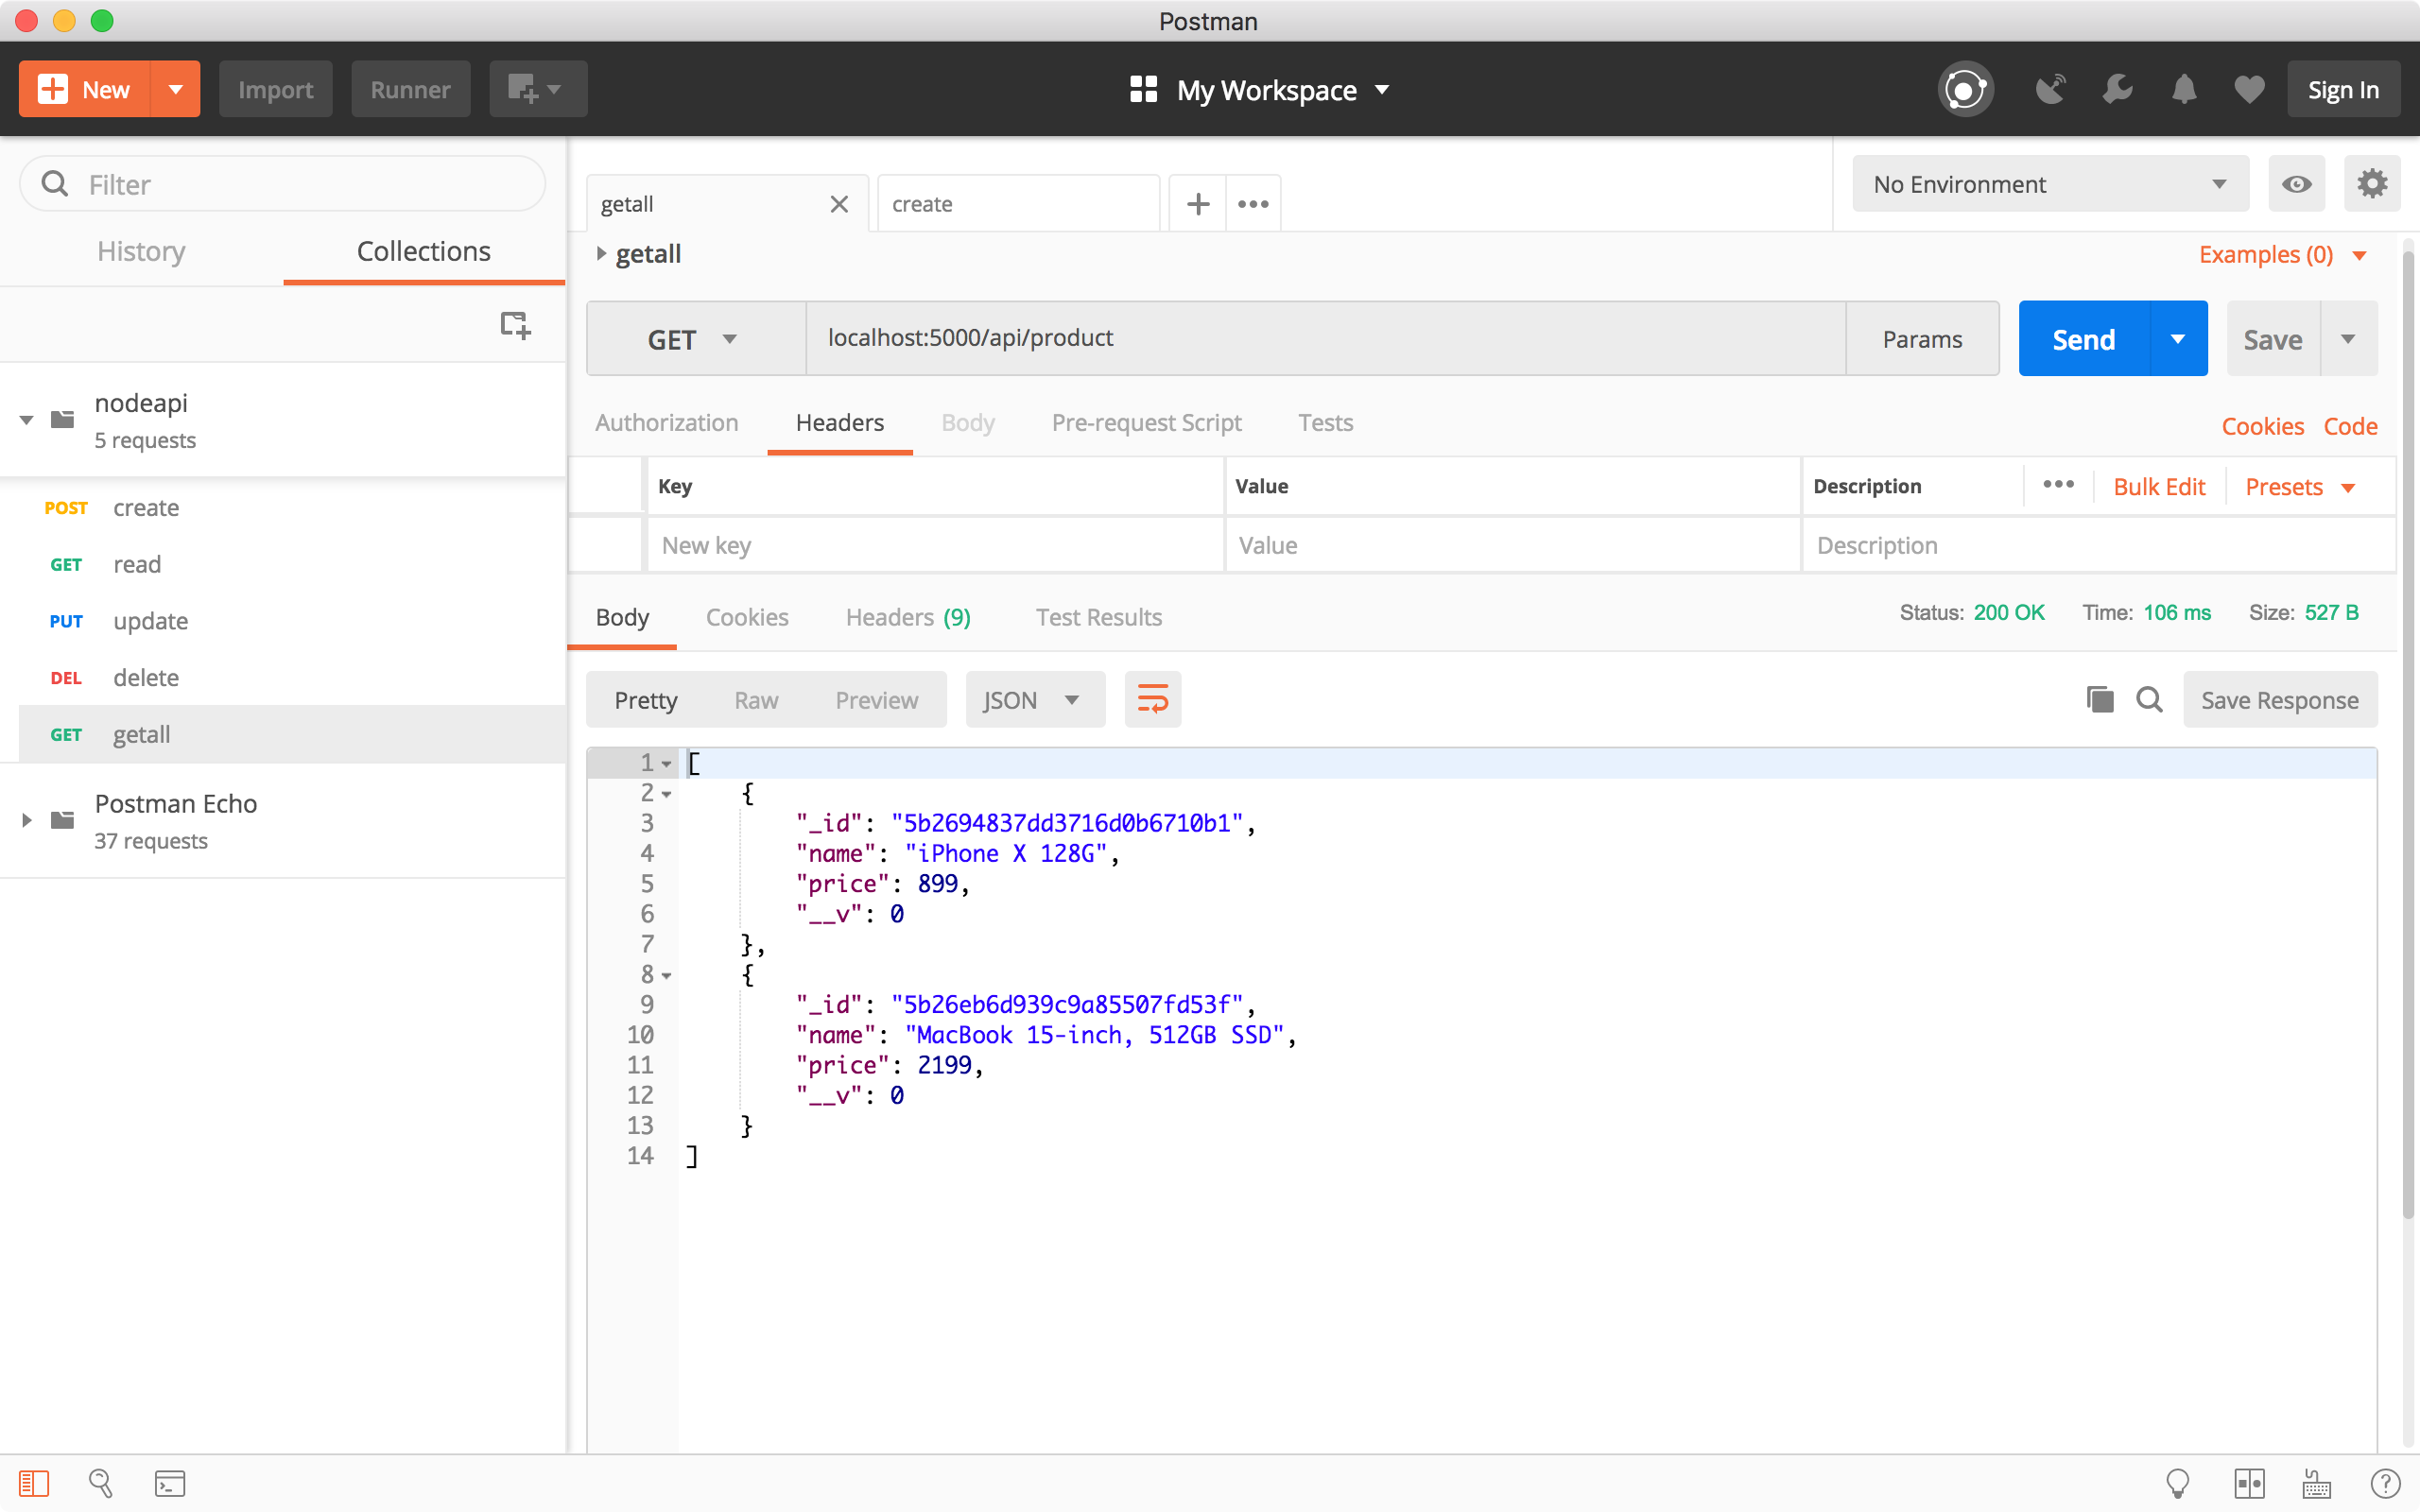
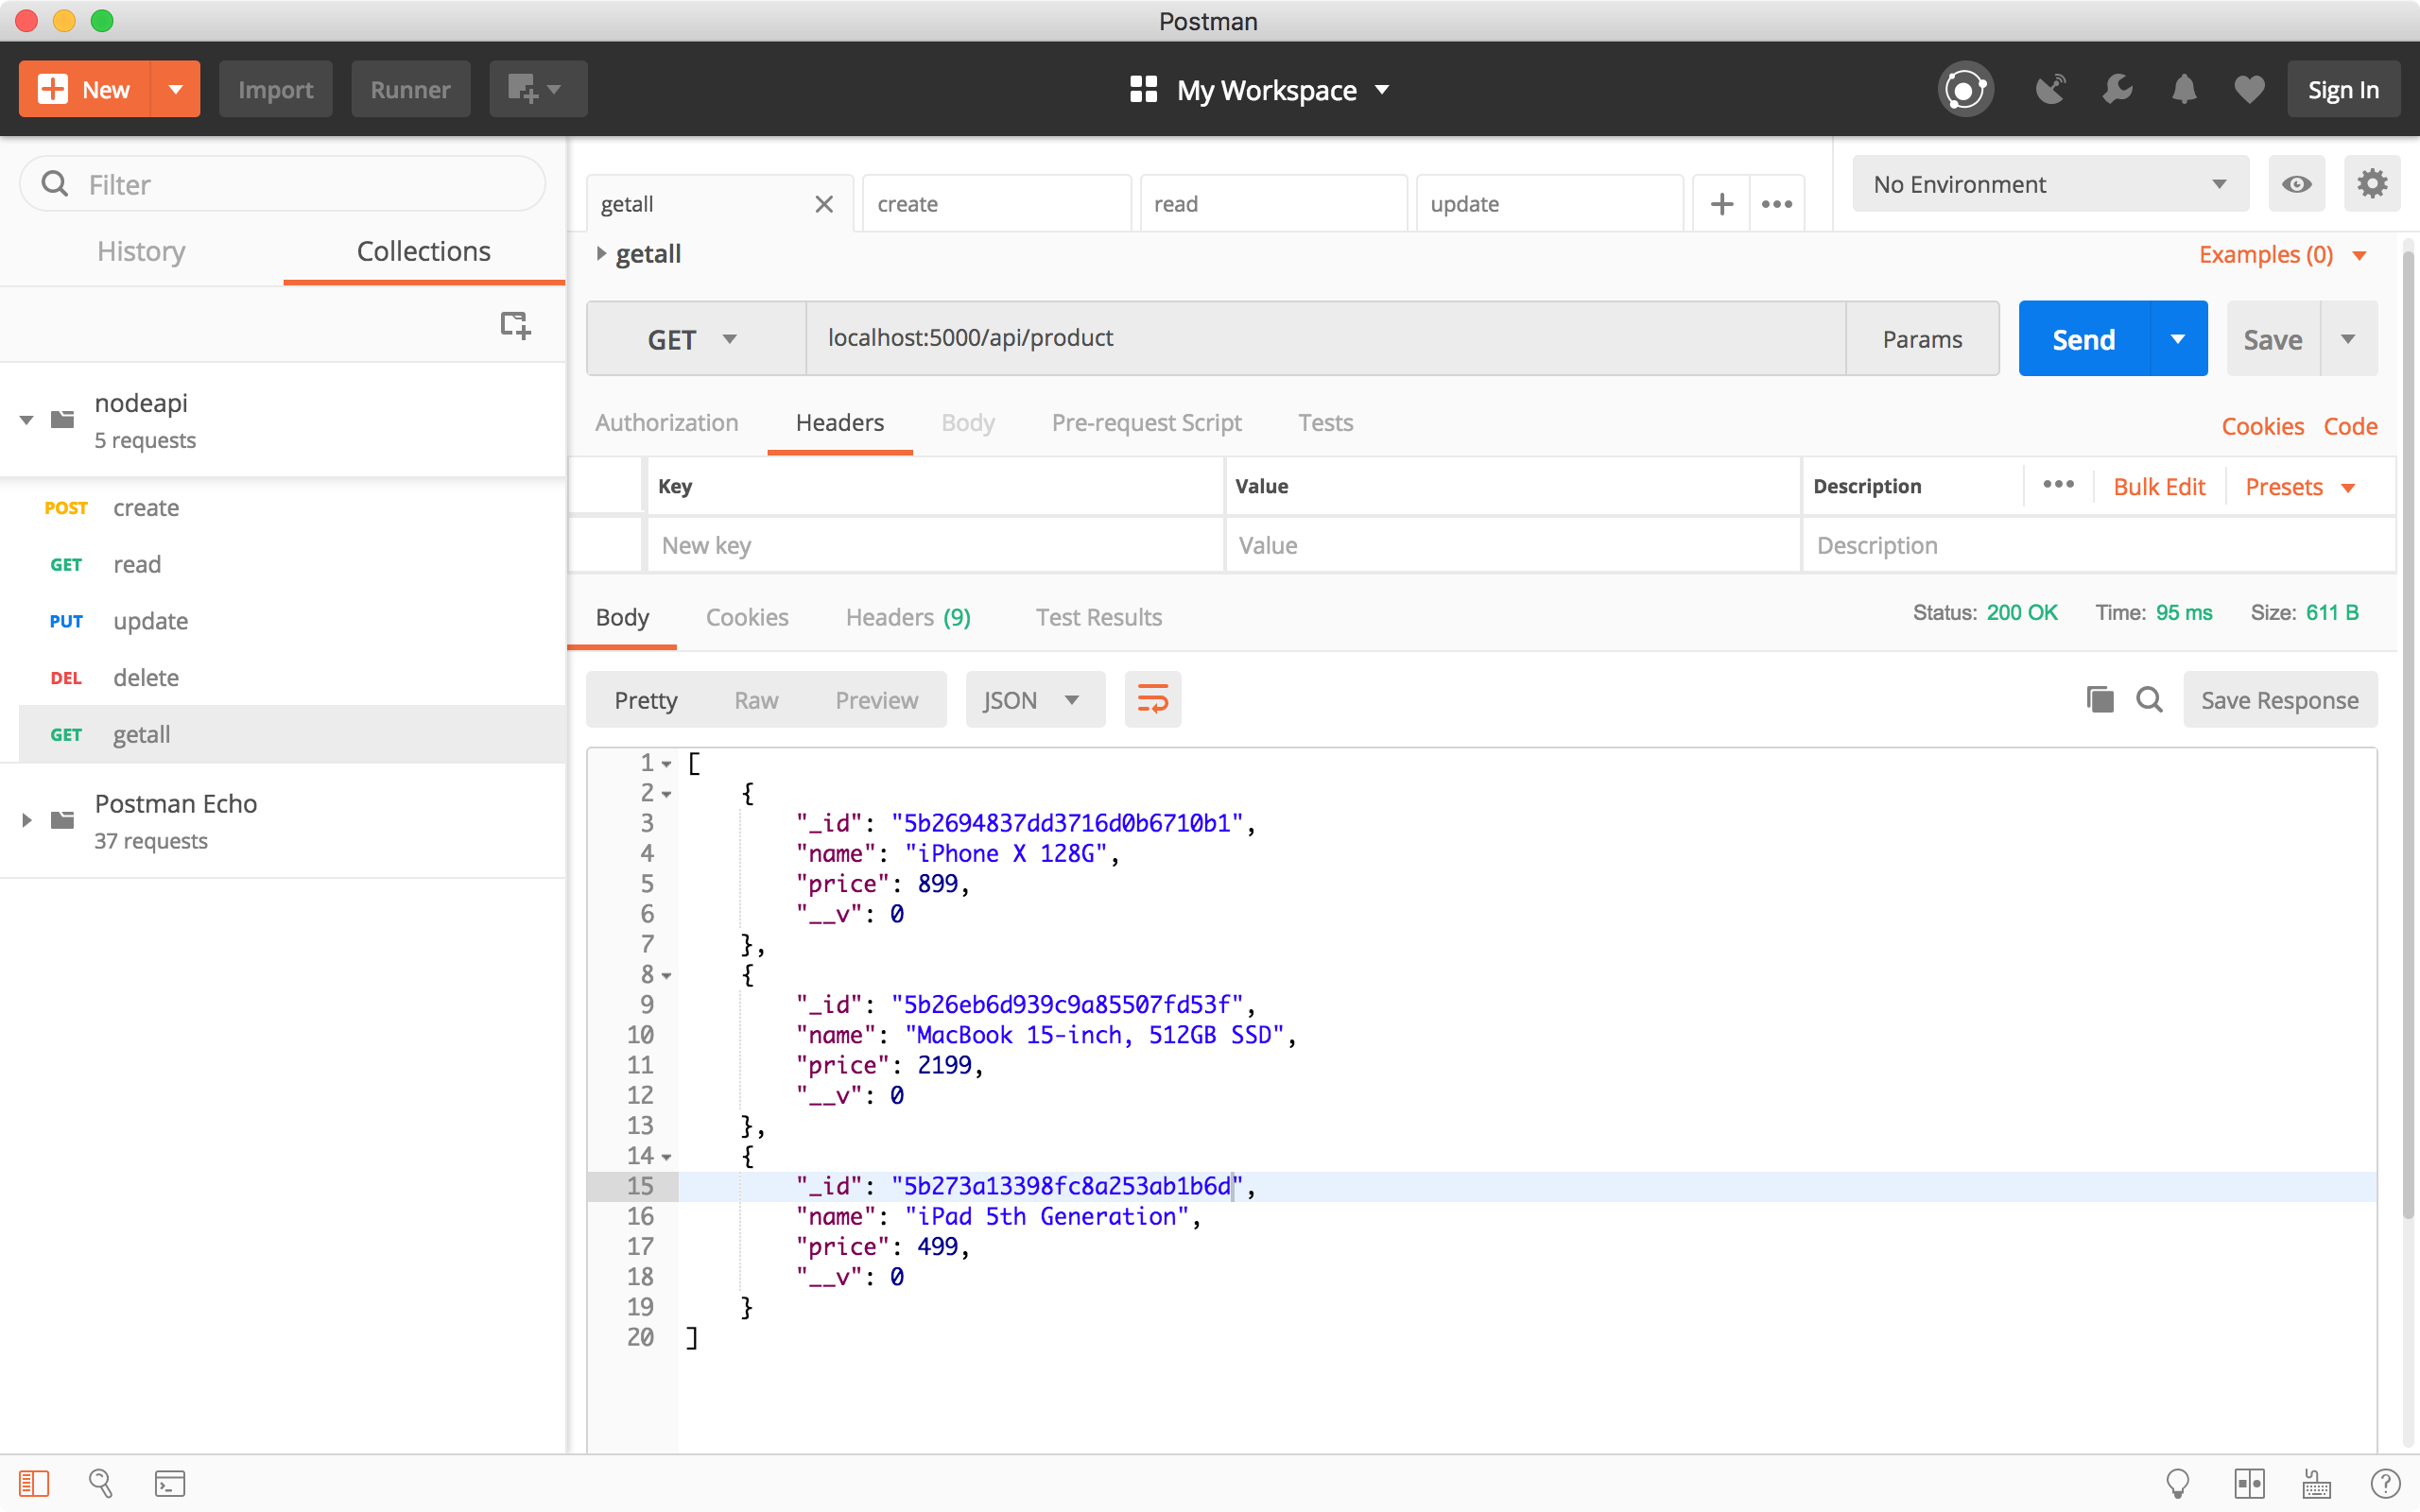
4.1 Get All Products
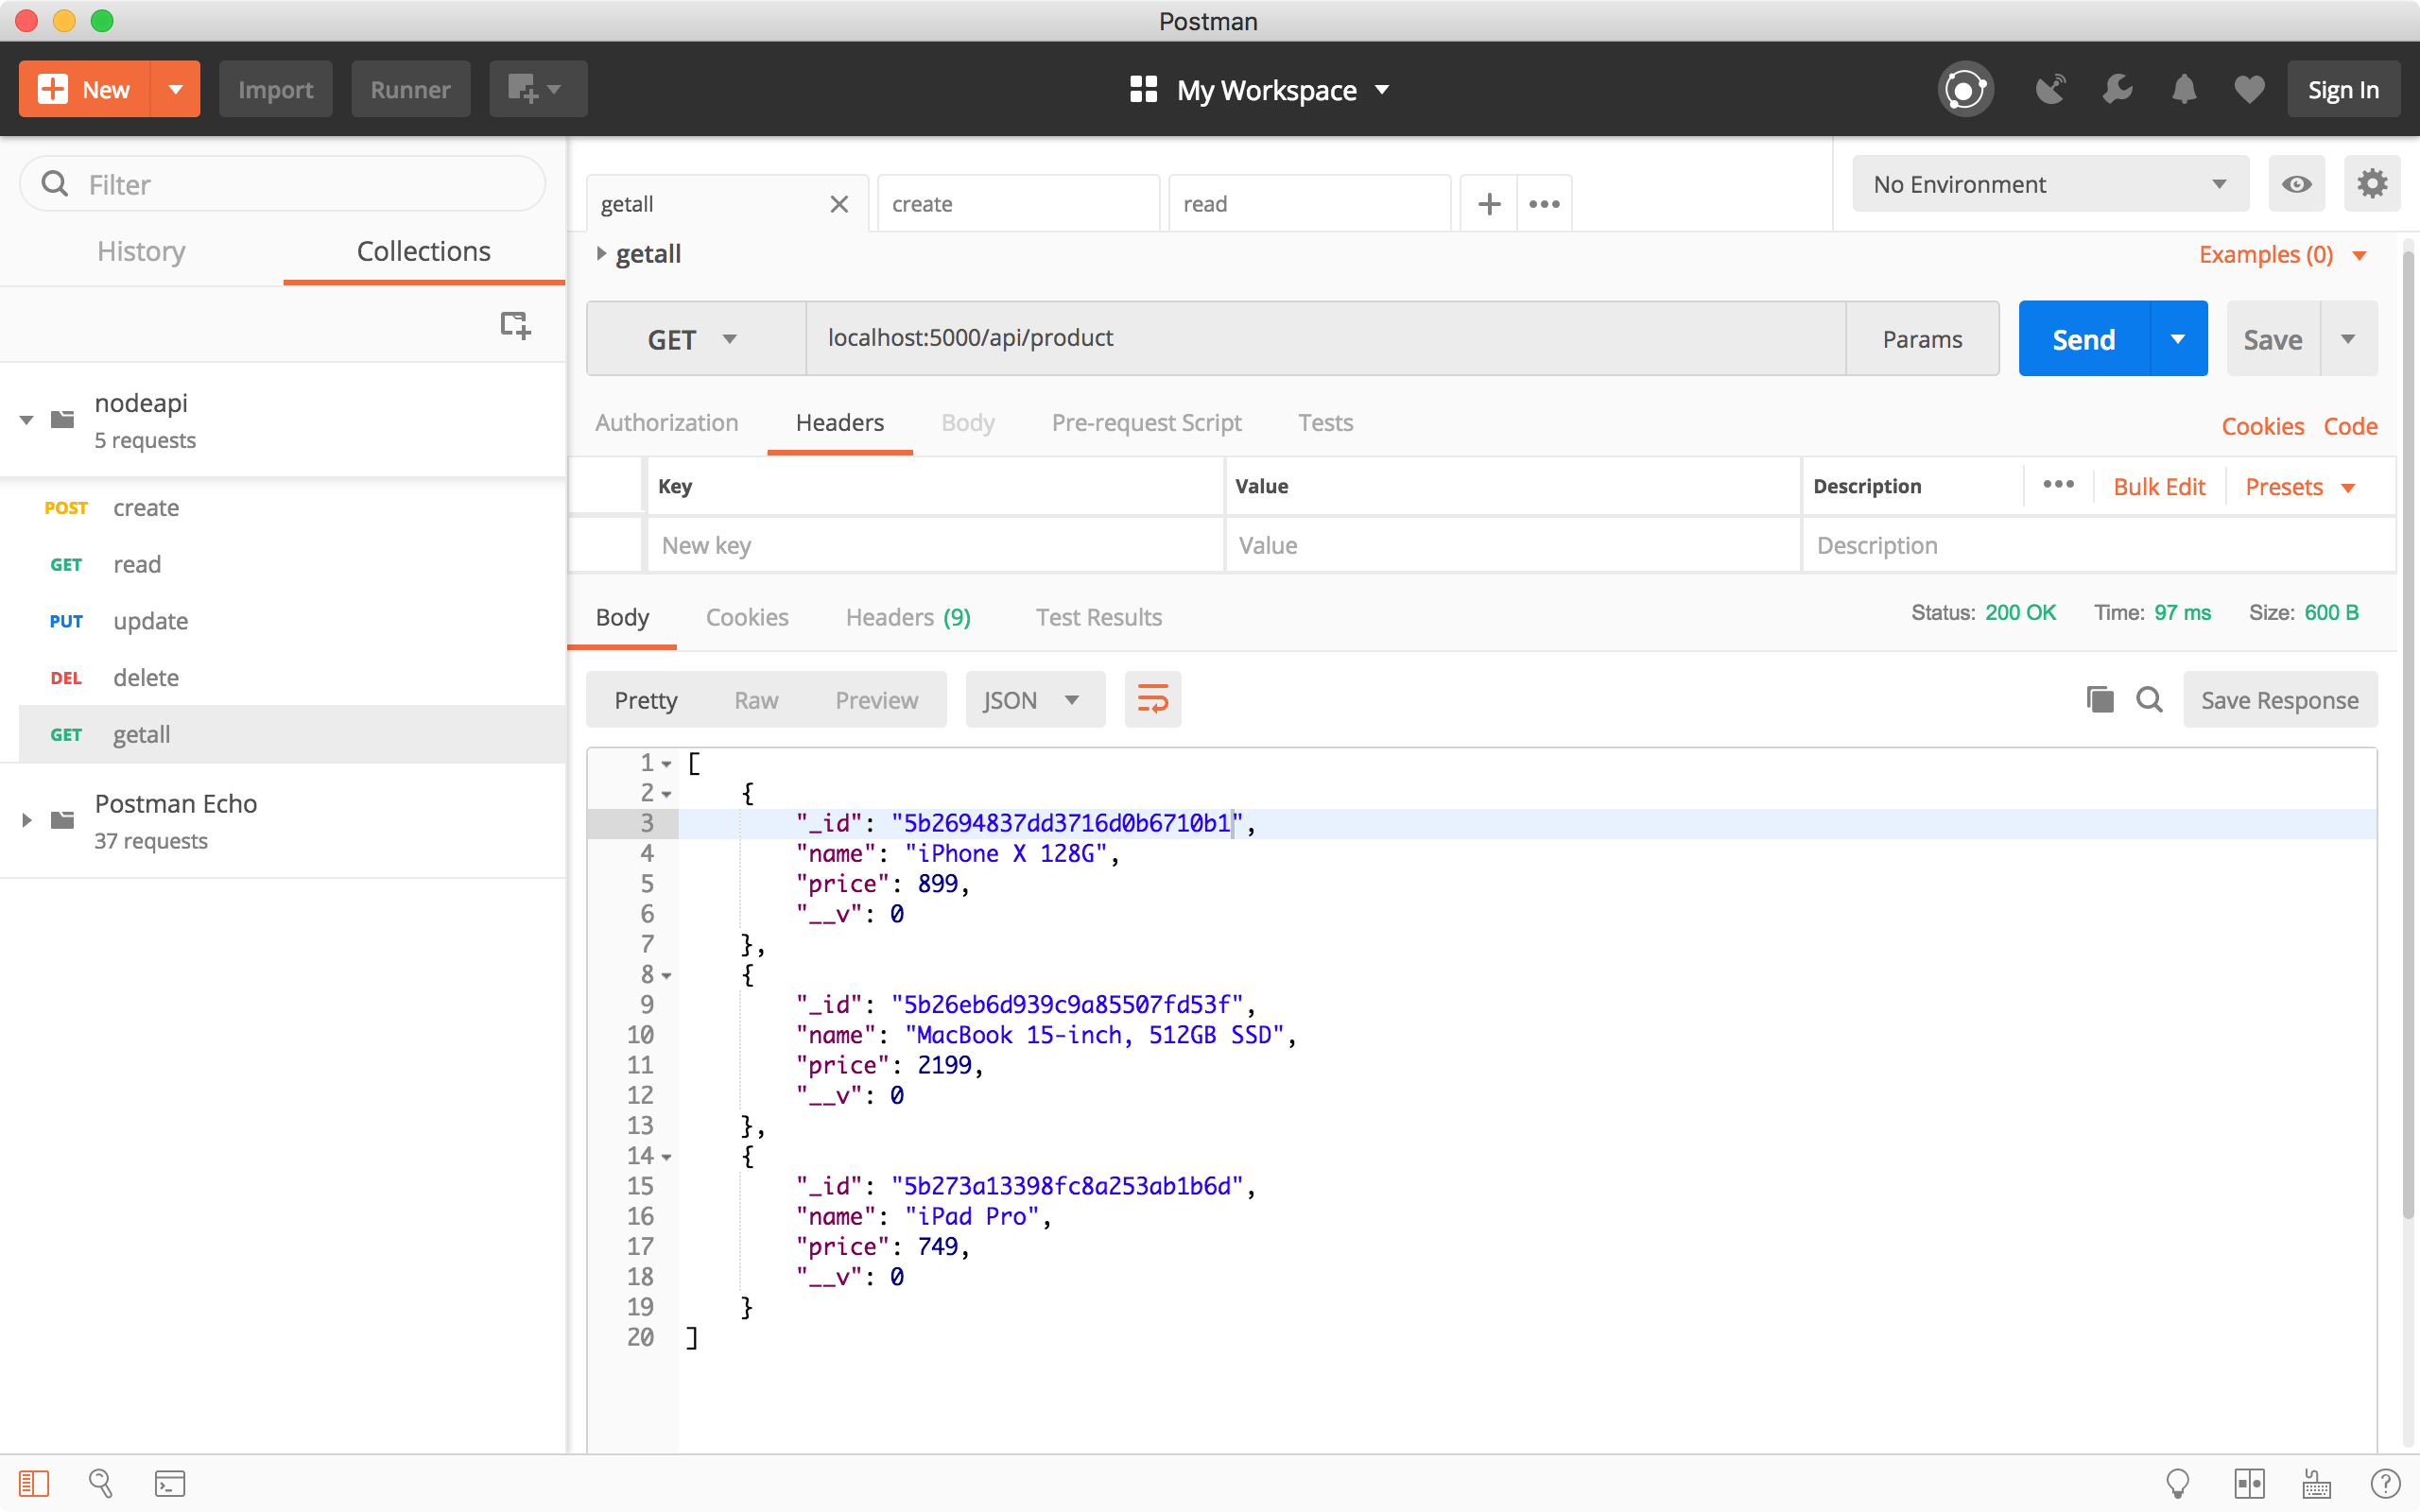
Create a request, choose ‘GET’ method and specify ‘http://localhost:5000/api/product’ as the URL, click the Send button. All two products are returned in the response body.
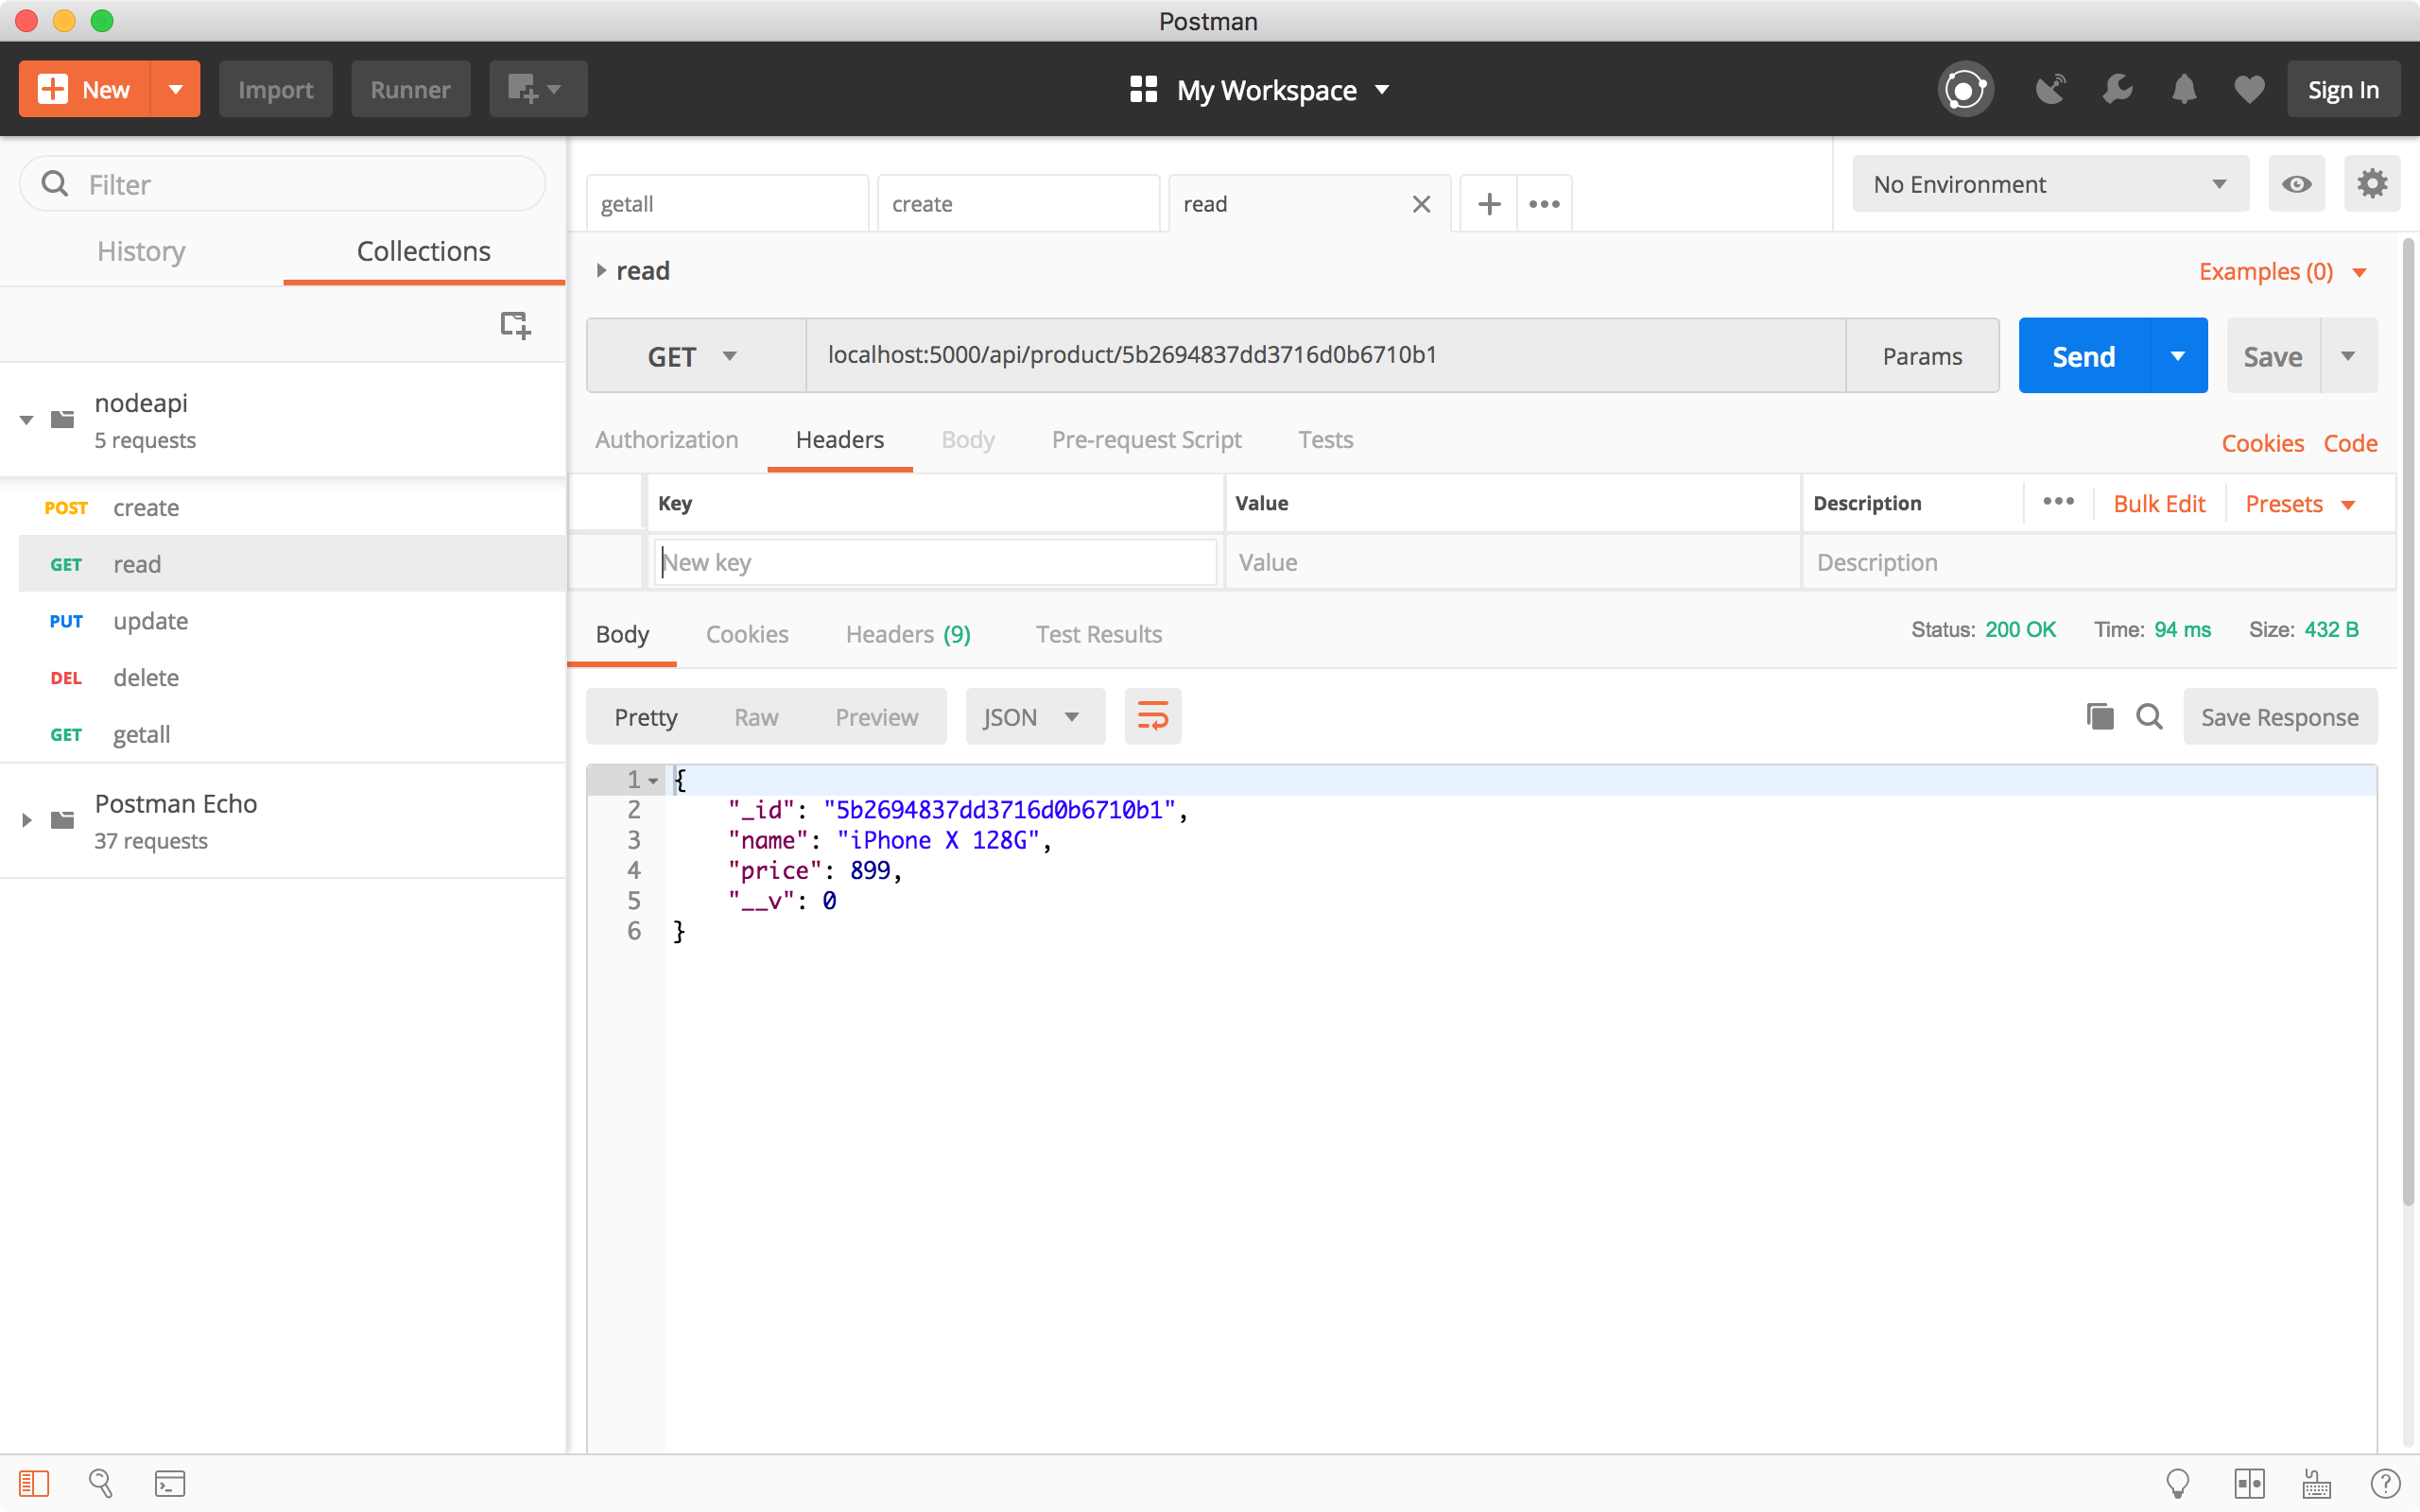
4.2 Get a product by ID
Create a new request, choose the ‘GET’ method and specify ‘http://localhost:8080/api/product/5b2694837dd3716d0b6710b1’ as the URL, click the Send button. Product with that id is returned in the response body.
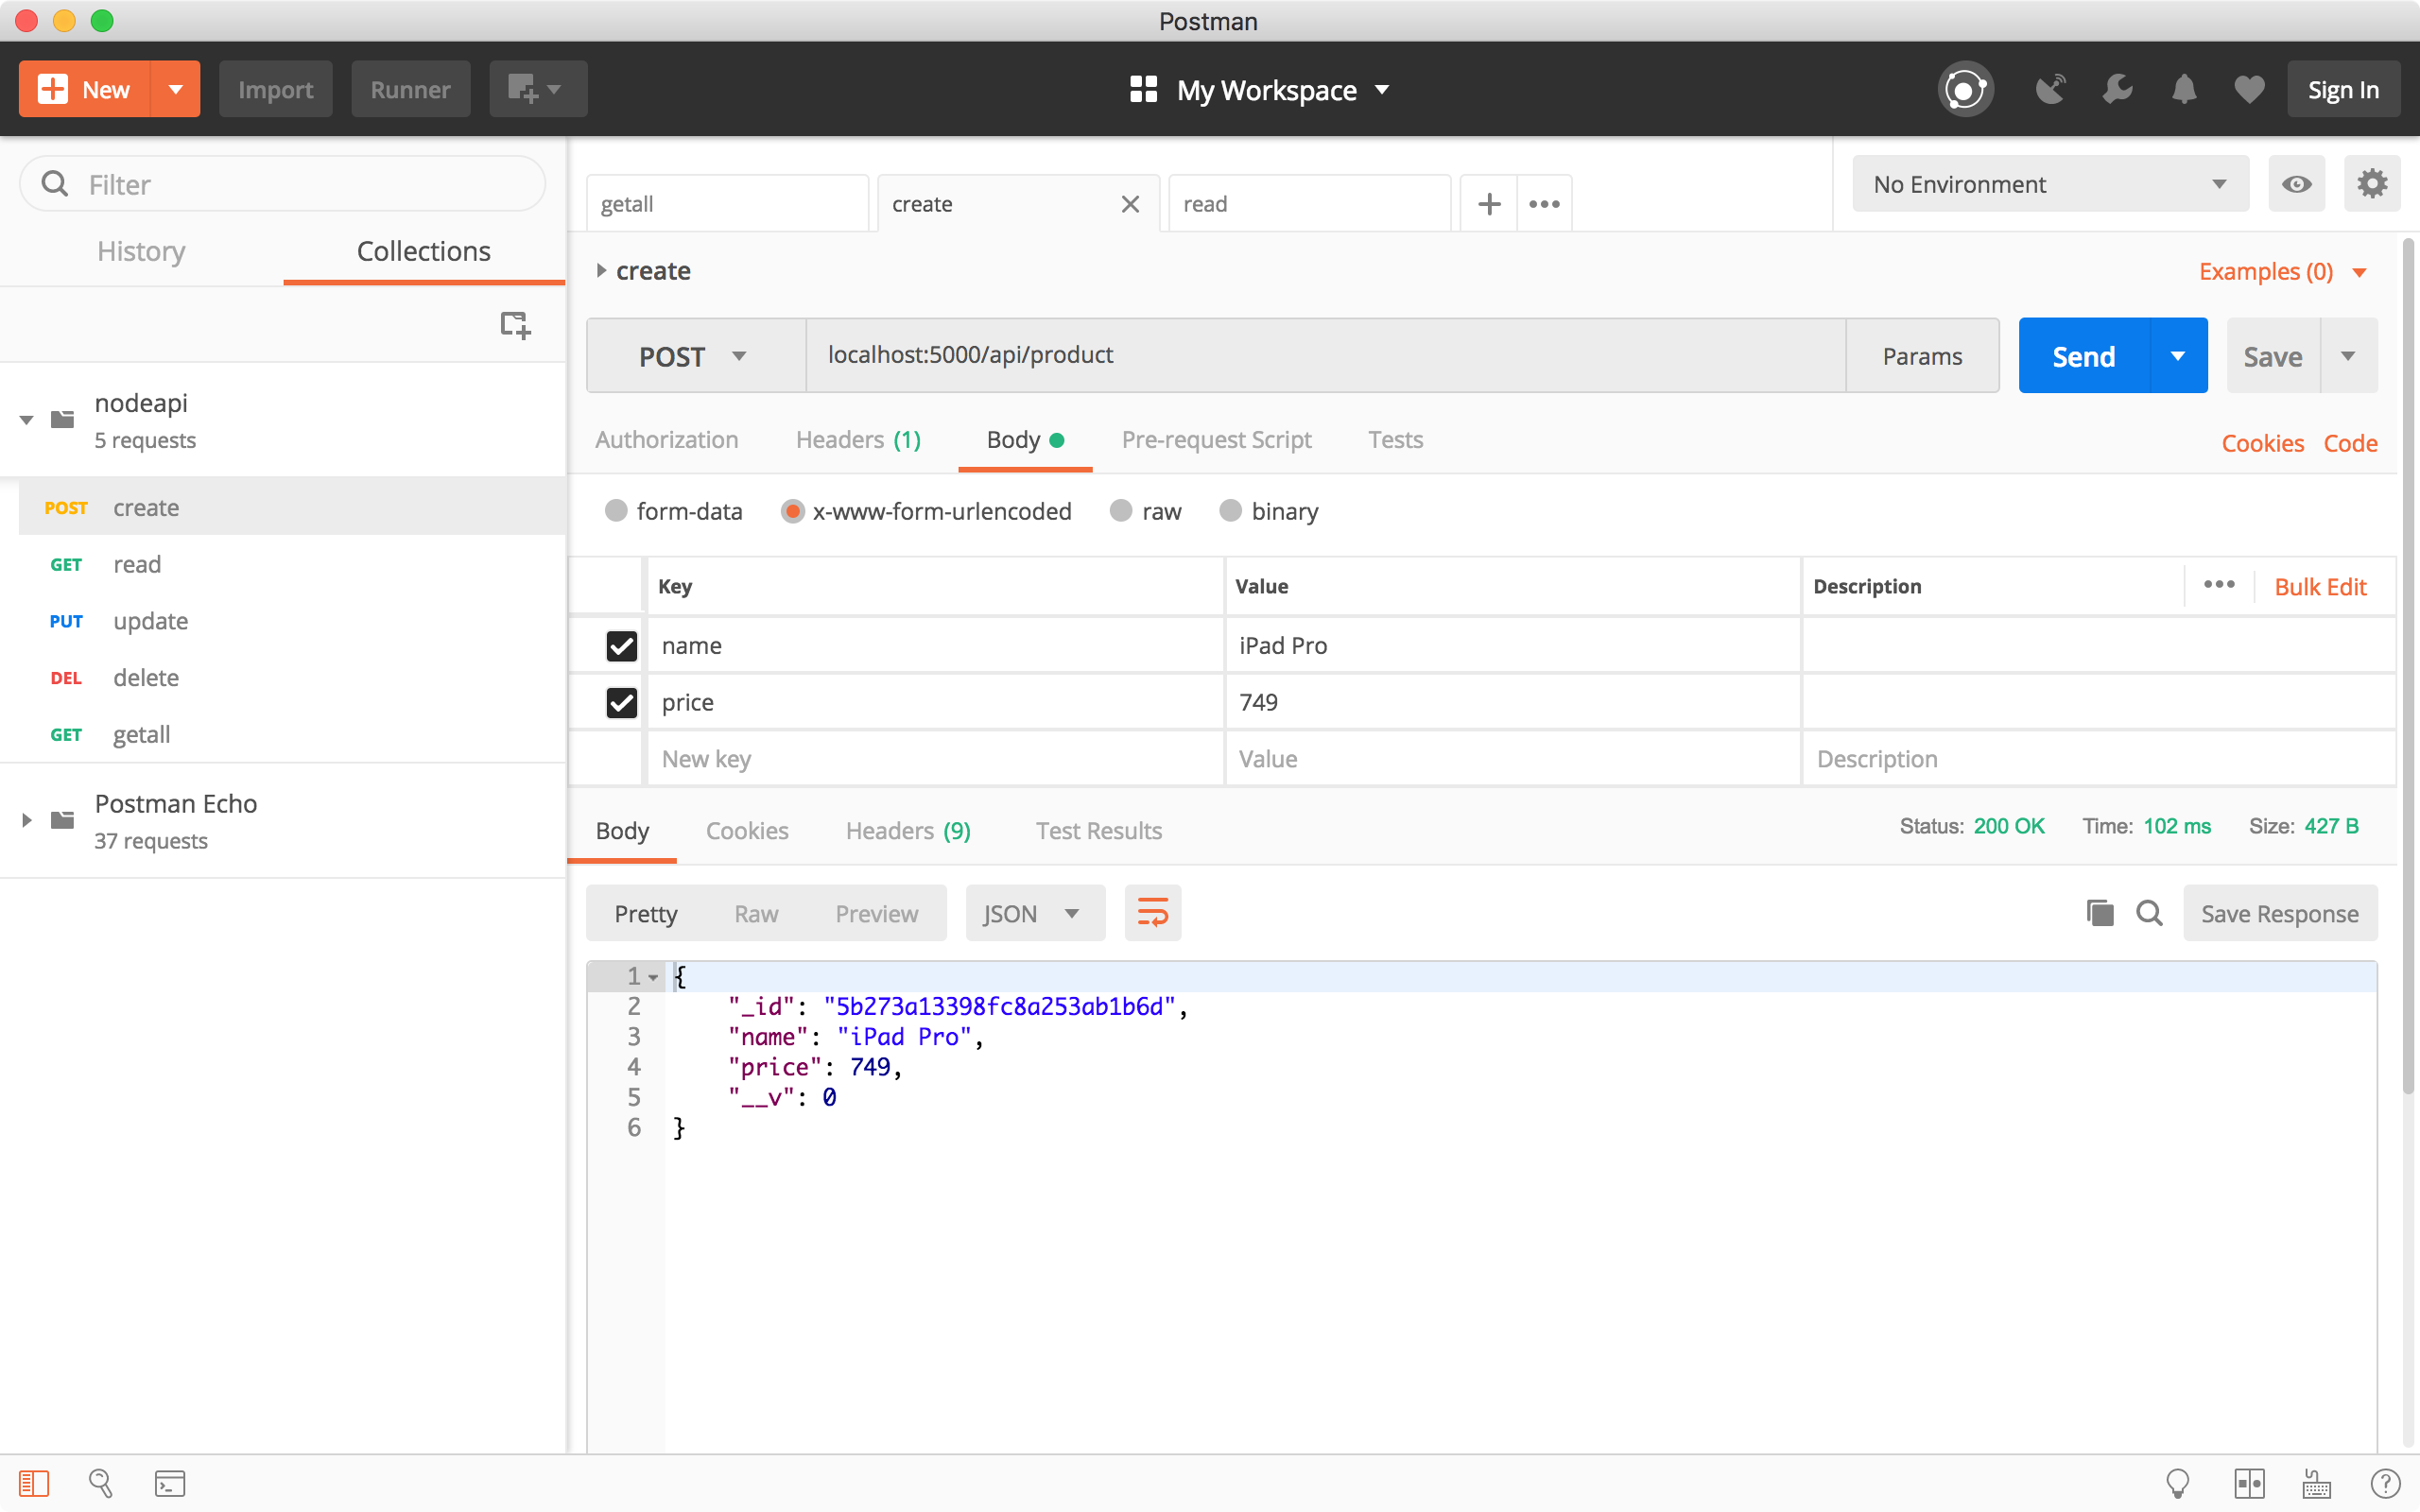
4.3 Create New Product
Create another request, choose the ‘POST’ method and specify ‘http://localhost:8080/api/product/’ as the URL. In the Request Body, set name to ‘iPad Pro’ and price to ‘799’, click the Send button. In the response body, we see the new product.
 Run the ‘Get all products’ request to verify whether the new product is created. We see there is a new product in the response body.
4.4 Update Product
Create a new request, choose ‘PUT’ method and specify ‘http://localhost:8080/api/product/5b273a13398fc8a253ab1b6d’ as the URL. In the Request Body, set name to ‘iPad 5th Generation’ and price to ‘499’, click the Send button. In the response body, we see the product has new name and price.
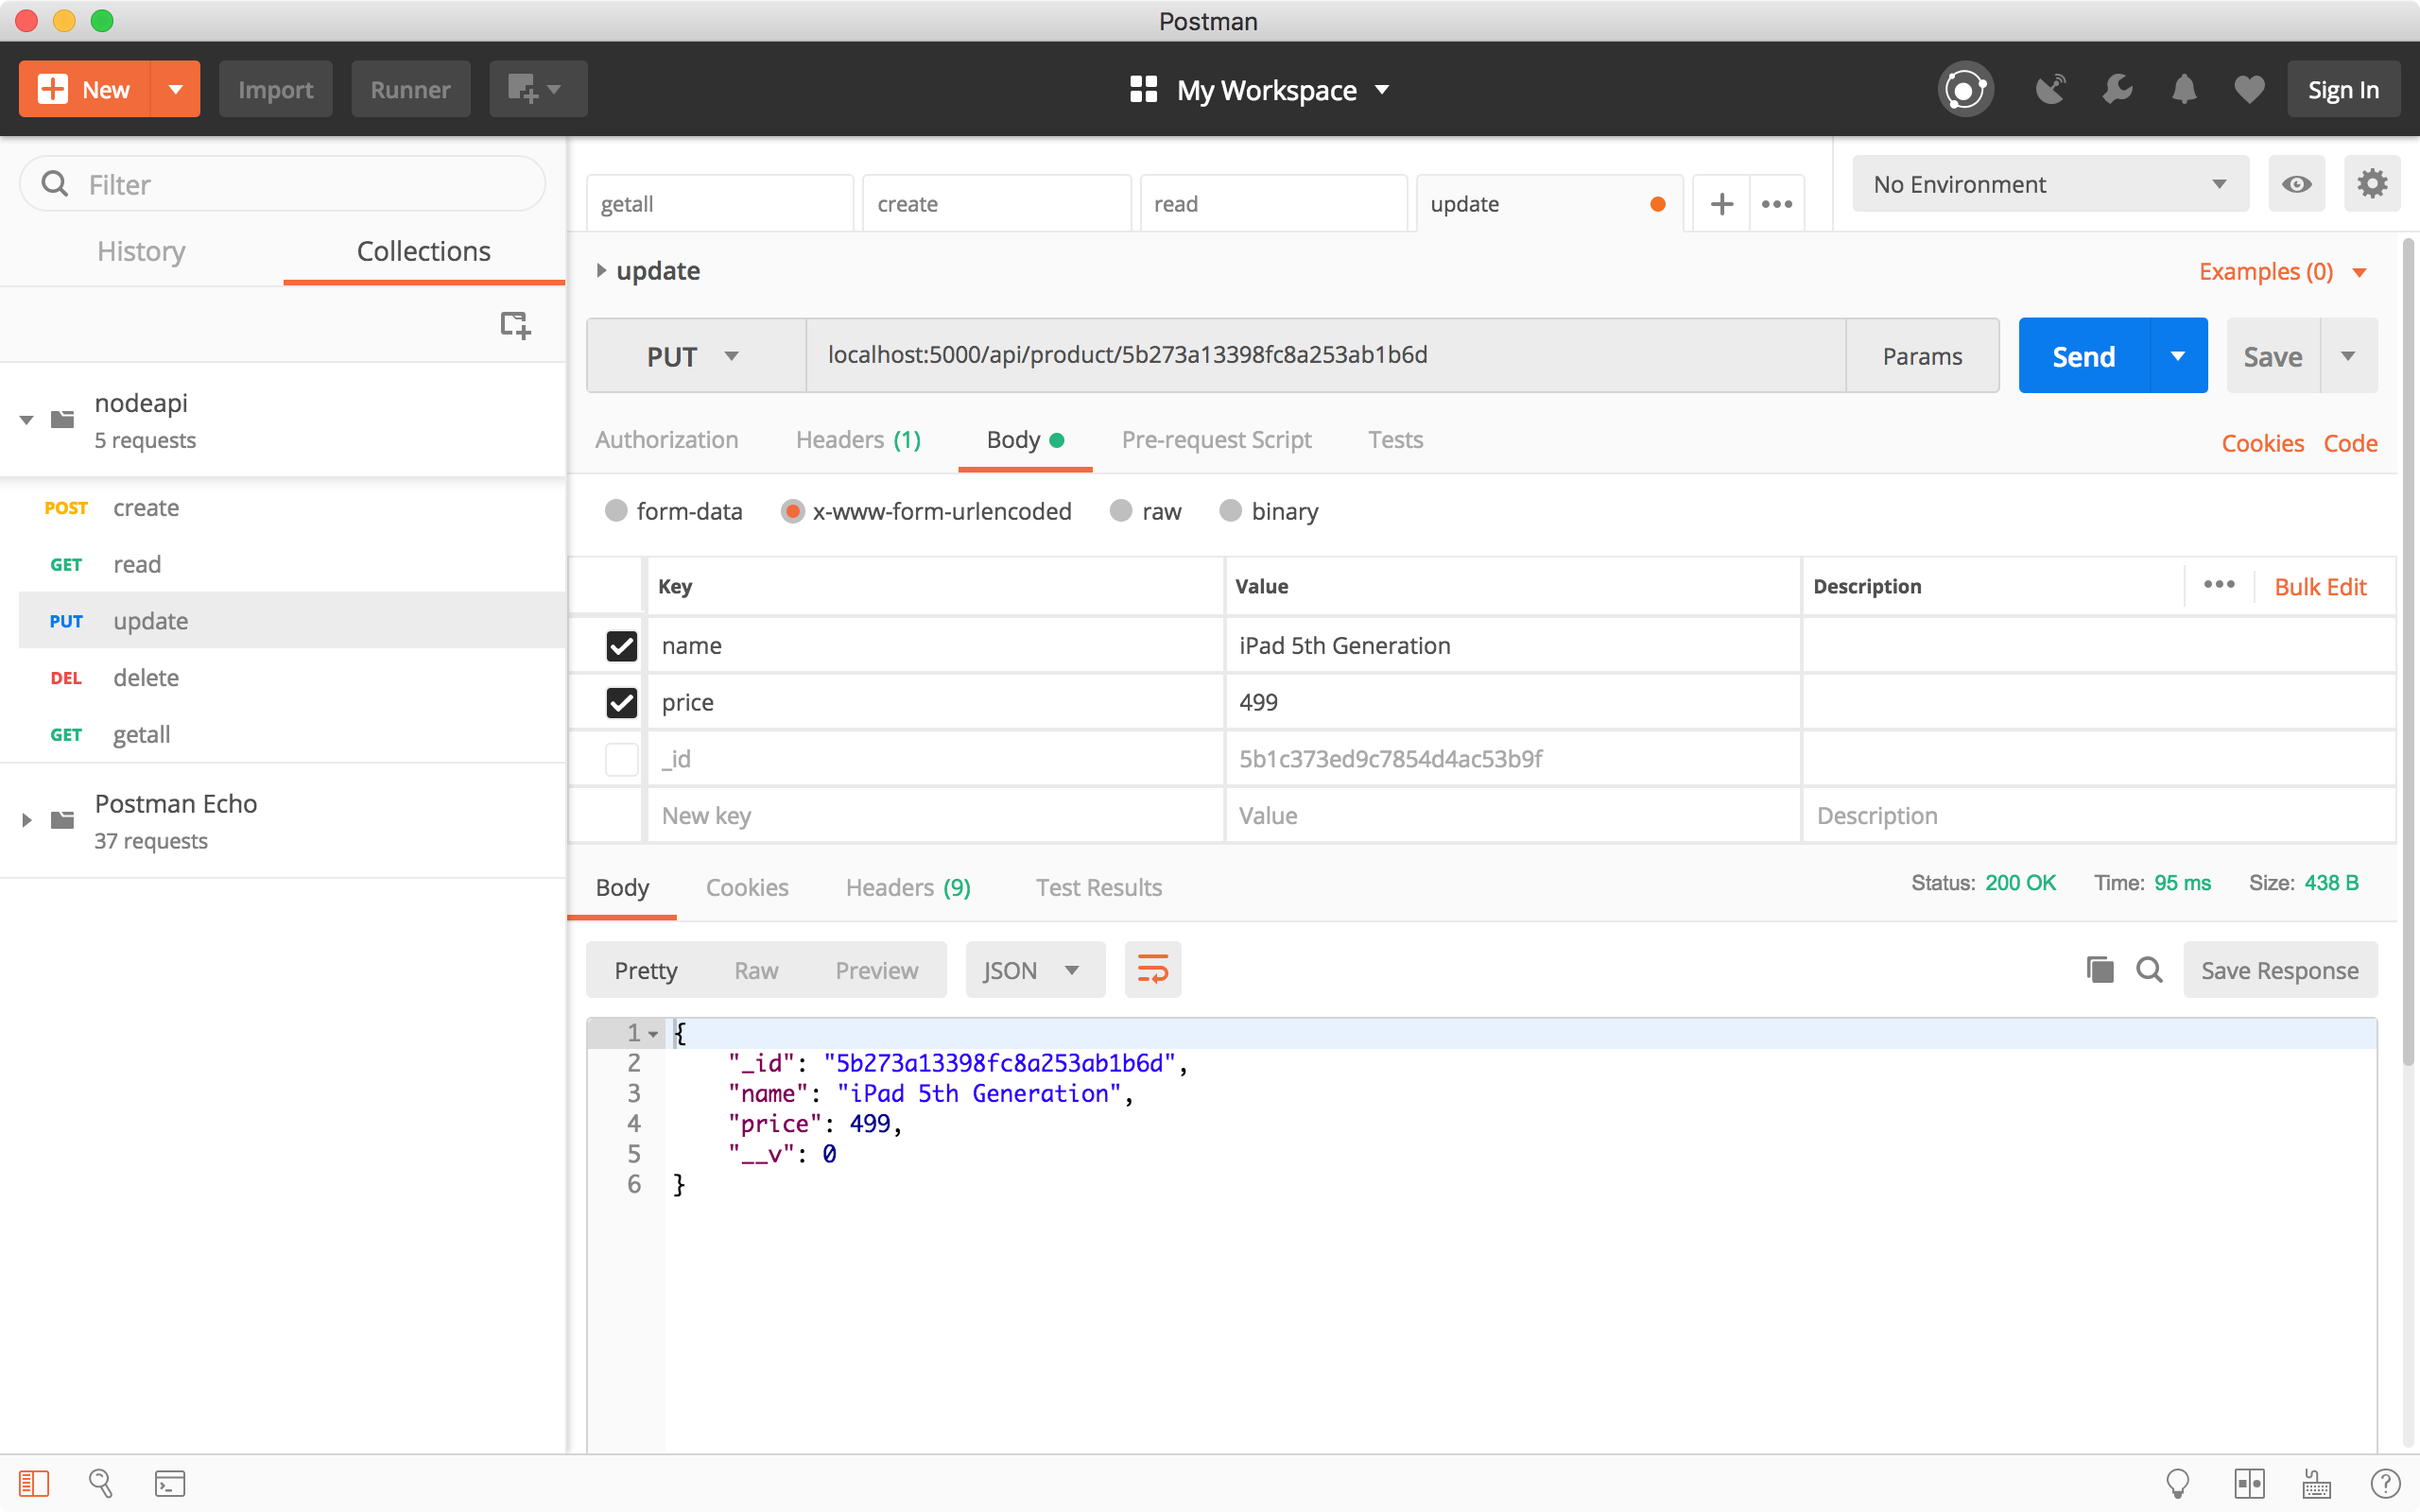 Run the ‘Get all products’ request to verify whether the product is updated. We see the third product has the new name and price.
4.5 Delete Product
Create a new request, choose ‘DELETE’ method and specify ‘http://localhost:8080/api/product/5b273a13398fc8a253ab1b6d’ as the URL, click the Send button. The deleted product is returned.
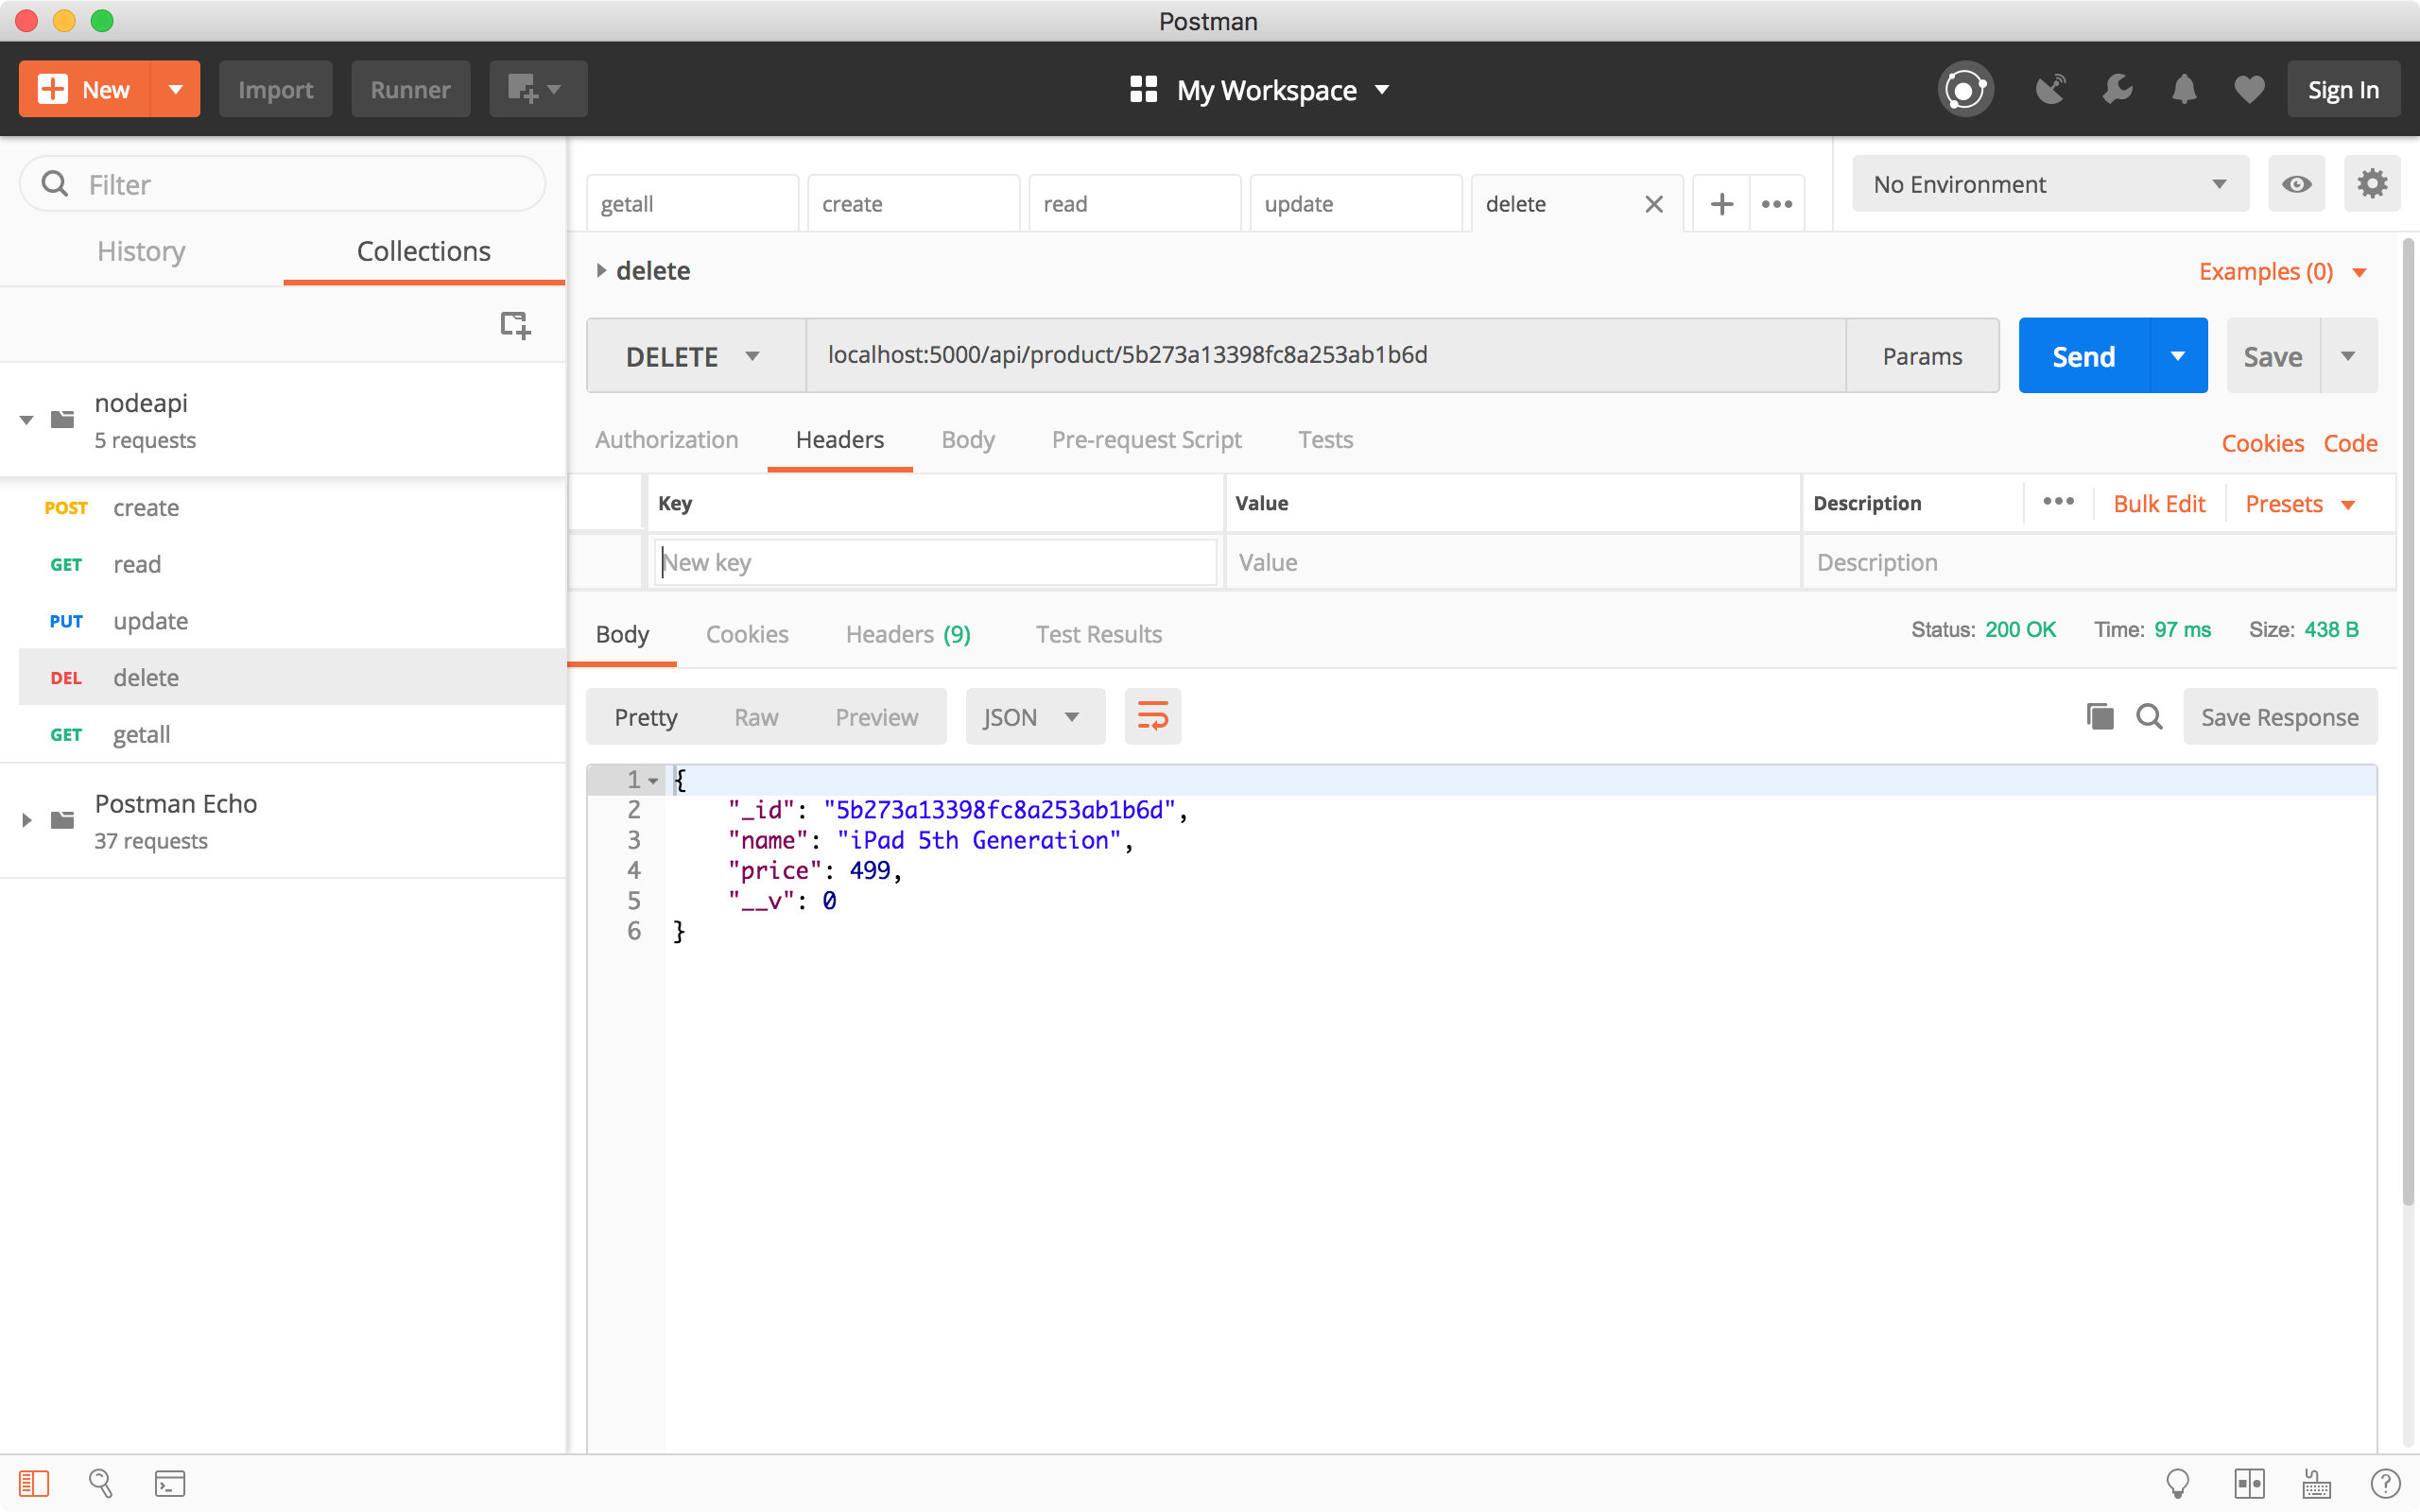 Run the ‘Get all products’ request to verify whether the third product is deleted. We see it is no longer existing.