4151. AWS-Route53AWS and Route53
Use Route53 and Routing services.
1. Domain and DNS
1.1 DNS
The Domain Name System (DNS) is the phonebook of the Internet. Humans access information online through domain names, like nytimes.com or espn.com. Web browsers interact through Internet Protocol (IP) addresses. DNS translates domain names to IP addresses so browsers can load Internet resources. DNS is used to convert human friendly domain names (such as http://www.google.com) into an Internet Protocol (IP) address (such as http://172.217.164.100).
IP addresses are used by computers to identify each other on the network. IP addresses commonly come in 2 different forms, IPv4 and IPv6.
1.2 IPv4 vs IPv6
IPv4 Addresses are running out…
- The IPv4 space is a 32 bit field and has over 4 billion different addresses (4,294,967,296 to be precise).
- IPv6 was created to solve this depletion issue and has an address space of 128bits which in theory is 340,282,366,920,938,463,463,374,607,431,768,211,456 addresses or 340 undecillion addresses.
1.3 Top Level Domains
If we look at common domain names such as google.com, bbc.co.uk. etc., you will notice a string of characters separated by dots (periods). The last word in a domain name represents the “top level domain”. The second word in a domain name is known as a second level domain name (this is optional though and depends on the domain name).
- .com
- .edu
- .gov
- .co.uk
- .gov.uk
- .com.au
These top level domain names are controlled by the Internet Assigned Numbers Authority (IANA) in a root zone database which is essentially a database of all available top level domains. You can view this database by visiting: http://www.iana.org/domains/root/db.
1.4 Domain Registrars
Because all of the names in a given domain name have to be unique, there needs to be a way to organize this all so that domain names aren’t duplicated. This is where domain registrars come in. A registrar is an authority that can assign domain names directly under one or more top-level domains. These domains are registered with InterNIC, a service of ICANN, which enforces uniqueness of domain names across the Internet. Each domain name becomes registered in a central database known as the WhoIS database.
1.5 Start Of Authority Record (SOA)
The SOA record stores information about:
- The name of the server that supplied the data for the zone.
- The administrator of the zone.
- The current version of the data file.
- The default number of seconds for the time-to-live file on resource records.
1.6 NS Records
NS stands for Name Server Records. They are used by Top Level Domain servers to direct traffic to the Content DNS server which contains the authoritative DNS records.
1.7 A Records
An “A” record is the fundamental type of DNS record. The “A” in A record stands for “Address”. The A record is used by a computer to translate the name of the domain to an IP address. For example, http://www.google.com might point to http://172.217.164.100.
1.8 TTL
The lifetime that a DNS record is cached on either the Resolving Server or the users own local PC is equal to the value of the “Time To Live” (TTL) in seconds. The lower the time to live, the faster changes to DNS records take to propagate throughout the internet.
1.9 CName
A Canonical Name (CName) can be used to resolve one domain name to another. For example, you may have a mobile website with the domain name http://m.google.com that is used for when users browse to your domain name on their mobile devices. You may also want the name http://mobile.google.com to resolve to this same address.
1.10 Alias Records
Alias records are used to map resource record sets in your hosted zone to Elastic Load Balancers, CloudFront distributions, or S3 buckets that are configured as websites.
Alias records work like a CNAME record in that you can map one DNS name (www.example.com) to another ‘target’ DNS name(ld123.amazonaws.com)
Key difference with CName - A CNAME can’t be used for naked domain names (zone apex record.) You can’t have a CNAME for http://google.com, it must be either an A record or an Alias.
1.11 Summary
- ELBs do not have pre-defined IPv4 addresses; you resolve to them using a DNS name.
- Understand the difference between an Alias Record and a CNAME.
- Given the choice, always choose an Alias Record over a CNAME.
Common DNS Types:
- SOA Records
- NS Records
- A Records
- CNAMES
- MX Records
- PTR Records
2. Route53
2.1 Amazon Route53
Amazon Route 53 is a highly available and scalable cloud Domain Name System (DNS) web service. It is designed to give developers and businesses an extremely reliable and cost effective way to route end users to Internet applications by translating names like www.example.com into the numeric IP addresses like 192.0.2.1 that computers use to connect to each other. Amazon Route 53 is fully compliant with IPv6 as well.
2.2 Available Routing Policies On AWS
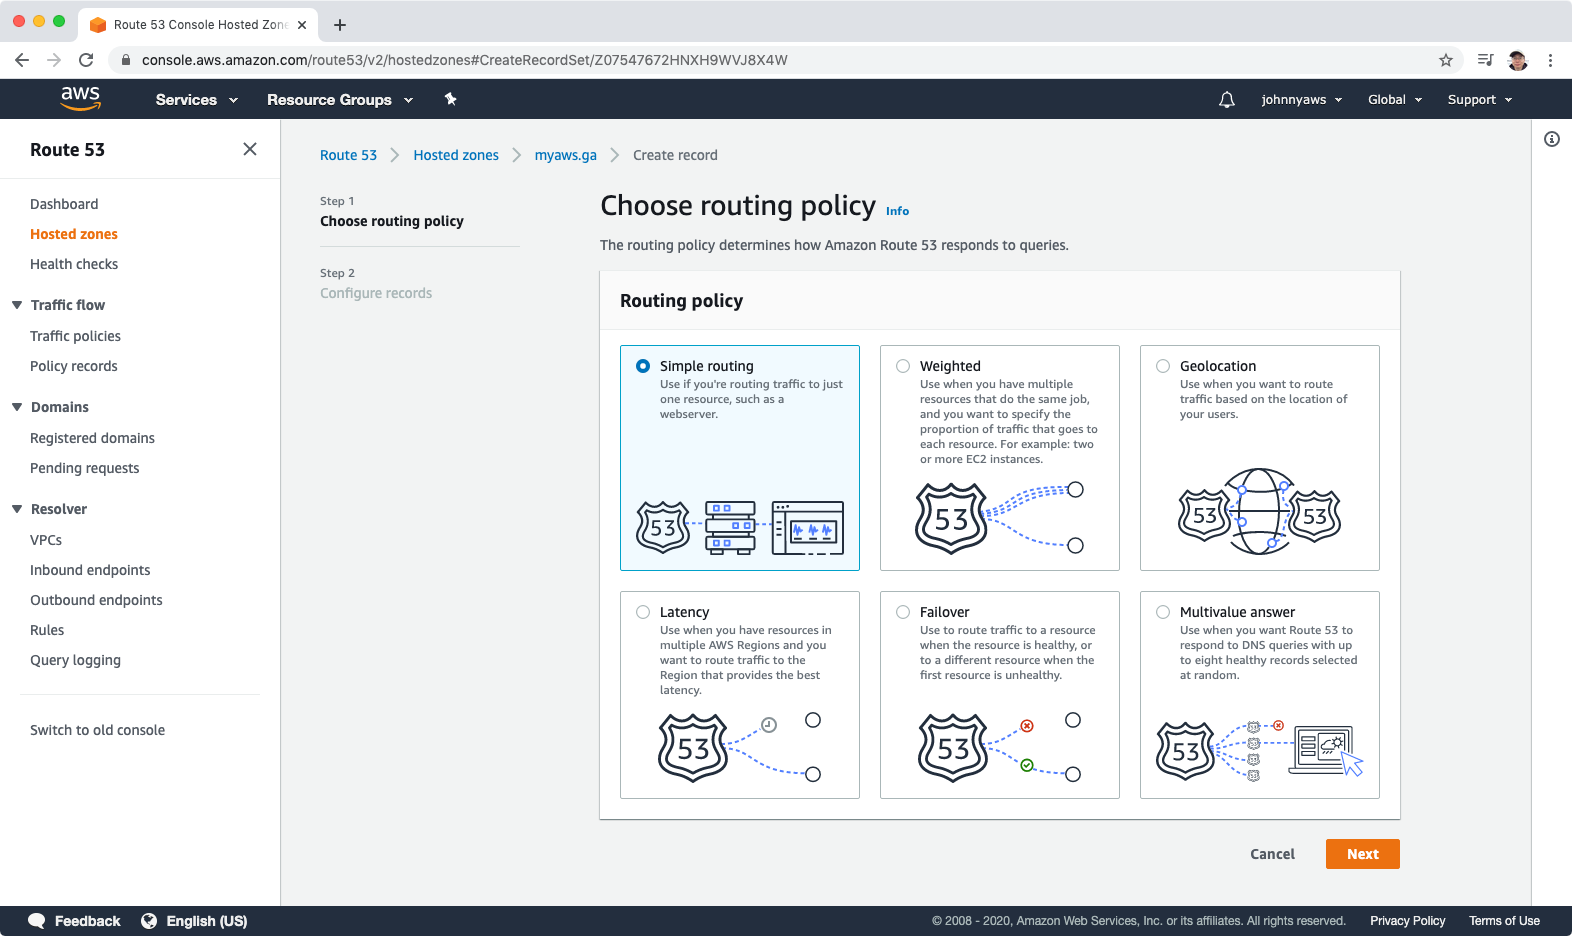
When you create a record, you choose a routing policy, which determines how Amazon Route 53 responds to queries:
- Simple routing policy – Use for a single resource that performs a given function for your domain, for example, a web server that serves content for the example.com website.
- Weighted routing policy – Use to route traffic to multiple resources in proportions that you specify.
- Latency routing policy – Use when you have resources in multiple AWS Regions and you want to route traffic to the region that provides the best latency.
- Failover routing policy – Use when you want to configure active-passive failover.
- Geolocation routing policy – Use when you want to route traffic based on the location of your users.
- Geoproximity routing policy – Use when you want to route traffic based on the location of your resources and, optionally, shift traffic from resources in one location to resources in another.
- Multivalue answer routing policy – Use when you want Route 53 to respond to DNS queries with up to eight healthy records selected at random.
3. Lab - Route53
3.1 Register A Domain Name
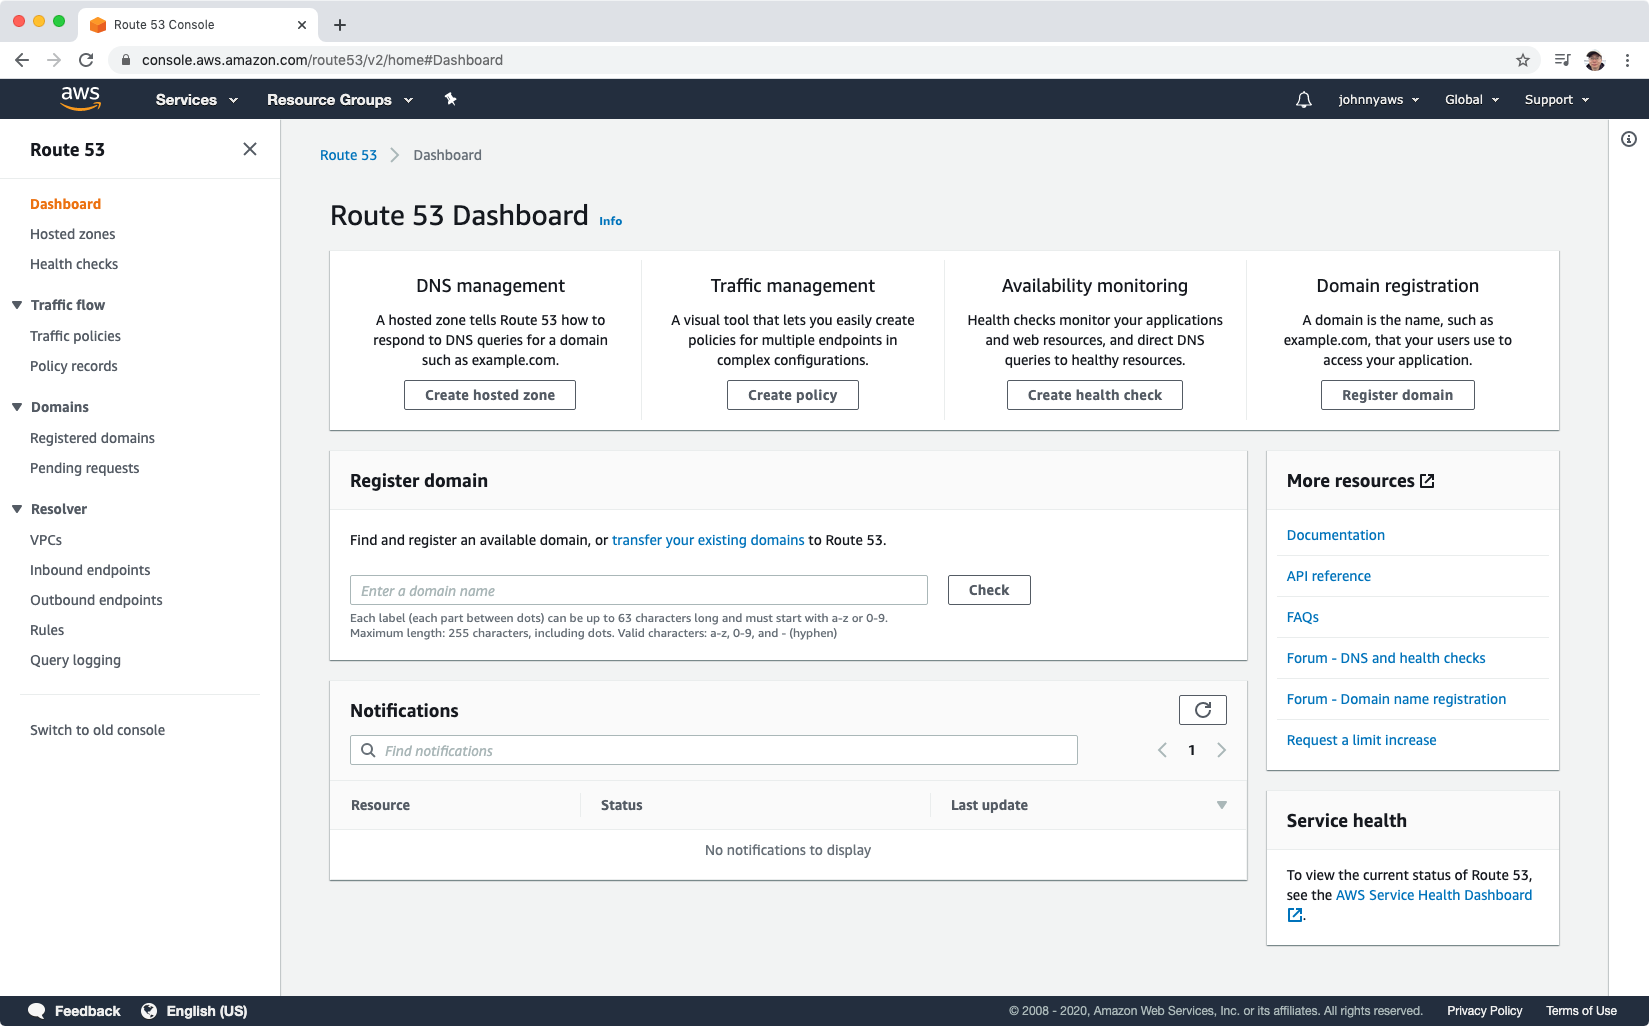
Go to Services -> Networking & Content Delivery -> Route 53, Registered domains.
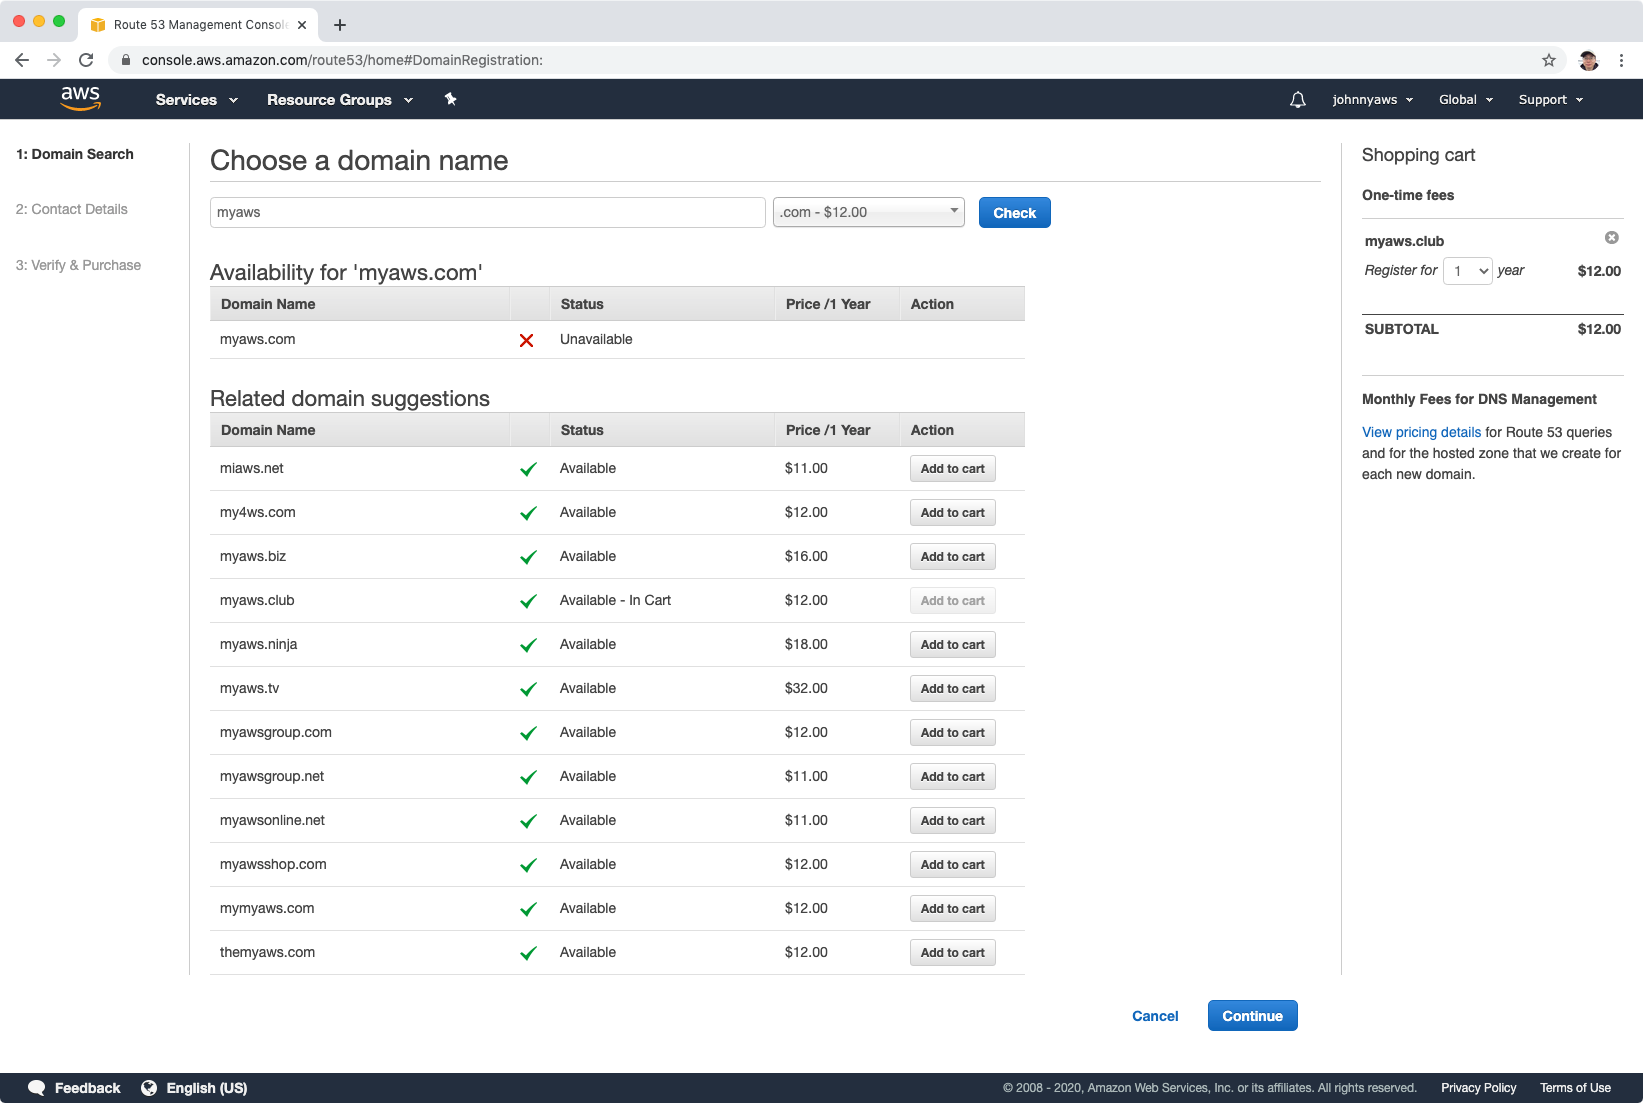
 Search available domains, add the one you like into cart.
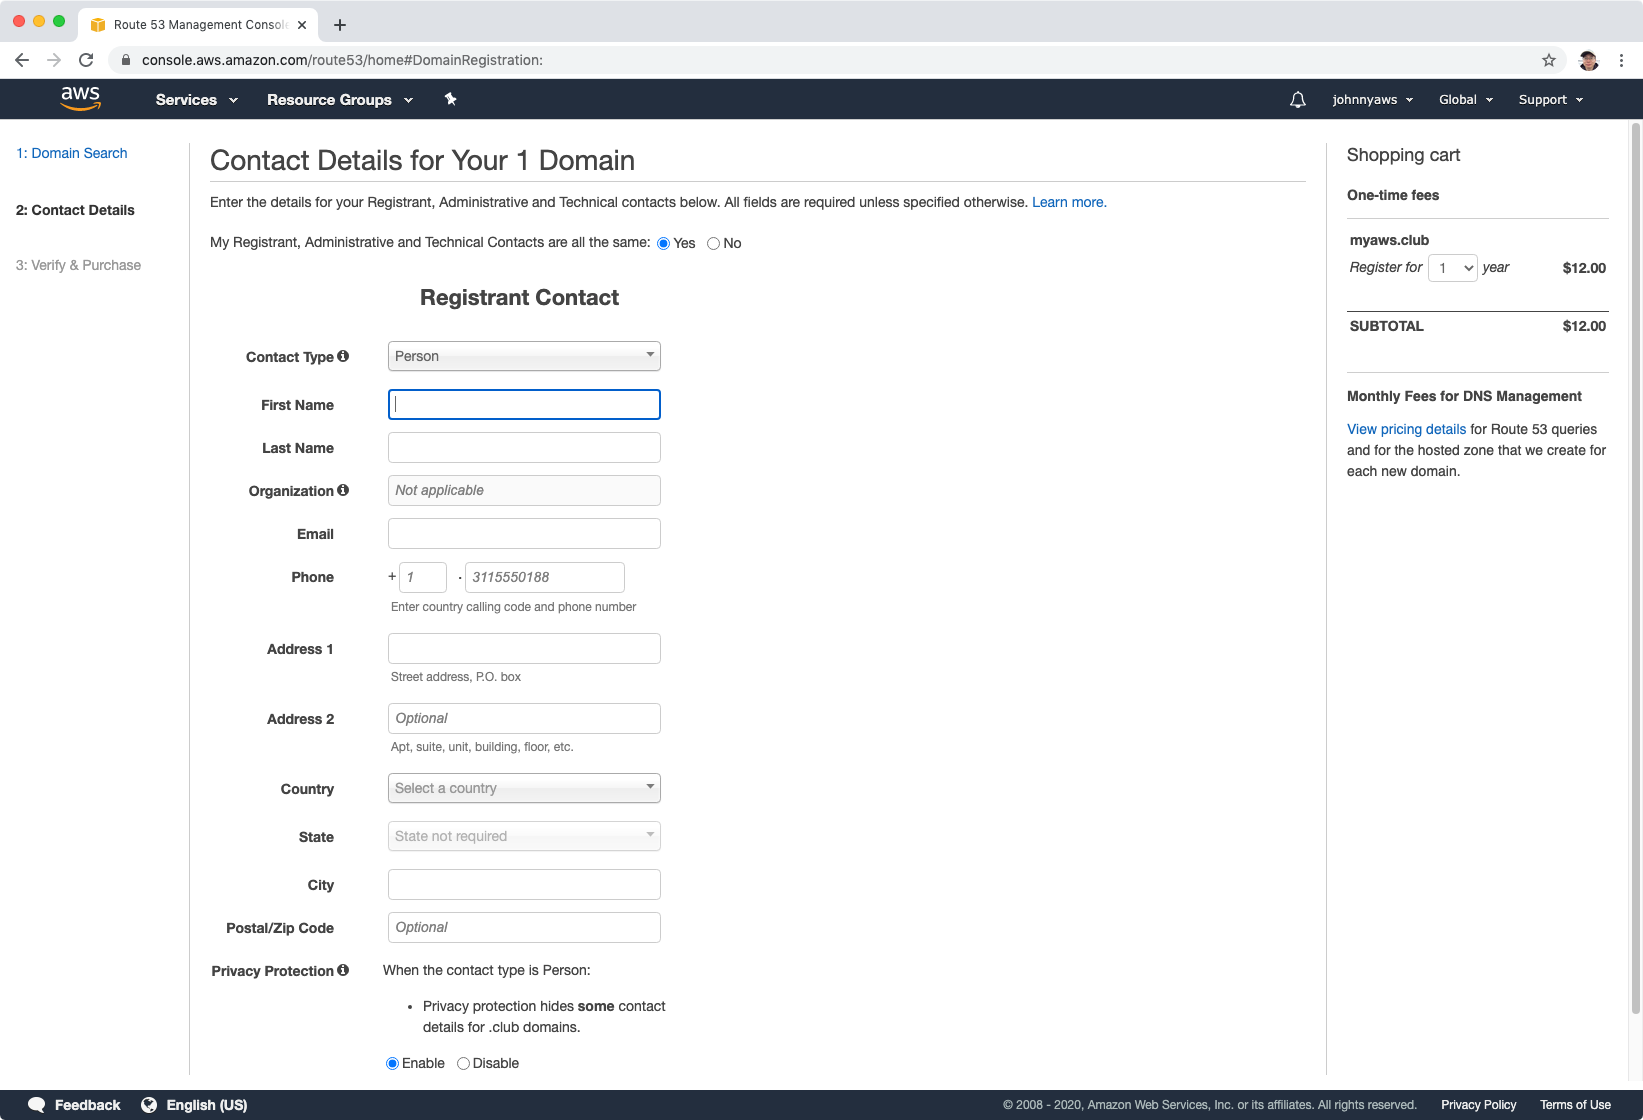
 Provide the personal information, continue and pay.
 It takes sometime before your new domain is ready.
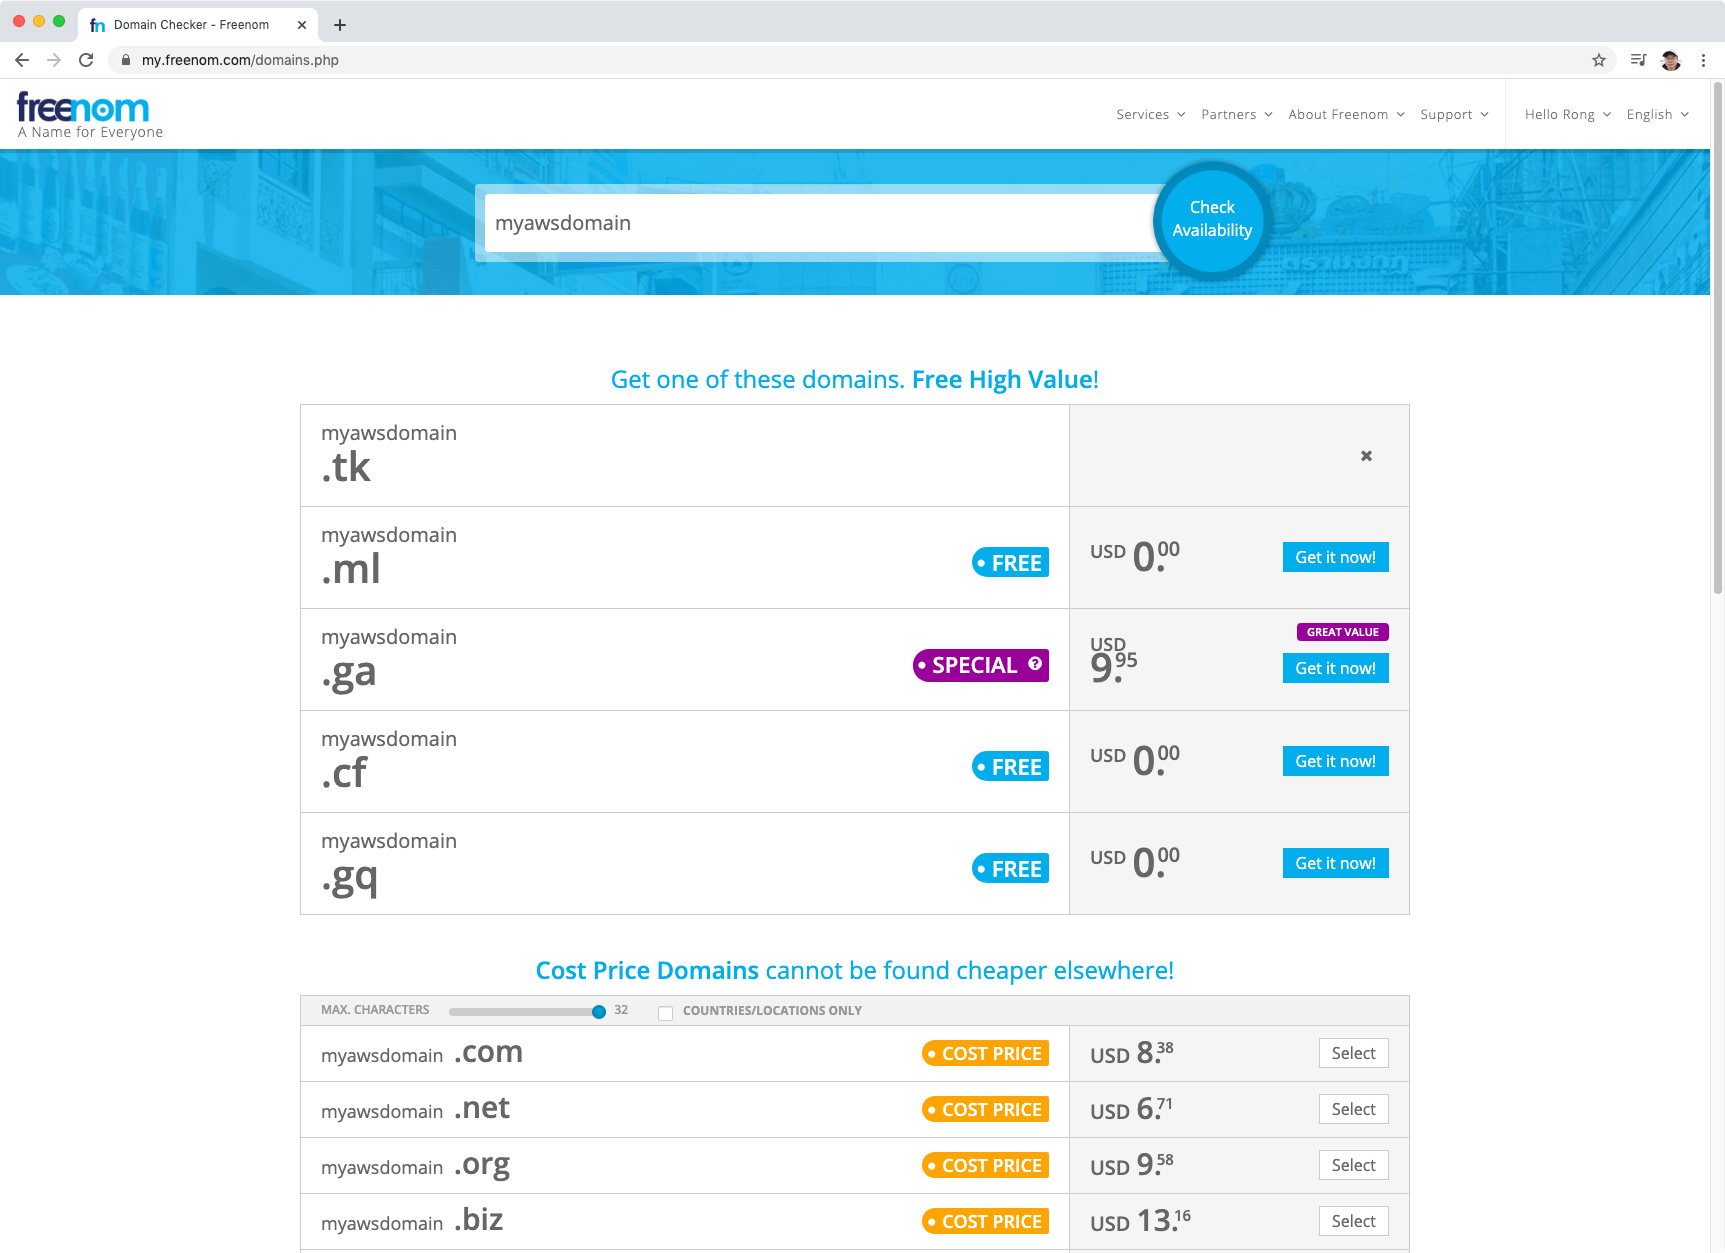
You can also register an account at freenom.com and get a free domain. I registered a domain named myaws.ga.
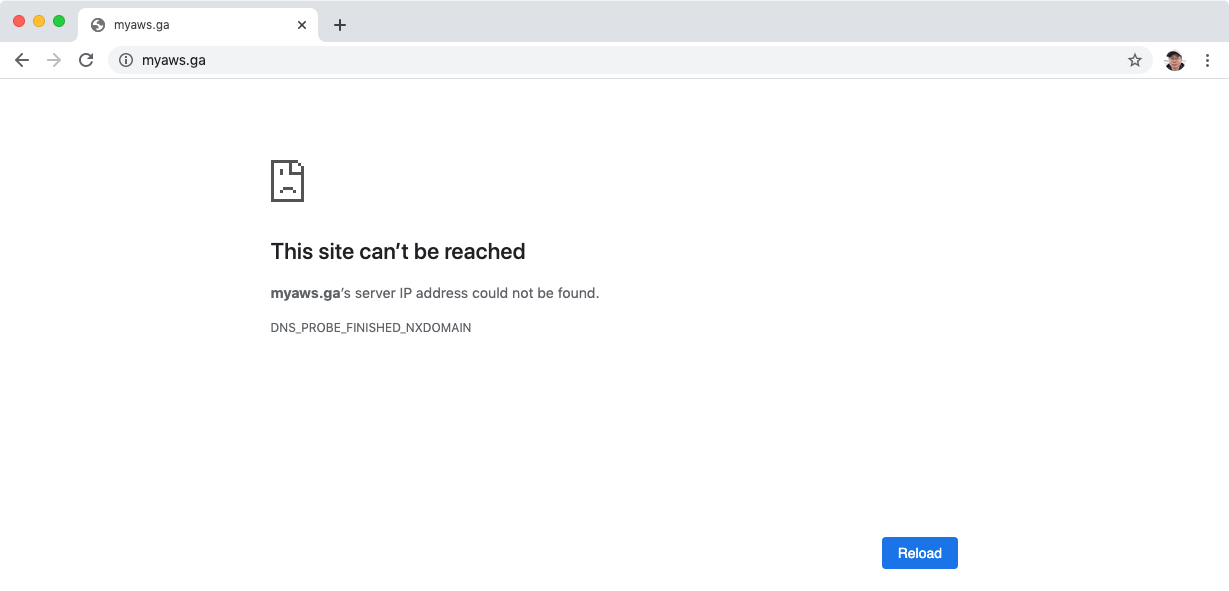
 If you access your domain in browser now, you will get the error - This site can’t be reached, because currently this domain is not pointing to any web server.
3.2 Create EC2 Instances
Use the following bootstrap script to create three ec2 instance in different regions. Change the content in the index.html for each instance to make them unique. So later we know which instance we are visiting. Make sure expose port 80 in the security group.
#!/bin/bash
yum update -y
yum install httpd -y
service httpd start
chkconfig httpd on
cd /var/www/html
echo "<html><h1>Hello world! This is the XXX Web Server</h1></html>" > index.html
For instance, we will create three instances in California, Oregon and Sydney.
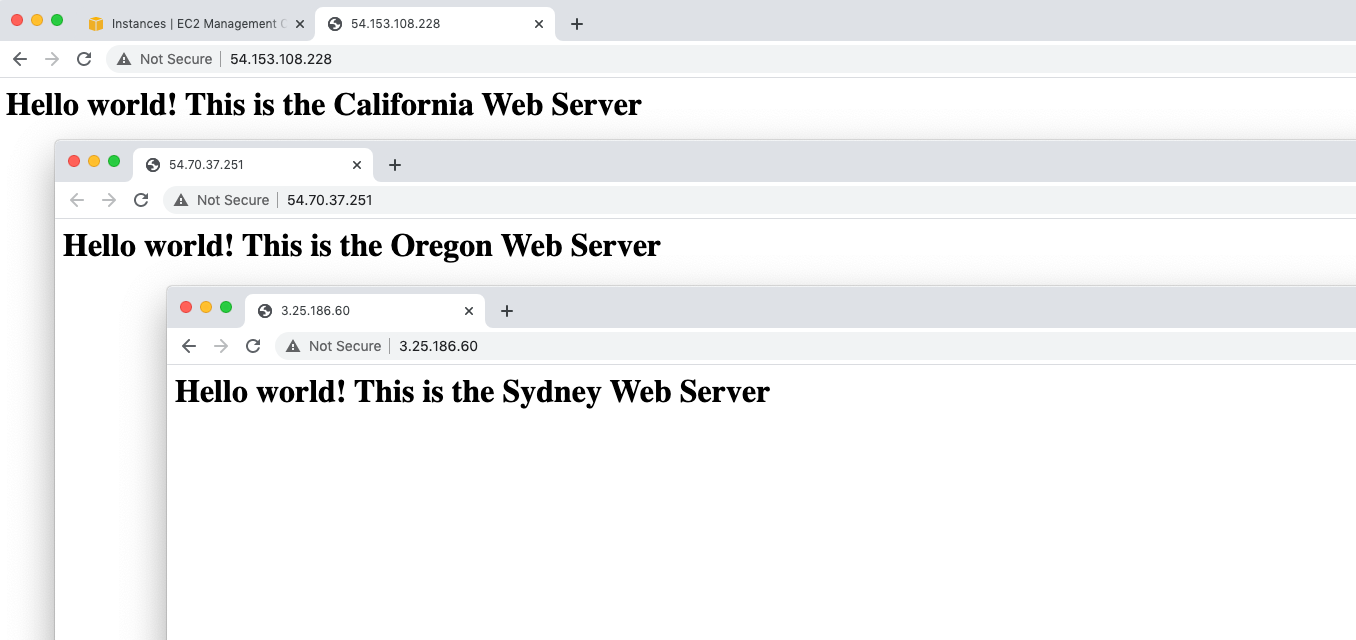
- Copy the three public ip addresses of the three instances, we will use them later.
54.153.108.228 -> California
54.70.37.251 -> Oregon
3.25.186.60 -> Sydney
3.3 Create Hosted Zone
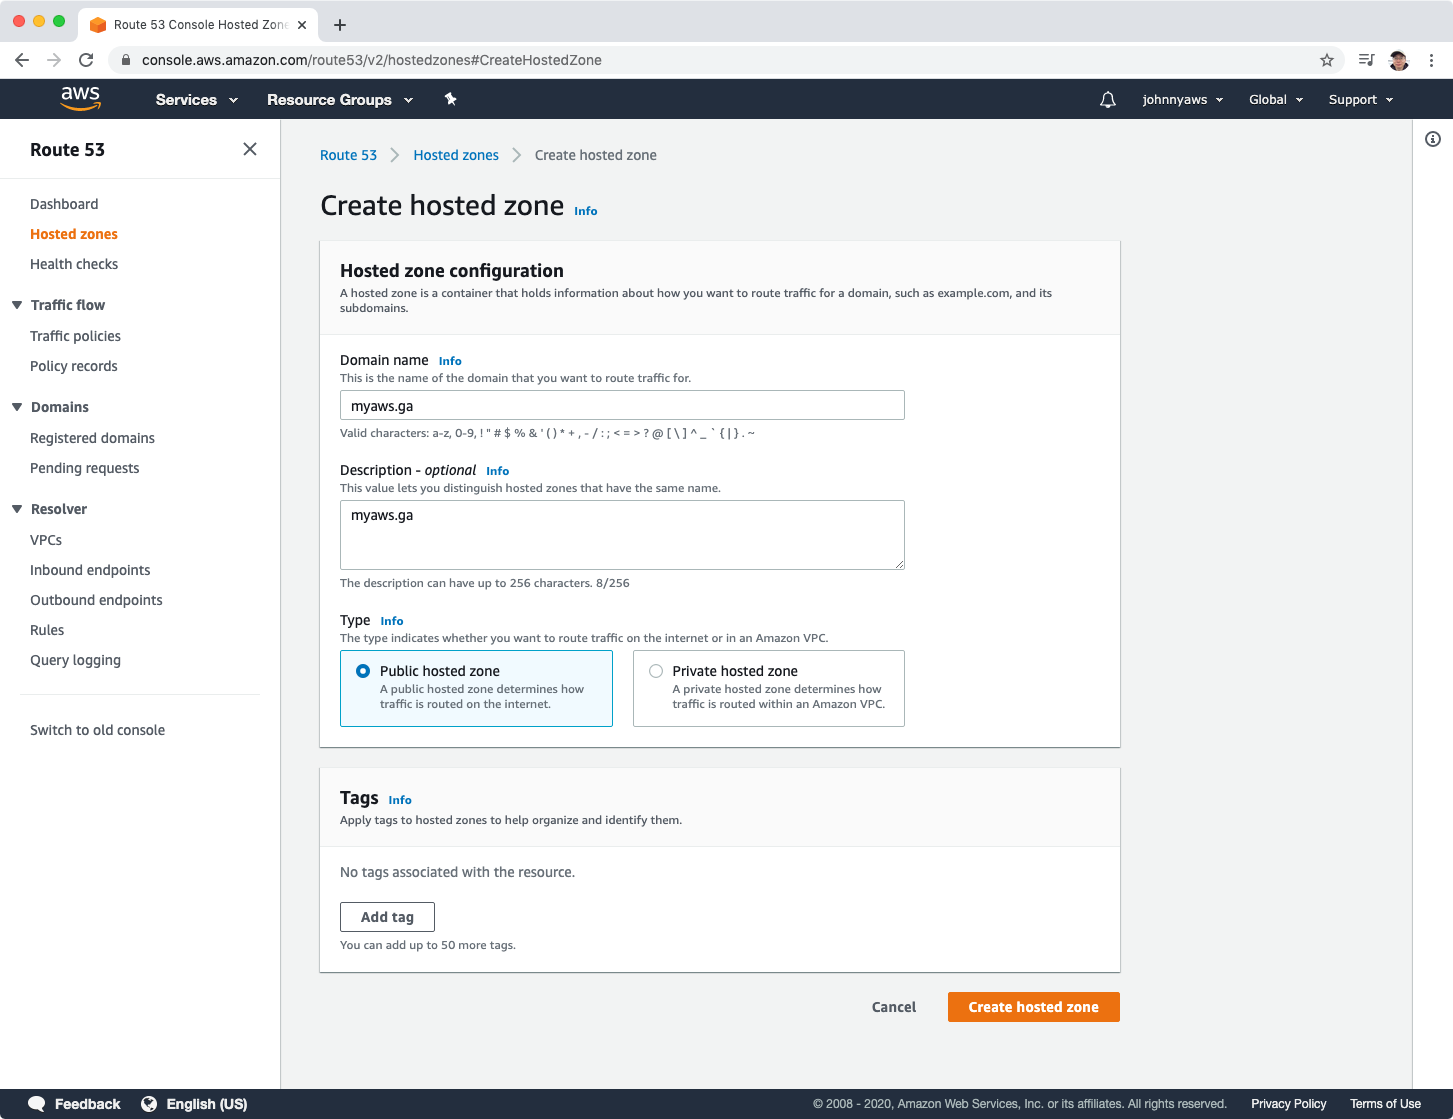
Go to Route53 -> Host Zones -> Create hosted zone, use the free domain myaws.ga, select Public Hosted Zone, click “Create hosted zone” button.
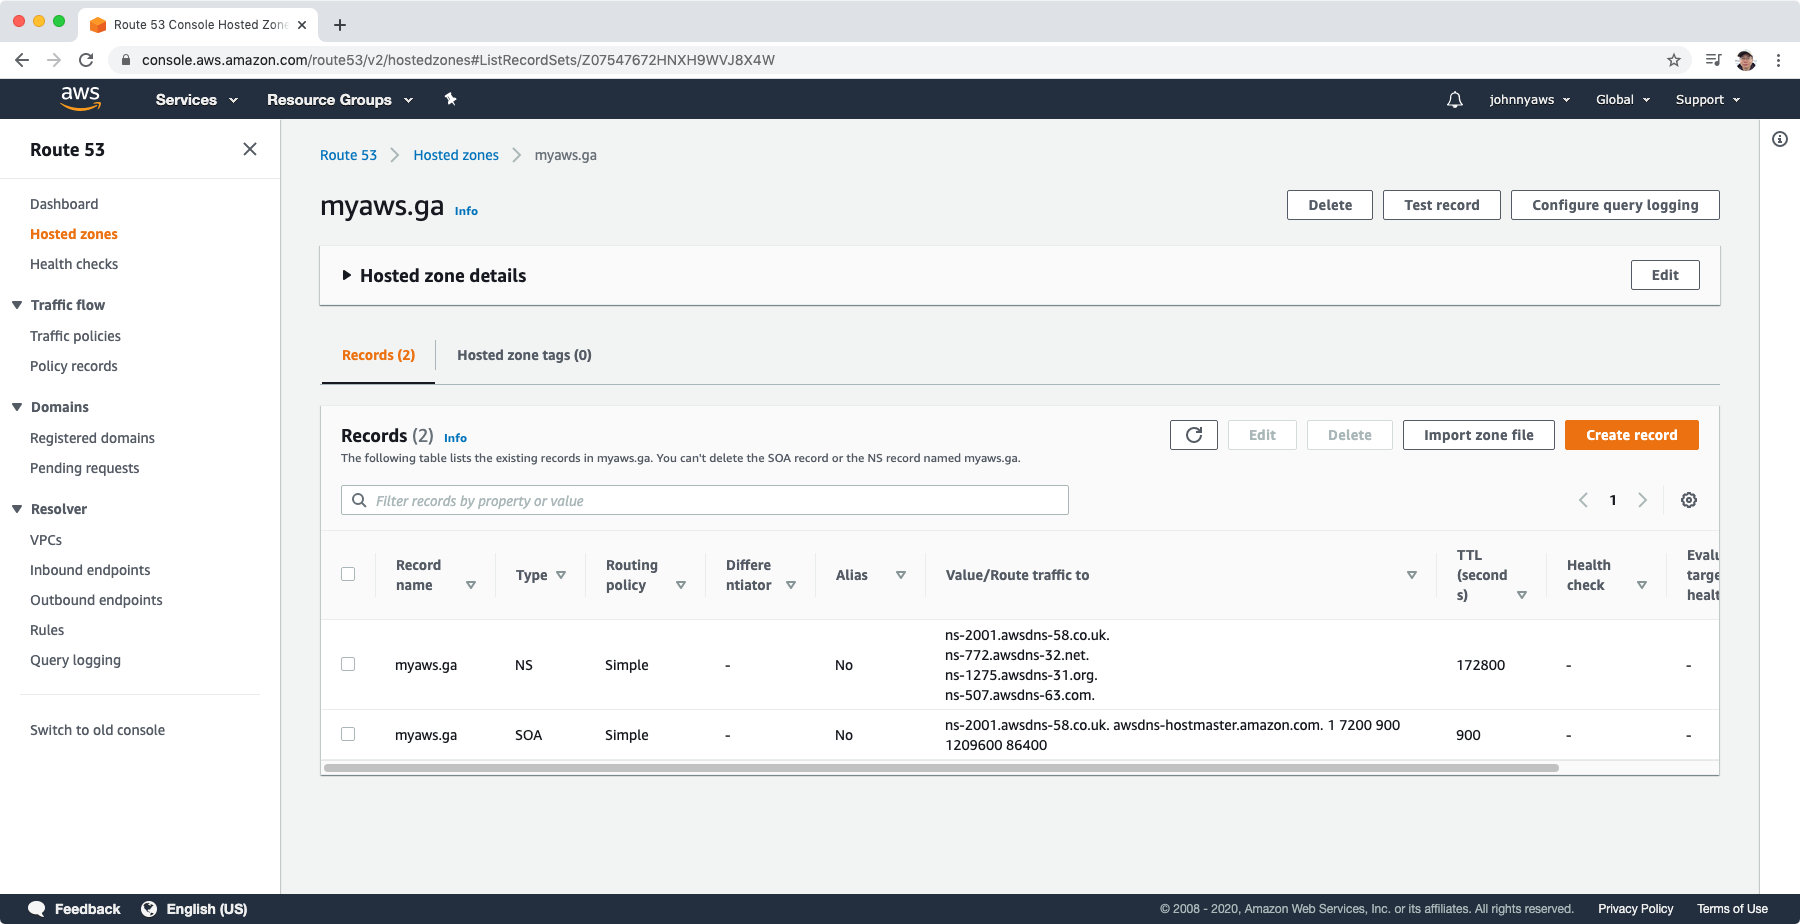
 Once created, you’ll see 2 default record sets for your domain. In here, take note all of the 4 Nameservers.
ns-2001.awsdns-58.co.uk.
ns-772.awsdns-32.net.
ns-1275.awsdns-31.org.
ns-507.awsdns-63.com.
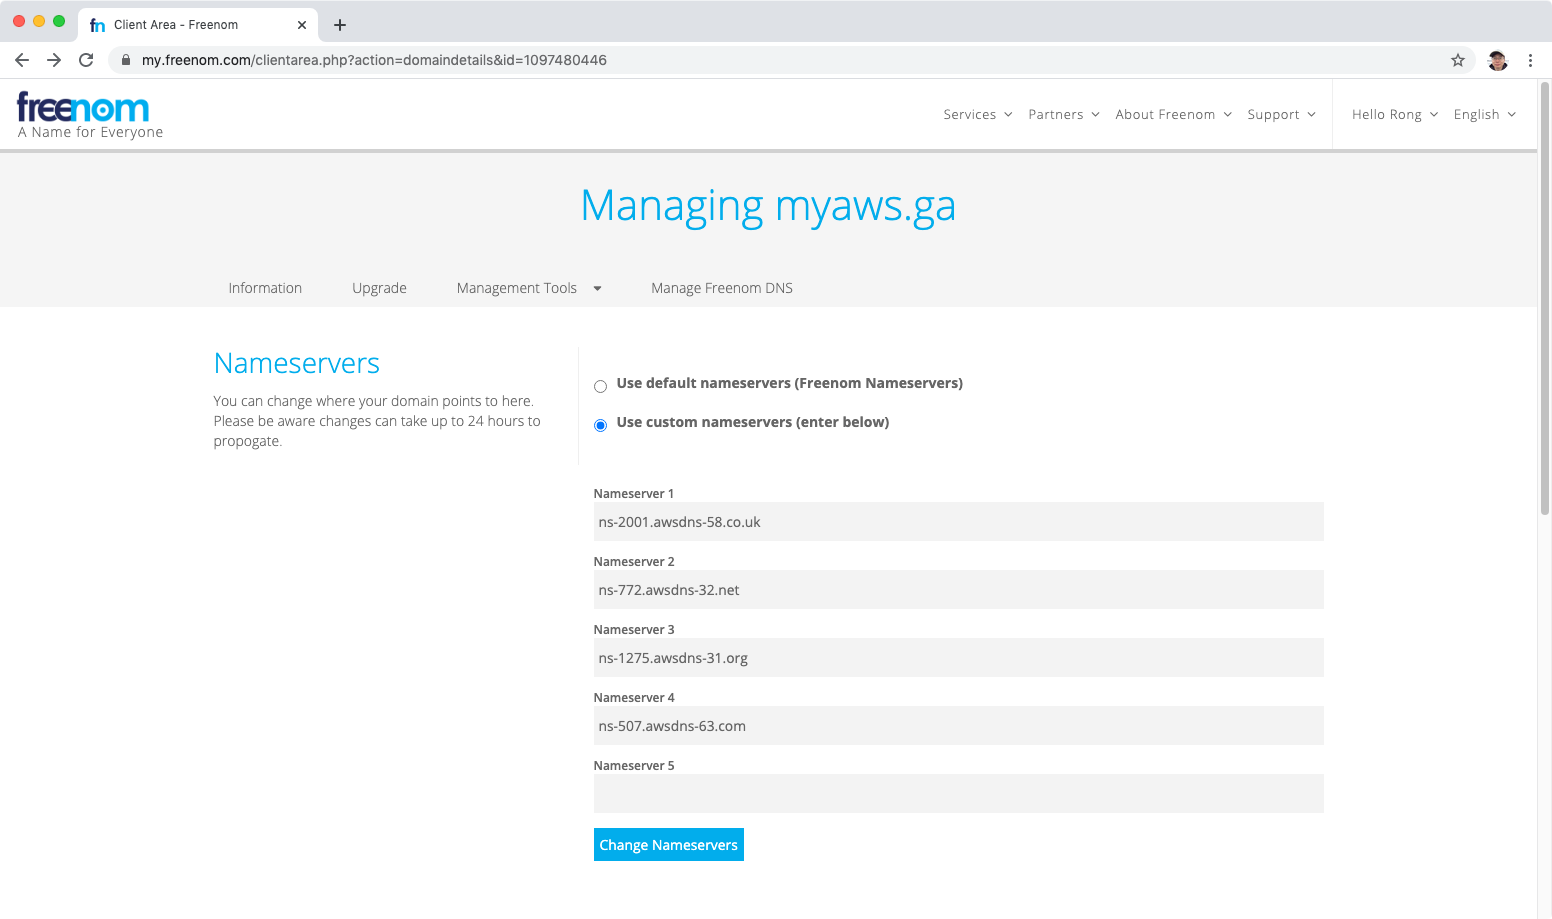
Login to freenom.com, go to Services->My Domains. From here, choose the domain and click on Manage Domain. Select Management Tools -> Nameservers. From here, select “Use custom nameservers”, enter all the 4 name servers and click the “Change Nameservers” button.
4. Routing Policy Lab
Next, we will create several routing policies to see how they work.
4.1 Simple Routing Policy
If you choose the simple routing policy you can only have one record with multiple IP addresses. If you specify multiple values in a record(1 to N), Route 53 returns all values to the user in a random order.
Create record, select simple.
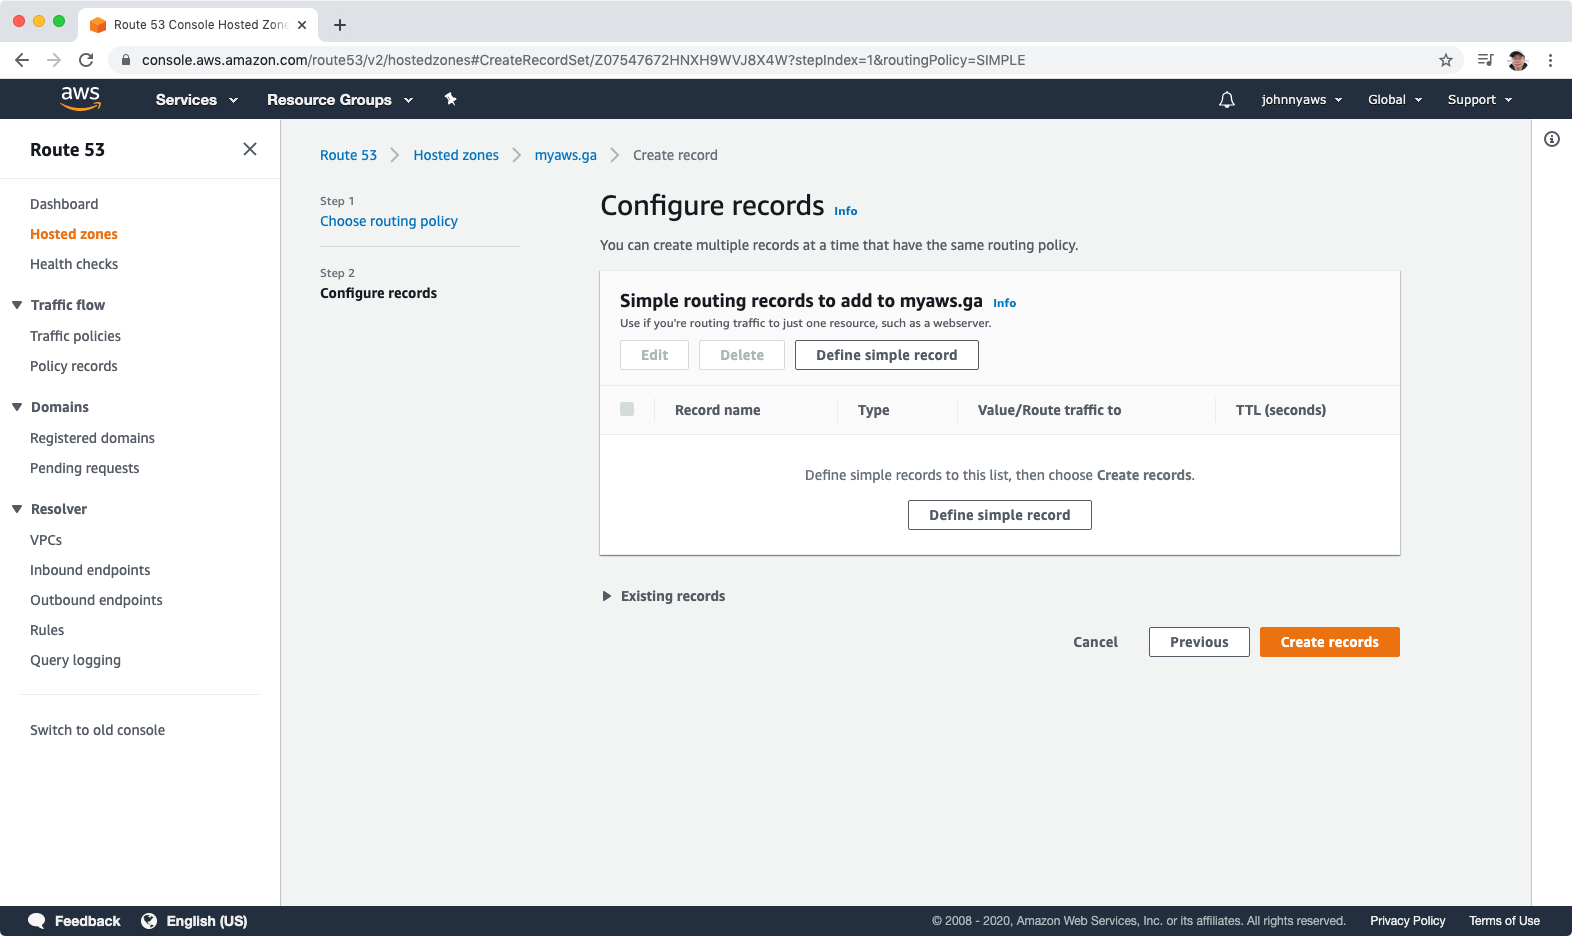
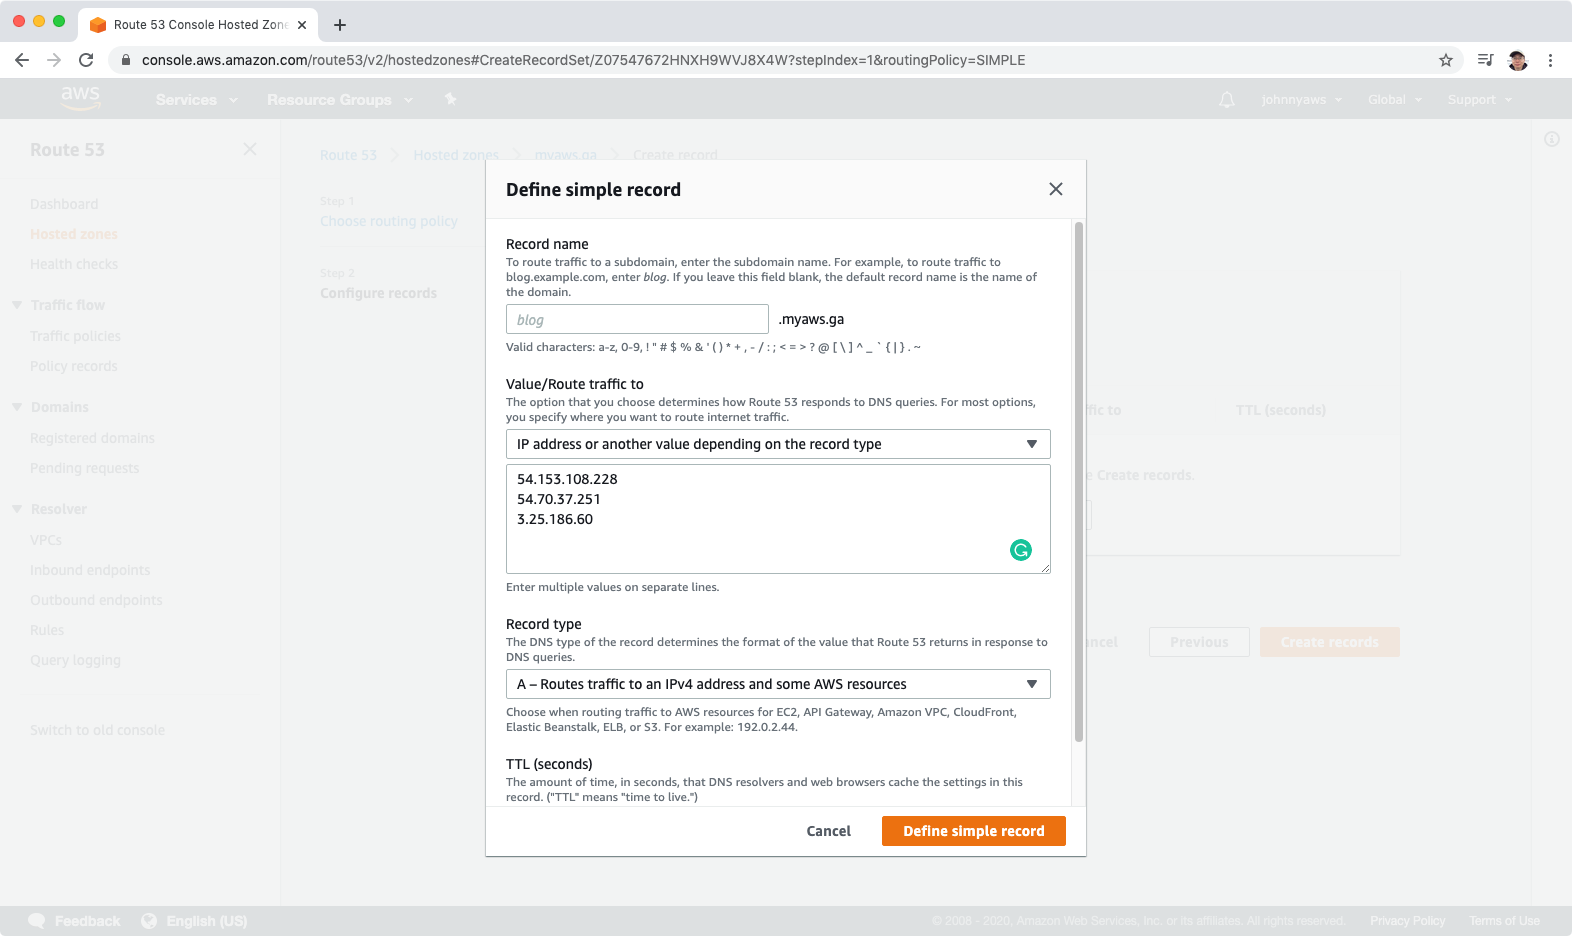
 Click “Define simple record”.
 Select type “A-Routers traffic to an IPv4 address and some AWS resources” and paste the three ip addresses into values box, click “Define simple record”.
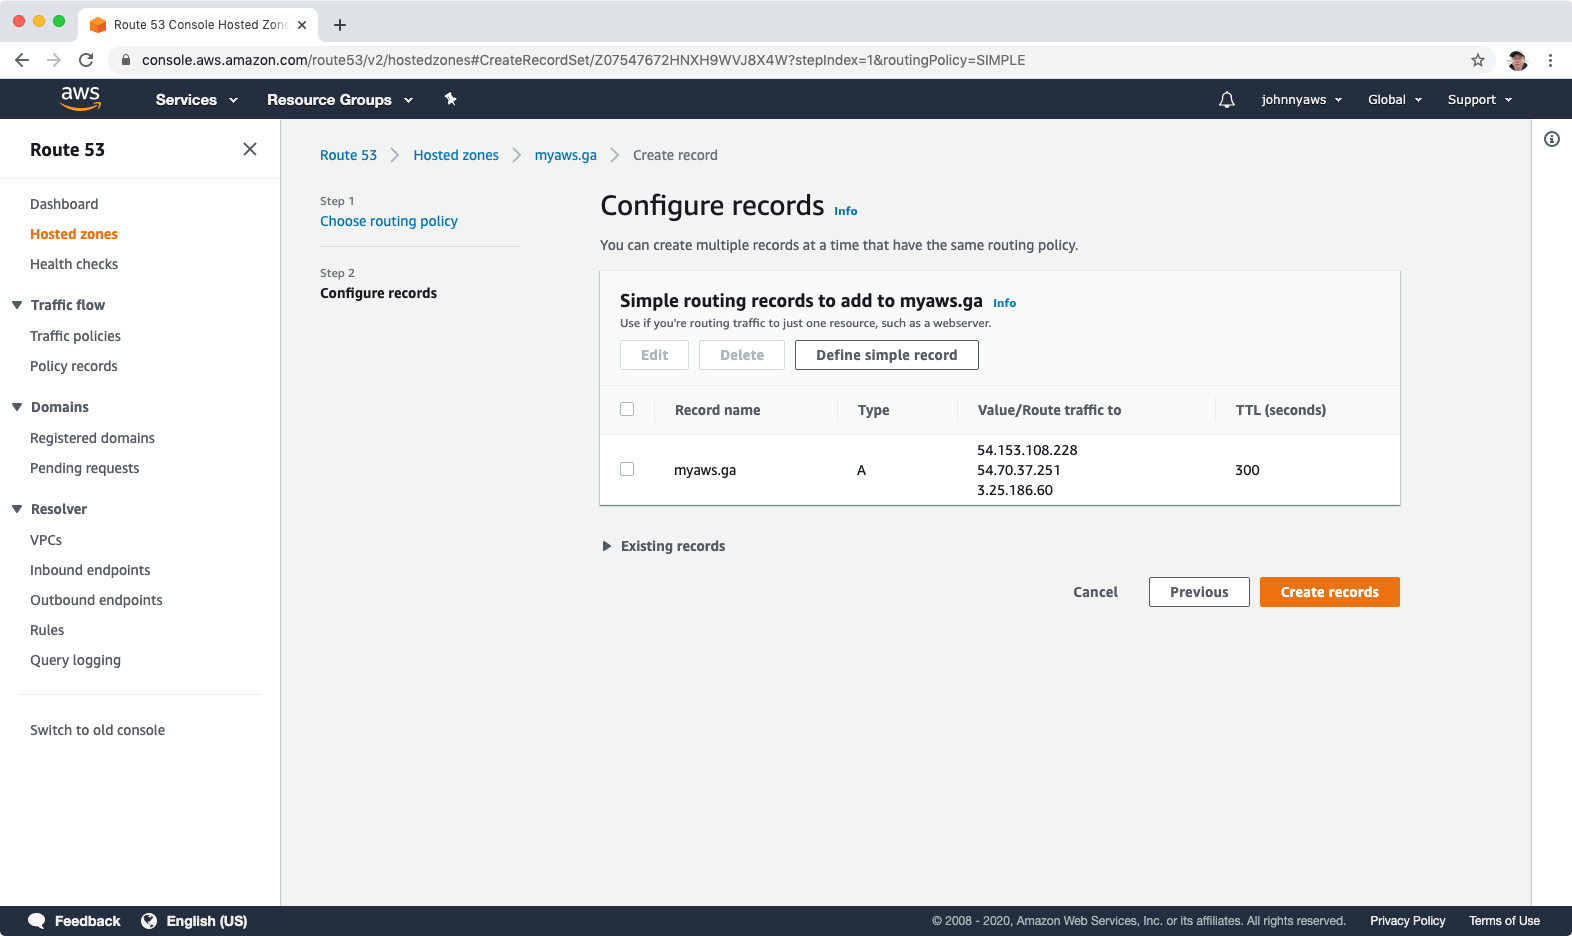
 The record is added, click “Create records”.
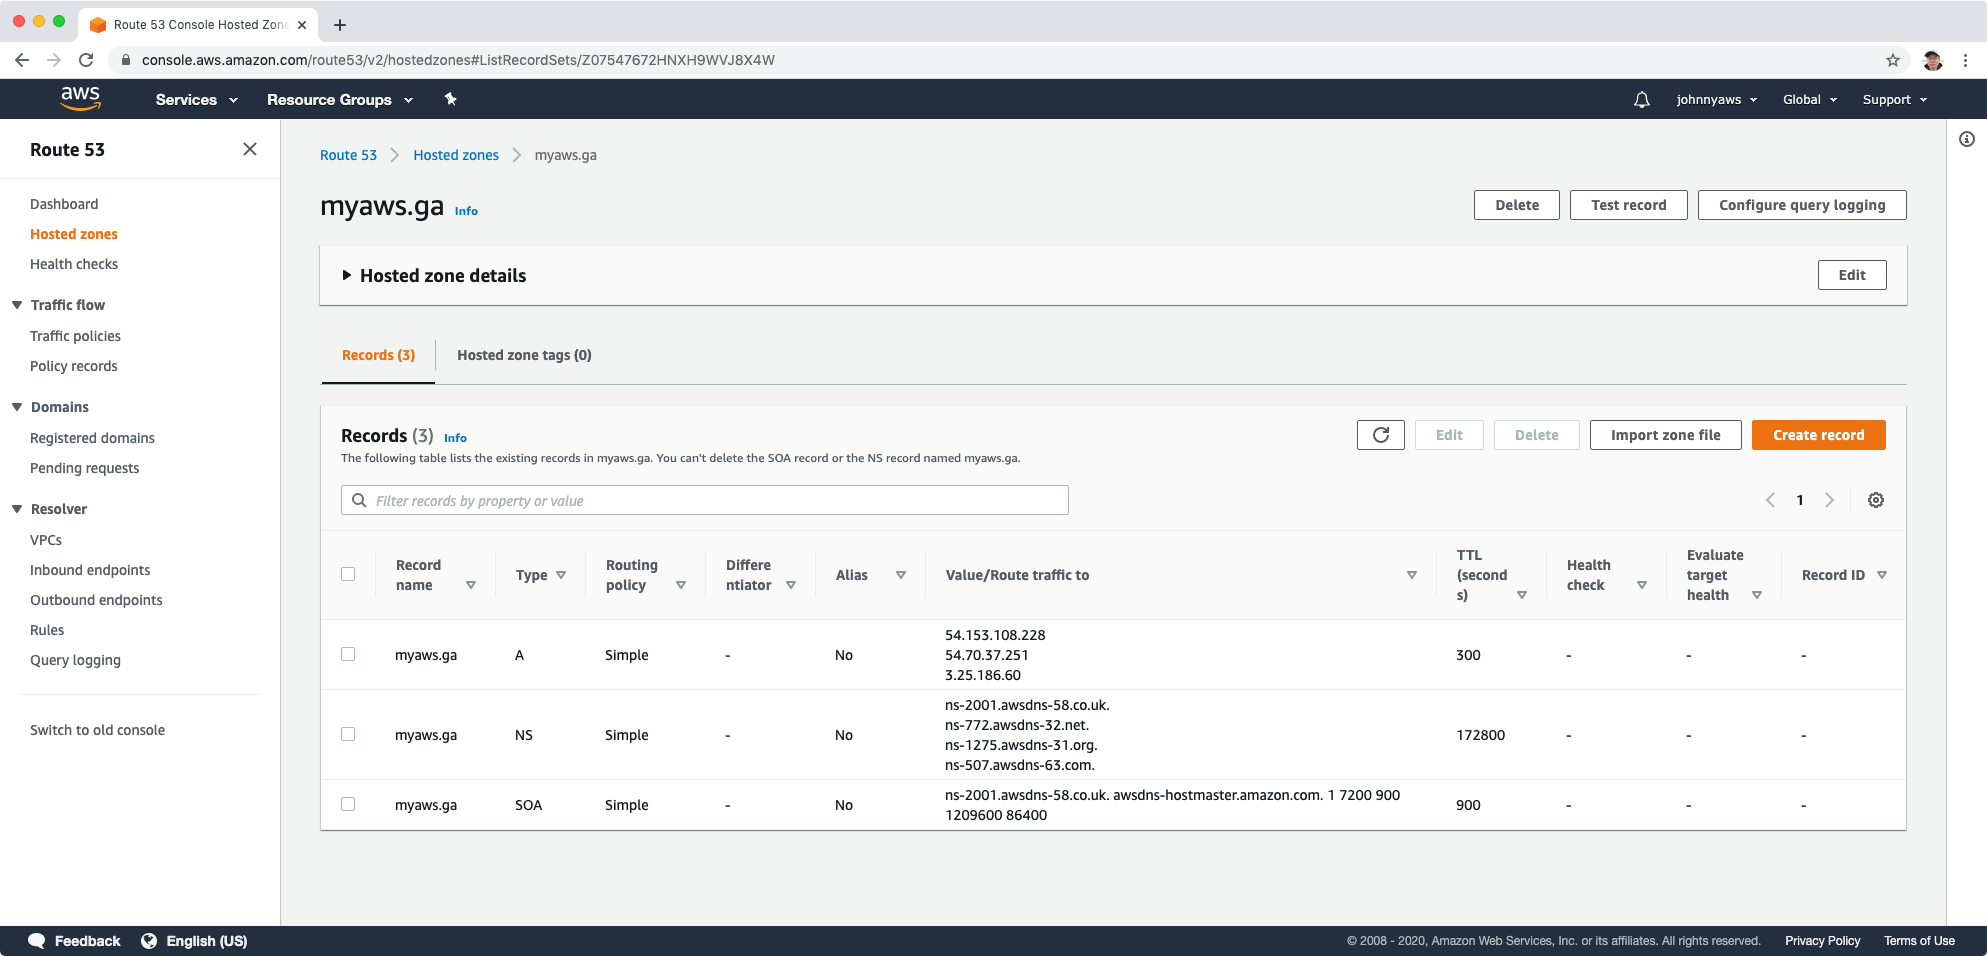
 In the domain’s home page, we see the new A record with the values of three ip addresses.
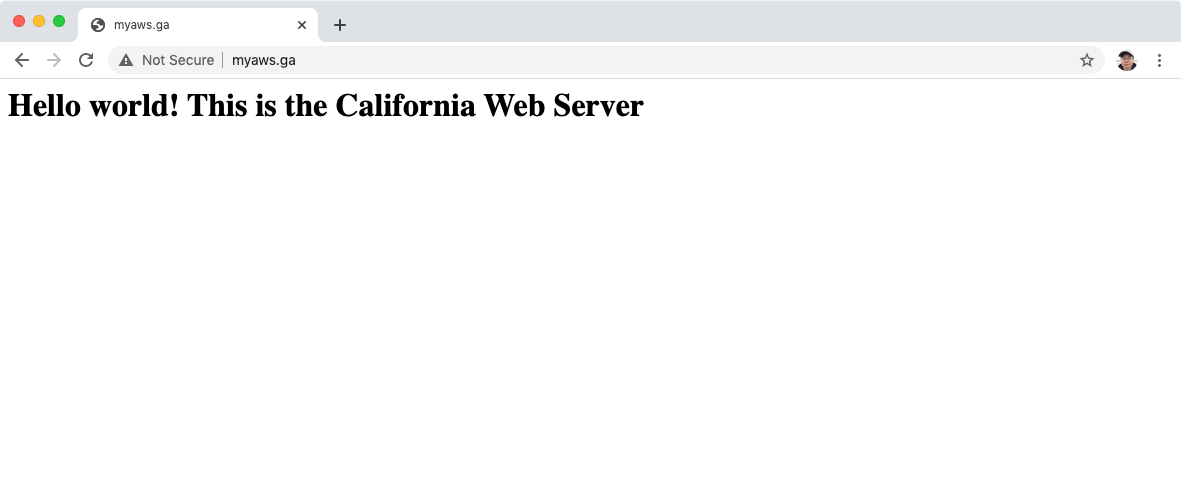
 Now you are able to access the web server in your EC2 instance with the domain myaws.ga.
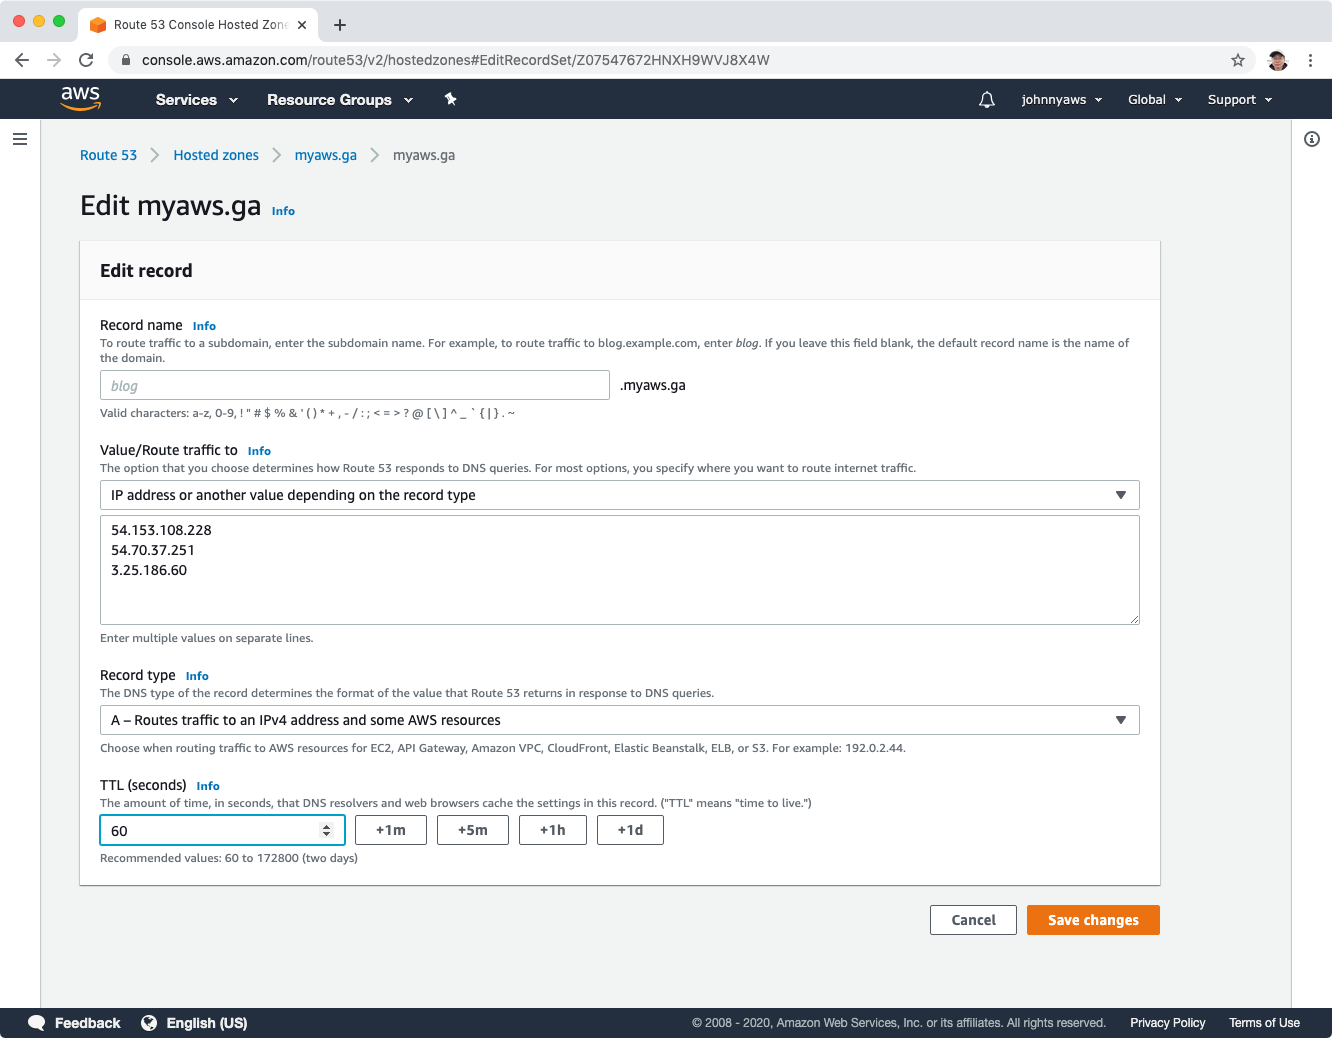
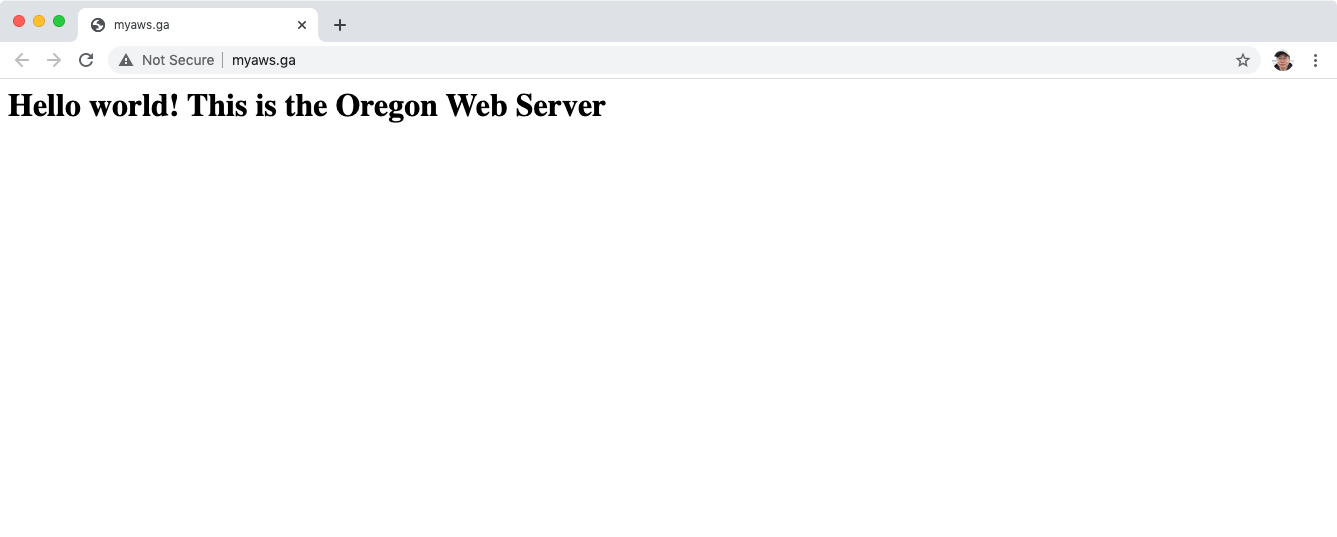 If you keep refreshing the page, the content won’t change. The server always stay in the Oregon. Edit the simple record, change the TTL to 1 minutes.
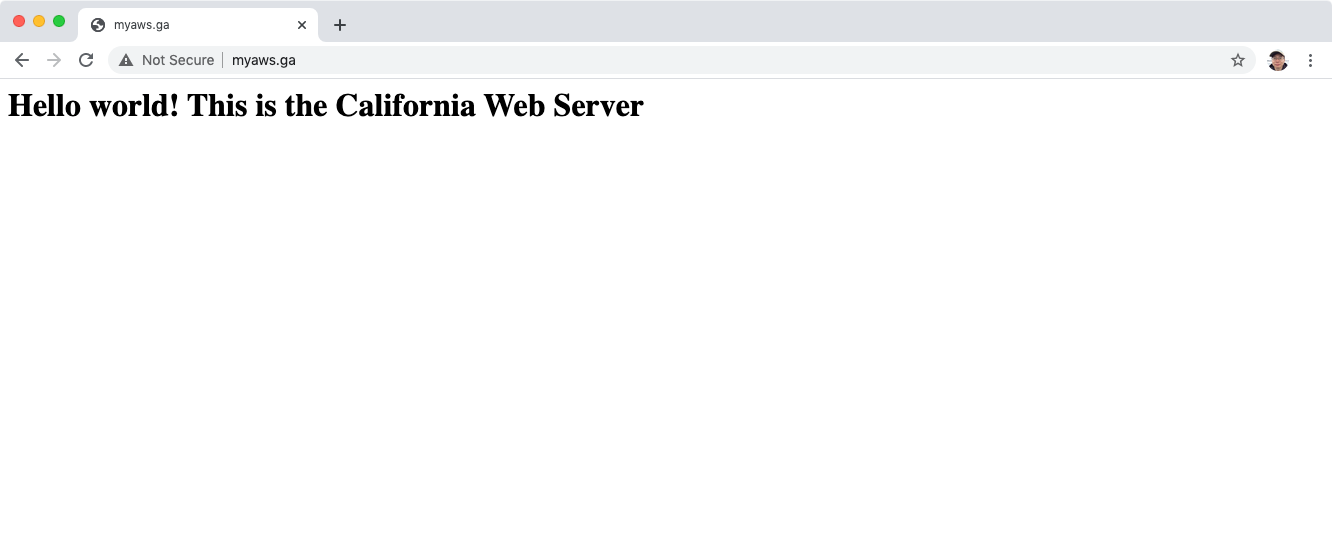
 Wait for 60 seconds and refresh the page. The content is returned from California server.
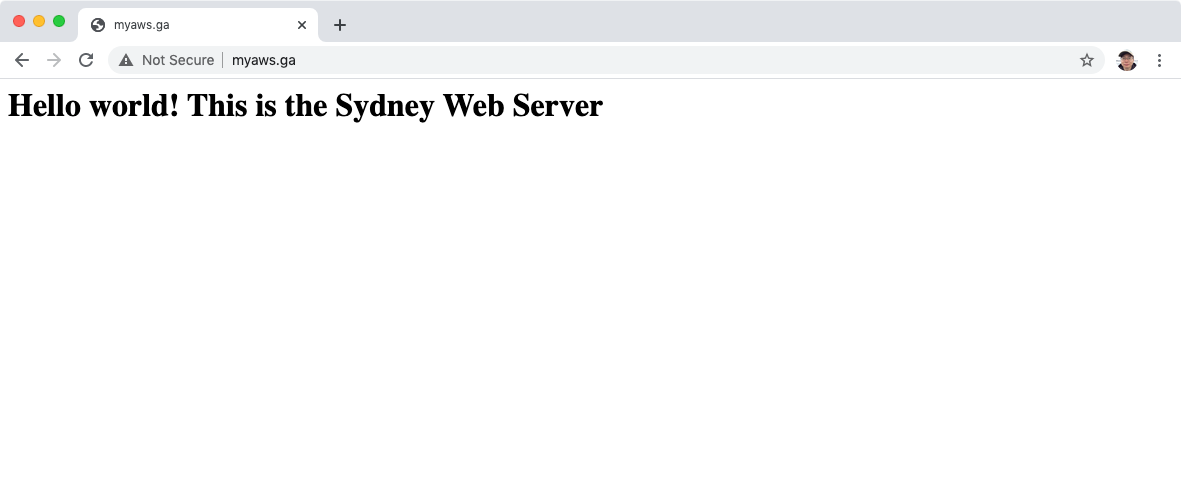
 If you keep refreshing, the content could also be returned from Sydney server.
4.2 Weighted Routing Policy
Weighted Routing Policy allows you split your traffic based on different weights assigned. For example, you can set 10% of your traffic to go to us-west-1 and 90% to go to eu-east-1.
Delete the record sets for simple routing policy created in previous section. Notice, page won’t be accessible(after TTL is past).
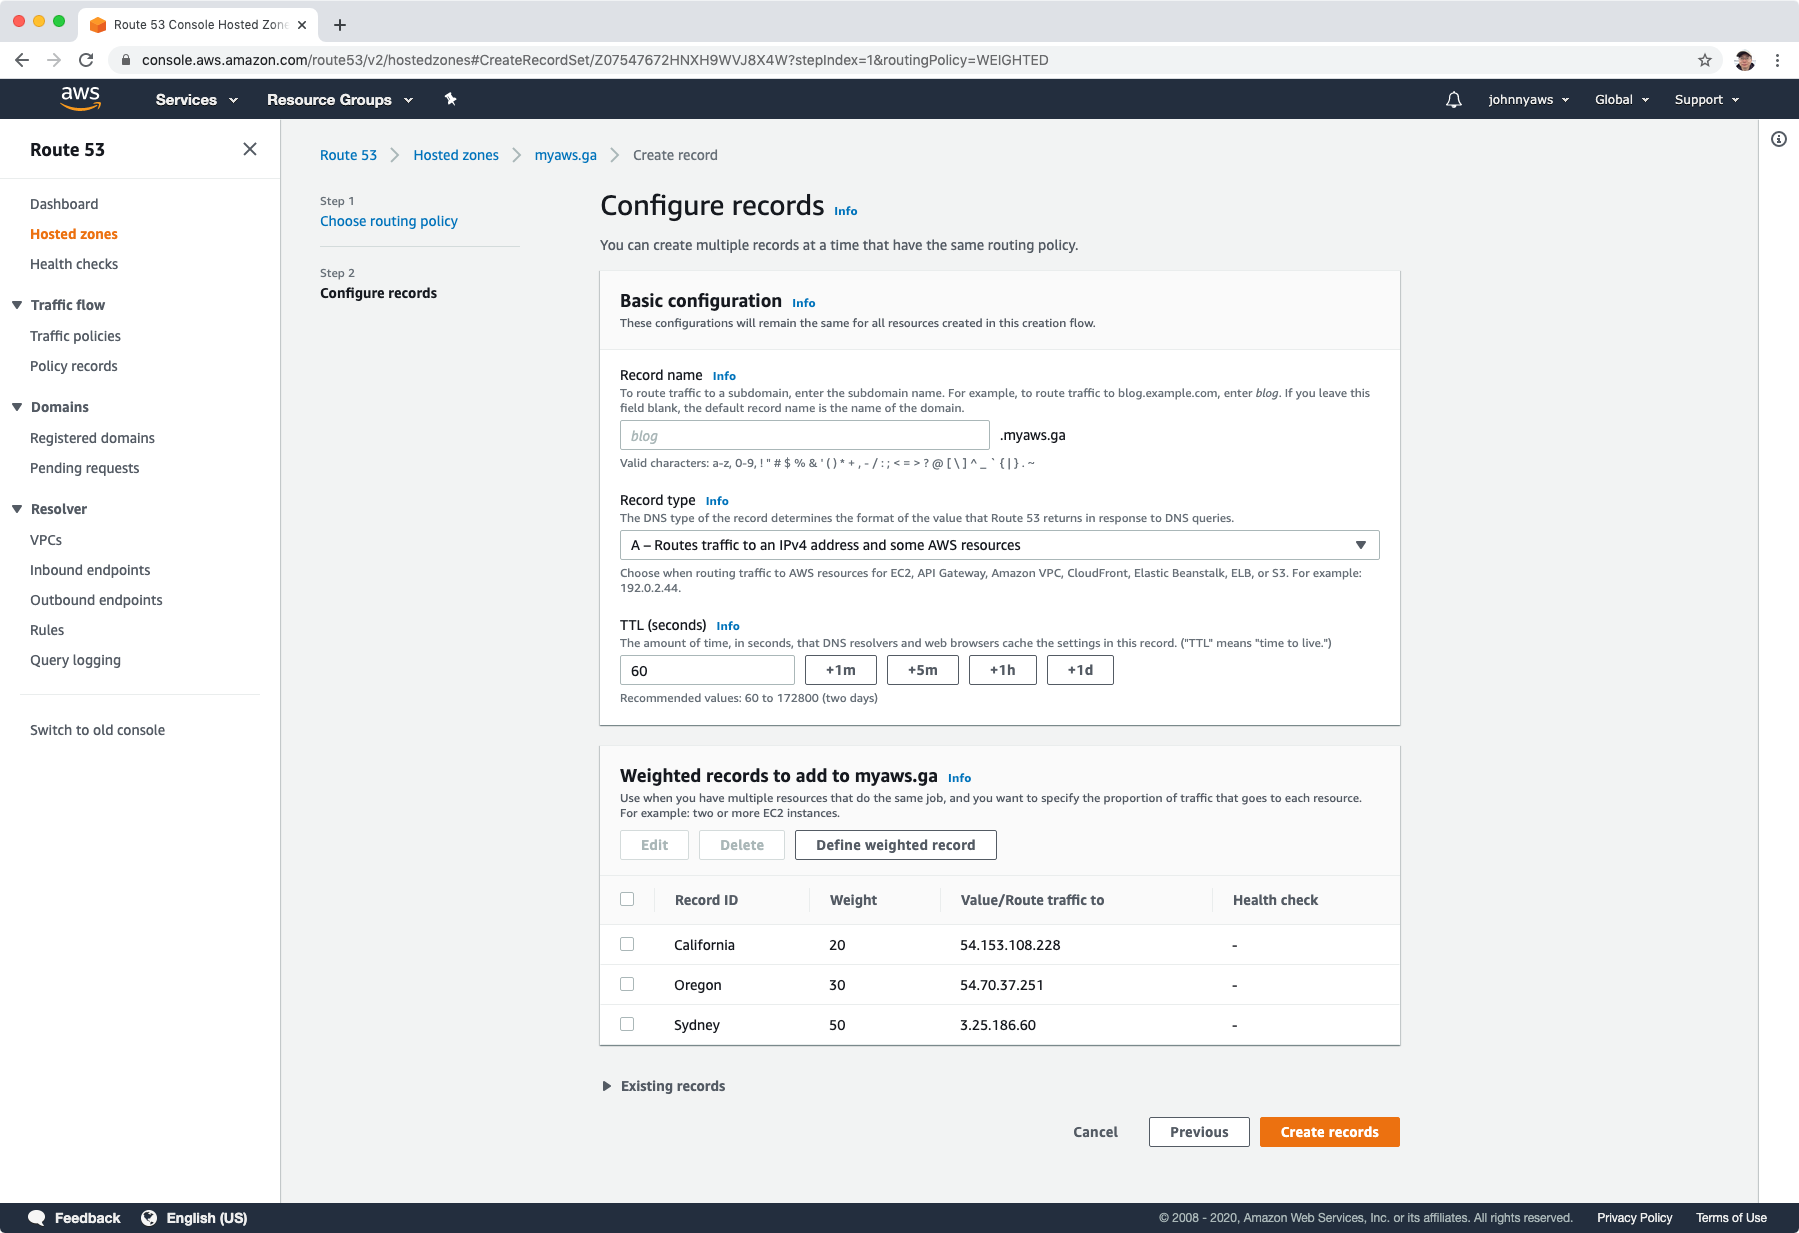
Create record, select Weighted, click “Define weighted record”.
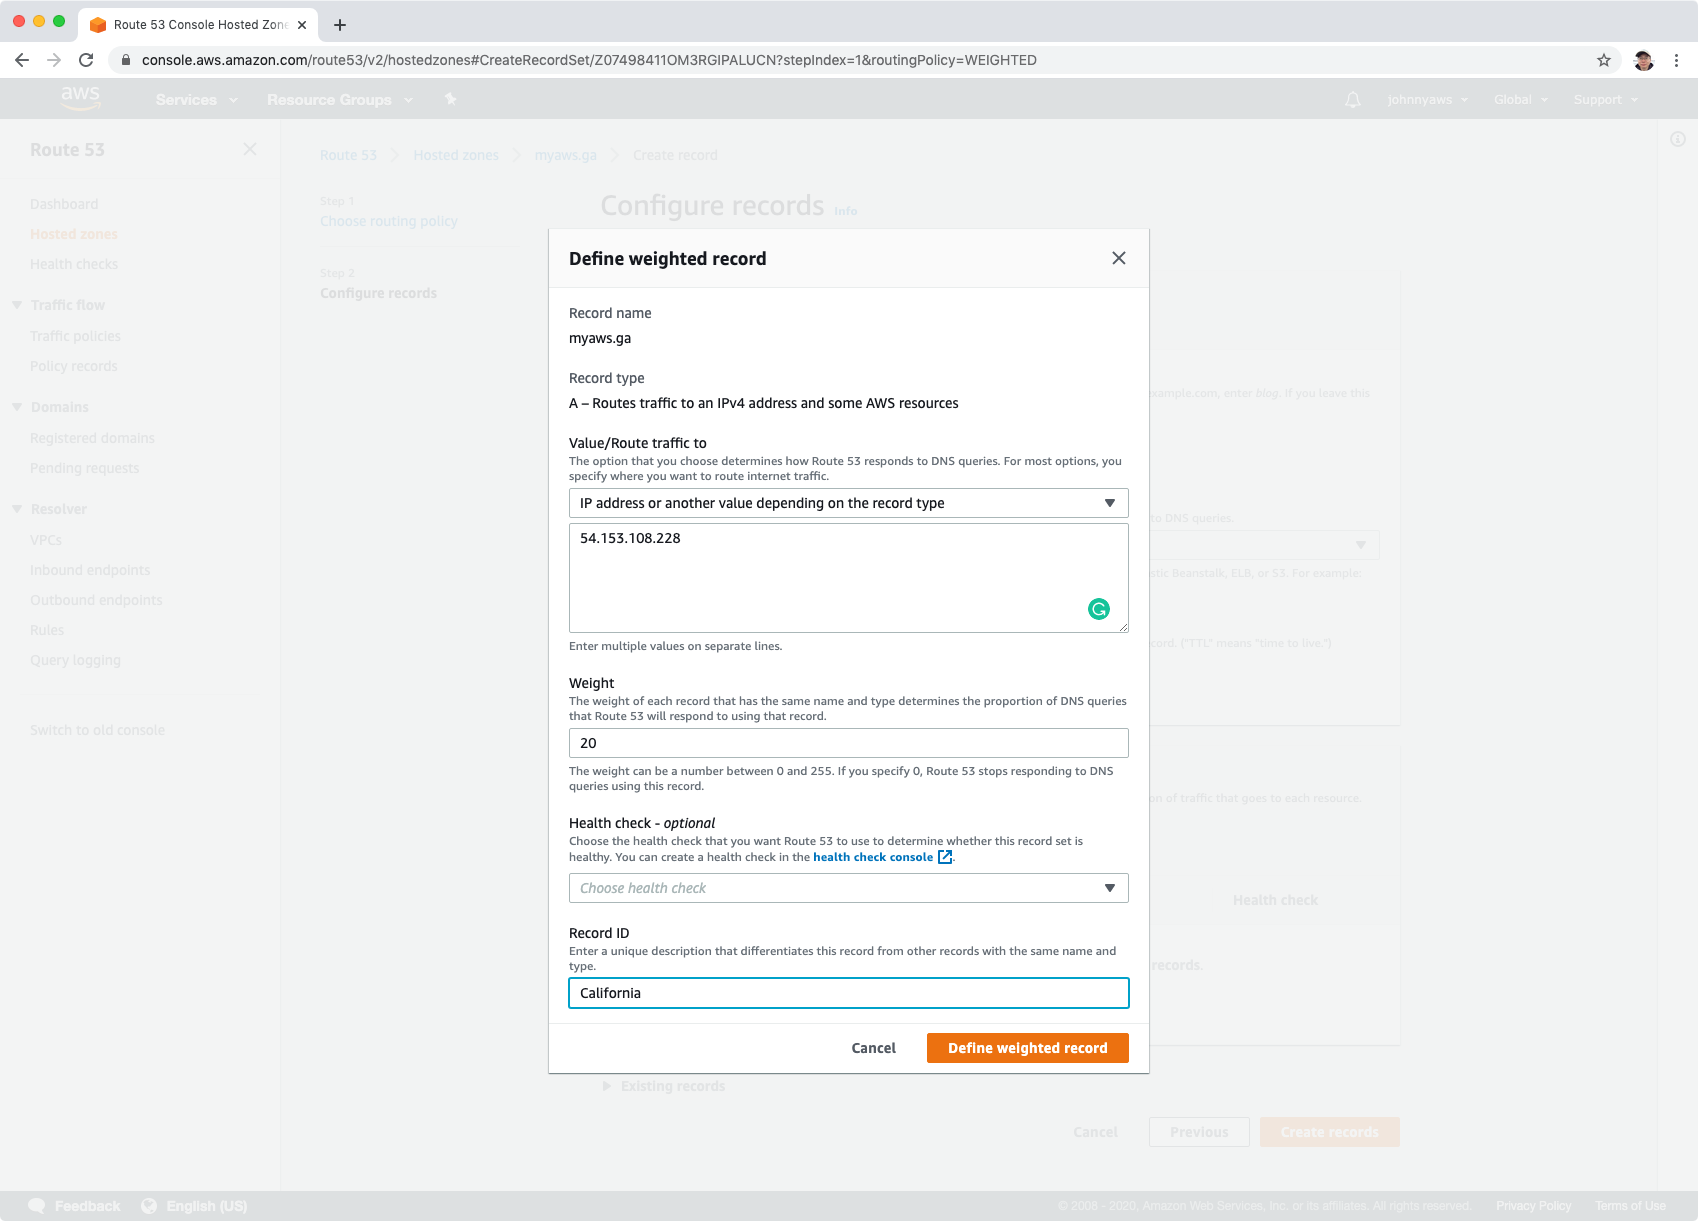
Create first record set as follows:
- Value = ip addresses of California instance
- Weight = 20
- Record ID = California
Create second record set as follows:
- Value = ip addresses of Oregon instance
- Weight = 30
- Record ID = Oregon
Create third record set as follows:
- Value = ip addresses of Sydney instance
- Weight = 50
- Record ID = Sydney
Set TTL to 1 minute, click “Create records”.
 We will see three new A records with weighted routing policy.
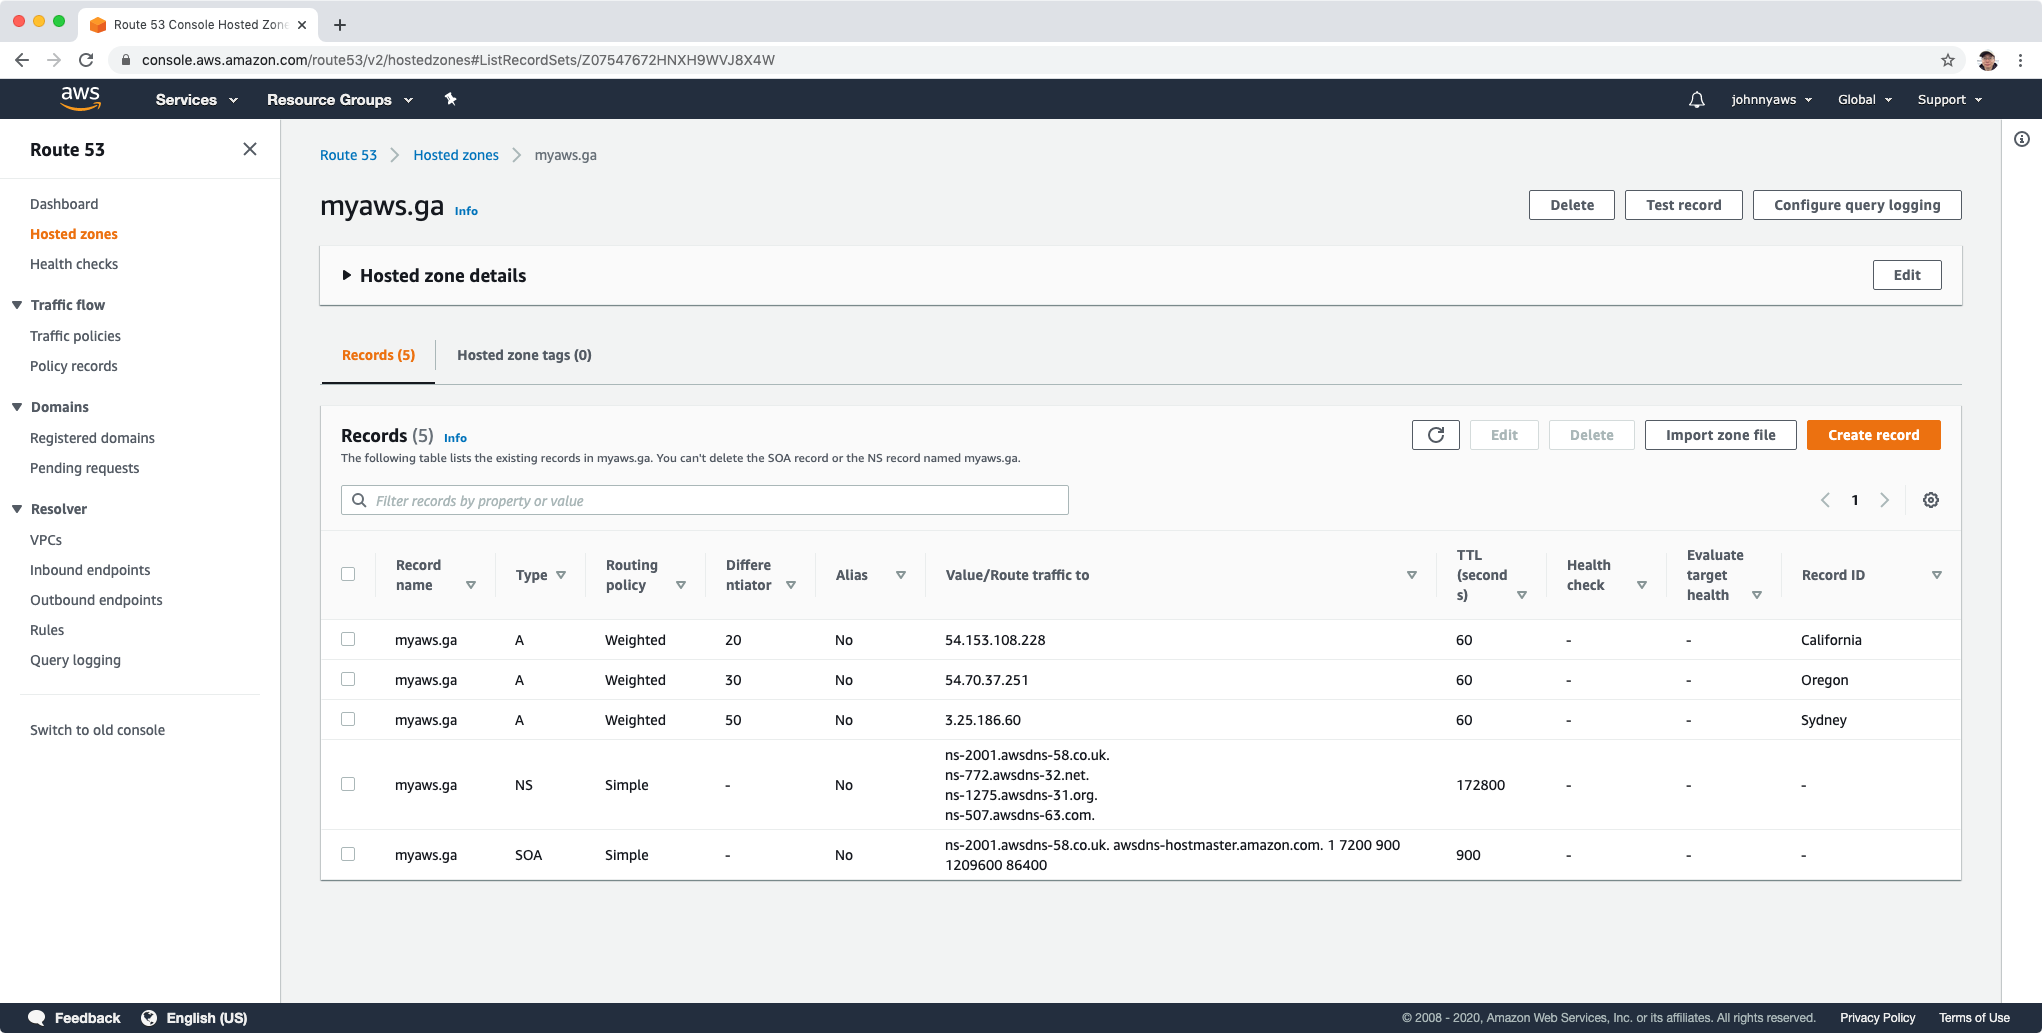 Refresh the page, you will get response from California with 20% chance, 30% chance from Oregon and 50% from Sydney.
4.3 Latency Routing Policy
- Allows you to route your traffic based on the lowest network latency for your end user (ie which region will give them the fastest response time).
- To use latency-based routing, you create a latency resource record set for the Amazon EC2 (or ELB) resource in each region that hosts your website. When Amazon Route 53 receives a query for your site, it selects the latency resource record set for the region that gives the user the lowest latency. Route 53 then responds with the value associated with that resource record set.
Health Checks:
- You can set health checks on individual record sets.
- If a record set fails a health check it will be removed from Route53 until it passes the health check.
- You can set SNS notifications to alert you if a health check is failed.
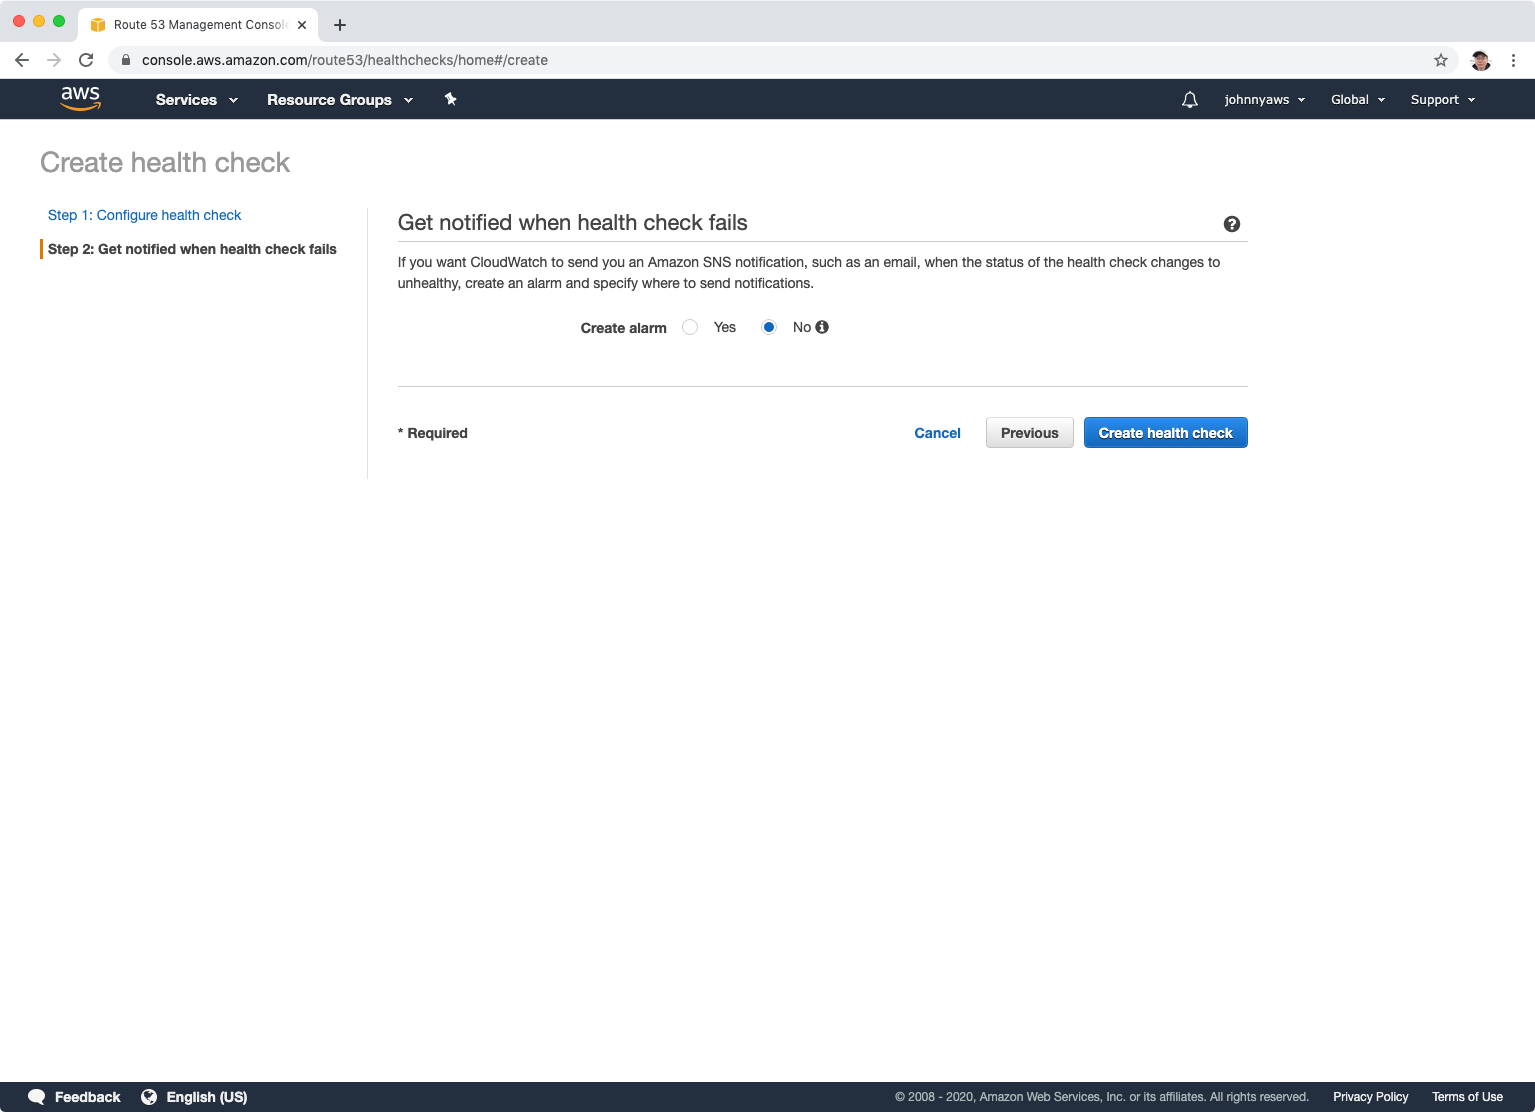
Create health check, Route53 -> Health checks, create Health Check, Name=California. Set the ip address of California server and domain for host name. Set path to index.html, click Next.
 Click “Create health check”.
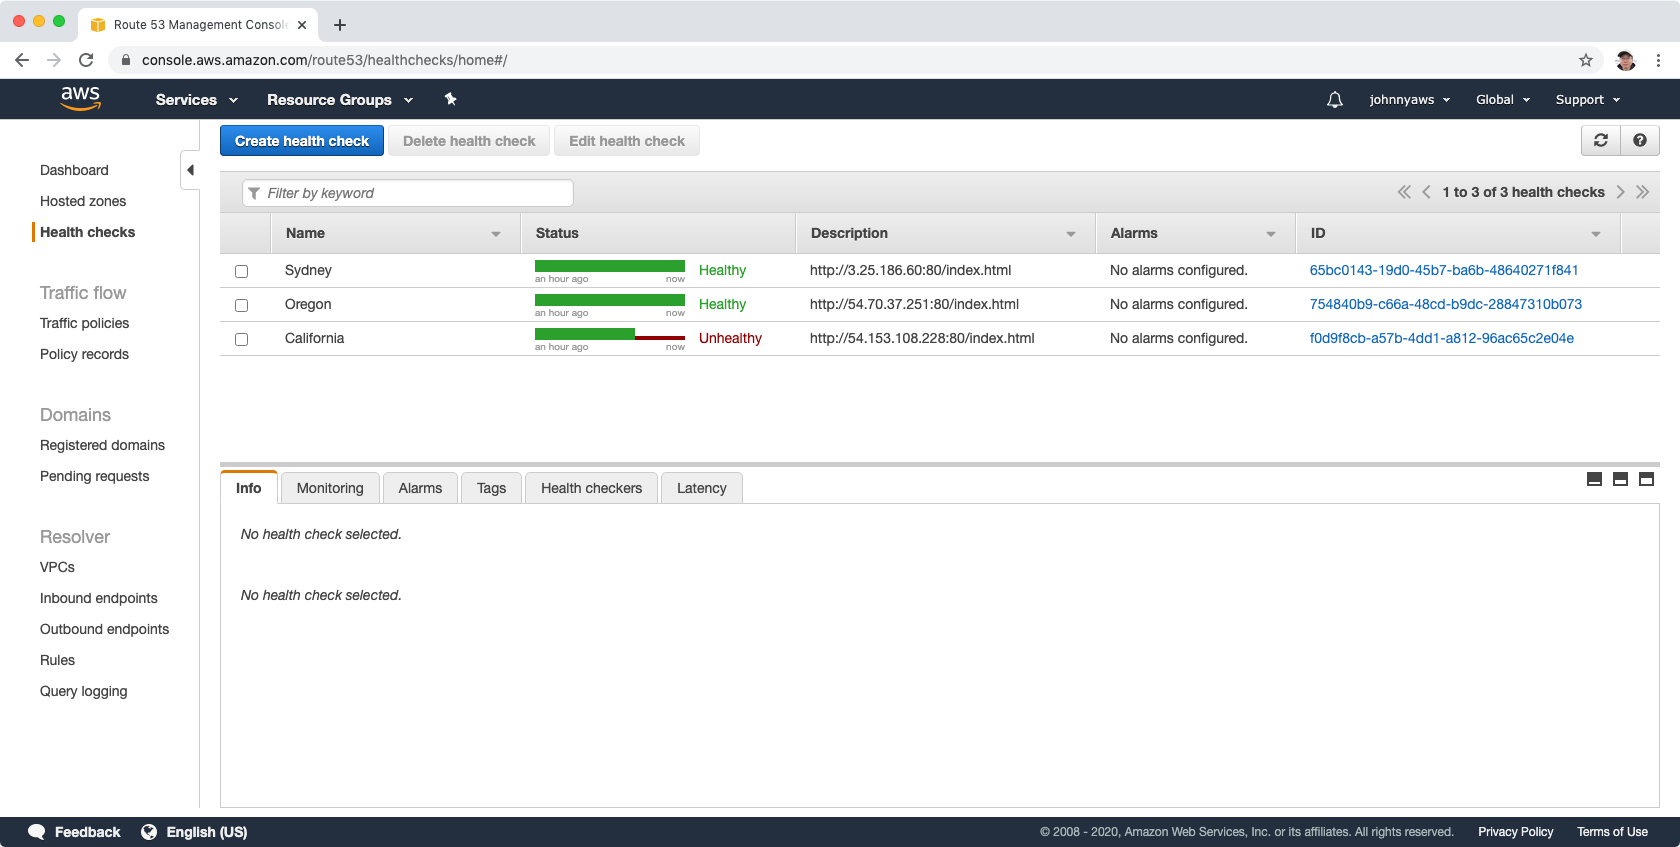
 Create another two health checks for Oregon and Sydney instances. Totally, we have three health checks.

Delete the record sets for weighted routing policy created in previous section. Notice, page won’t be accessible(after TTL is past).
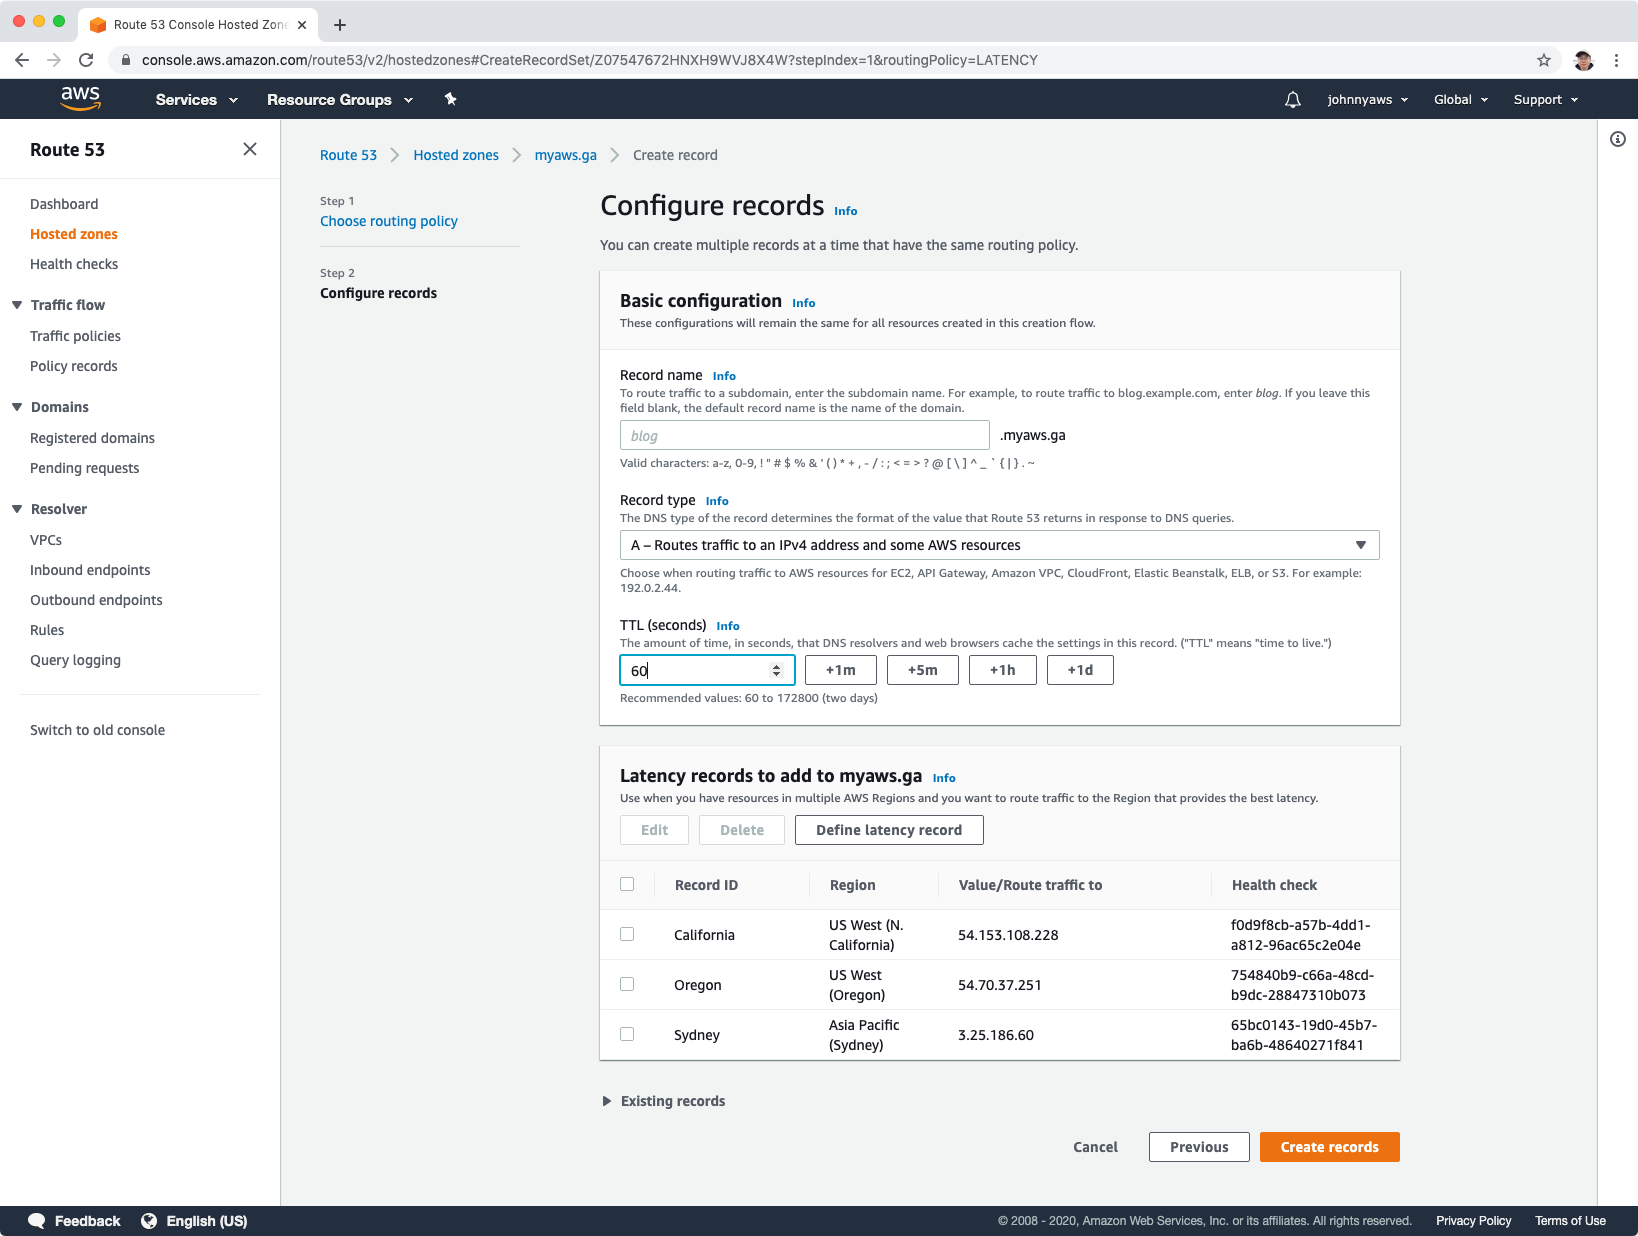
Create record, select Latency, click “Define latency record”.
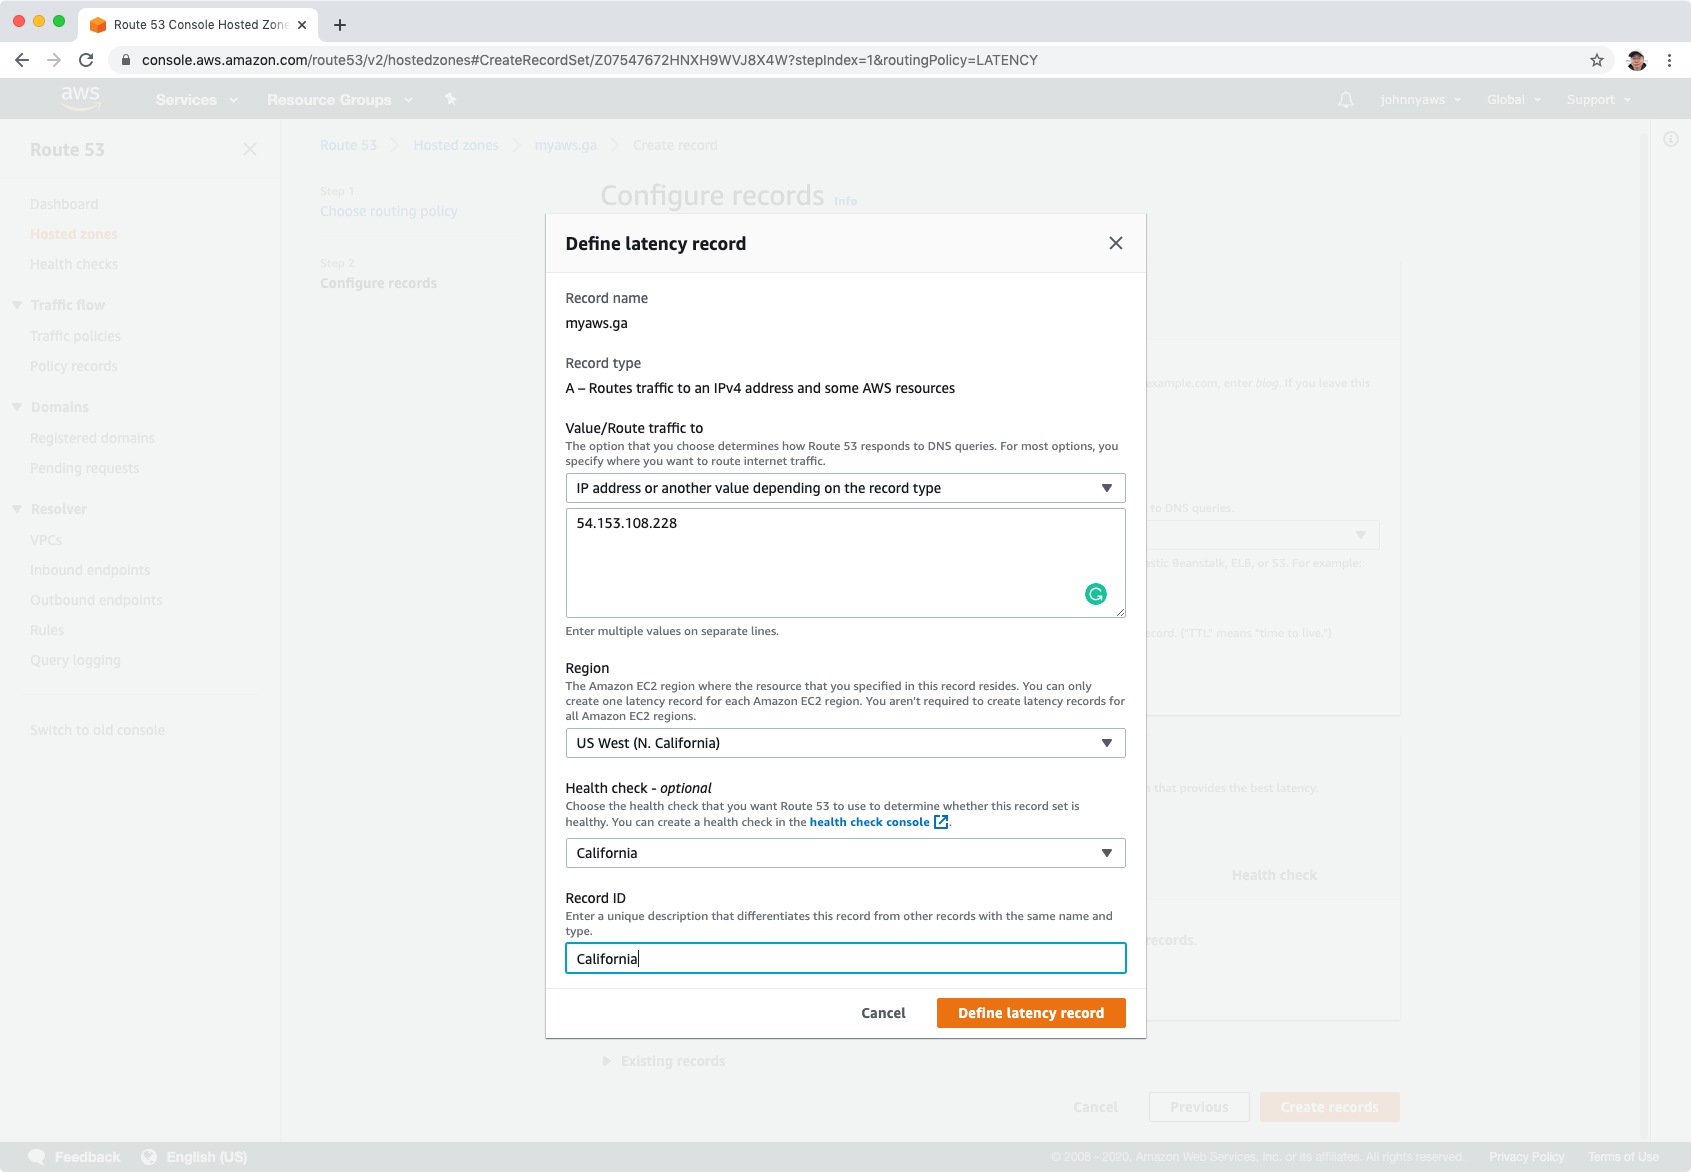
- Notice that when input the ip address, region is automatically selected based on the location.
Create first record set as follows:
- Value = ip addresses of California instance
- Region = us-west-1
- Record ID = California
- Health check to associate = The health check of California
Create second record set as follows:
- Value = ip addresses of Oregon instance
- Region = us-west-2
- Record ID = Oregon
- Health check to associate = The health check of Oregon.
Create second record set as follows:
- Value = ip addresses of Sydney instance
- Region = ap-southeat-2
- Record ID = Sydney
- Health check to associate = The health check of Sydney.
Set TTL to 1 minute, click “Create records”.
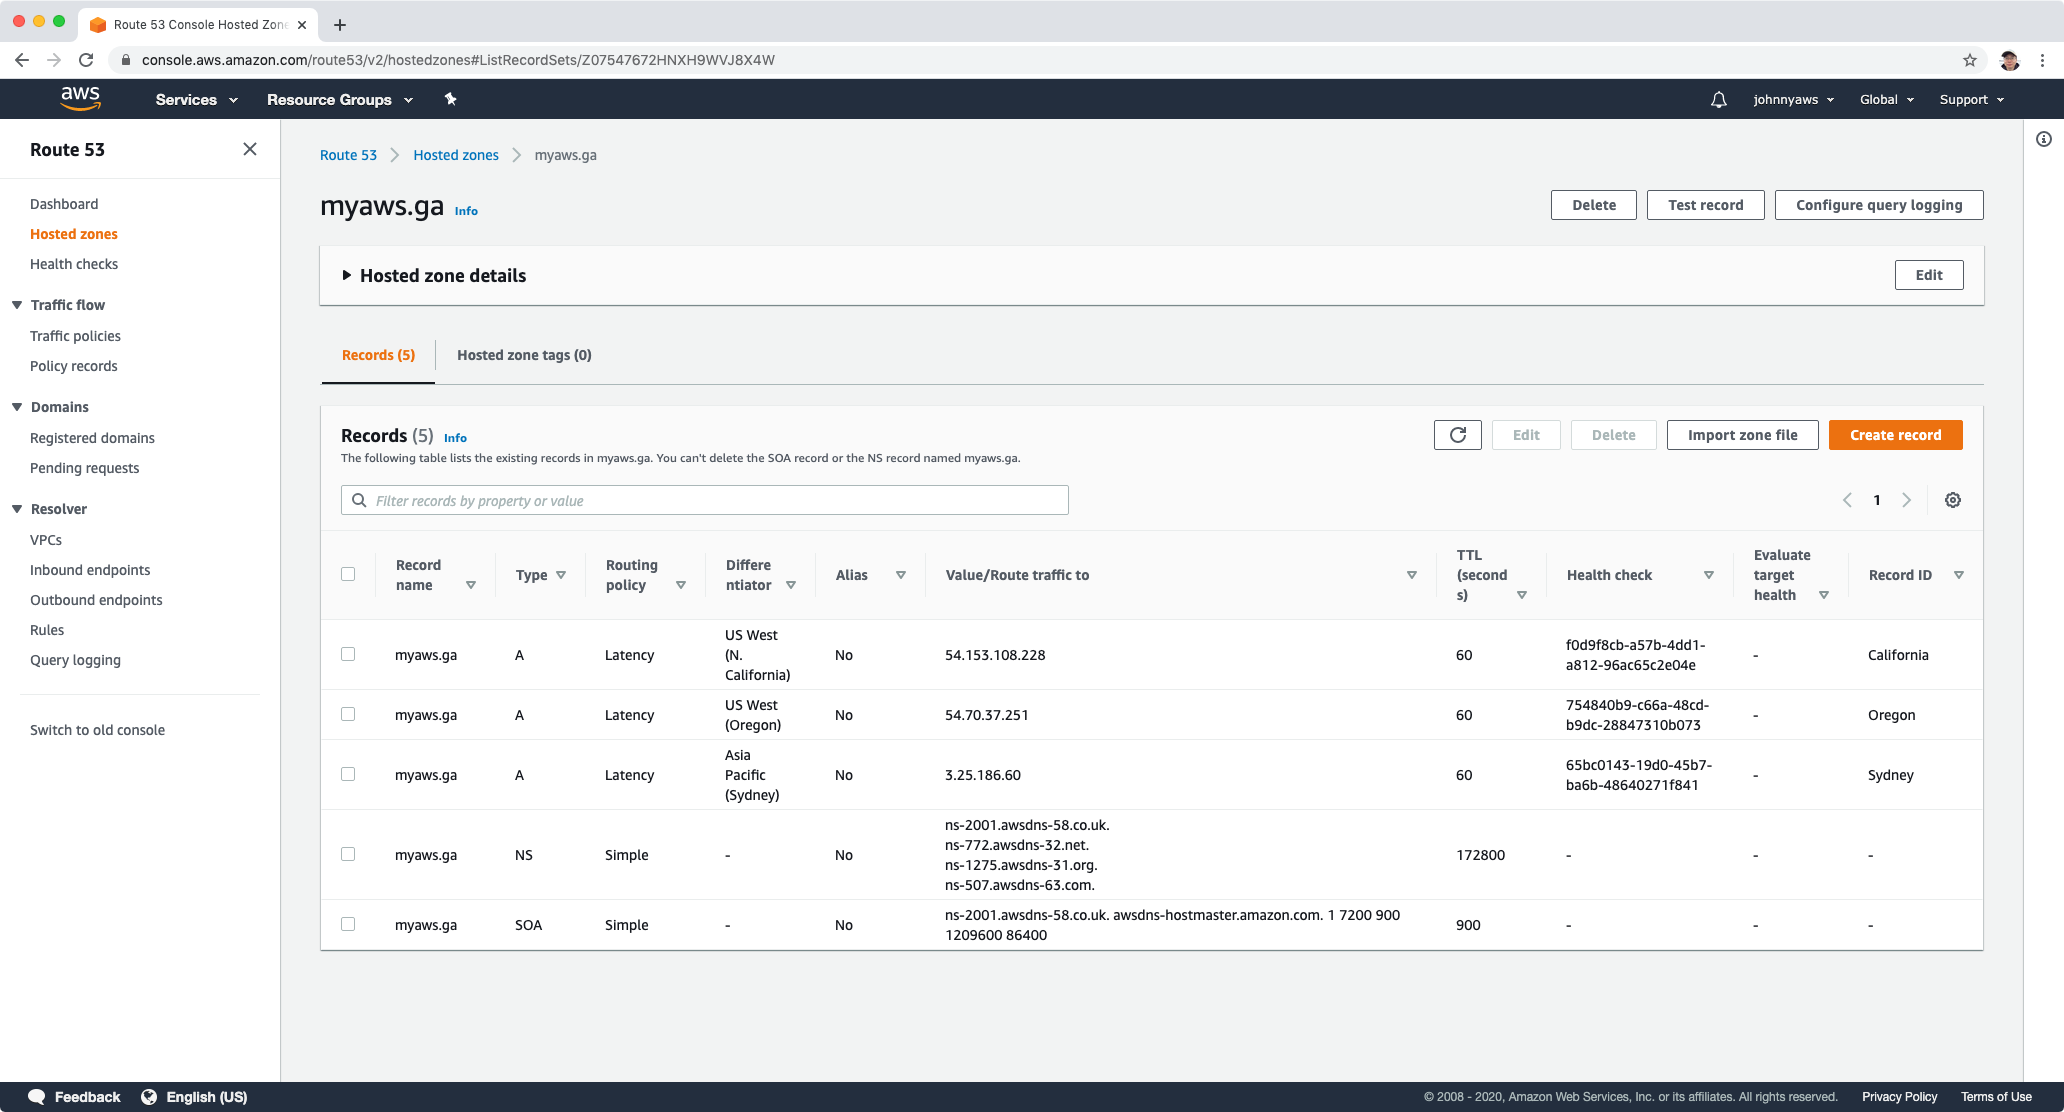
 We will see three new A records with latency routing policy.
 Refresh the page, it should show in the content fetched from the closest server. Use a VPN tool to change you machines ip to verify that you always get the content from the closest server.
4.4 Failover Routing Policy
- Failover routing policies are used when you want to create an active/passive set up. For example, you may want your primary site to be in California and your secondary site in Sydney.
- Route53 will monitor the health of your primary site using a health check.
- A health check monitors the health of your end points.
Delete the record sets for latency routing policy created in previous section. Notice, page won’t be accessible(after TTL is past).
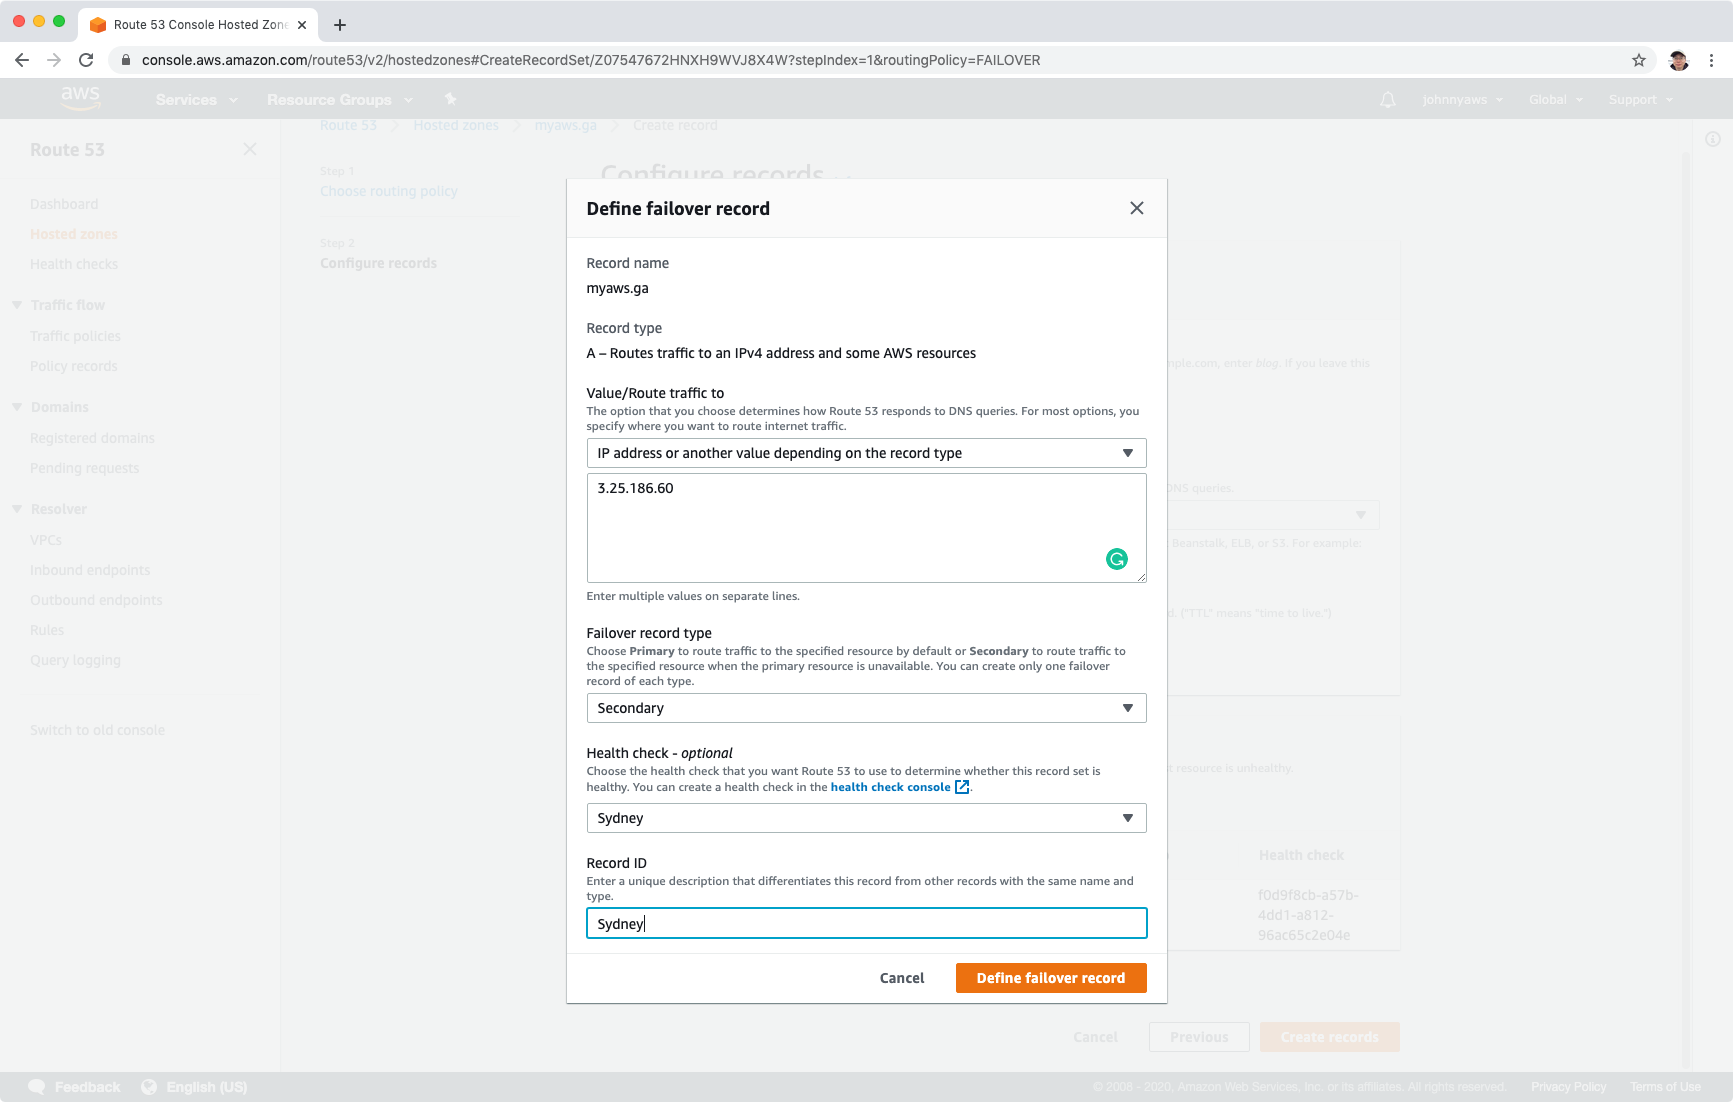
Create record, select Failover, click “Define failover record”.
Create first record set as follows:
- Value = ip addresses of California instance
- Failover Record Type = Primary
- Record ID = California
- Health check to associate = The health check of California.

Create second record set as follows:
- Value = ip addresses of Sydney instance
- Failover Record Type = Secondary
- Record ID = Sydney
- Health check to associate = The health check of Sydney.
 Set TTL to 1 minute, click “Create records”.
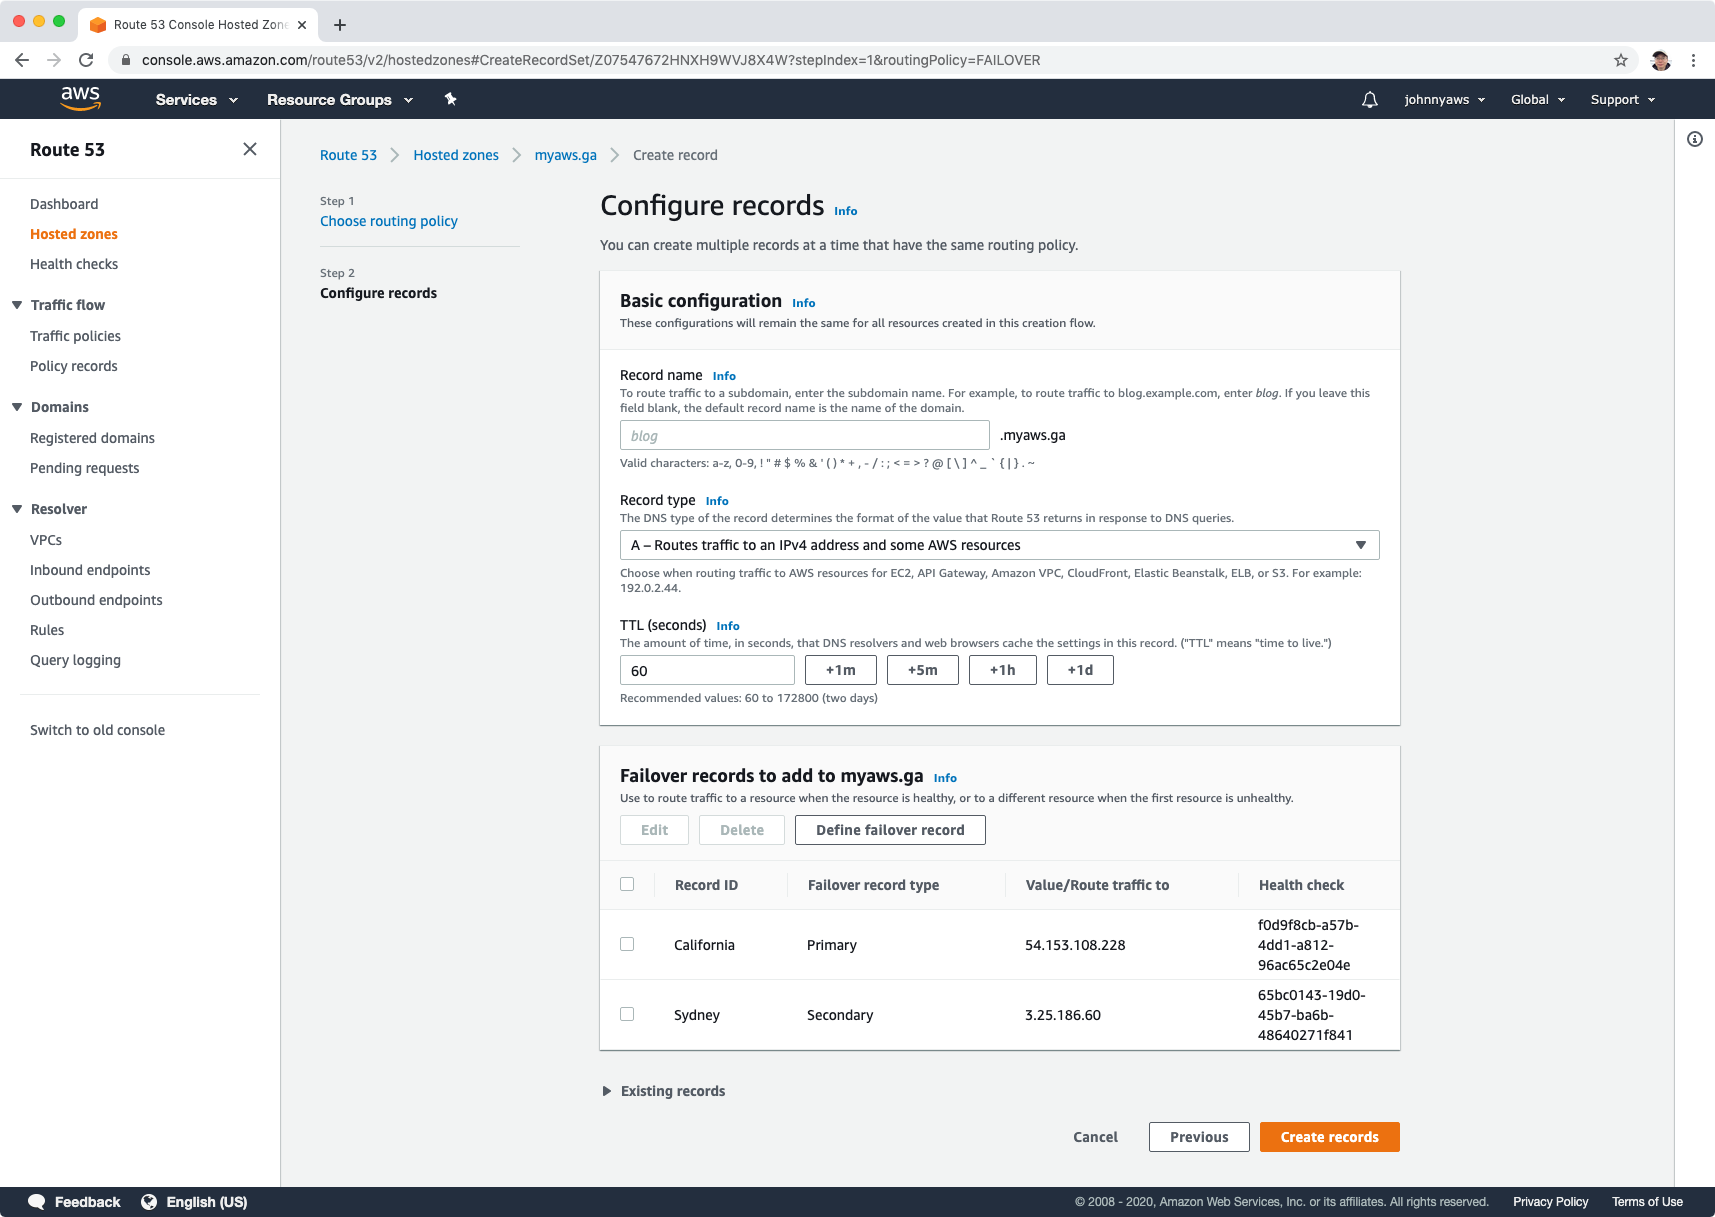 We will see two new A records with failover routing policy.
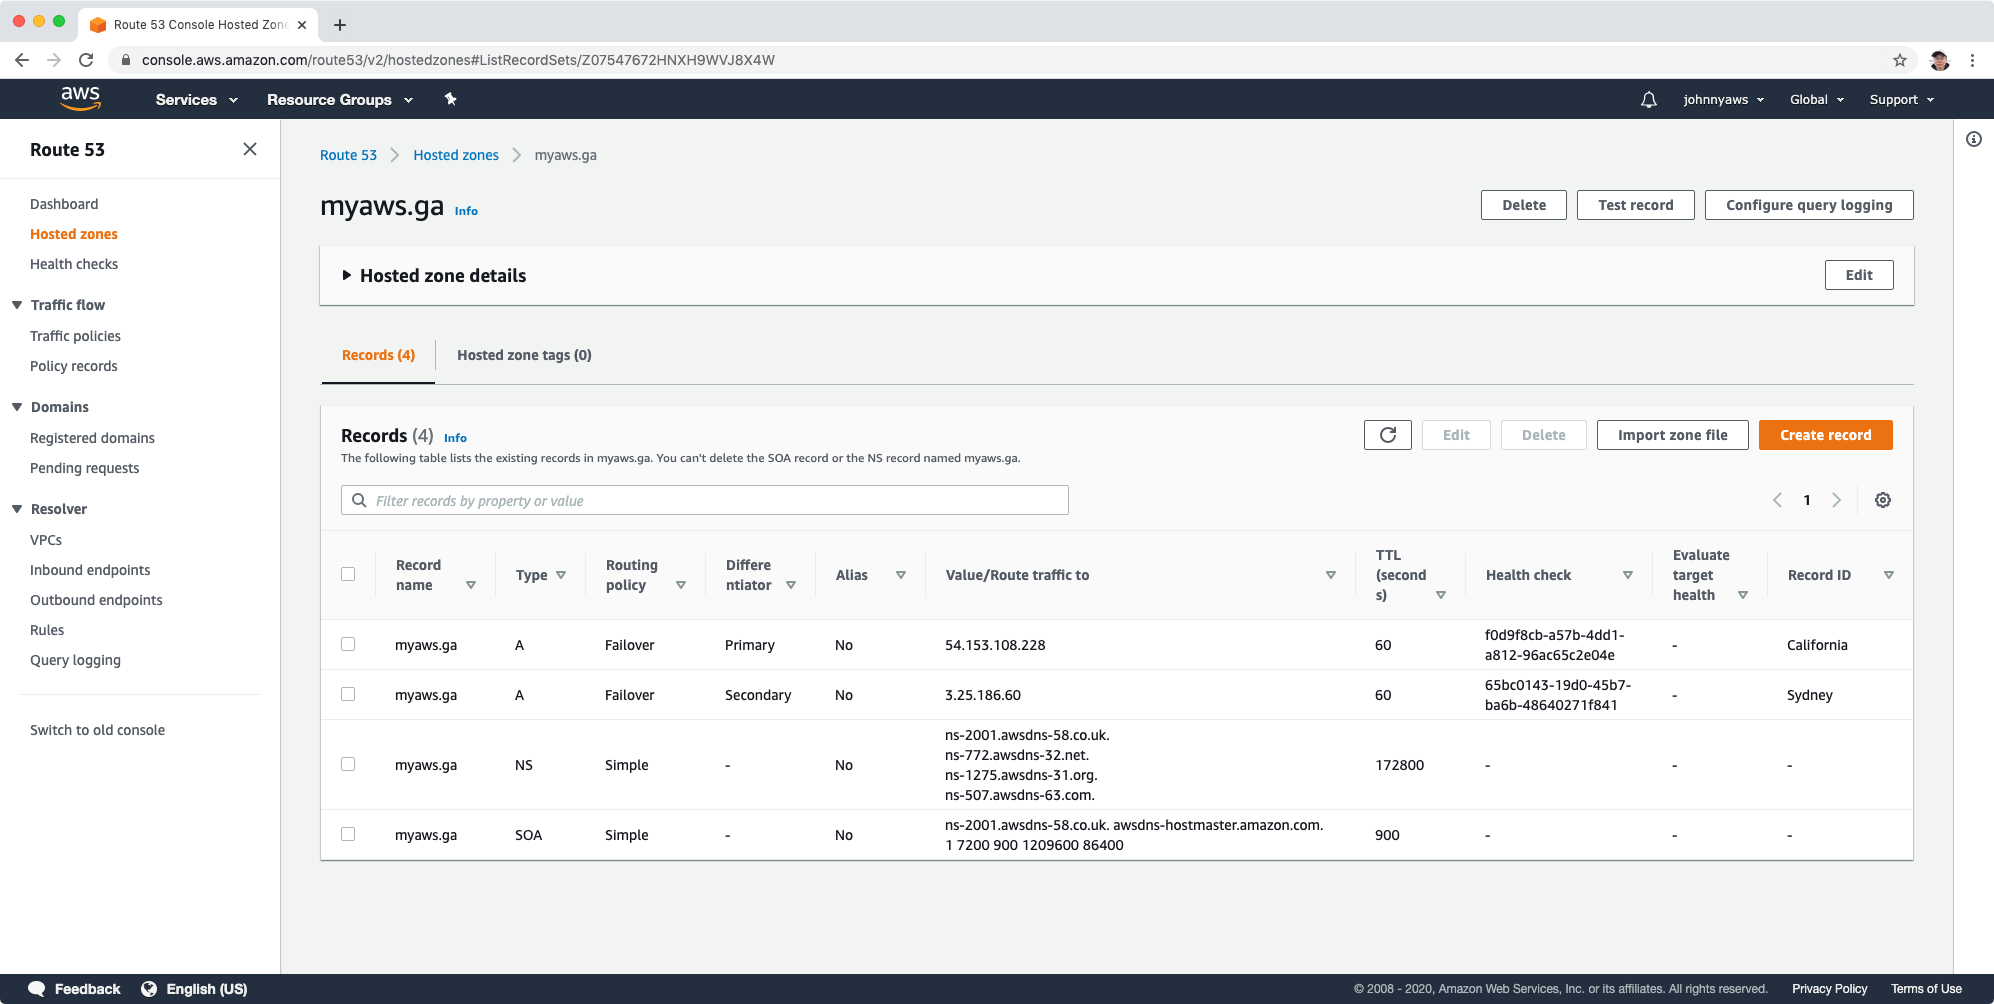 Access the domain, we should see the California page.
 Stop the California EC2 instance. Go to health check, wait for a while. It becomes unhealthy.
 Refresh the page, it connects to Sydney automatically.
4.5 Geolocation Routing Policy
Geolocation Routing Policy Geolocation routing lets you choose where your traffic will be sent based on the geographic location of your users (ie the location from which DNS queries originate). For example, you might want all queries from Europe to be routed to a fleet of EC2 instances that are specifically configured for your European customers. These servers may have the local language of your European customers and all prices are displayed in Euros.
Delete the record sets for failover routing policy created in previous section. Notice, page won’t be accessible(after TTL is past).
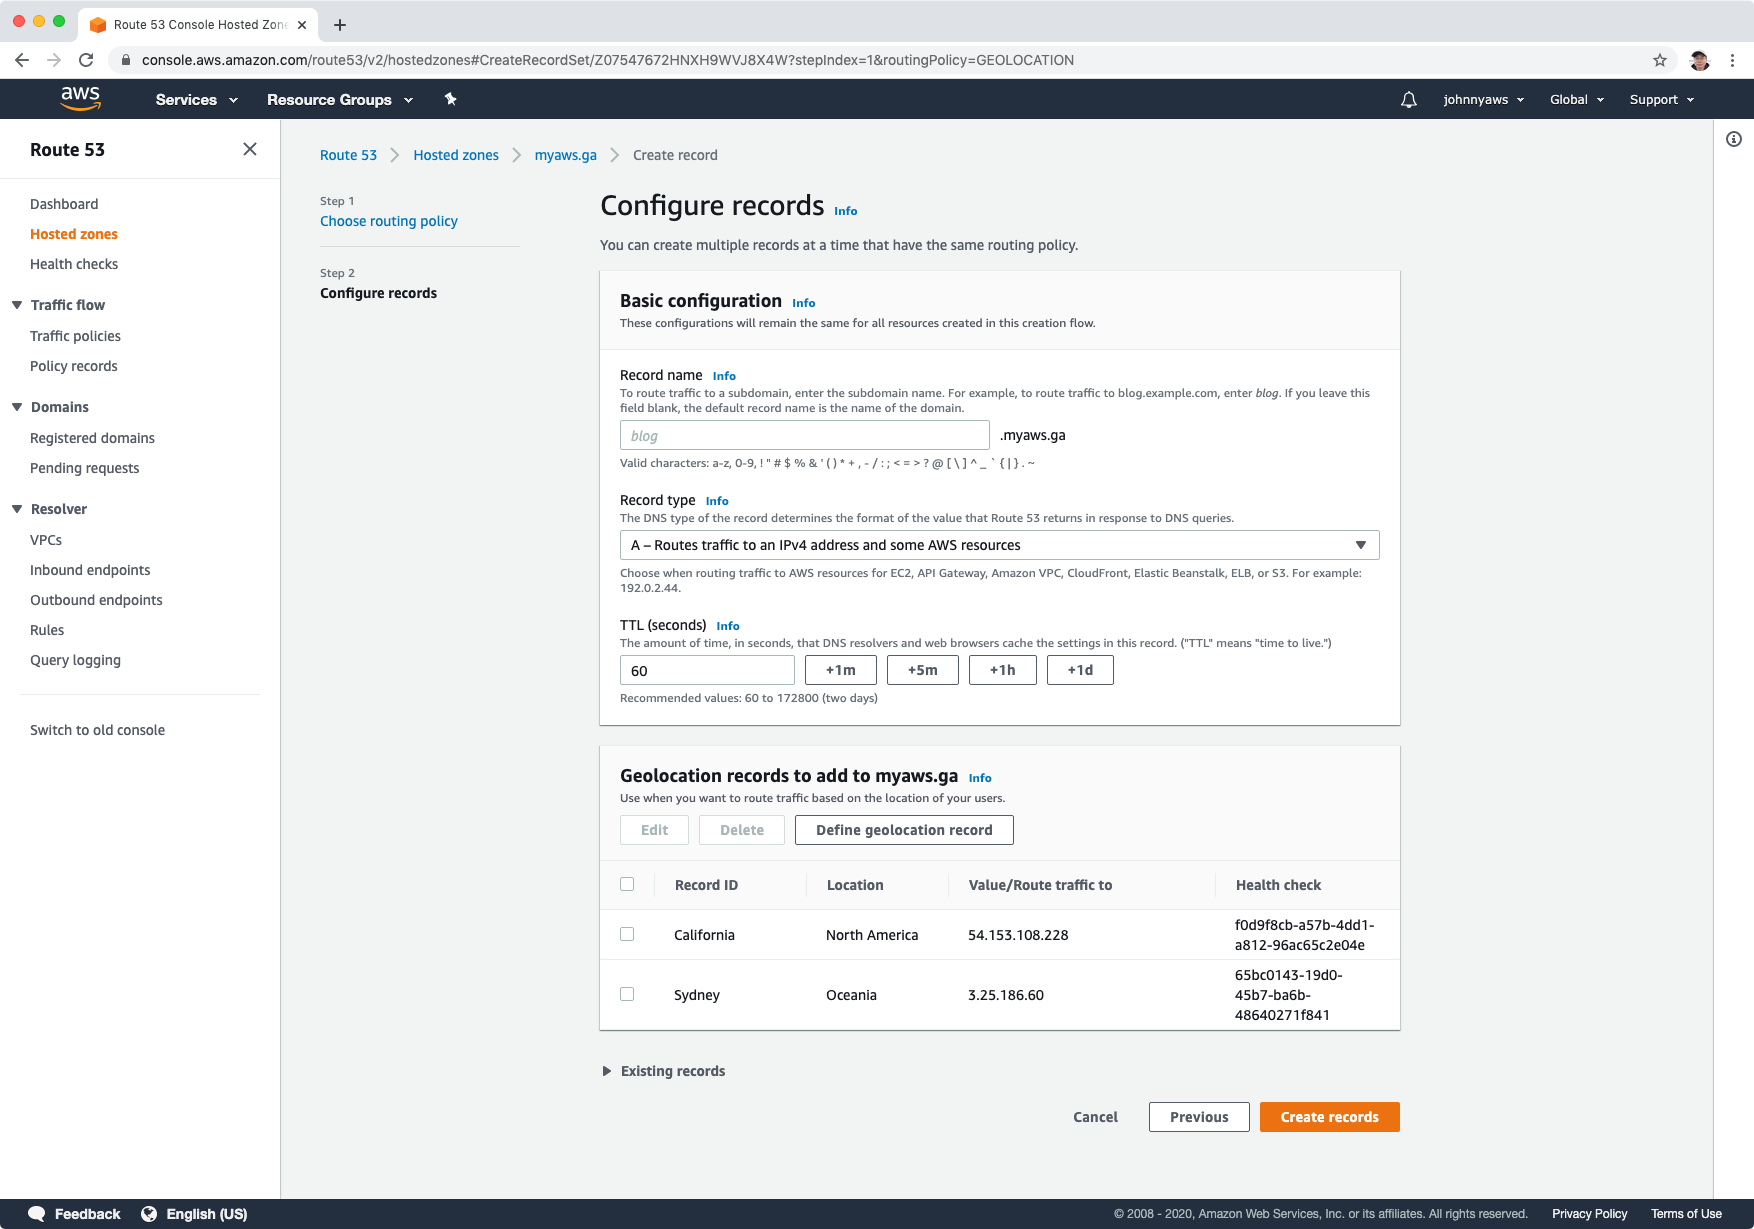
Create record, select Geolocation, click “Define geolocation record”.
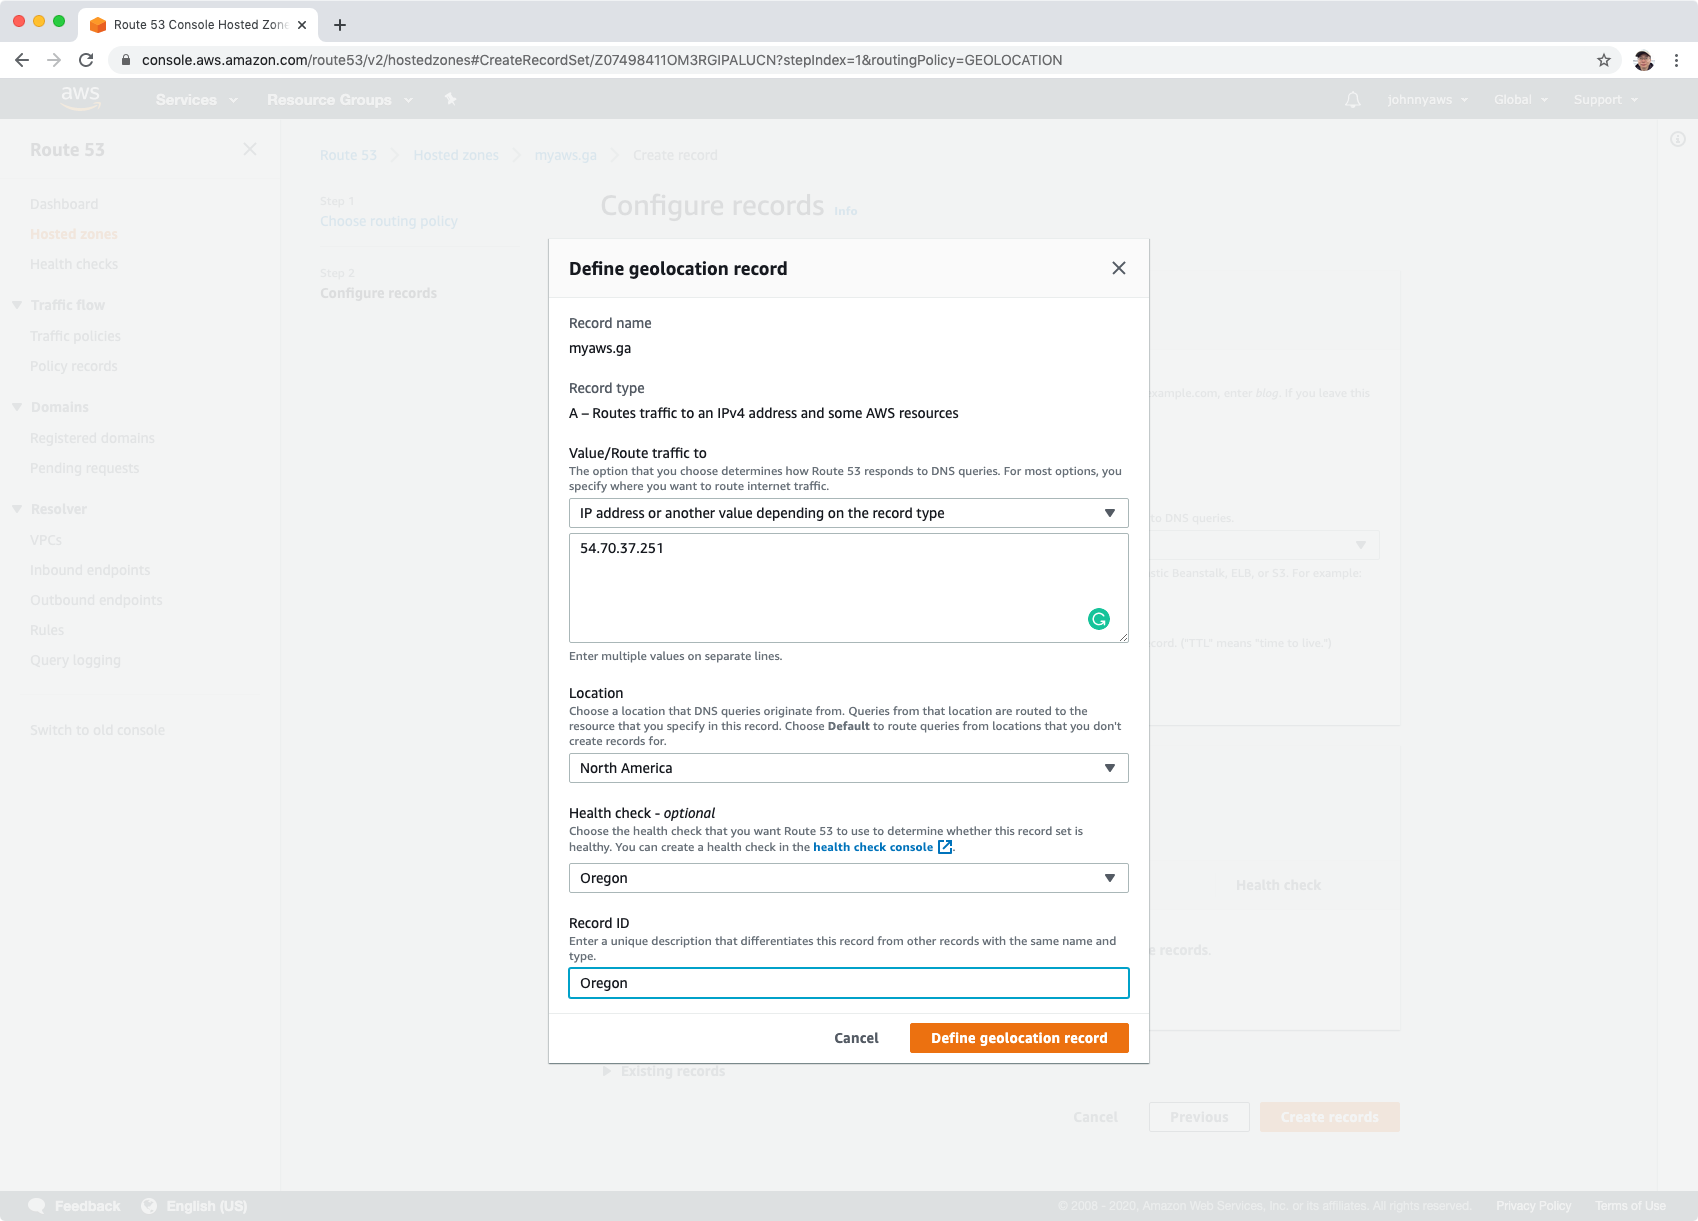
Create first record set as follows:
- Value = ip addresses of Oregon instance
- Location = North America
- Record ID = Oregon
- Health check to associate = The health check of Oregon.
Create second record set as follows:
- Value = ip addresses of Sydney instance
- Location = Oceania
- Record ID = Sydney
- Health check to associate = The health check of Sydney.
Set TTL to 1 minute, click “Create records”.
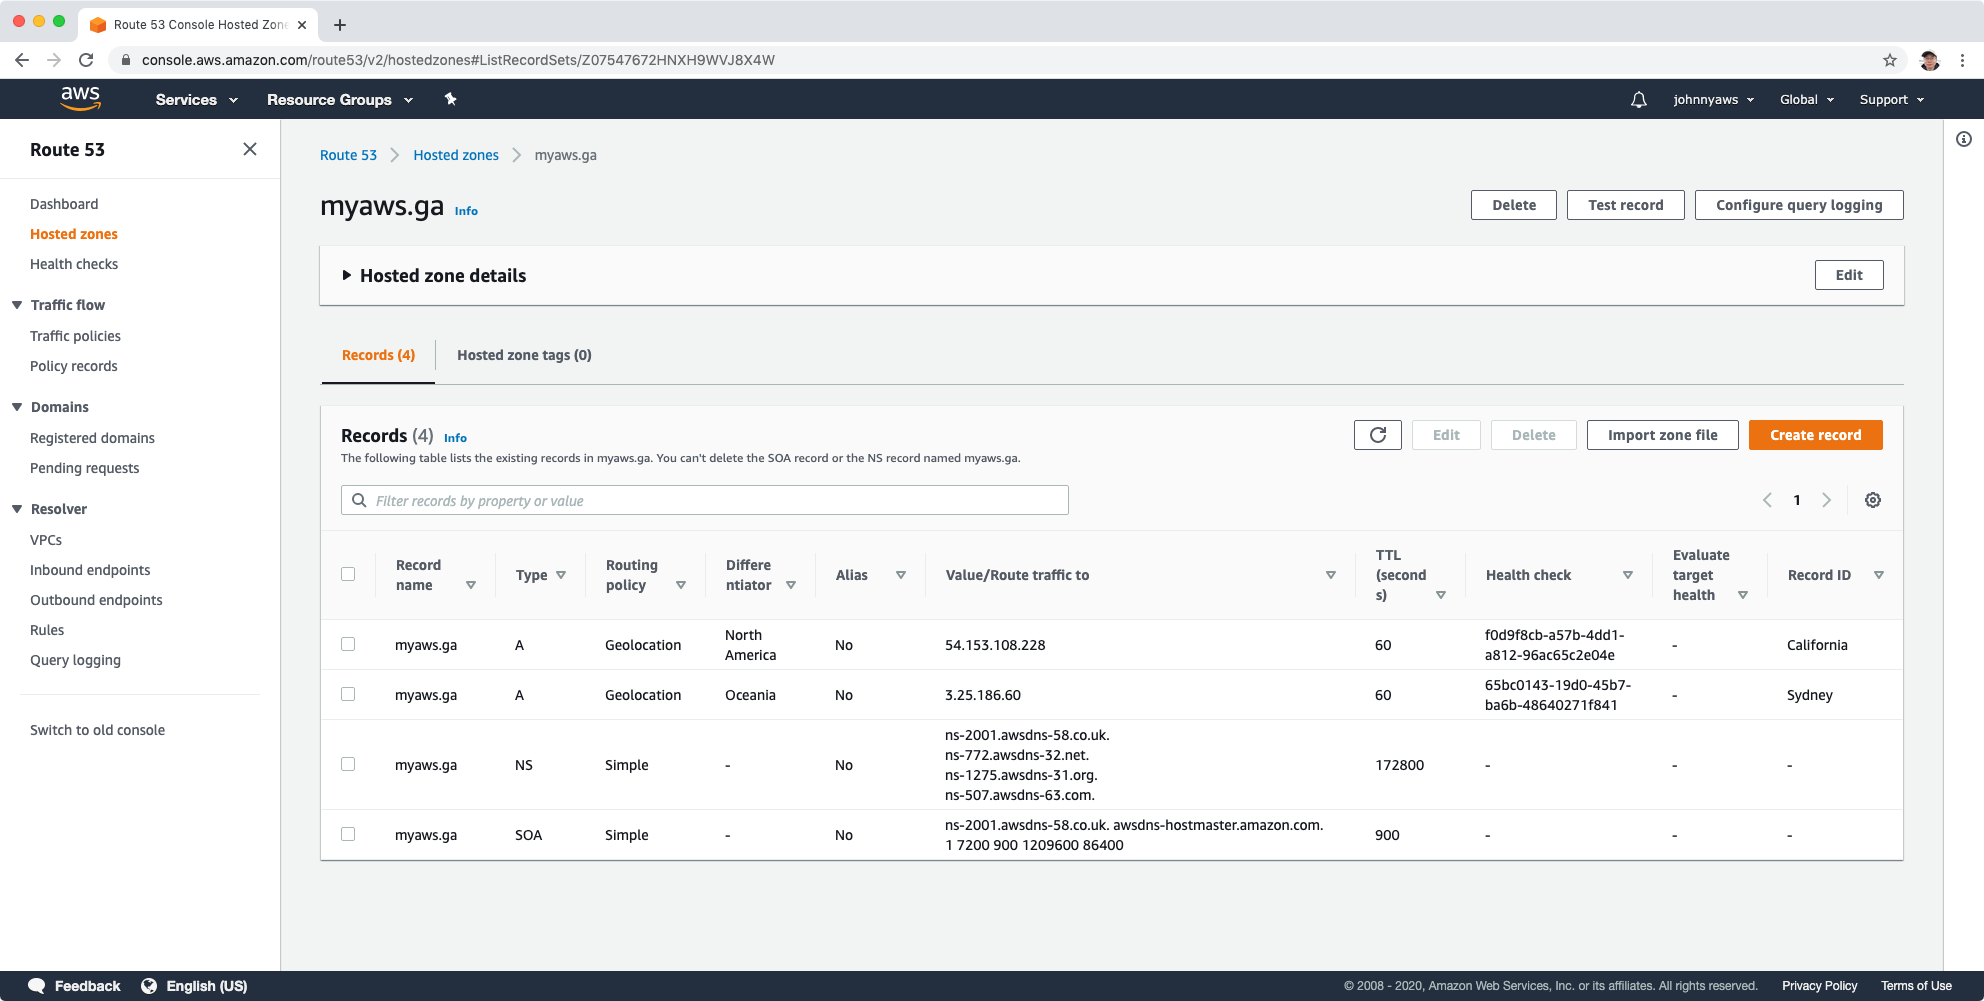
 We will see two new A records with geolocation routing policy.
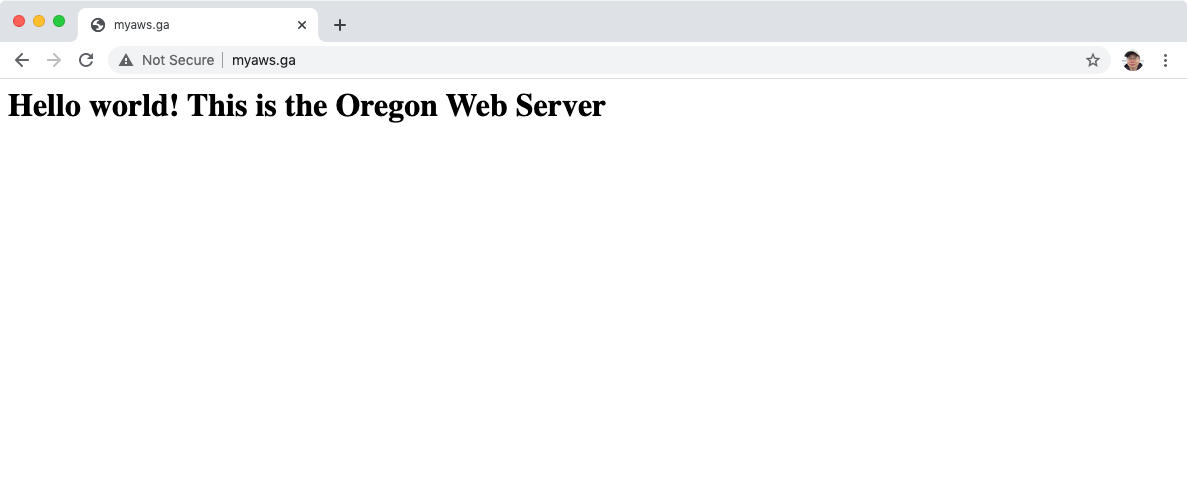
 Access the domain, it should return the Oregon page.
 If we change the location to Australia using VPN tools, the page will return Sydney.
4.6 Geoproximity Routing Policy (Traffic Flow Only)
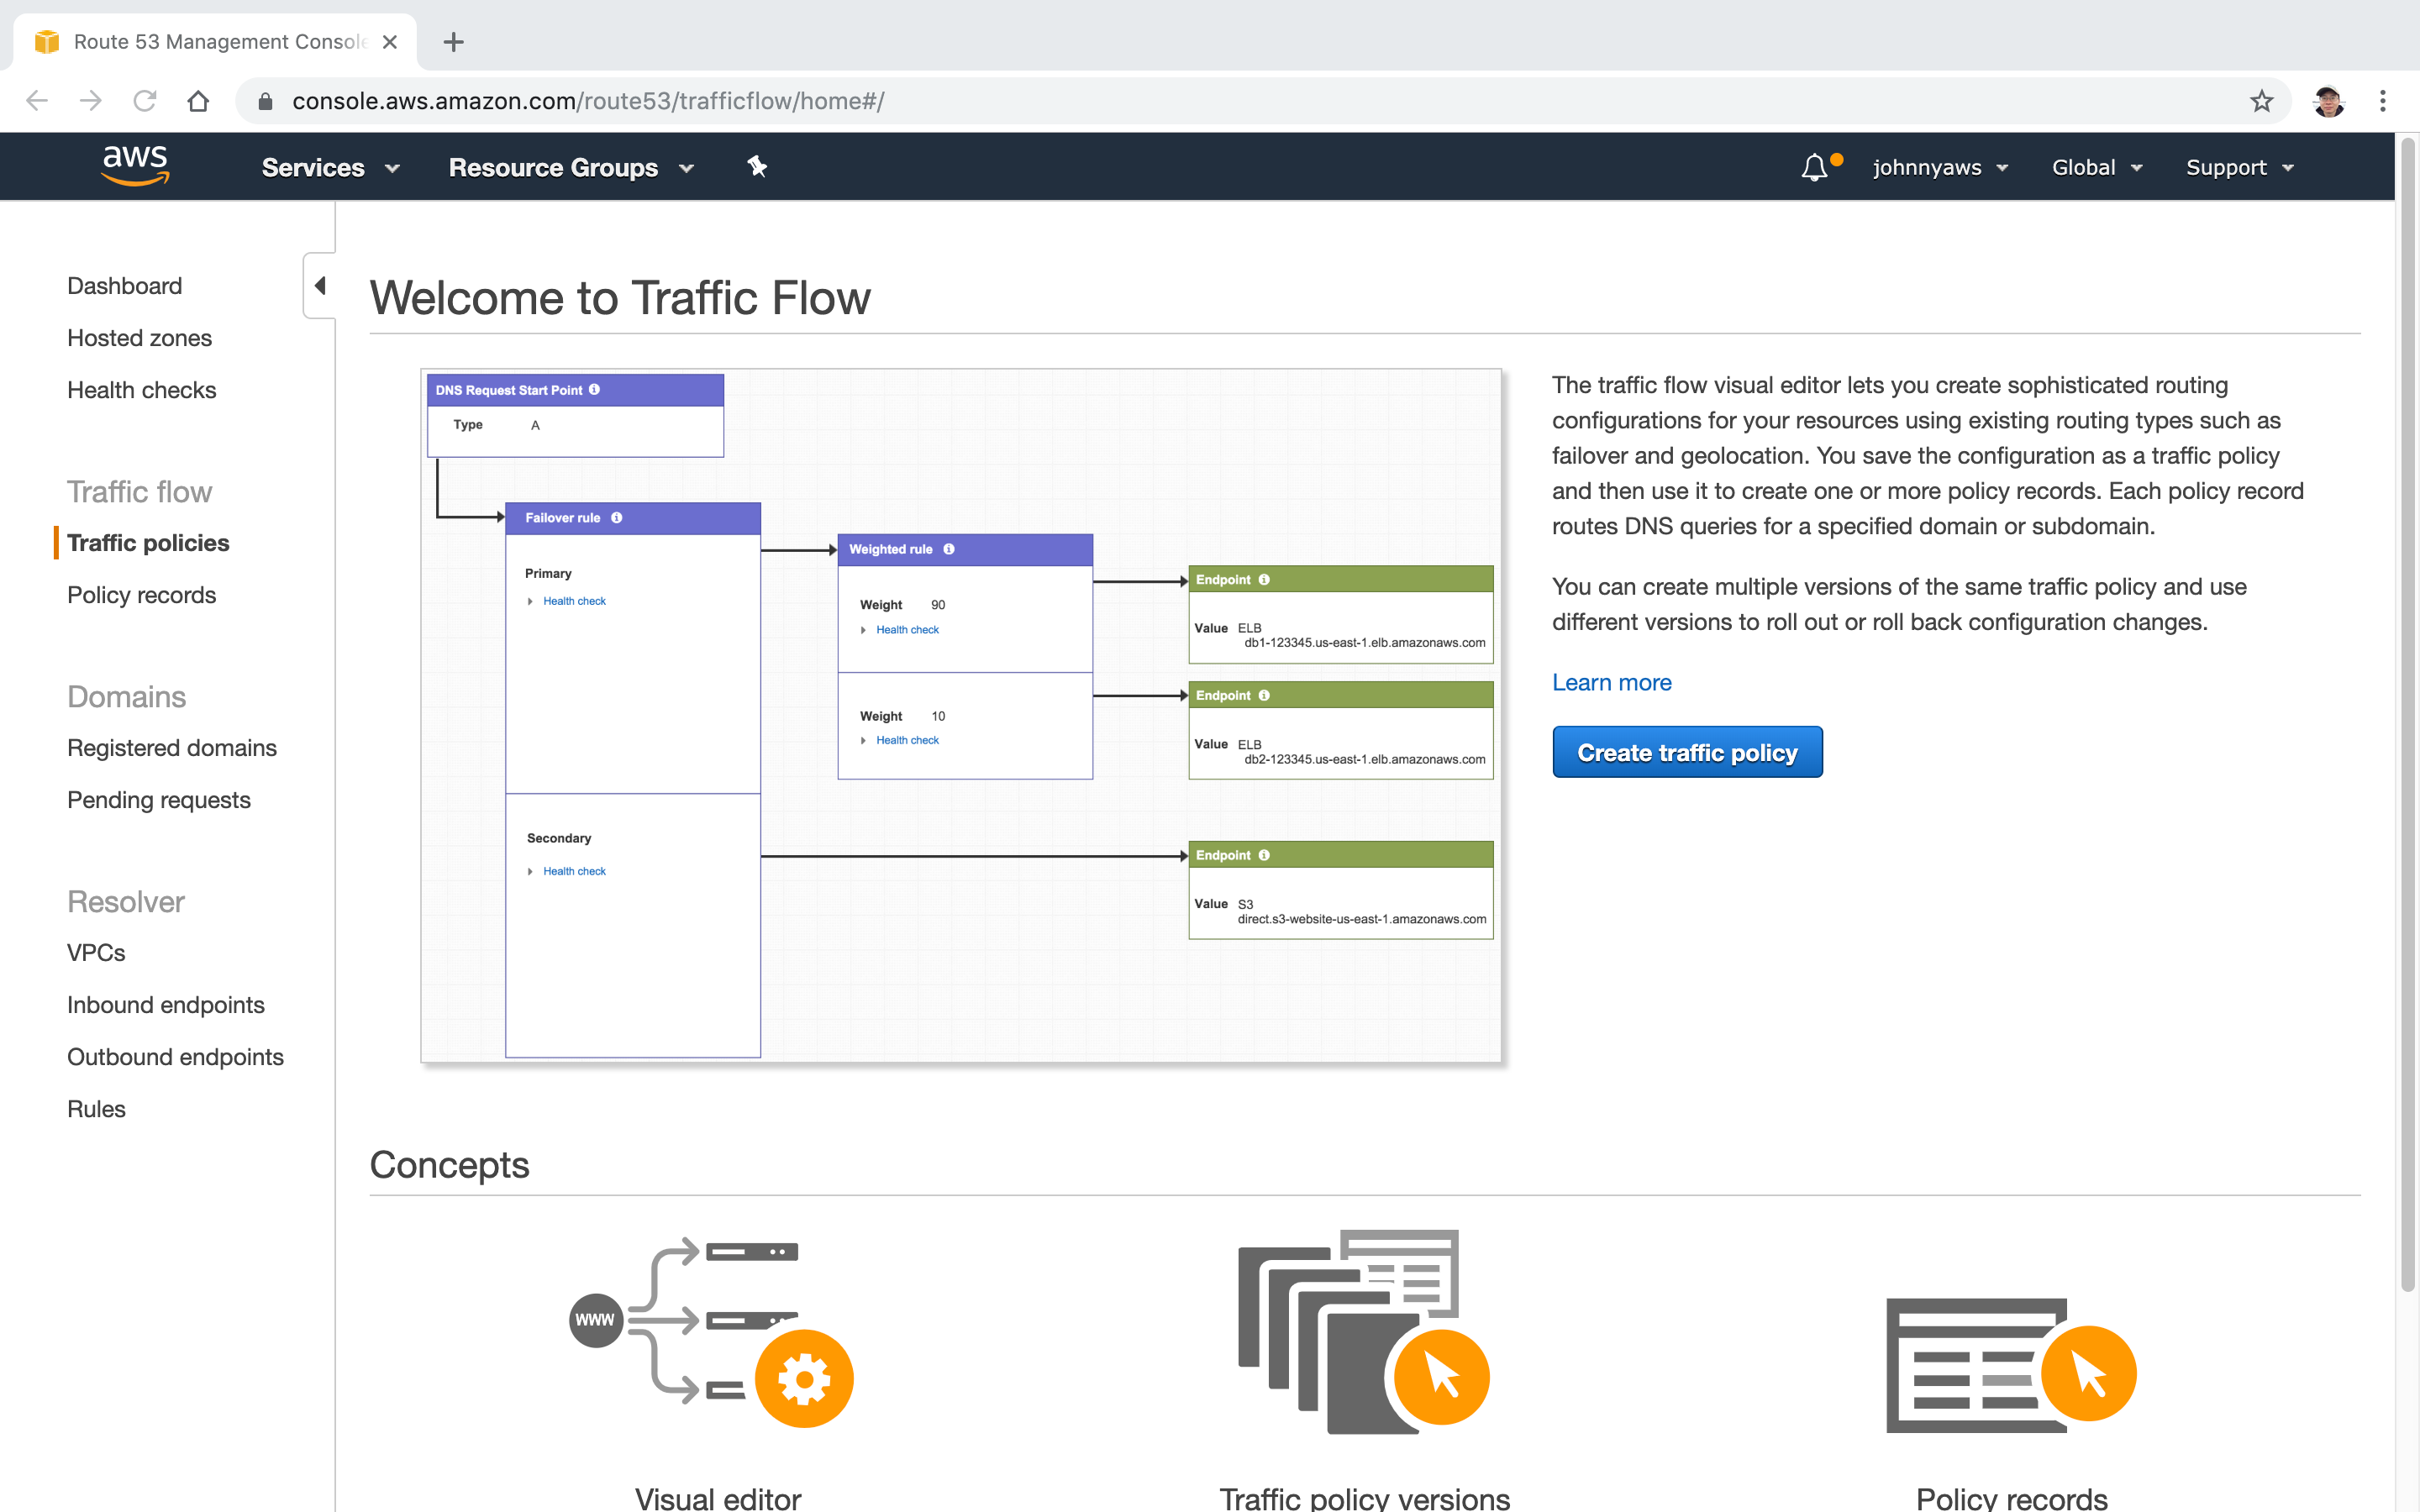
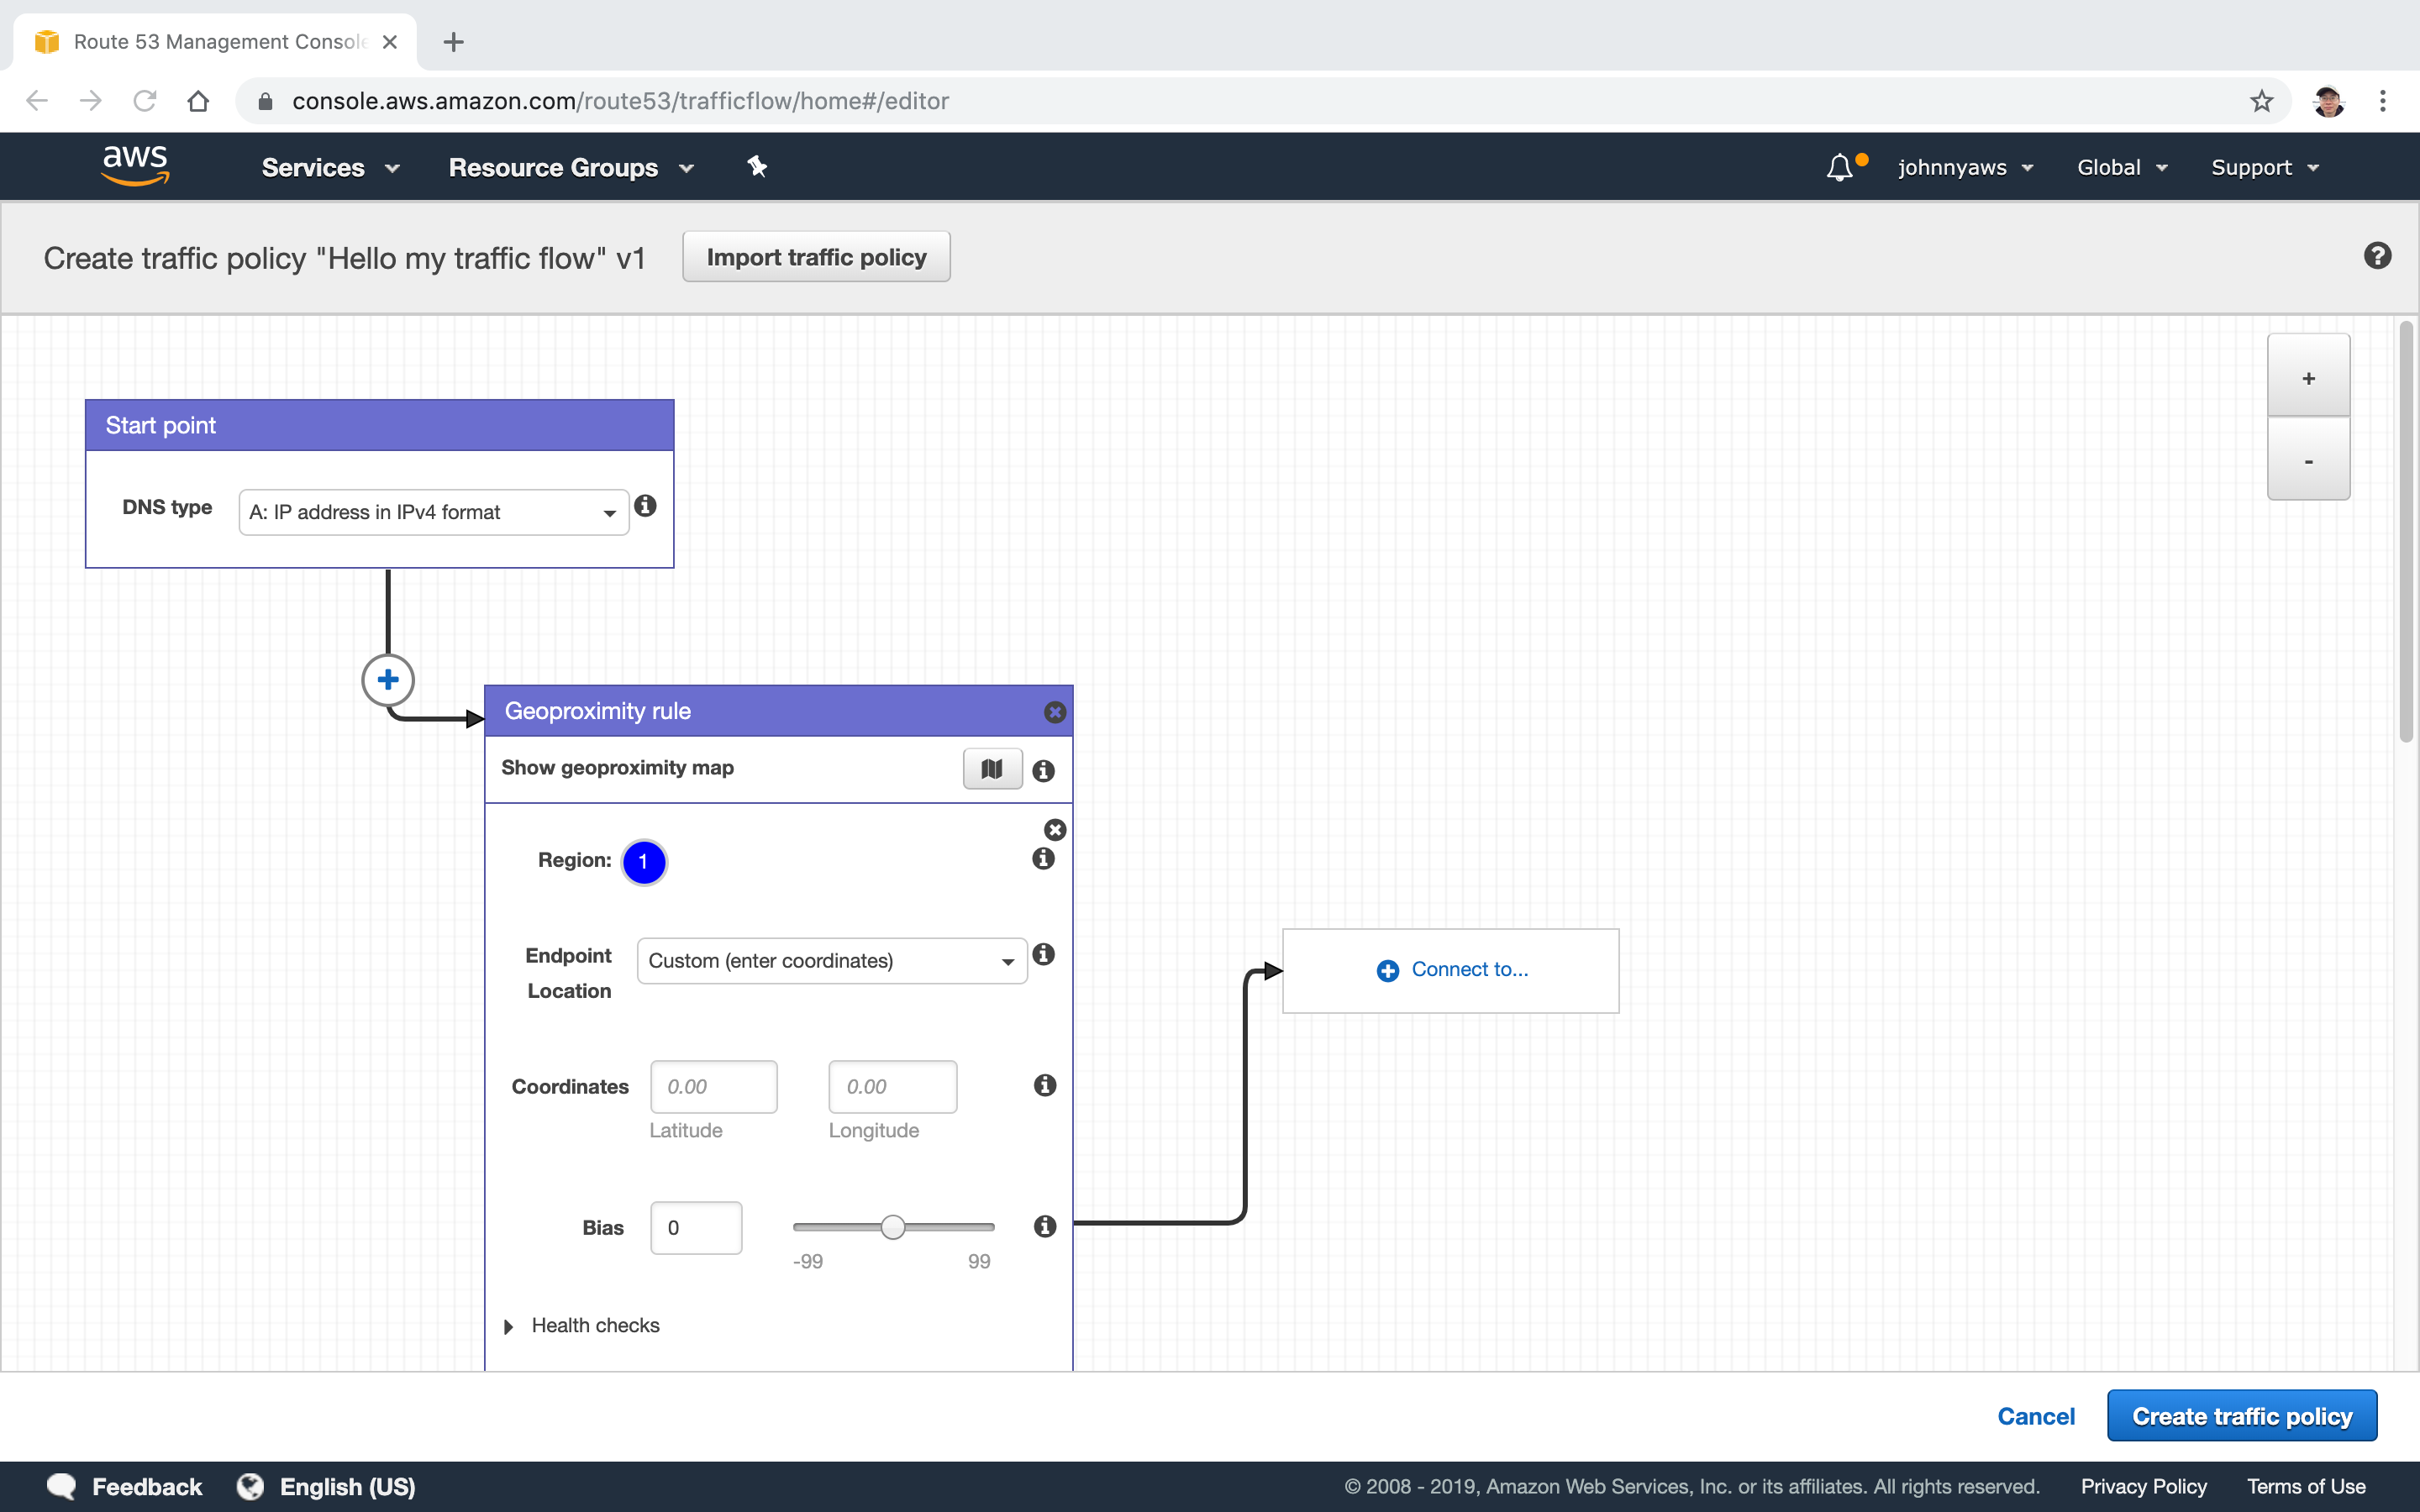
Geoproximity routing lets Amazon Route 53 route traffic to your resources based on the geographic location of your users and your resources. You can also optionally choose to route more traffic or less to a given resource by specifying a value, known as a bias. A bias expands or shrinks the size of the geographic region from which traffic is routed to a resource. To use geoproximity routing, you must use Route 53 traffic flow.
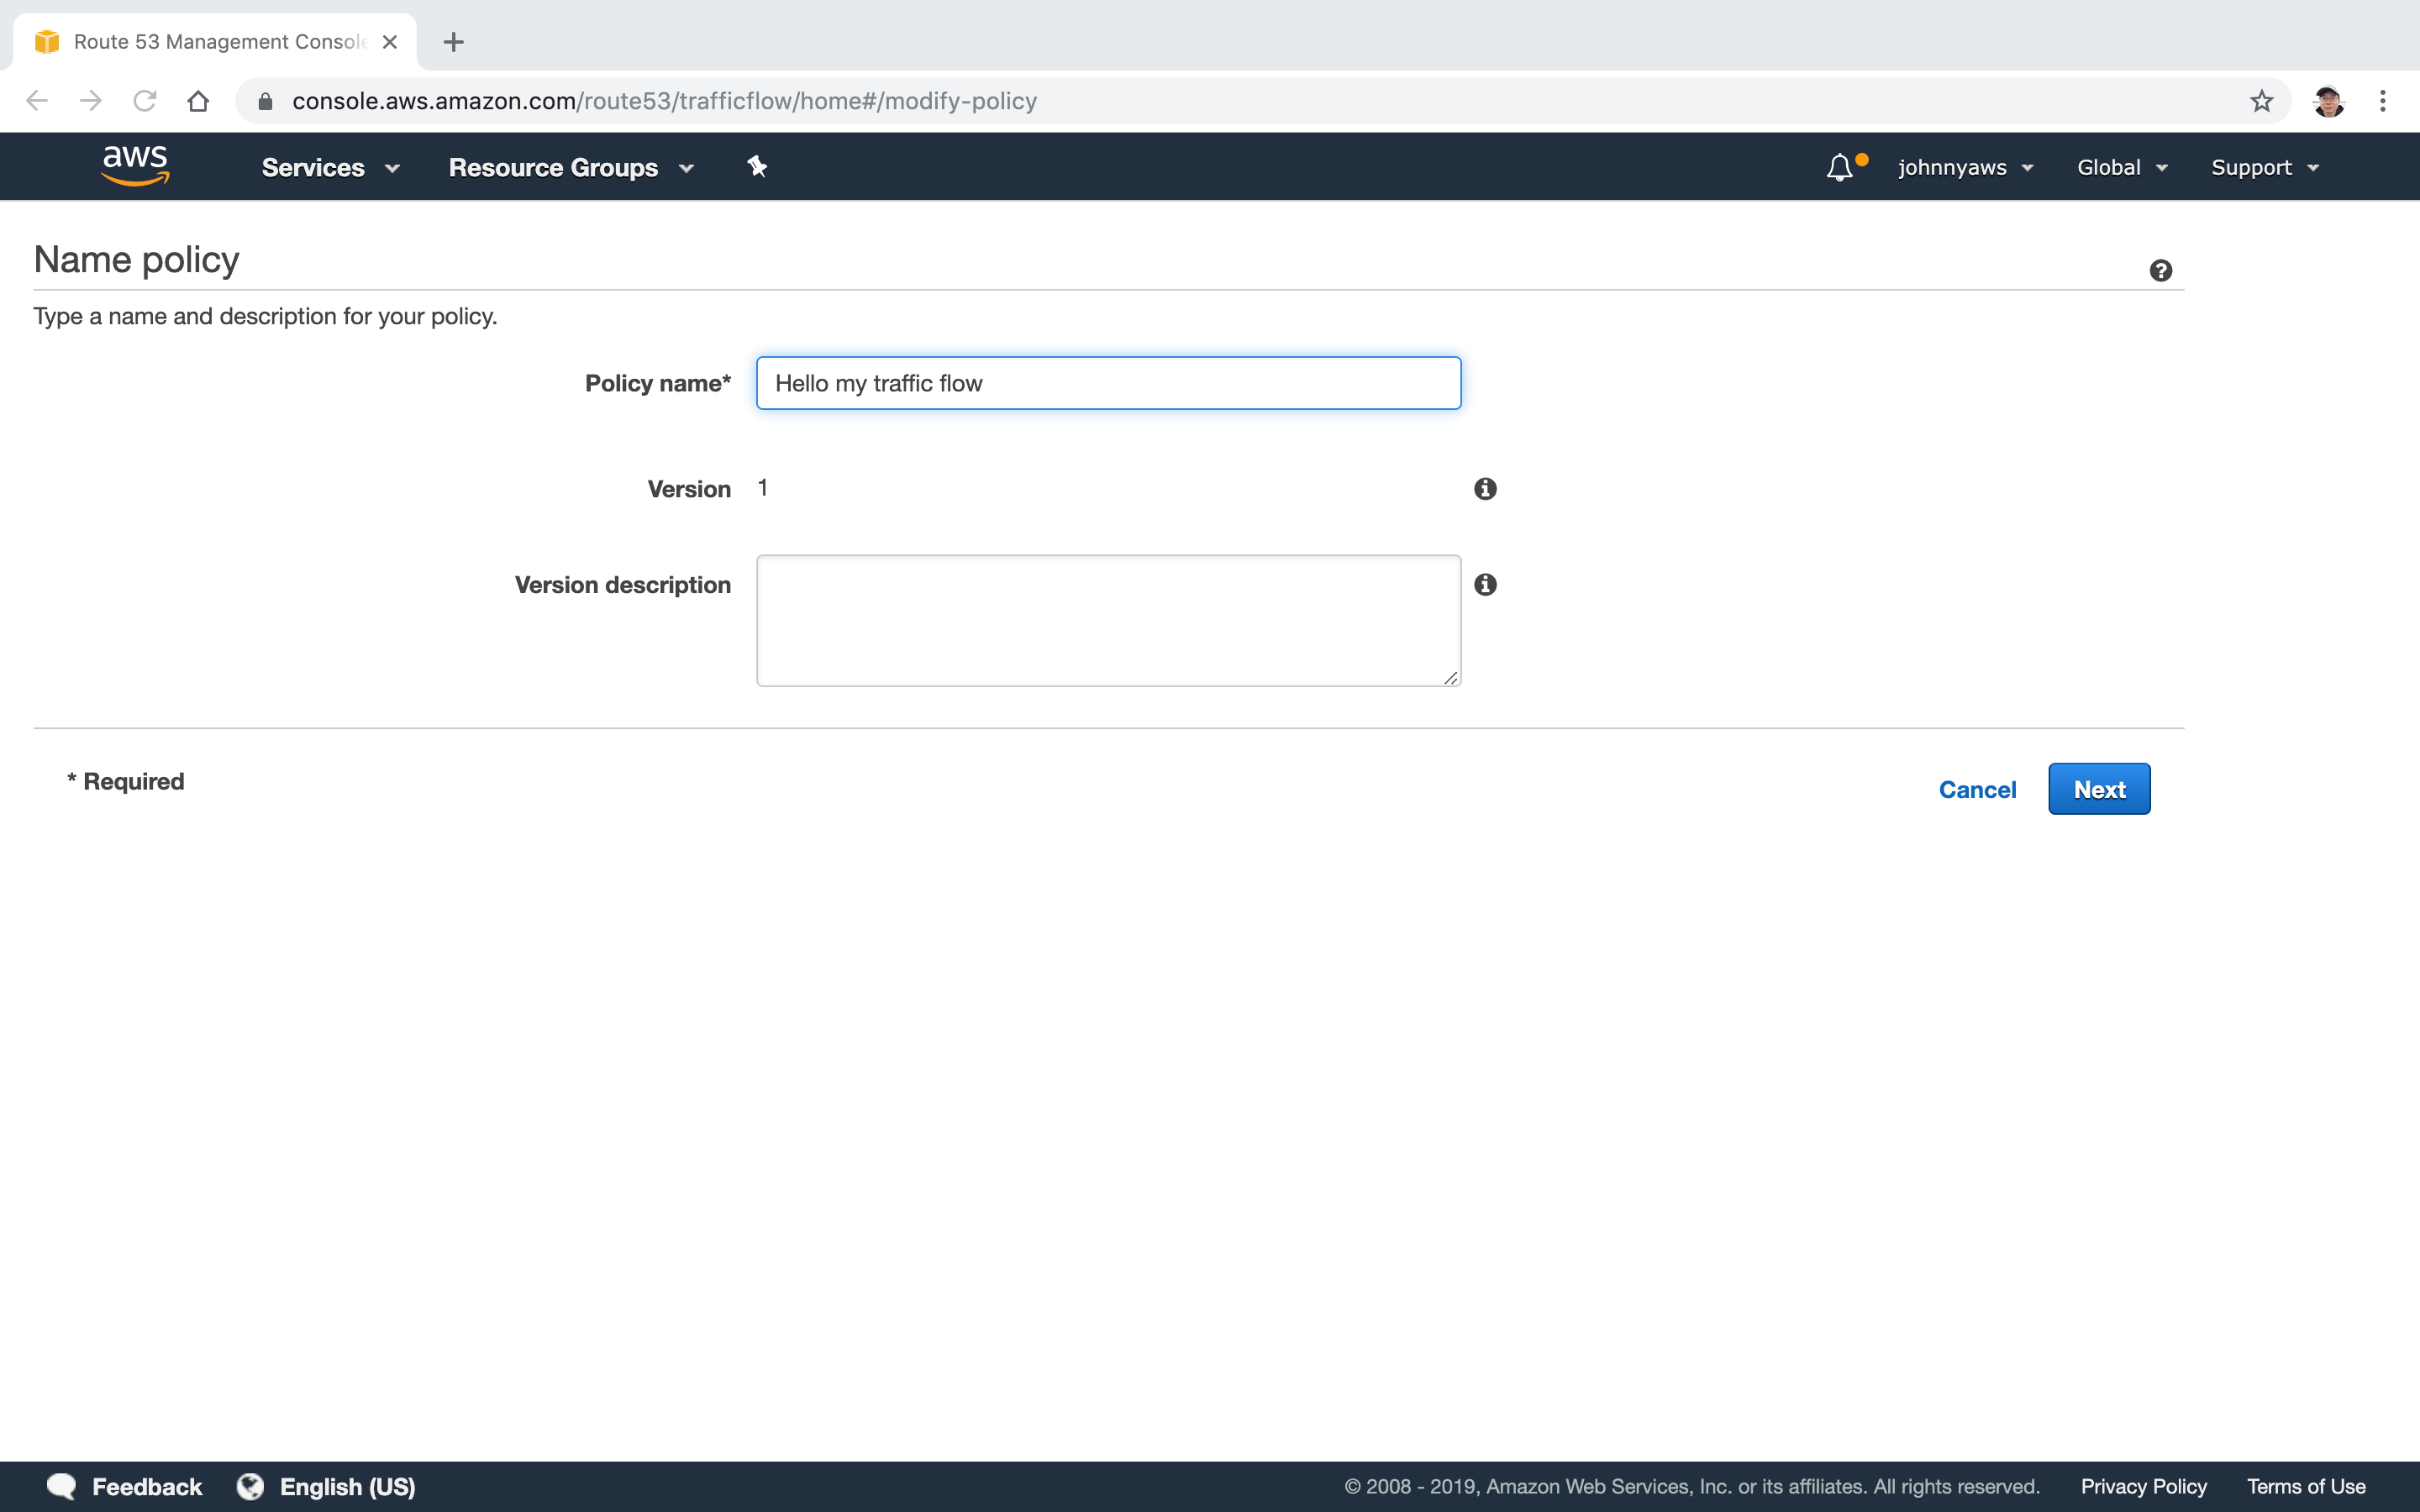
Go to Route53 -> Traffic policies->Create Traffic policy.
 Set policy name.
 Customize Geoproximity rules.
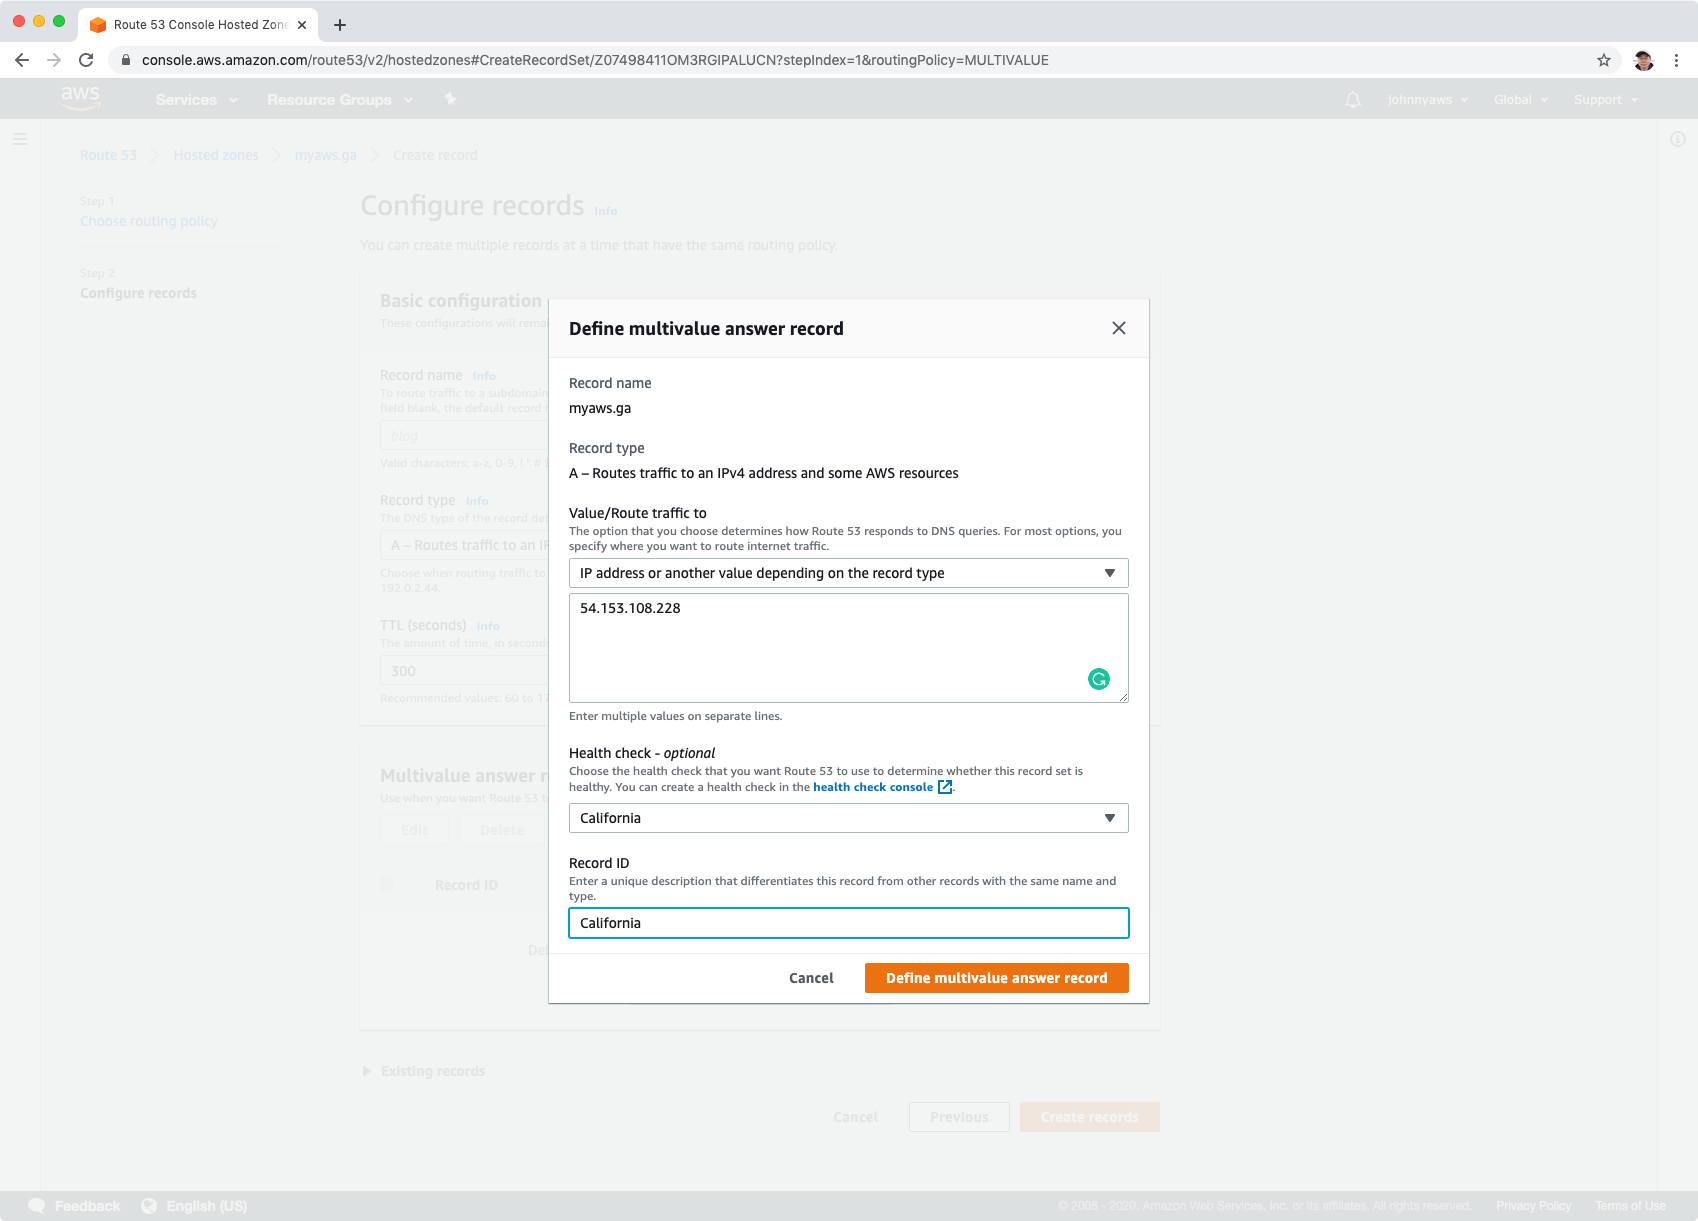
4.7 Multivalue Answer Policy
Multivalue answer routing lets you configure Amazon Route 53 to return multiple values, such as IP addresses for your web servers, in response to DNS queries. You can specify multiple values for almost any record, but multivalue answer routing also lets you check the health of each resource, so Route 53 returns only values for healthy resources. This is similar to simple routing, however it allows you to put health checks on each record set.