4161. AWS-VPC-Custom VPCAWS and VPC
Create custom VPC.
1. VPCs
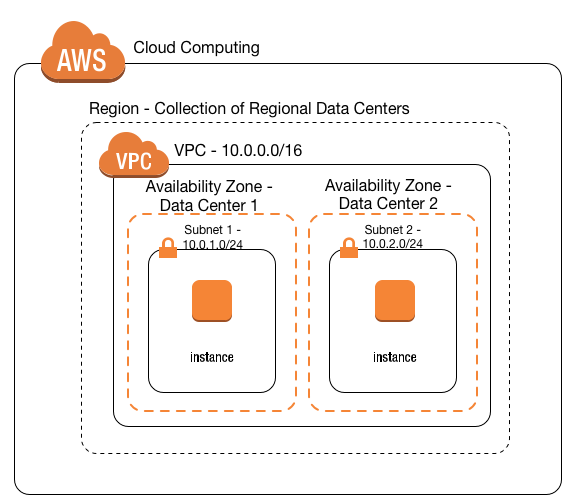
1.1 What Is A VPC?
You can easily customize the network configuration for your Amazon Virtual Private Cloud(VPC). For example, you can create a public-facing subnet for your webservers that has access to the Internet, and place your backend systems such as databases or application servers in a private-facing subnet with no Internet access. You can leverage multiple layers of security, including security groups and network access control lists, to help control access to Amazon EC2 instances in each subnet.
Additionally, you can create a Hardware Virtual Private Network (VPN) connection between your corporate datacenter and your VPC and leverage the AWS cloud as an extension of your corporate datacenter.

1.2 VPC Features
What can we do with a VPC?
- Launch instances into a subnet of your choosing
- Assign custom IP address ranges in each subnet
- Configure route tables between subnets
- Create Internet gateway and attach it to your VPC
- Much better security control over your AWS resources
- Instance security groups
- Subnet network access control lists (ACES)
Default VPC vs Custom VPC:
- Default VPC is user friendly, allowing you to immediately deploy instances.
- All Subnets in default VPC have a route out to the internet.
- Each EC2 instance has both a public and private IP address.
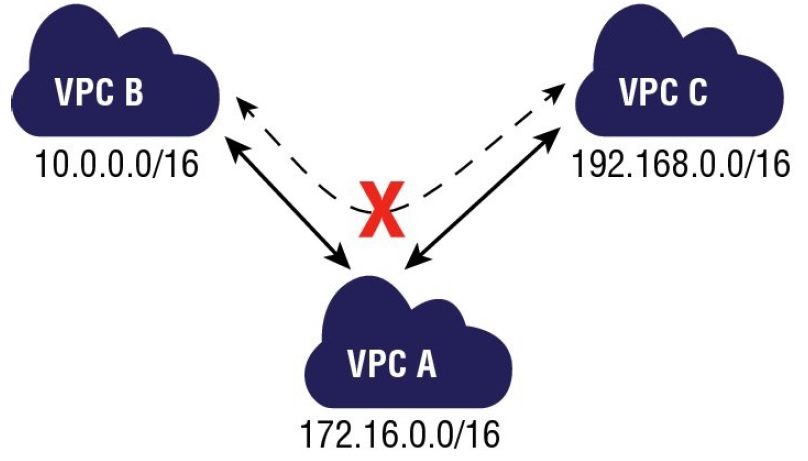
1.3 VPC Peering
- Allows you to connect one VPC with another via a direct network route using private IP addresses.
- Instances behave as if they were on the same private network
- You can peer VPC’s with other AWS accounts as well as with other VPCs in the same account.
- Peering is in a star configuration: ie 1 central VPC peers with 4 others.
NO TRANSITIVE PEERING!!! - You can peer between regions.
Can’t access from B to C through A. Must create VPC peering from B to C directly.
1.4 Summary of VPC
- Think of a VPC as a logical datacenter in AWS.
- Consists of IGWs (Or Virtual Private Gateways), Route Tables, Network Access Control Lists, Subnets, and Security Groups
- 1 Subnet = 1 Availability Zone
- Security Groups are Stateful; Network Access Control Lists are Stateless
- NO TRANSITIVE PEERING
Remember the following:
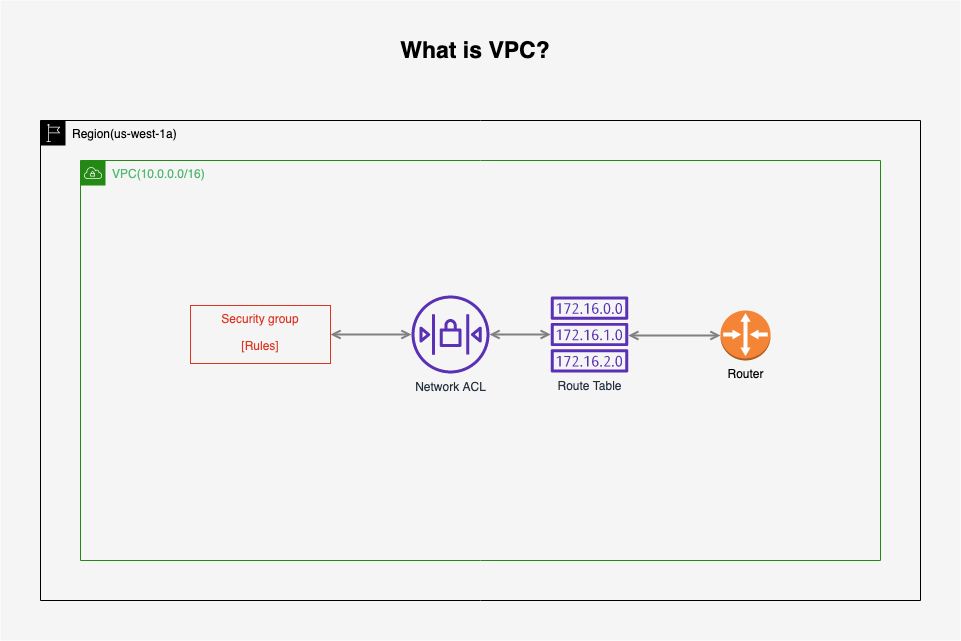
- When you create a VPC, a default Route Table, Network Access Control List (NACL) and a default Security Group are actually created.
- It won’t create any subnets, nor will it create a default internet gateway.
- US-East-1A in your AWS account can be a completely different availability zone to US-East-1A in another AWS account. The AZ’s are randomized.
- Amazon always reserve 5 IP addresses within your subnets.
- You can only have 1 Internet Gateway per VPC.
- Security Groups can’t span VPCs.
2. Lab - VPC
2.1 Create Custom VPC
VPC contains Route Table, Network ACL and Security Group.
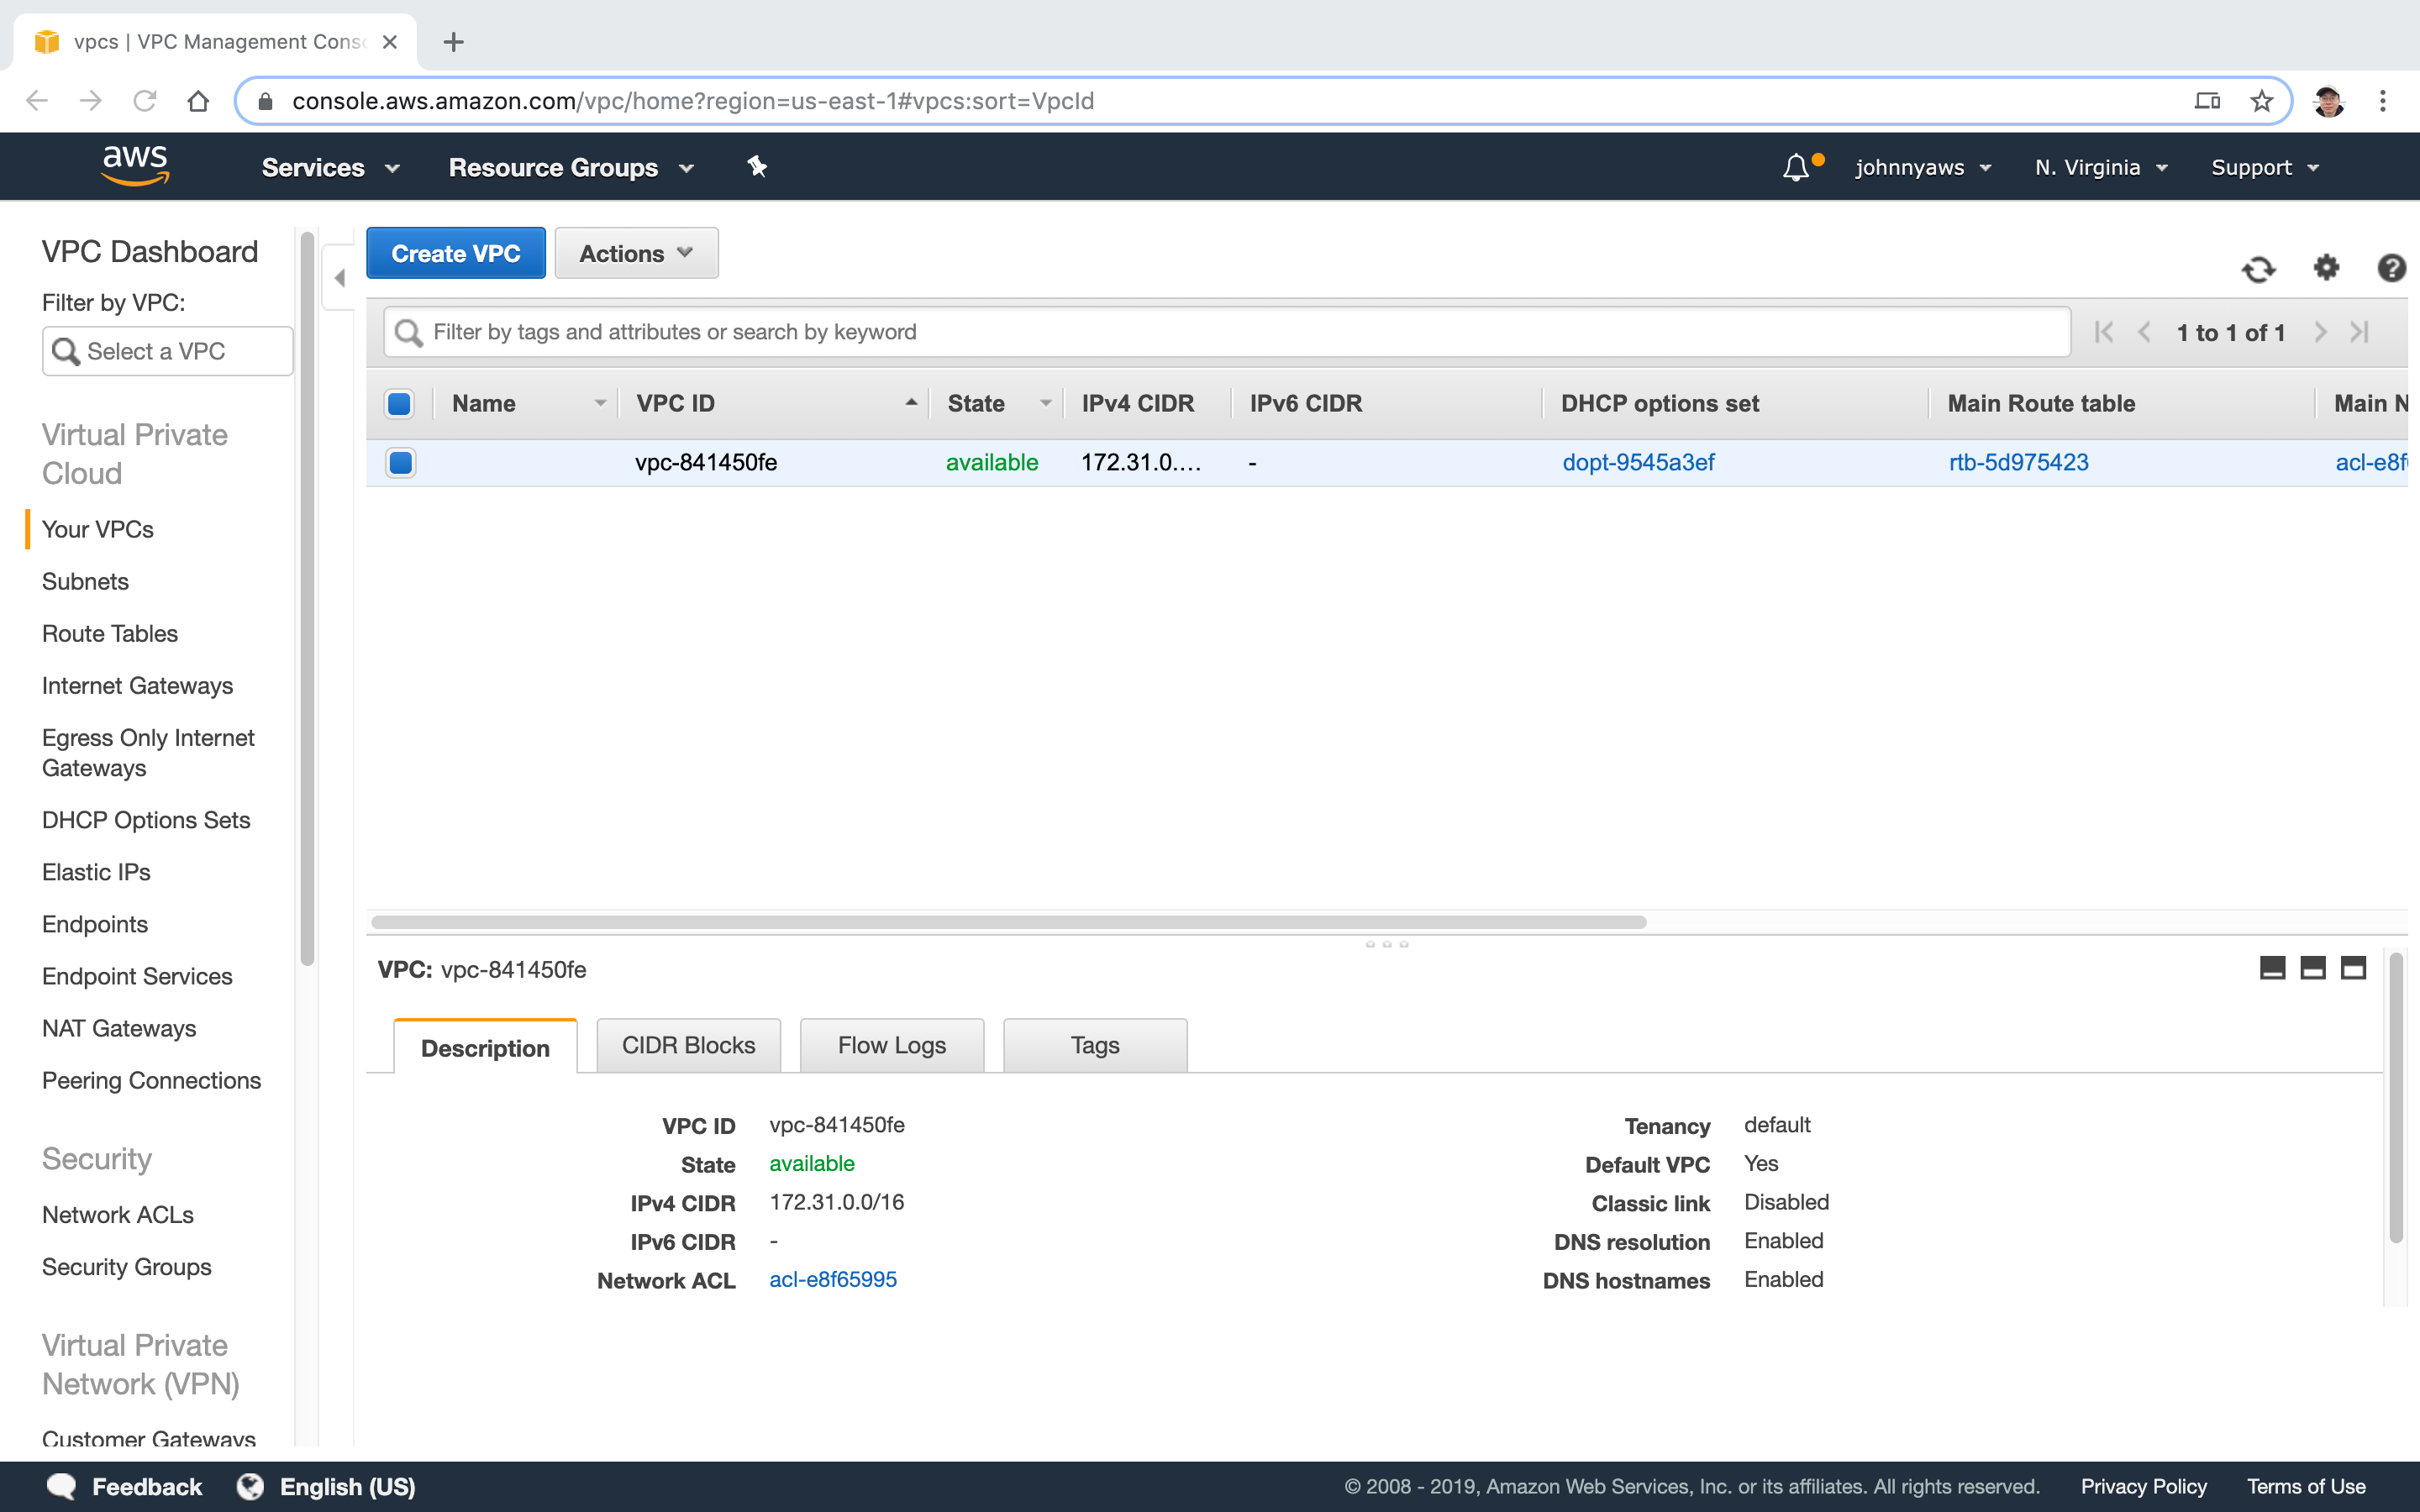
 Go to Services->Networking & Content Delivery->VPC, select “Your VPCs” at the left panel, click “Create VPC” button.
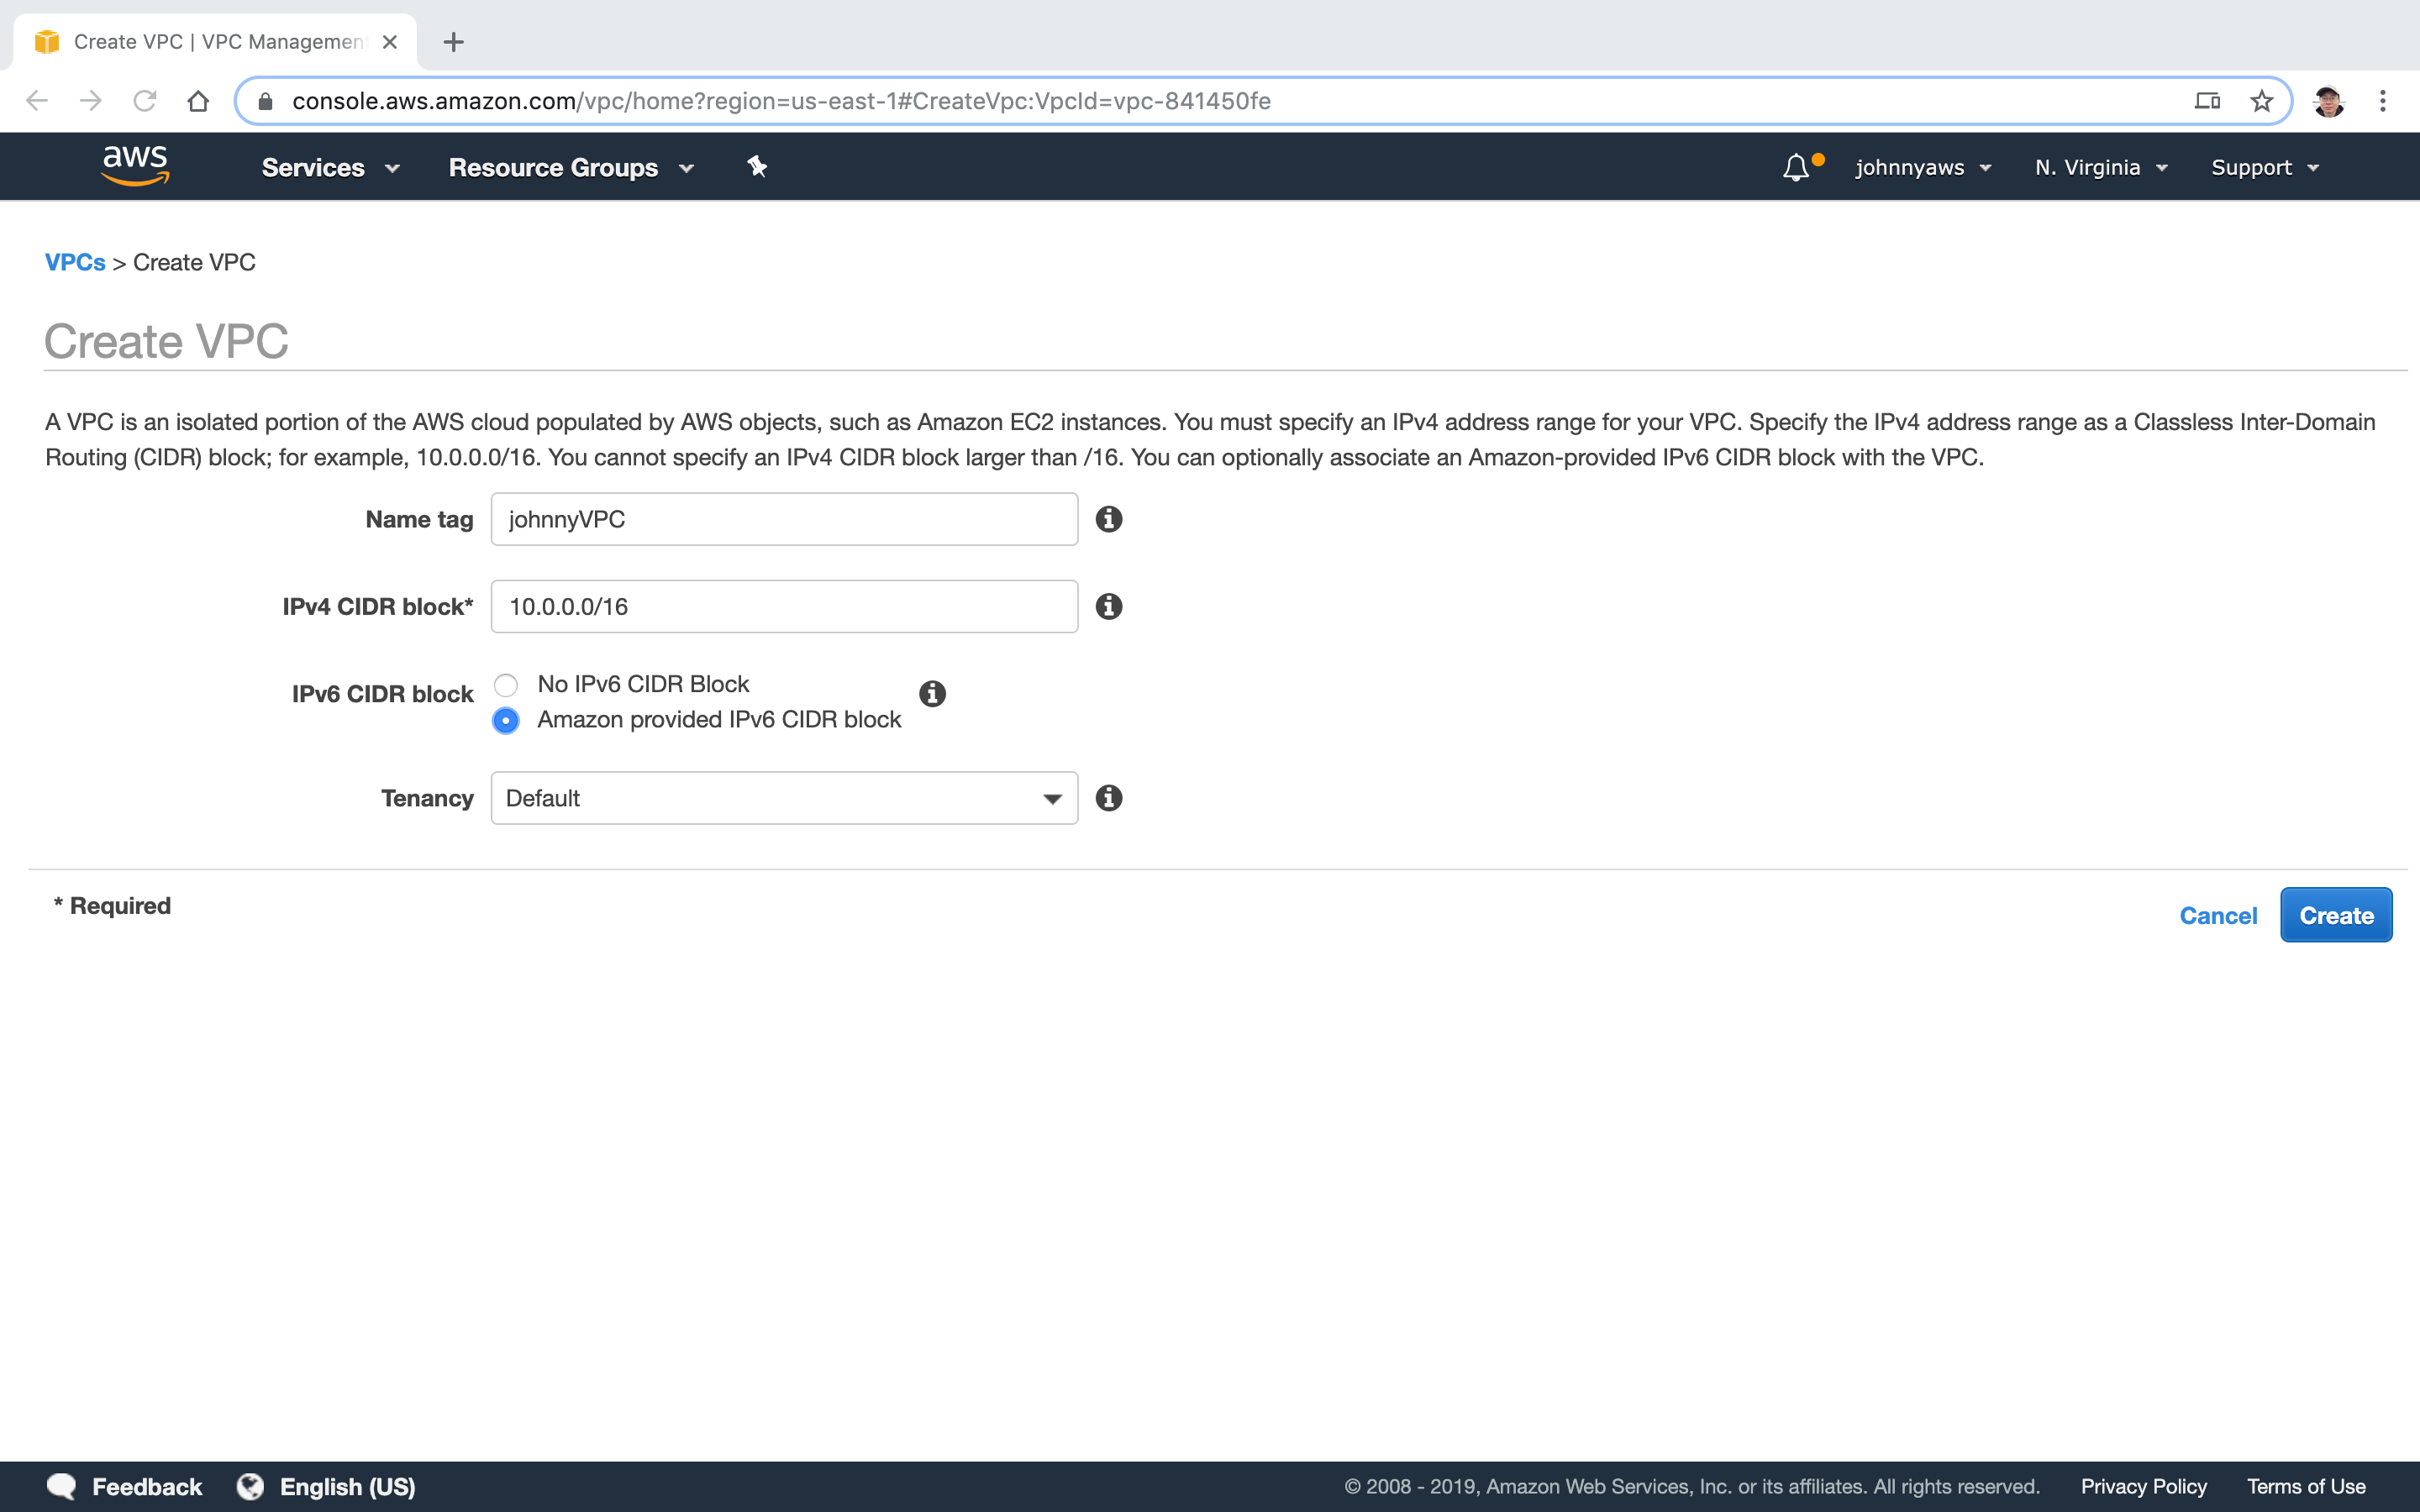
 Provide name and ip address, then Create.
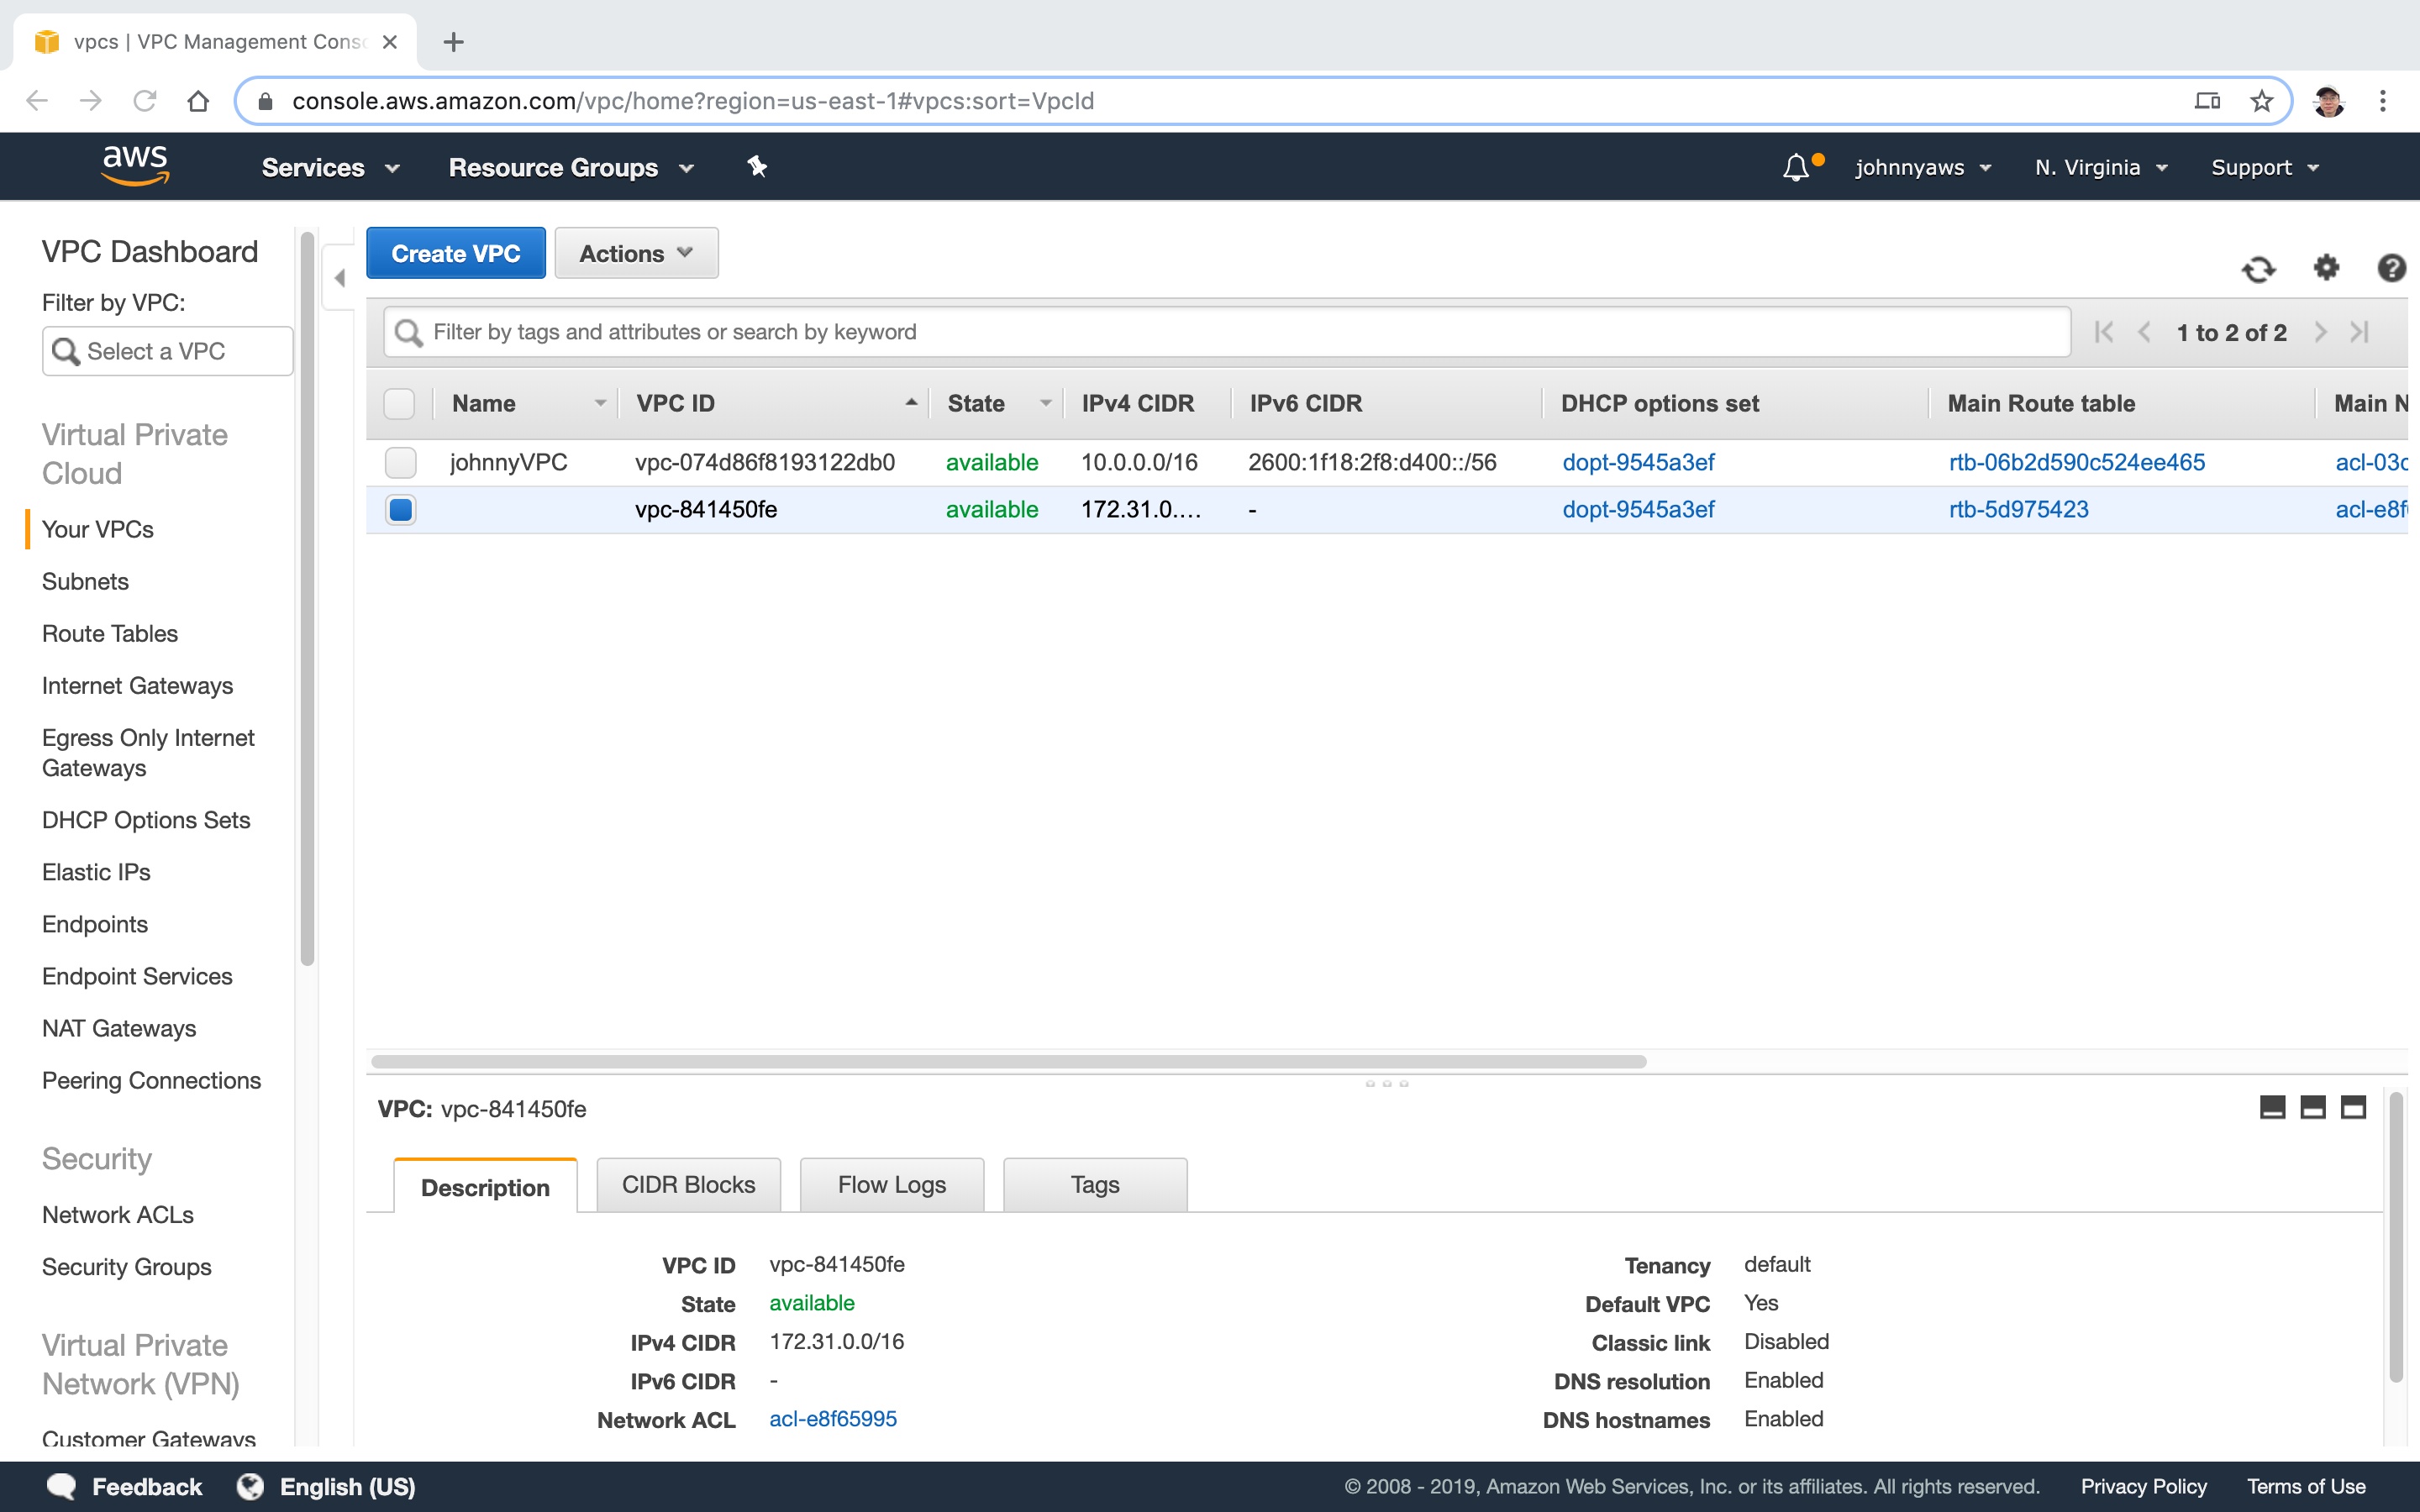
 New VPC is created.
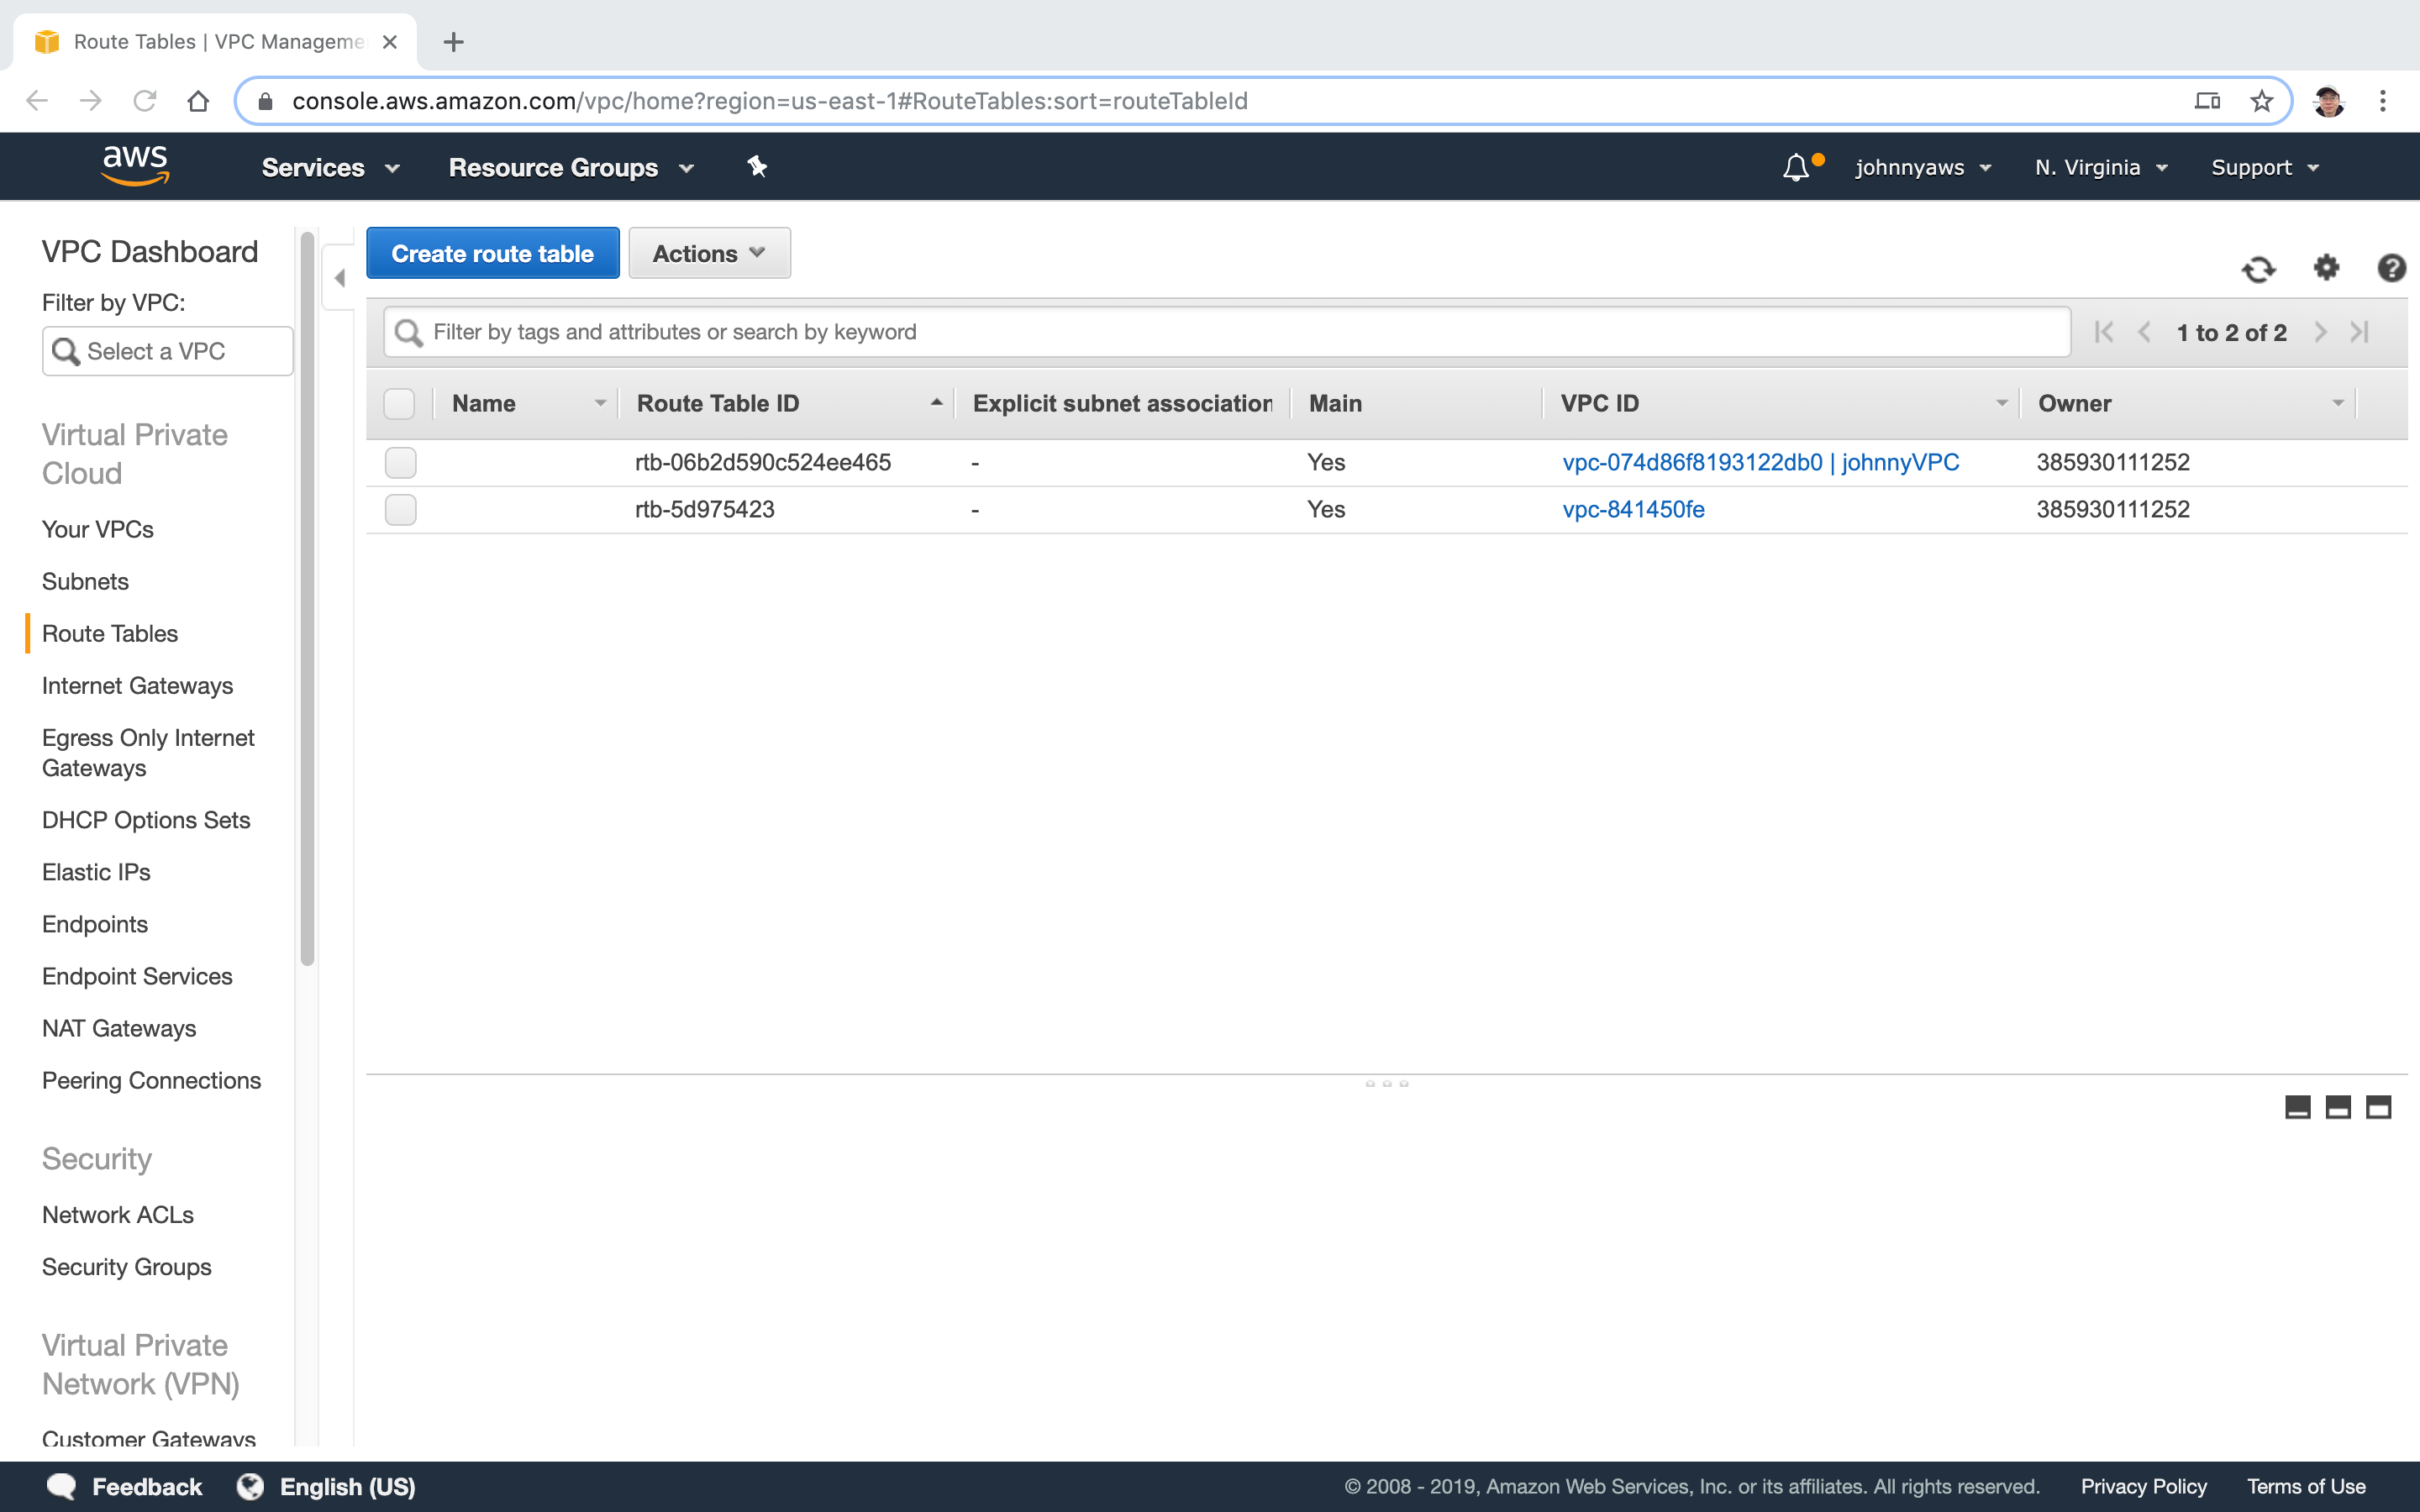
 There is one more entry in Route Tables.
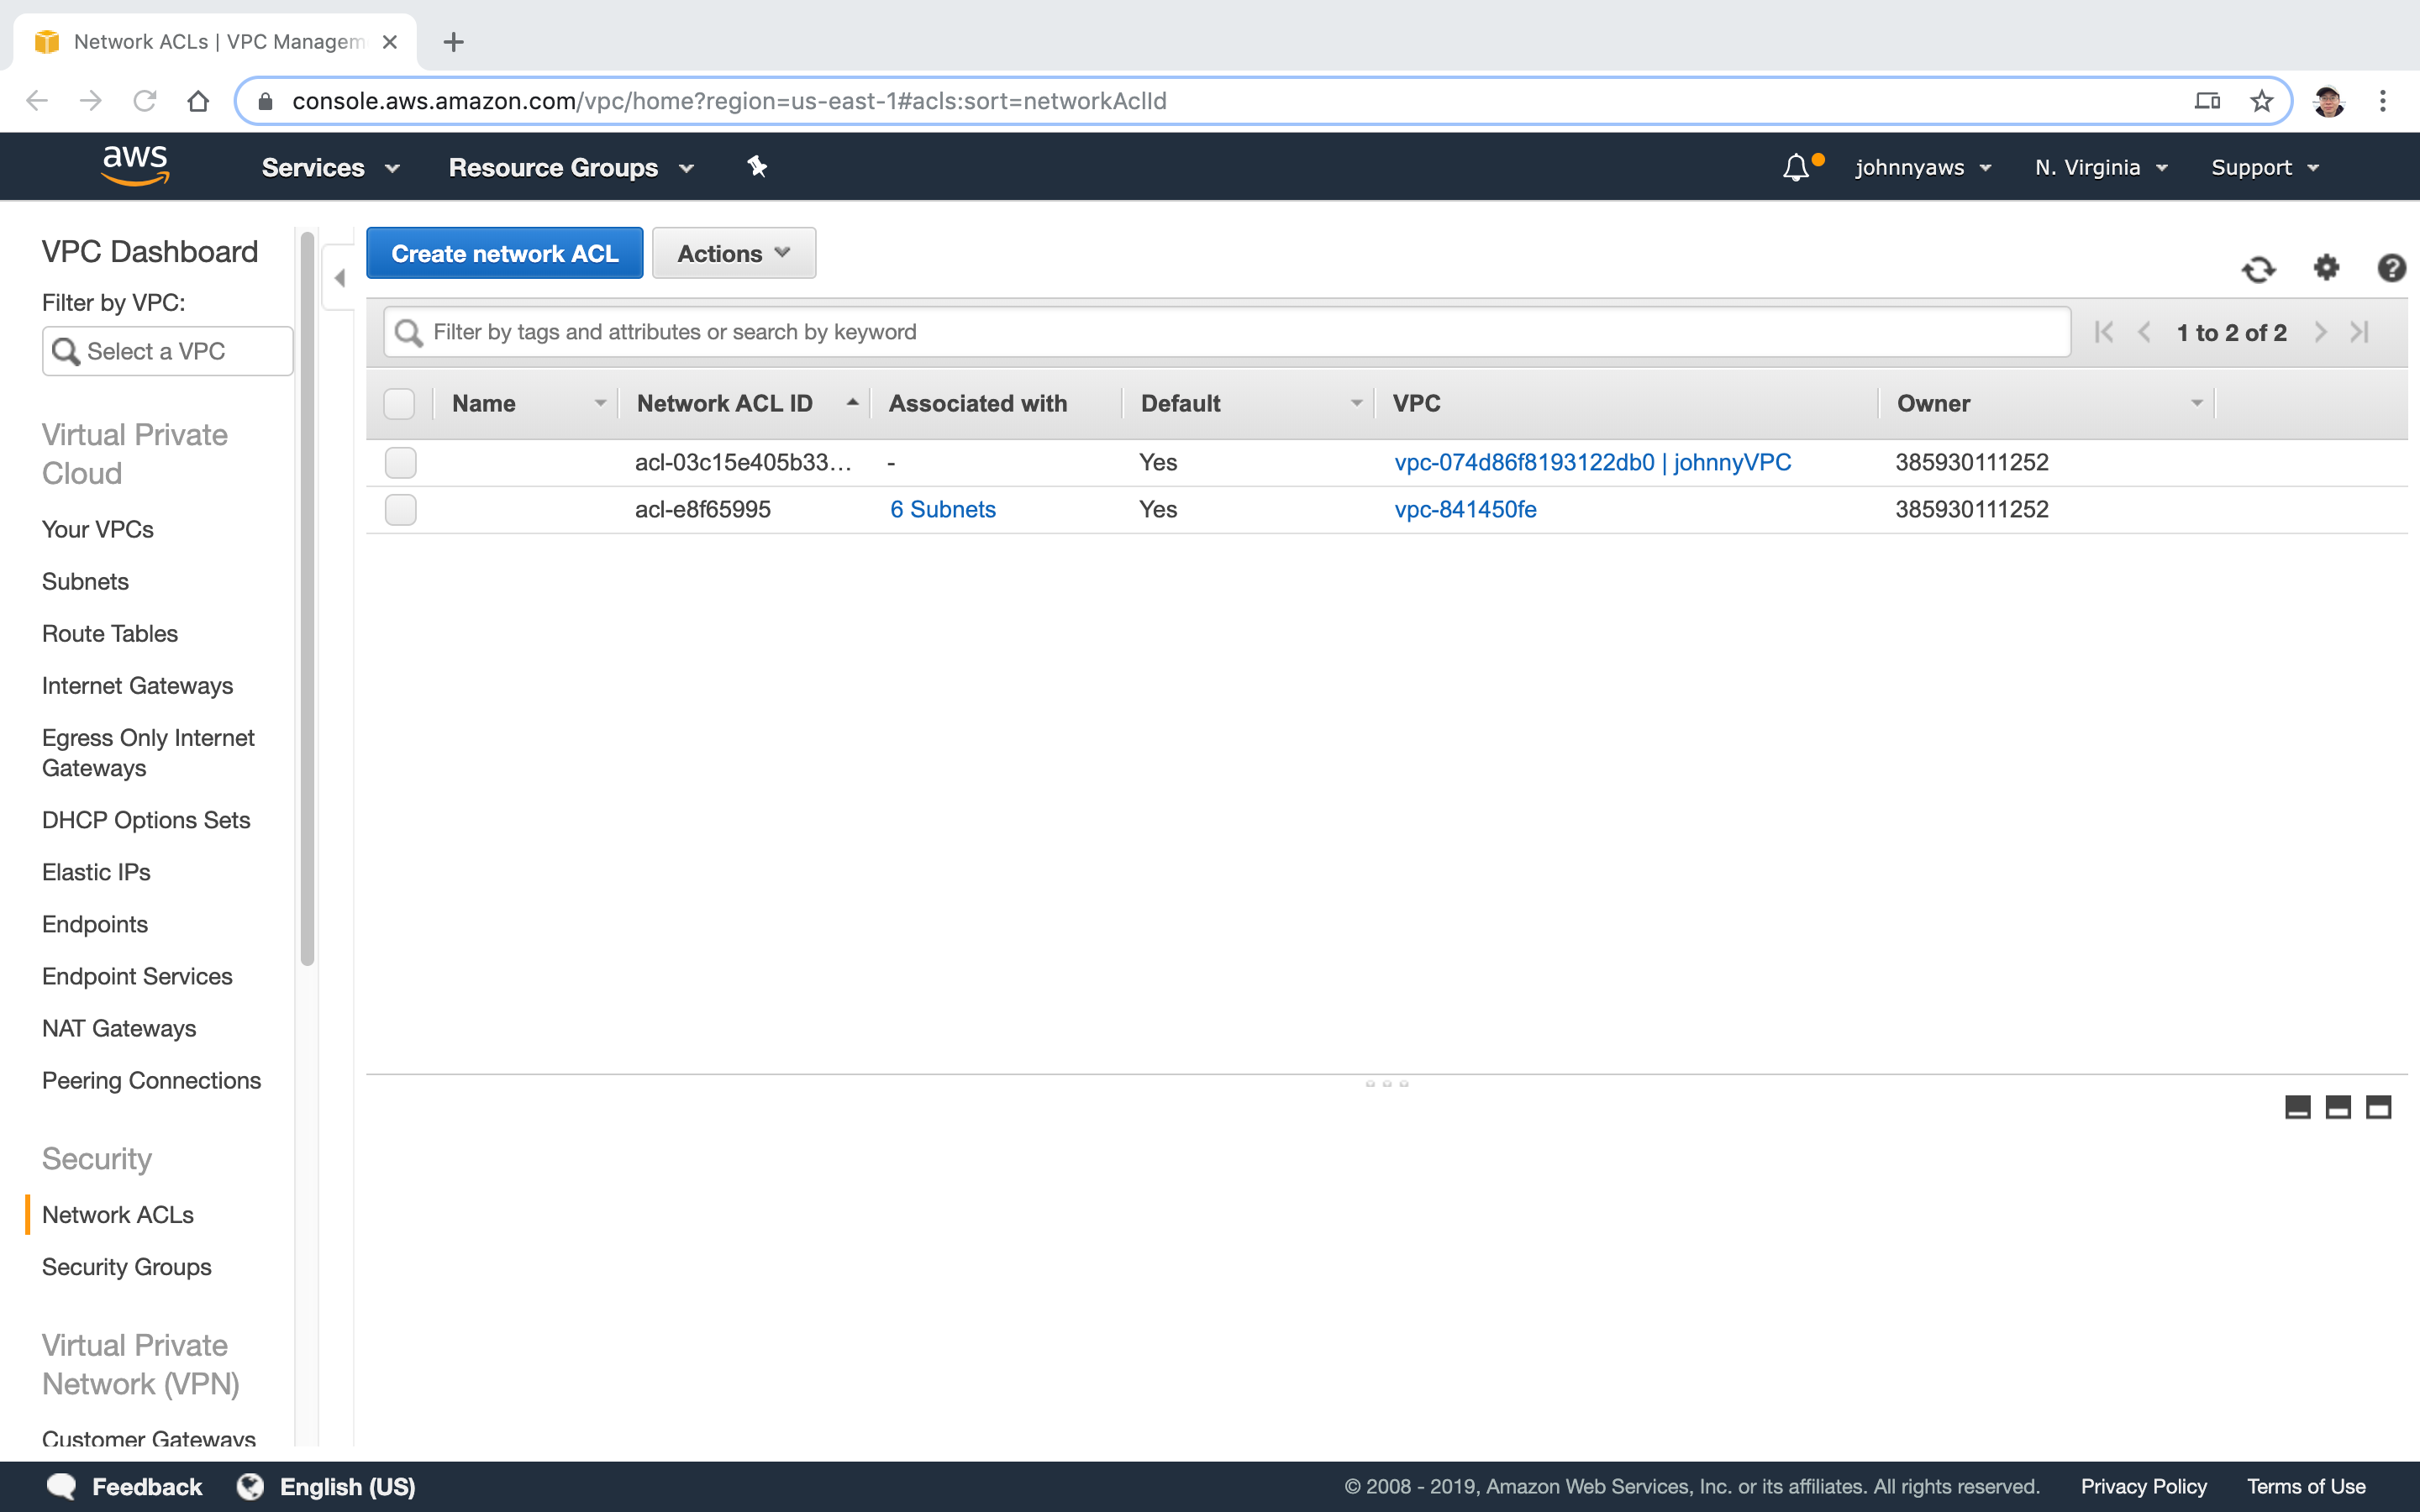
 And one more entry in Network ACLs.
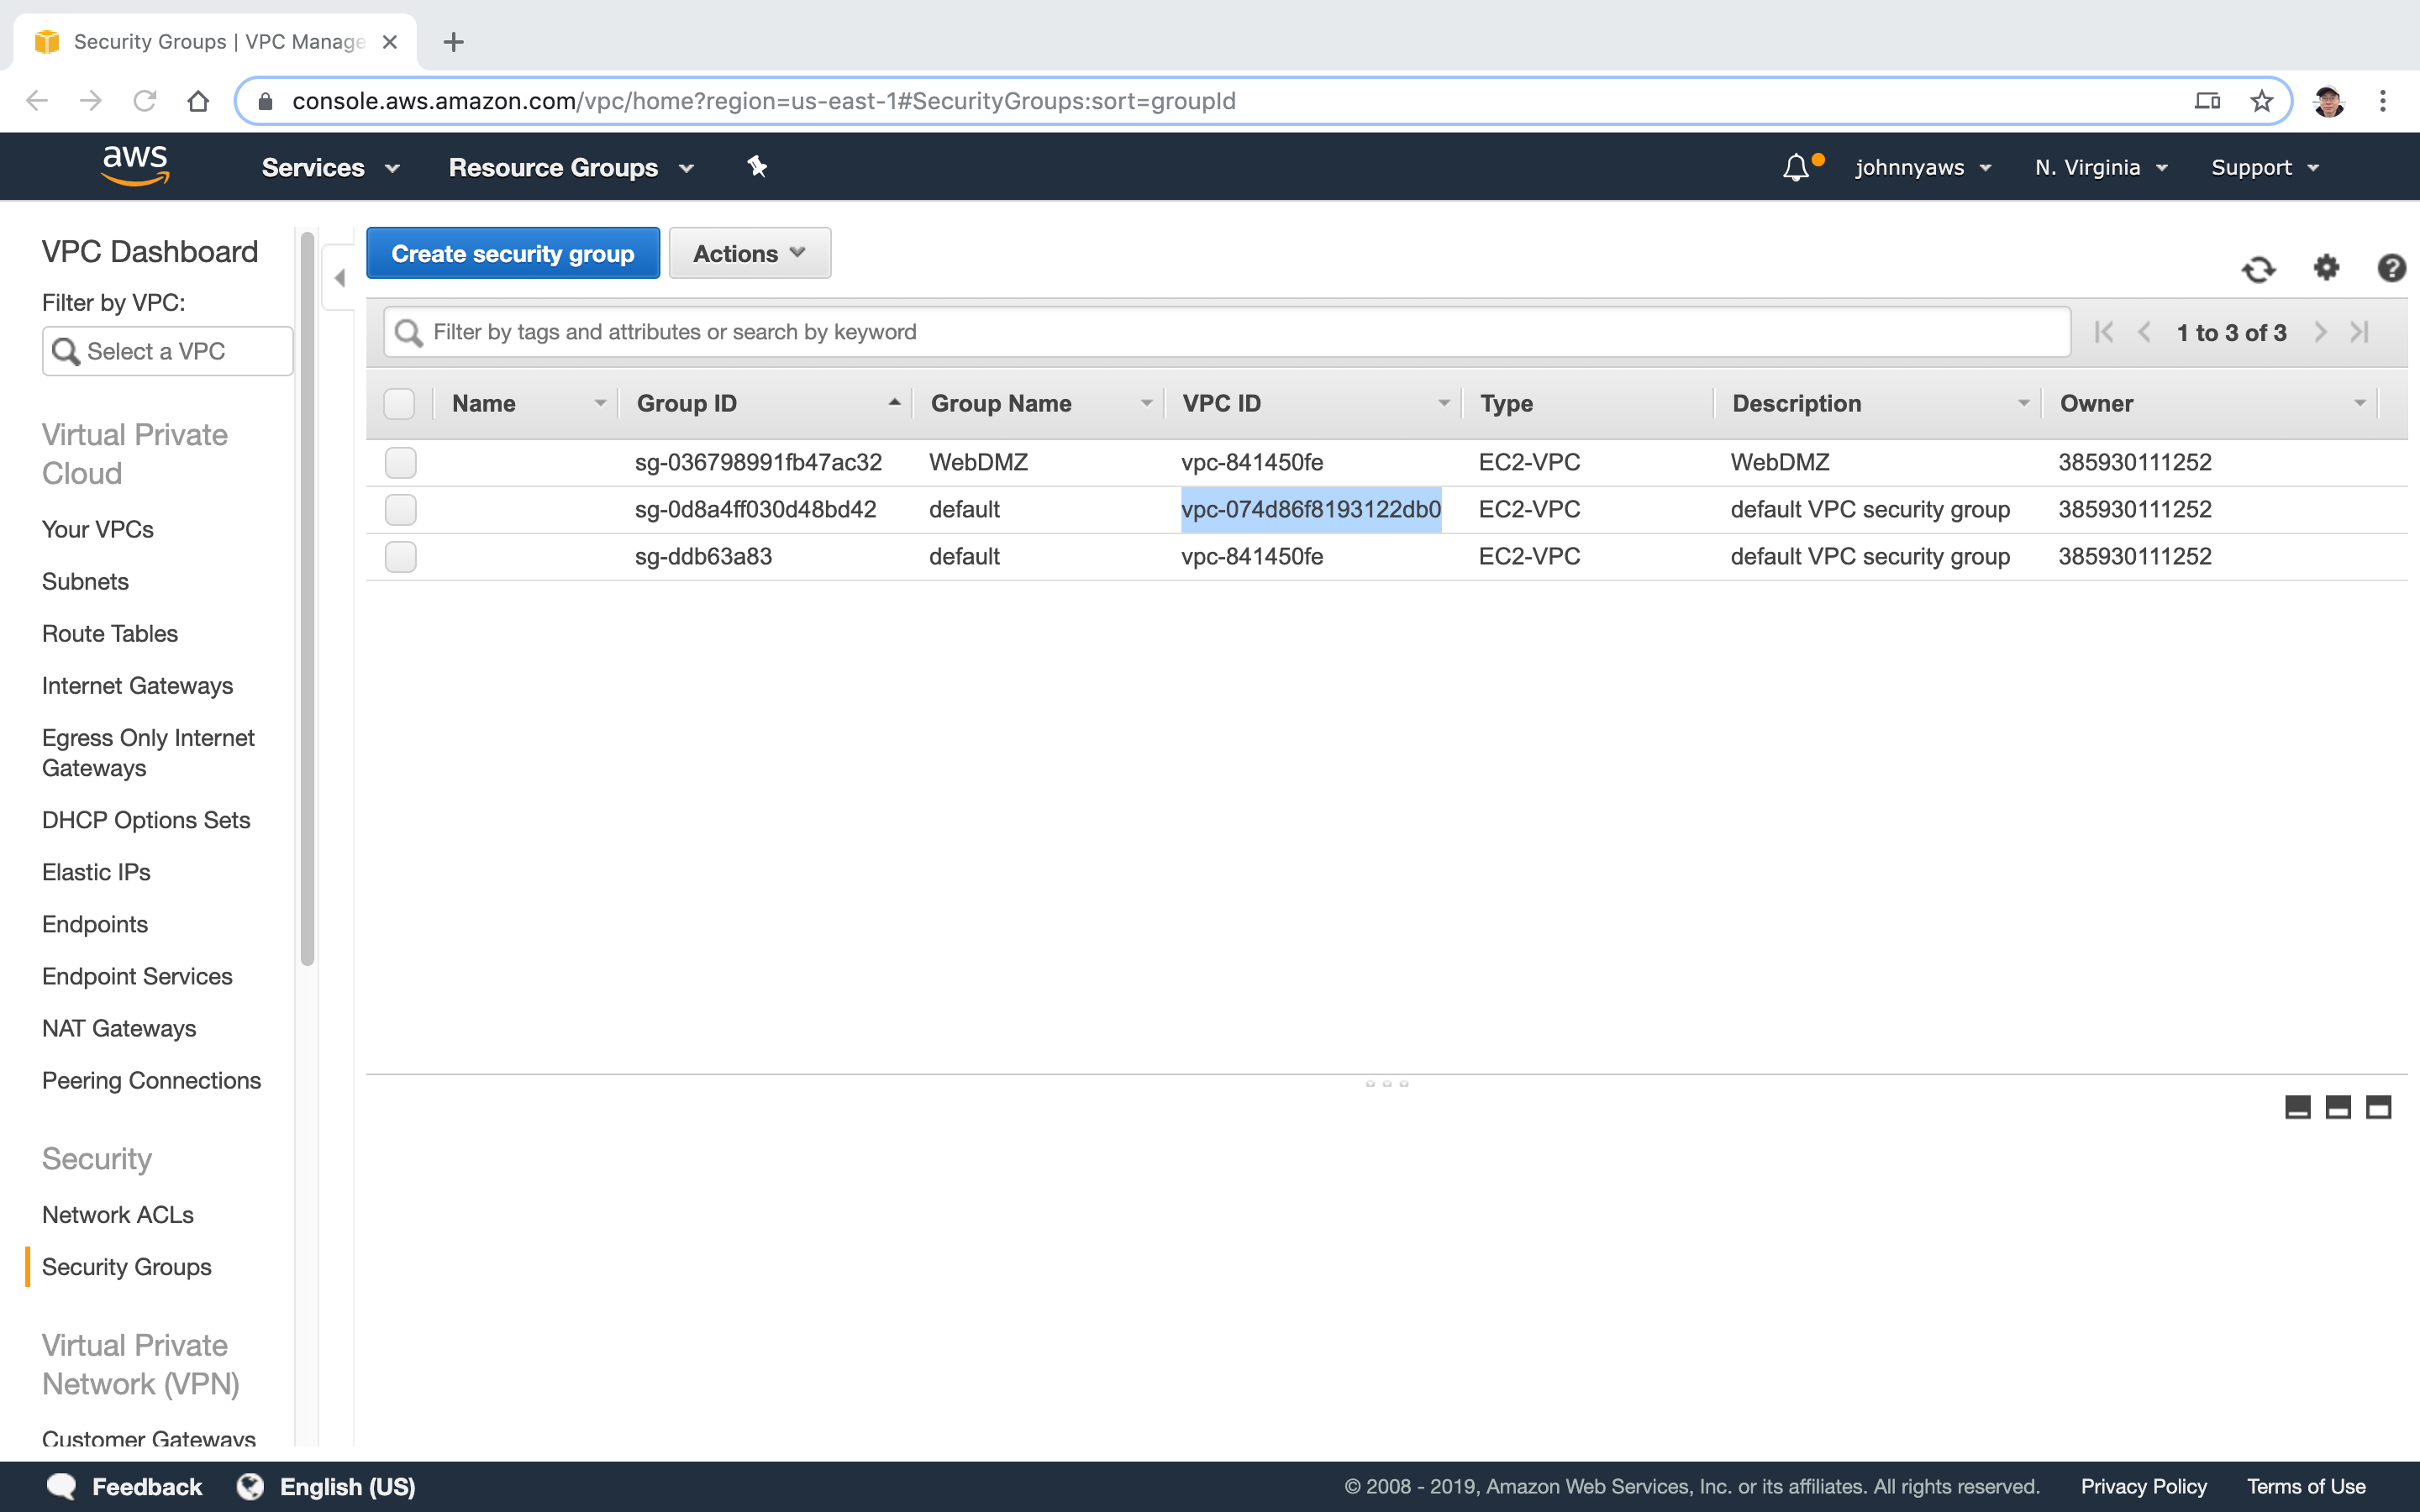
 And one more entry in Security Group(the second one).
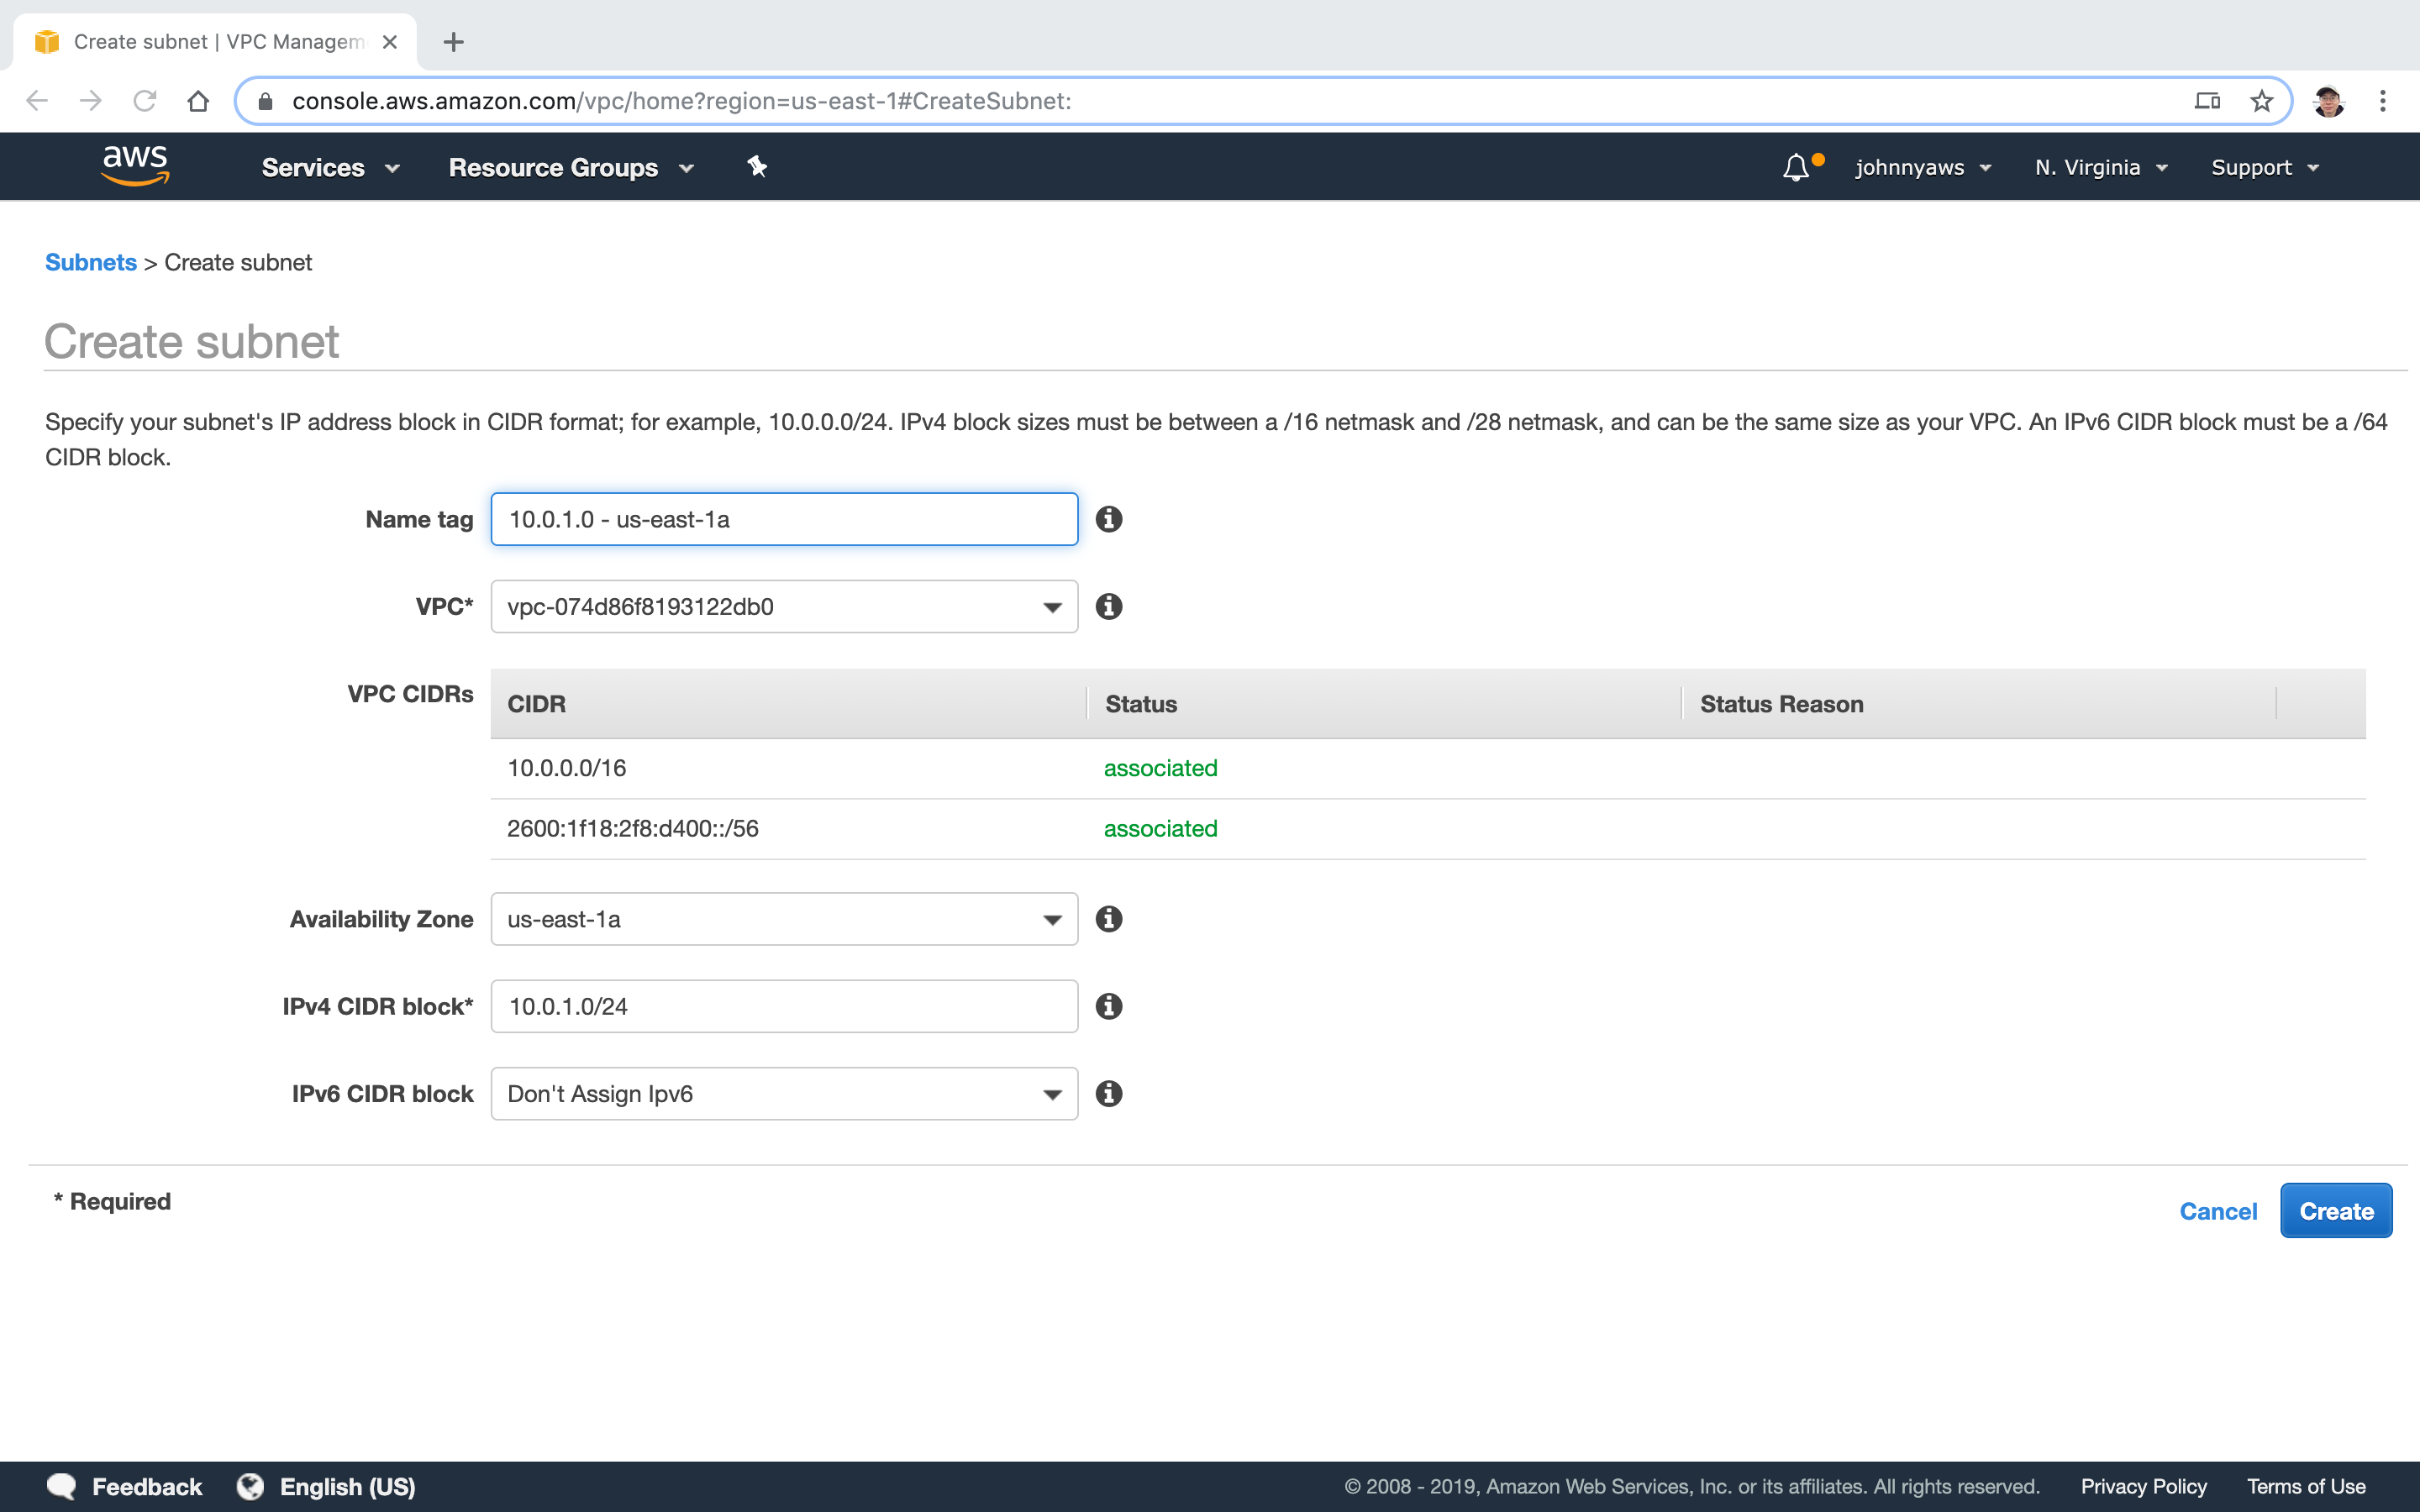
 Create Subnet, 10.0.1.0.
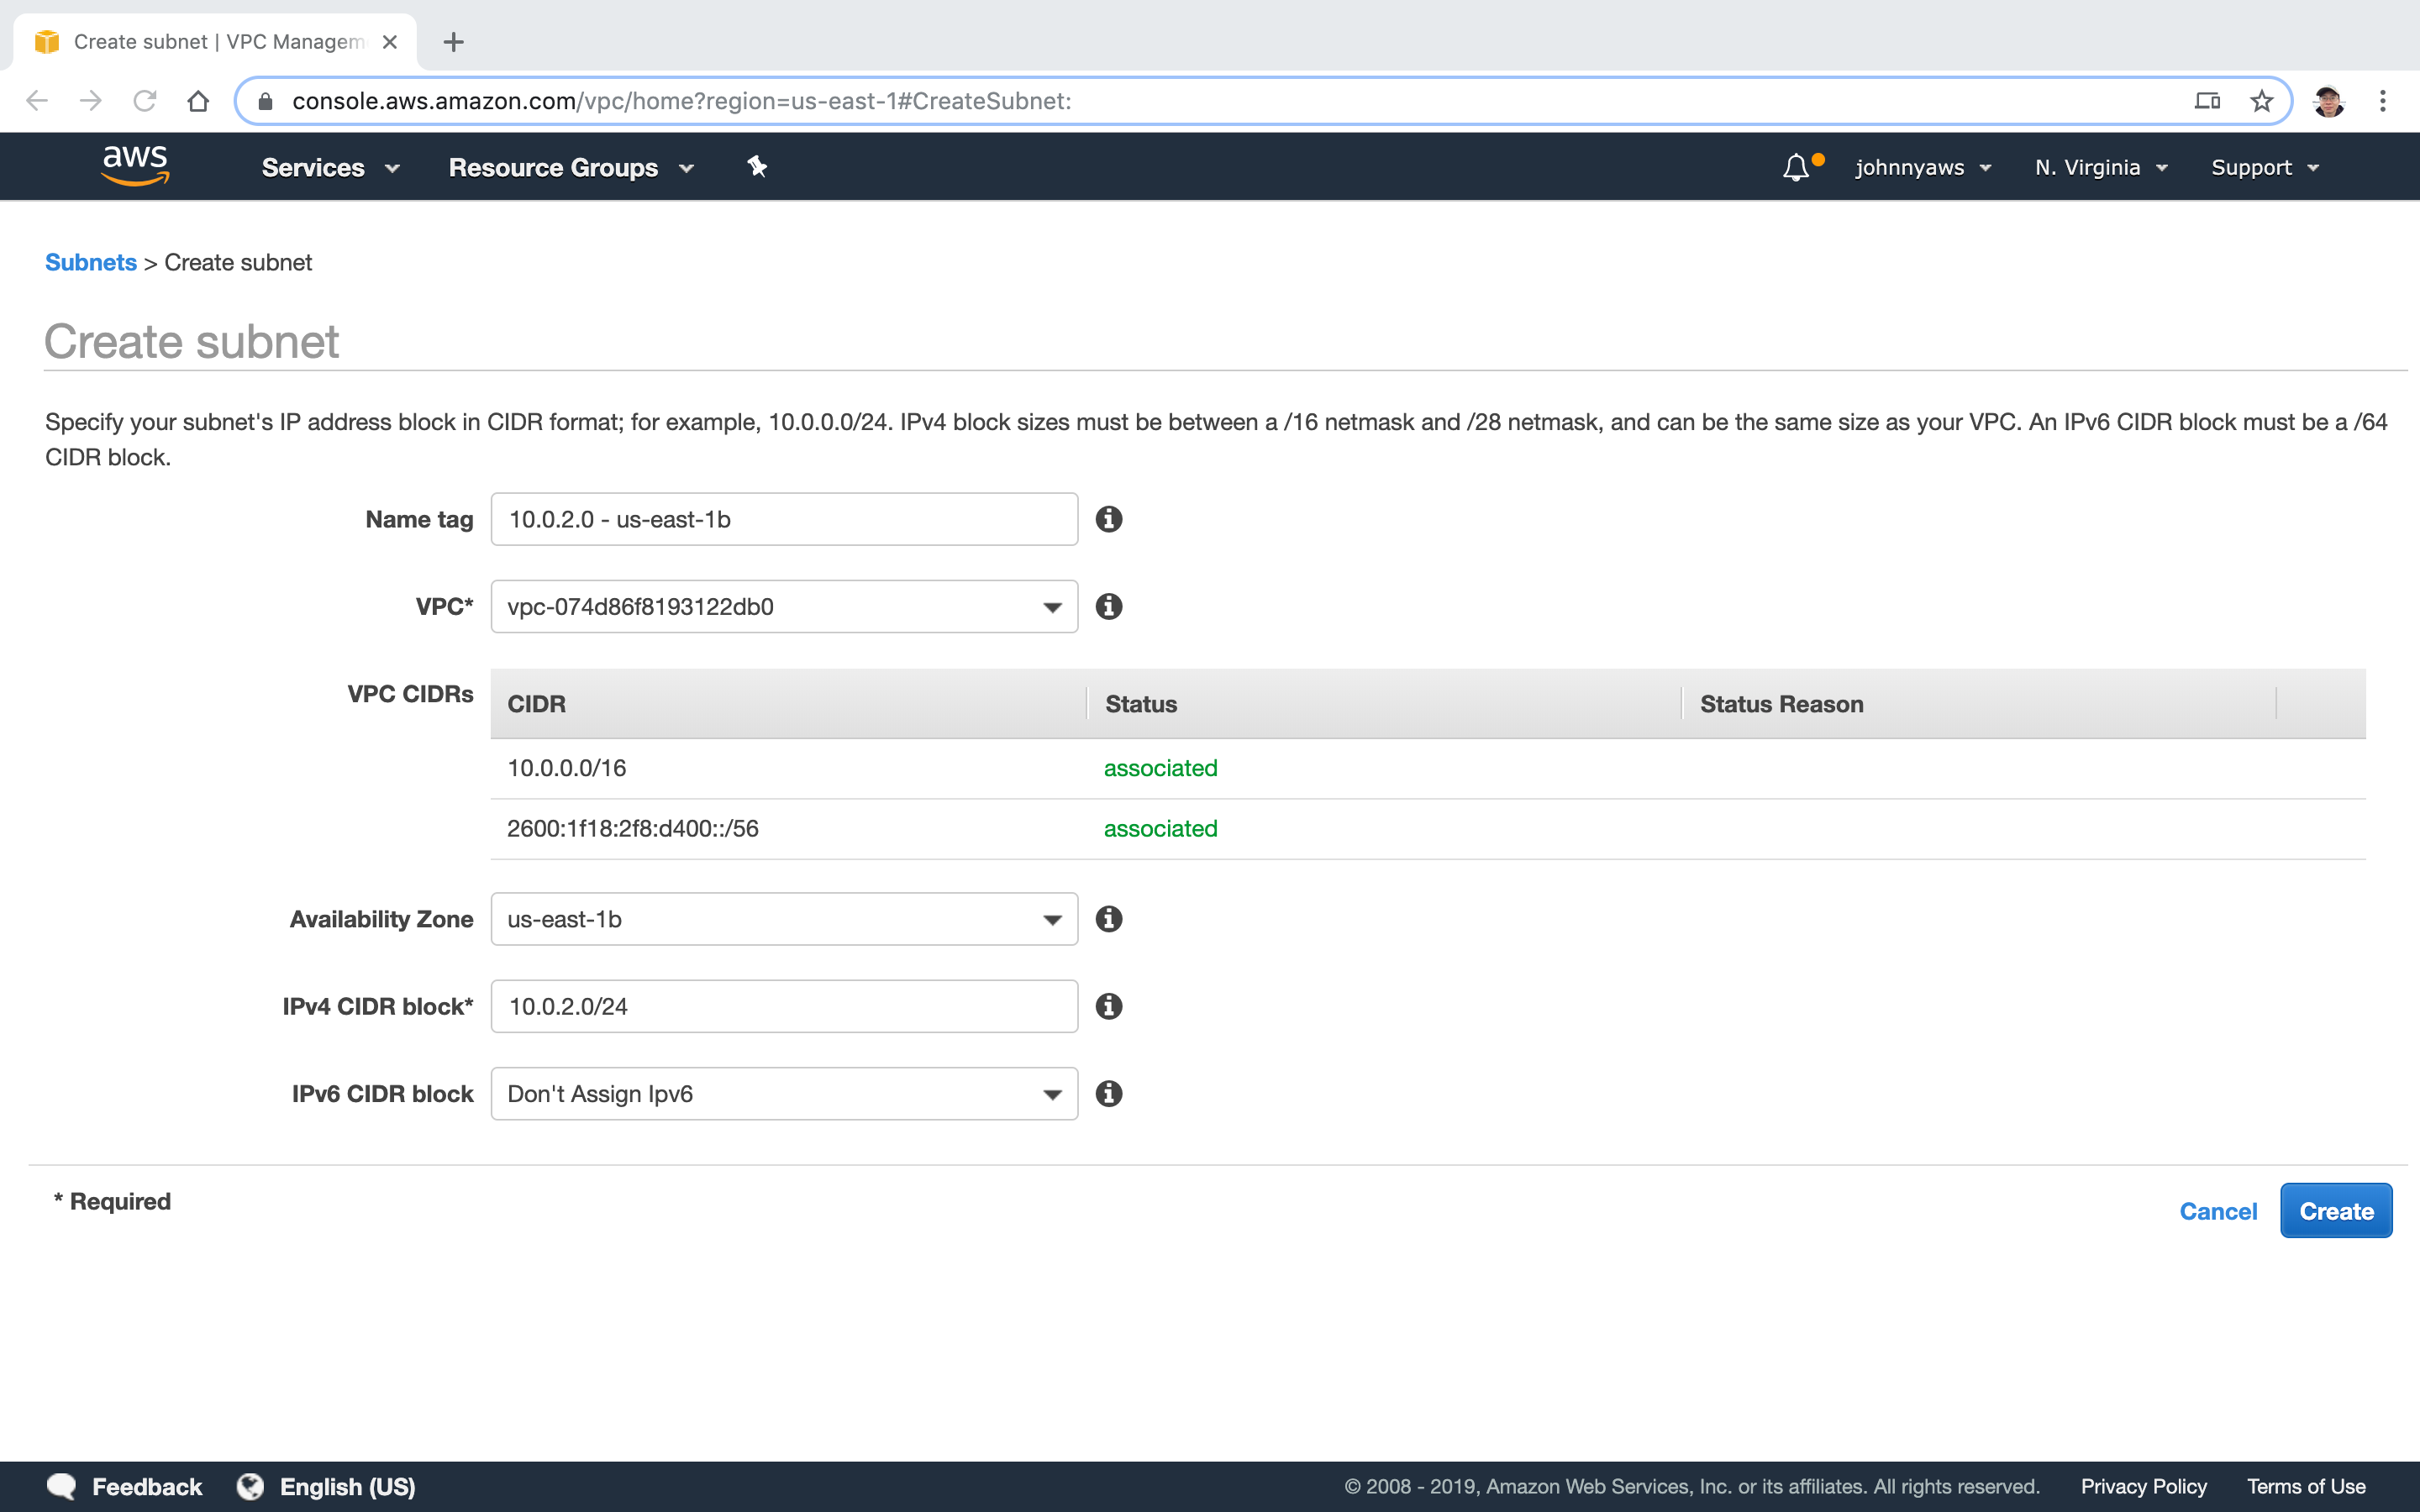
 Create another Subnet, 10.0.2.0.
 Two subnets are created.
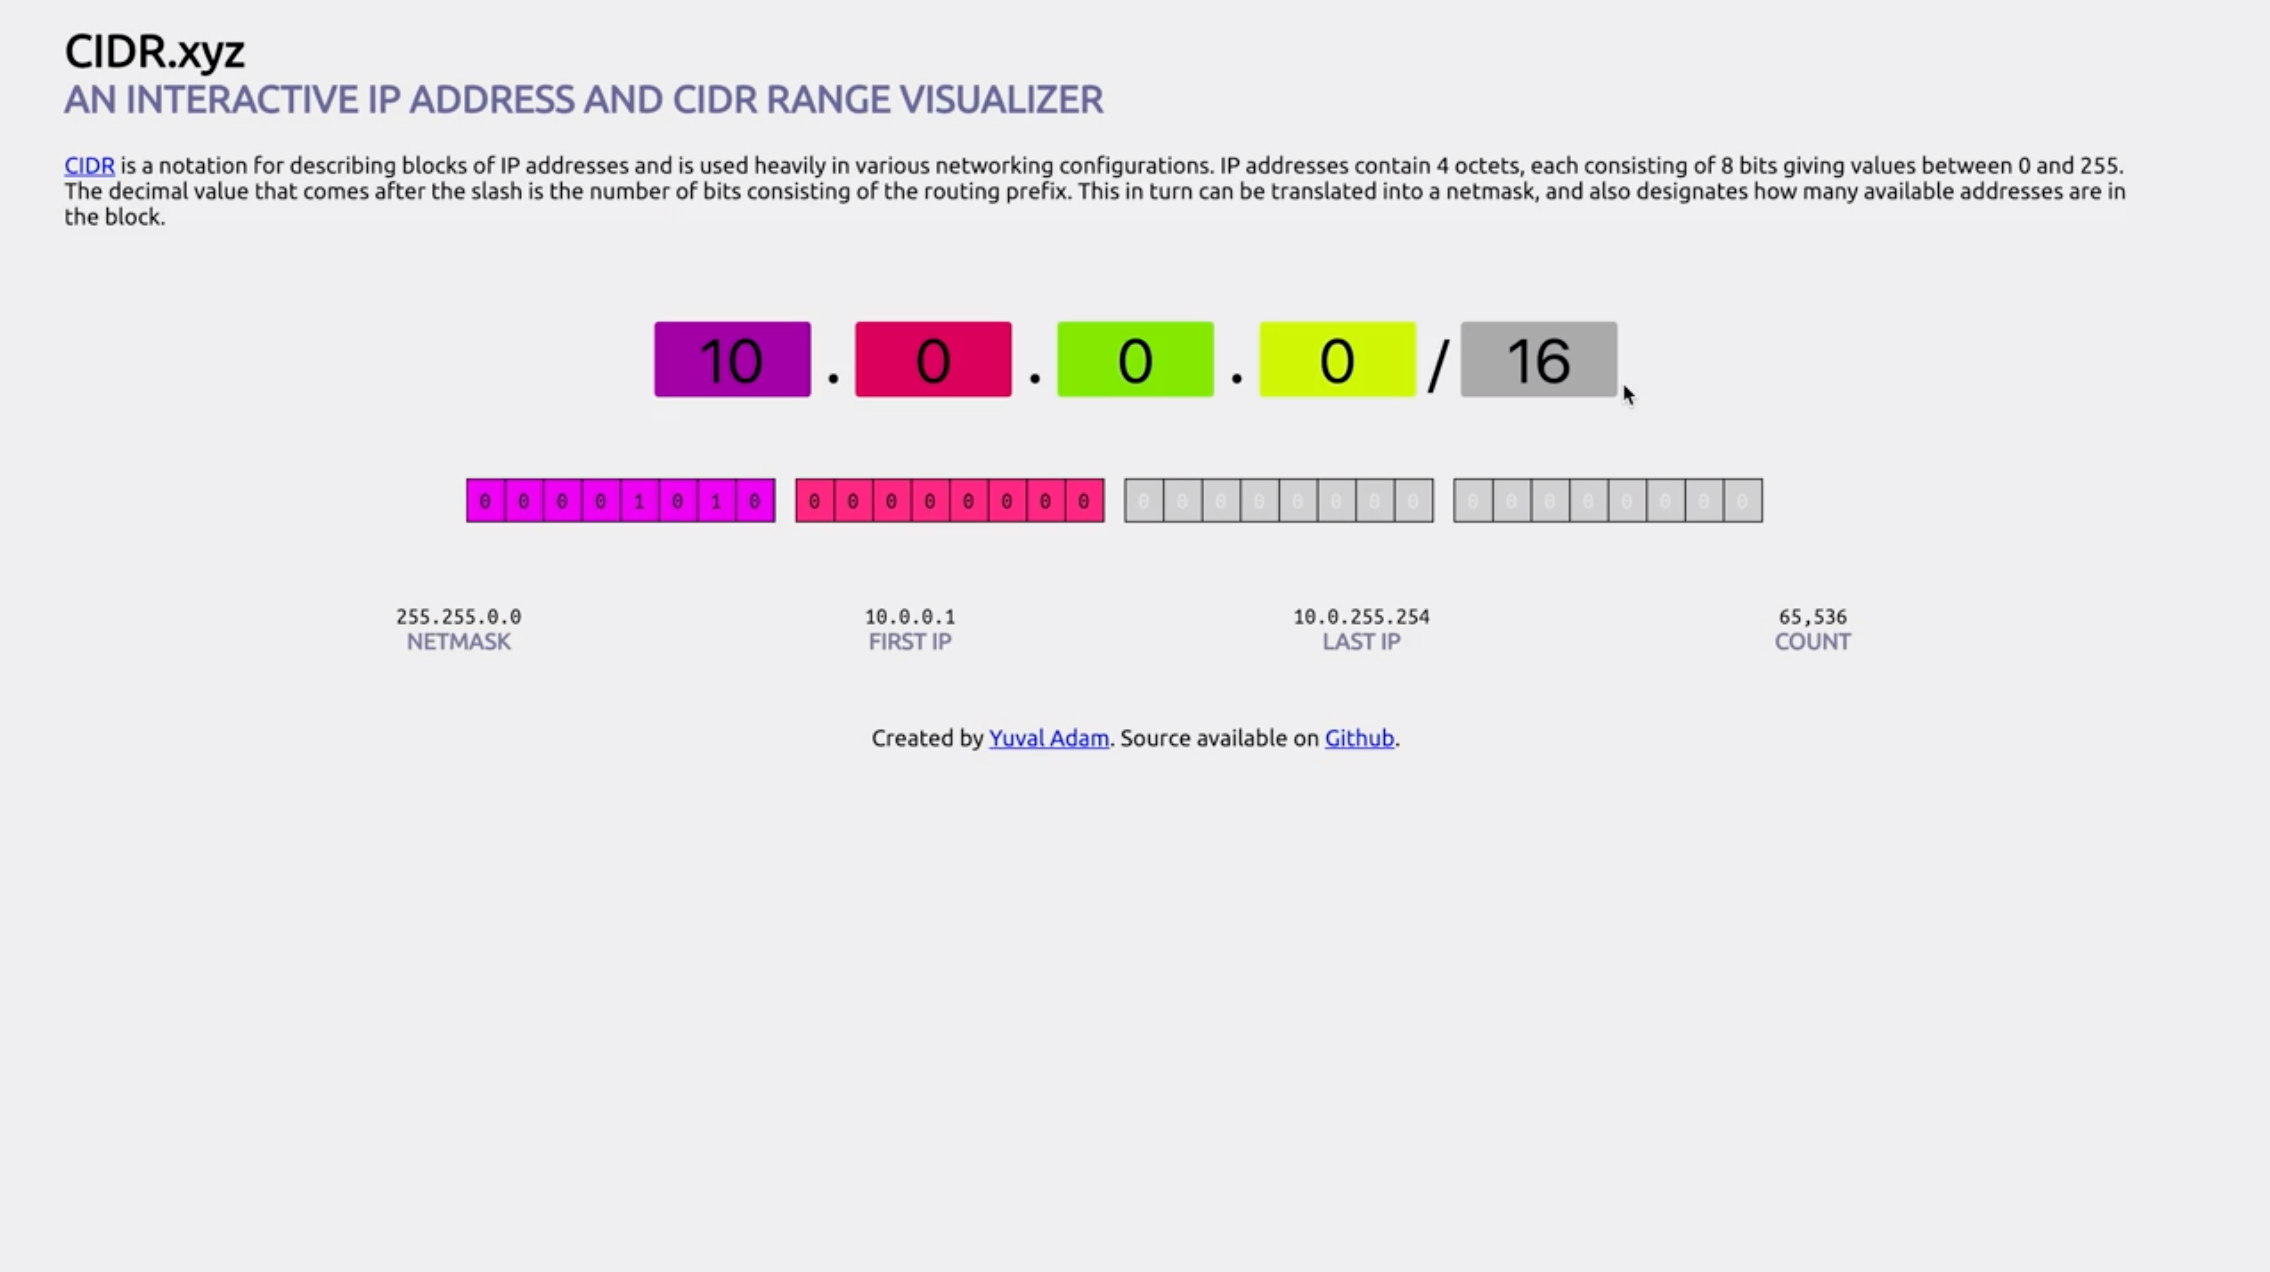
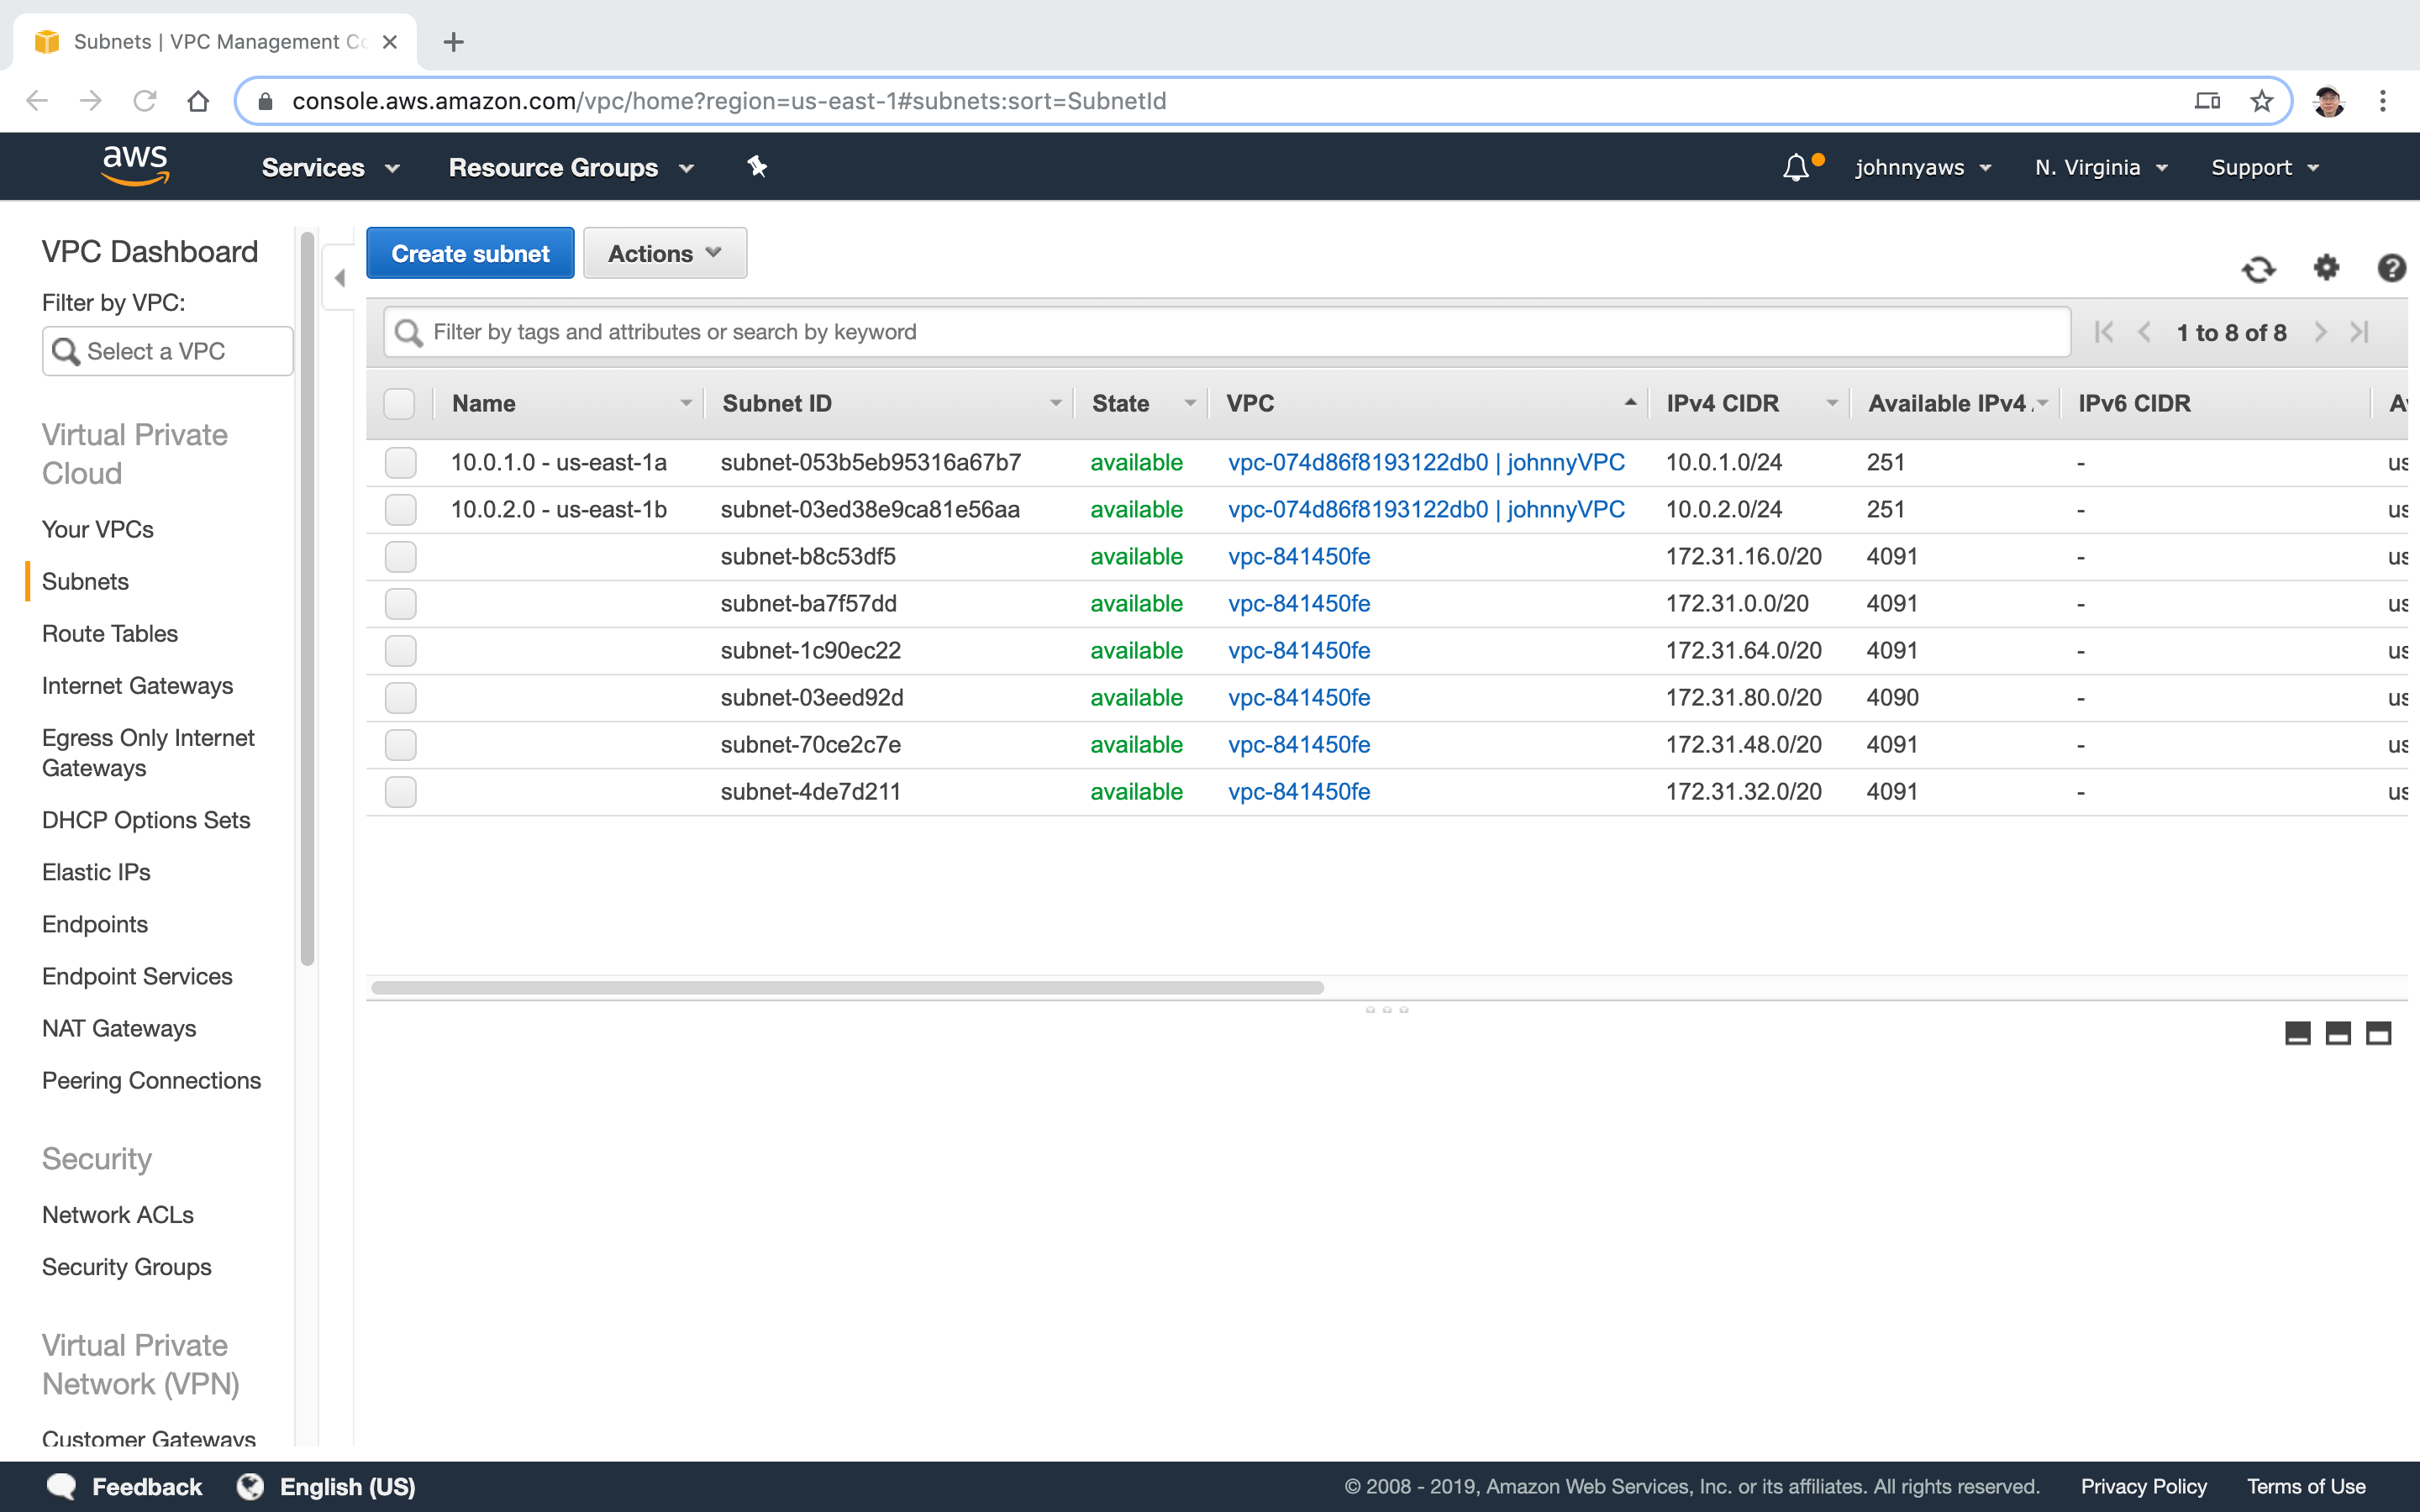 You see the “Available IPv4” is 251(total should be 256, CIDR.xyz), 5 ip addresses are reserved, see VPCs and Subnets.
- 10.0.0.0: Network address.
- 10.0.0.1: Reserved by AWS for the VPC router.
- 10.0.0.2: Reserved by AWS. The IP address of the DNS server is always the base of the VPC network range plus two; however, we also reserve the base of each subnet range plus two. For VPCs with multiple CIDR blocks, the IP address of the DNS server is located in the primary CIDR. For more information, see Amazon DNS Server.
- 10.0.0.3: Reserved by AWS for future use.
- 10.0.0.255: Network broadcast address. We do not support broadcast in a VPC, therefore we reserve this address.
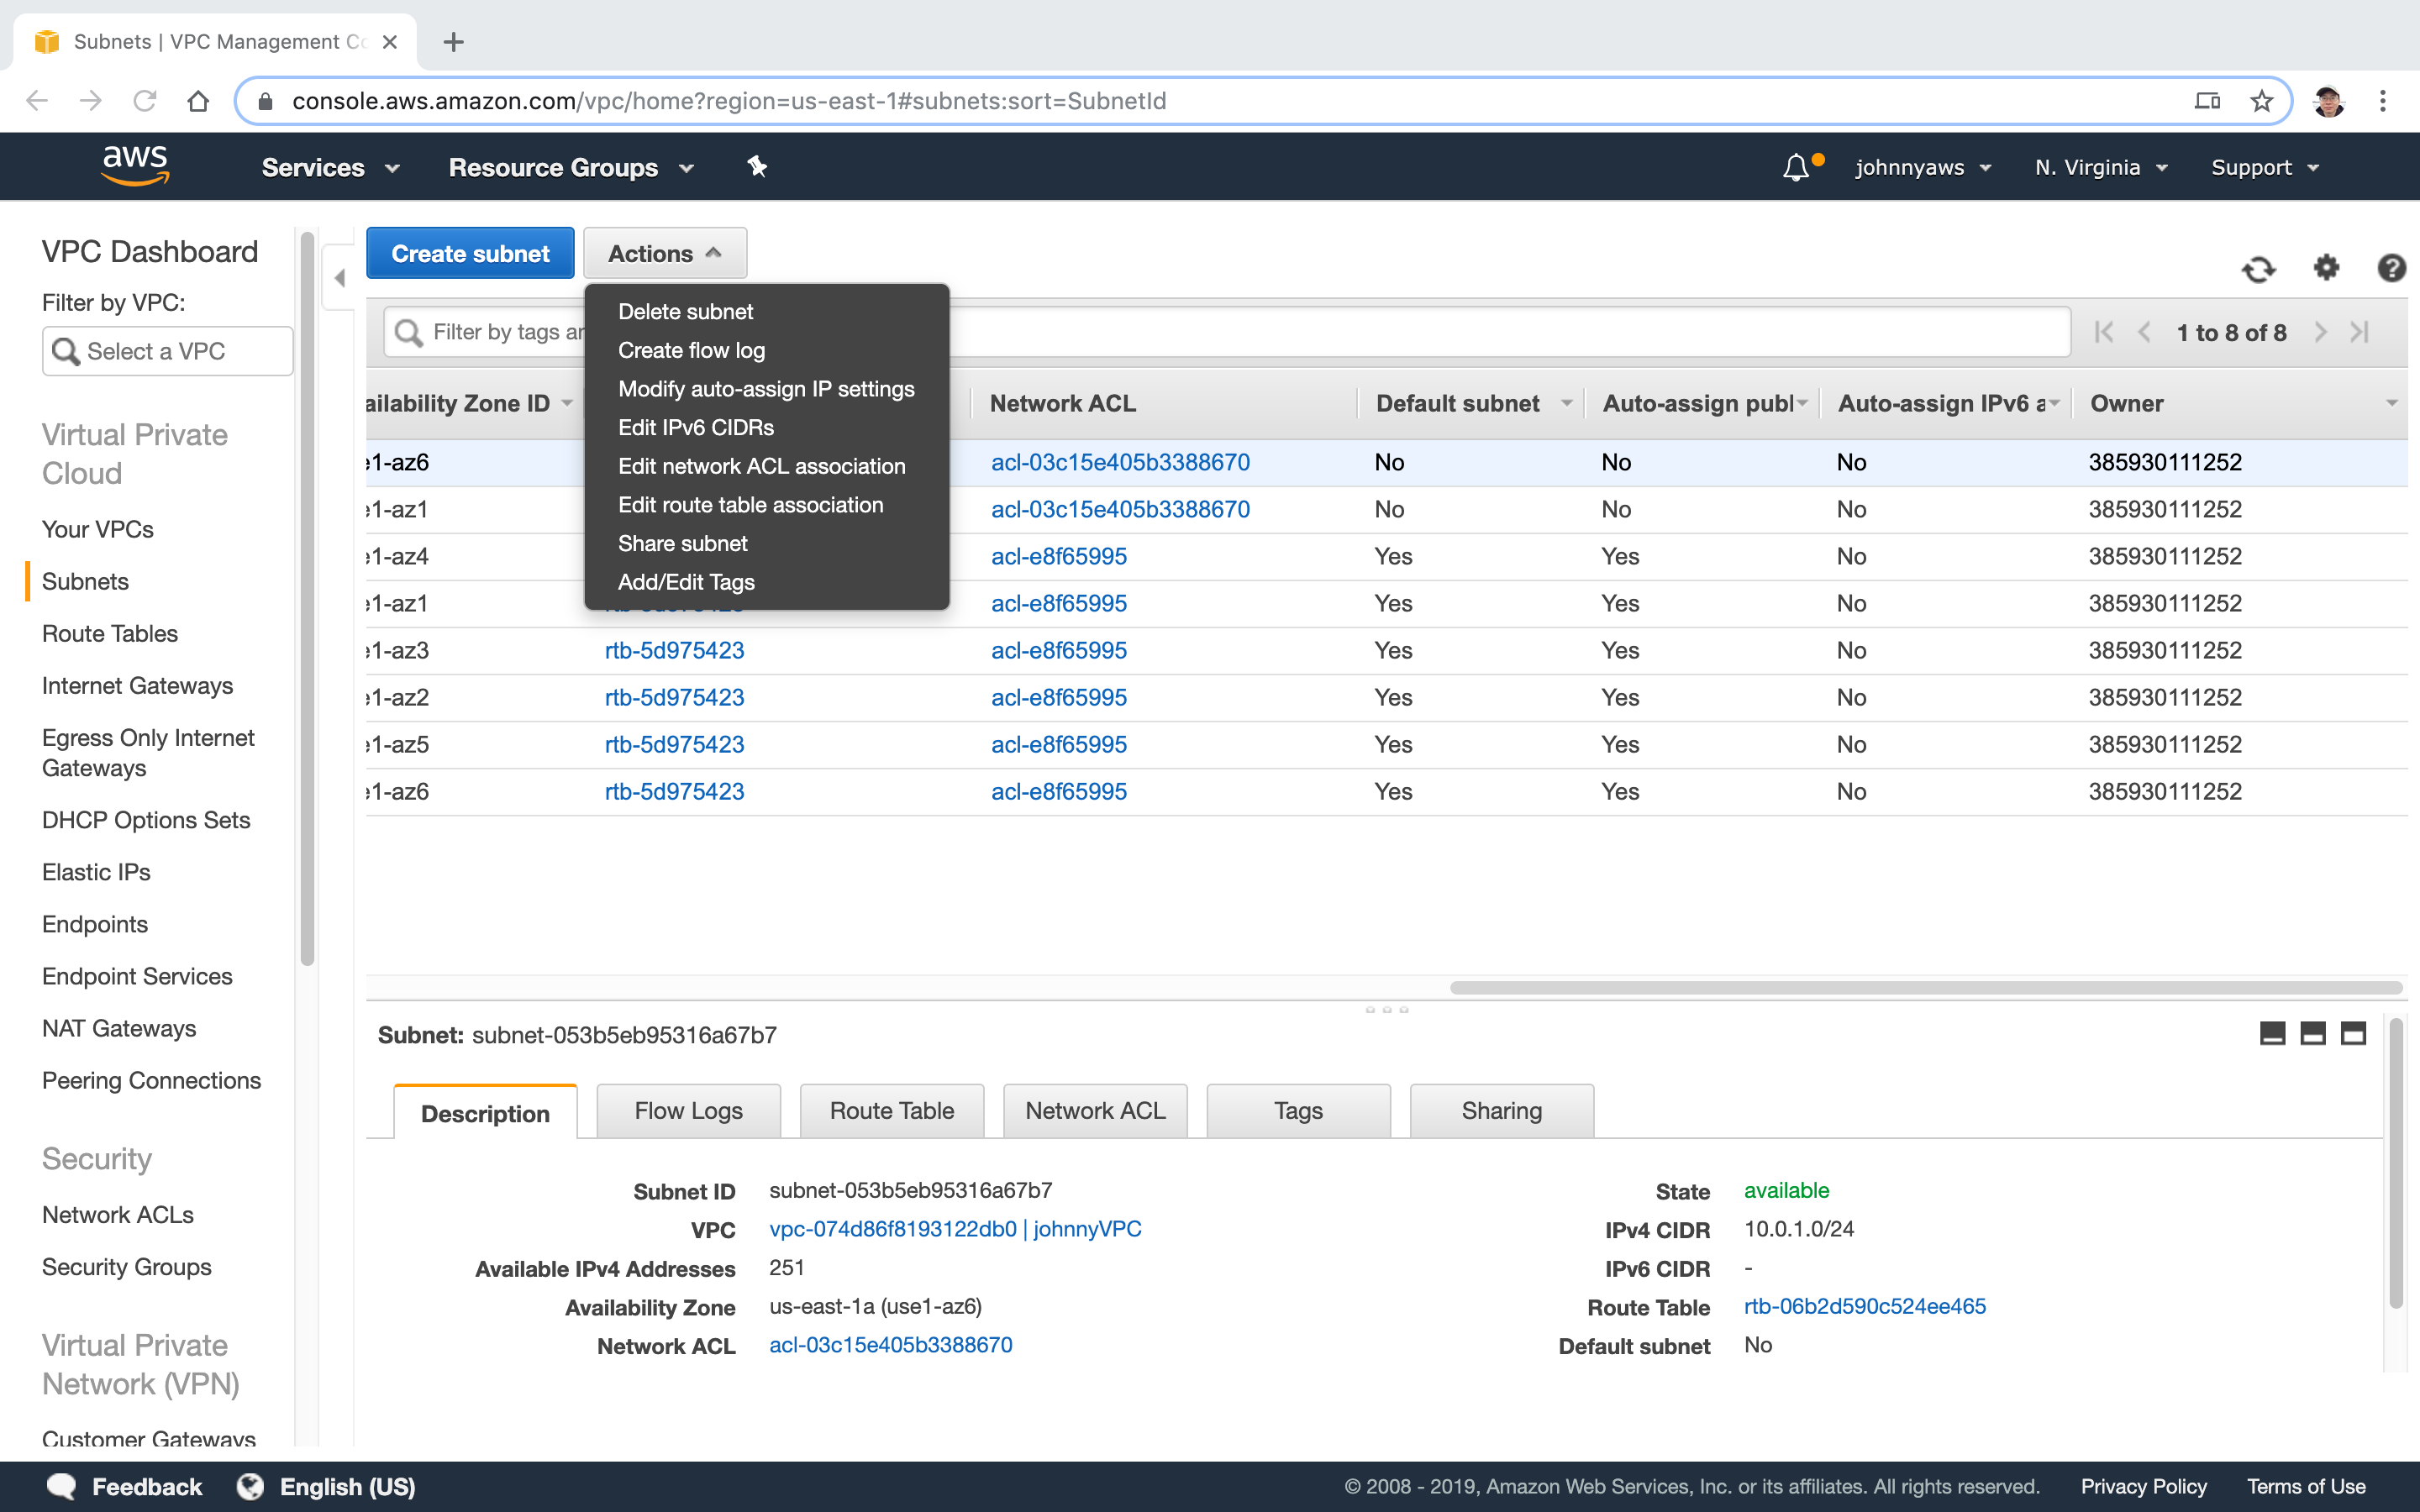
Select the first subnet, click Actions->Modify auto-assign IP settings.
 Enable the option “Enable auto-assign public IPv4 address”, Save.
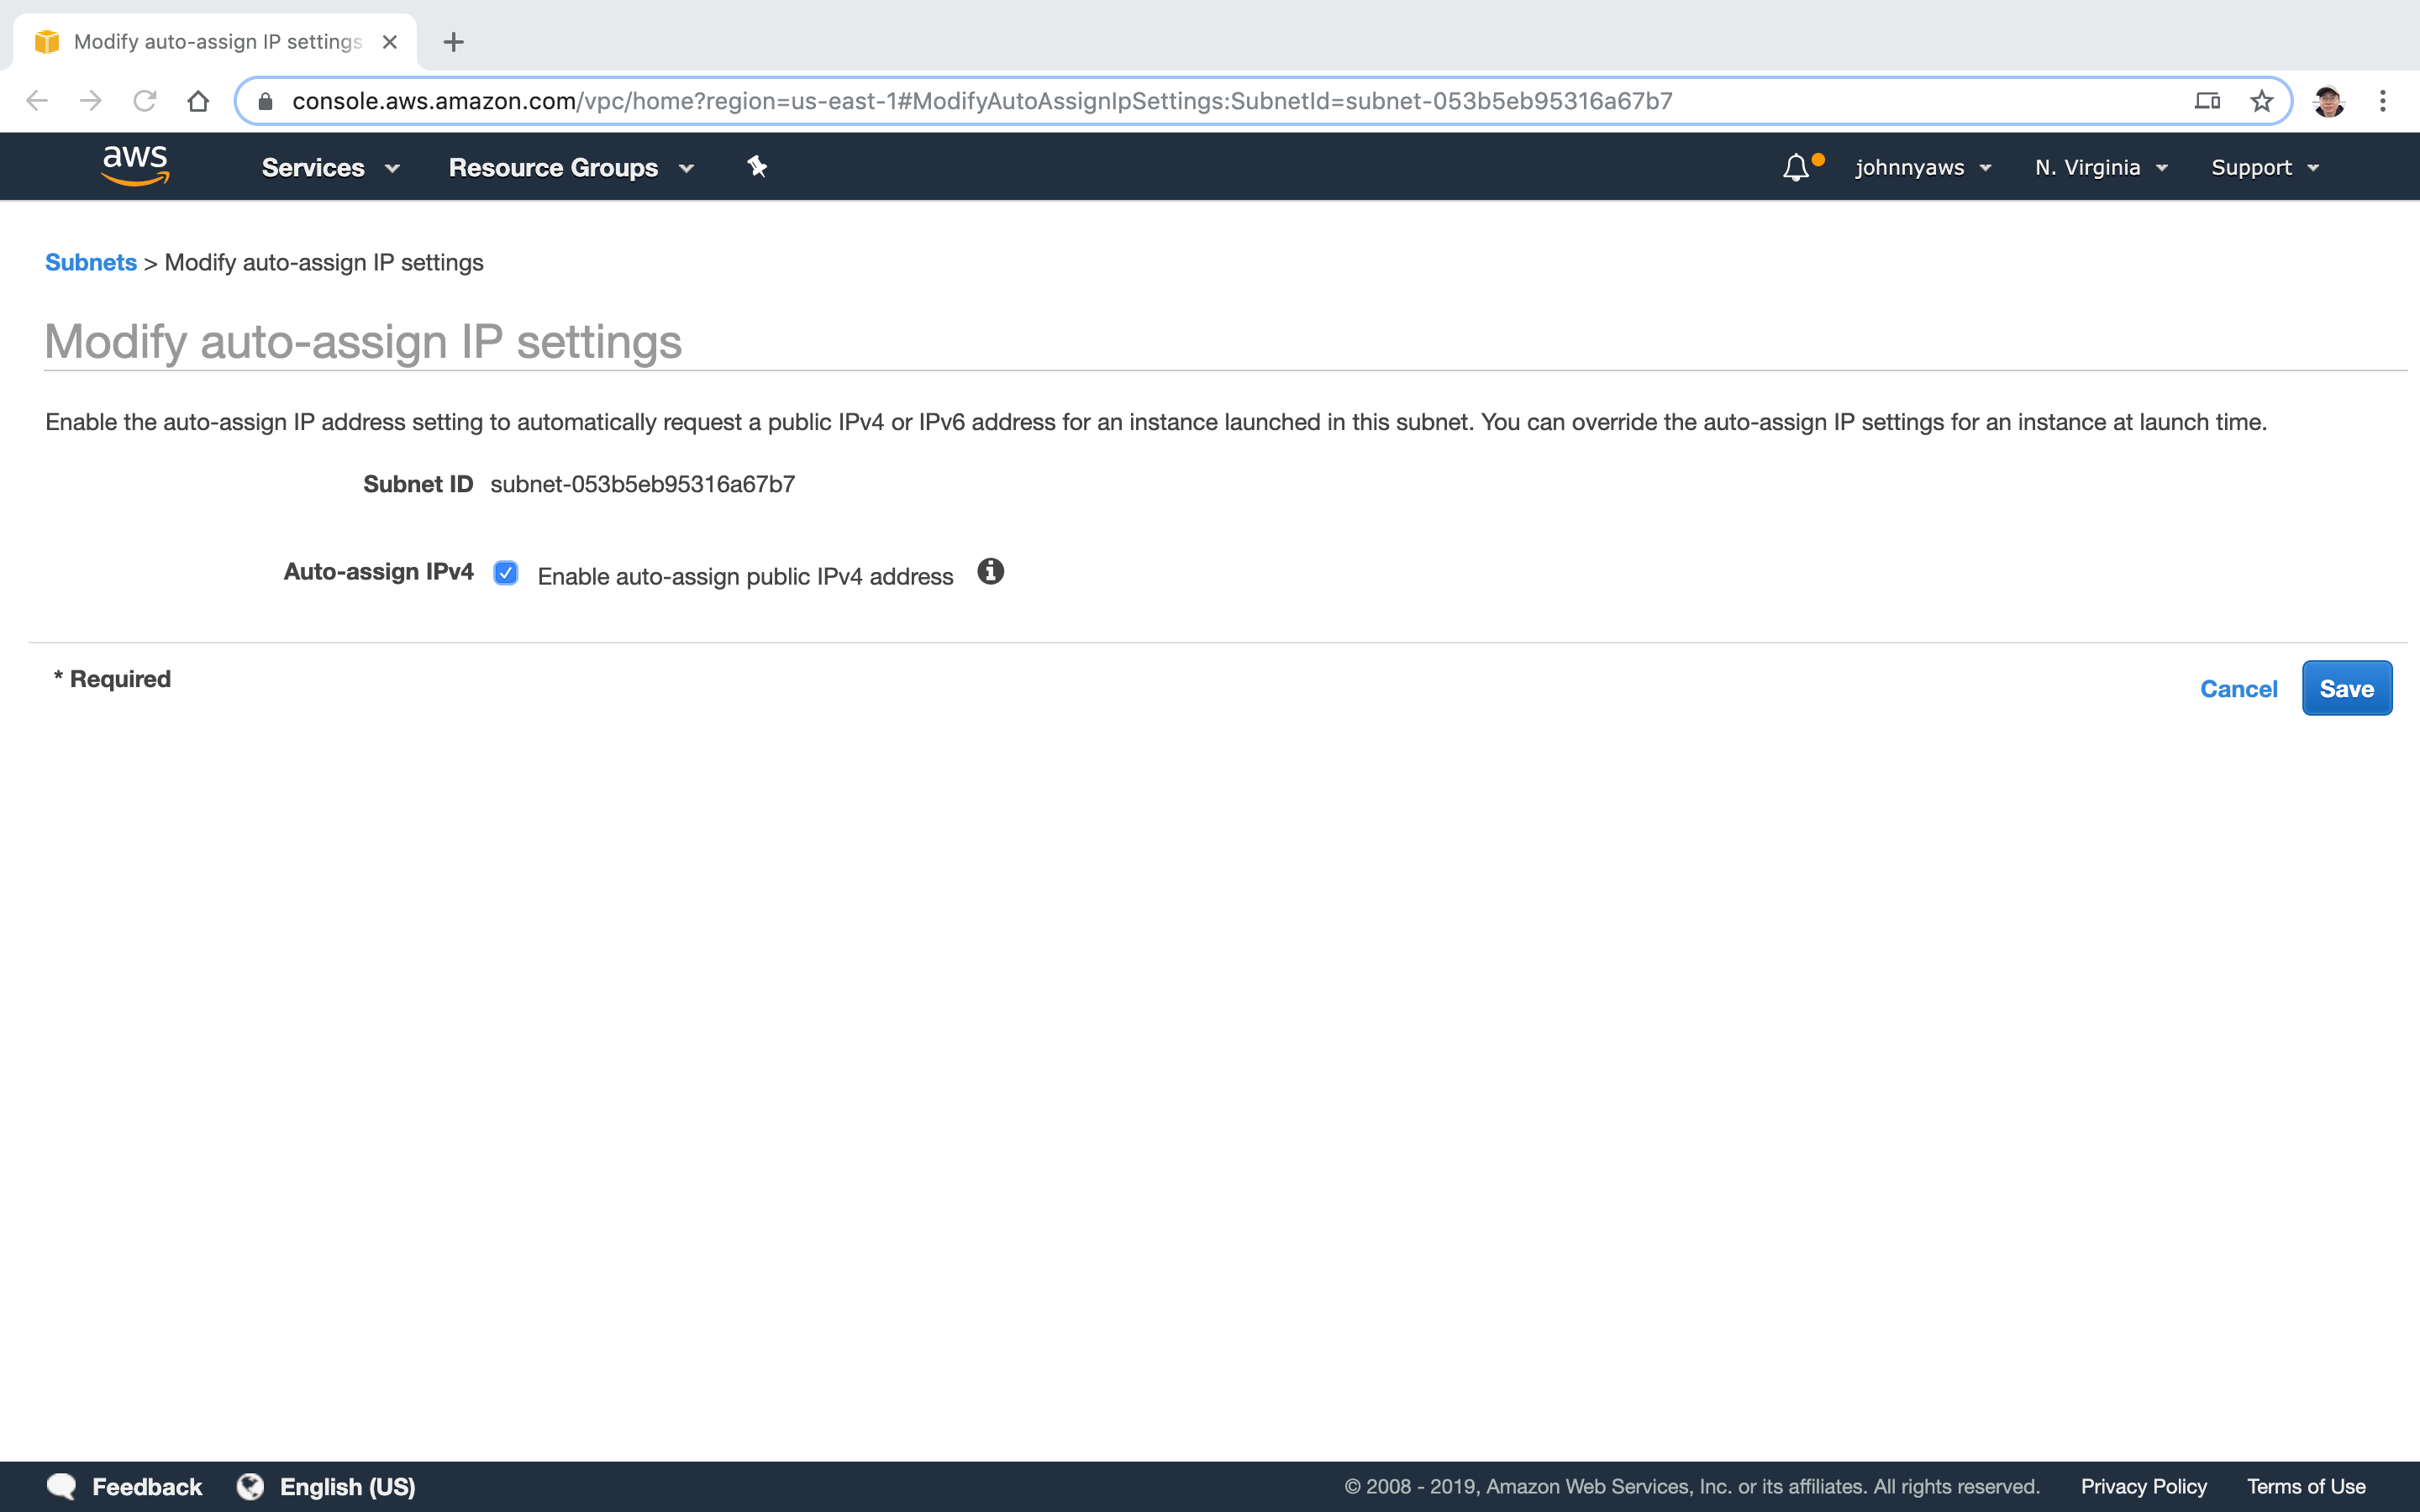 Now, auto public ip address is enabled to the subnet 10.0.1.0.
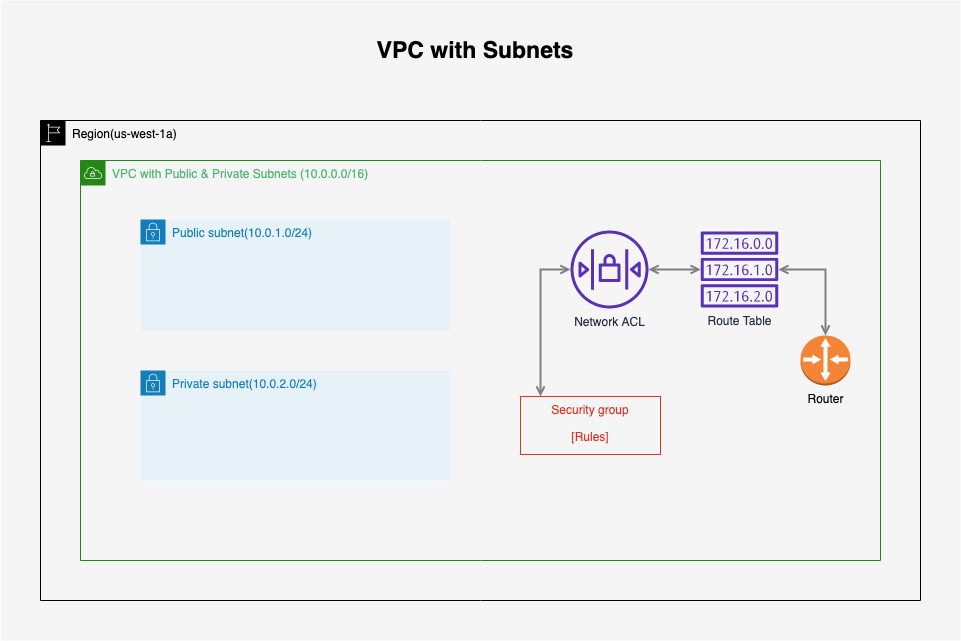
 Now, our VPC looks like this.
2.2 Create Internet Gateway
Go to Services->Networking & Content Delivery->VPC, select “Internet Gateways” at the left panel, click “Create internet gateway” button.
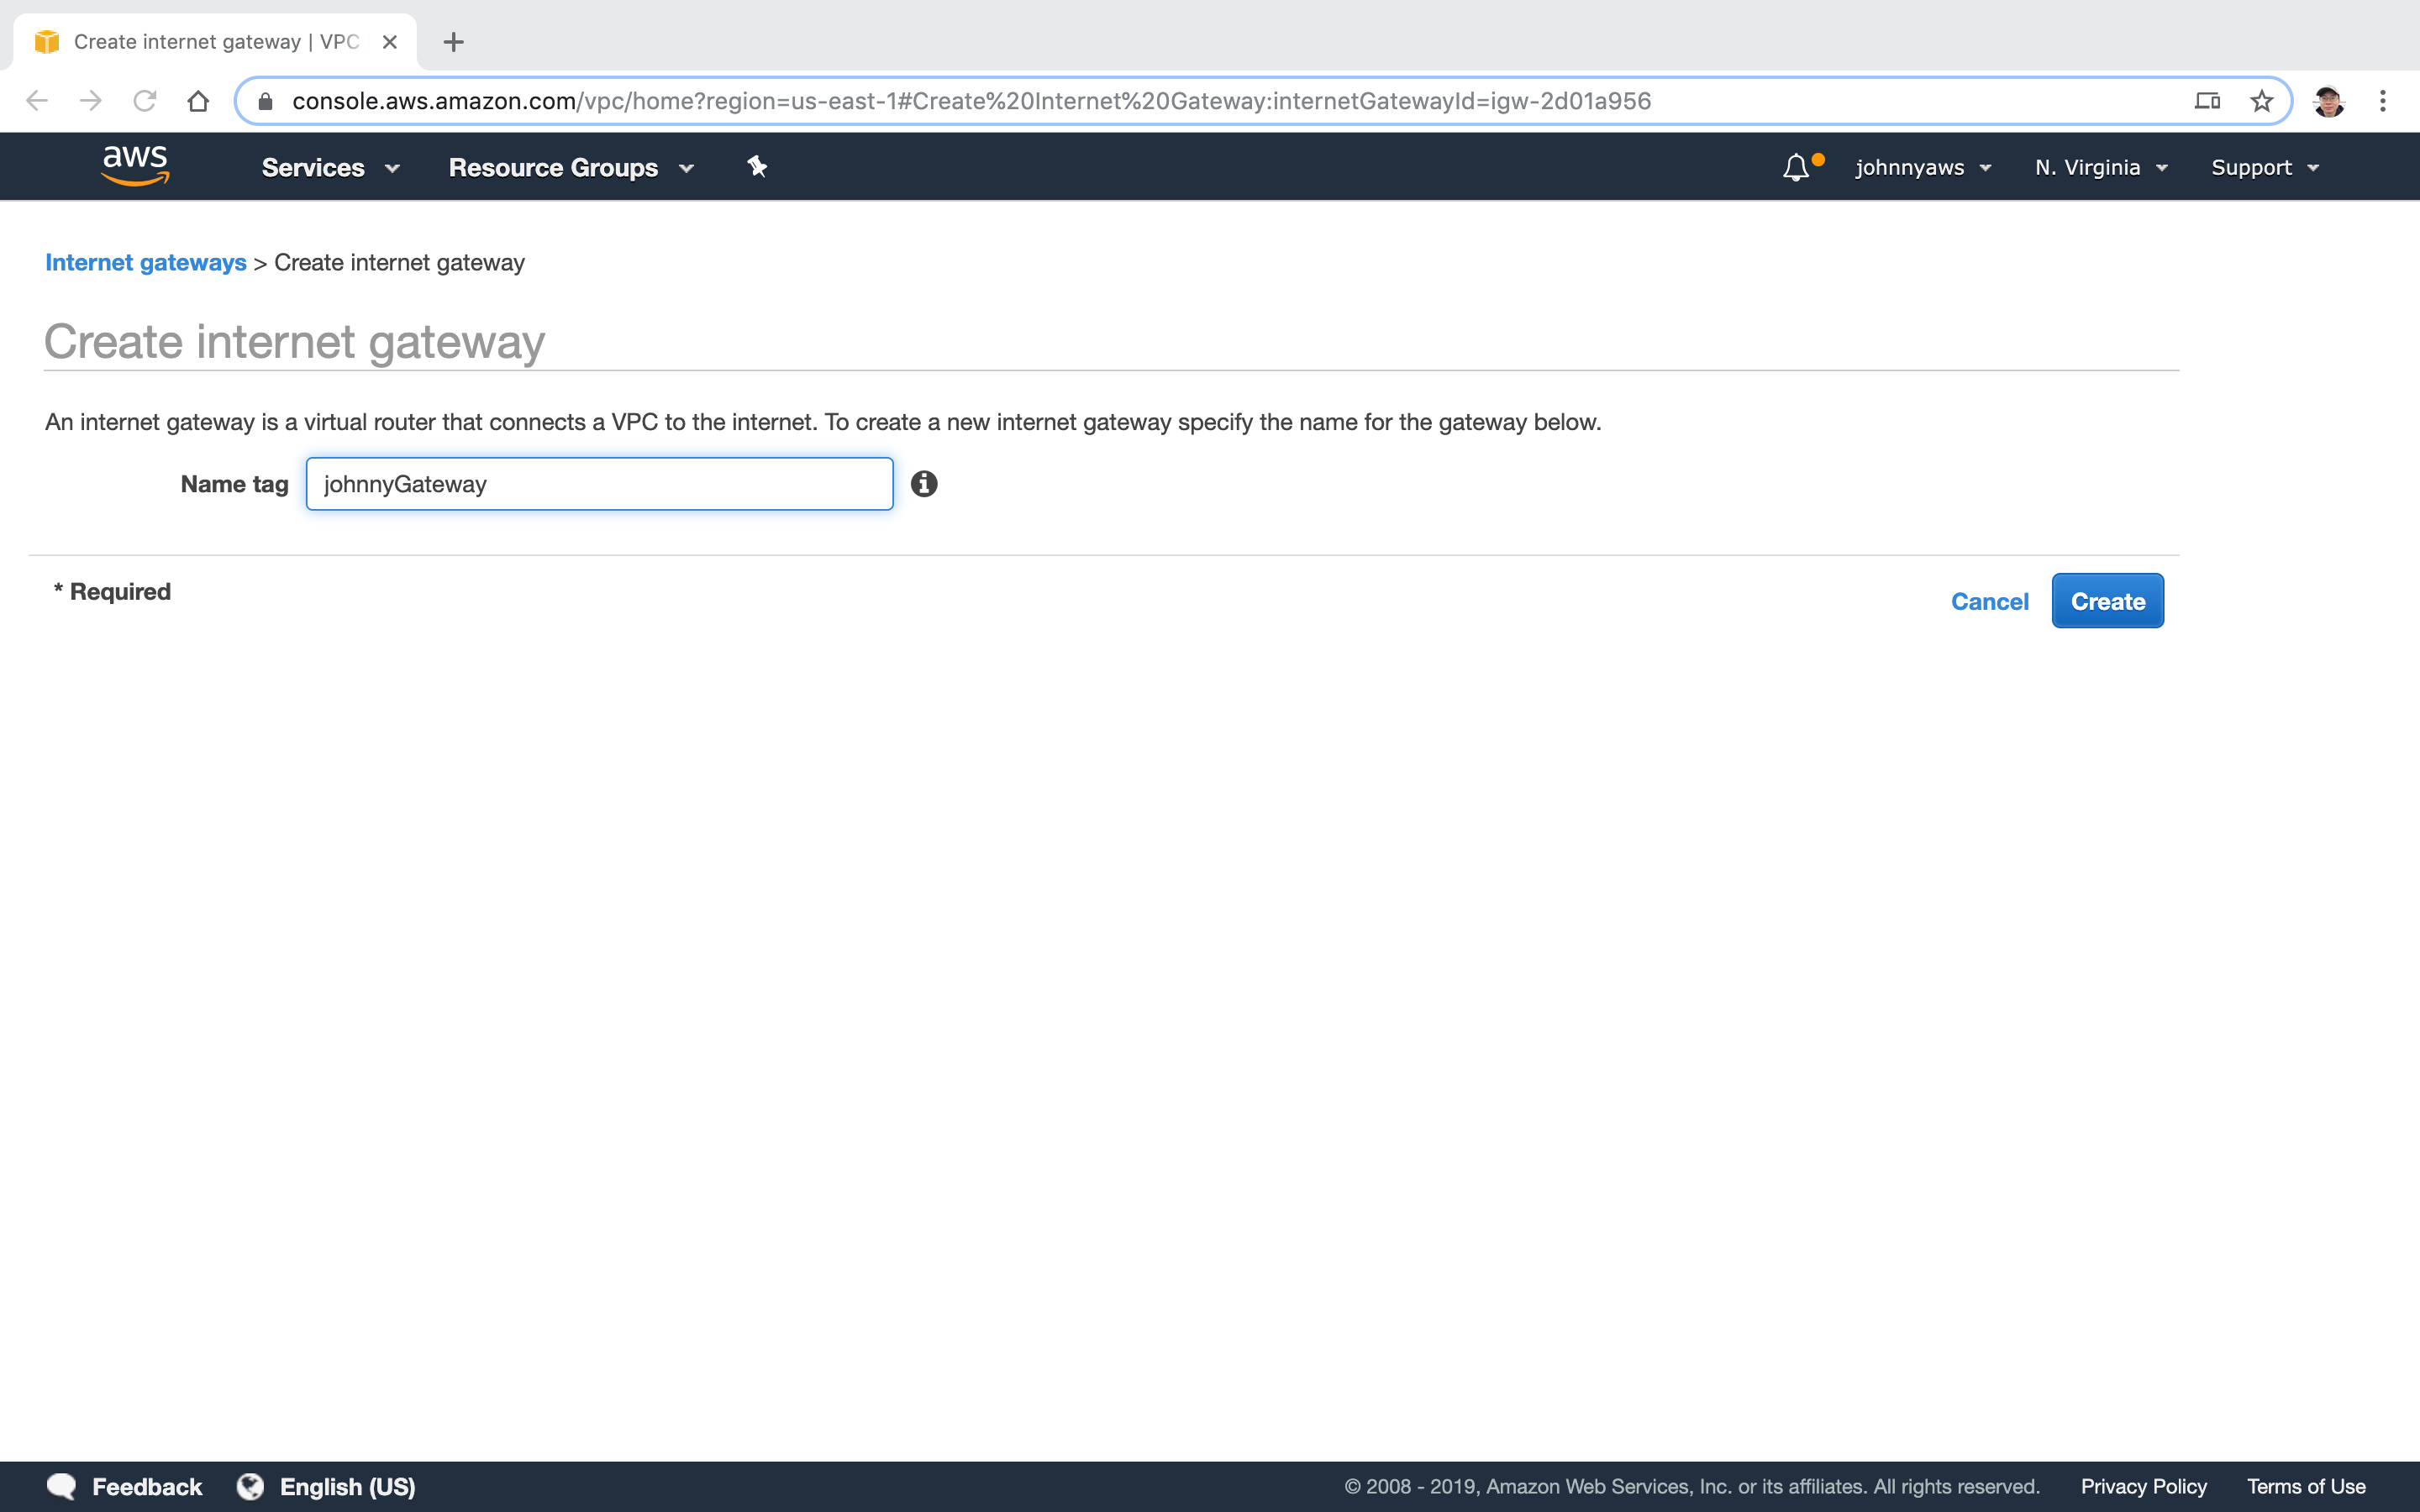
 Provide the name, Create.
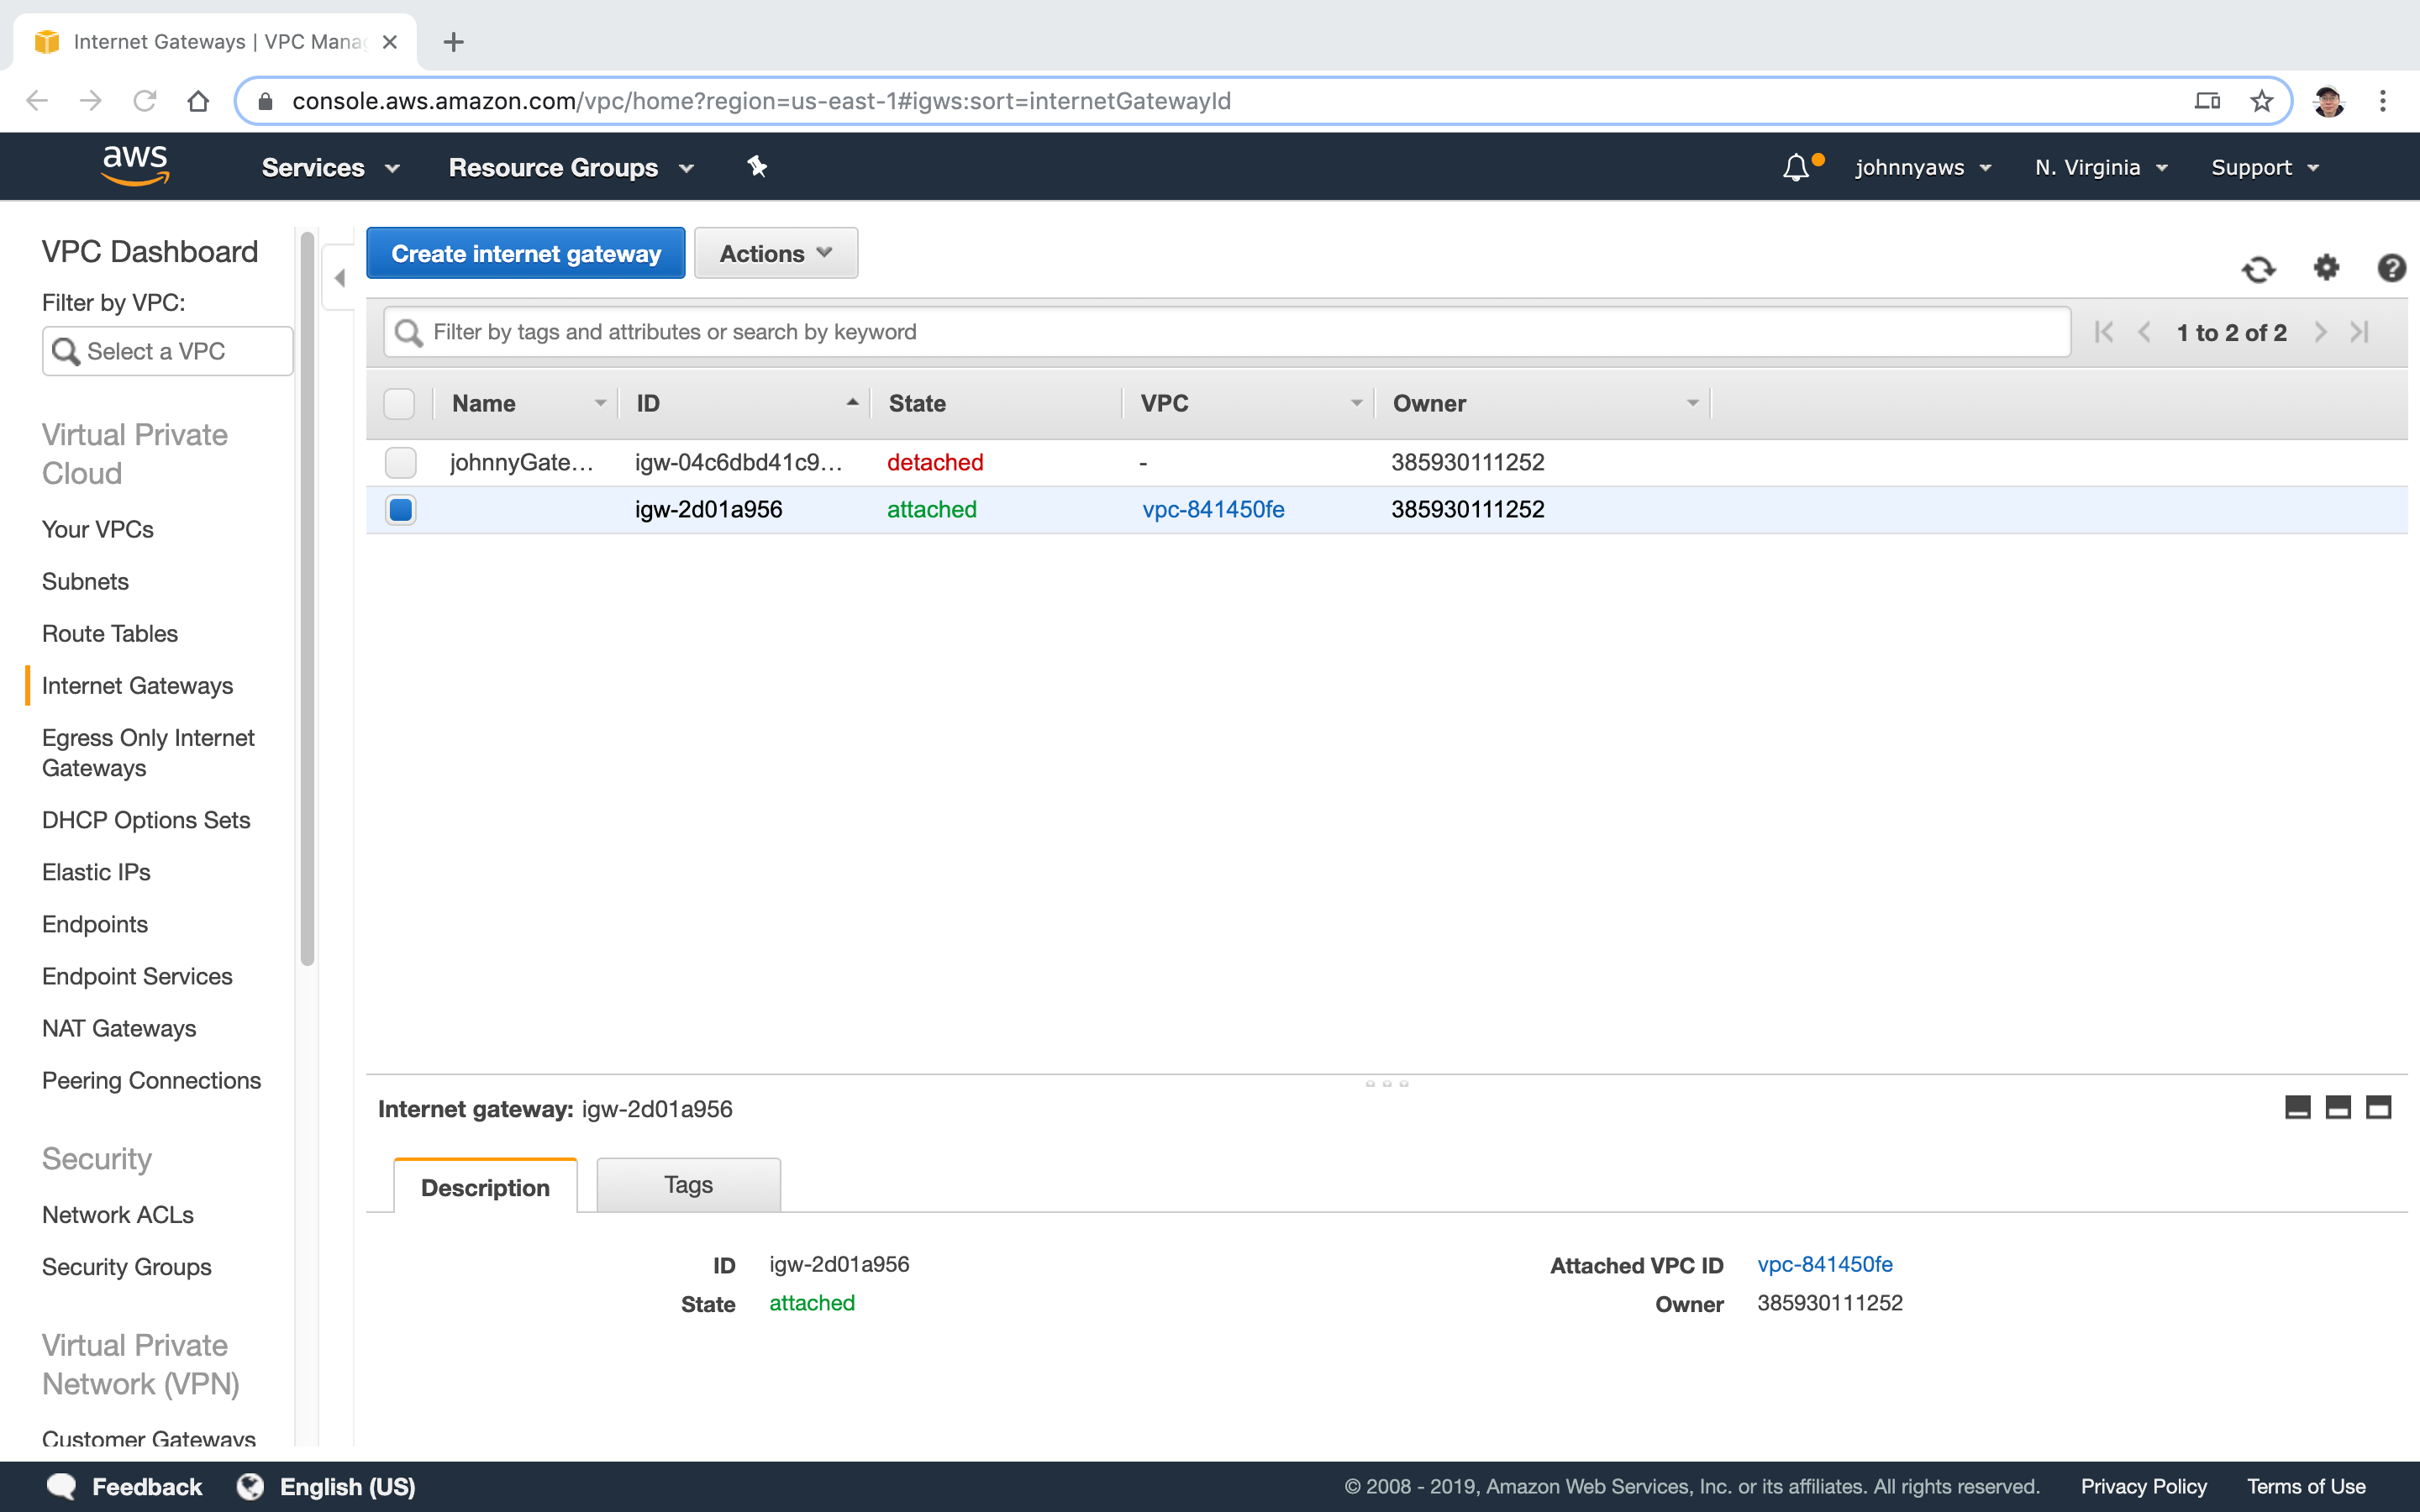
 It is created and its state is detached.
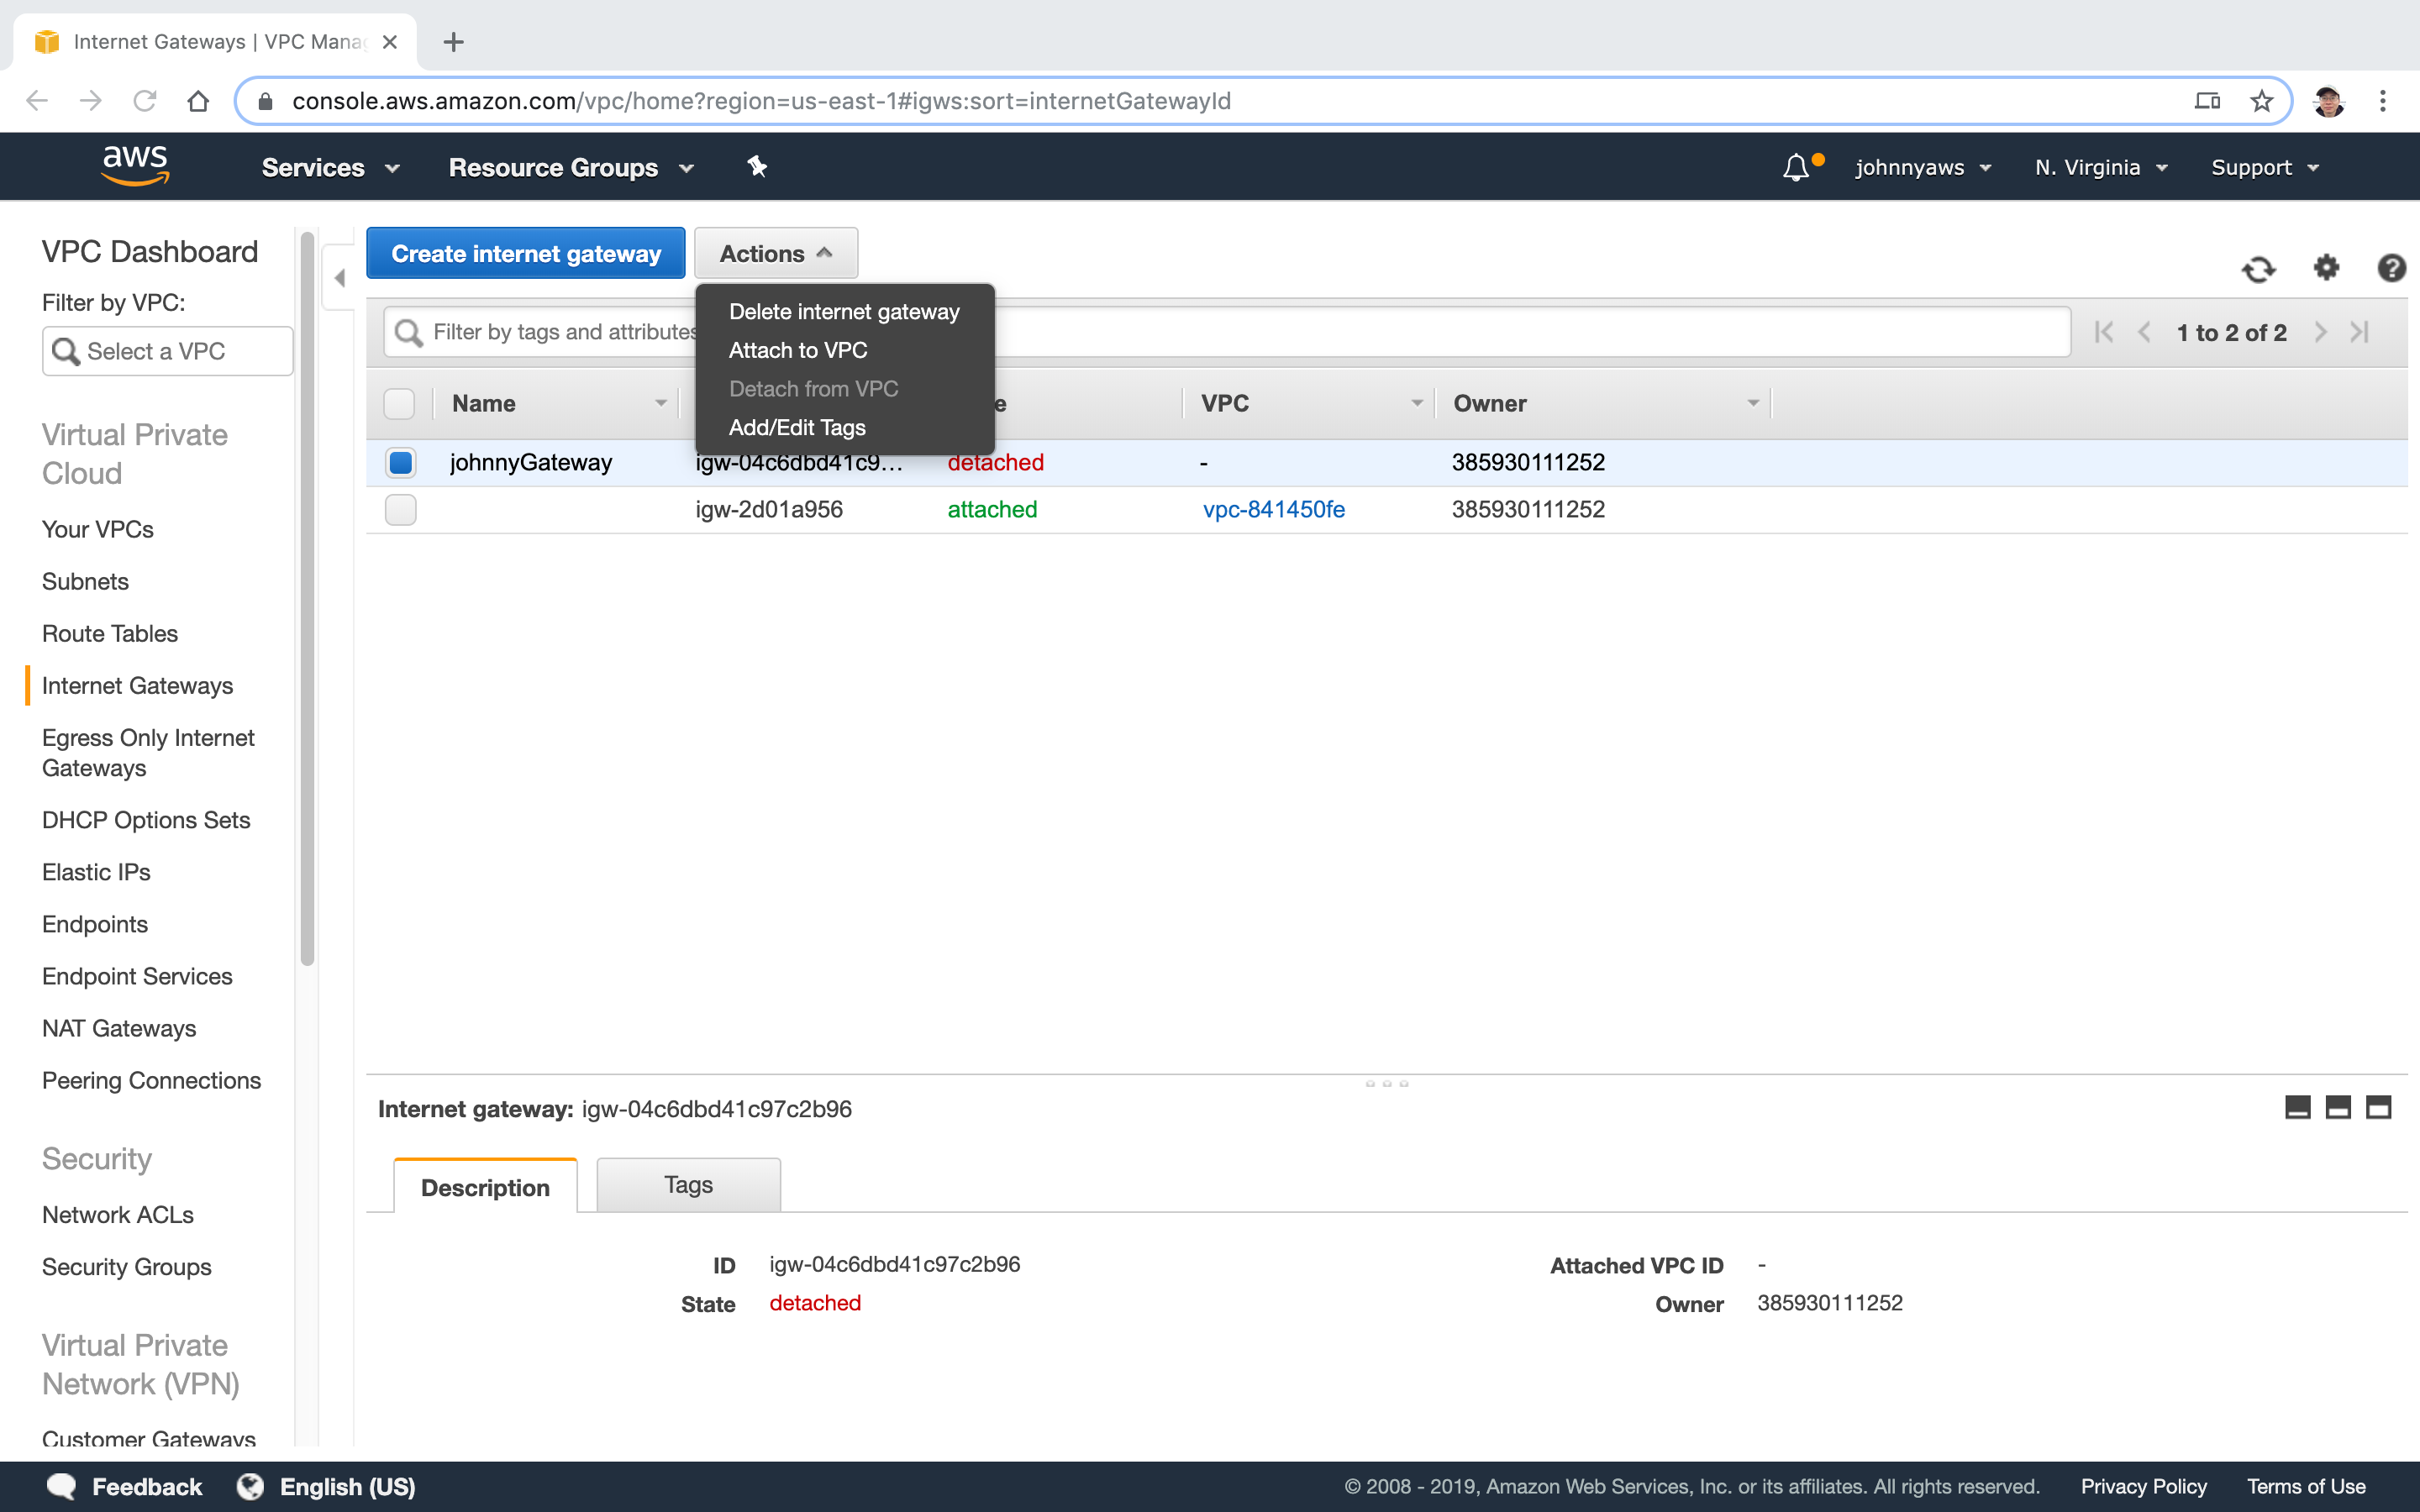
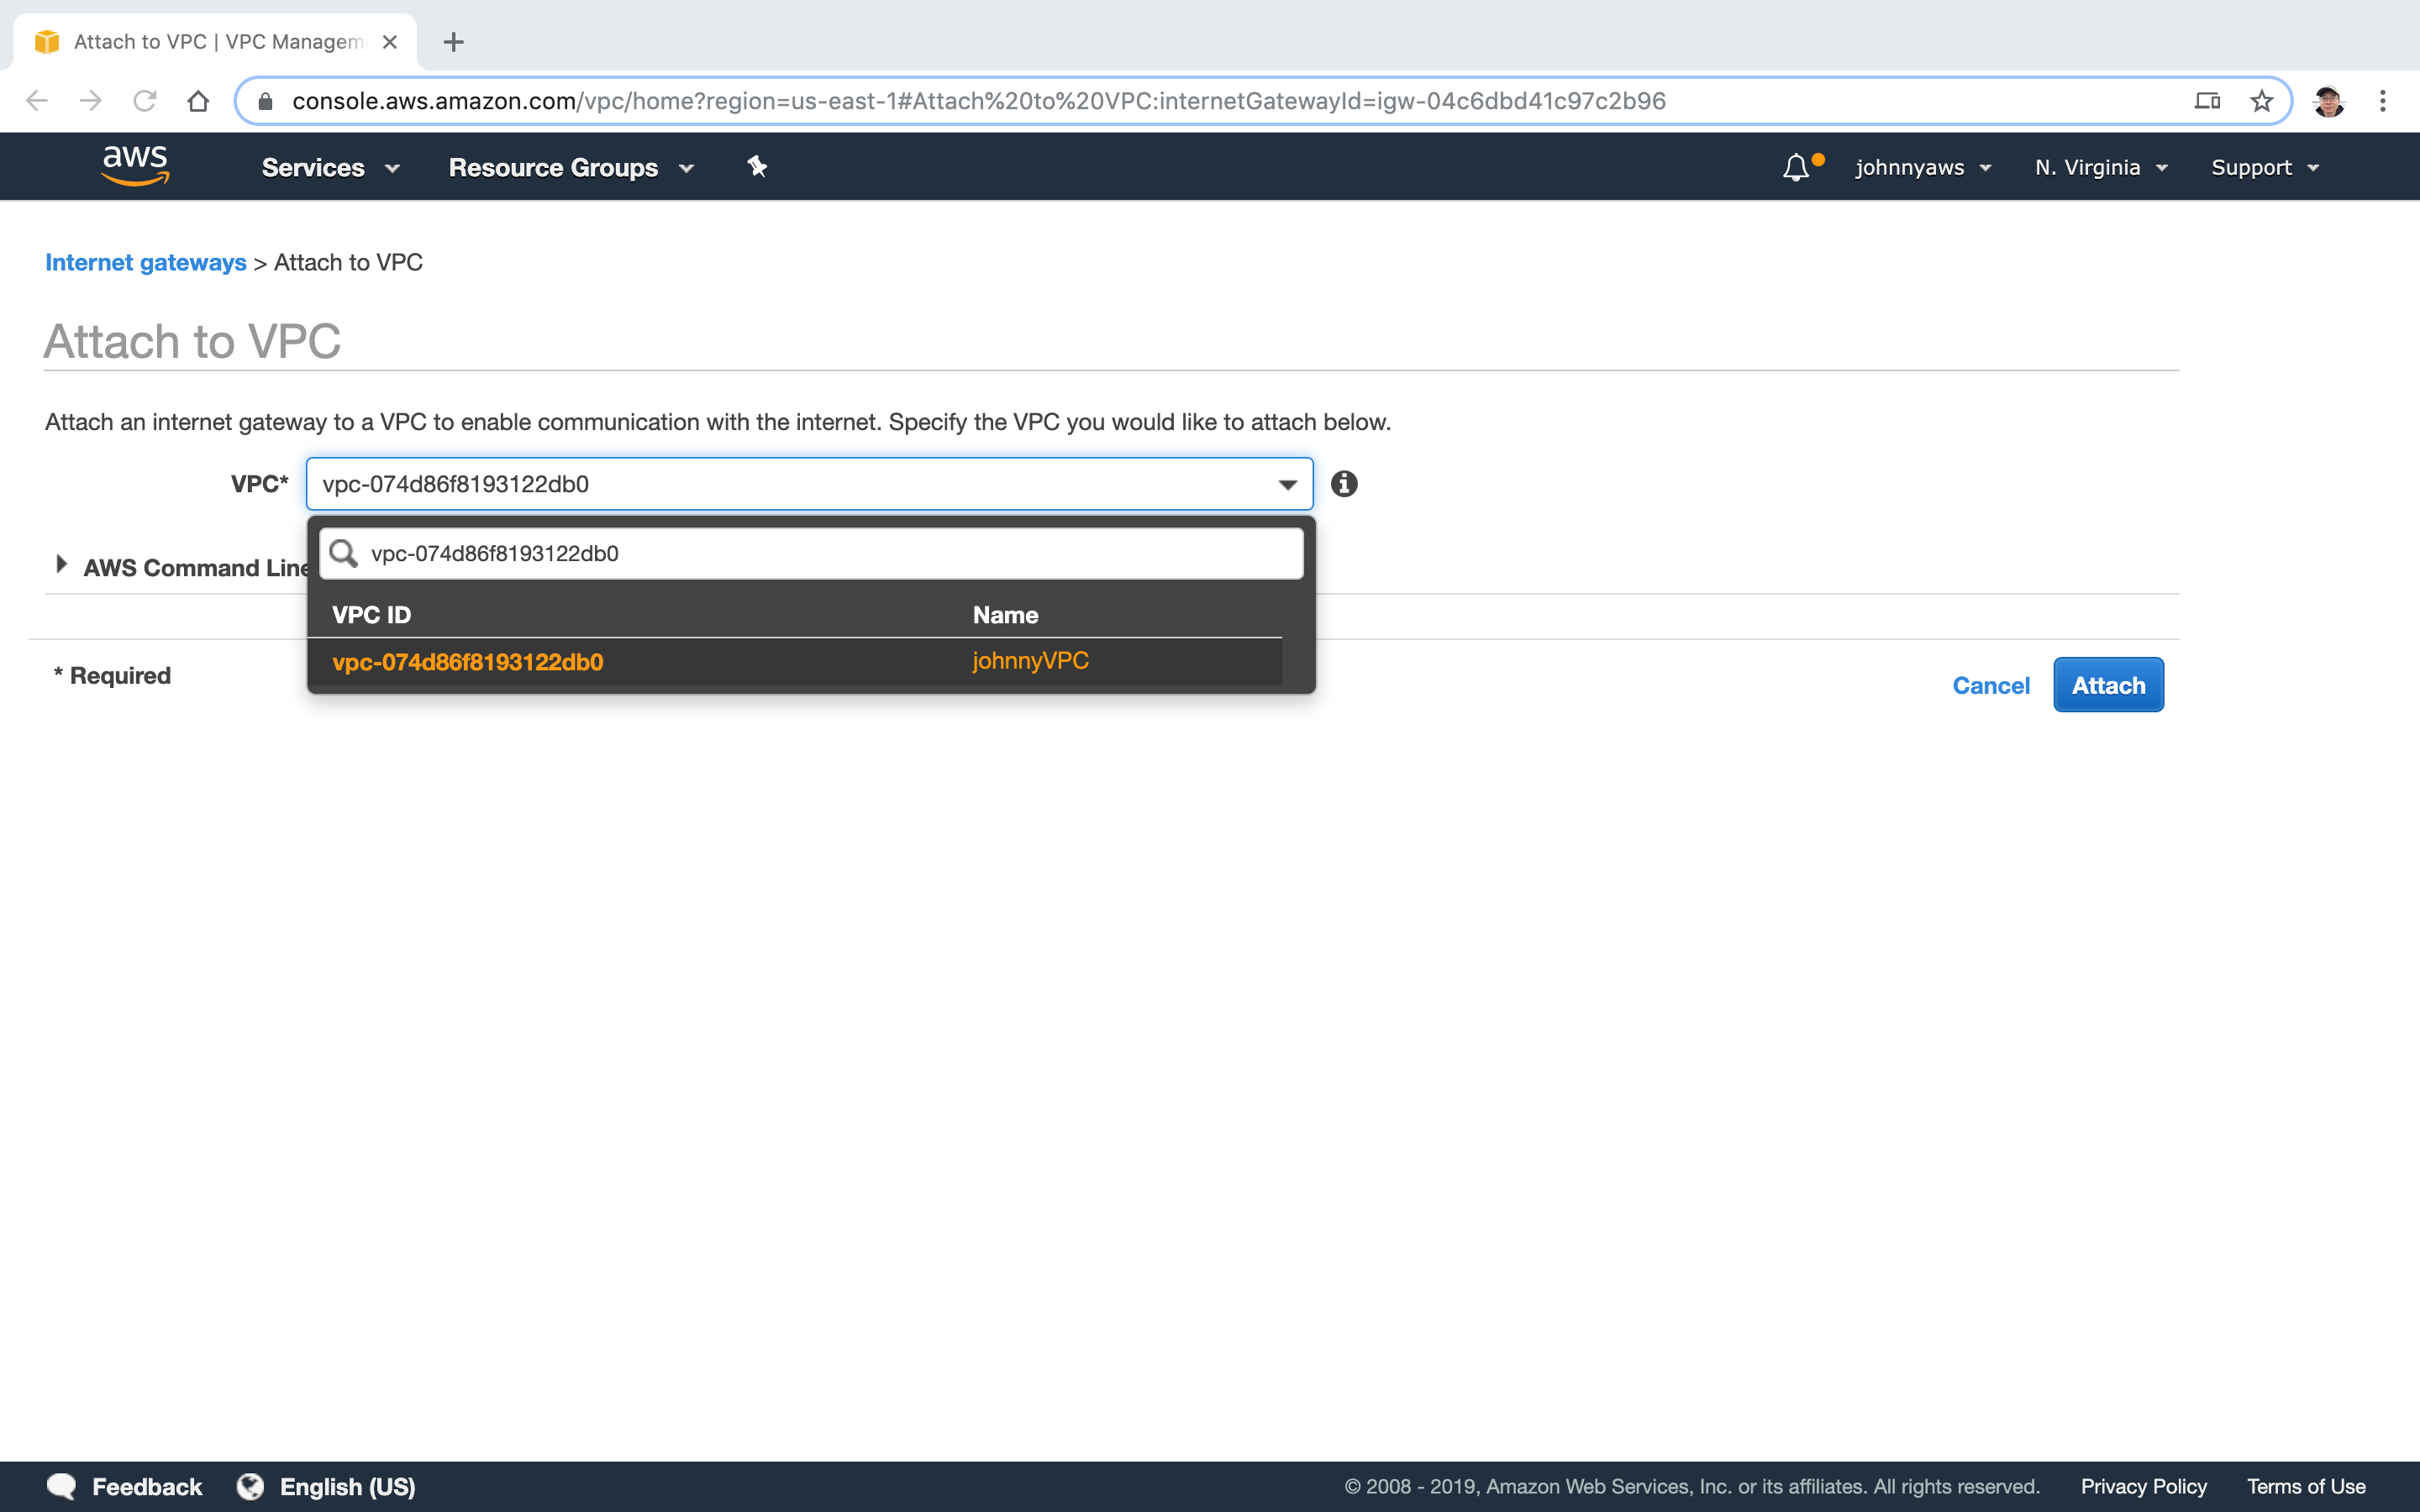
 Select the new gateway, Actions->Attach to VPC.
 Choose the VPC we just created before.
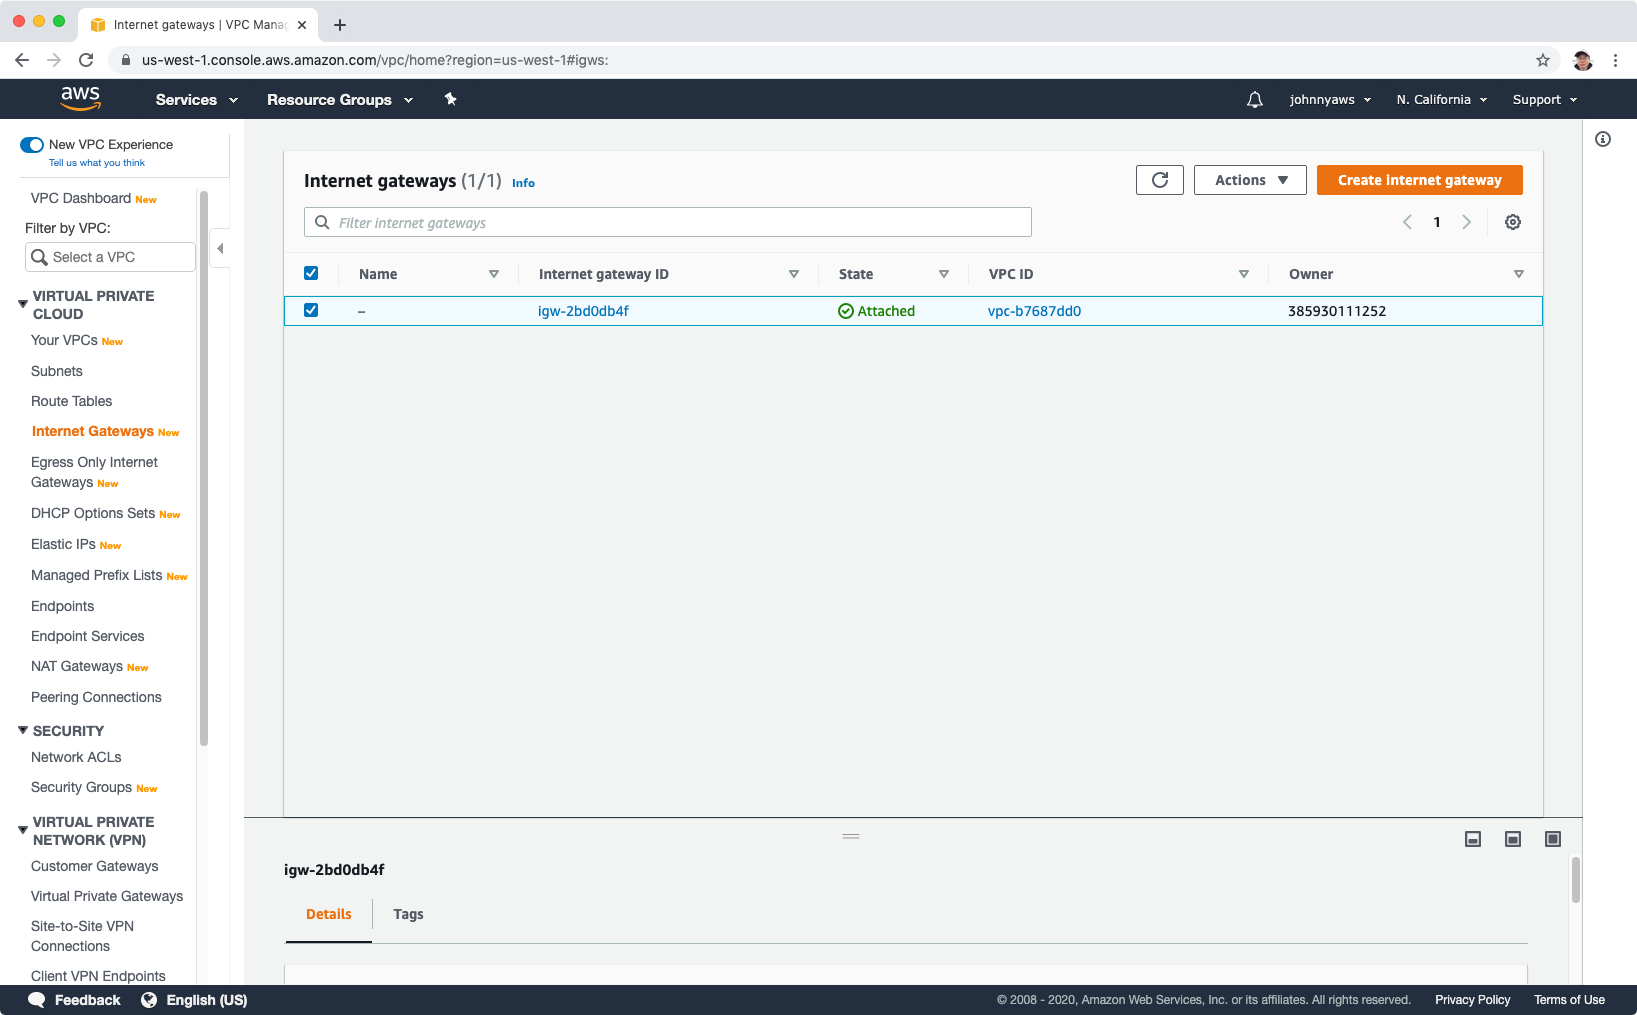
 Now, it is attached.
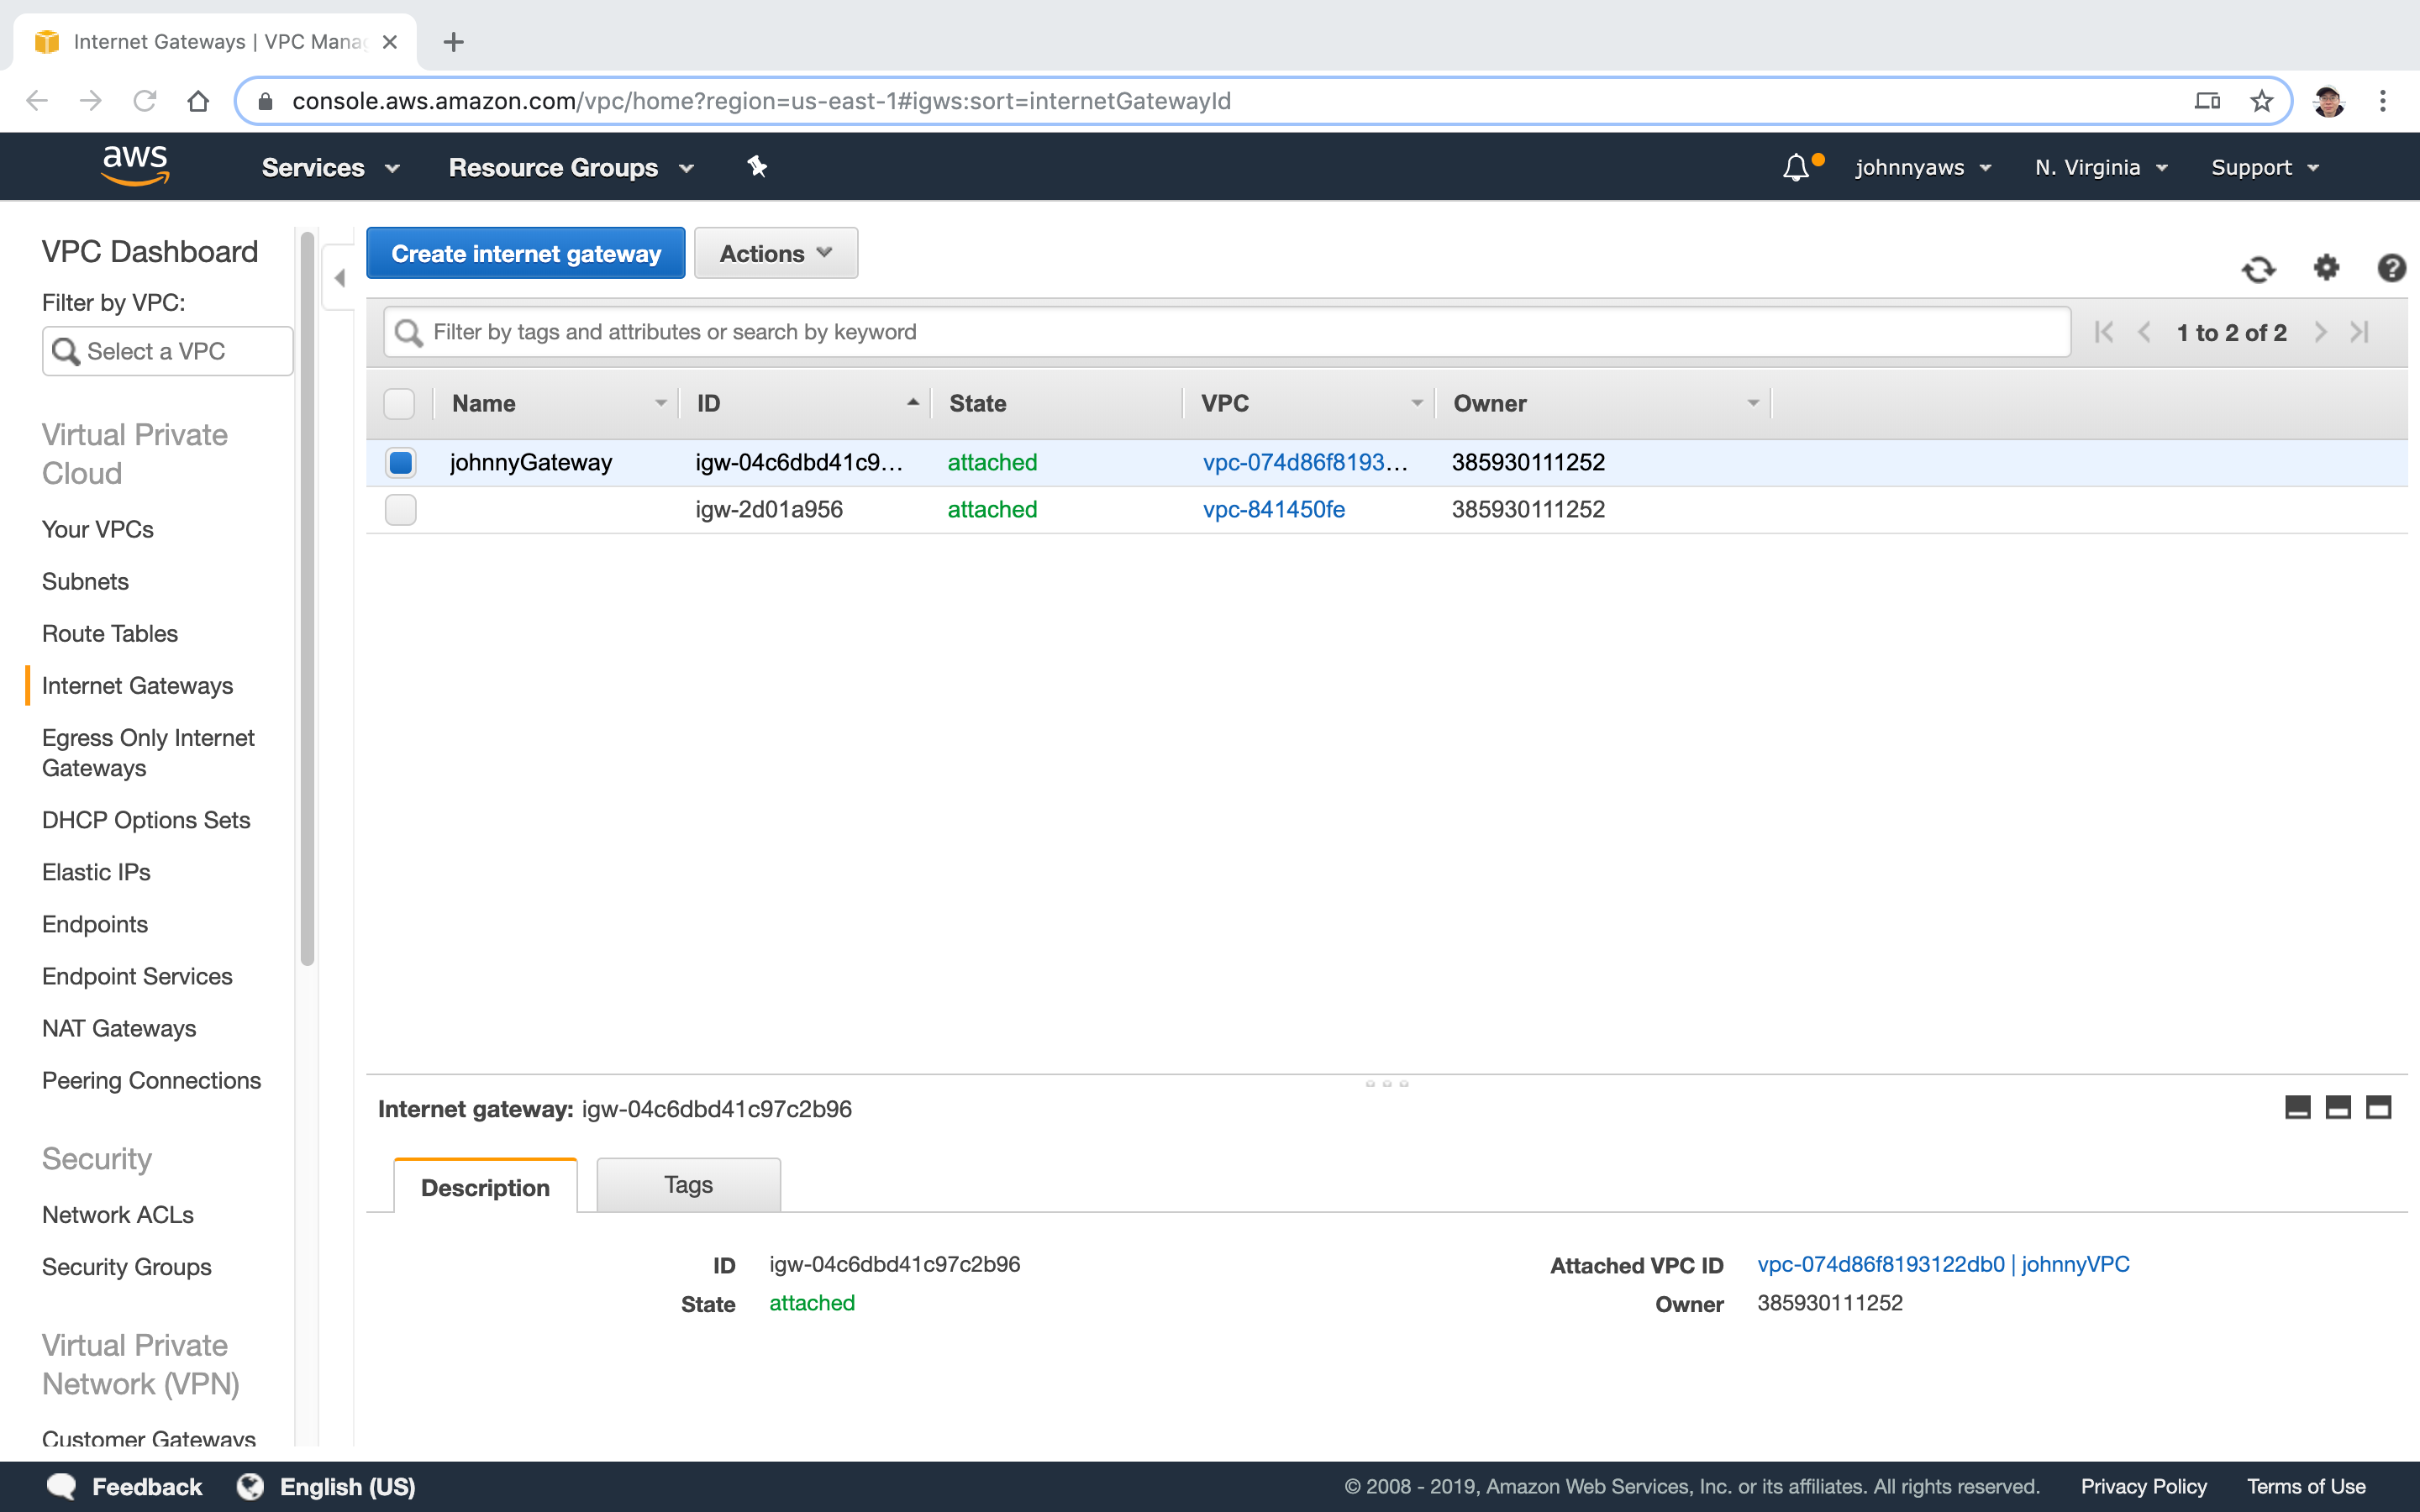
- Notice, you can attach only one internet gateway to VPC.
Check the status of the current route table for new VPC. It has route for internal only.
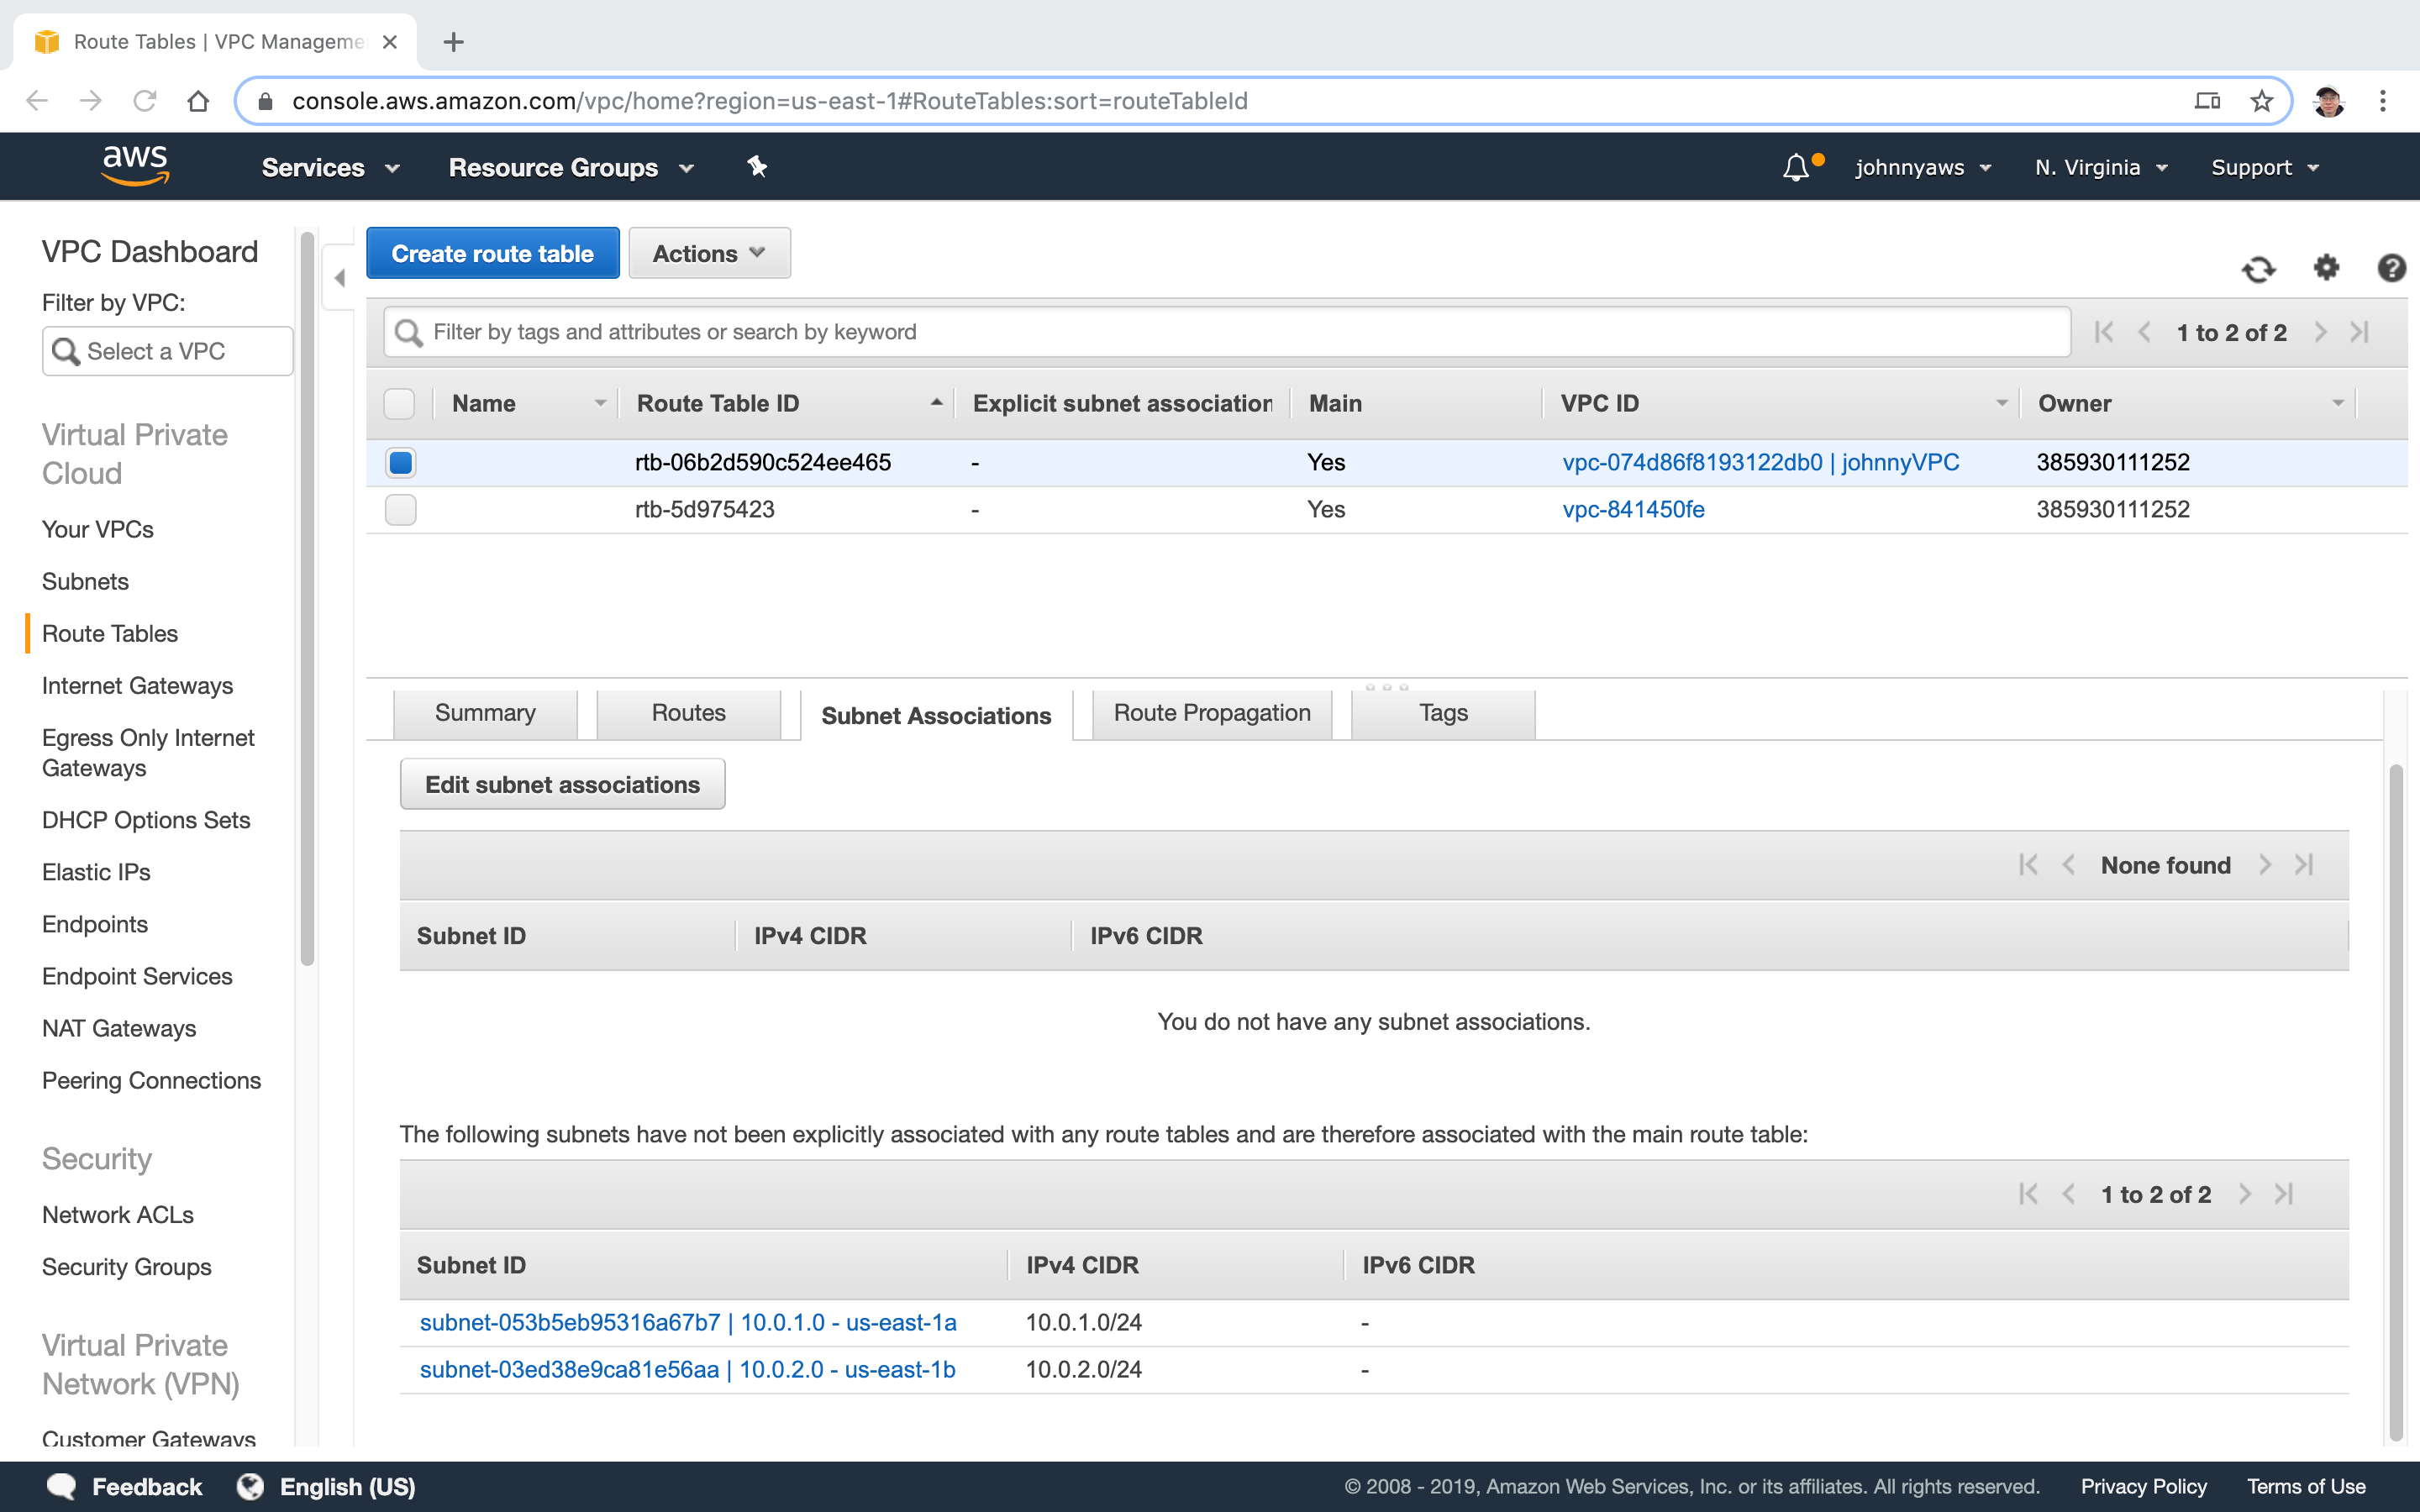
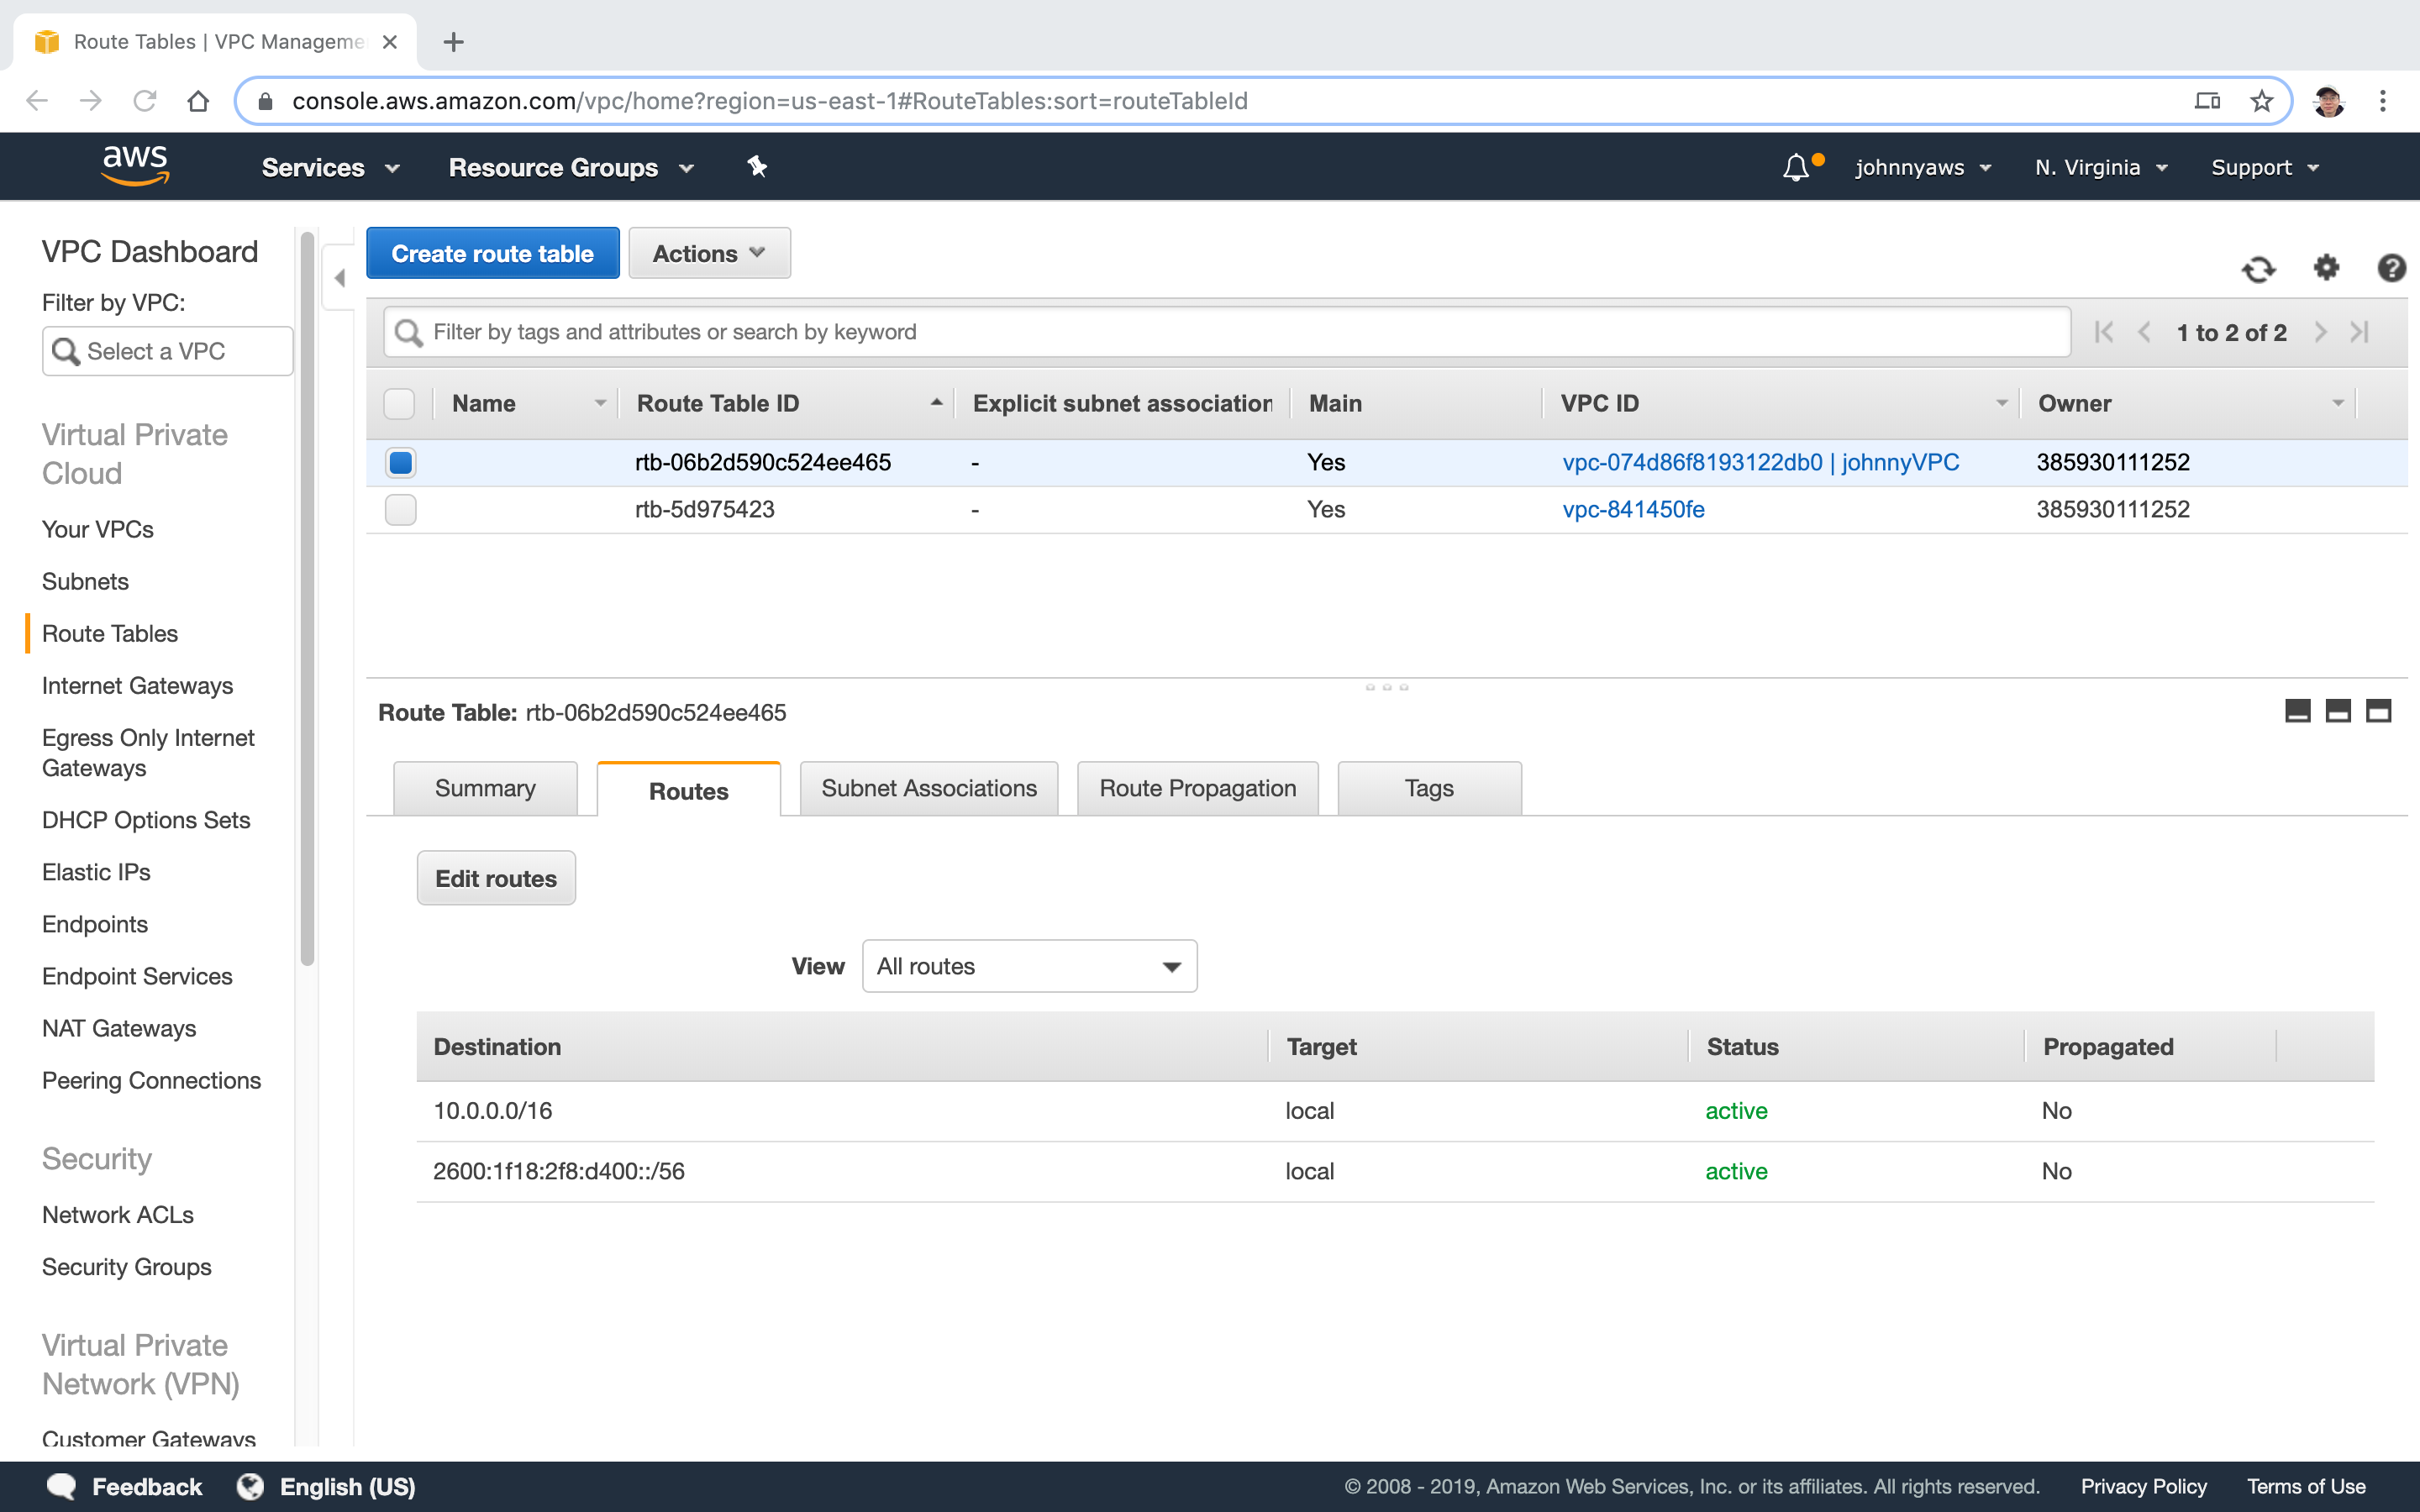 There are two subnets, but none of them is associated to this route table.
 In the next steps, we will create a new route table for public access.
2.3 Create Route Table
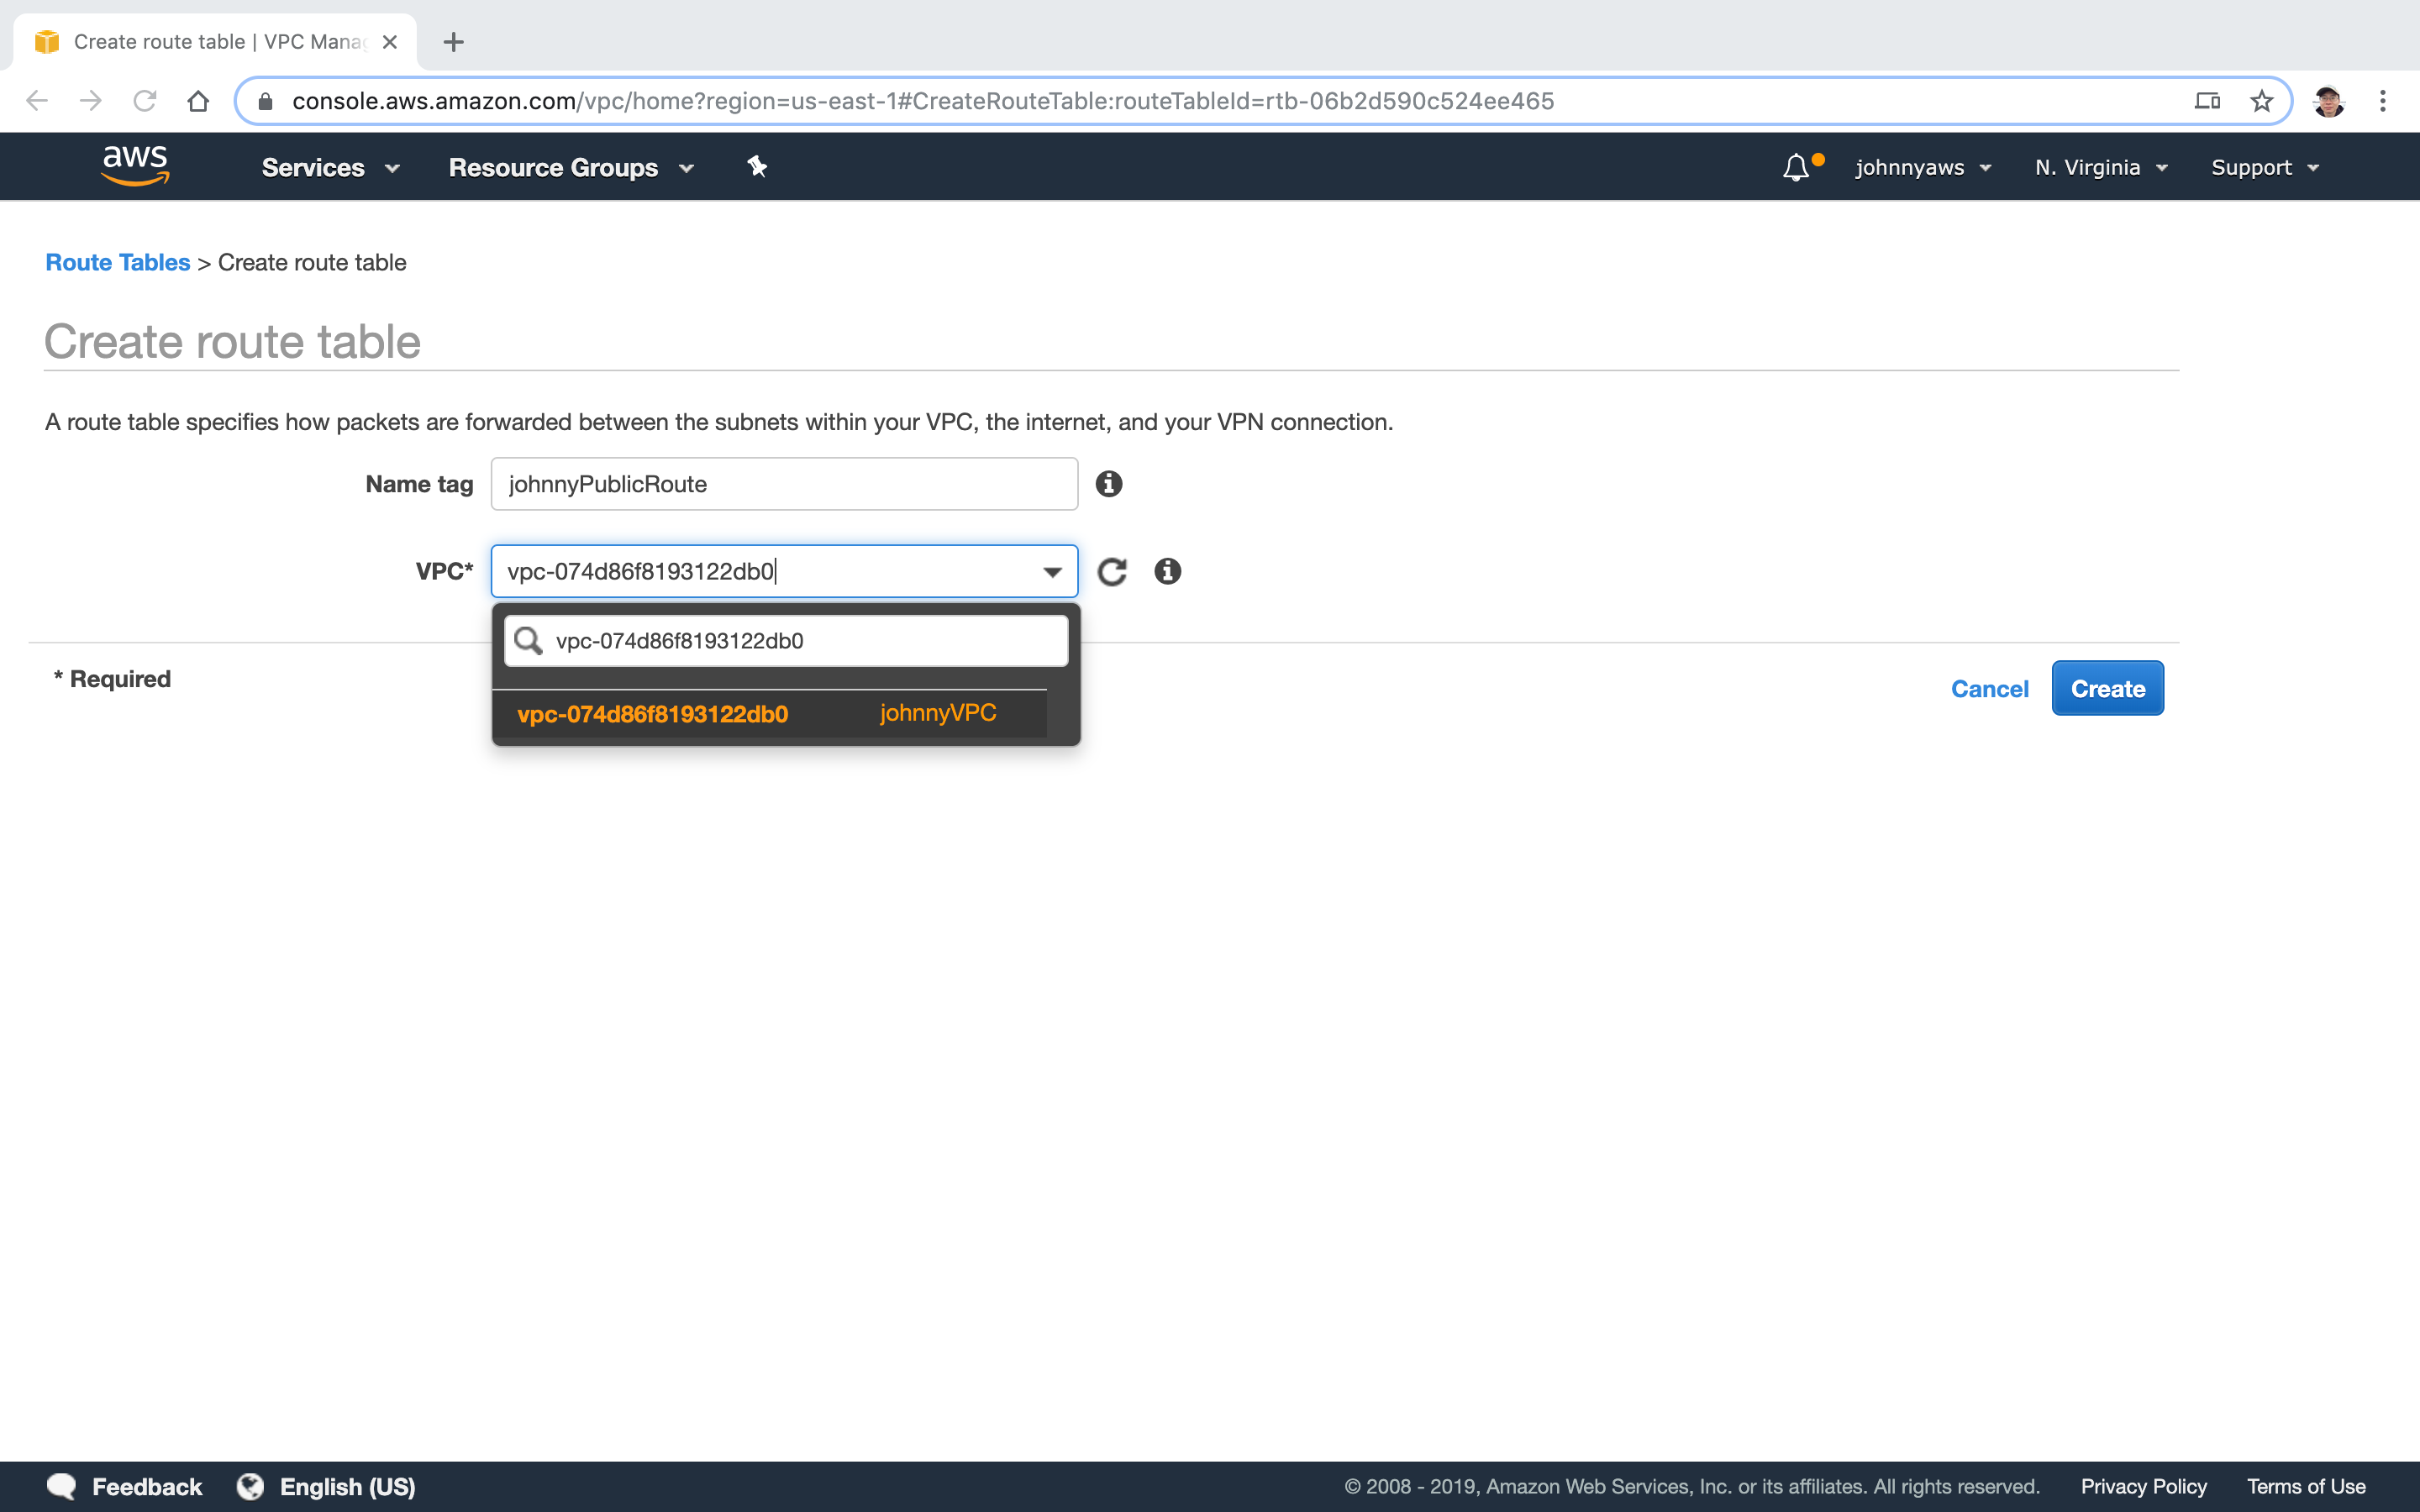
Go to Services->Networking & Content Delivery->VPC, select “Route Tables” at the left panel, click “Create route table” button. Provide the name and select the new VPC.
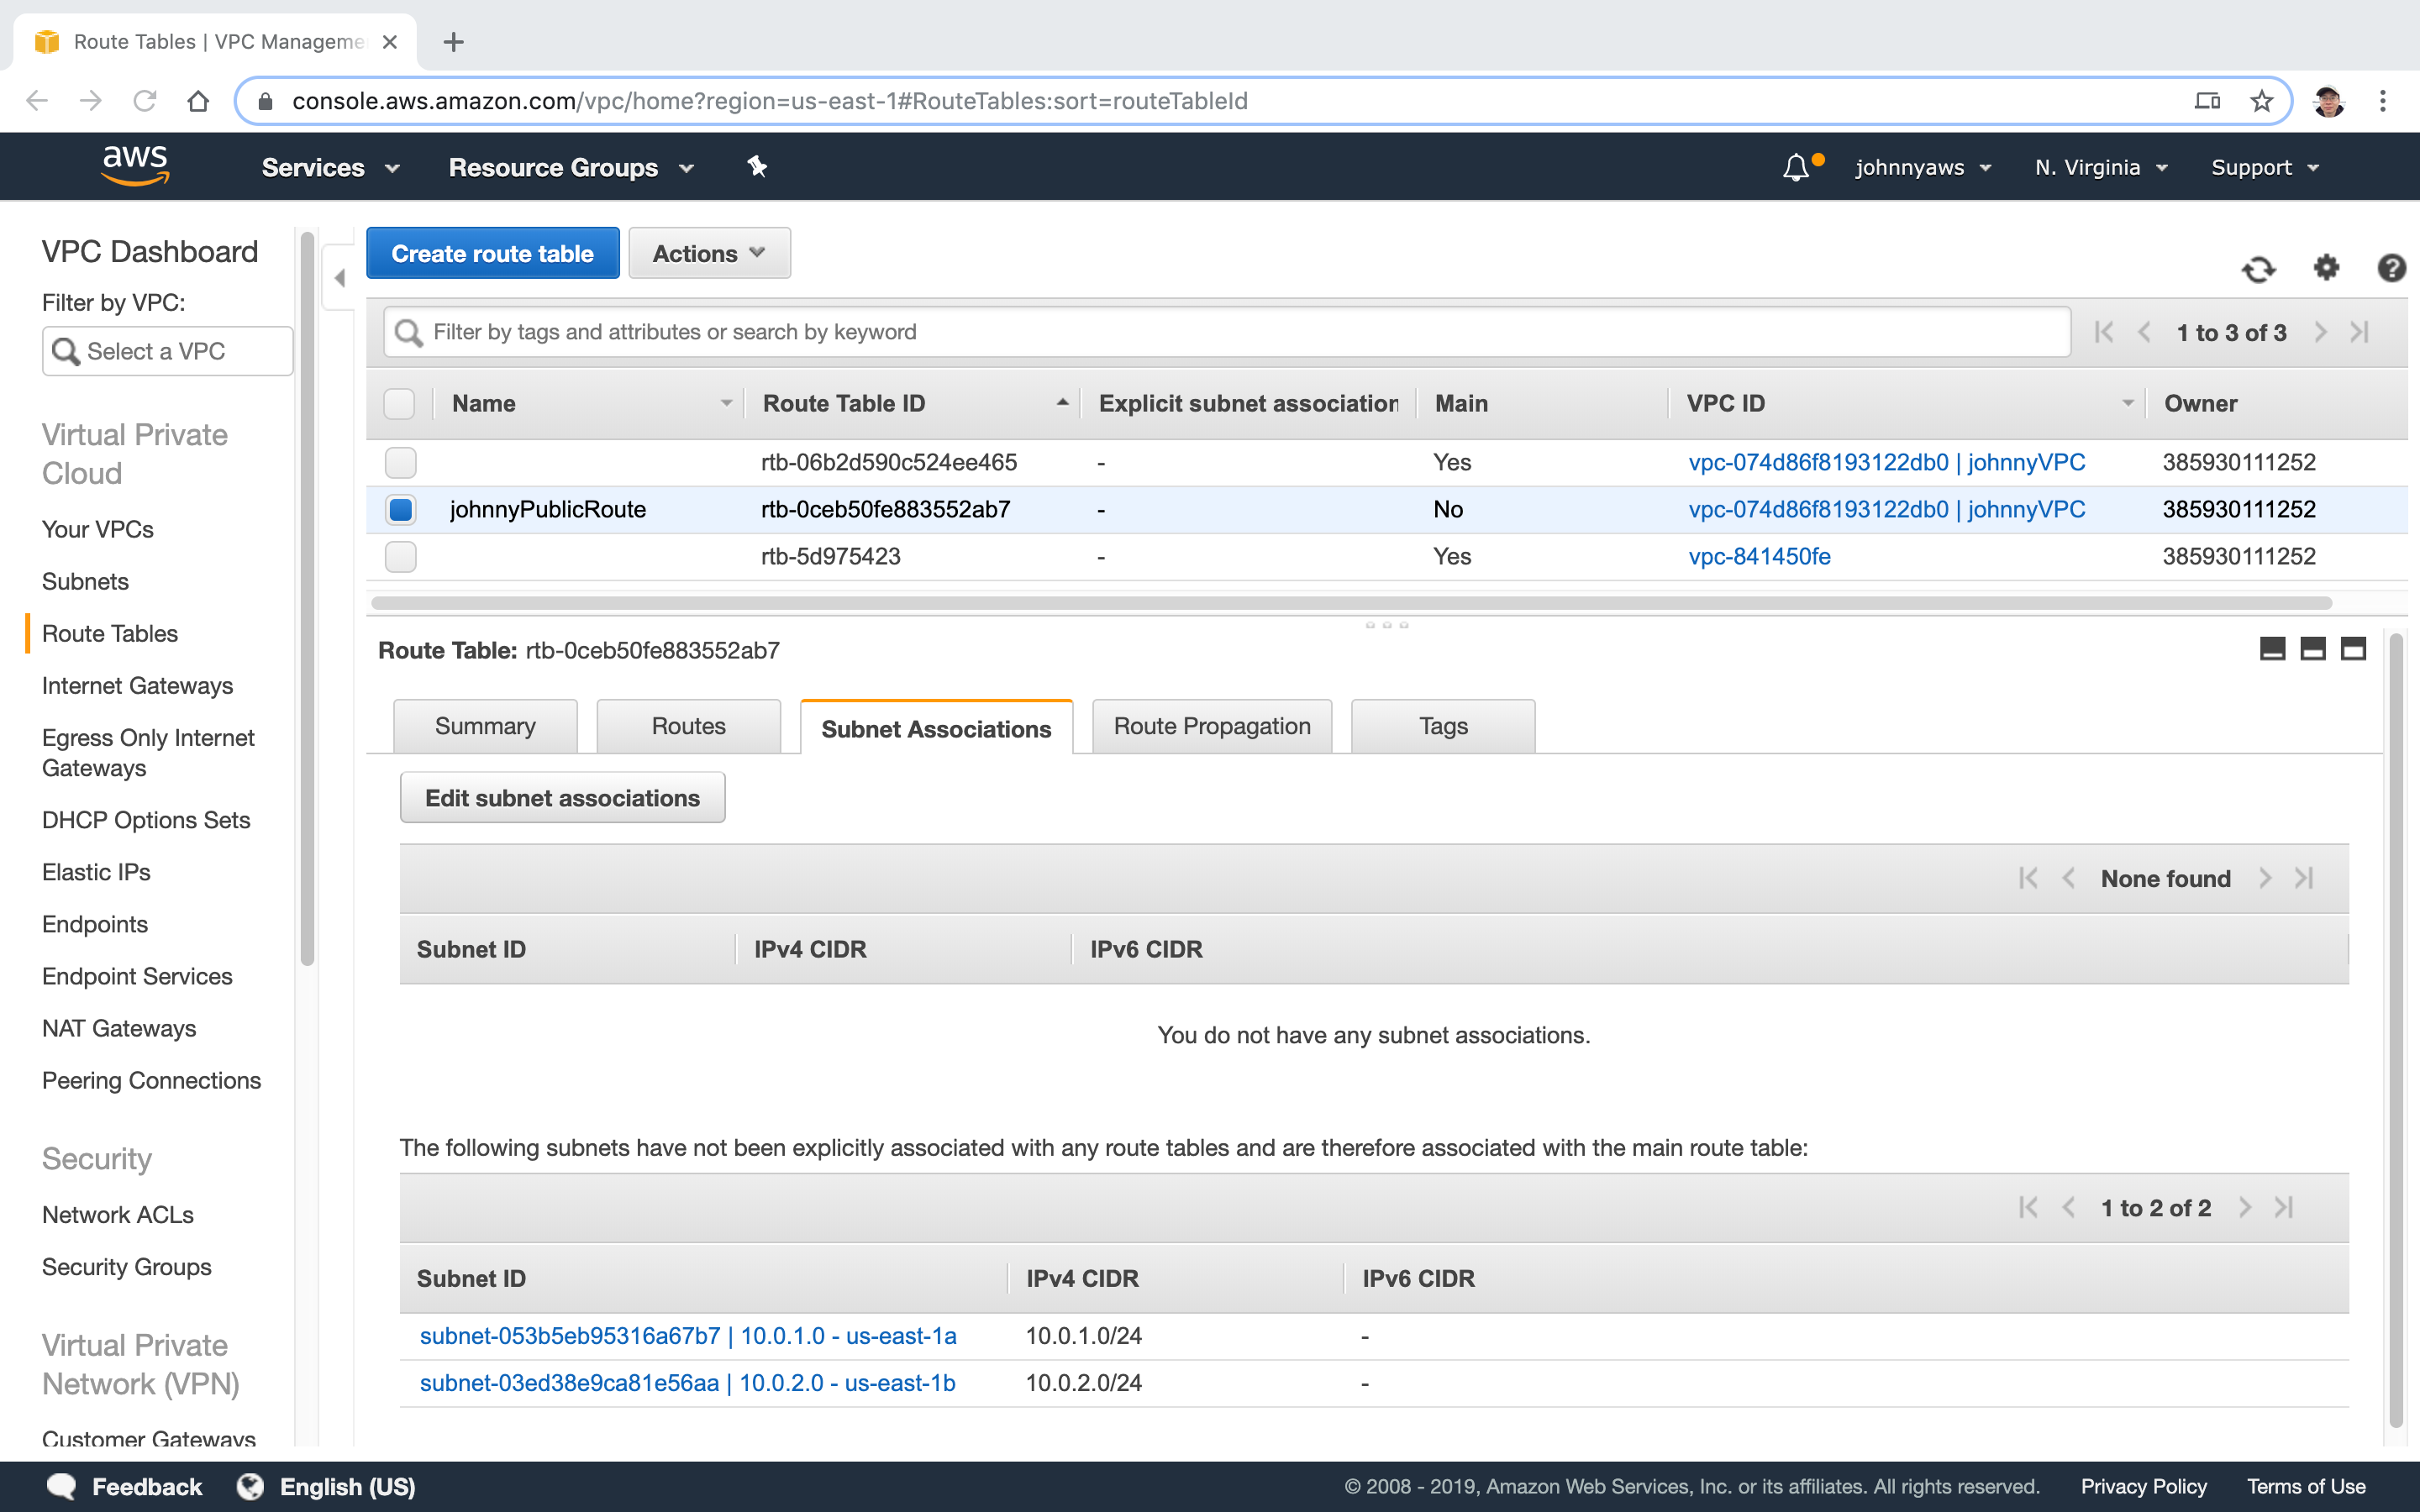
 The new route table is created, notice it is not main.
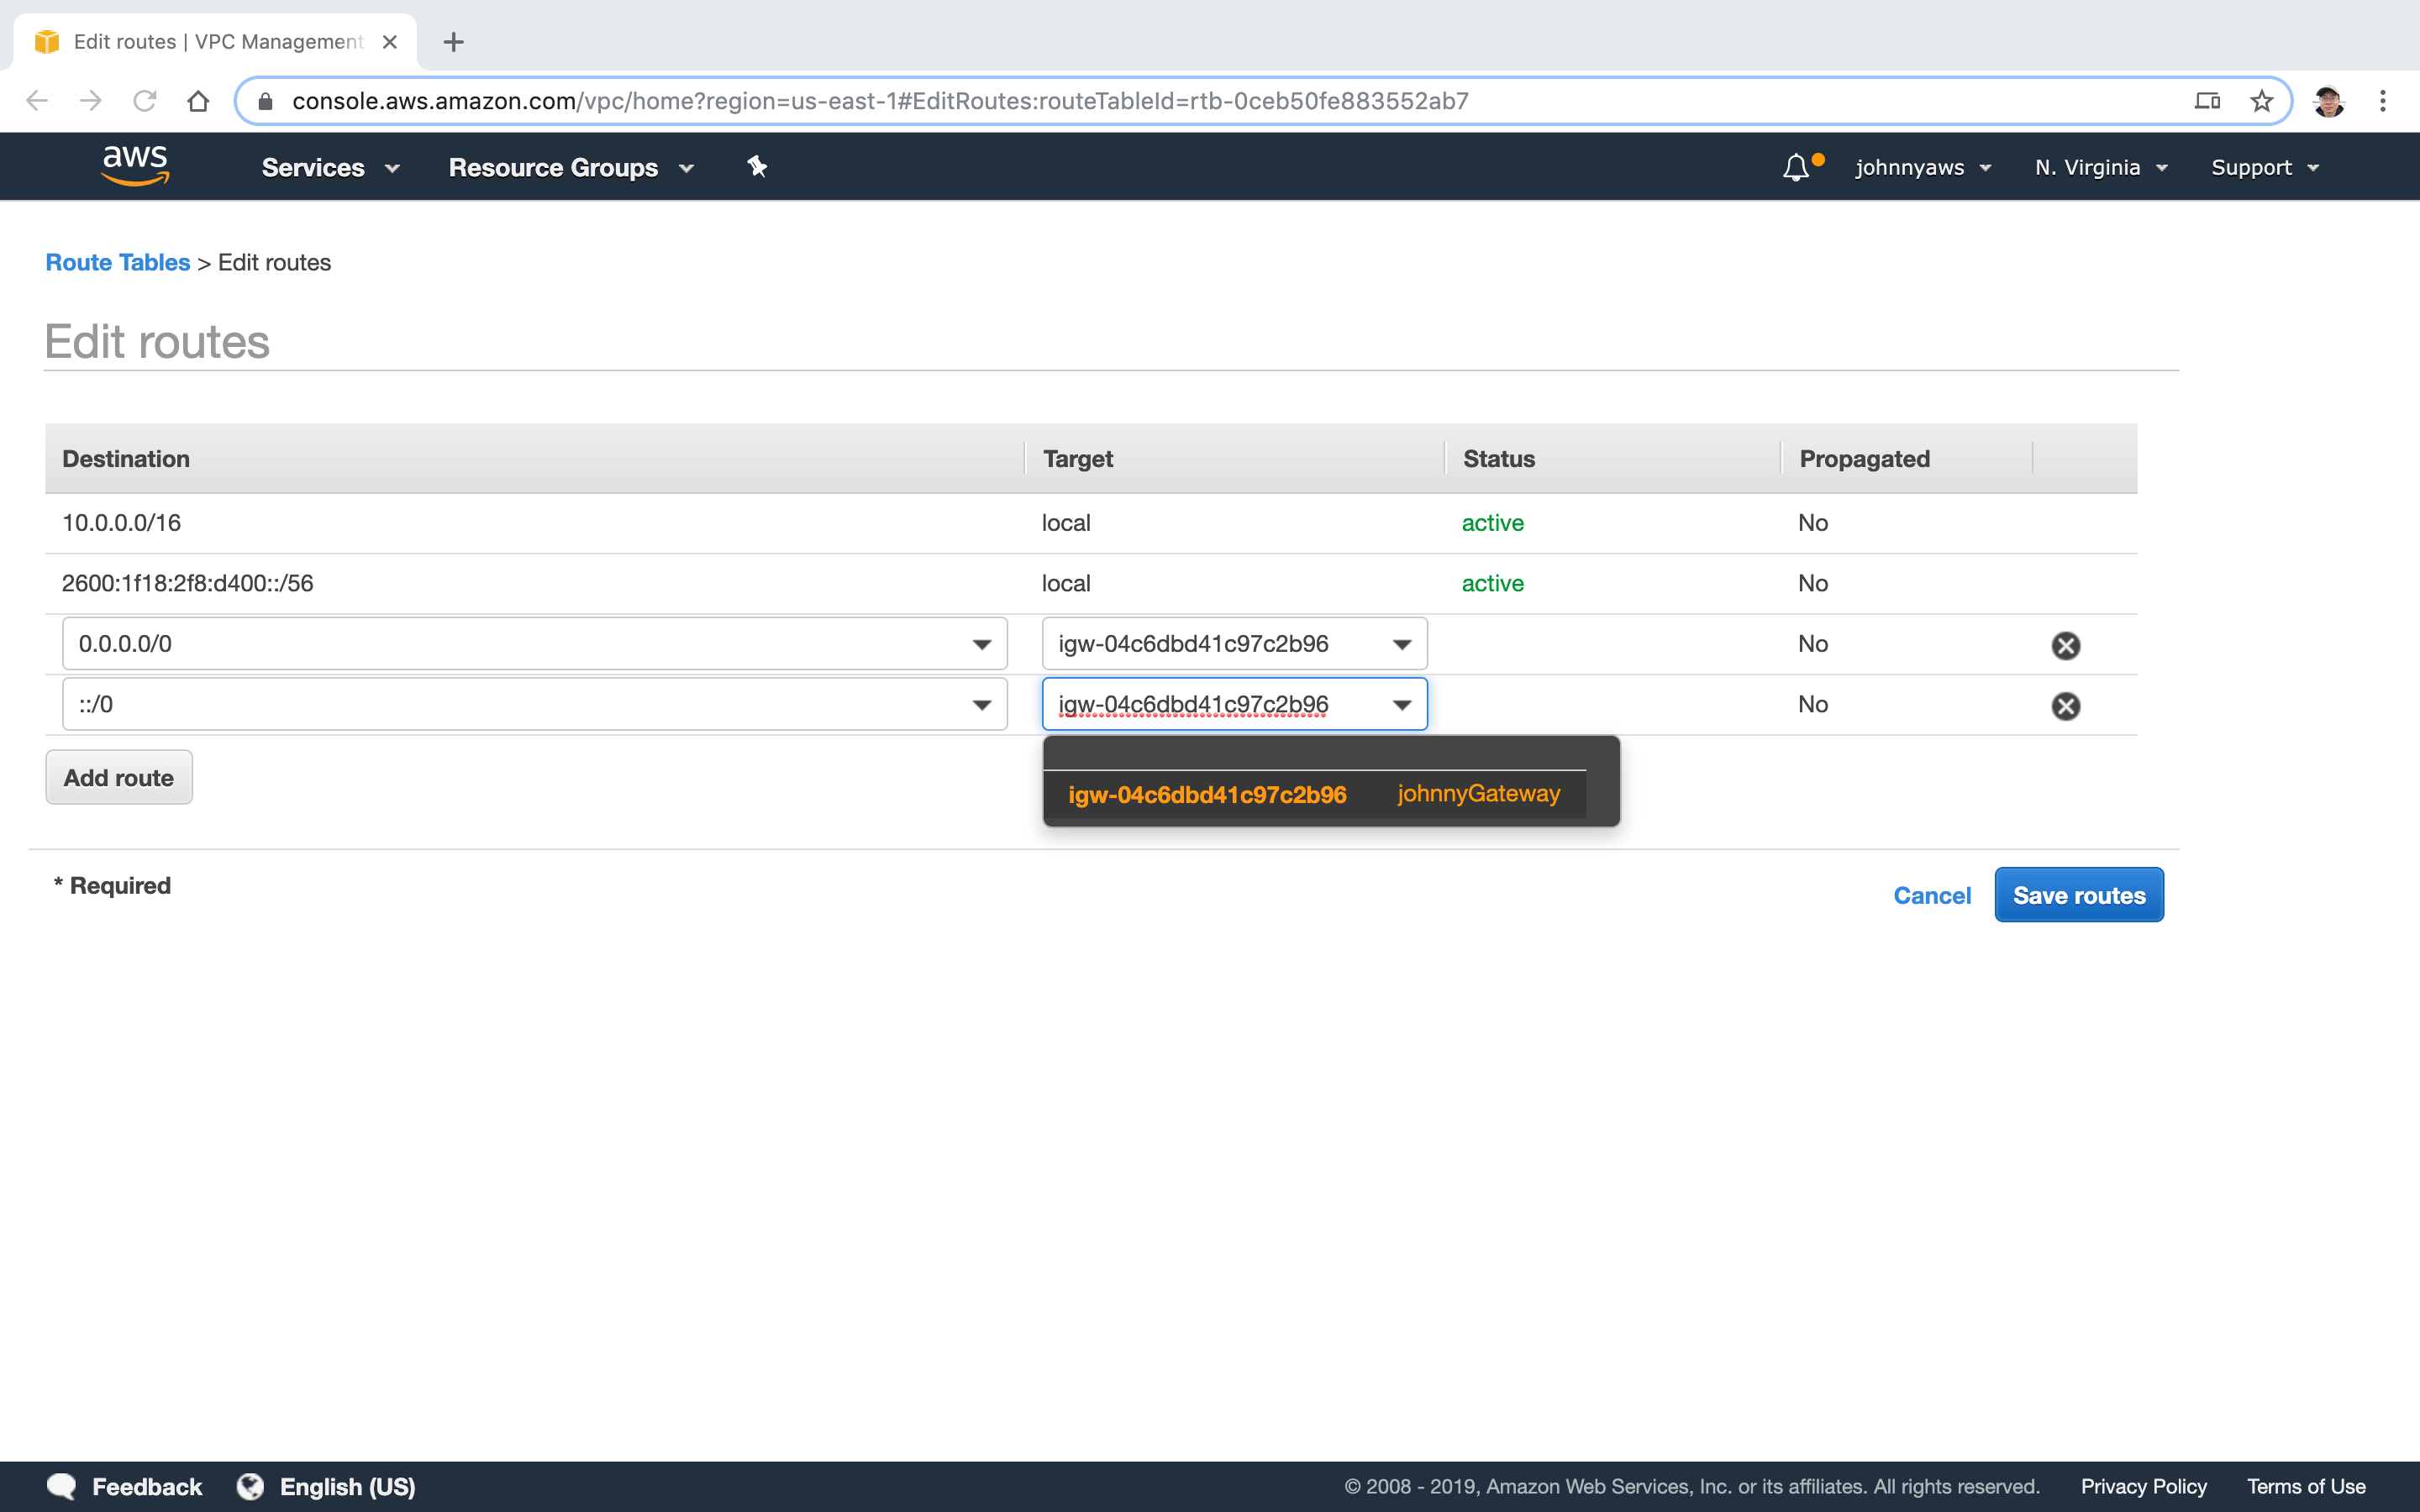
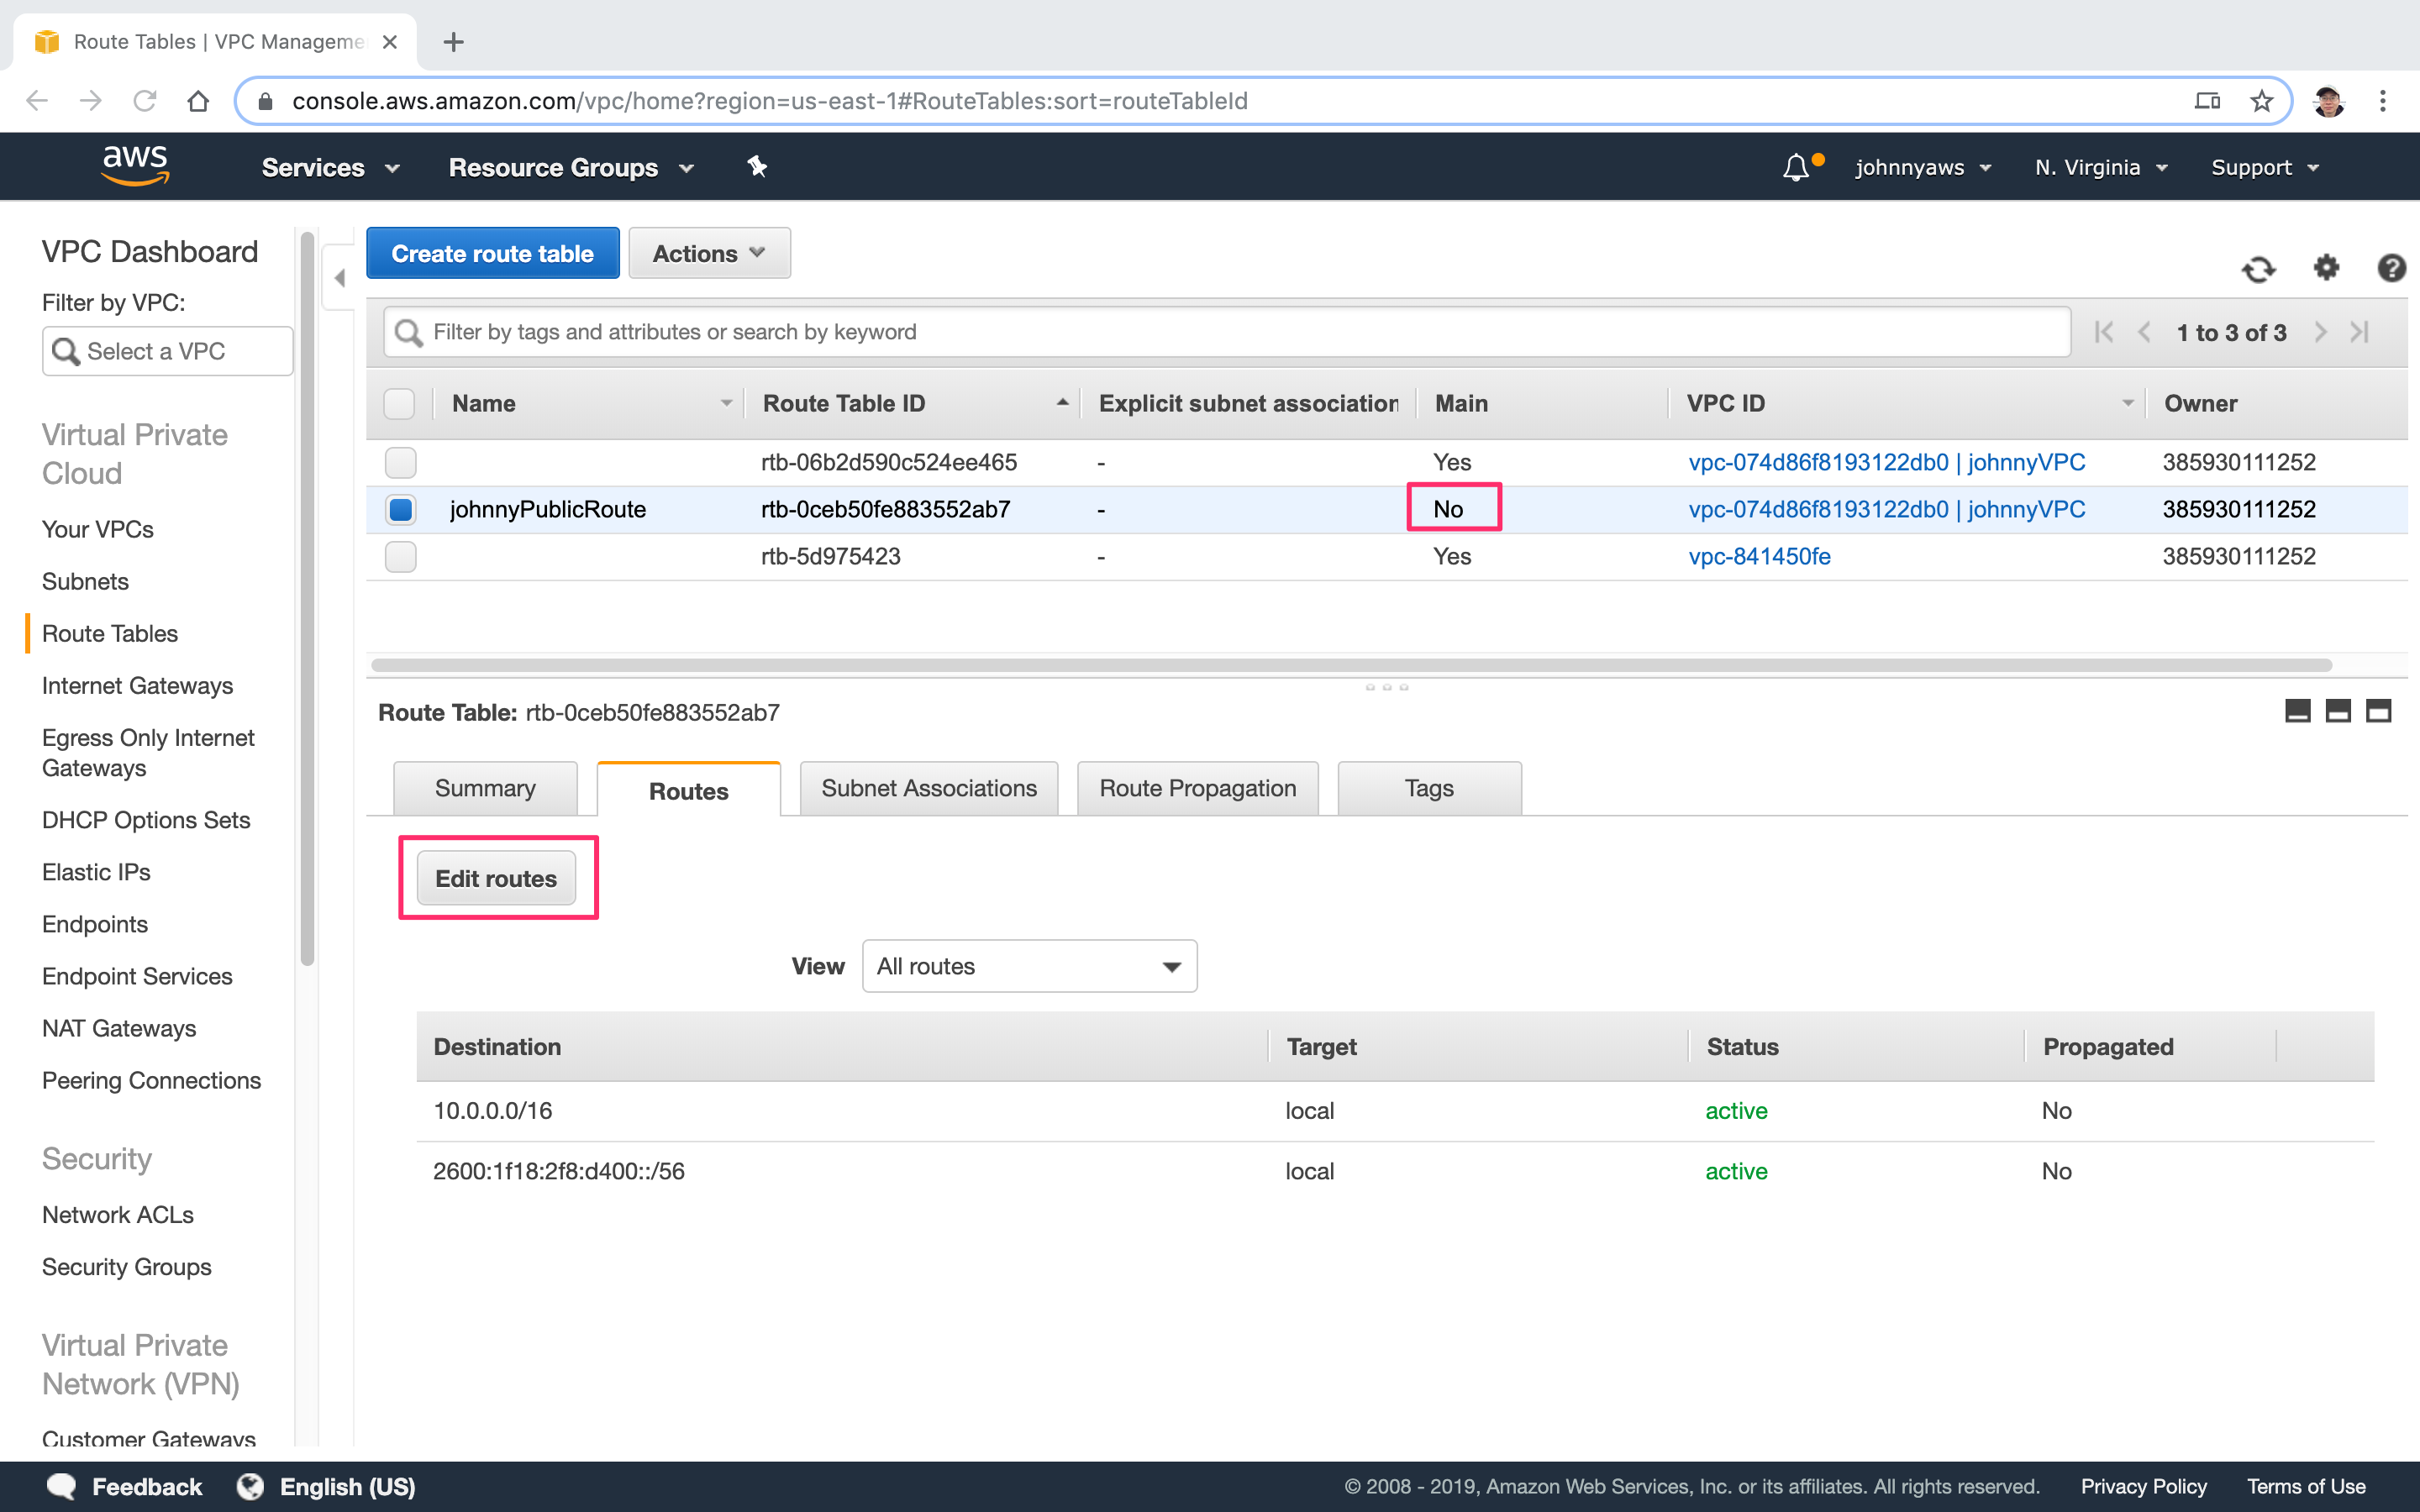 Click “Edit routes” button. Add two routes “0.0.0.0/0” for ipv4 and “::/0” for ipv6. Select the internet gateway created above as target.
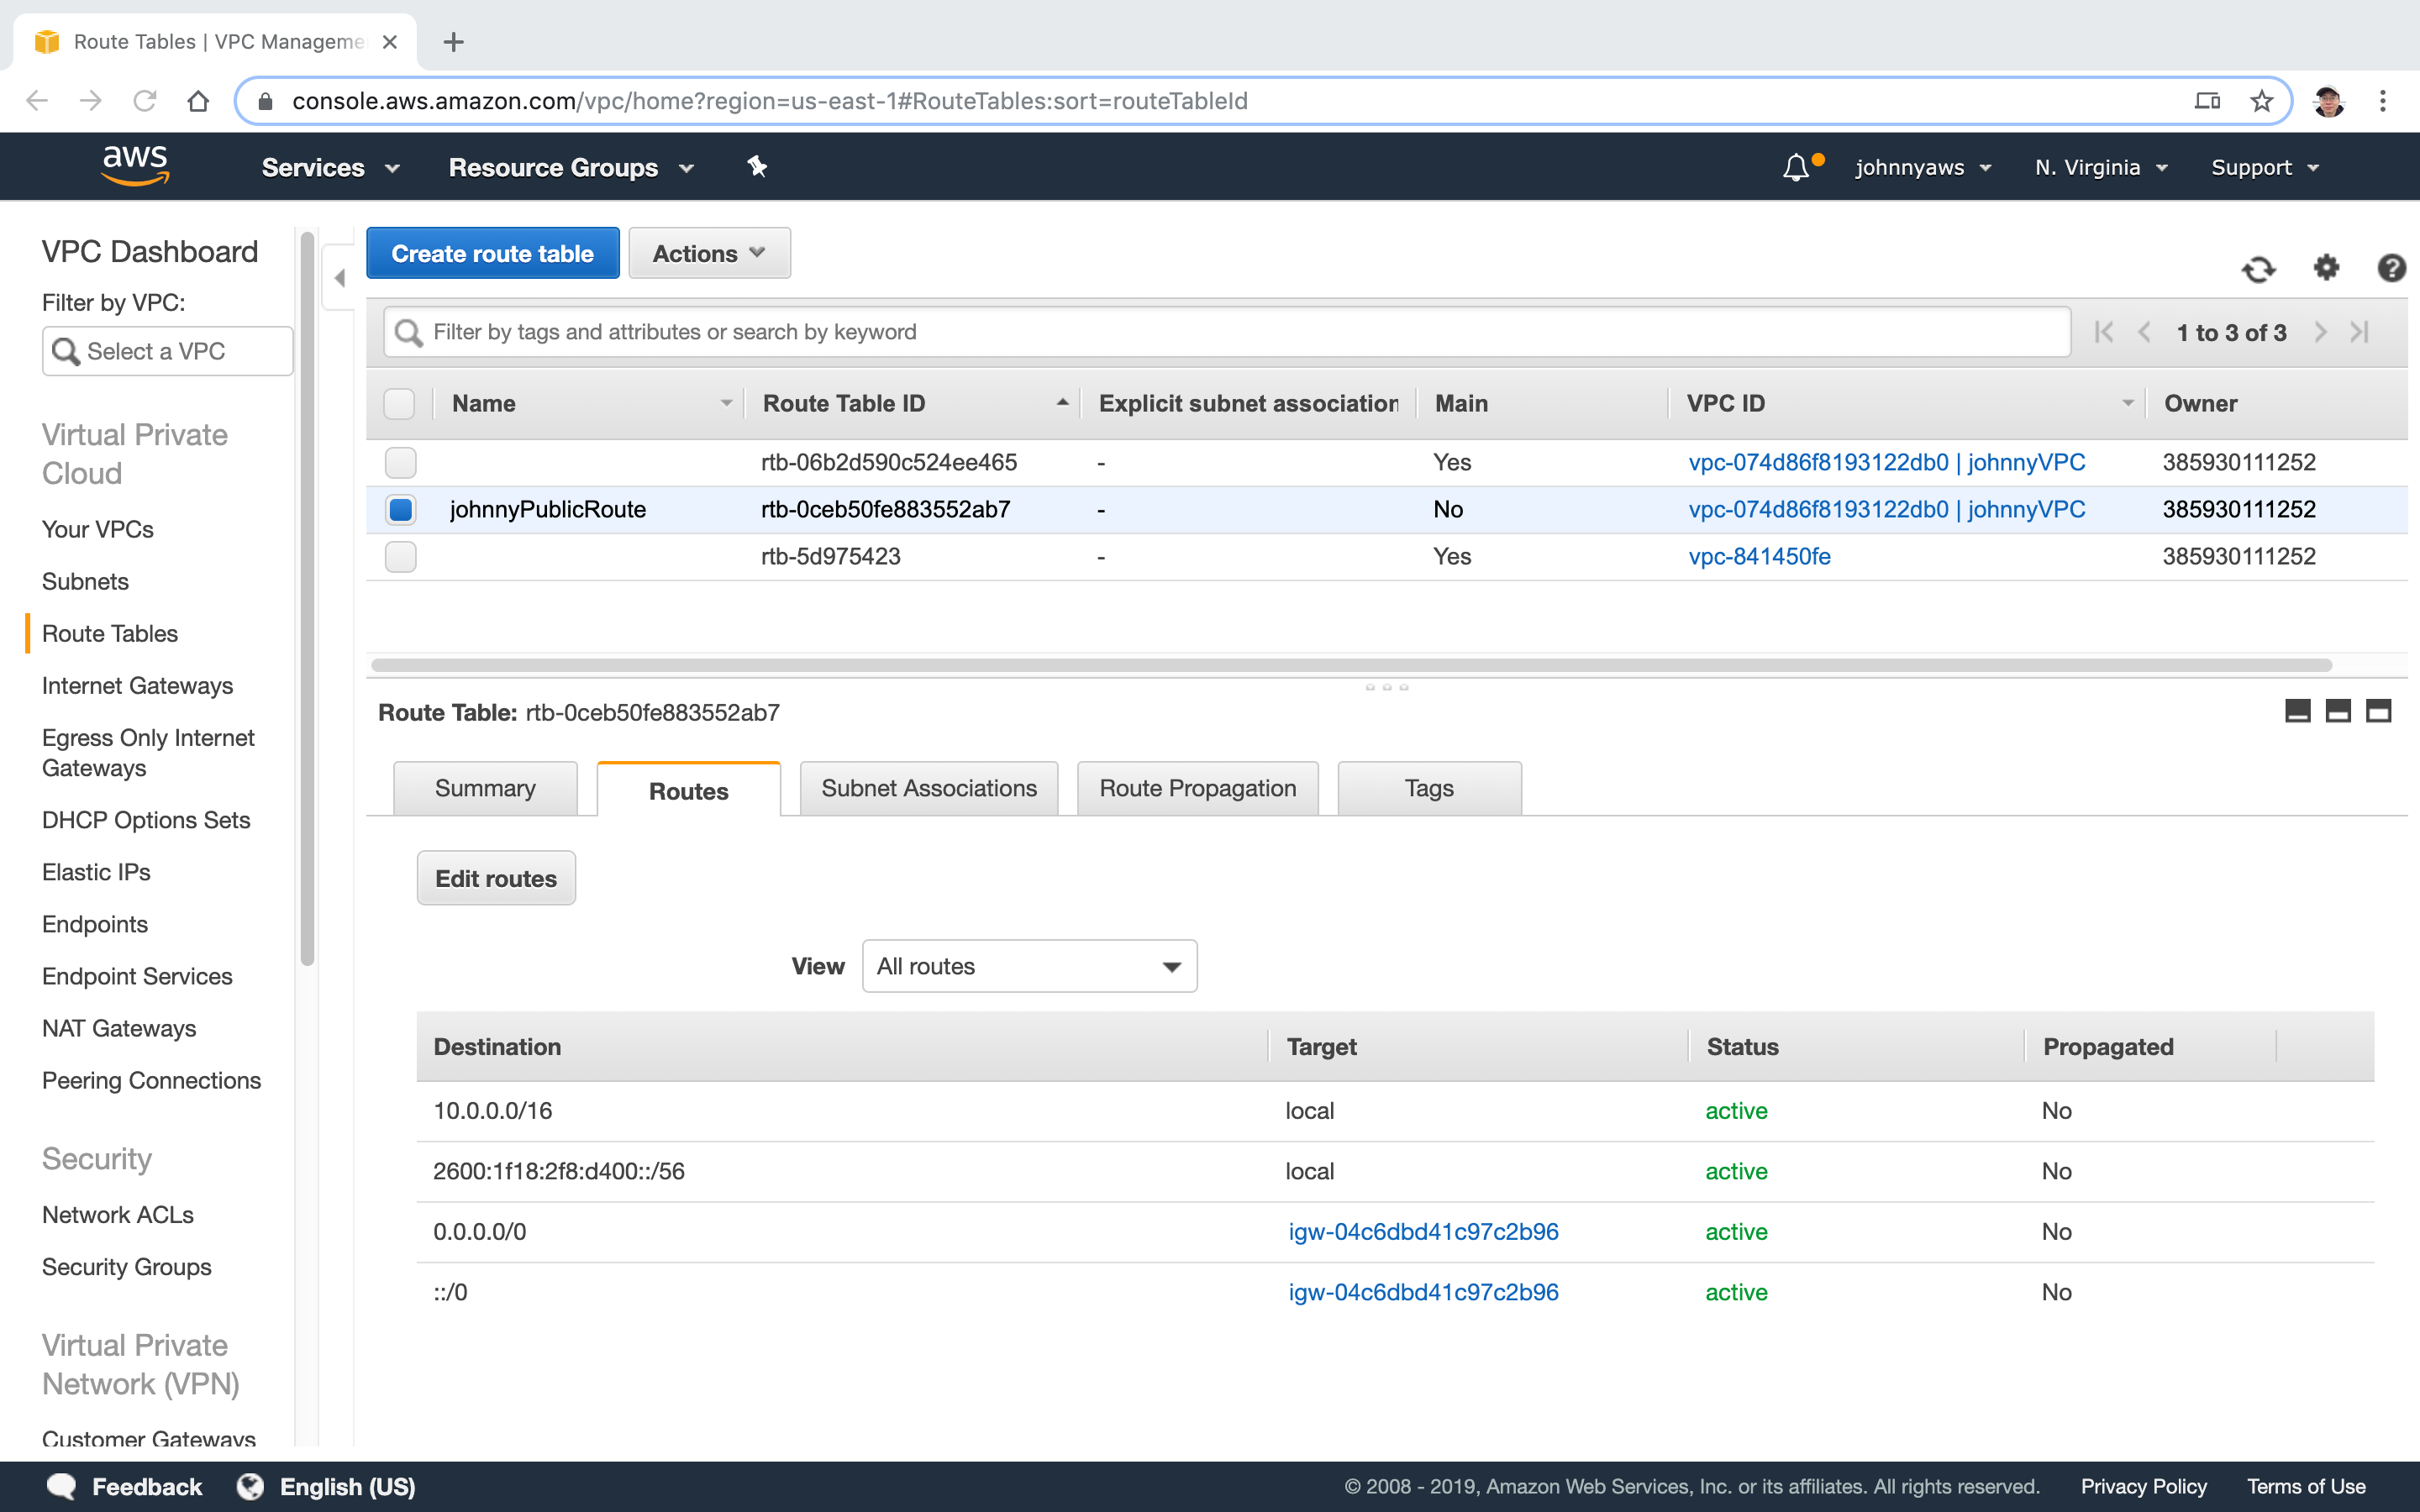
 Now we have two more routes.
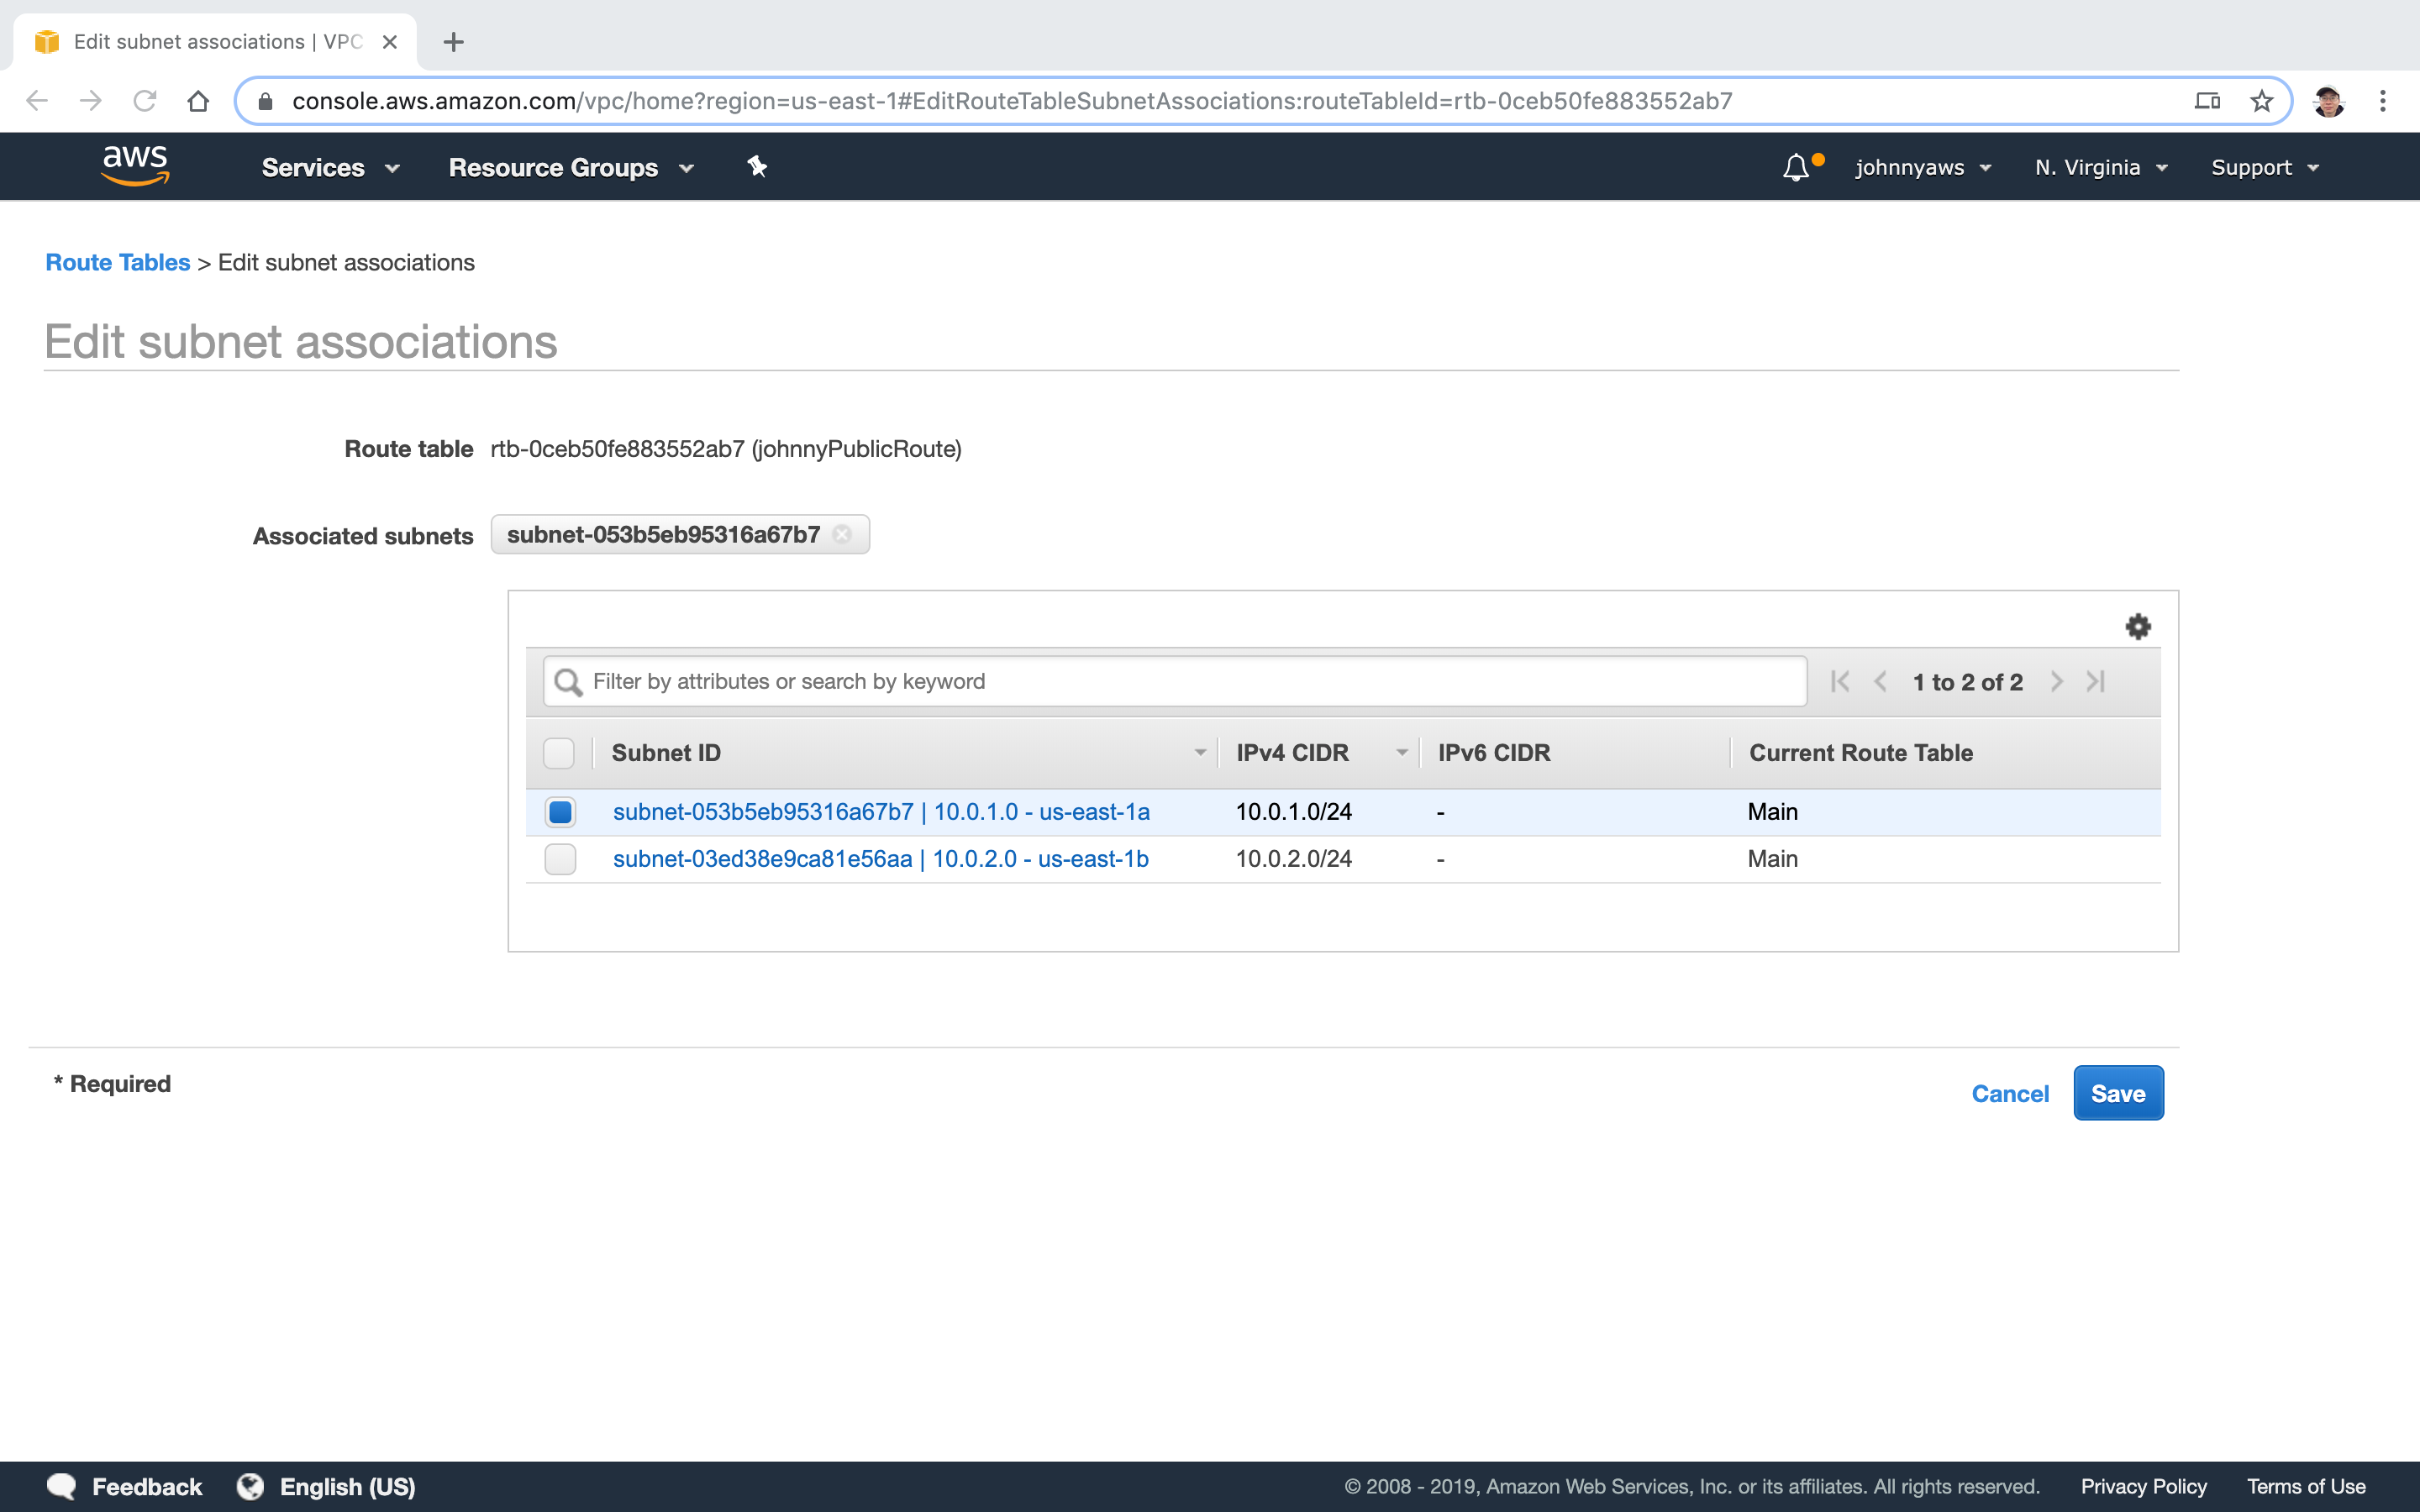
 Switch to Subnet Associations tab, click “Edit subnet associations” button.
 Select the first subnet(10.0.1.0) and save.
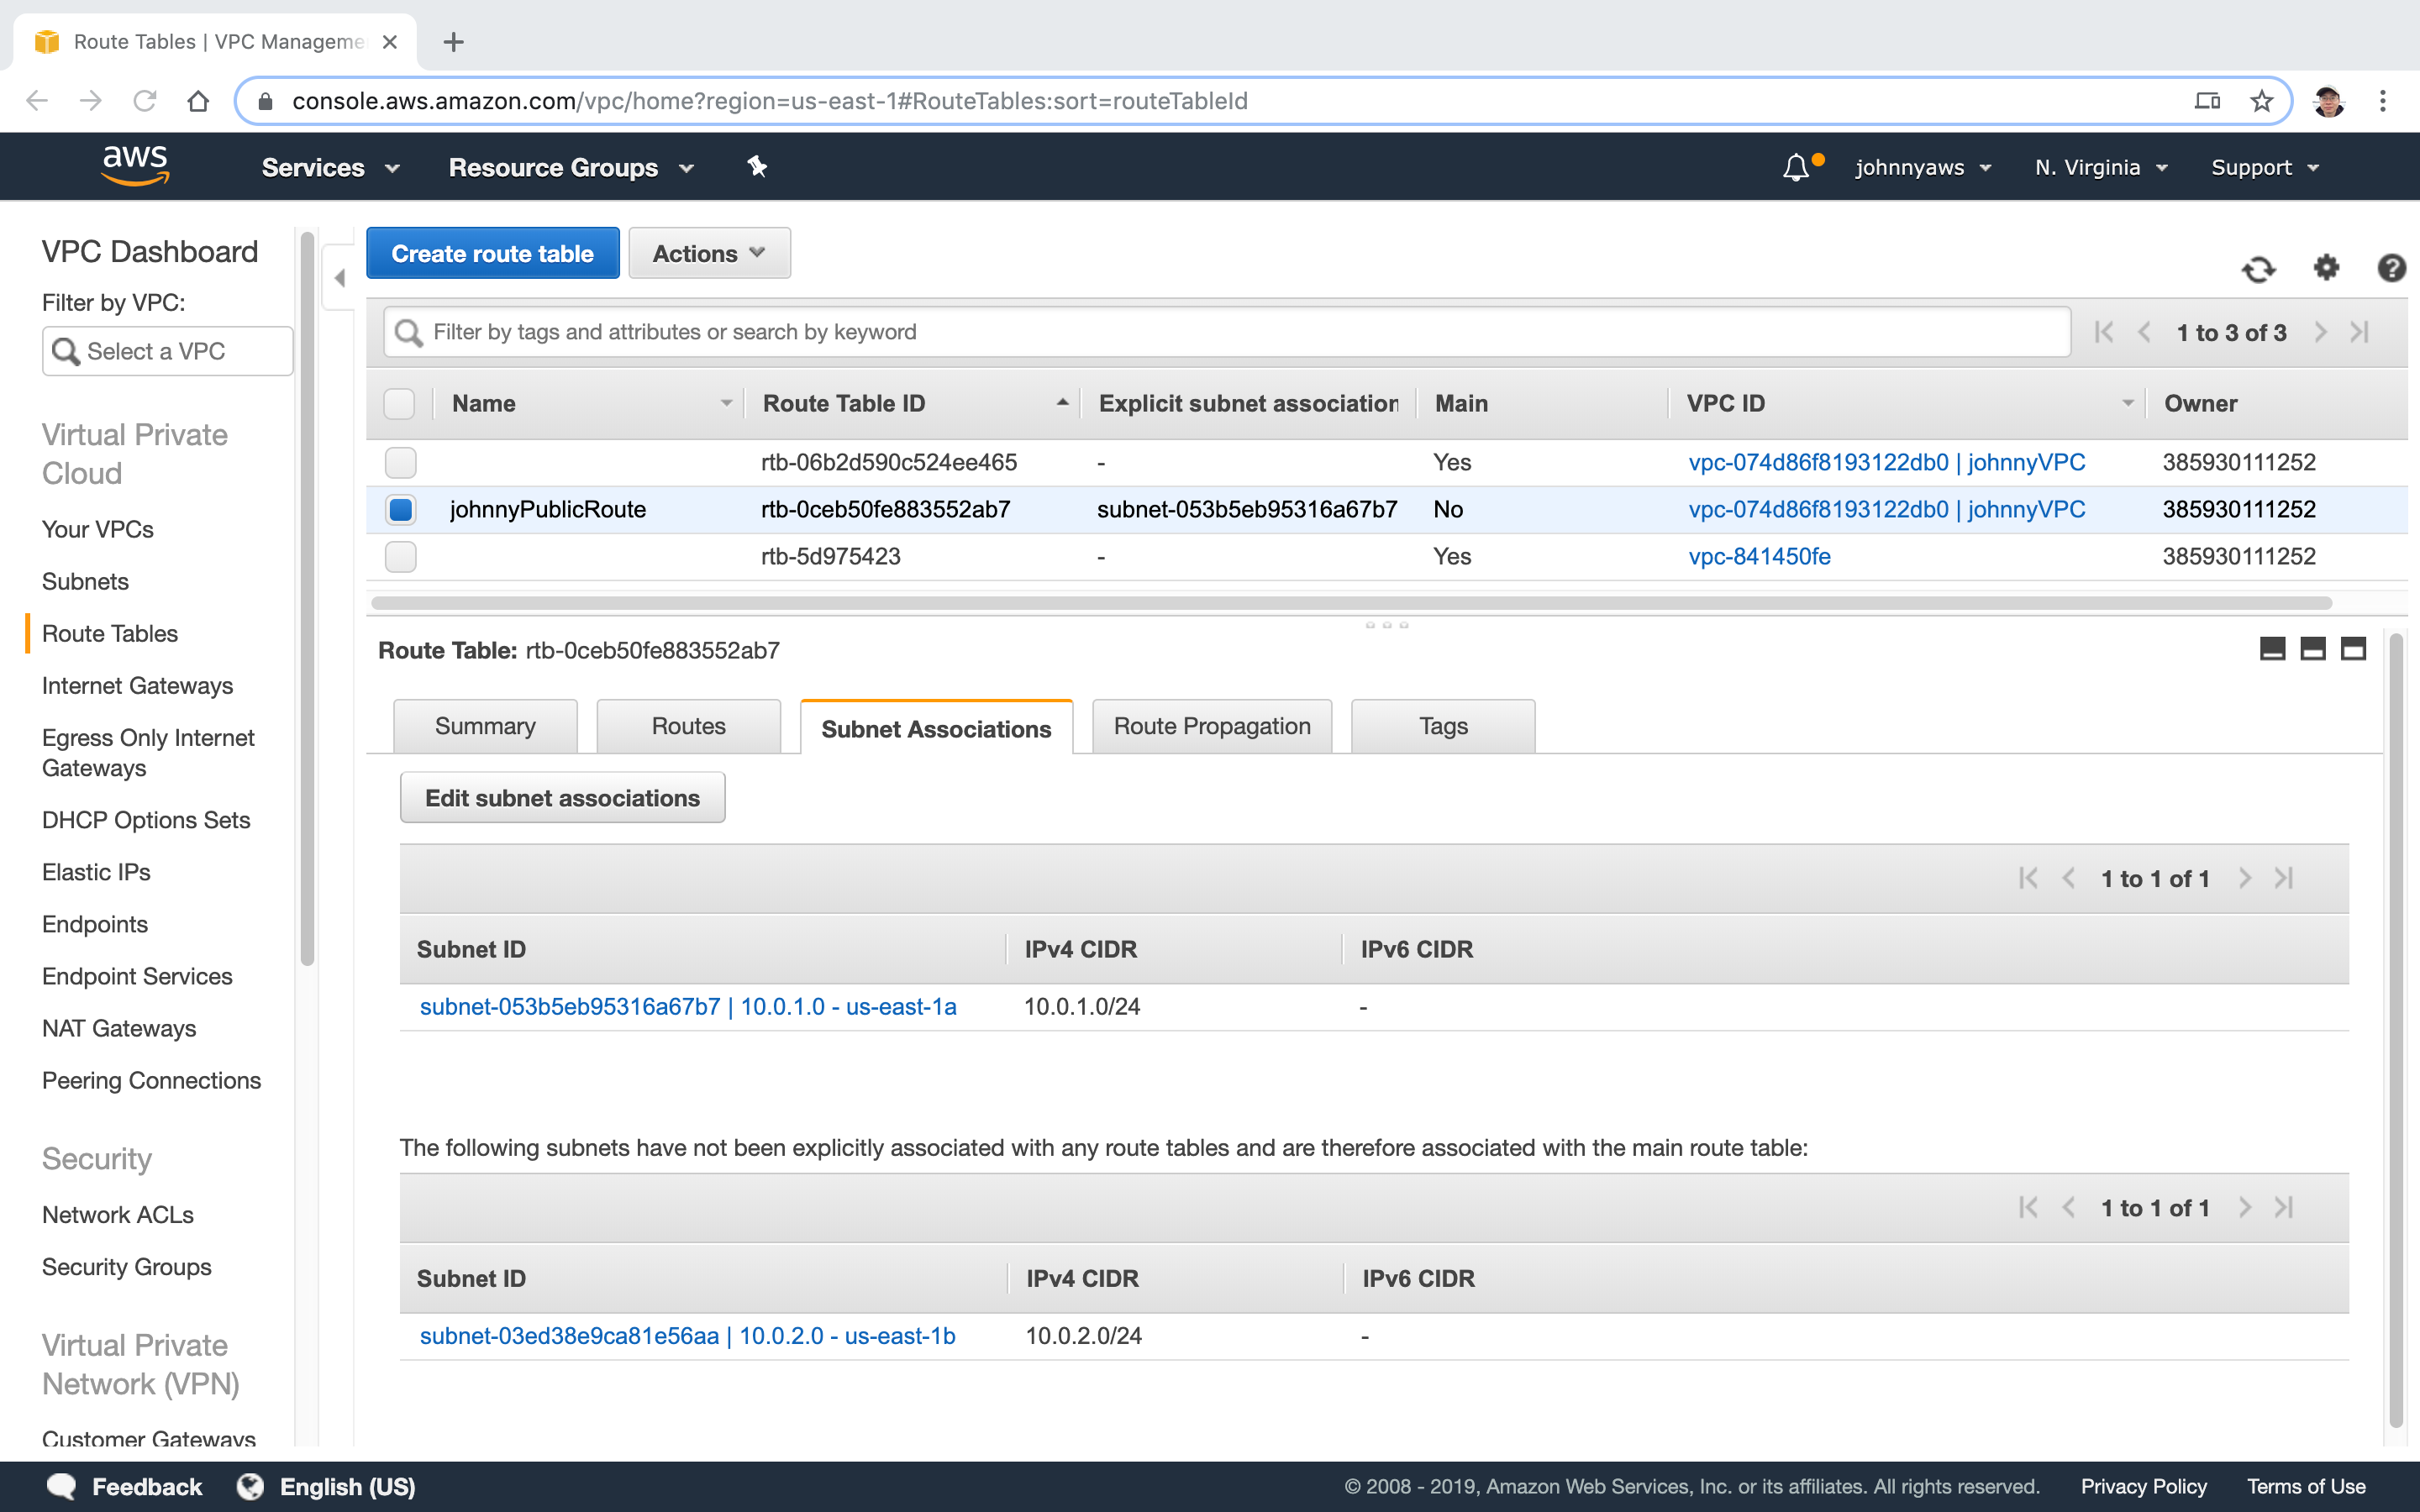
 Now, the first subnet is associated with the public route table.
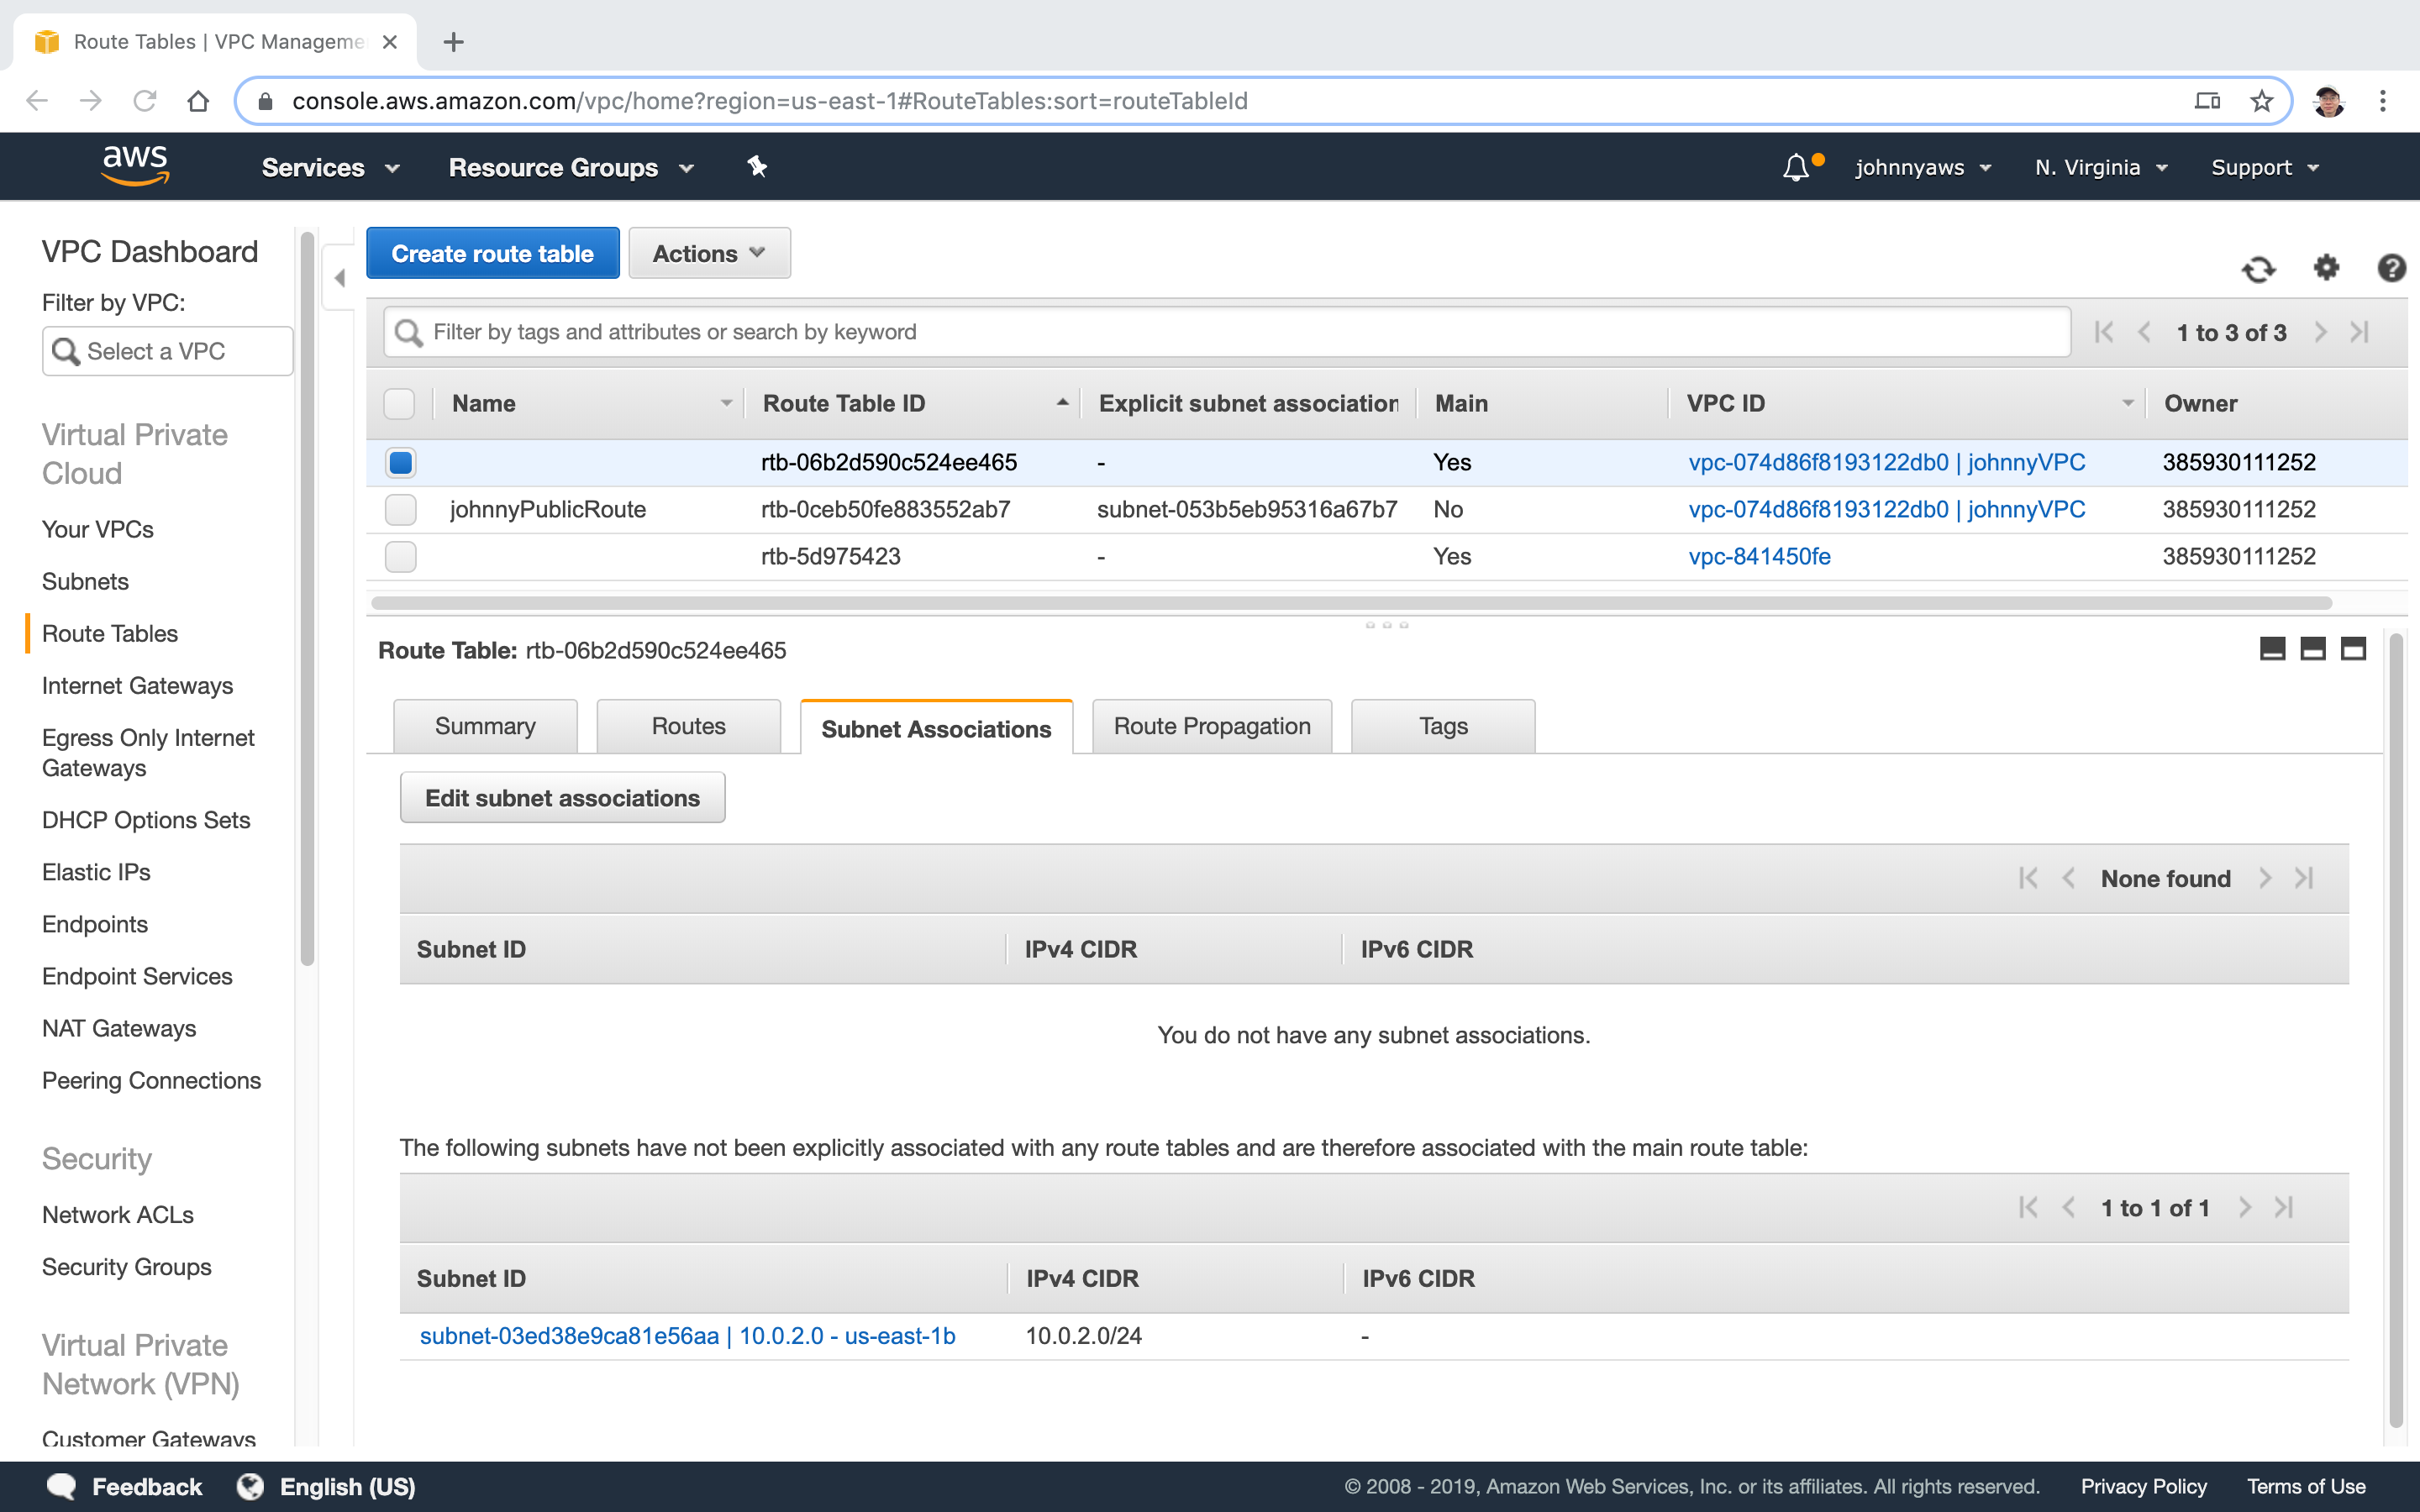
 If we check the subnet associations of the main route tables, the first subnet is not there anymore. Now we have the private subnet and the public subnet.
2.4 Create EC2 Instance
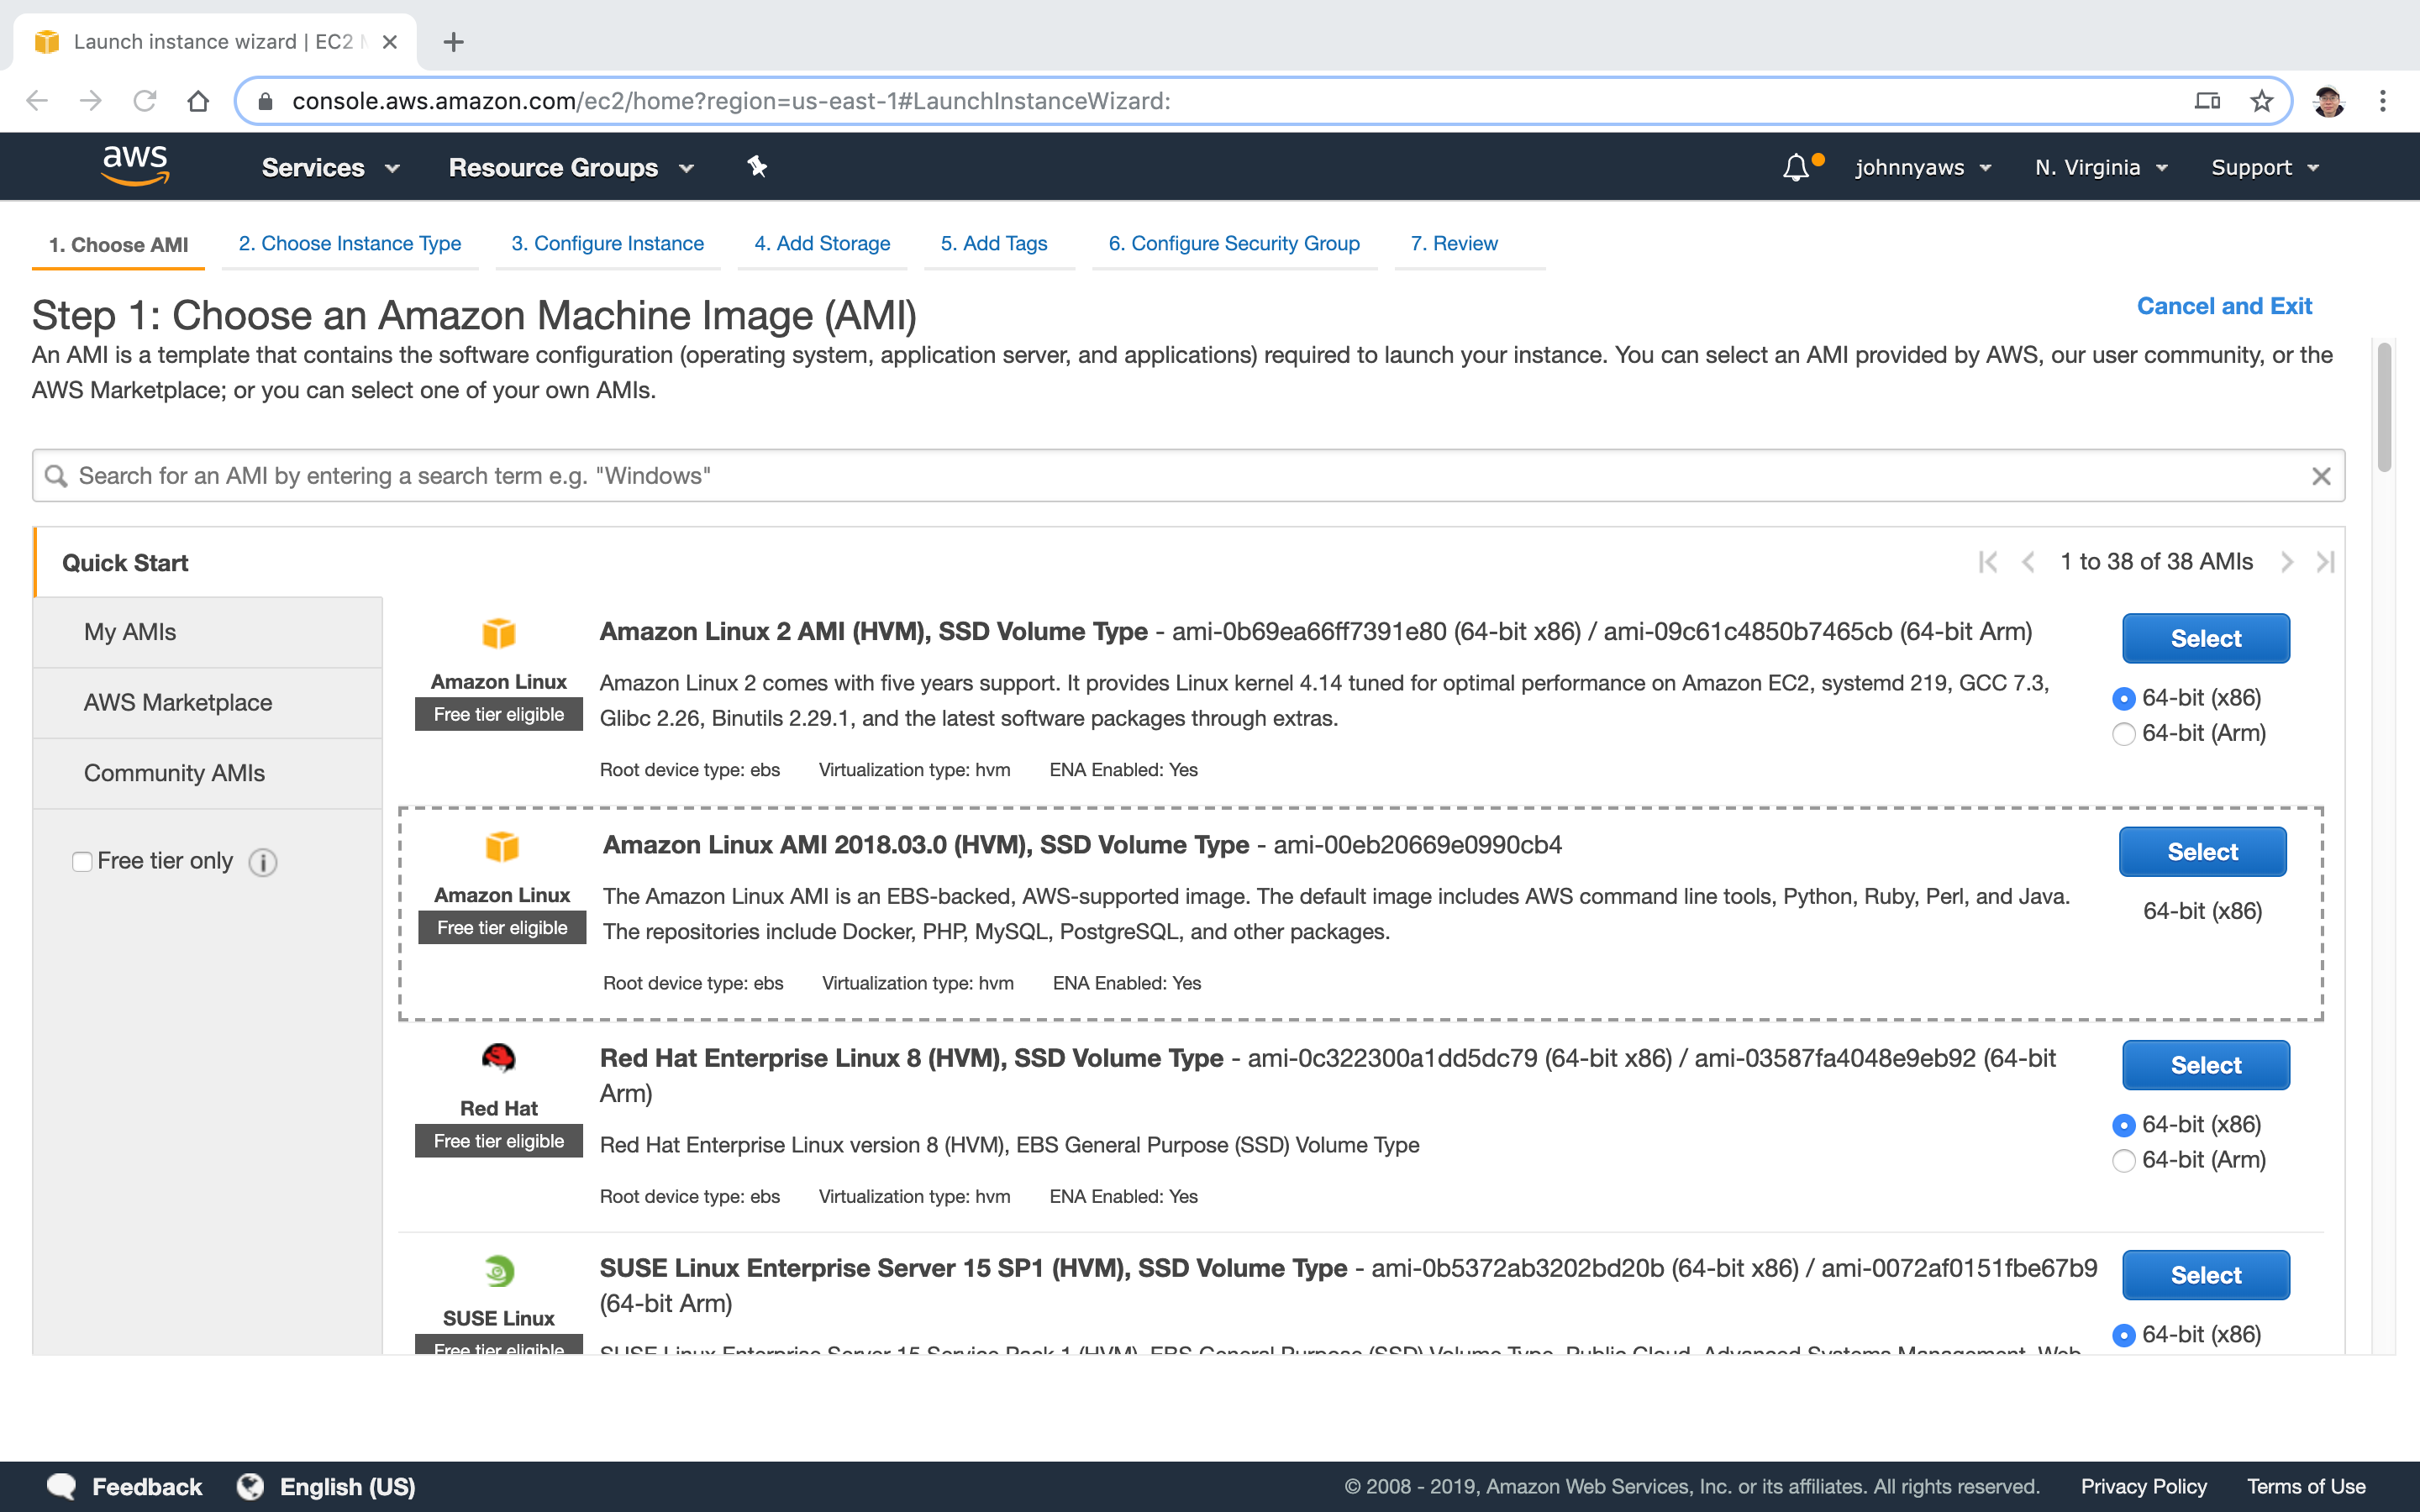
Create a new EC2 instance for acting as web server, select the second AMI.
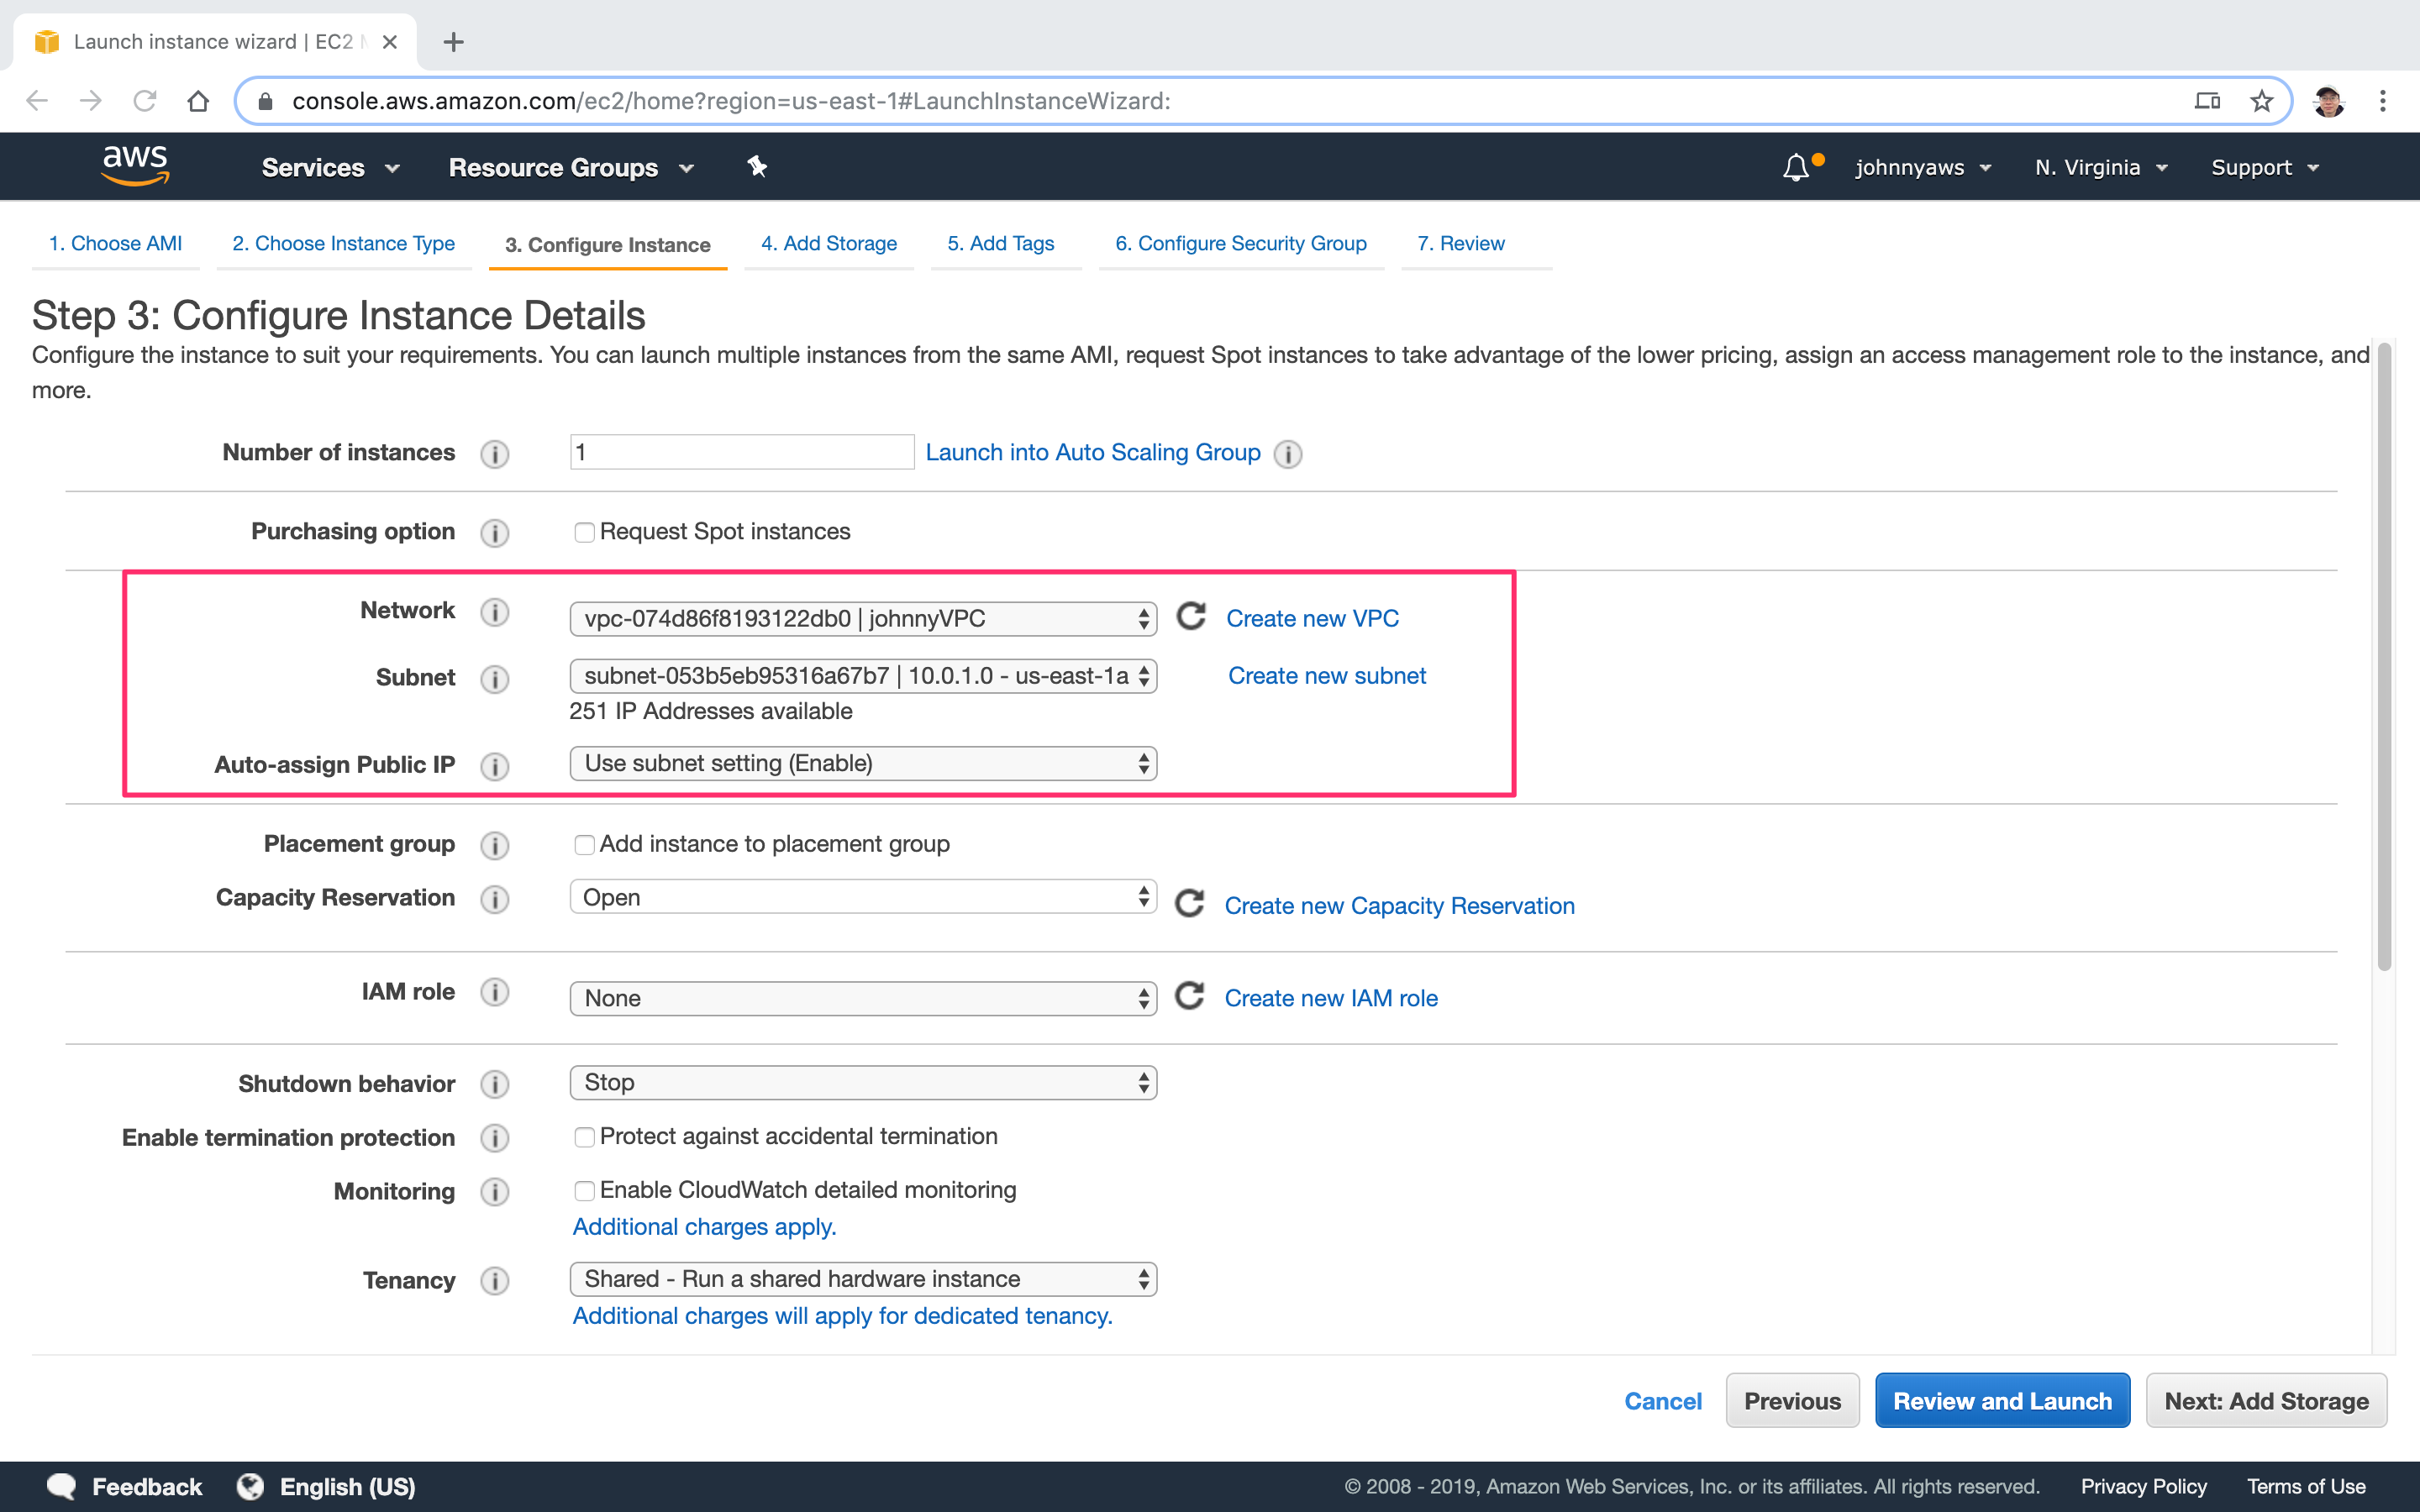
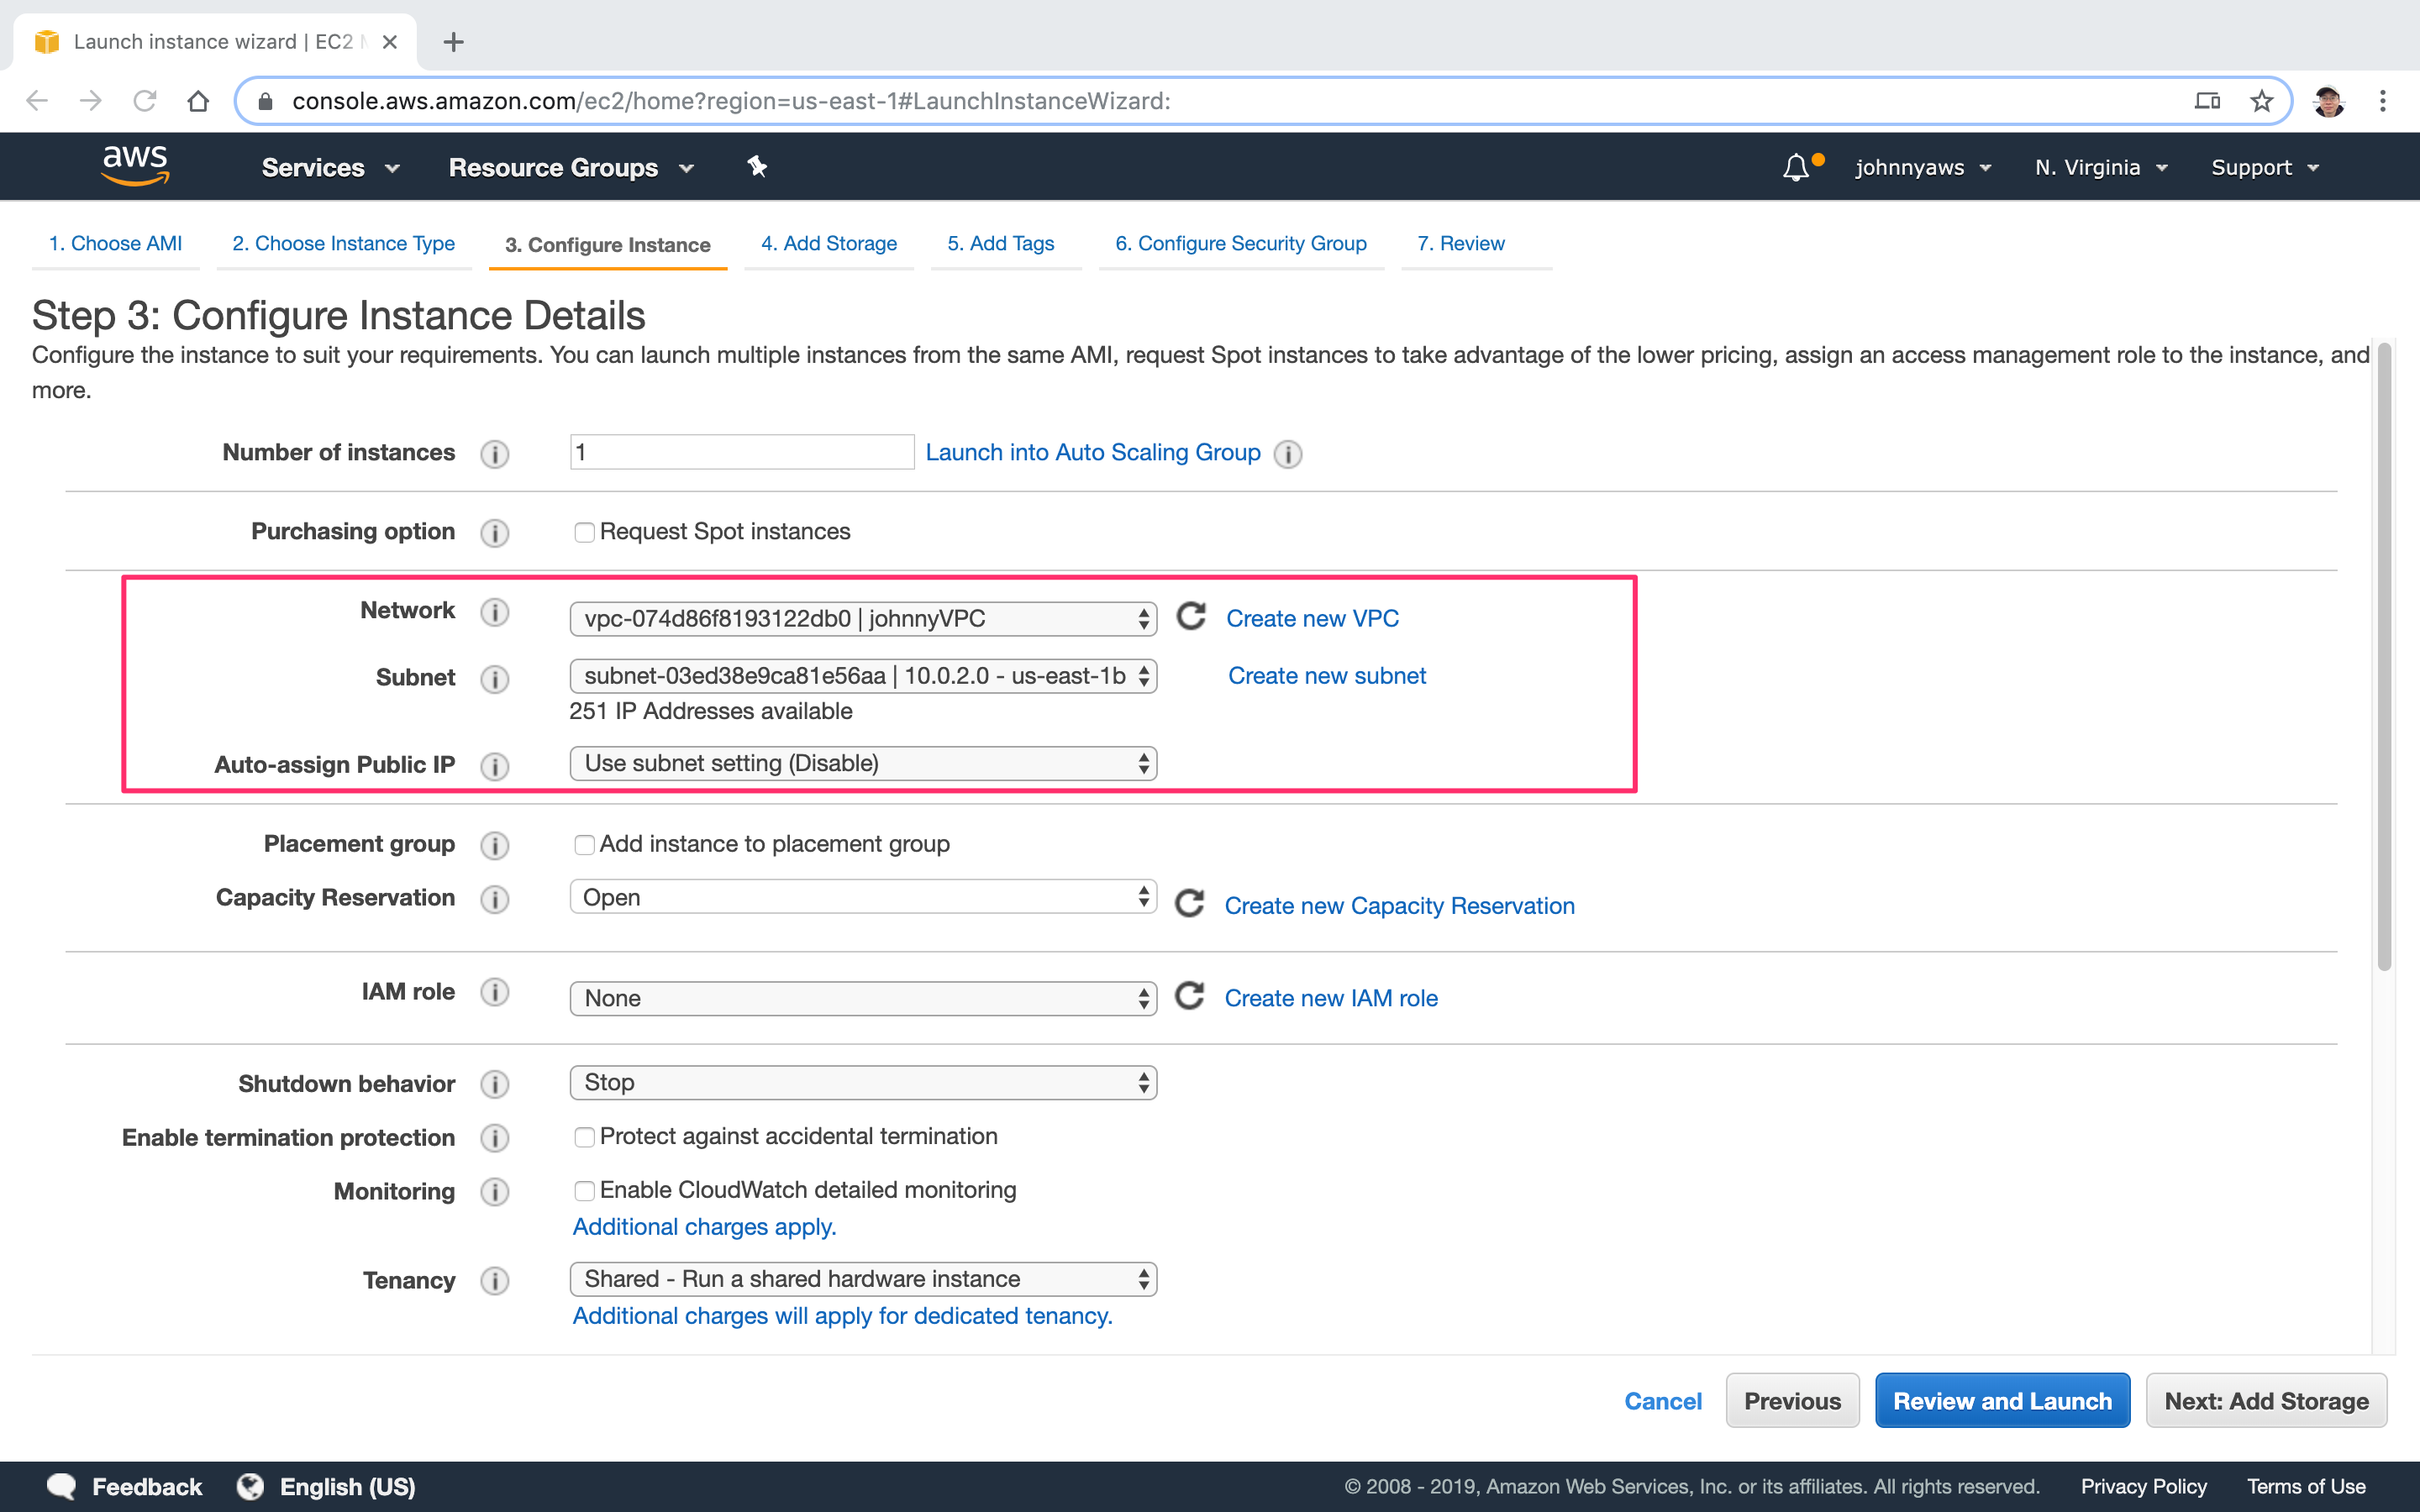
 Select the custom VPC created previously and choose the first subnet(10.0.1.0). Notice the public ip is auto enabled.
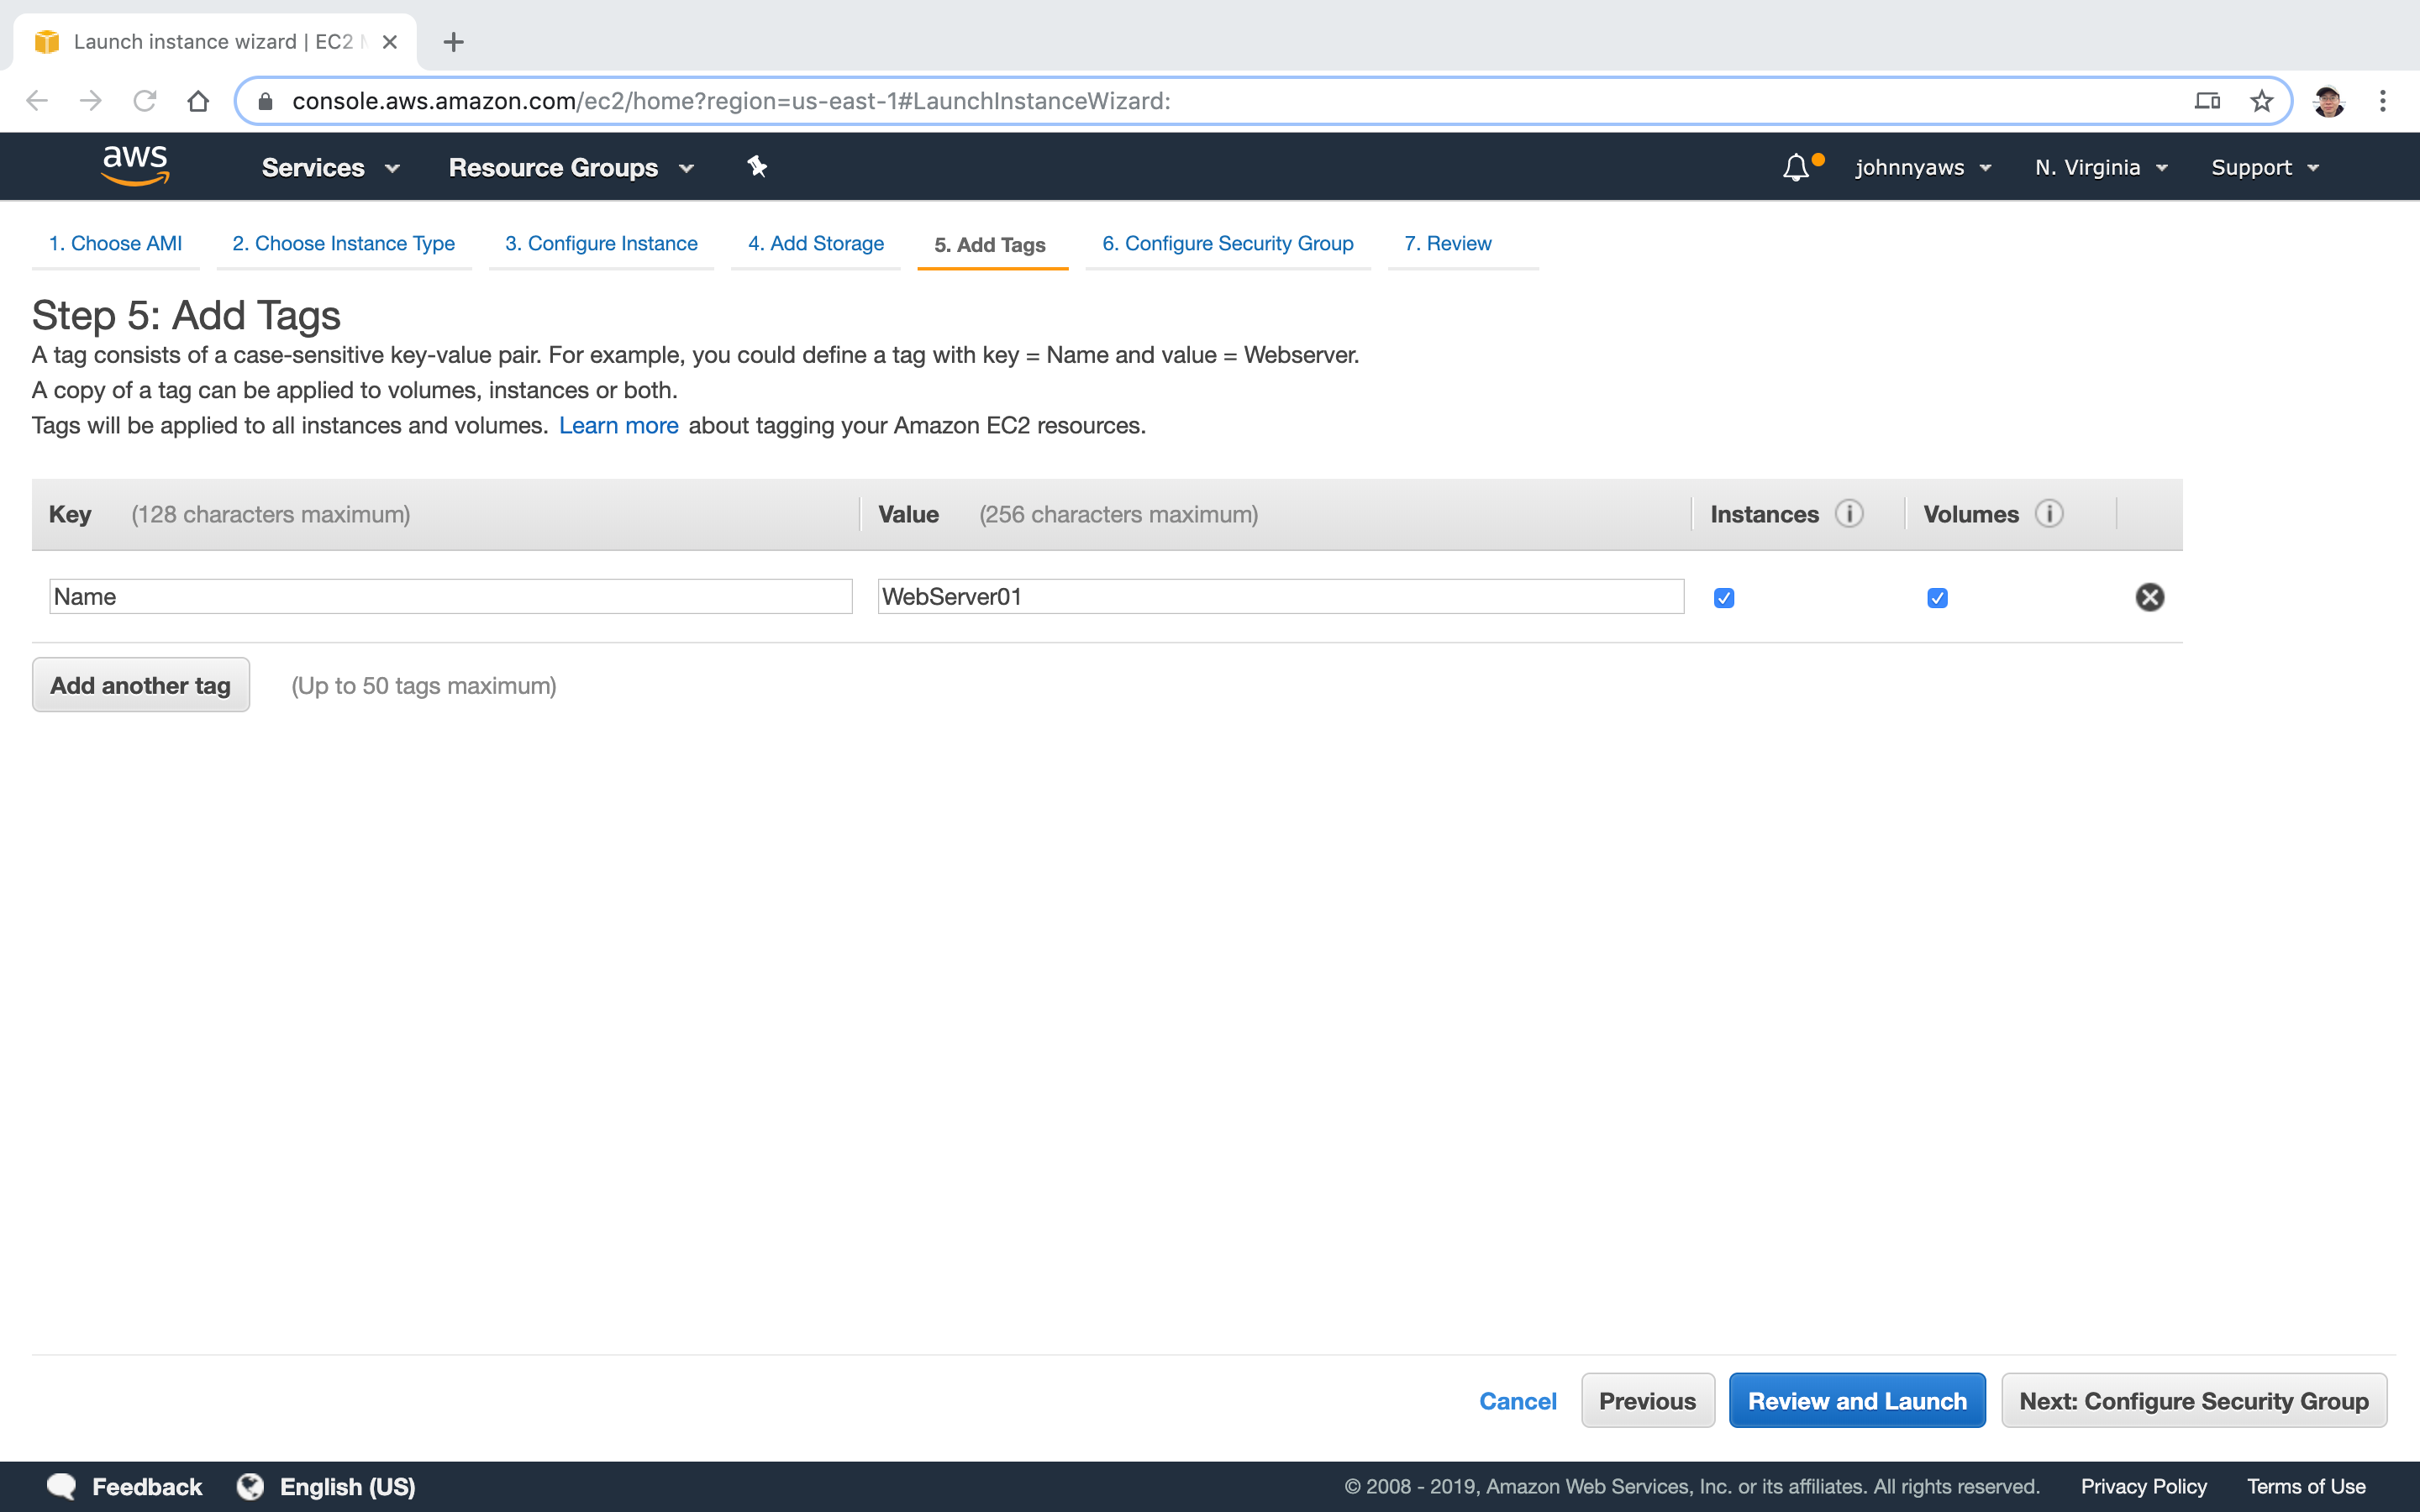
 Add tags to indicate this is a web server.
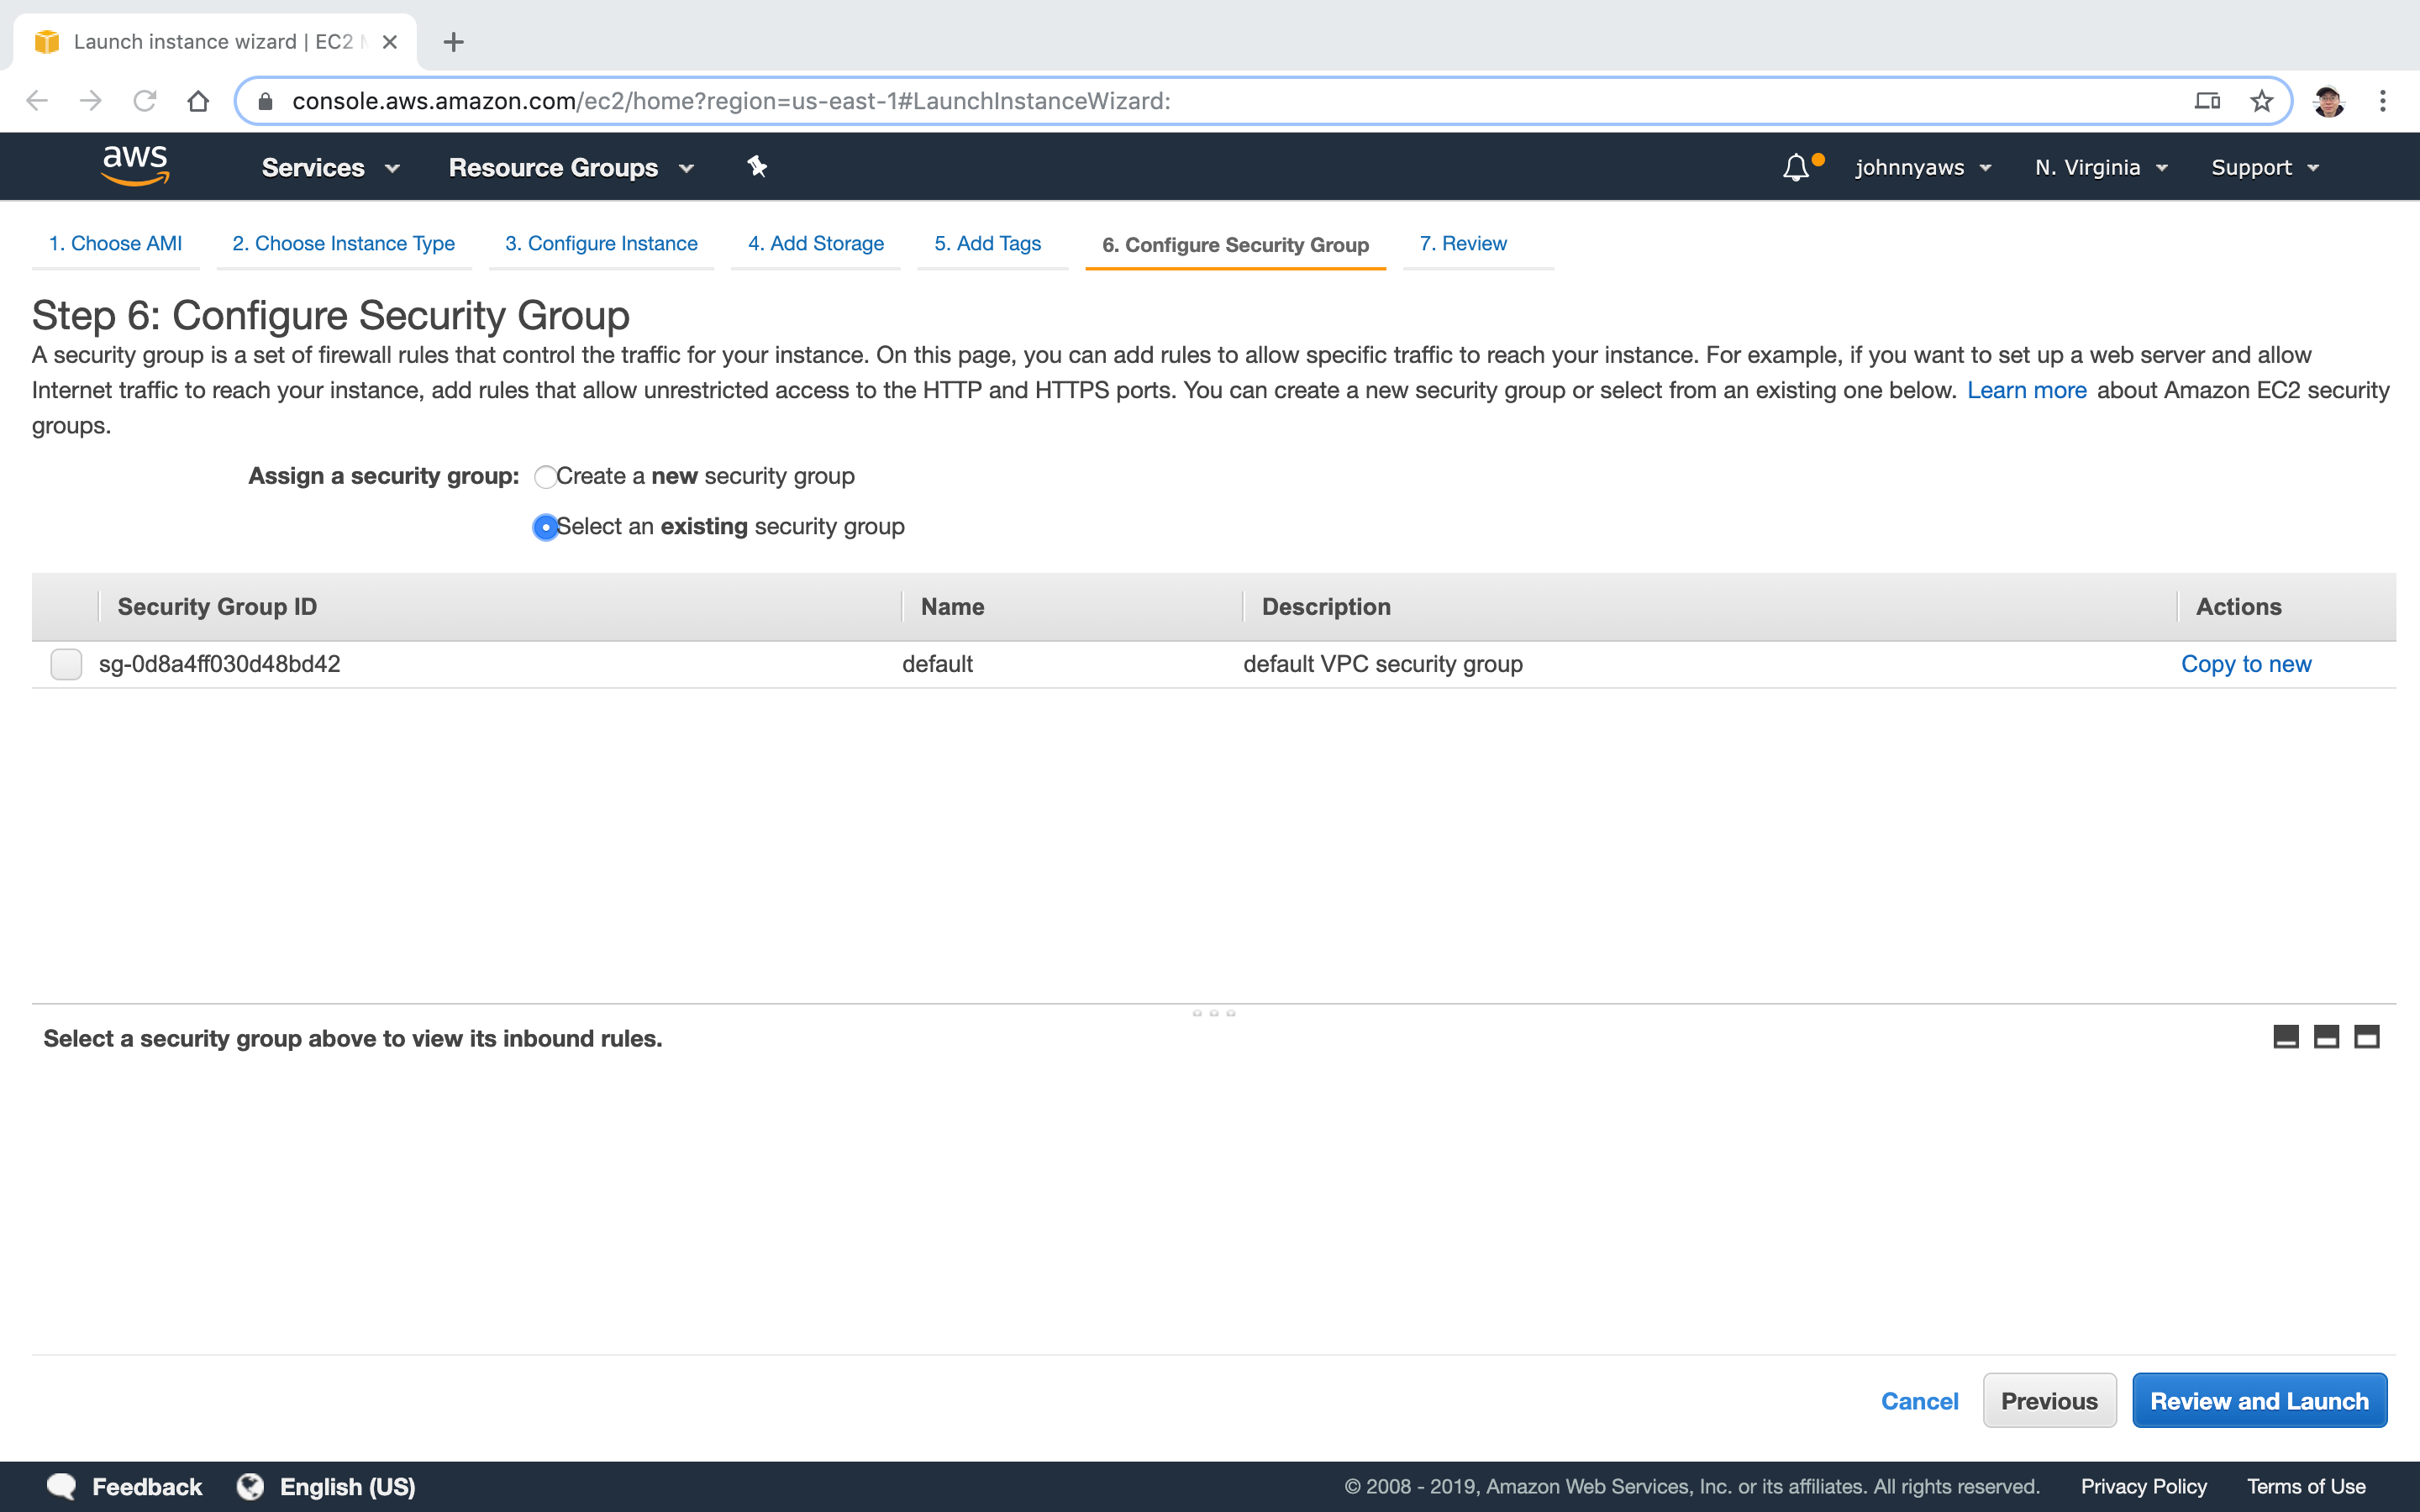
 There is no existing security groups here(Not seeing the WebDMZ), since we are using the new VPC now.
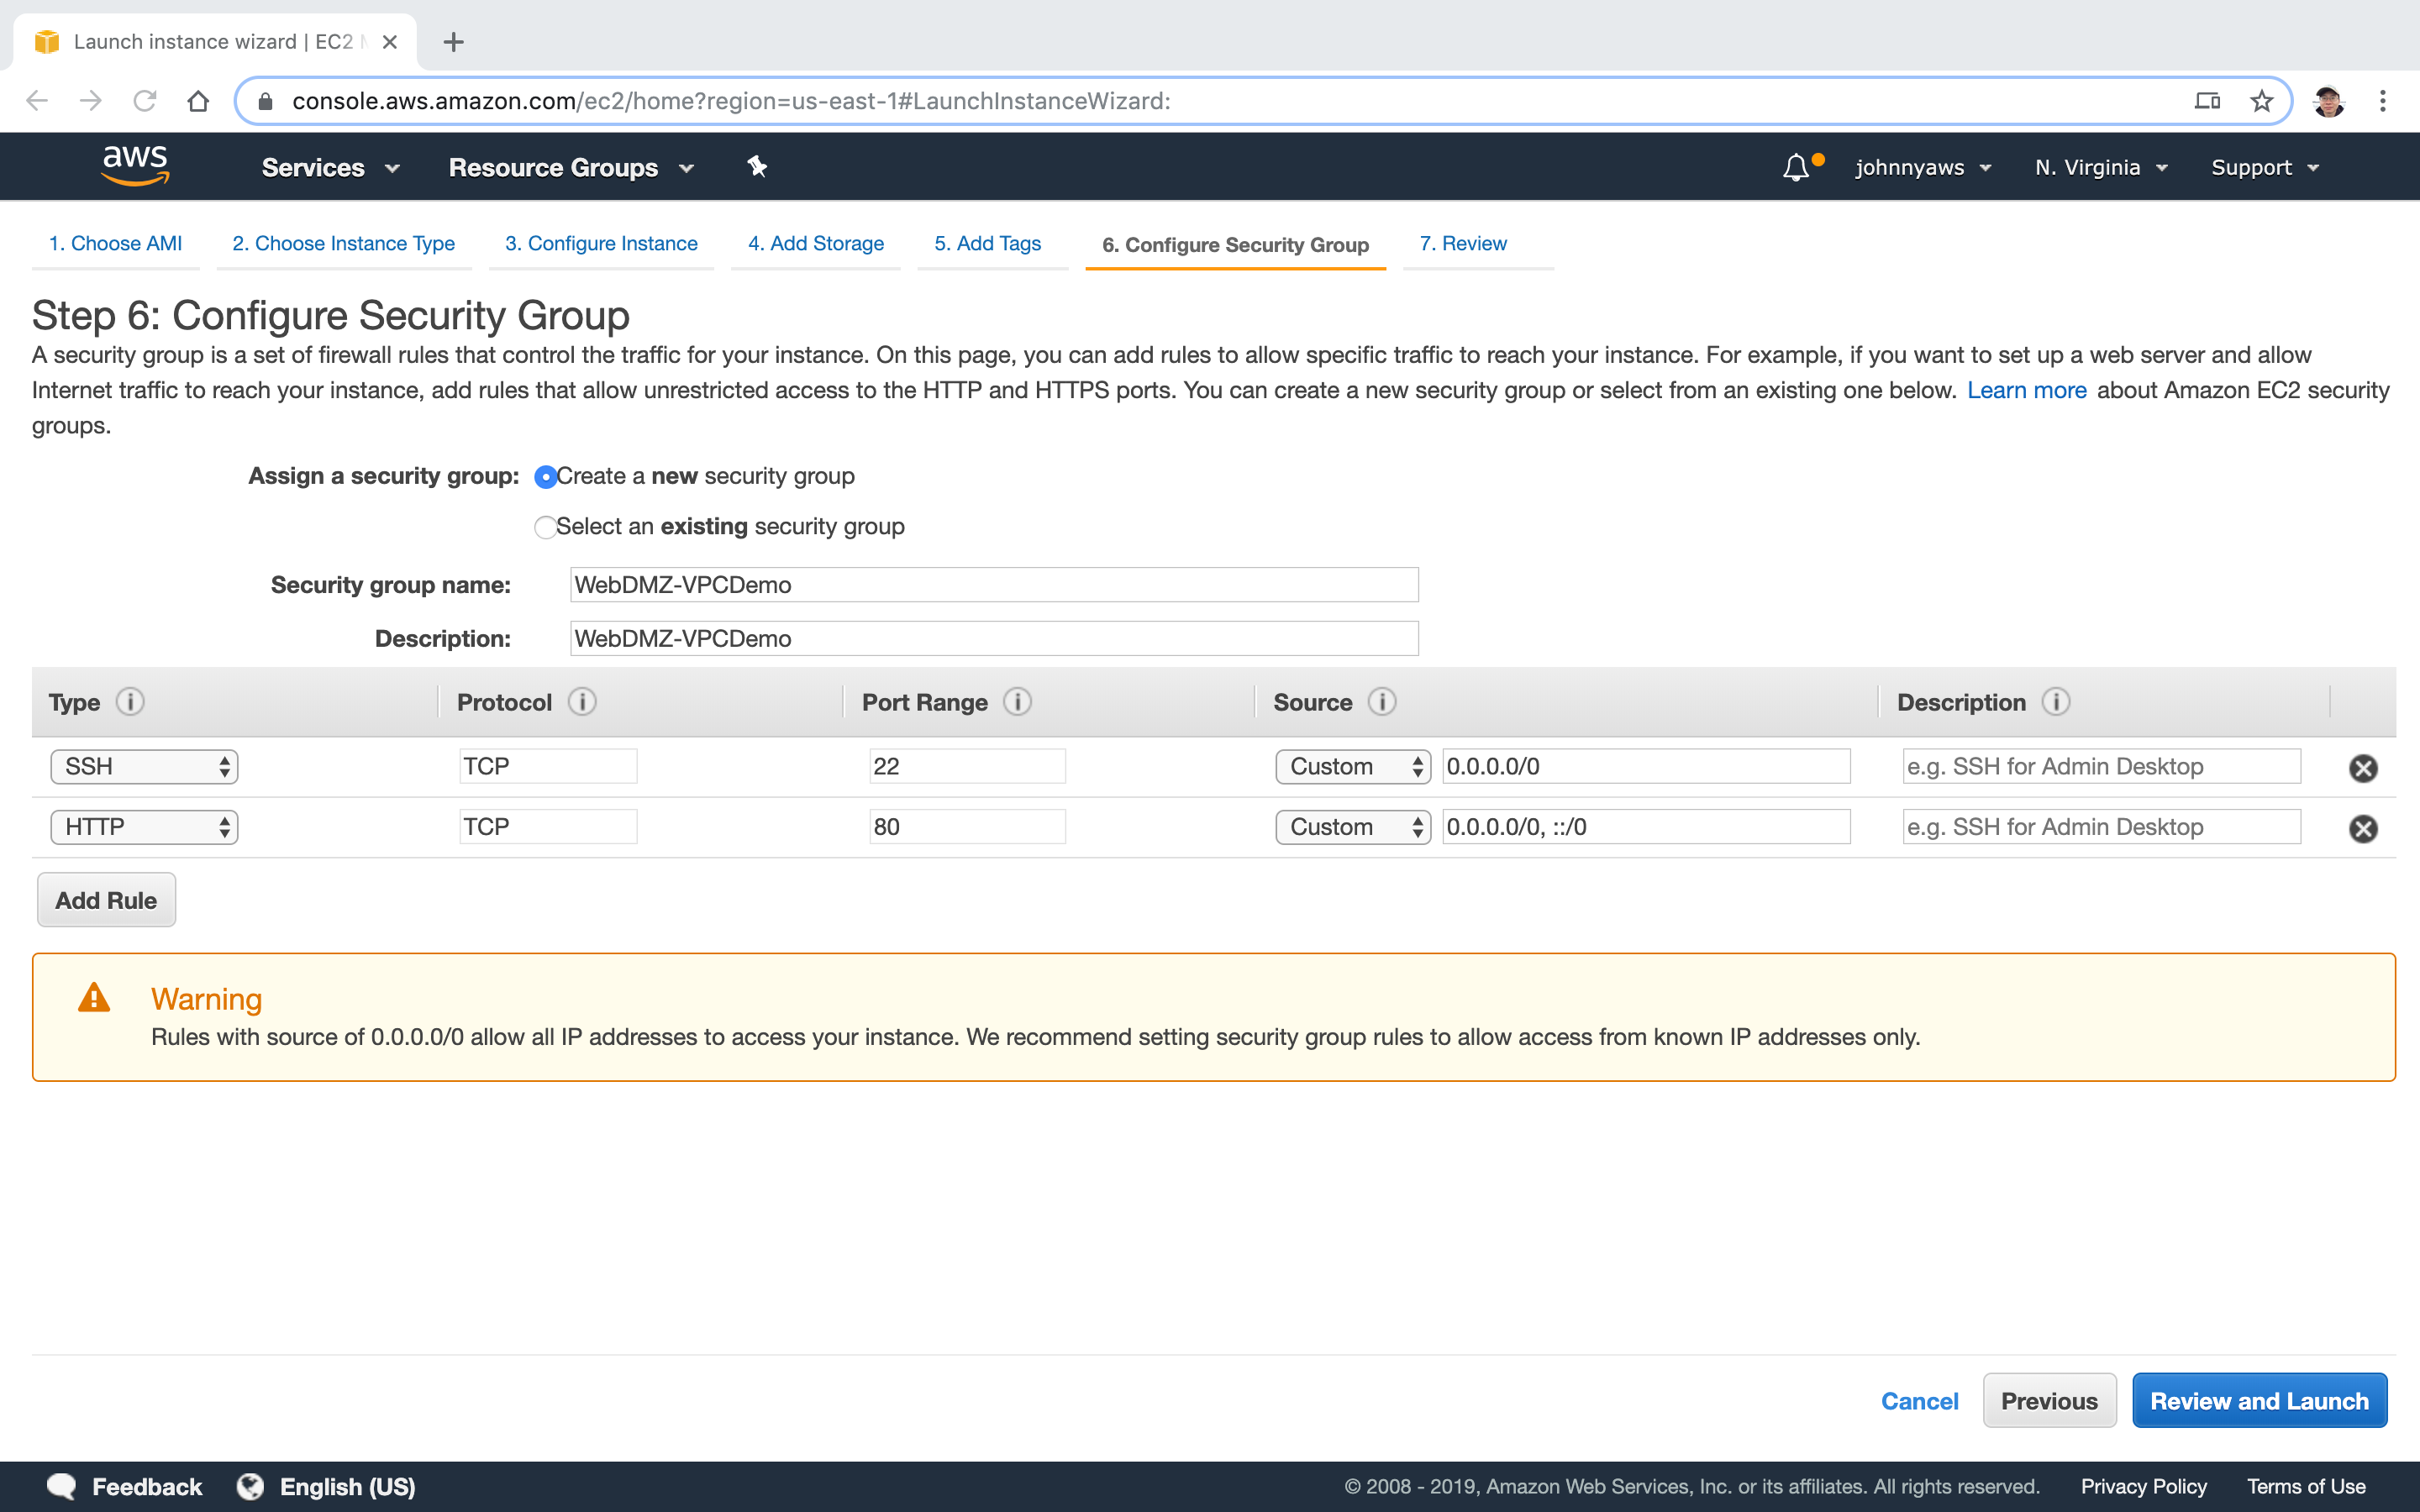
 Create new security group.
 Create second instance for database. Select the VPC and choose the second subnet(10.0.2.0). Notice the public ip is auto disabled.
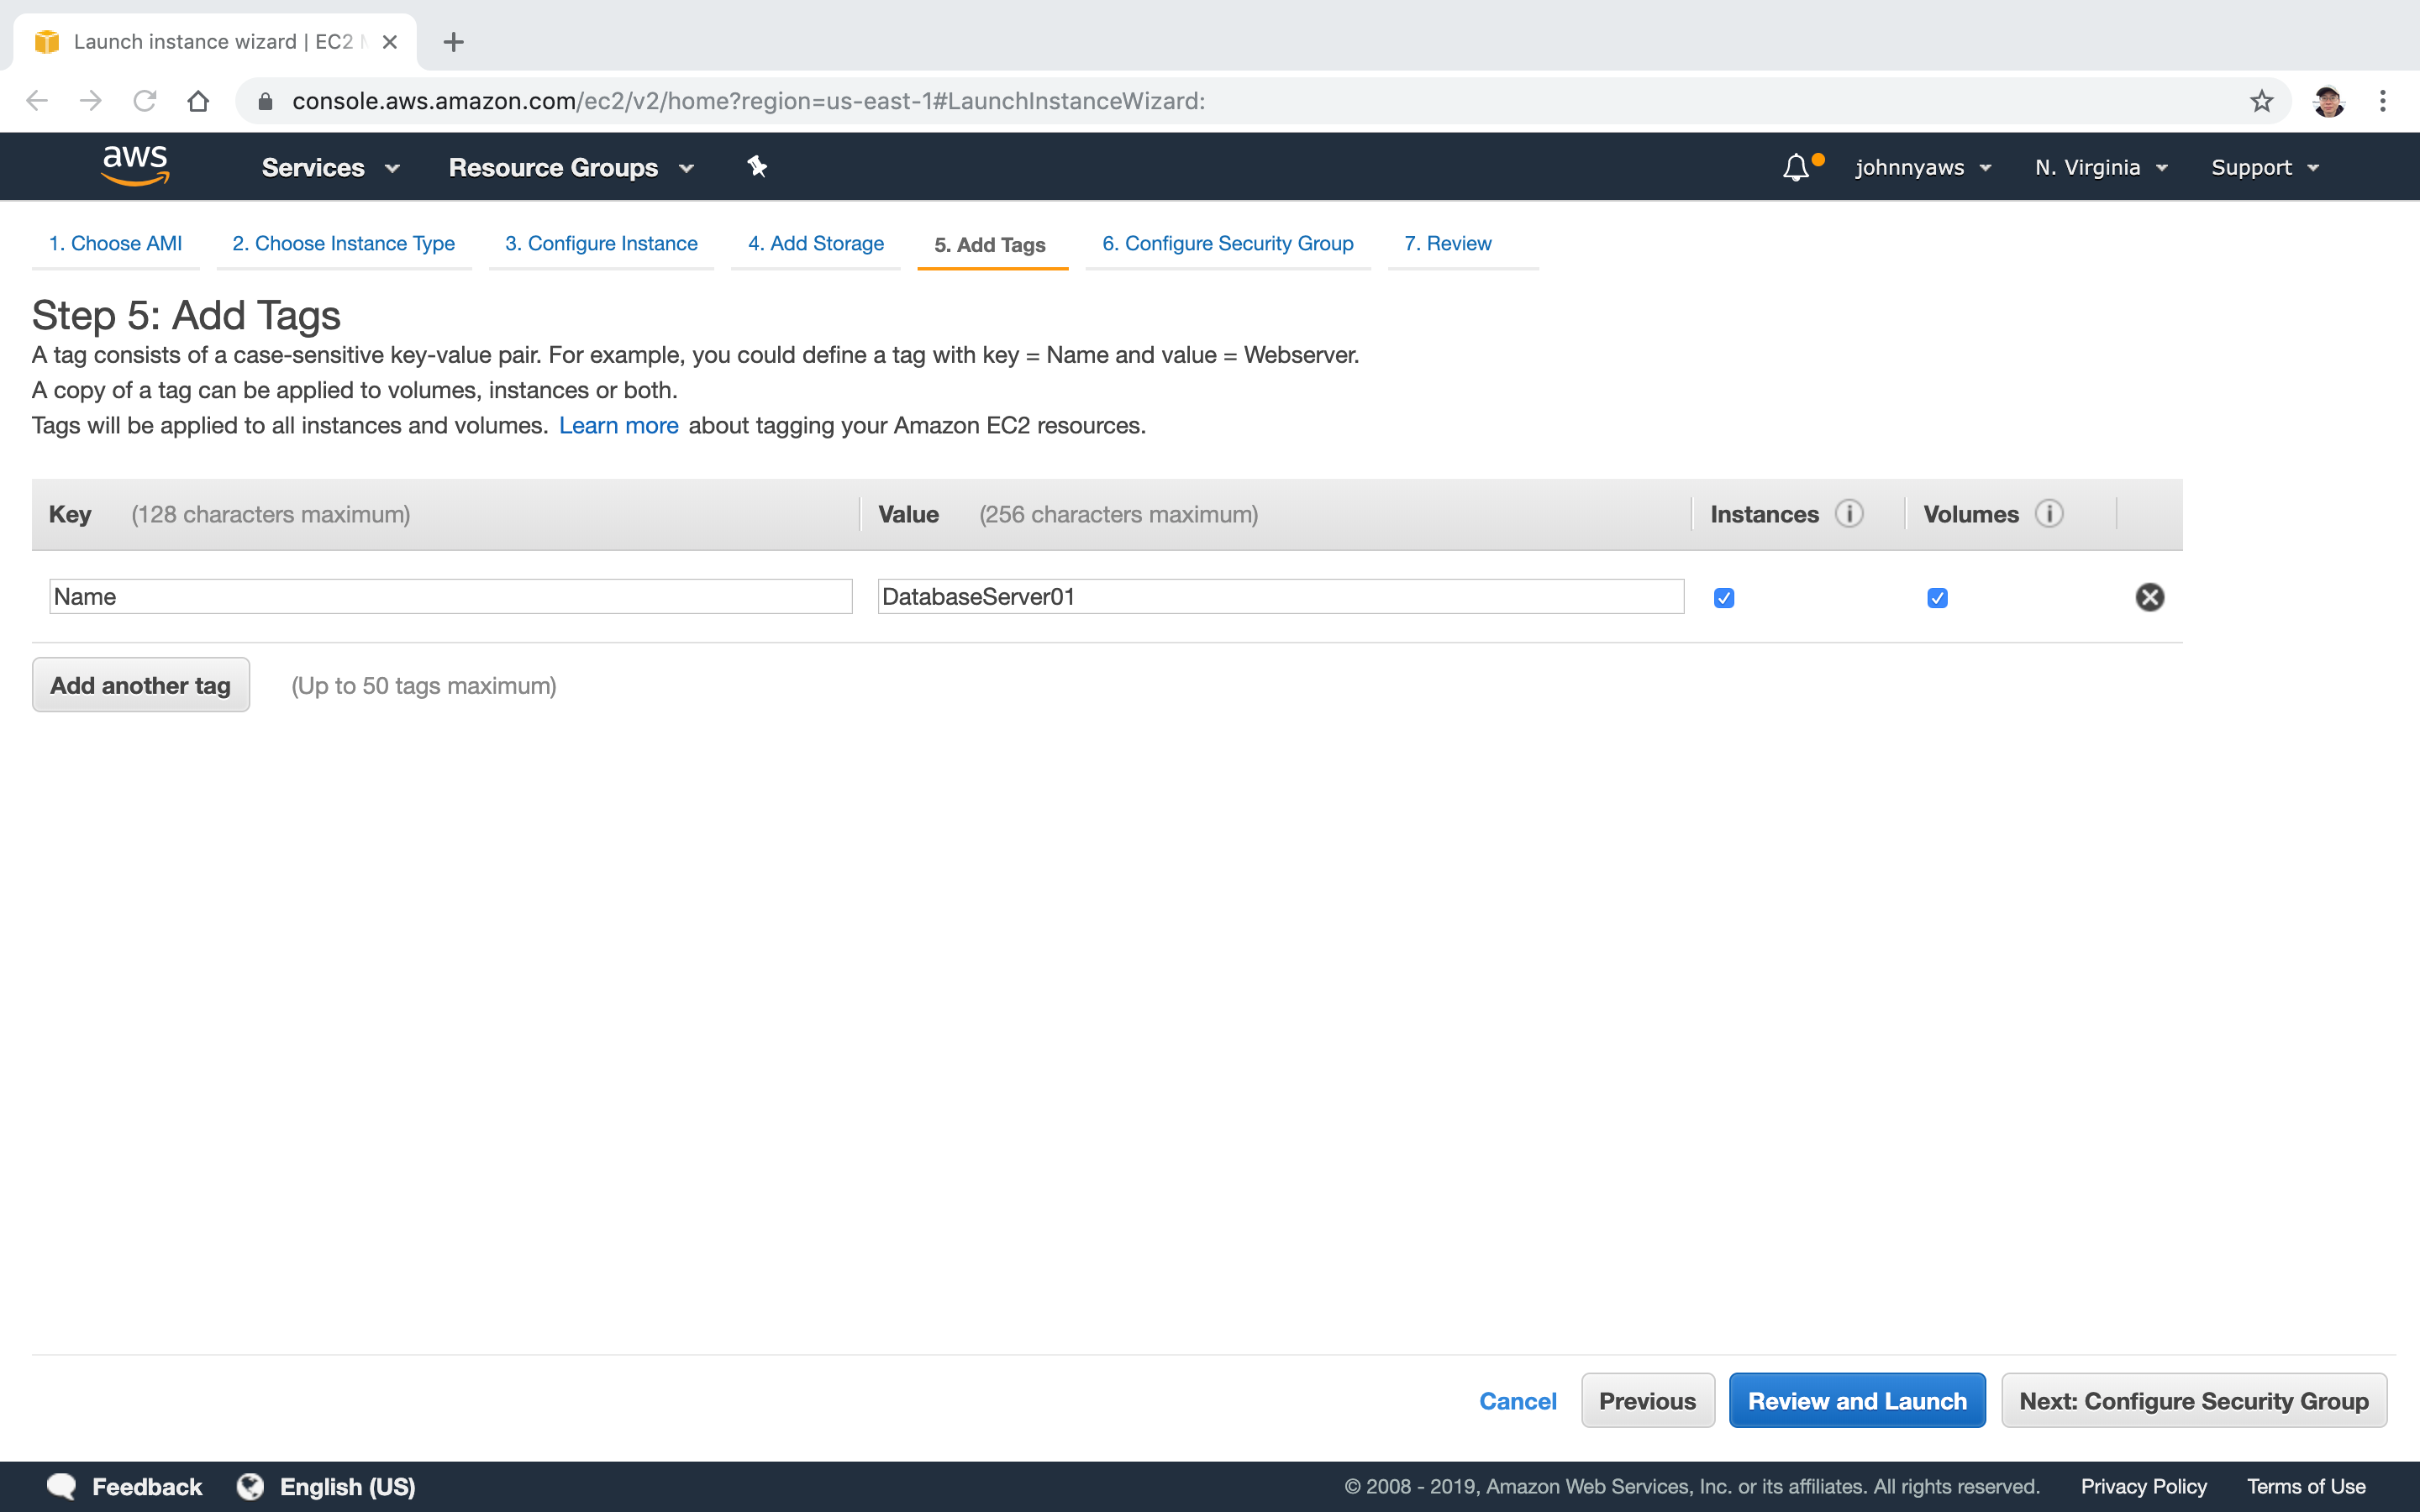
 Add tags to indicate this is a database server.
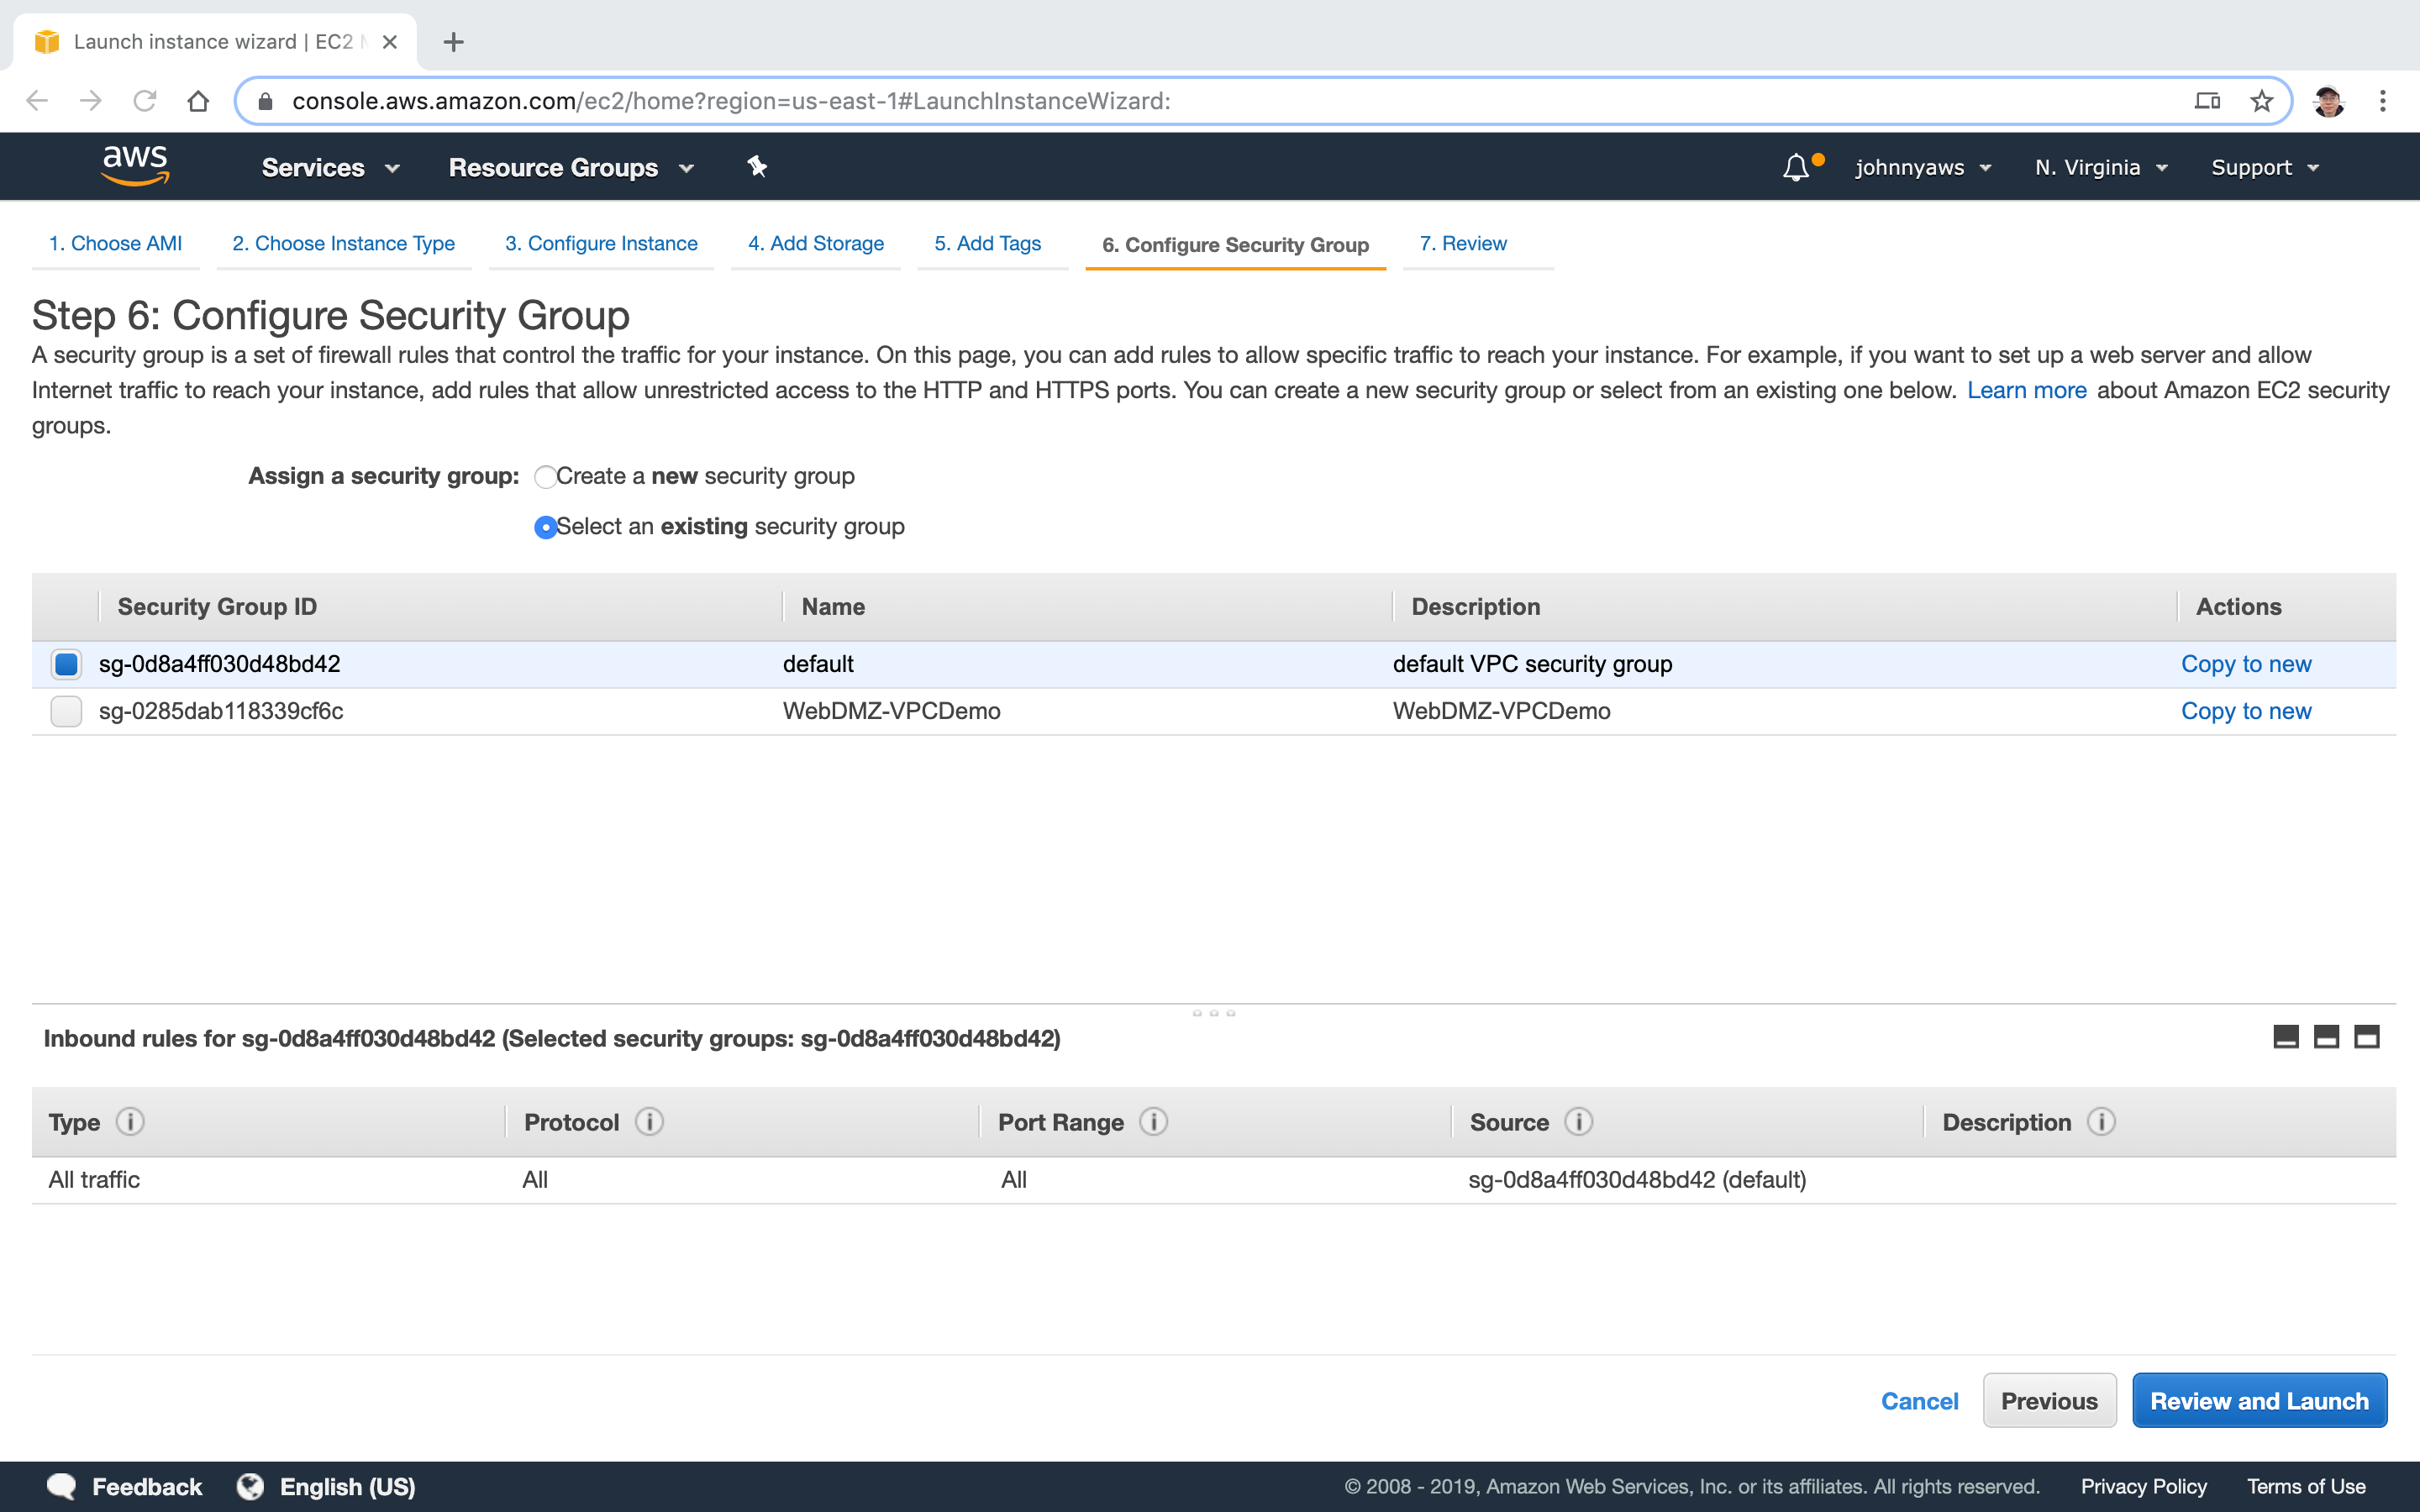
 Use the default security group.
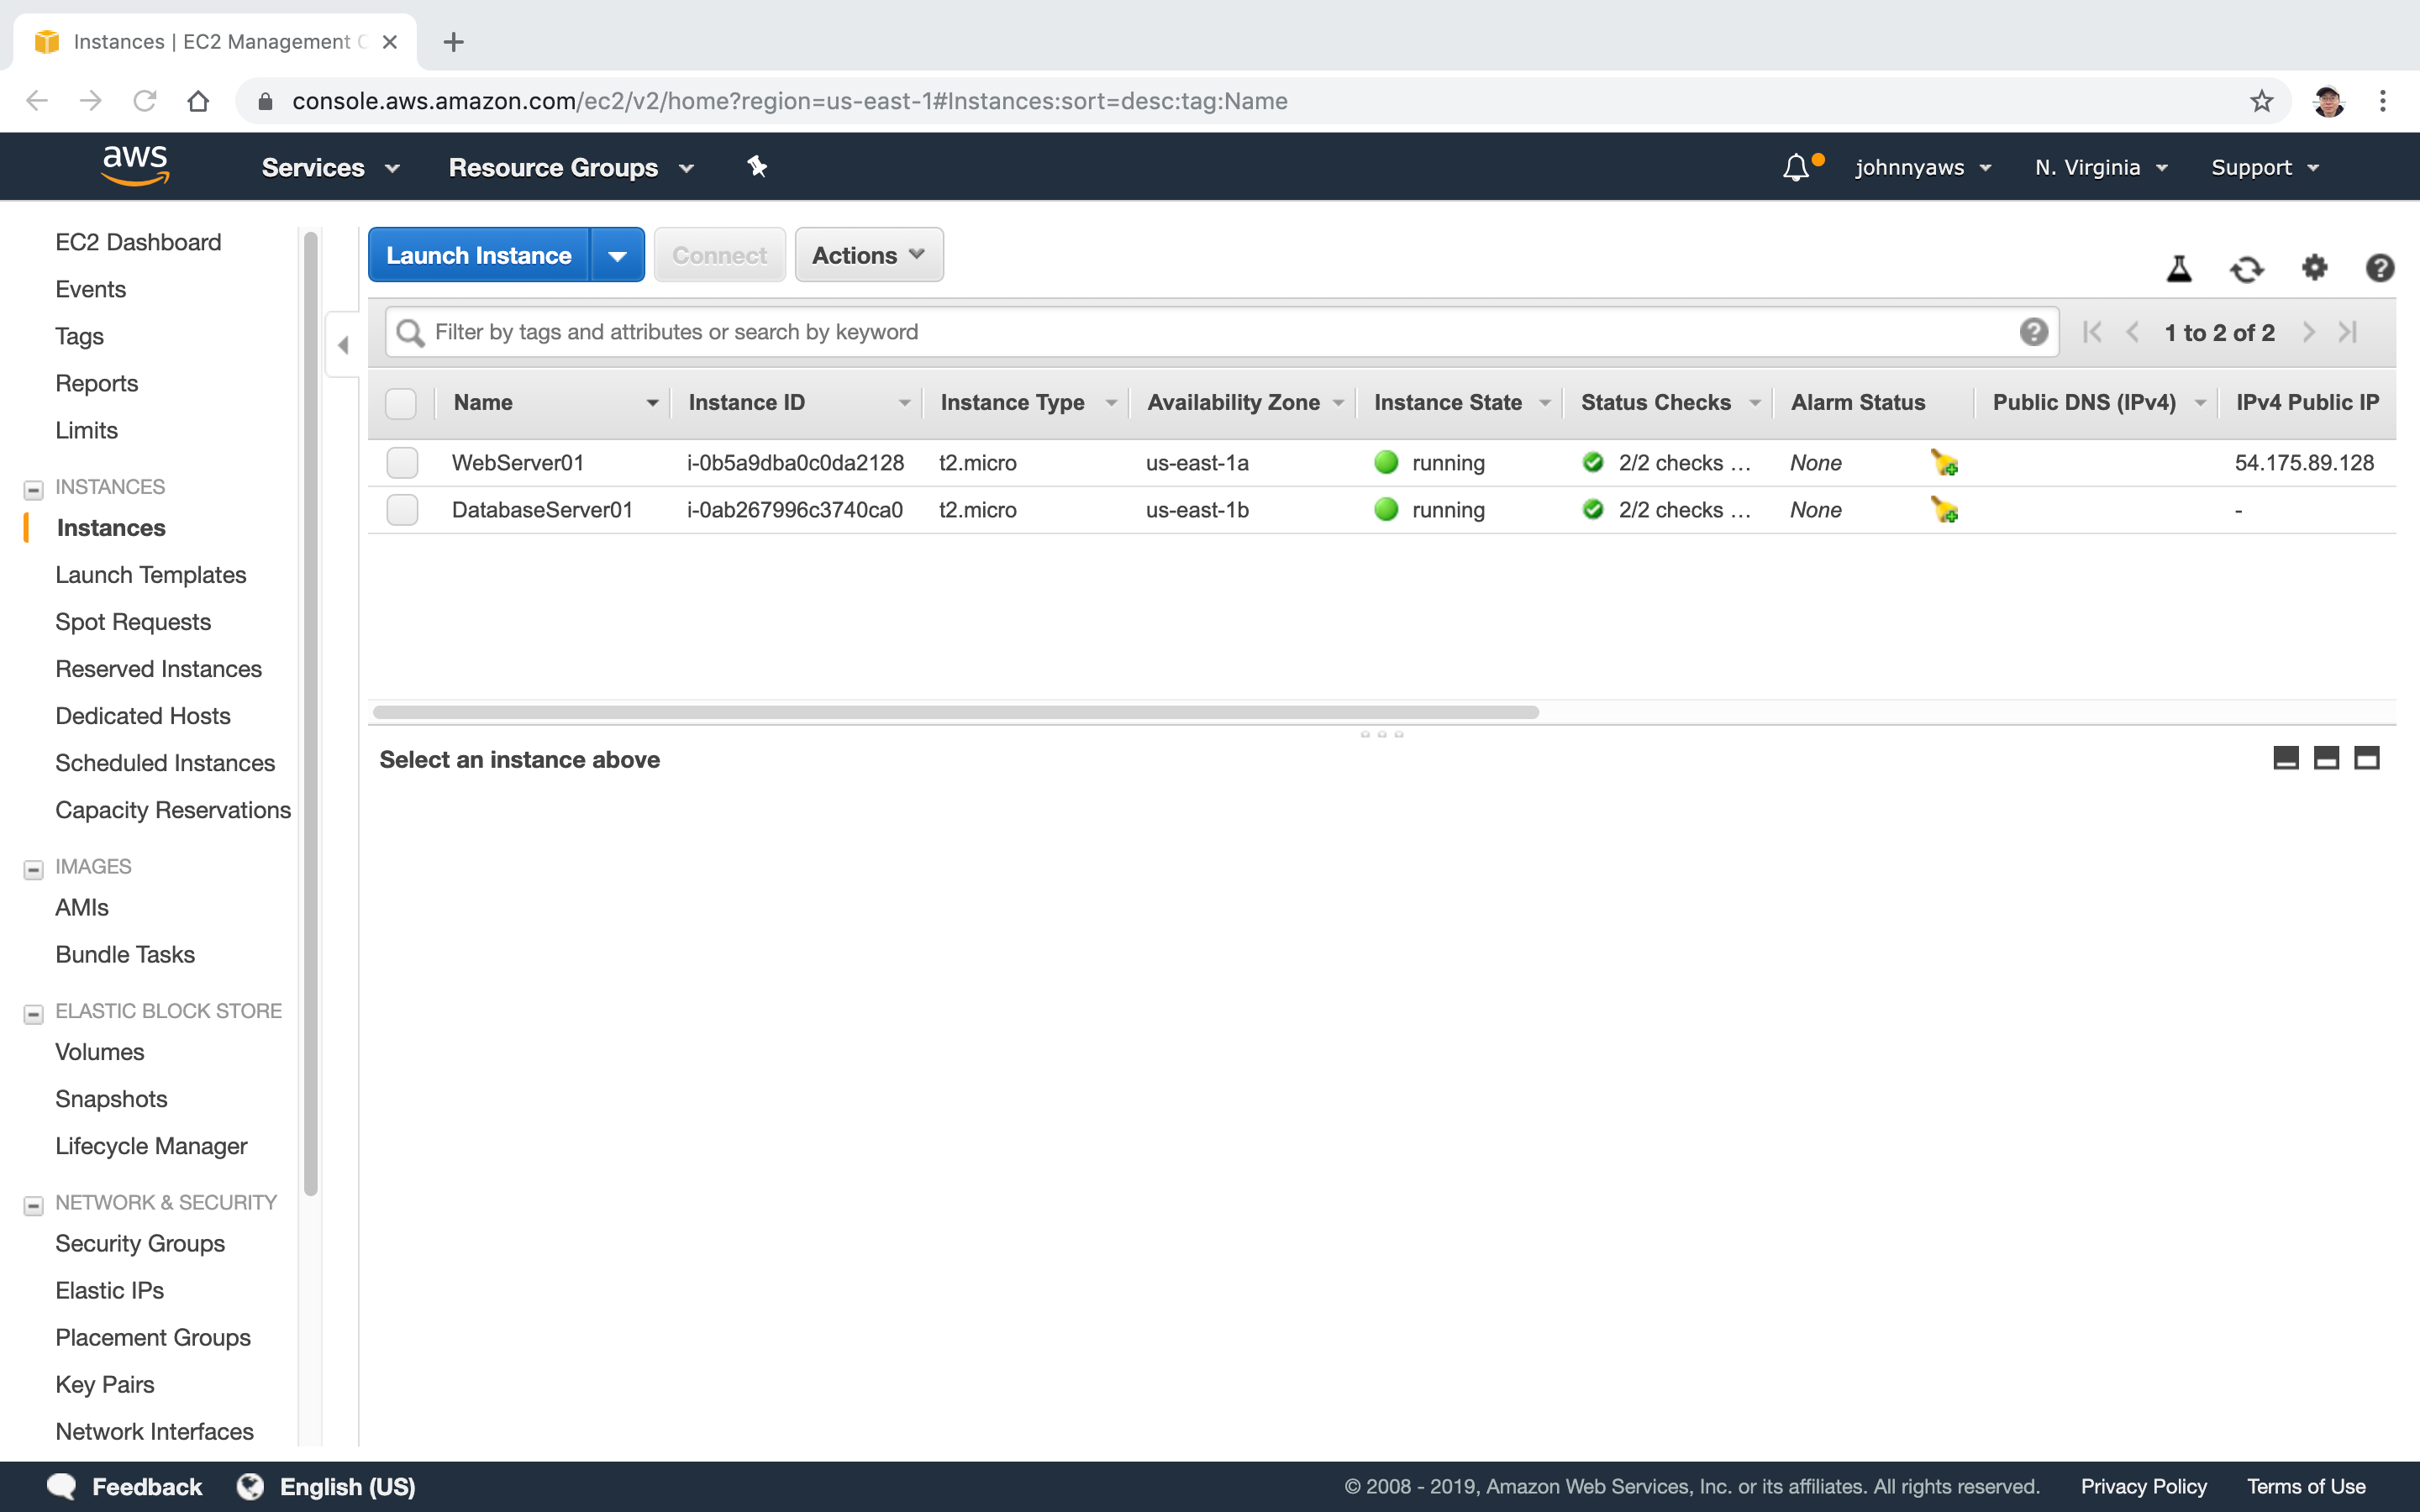
 Now we have two instances, one for web server, one for db server. Notice the webserver has public ip address.
 Until now, we have created the VPC from scratch and it looks as follows.
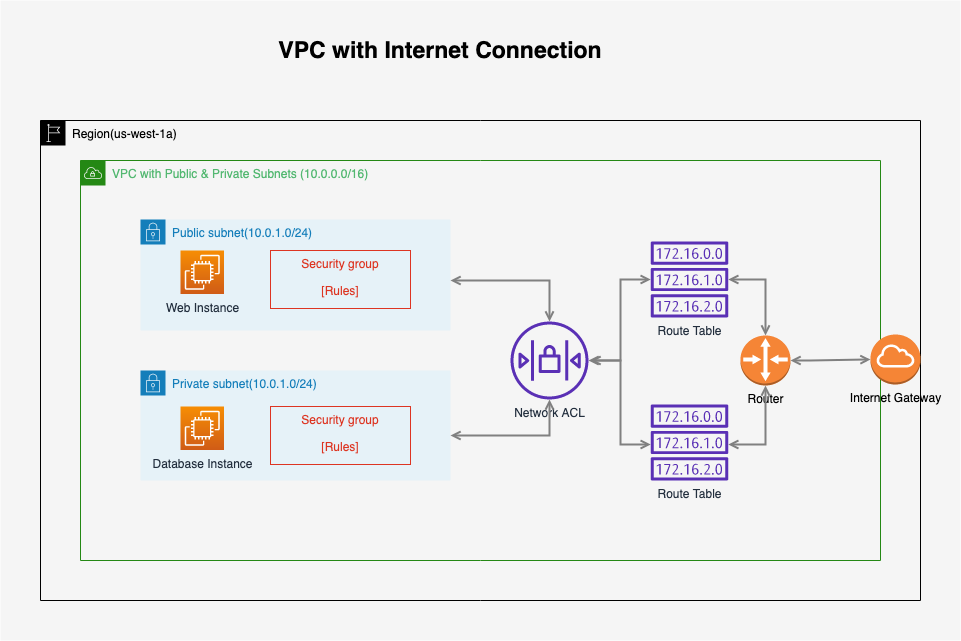 We have two instances, one is web server and another is DB server. Currently, the web server can’t connect to db server. We will create security group to enable the connection from web server to db server.
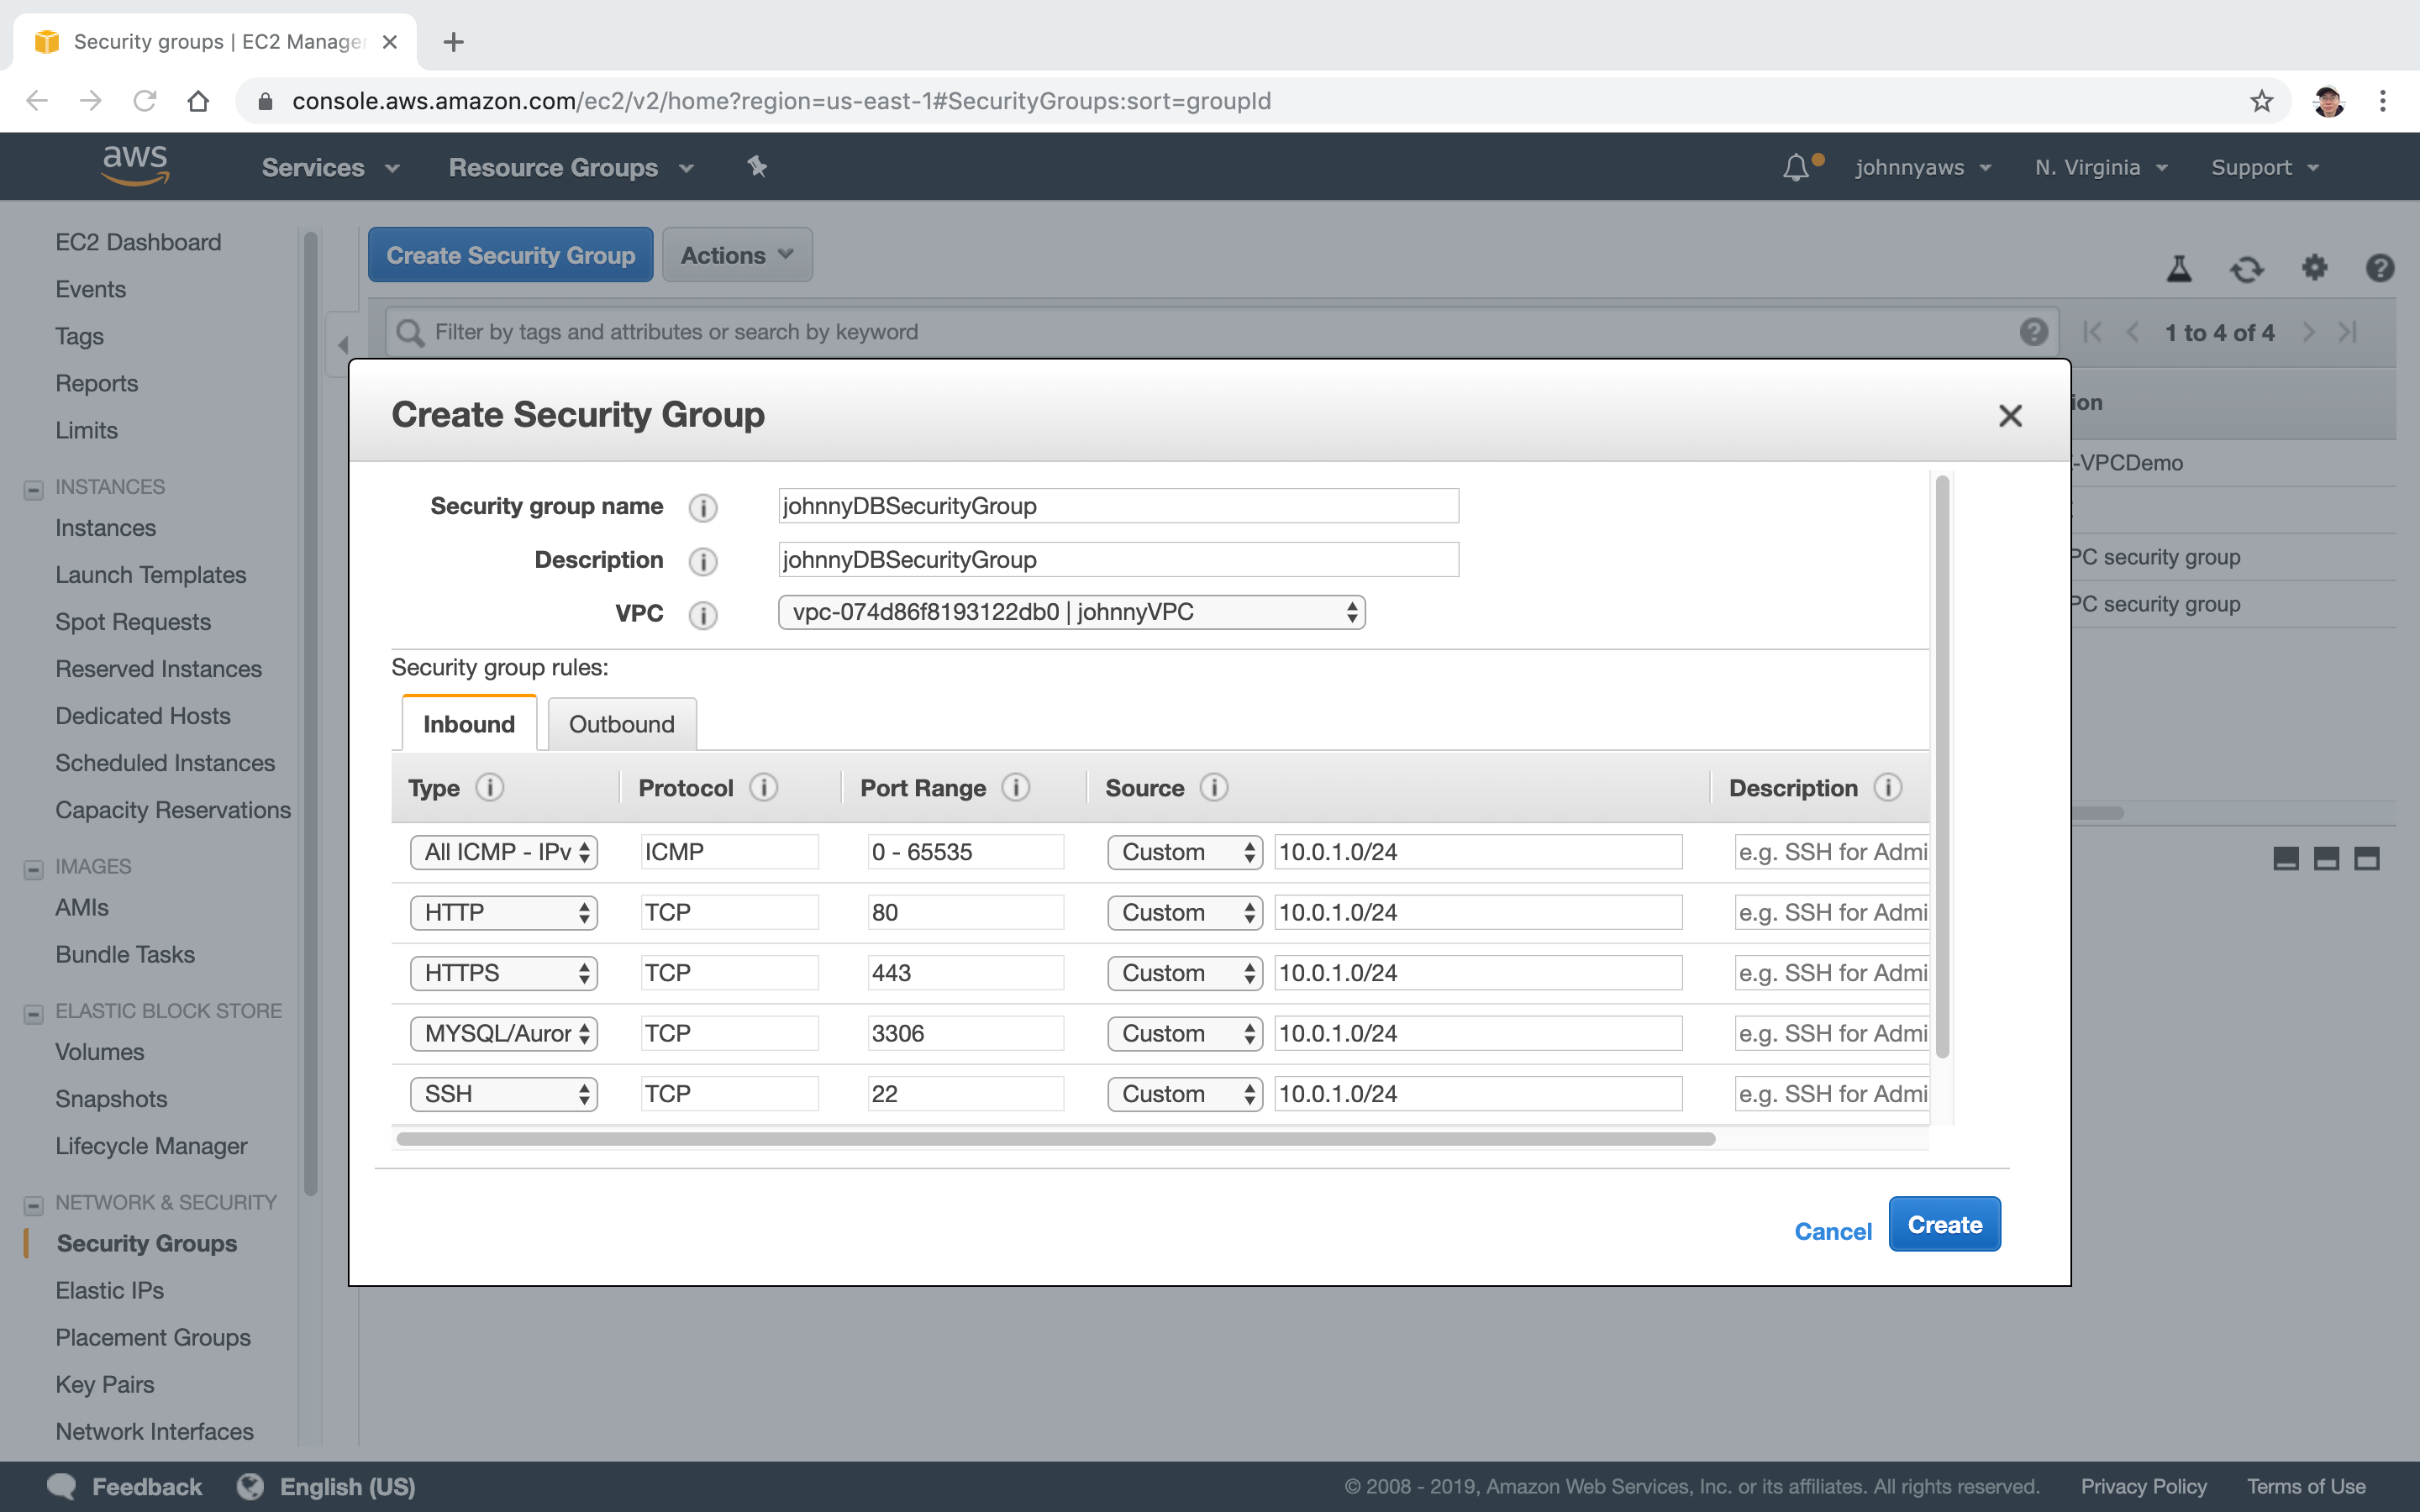
2.5 Create Security Group
Go to Services->EC2->Network & Security->Security Groups, click “Create security group”. Provide name and description, select the custom VPC. Setup the rules as follows, Create.
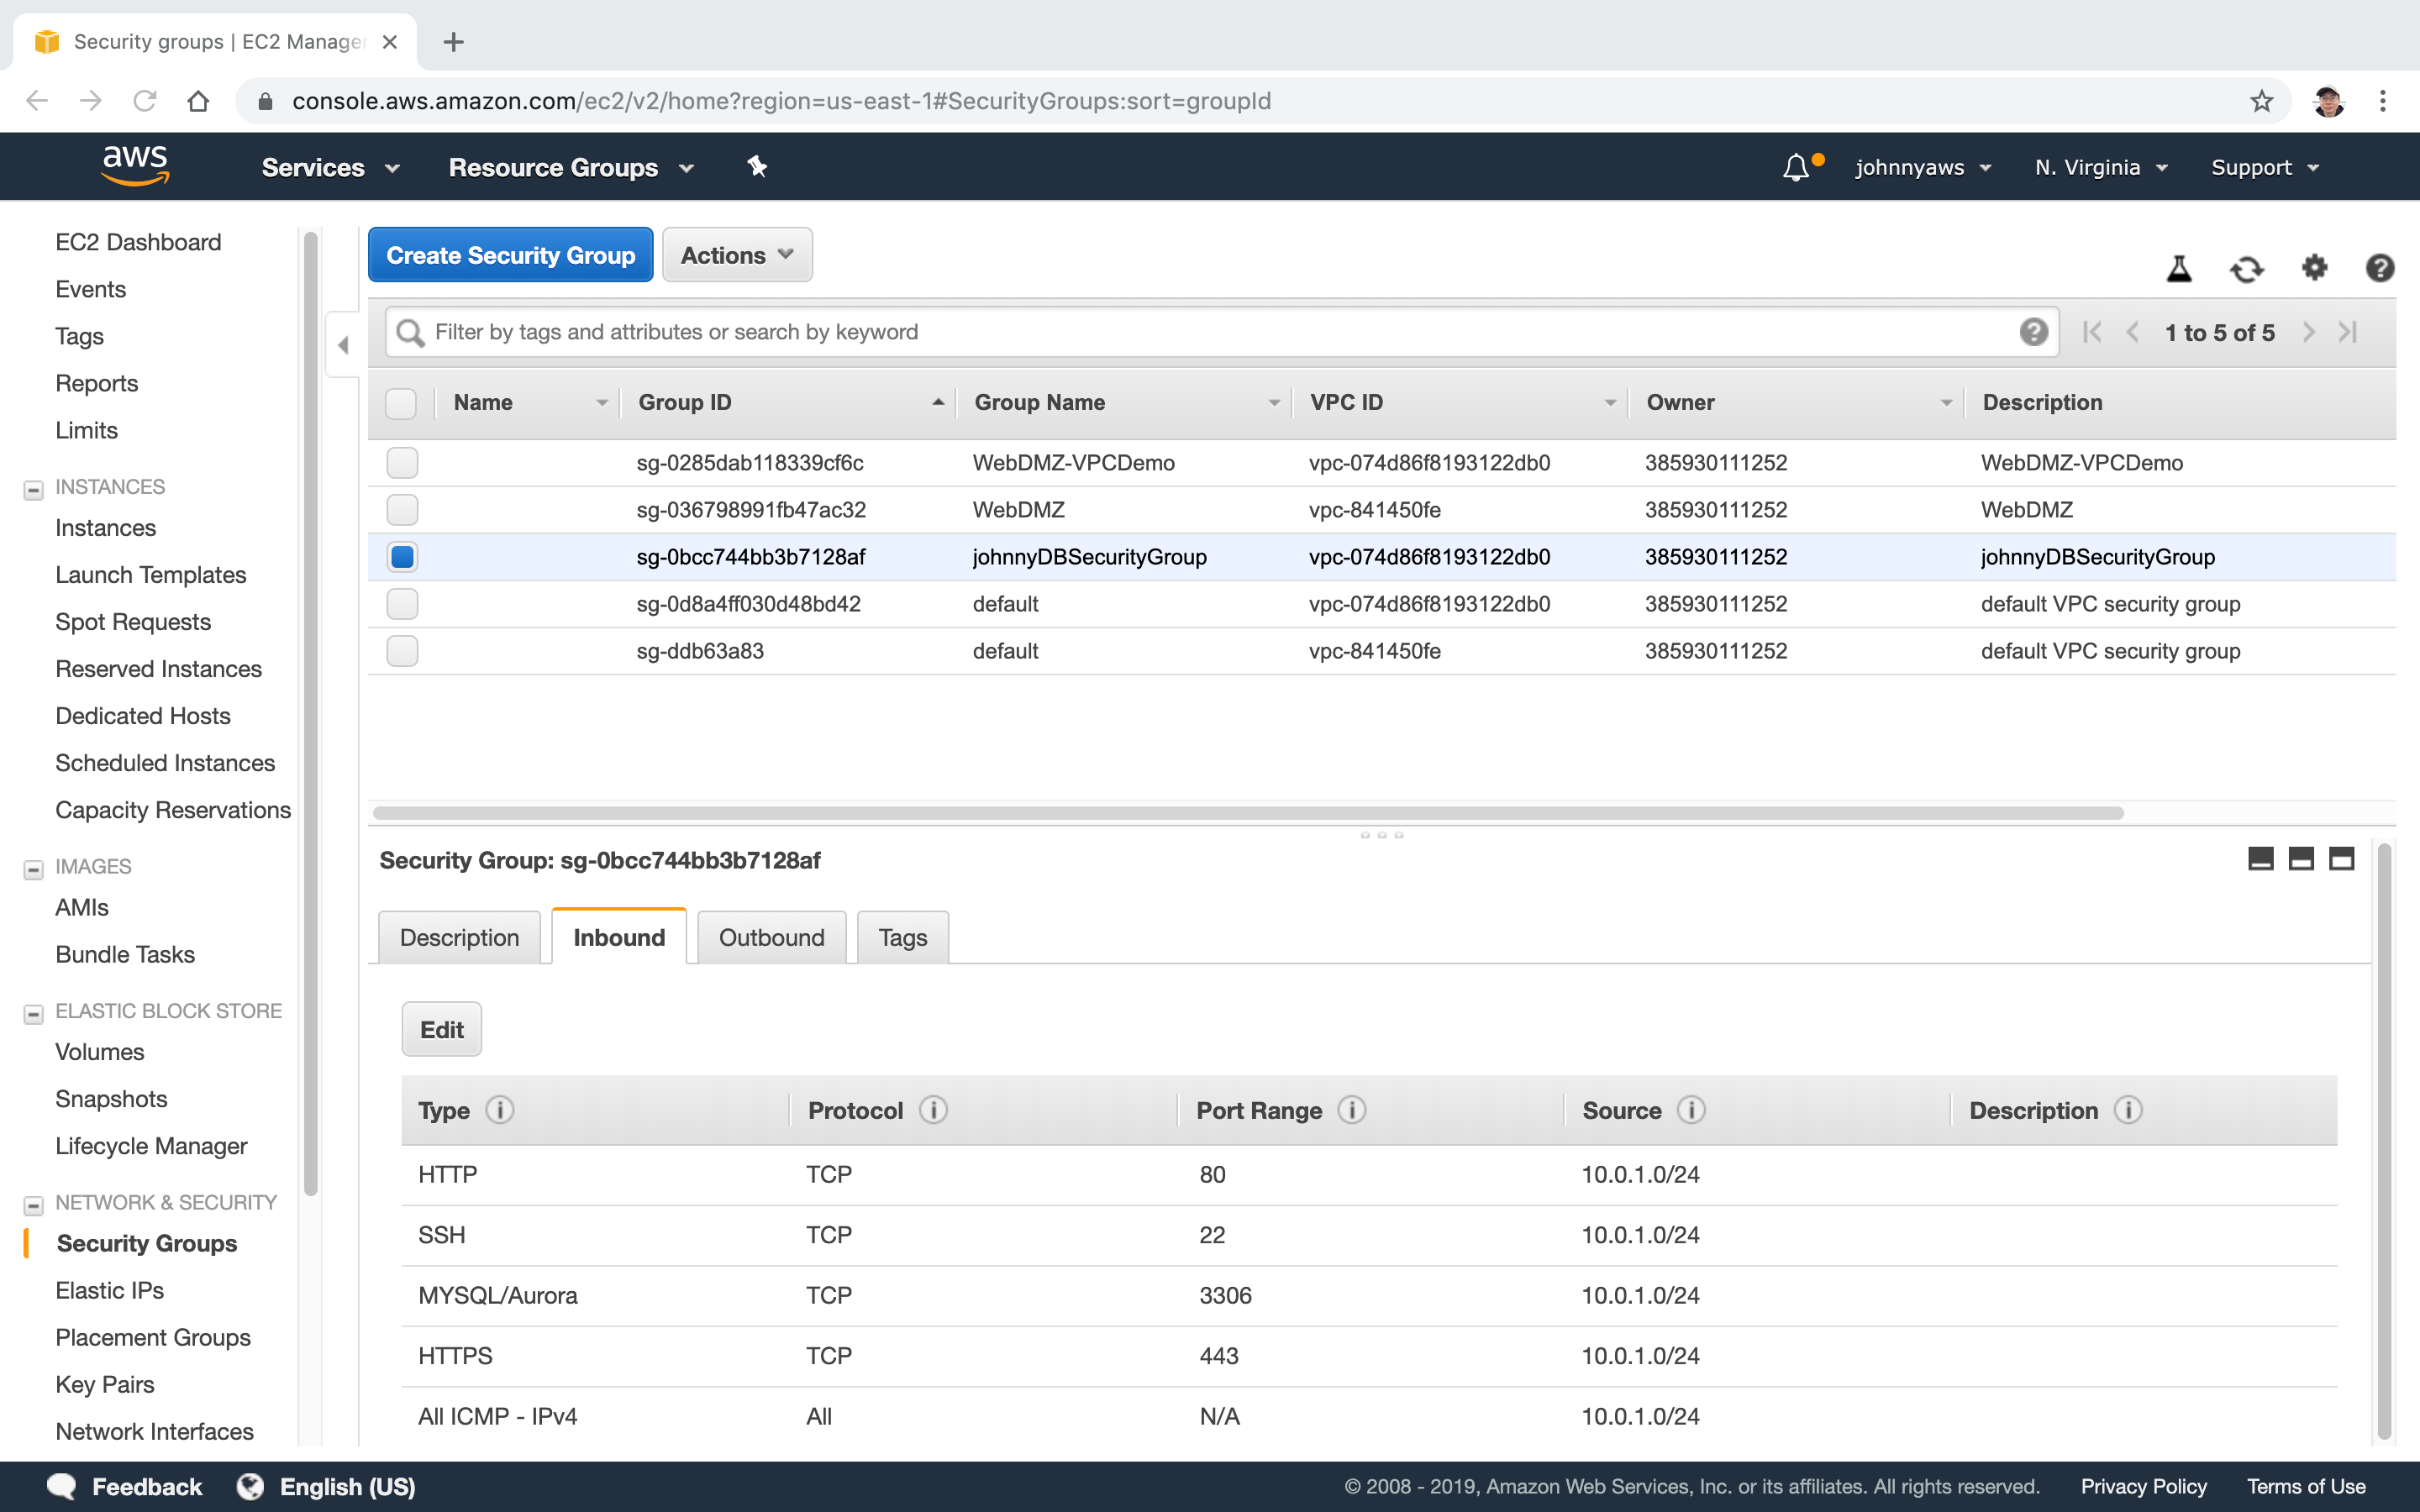
 A new security group is created.
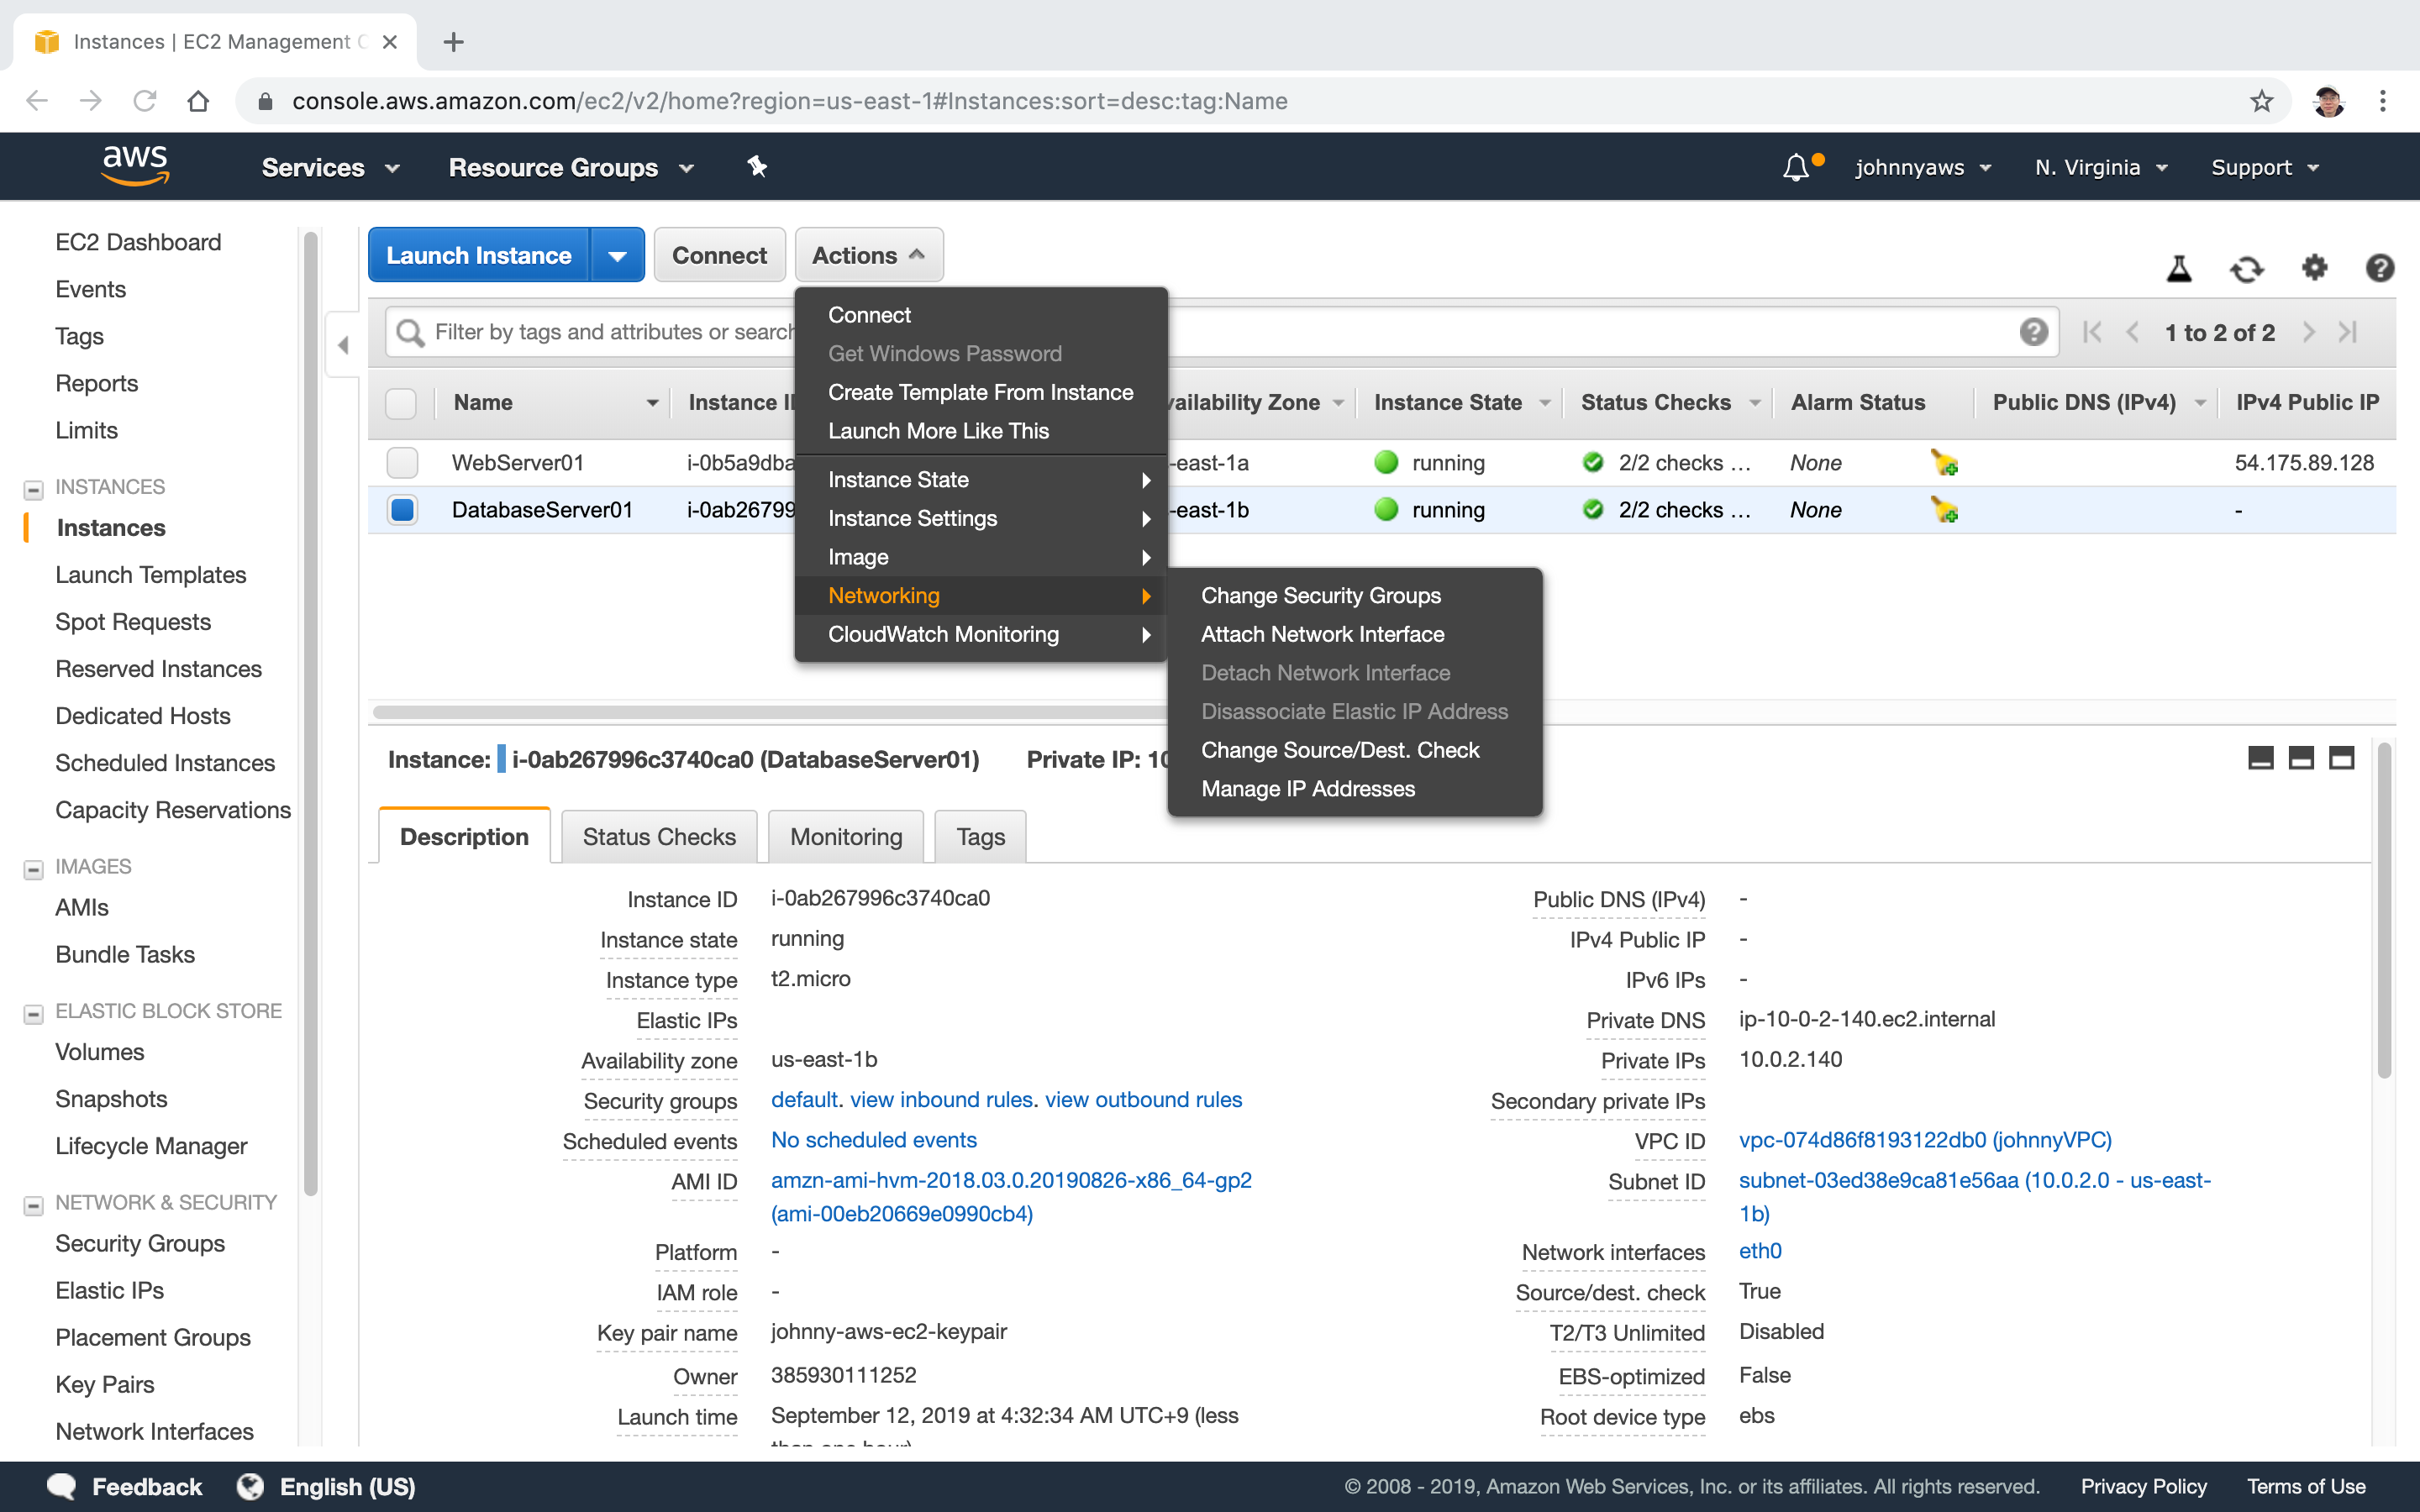
 Change the security group for DB server. Go to EC2 instances, select the database instance, Actions->Networking->Change Security Group.
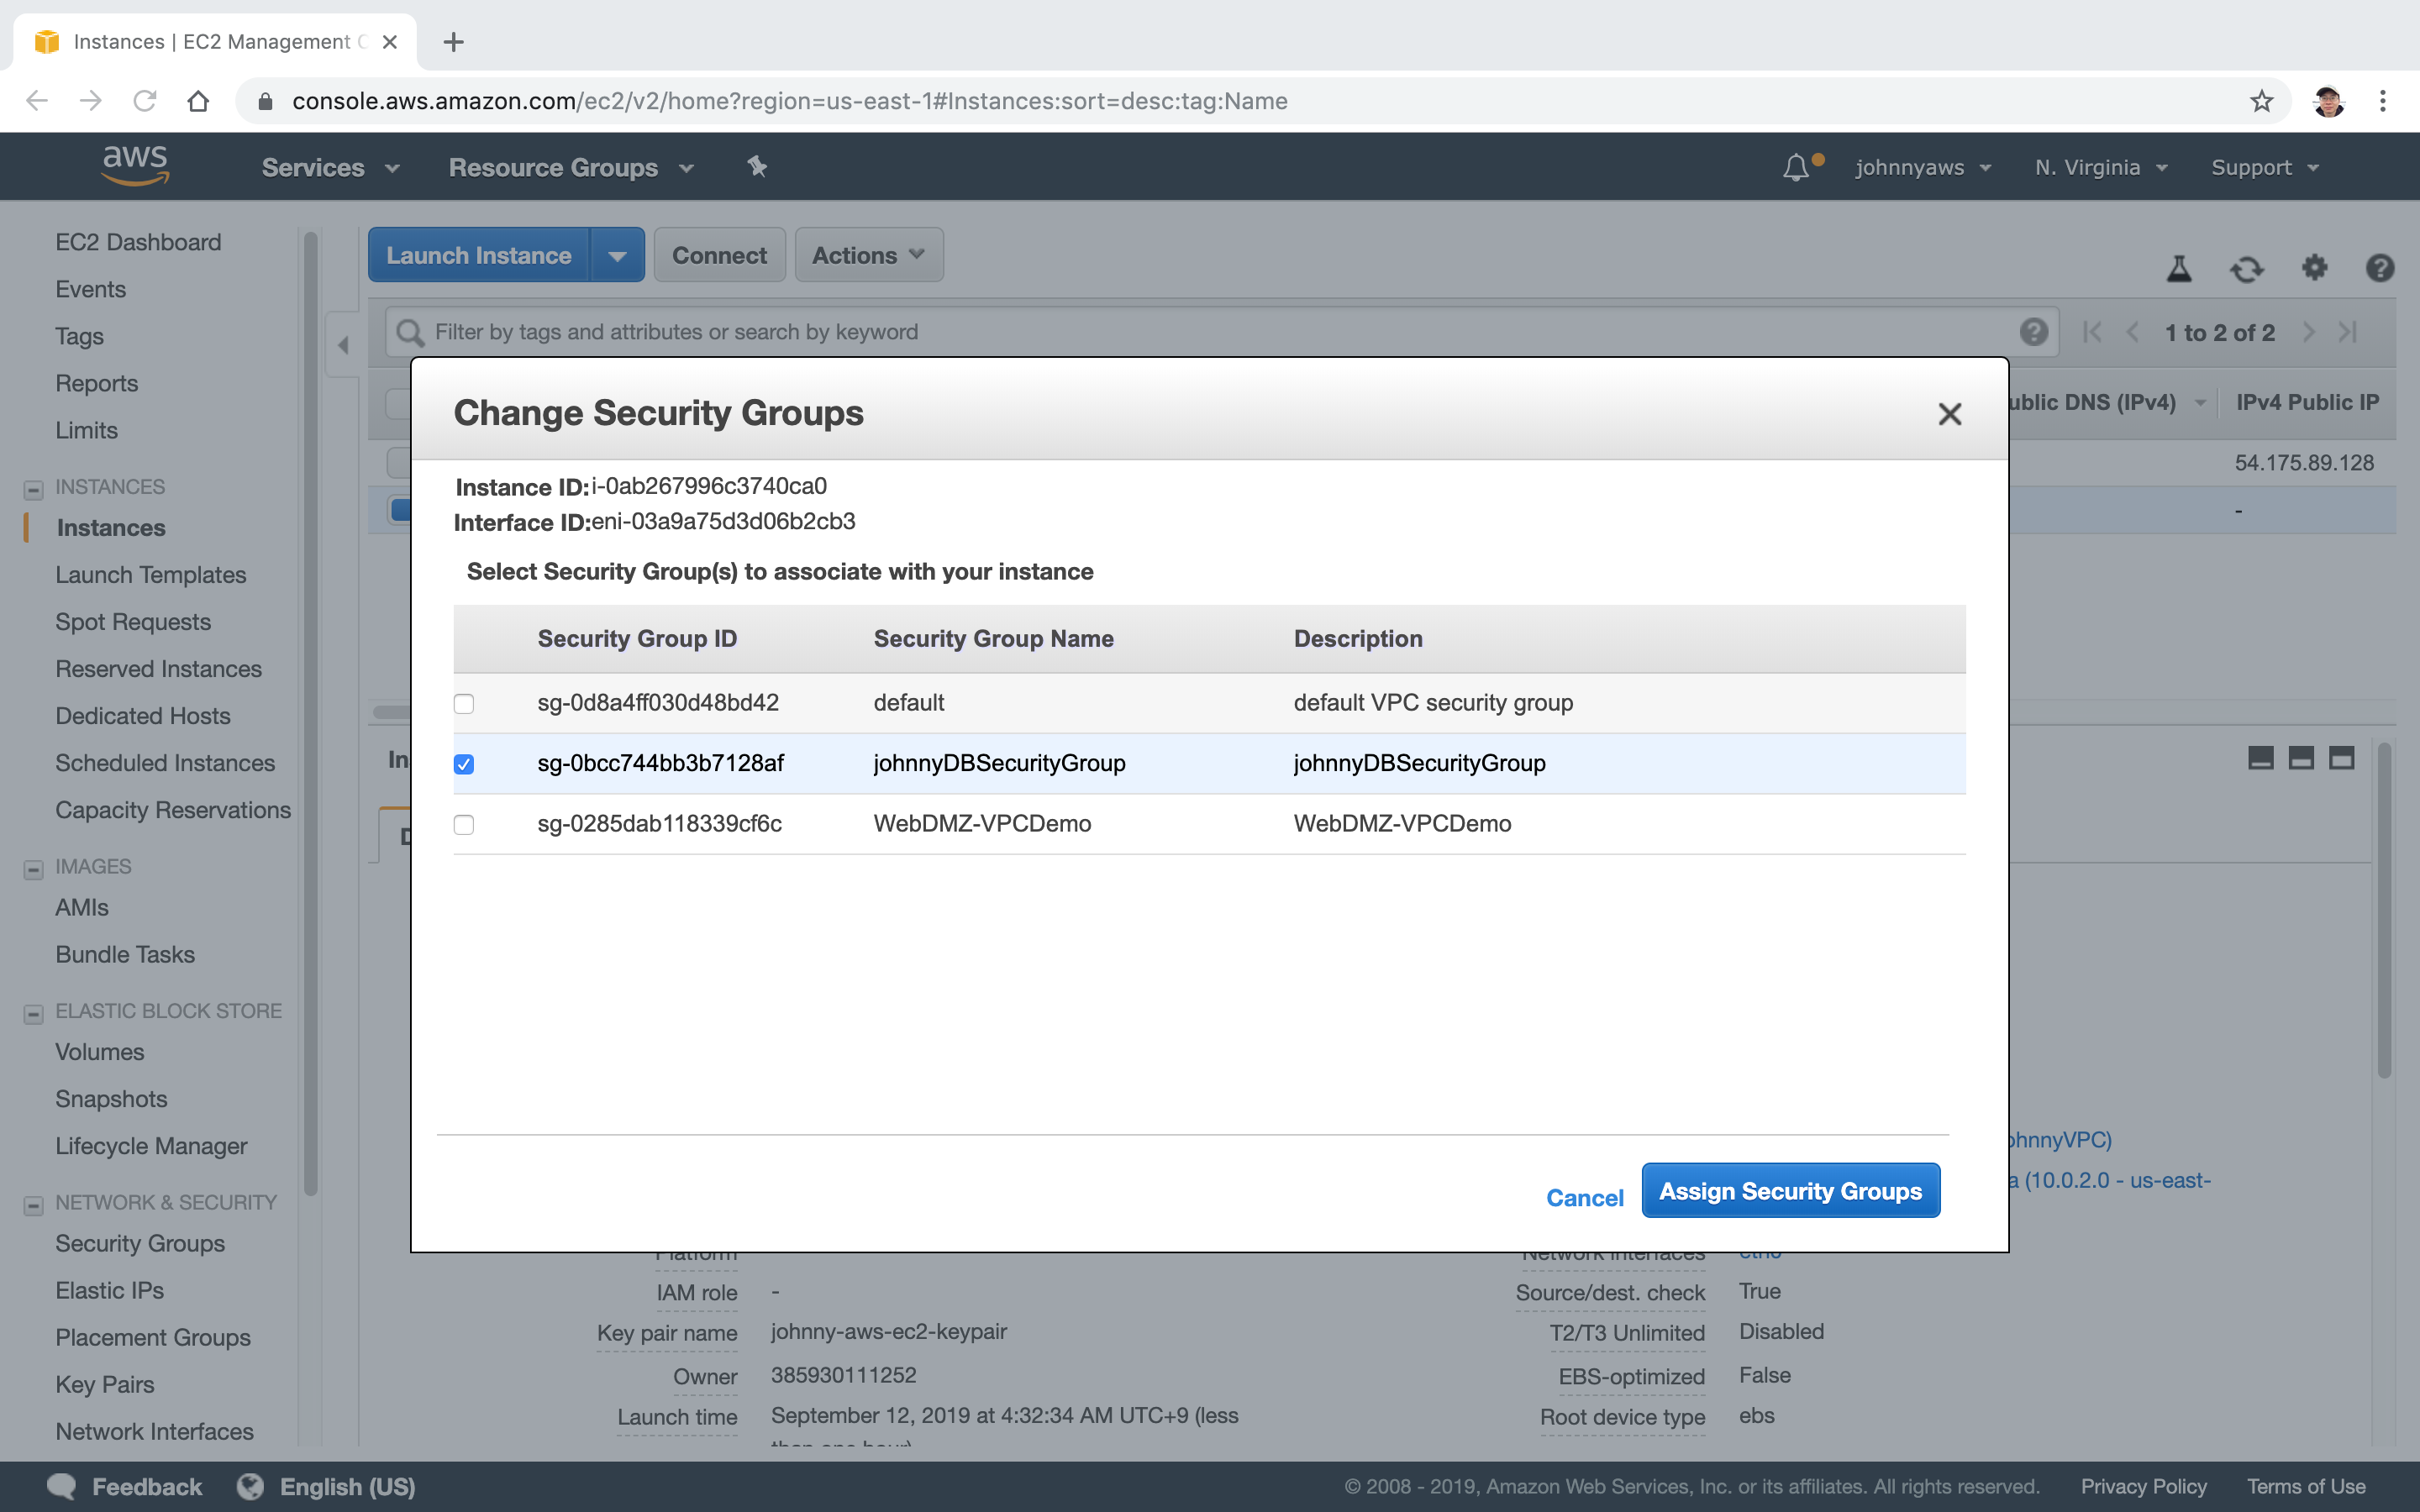
 Only select the new security group for database.
 Remote ssh to web server and ping the database server from it. ‘54.175.89.128’ is the public ip of web server and ‘10.0.2.140’ is the private ip of database server. If you upload the keypair to web server, you can also ssh to database server from webserver.
$ ssh ec2-user@54.175.89.128 -i johnny-aws-ec2-keypair.pem
The authenticity of host '54.175.89.128 (54.175.89.128)' can't be established.
ECDSA key fingerprint is SHA256:+IhFl1sALdOm4yIQbmA0OIyrG8jpfkufQfmmAlbnDNA.
Are you sure you want to continue connecting (yes/no)? yes
Warning: Permanently added '54.175.89.128' (ECDSA) to the list of known hosts.

       __|  __|_  )
       _|  (     /   Amazon Linux AMI
      ___|\___|___|

https://aws.amazon.com/amazon-linux-ami/2018.03-release-notes/
[ec2-user@ip-10-0-1-251 ~]$ ping 10.0.2.140
PING 10.0.2.140 (10.0.2.140) 56(84) bytes of data.
64 bytes from 10.0.2.140: icmp_seq=1 ttl=255 time=0.750 ms
64 bytes from 10.0.2.140: icmp_seq=2 ttl=255 time=0.881 ms
64 bytes from 10.0.2.140: icmp_seq=3 ttl=255 time=0.946 ms
64 bytes from 10.0.2.140: icmp_seq=4 ttl=255 time=0.807 ms