3651. Installing and Using Splunk on LinuxRedHat, Ubuntu, and Splunk
Introduce how to install Splunk on Linux and use the its basic functions.
The first time I came to know Splunk is when I was taking a class about cyber security. The teacher used Splunk to analyze the logs of user login history to find out some suspicious behaviors. Splunk is a good tool for searching the unstructured documents. I use it to filter data from log files and also use it for analyzing performance issues.
1. What is Splunk?
Basically, Splunk is a log management tool. It makes easy to analyze machine-generated logs via a web-style interface. Official website: https://www.splunk.com/.
2. Installation on Linux
2.1 Installing Splunk Enterprise
1) Download Splunk
Go to https://www.splunk.com/en_us/products.html, click ‘Free Download’ for Splunk Enterprise, choose RPM(For RedHat) or DEB(For Ubuntu) version.
2) Install Splunk
In terminal, go to the folder where the installer file locates. Run the commands below.
$ sudo rpm -i splunk_package_name.rpm  // for RedHat
$ sudo dpkg -i splunk_package_name.deb // for Ubuntu
After running the commands, Splunk is installed into /opt/splunk/.
3) Configure Environment Variable for Splunk
Set SPLUNK_HOME to point to the top-level installation directory, and add $SPLUNK_HOME/bin to the shell’s path.
$ export SPLUNK_HOME=/opt/splunk
$ export PATH=$SPLUNK_HOME/bin:$PATH
2.2 Launching Splunk Web
1) Start Splunk
$ sudo $SPLUNK_HOME/bin/splunk start
For the first time launching Splunk, you need to accept its license agreement.
2) Useful CLI Commands
If you need to stop, restart, or check the status of the Splunk Enterprise server, use these CLI commands:
$ splunk stop
$ splunk restart
$ splunk status
3) You can change web server from the default port 8000 to other ports.
$ splunk set web-port 8081
If you get ‘Permission denied’ error, grant whole access to the entire splunk folder.
$ sudo chown -R $USER /opt/splunk/
In addition, add port number to Firewall’s exception list if necessary.
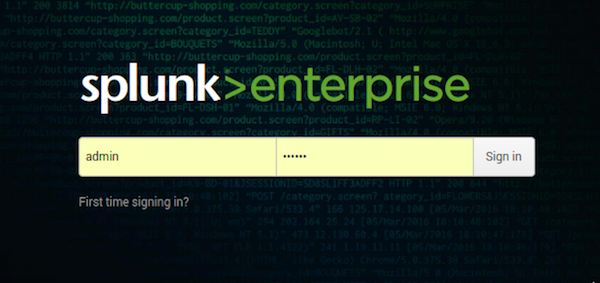
2.3 Logging into Splunk Web
Open a web browser, access the following address. The default user is ‘admin’. You need to change the password for the first time you login.
http://localhost:8081/
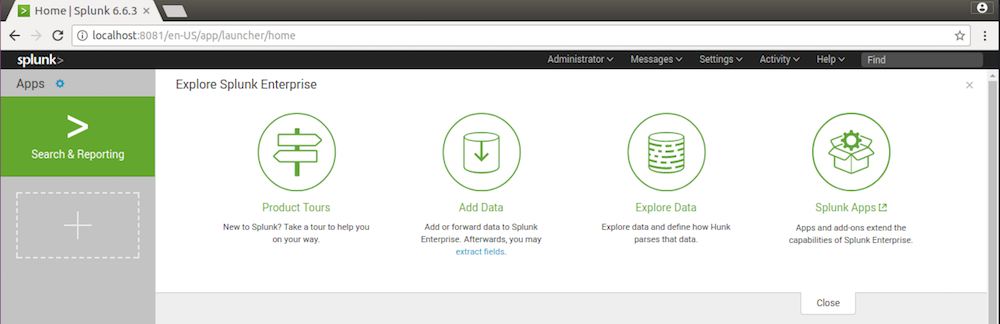
3. Importing Data
To use Splunk, you need to import data first.
3.1 Adding Data
In the main page, select ‘Add Data’->Upload files from my computer->Choose the file.
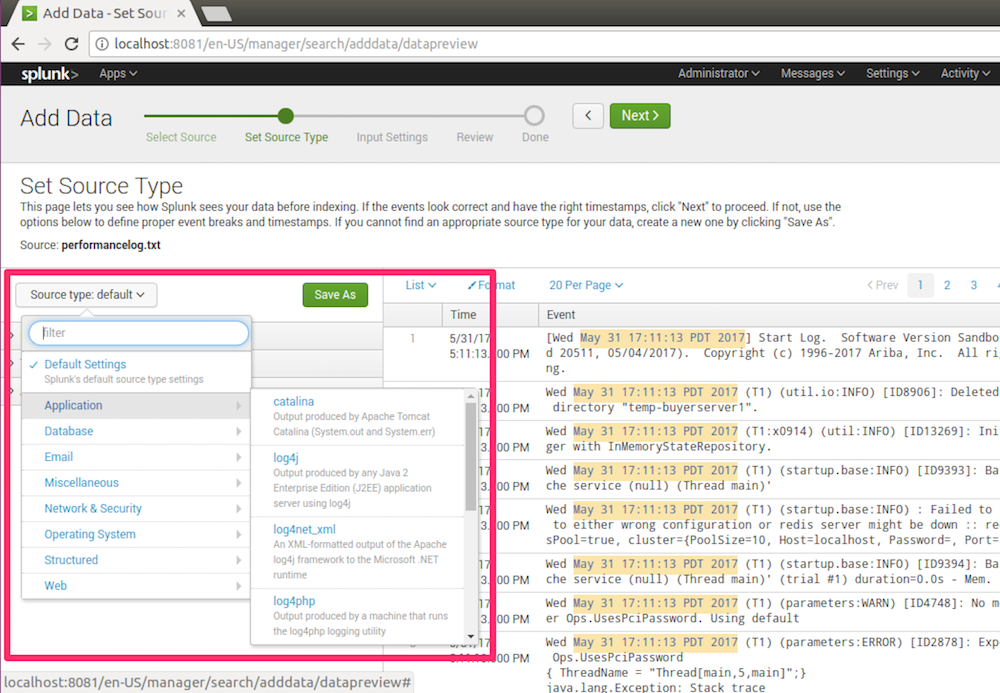
3.2 Setting Source Type
Choose the source type, eg. log4j, csv, etc.
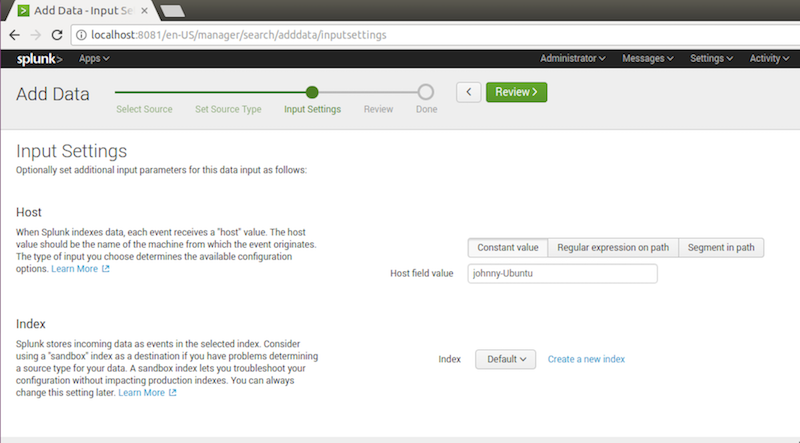
3.3 Inputing Settings
Leave as it is.
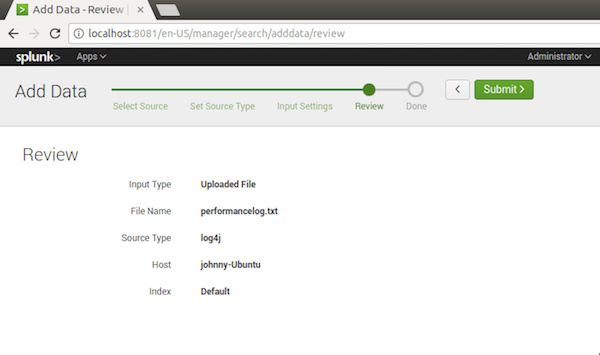
3.4 Reviewing and Submitting
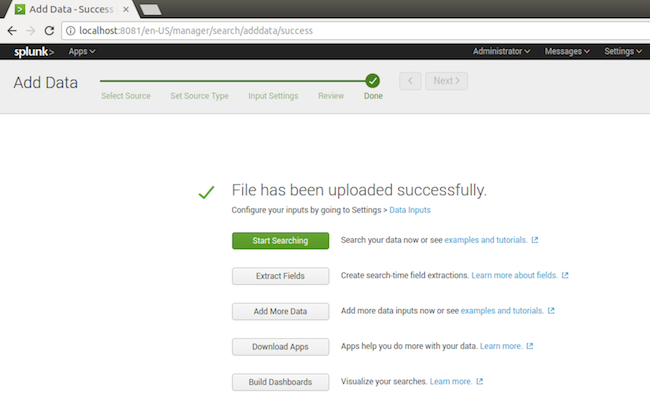
3.5 Done
Now, you can use the search function.
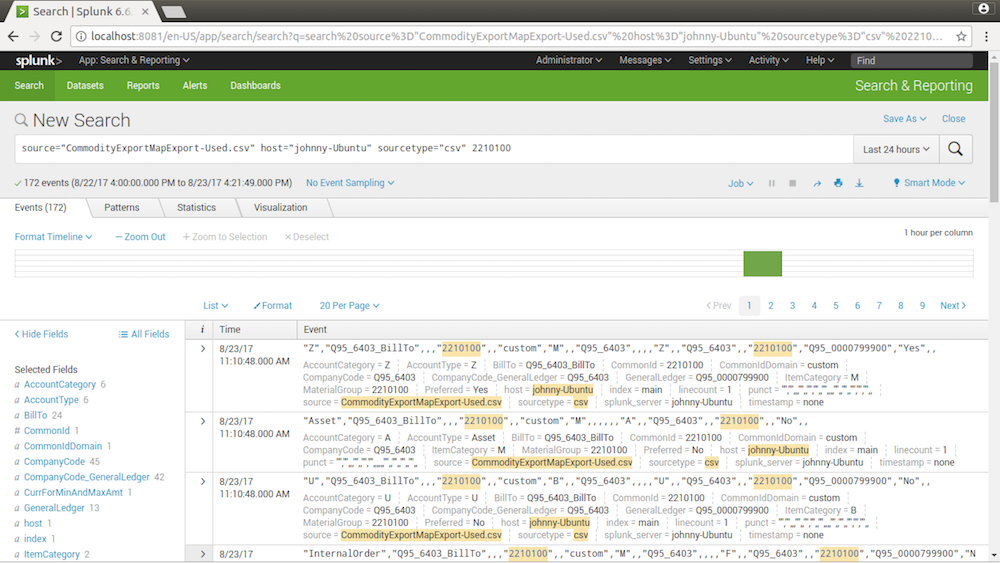
4. Searching
After data is imported to splunk, we can now create queries for searching data from logs.
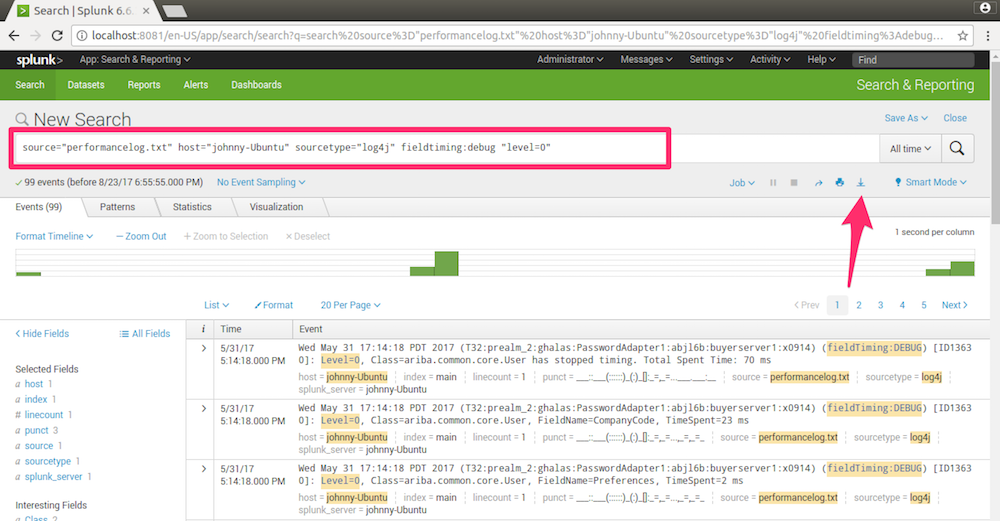
4.1 Creating Query
By default, Splunk specifies three condition: source, host and sourcetype.
source="performancelog.txt" host="johnny-Ubuntu" sourcetype="log4j"
You can append more conditions to the end of the query. Click the Search icon to execute the query. You will see the result immediately.
4.2 Exploring Features
There are lots of functions provided by Splunk for search query and search result. Some of them are listed as follows.
- Save the query for next time use
- Change search mode(Smart Mode, Fast Mode and Verbose Mode) to optimize the search performance
- View result in different style(Raw, List and Table)
- Filter columns in result
- Export search result to csv file
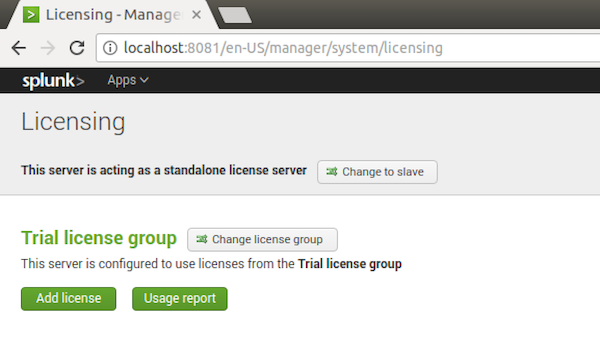
5. Free License
5.1 Enterprise Trial License
When you first download and install Splunk, you are automatically using an Enterprise Trial license. You can continue to use the Enterprise Trial license until it expires. After expiration, switch from Enterprise Trial license to Free license.
5.2 Steps to switch to a Free License:
1) Log in to Splunk Web as a user with admin privileges and navigate to Settings > Licensing.
2) Click Change license group at the top of the page.
3) Select Free license and click Save.
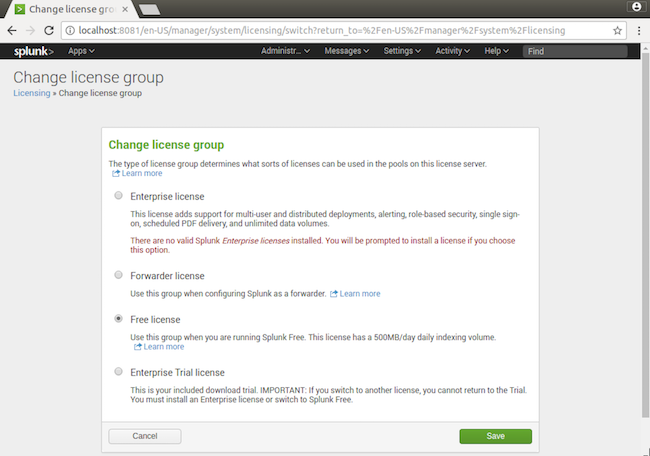
4) You are prompted to restart.