2537. Data Persistence with HibernateHibernate and ORM
Use Hibernate to persist data into database.
1. What is Hibernate?
Hibernate is a high-performance Object/Relational persistence and query service. Hibernate not only takes care of the mapping from Java classes to database tables (and from Java data types to SQL data types), but also provides data query and retrieval facilities.
2. Installing Hibernate to Eclipse Project
2.1 Downloading Hibernate
Go to http://hibernate.org/orm/releases/, download the latest version of Hibernate, eg hibernate-release-5.0.11.Final.zip, unzip it after downloading.
2.2 Creating Java Project
In Eclipse, File -> New -> ‘Java Project’, Name: HibernateTutorial. Create lib and src subdirectories in this project. (When you create a new Java Project in Eclipse IDE, src subdirectory will be created automatically.)
2.3 Importing JAR Files
Copy JAR files which are listed below, from hibernate distribution that you have downloaded to the lib directory of the HibernateTutorial project.
- antlr-2.7.7.jar
- dom4j-1.6.1.jar
- geronimo-jta_1.1_spec-1.1.1.jar
- hibernate-commons-annotations-5.0.1.Final.jar
- hibernate-core-5.0.11.Final.jar
- hibernate-entitymanager-5.0.11.Final.jar
- hibernate-java8-5.0.11.Final.jar
- hibernate-jpa-2.1-api-1.0.0.Final.jar
- jandex-2.0.0.Final.jar
- javassist-3.18.1-GA.jar
- jboss-logging-3.3.0.Final.jar
In addition, go to https://dev.mysql.com/downloads/connector/j/5.1.html, download MySQL Connector/J(ZIP Archive).
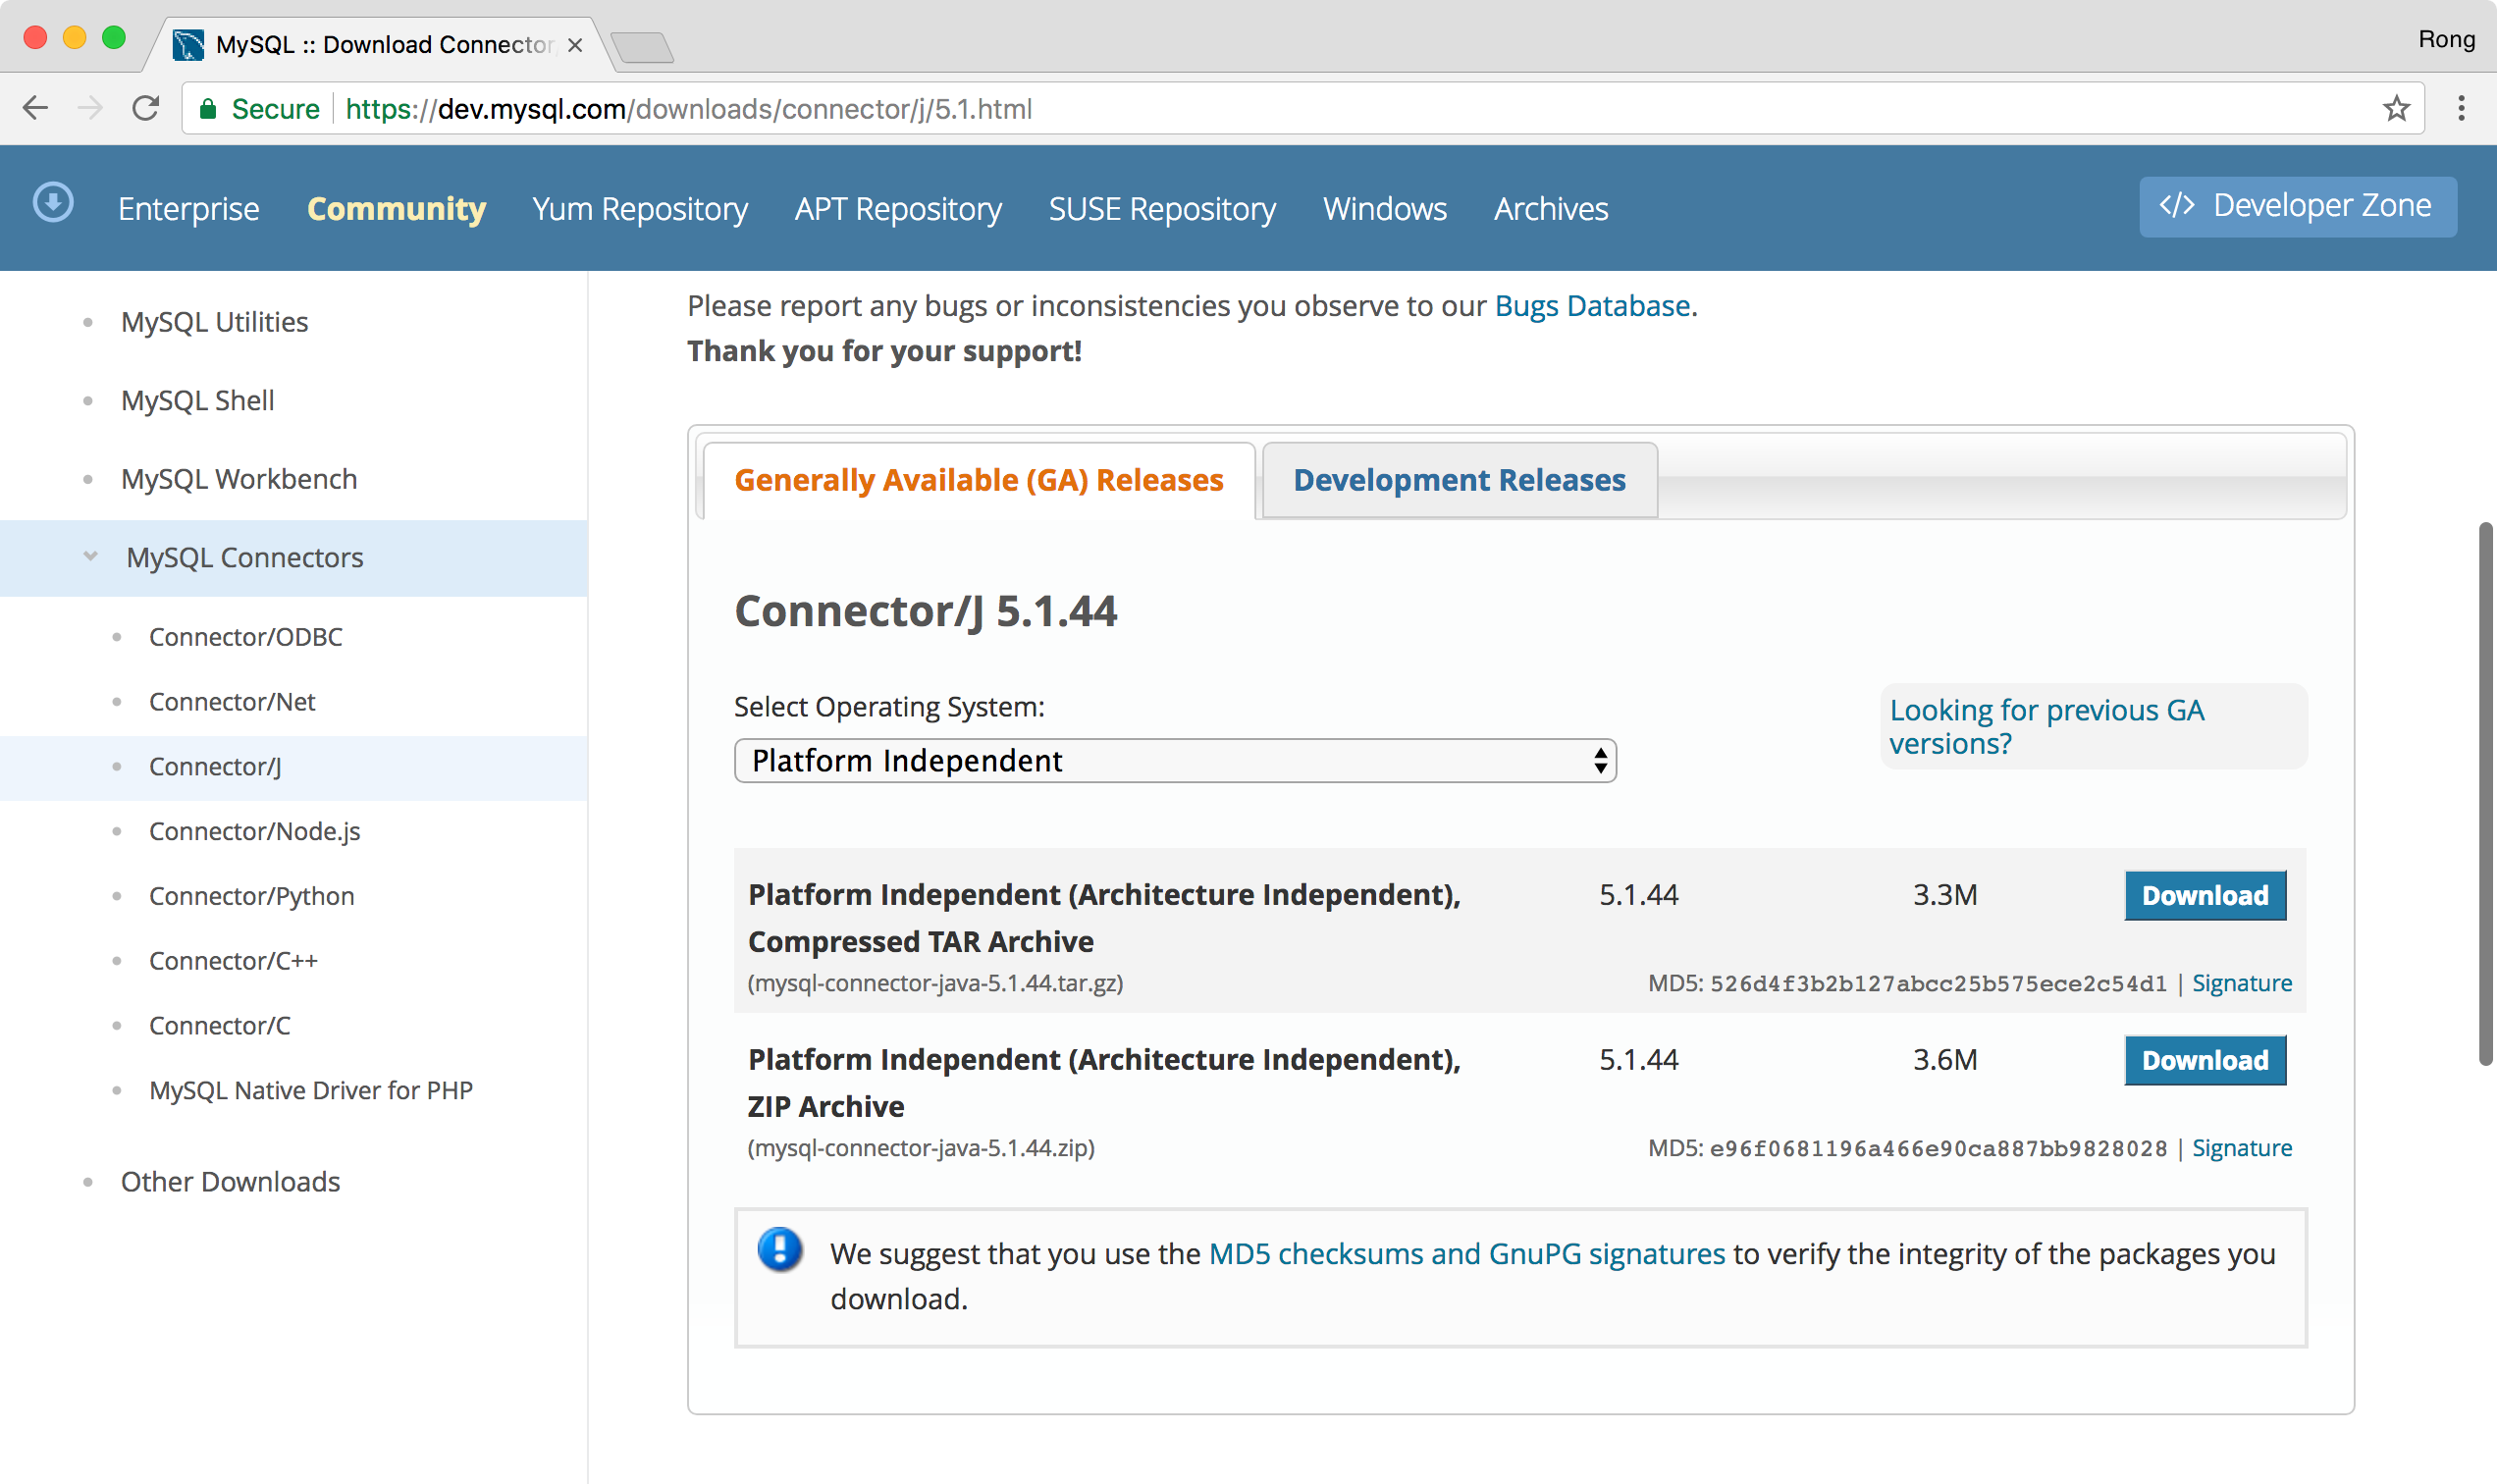
Extract mysql-connector-java-5.1.44-bin.jar from the the downloaded zip file, and copy it to the lib directory of the HibernateTutorial project.
- mysql-connector-java-5.1.44-bin.jar
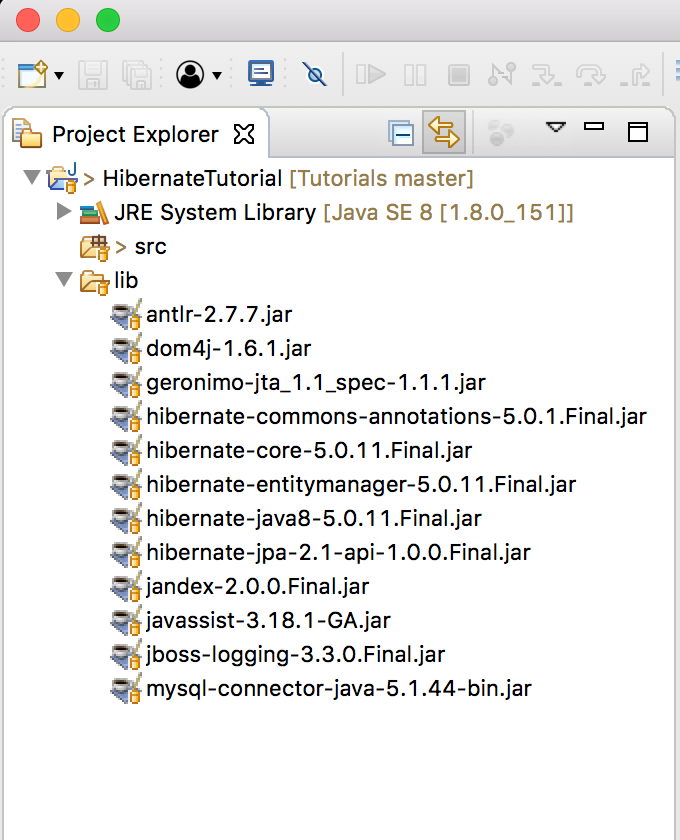
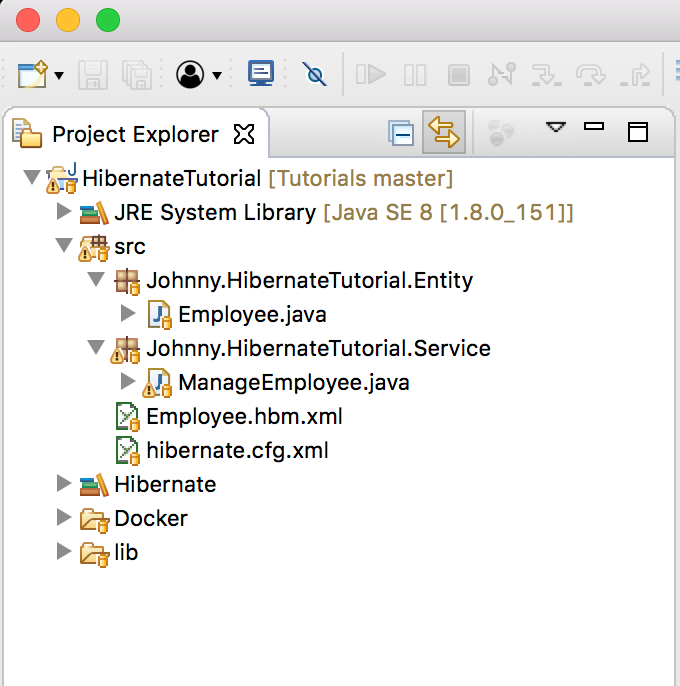
After all above steps, HibernateTutorial project will look like this:
2.4 Adding Reference
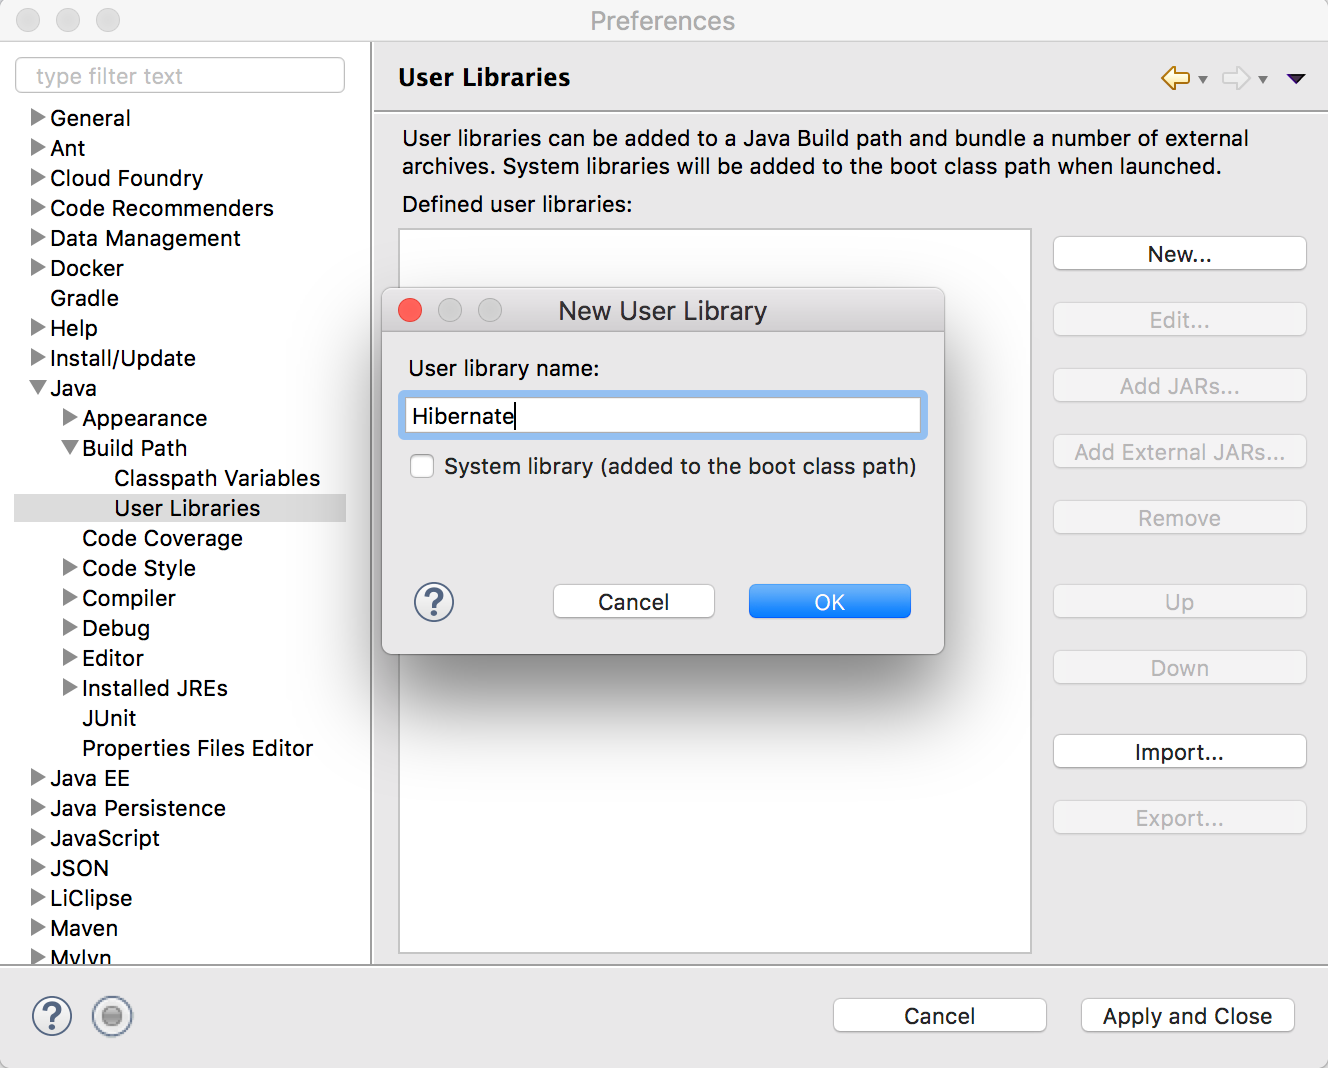
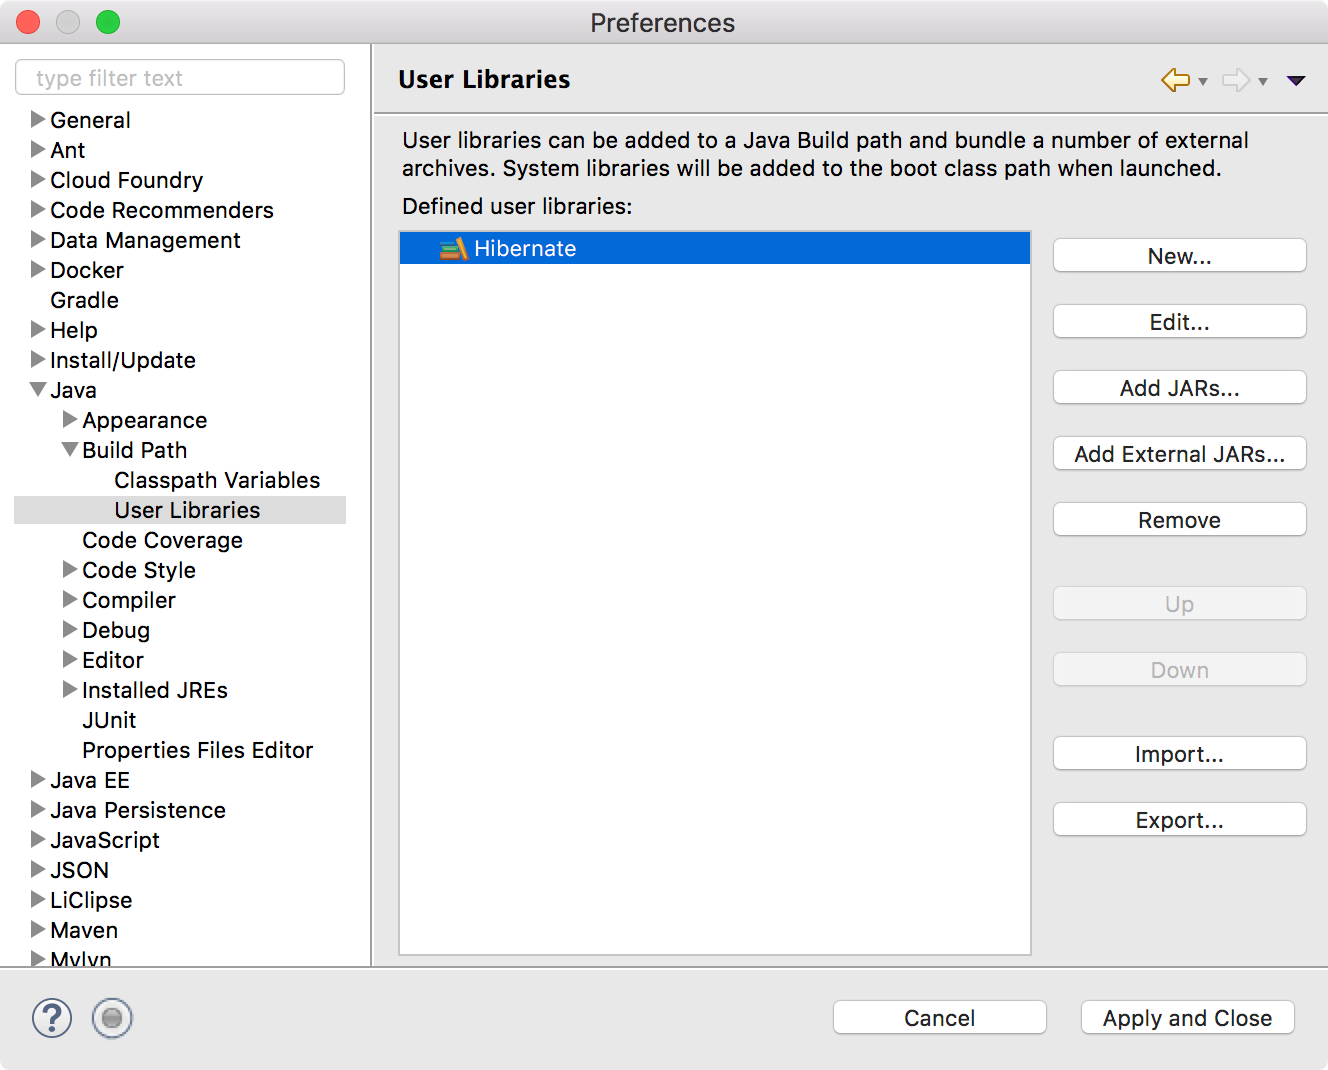
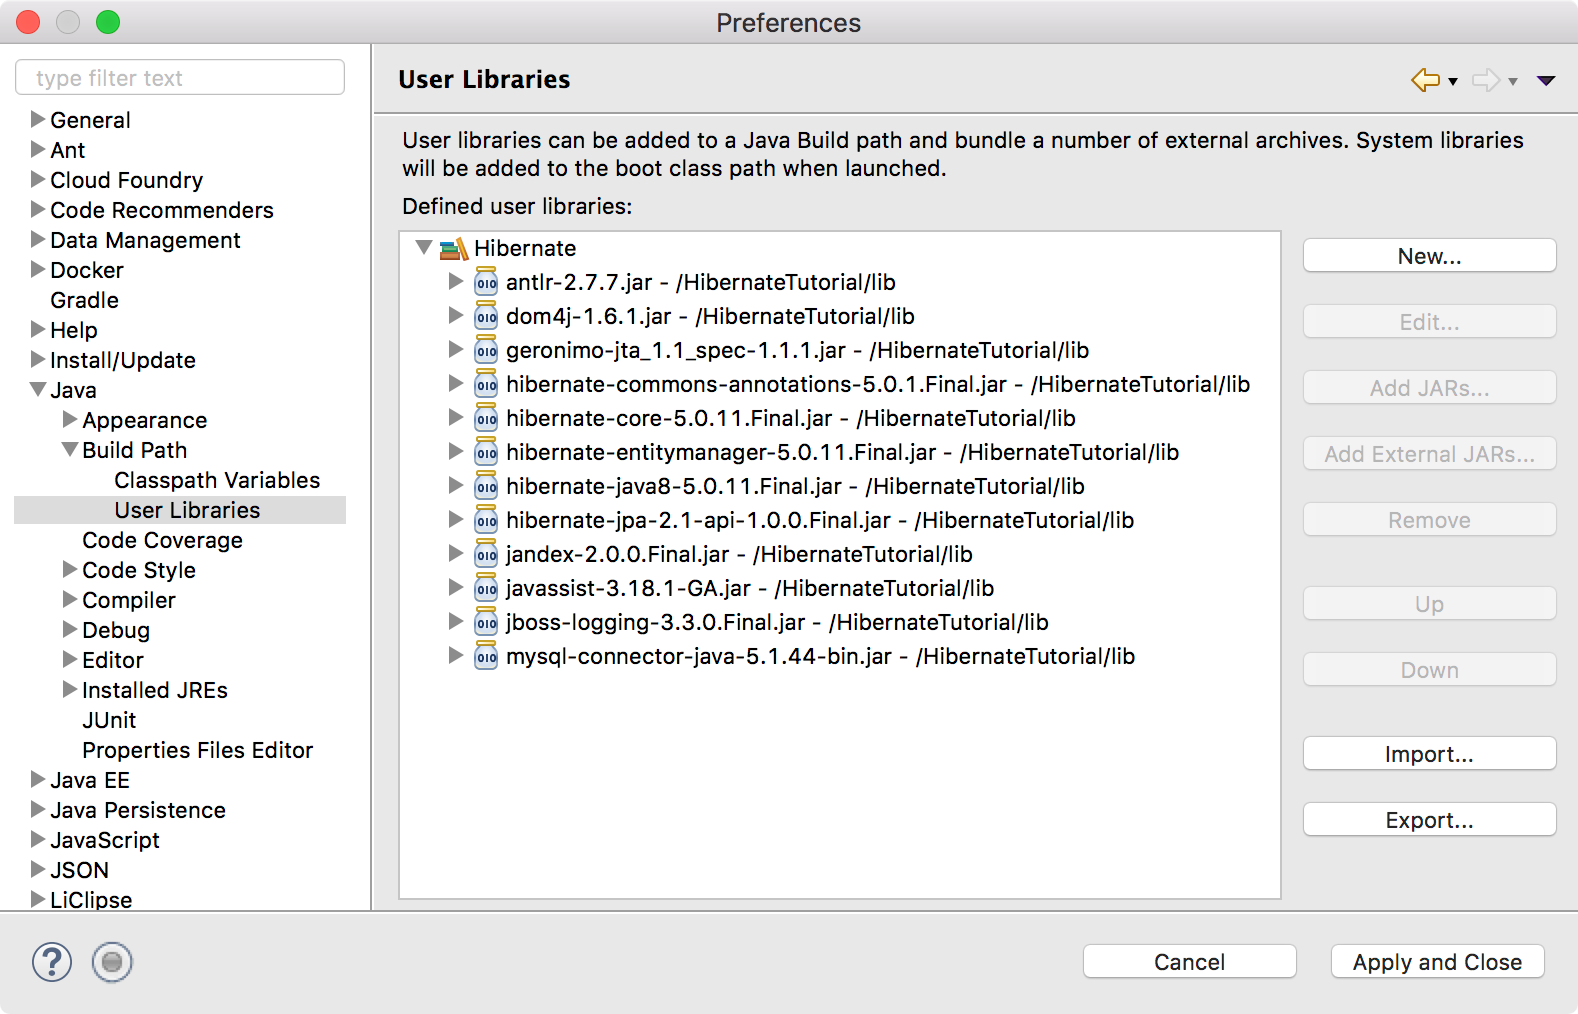
Eclipse->Preferences, Java->Build Path->User Libraries, add new user library Hibernate.
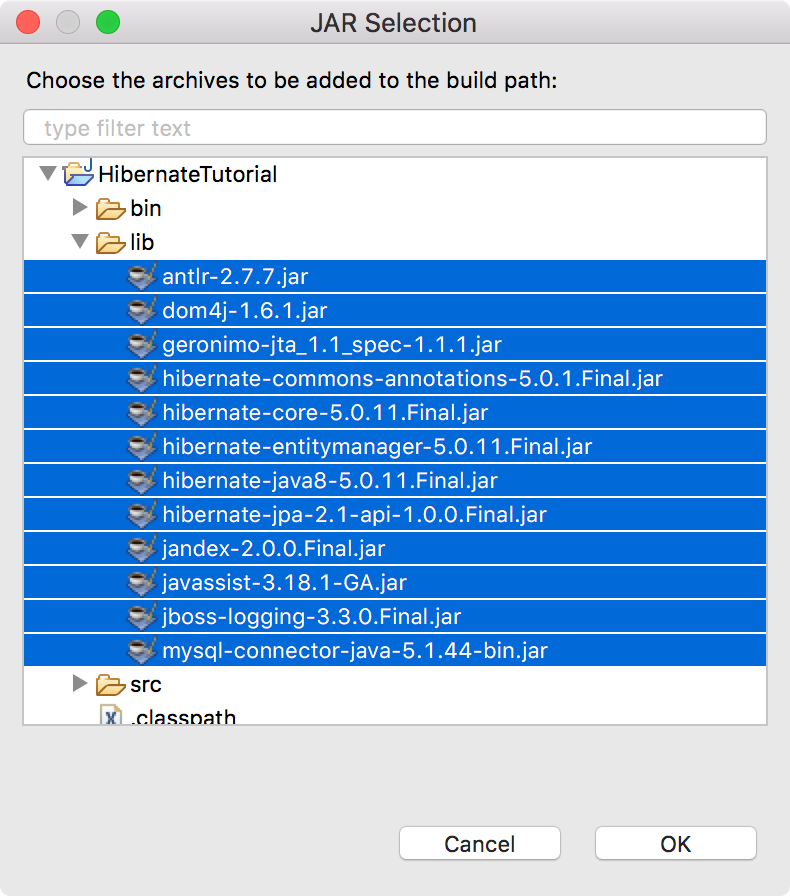
Select Hibernate User library that we just created and click Add JARS… button.
Select all JAR files in the lib folder of the HibernateTutorial project and click Open button to add all JAR files to Hibernate User library.
Now Hibernate User library is ready and we can add this User library to HibernateTutorial project build path.
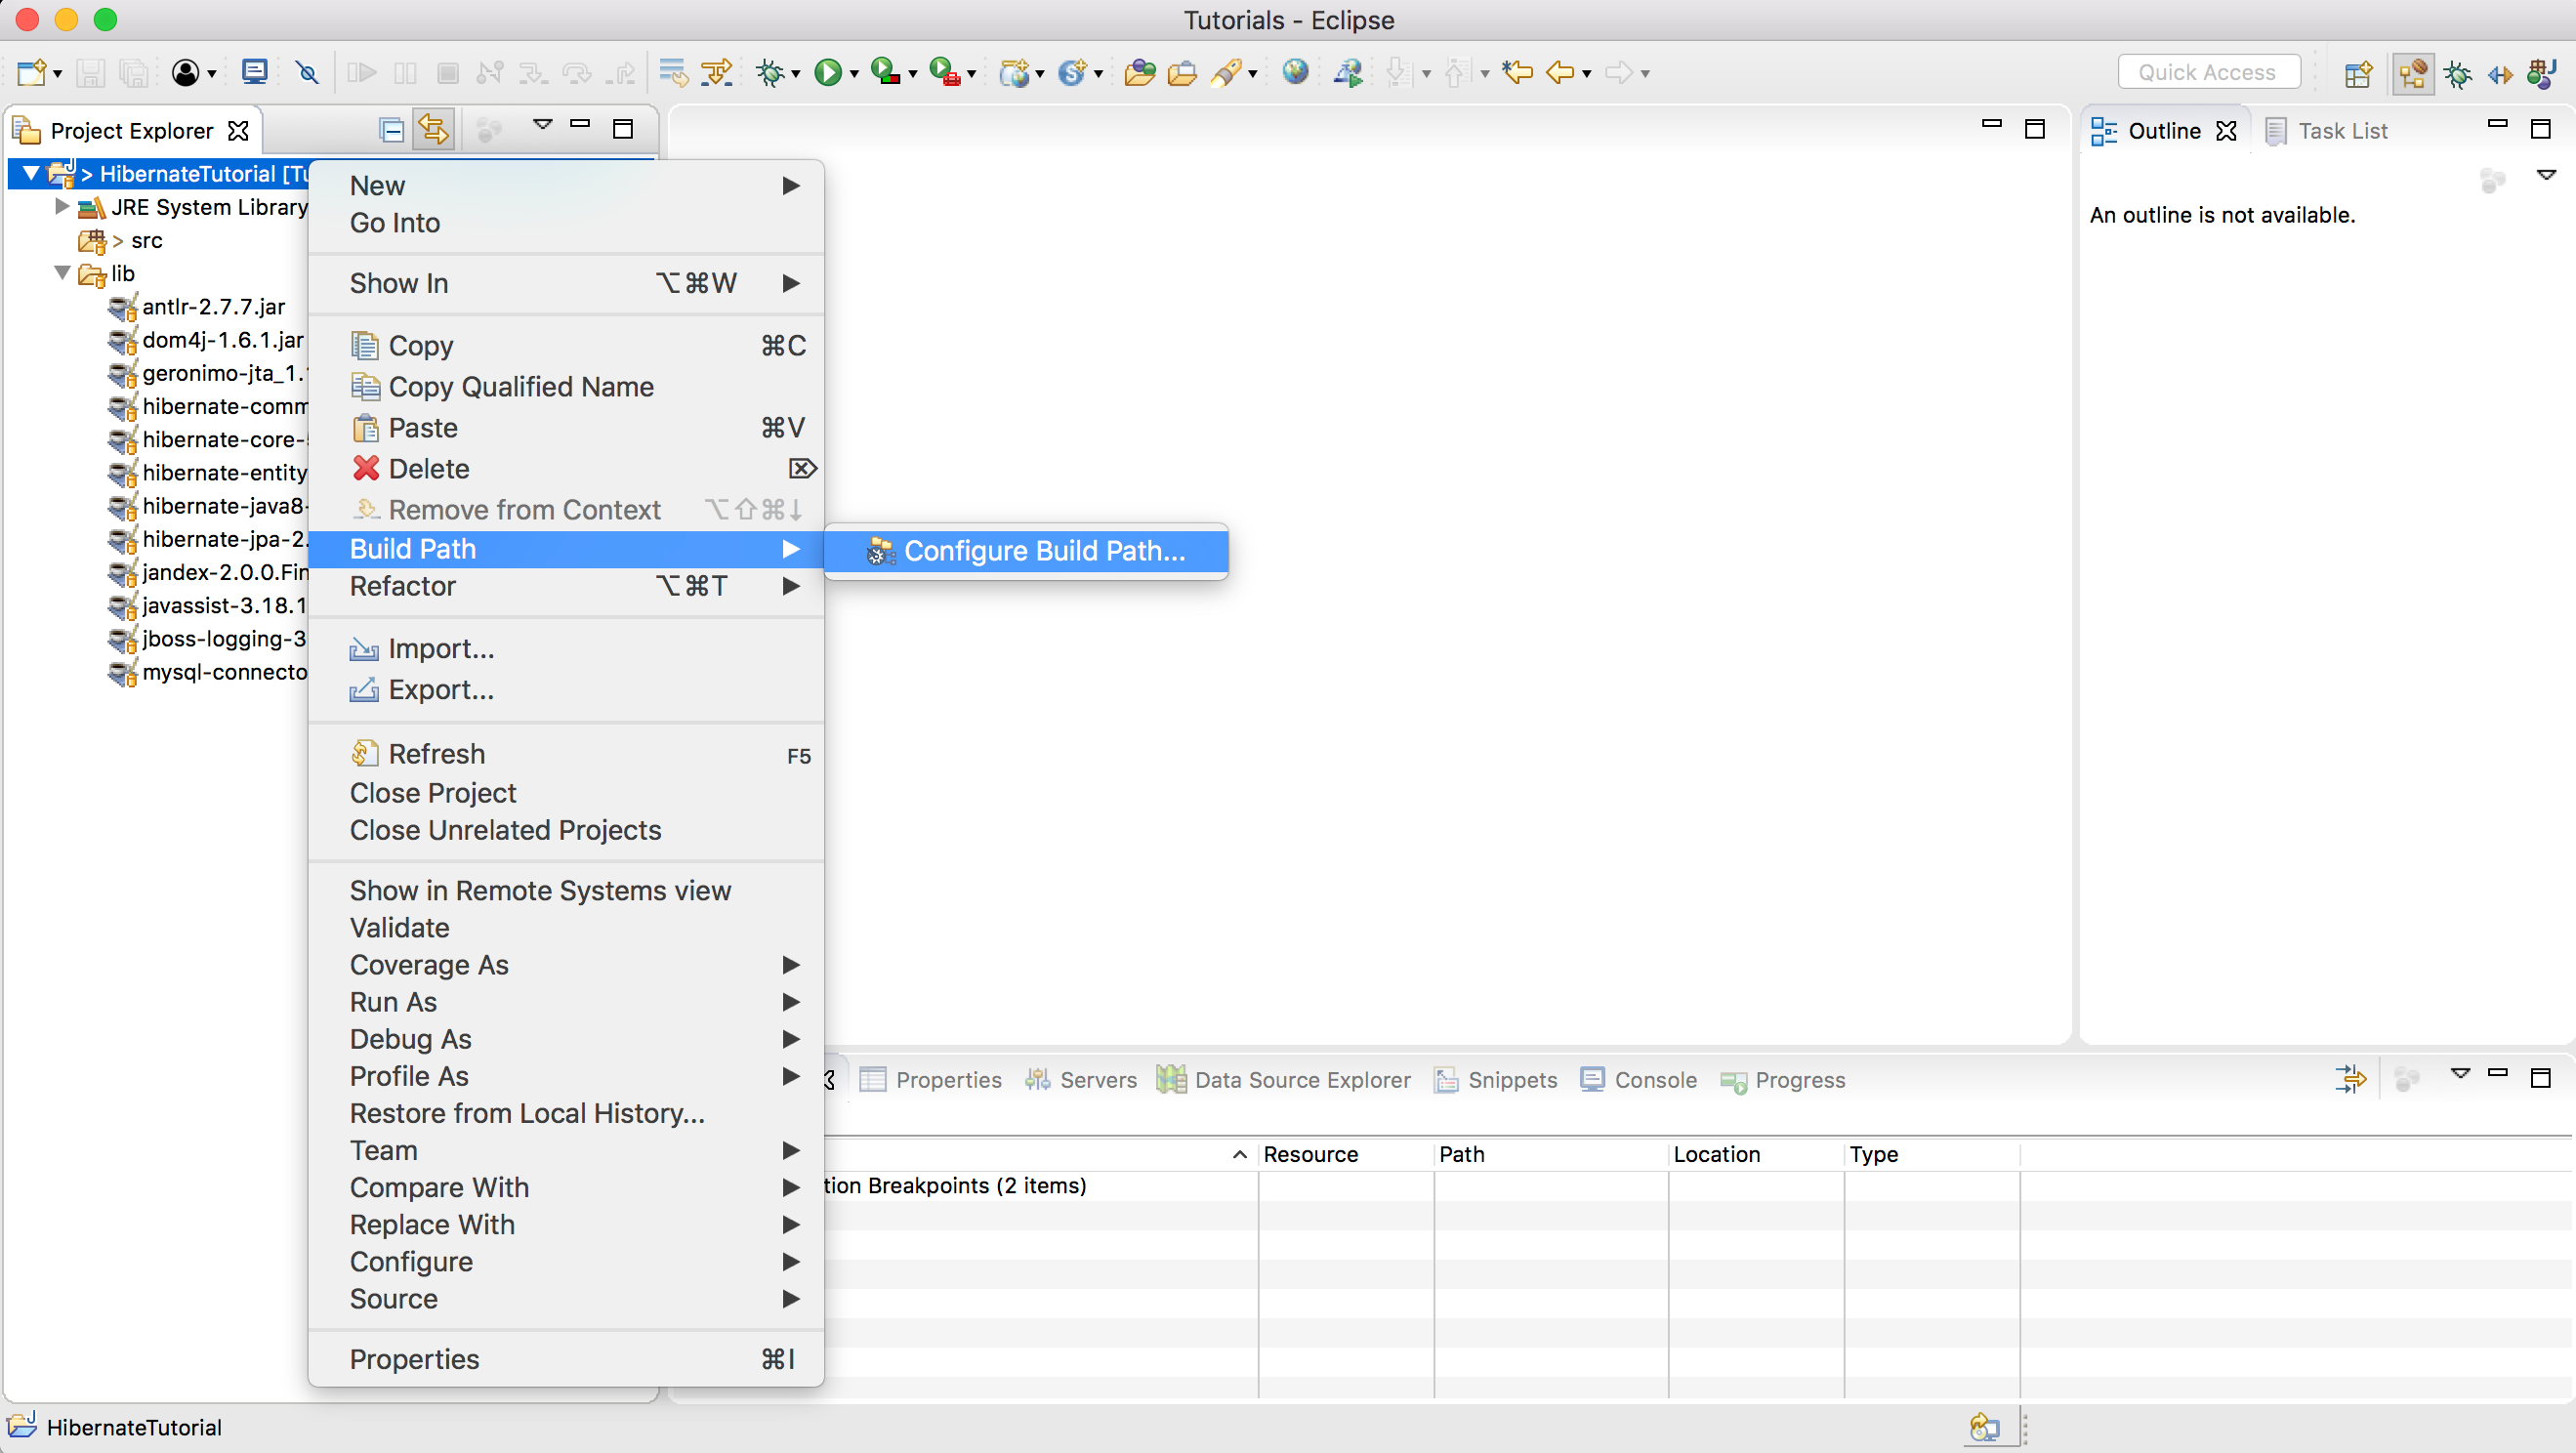
Right click to project and click Build Path–>Configure Build Path
 Then, click
 Add Library.
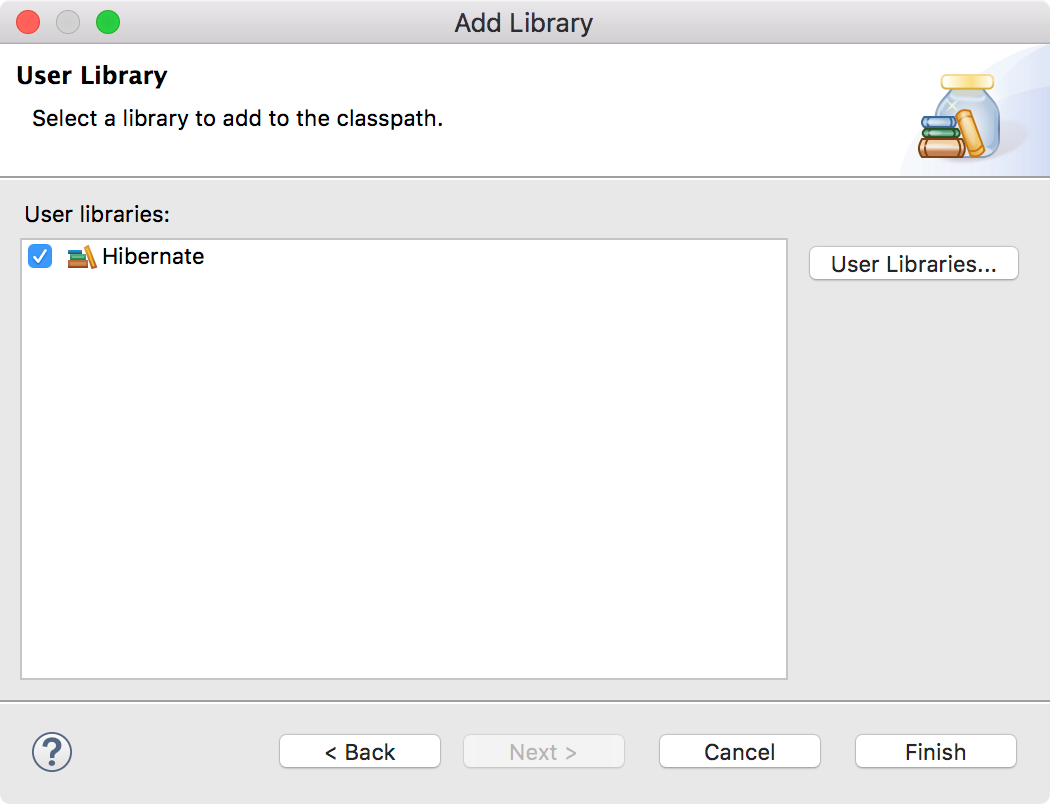
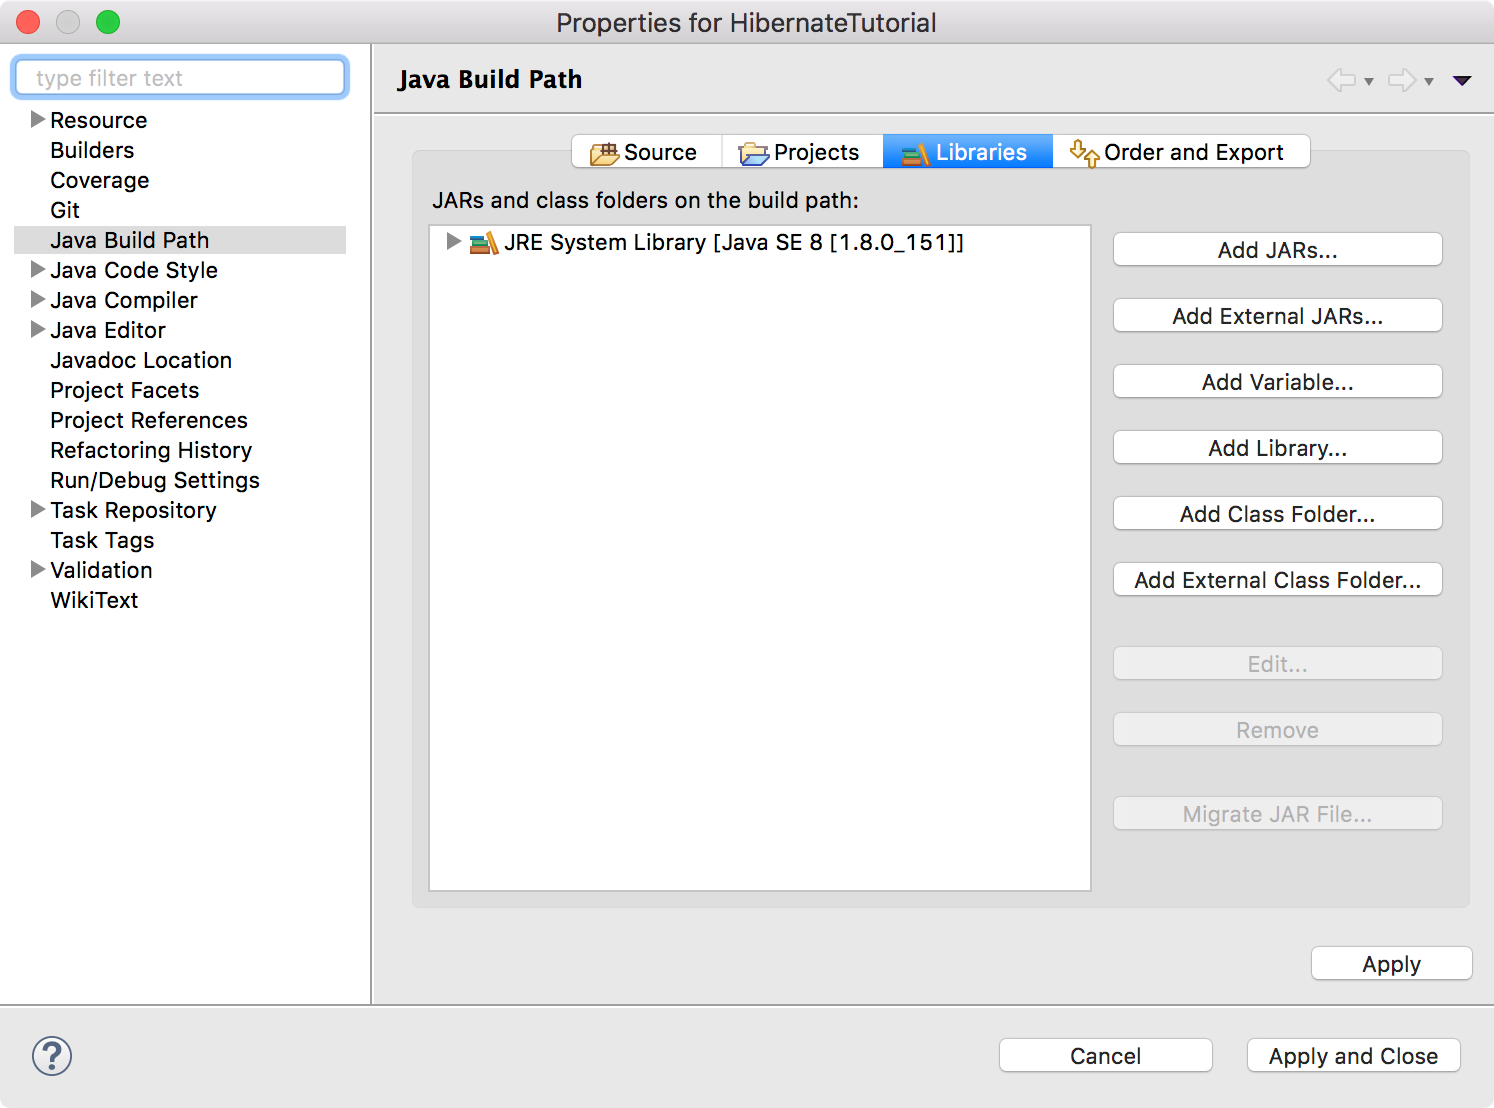 Select
 User Library and click Next button.
 Finally, check the box of
 Hibernate User library and click Finish button.
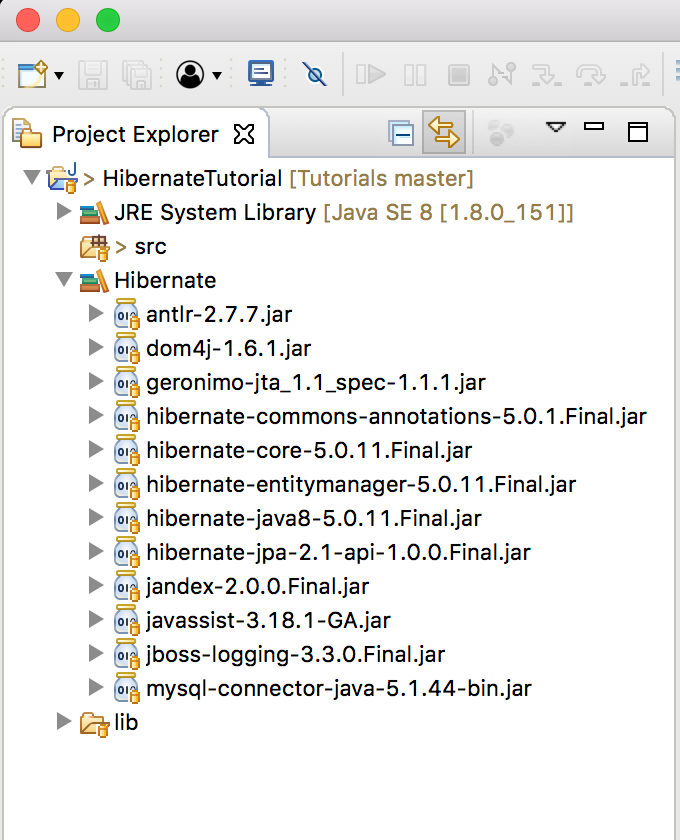
 After adding
 Hibernate User library to HibernateTutorial project, it will look like this:
3. Setting up MySQL Container
We use docker container to host our MySQL database.
3.1 Creating Dockerfile
Create a file named Dockerfile with the following content.
#Create MySQL Image for Hibernate Tutorial
FROM mysql
MAINTAINER csgeek@mail.com

ENV MYSQL_ROOT_PASSWORD hbn
ADD hbn_backup.sql /docker-entrypoint-initdb.d

EXPOSE 3306
Notice that we set environment variable MYSQL_ROOT_PASSWORD to hbn. Later, we can access this MySQL database with user root and password hbn. We also add hbn_backup.sql file into /docker-entrypoint-initdb.d, which means the sql scripts inside hbn_backup.sql will be executed when the MySQL container is started. The sql scripts create a database named hbndb and a table named EMPLOYEE.
CREATE DATABASE IF NOT EXISTS `hbndb`;
USE `hbndb`;

DROP TABLE IF EXISTS `EMPLOYEE`;
CREATE TABLE `EMPLOYEE` (
   `id` INT NOT NULL AUTO_INCREMENT,
   `name` VARCHAR(20) DEFAULT NULL,
   `salary` DOUBLE NOT NULL,
   PRIMARY KEY (`id`)
);
3.2 Creating Image with Dockerfile
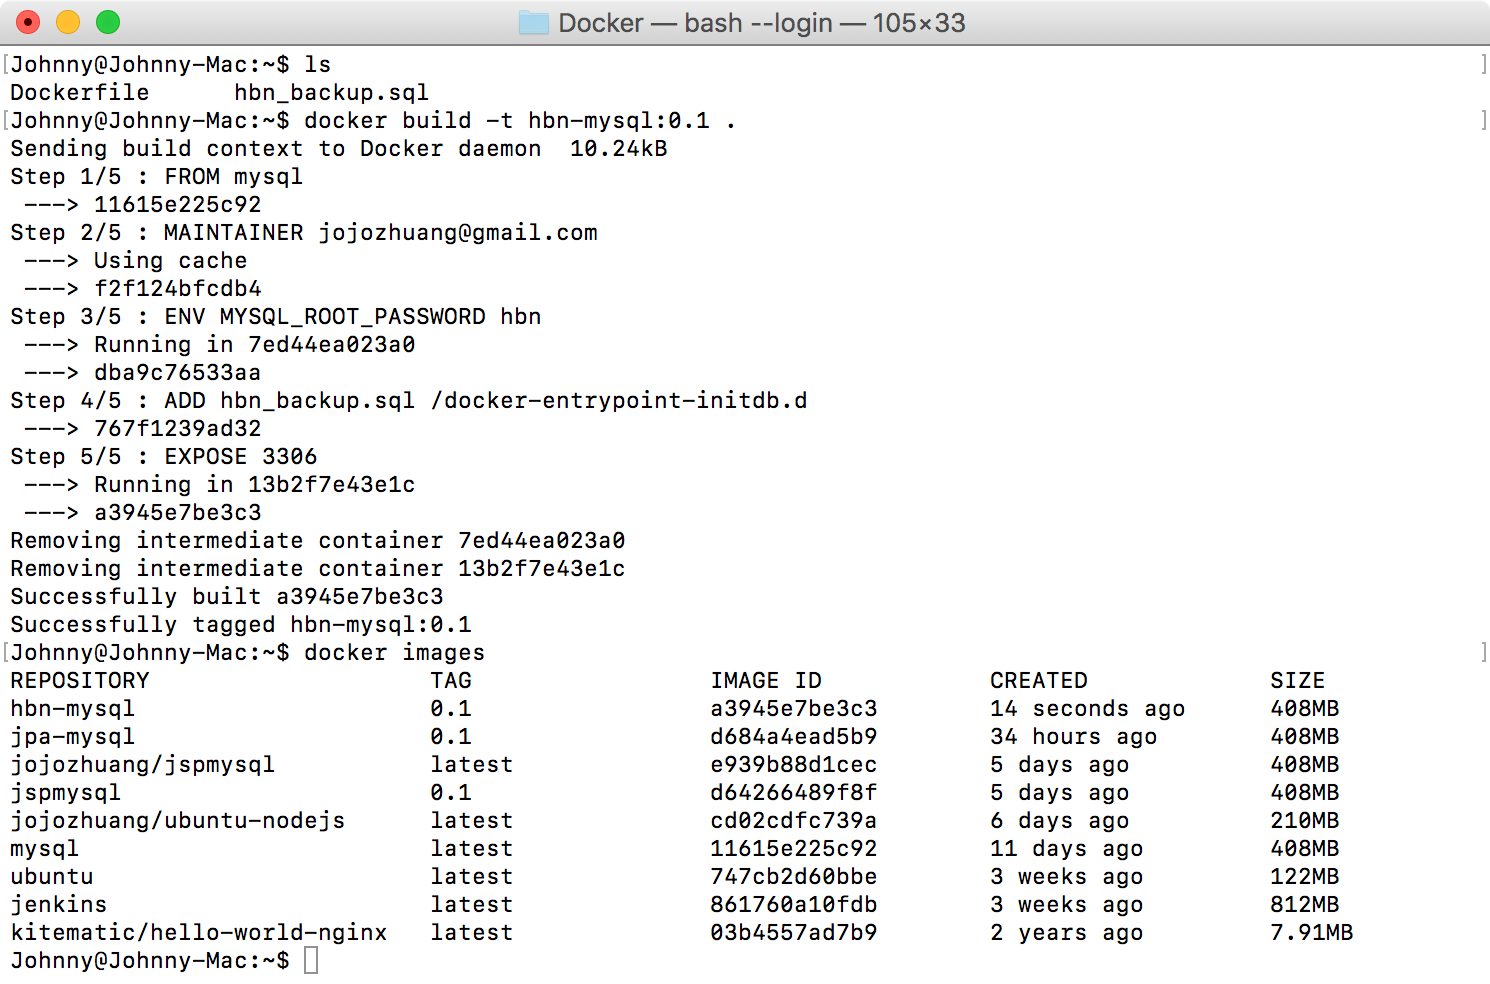
In Docker Terminal, navigate to /HibernateTutorial/Docker/, run the following command the create MySQL image.
$ docker build -t hbn-mysql:0.1 .
The new image is created with named hbn-mysql and tag 0.1.
$ docker images
3.3 Running MySQL Container
In Docker Terminal, run command to launch MySQL container with the new image ‘hbn-mysql:0.1’.
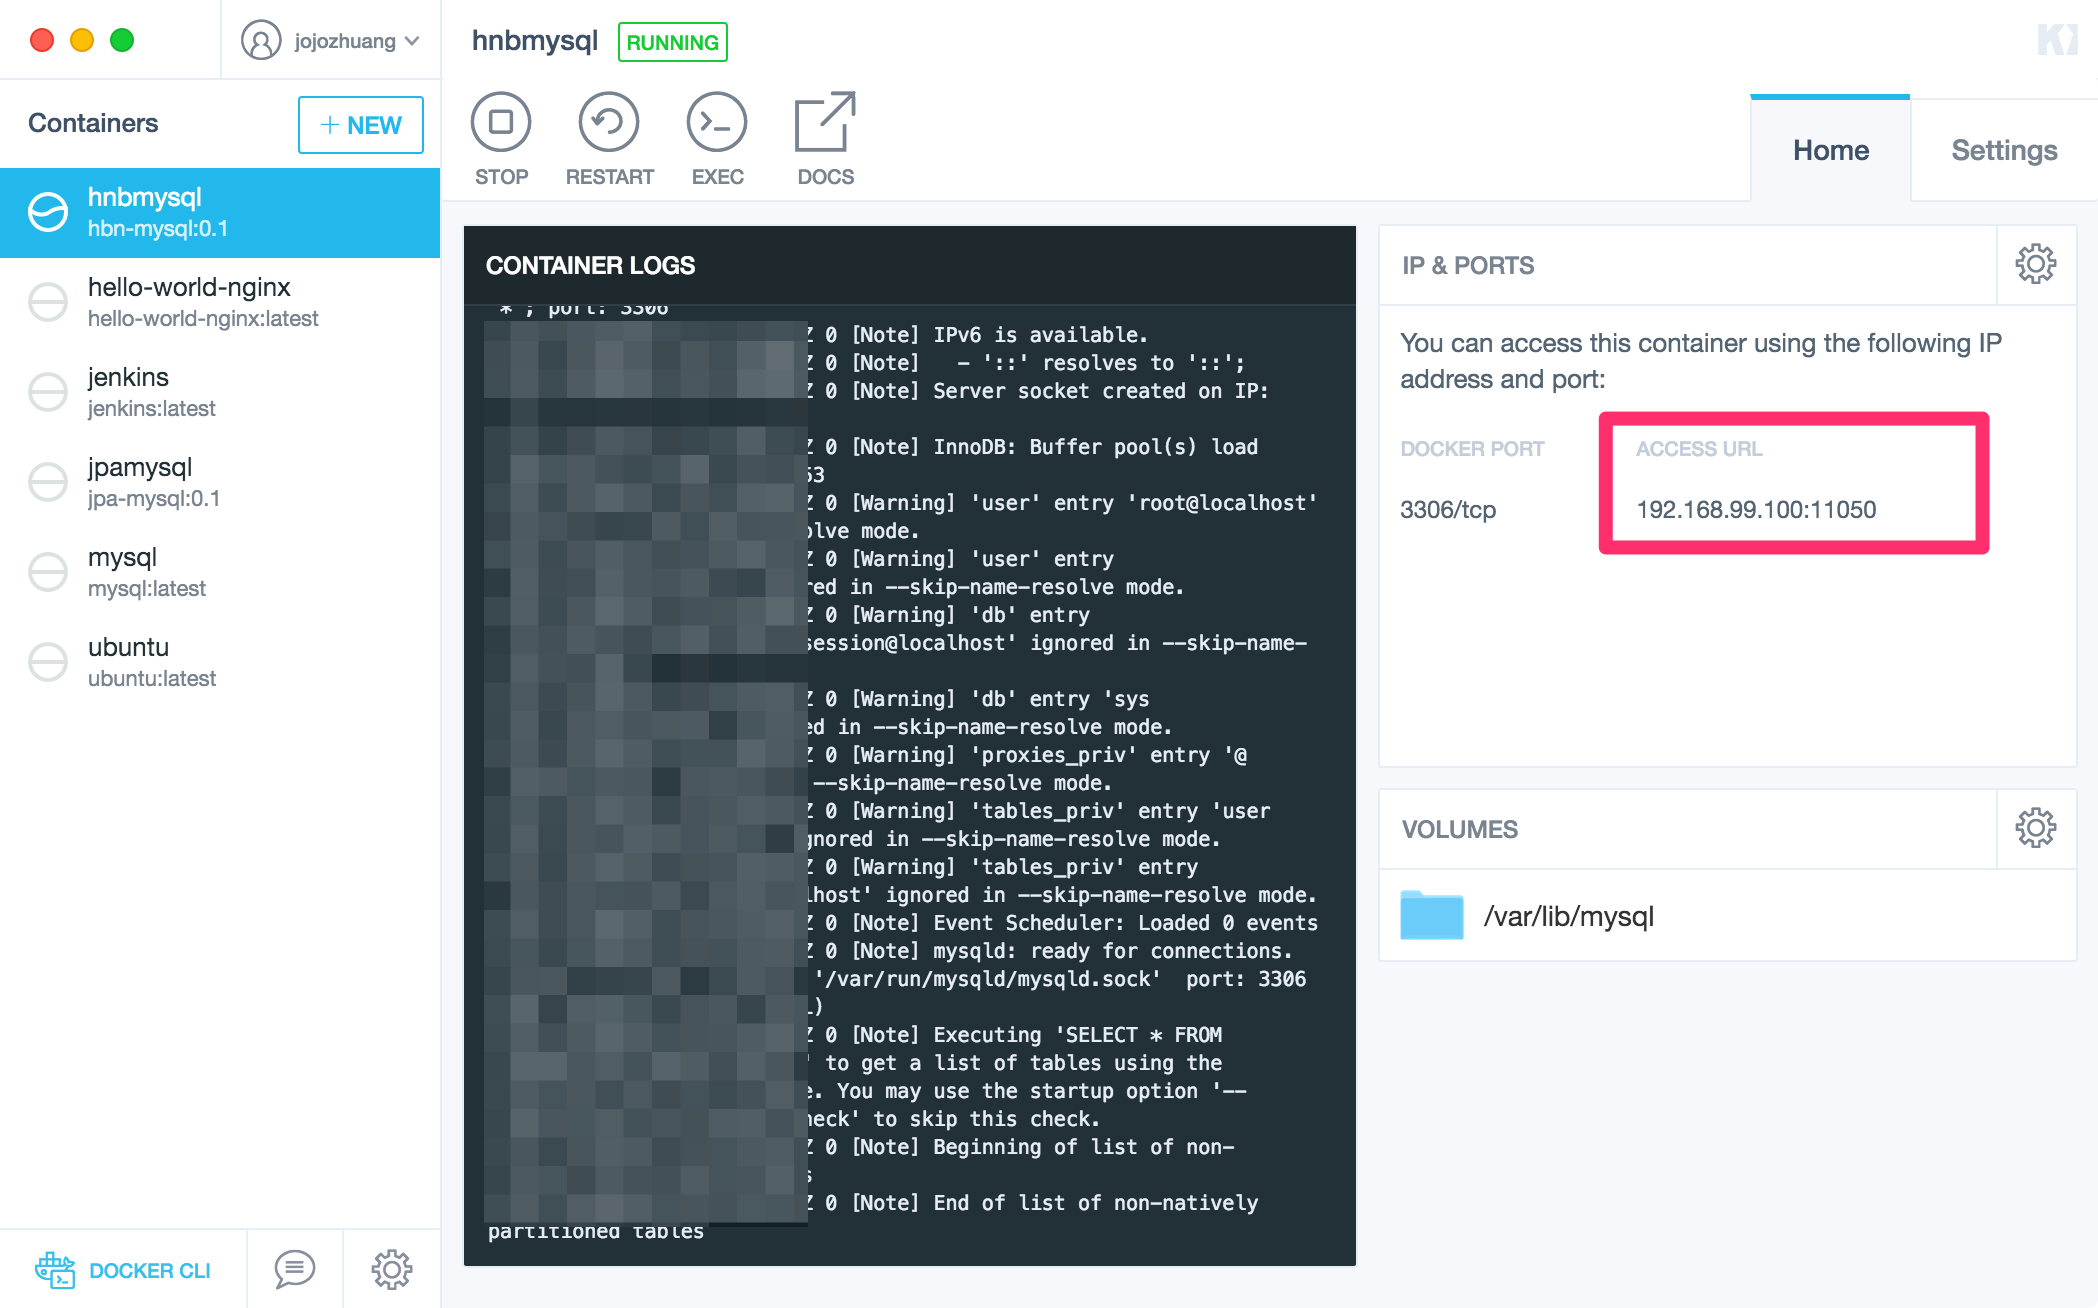
$ docker run --detach --name=hnbmysql --publish 11050:3306 hbn-mysql:0.1
You will see that a container named hnbmysql is running now. Note the IP address 192.168.99.100 and port 11050. We will use them to configure the database connection in eclipse and MySQL Workbench later.
3.4 Connecting MySQL Container With MySQL Workbench
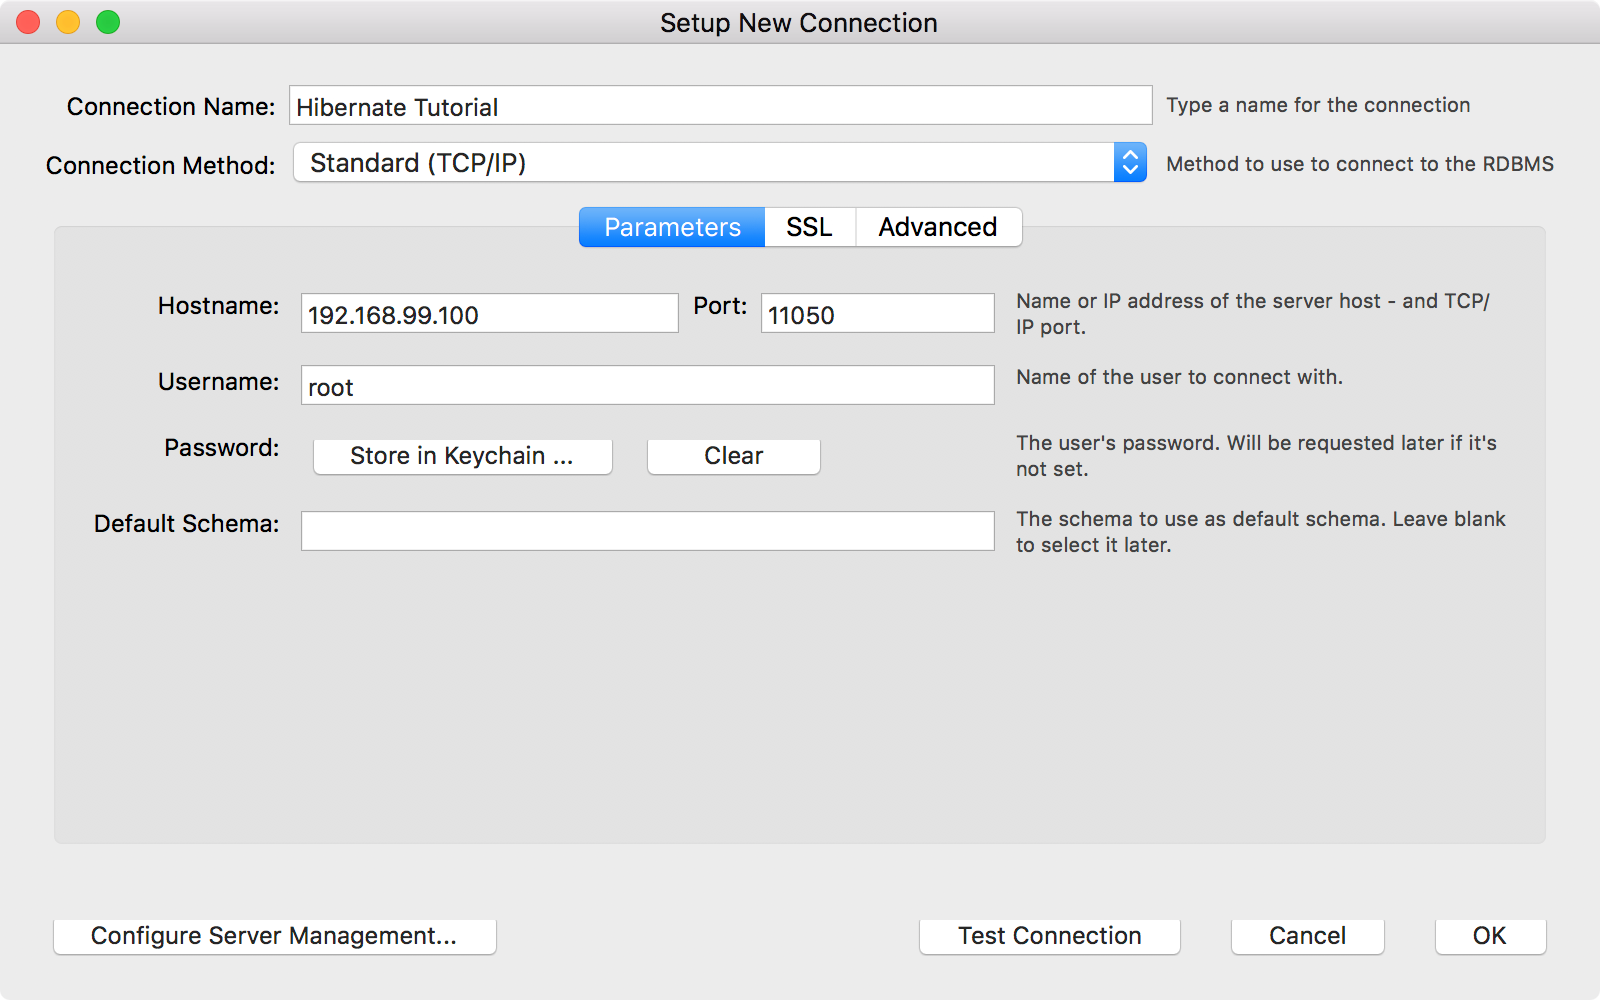
In MySQL Workbench, create a new connection with name ‘Hibernate Tutorial’. Set IP address to 192.168.99.100 and port to 11050. And set password hbn for user root.
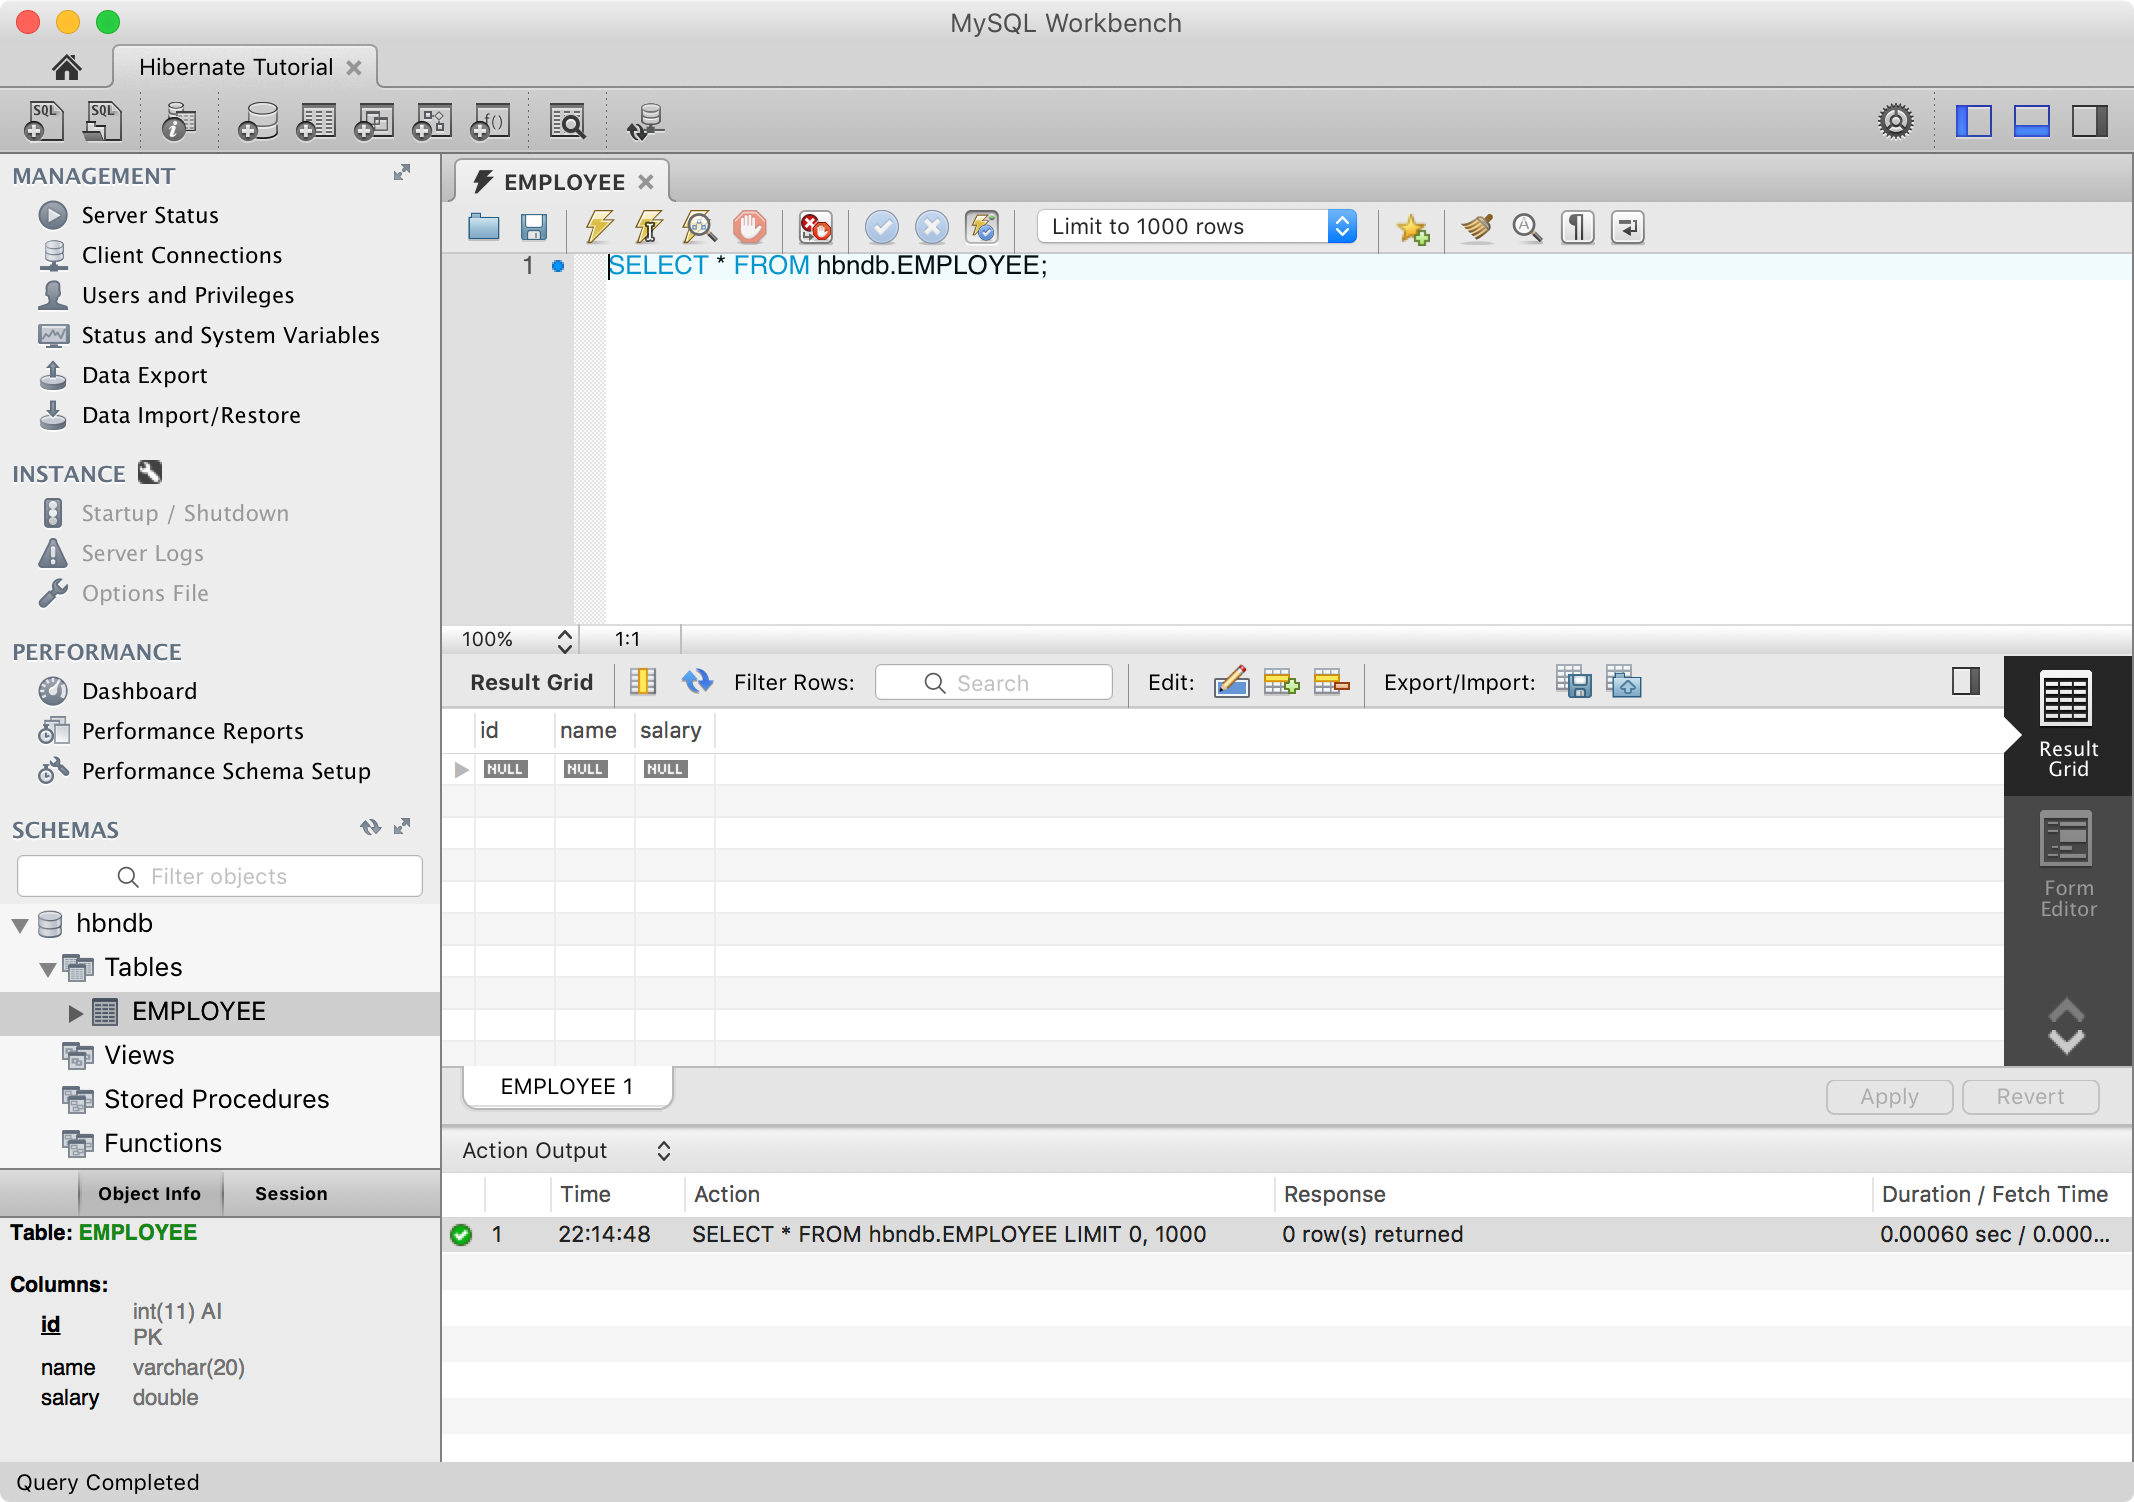
 Test the connection and connect the MySQL container. You will see database
 hbndb and table EMPLOYEE are created, but there is no data created yet in table EMPLOYEE.
4. Making Changes to HibernateTutorial Project
4.1 Creating Entity
Create package Johnny.HibernateTutorial.Entity under src, and create class Employee as follows.
package Johnny.HibernateTutorial.Entity;

public class Employee {
    private int id;
    private String name;
    private double salary;

    public Employee() {}
    public Employee(String name, double salary) {
       this.name = name;
       this.salary = salary;
    }

    public int getId( ) {
        return id;
    }

    public void setId(int id) {
       this.id = id;
    }

    public String getName( ) {
       return name;
    }

    public void setName(String name) {
       this.name = name;
    }

    public double getSalary( ) {
       return salary;
    }

    public void setSalary(double salary) {
       this.salary = salary;
    }

    @Override
    public String toString() {
       return "Employee [id=" + id + ", name=" + name + ", salary=" + salary + "]";
    }
}
4.2 Creating Persistence Operations
Create another package Johnny.HibernateTutorial.Service under src, and create class ManageEmployee as follows. The main method has three operations.
- Create three employees
- Update the salary of the first employee
- Delete the second the employee
package Johnny.HibernateTutorial.Service;

import java.util.List;
import java.util.Date;
import java.util.Iterator;

import org.hibernate.HibernateException;
import org.hibernate.Session;
import org.hibernate.Transaction;
import org.hibernate.SessionFactory;
import org.hibernate.cfg.Configuration;

import Johnny.HibernateTutorial.Entity.Employee;

public class ManageEmployee {
    private static SessionFactory factory;

    public static void main(String[] args) {
        try {
            factory = new Configuration().configure().buildSessionFactory();
        } catch (Throwable ex) {
            System.err.println("Failed to create sessionFactory object." + ex);
            throw new ExceptionInInitializerError(ex);
        }
        ManageEmployee ME = new ManageEmployee();

        /* Add few employee records in database */
        Integer empID1 = ME.addEmployee("Johnny Zhuang", 1000);
        Integer empID2 = ME.addEmployee("Michael Jackson", 5000);
        Integer empID3 = ME.addEmployee("Johnny Walker", 10000);

        /* List down all the employees */
        ME.listEmployees();

        /* Update employee's records */
        ME.updateEmployee(empID1, 7000);

        /* Delete an employee from the database */
        ME.deleteEmployee(empID2);

        /* List down new list of the employees */
        ME.listEmployees();
   }

    /* Method to CREATE an employee in the database */
    public Integer addEmployee(String name, double salary){
        Session session = factory.openSession();
        Transaction tx = null;
        Integer employeeID = null;

        try {
            tx = session.beginTransaction();
            Employee employee = new Employee(name, salary);
            employeeID = (Integer) session.save(employee);
            tx.commit();
        } catch (HibernateException e) {
            if (tx!=null) tx.rollback();
            e.printStackTrace();
        } finally {
            session.close();
        }
        return employeeID;
    }

    /* Method to  READ all the employees */
    public void listEmployees( ){
        Session session = factory.openSession();
        Transaction tx = null;

        try {
            tx = session.beginTransaction();
            List employees = session.createQuery("FROM Employee").list();
            for (Iterator iterator = employees.iterator(); iterator.hasNext();){
                Employee employee = (Employee) iterator.next();
                System.out.print("Name: " + employee.getName());
                System.out.println(" Salary: " + employee.getSalary());
            }
            tx.commit();
        } catch (HibernateException e) {
            if (tx!=null) tx.rollback();
            e.printStackTrace();
        } finally {
            session.close();
        }
    }

    /* Method to UPDATE salary for an employee */
    public void updateEmployee(Integer EmployeeID, double salary ){
        Session session = factory.openSession();
        Transaction tx = null;

        try {
            tx = session.beginTransaction();
            Employee employee = (Employee)session.get(Employee.class, EmployeeID);
            employee.setSalary(salary);
            session.update(employee);
            tx.commit();
        } catch (HibernateException e) {
            if (tx!=null) tx.rollback();
            e.printStackTrace();
        } finally {
            session.close();
        }
    }

    /* Method to DELETE an employee from the records */
    public void deleteEmployee(Integer EmployeeID){
        Session session = factory.openSession();
        Transaction tx = null;

        try {
            tx = session.beginTransaction();
            Employee employee = (Employee)session.get(Employee.class, EmployeeID);
            session.delete(employee);
            tx.commit();
        } catch (HibernateException e) {
            if (tx!=null) tx.rollback();
            e.printStackTrace();
        } finally {
            session.close();
        }
    }
}
4.3 Creating Mapping Configuration File
Create Employee.hbm.xml under src.
<?xml version = "1.0" encoding = "utf-8"?>
<!DOCTYPE hibernate-mapping PUBLIC
"-//Hibernate/Hibernate Mapping DTD//EN"
"http://www.hibernate.org/dtd/hibernate-mapping-3.0.dtd">

<hibernate-mapping>
    <class name="Johnny.HibernateTutorial.Entity.Employee" table="EMPLOYEE">
        <meta attribute = "class-description">This class contains the employee detail.</meta>
        <id name="id" type="int" column="id">
            <generator class="native"/>
        </id>
        <property name="name" column="name" type="string"/>
        <property name="salary" column="salary" type="double"/>
   </class>
</hibernate-mapping>
4.4 Creating Hibernate Configuration File
Create hibernate.cfg.xml under src.
<?xml version = "1.0" encoding = "utf-8"?>
<!DOCTYPE hibernate-configuration SYSTEM
"http://www.hibernate.org/dtd/hibernate-configuration-3.0.dtd">
<hibernate-configuration>
    <session-factory>
        <!-- Database connection settings -->
        <property name="hibernate.dialect">org.hibernate.dialect.MySQLDialect</property>
        <property name="hibernate.connection.driver_class">com.mysql.jdbc.Driver</property>
        <property name = "hibernate.connection.url">jdbc:mysql://192.168.99.100:11050/hbndb</property>
        <property name = "hibernate.connection.username">root</property>
        <property name = "hibernate.connection.password">hbn</property>

        <!-- List of XML mapping files -->
        <mapping resource = "Employee.hbm.xml"/>
   </session-factory>
</hibernate-configuration>
4.5 Final Project Structure
Finally, the project looks as follows.
5. Testing
5.1 Running ManageEmployee Class
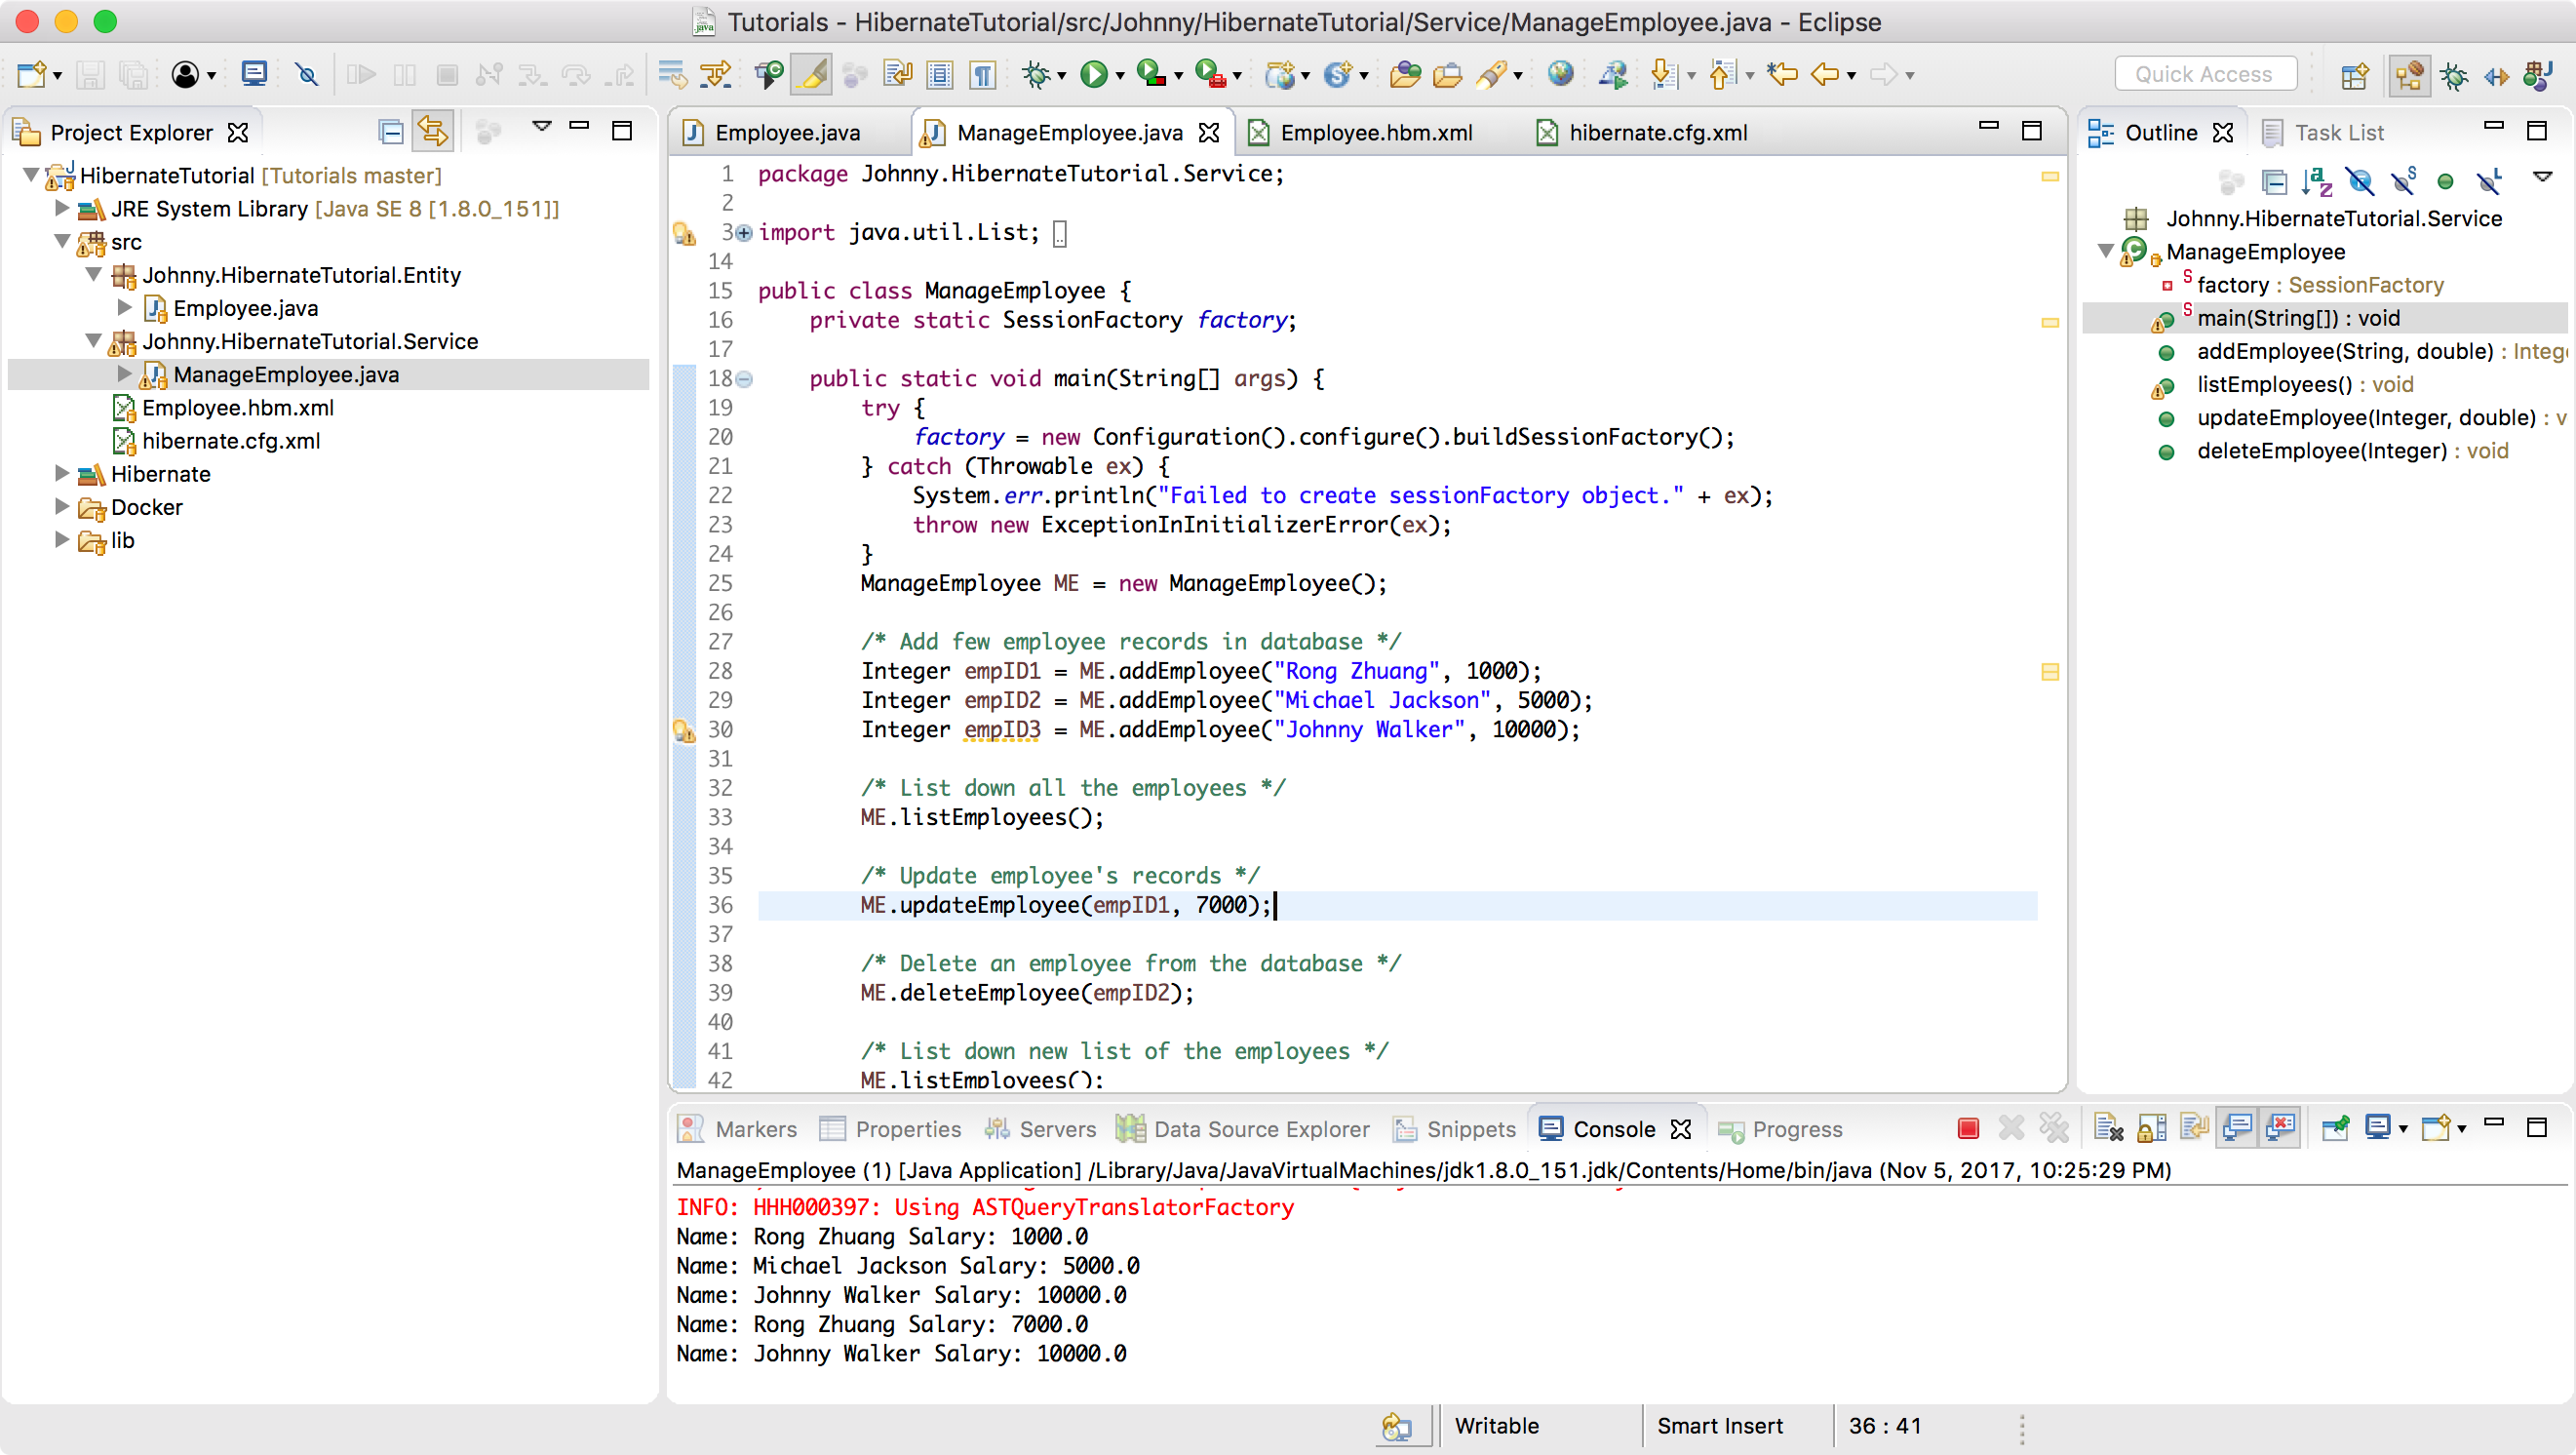
In Eclipse, right click on ManageEmployee.java file -> Run AS -> Java Application. You will get the following output in the console panel of eclipse IDE.
Name: Johnny Zhuang Salary: 1000.0
Name: Michael Jackson Salary: 5000.0
Name: Johnny Walker Salary: 10000.0
Name: Johnny Zhuang Salary: 7000.0
Name: Johnny Walker Salary: 10000.0
5.2 Checking Data in MySQL
In MySQL Workbench, run sql query to find all rows in table Employee. You will see two entries.
SELECT * FROM hbndb.EMPLOYEE;
