8613. Testing RESTful API with PostmanHTTP and Postman
Test RESTful APIs with Postman.
1. Postman
Postman is a Chrome add-on and Mac application which is used to fire requests to an API. It is very lightweight and fast. Requests can be organized in groups, also tests can be created with verifications for certain conditions on the response. With its features it is very good and convenient API tool. It is possible to make different kinds of HTTP requests – GET, POST, PUT, PATCH and DELETE. It is possible to add headers in the requests.
2. Installation
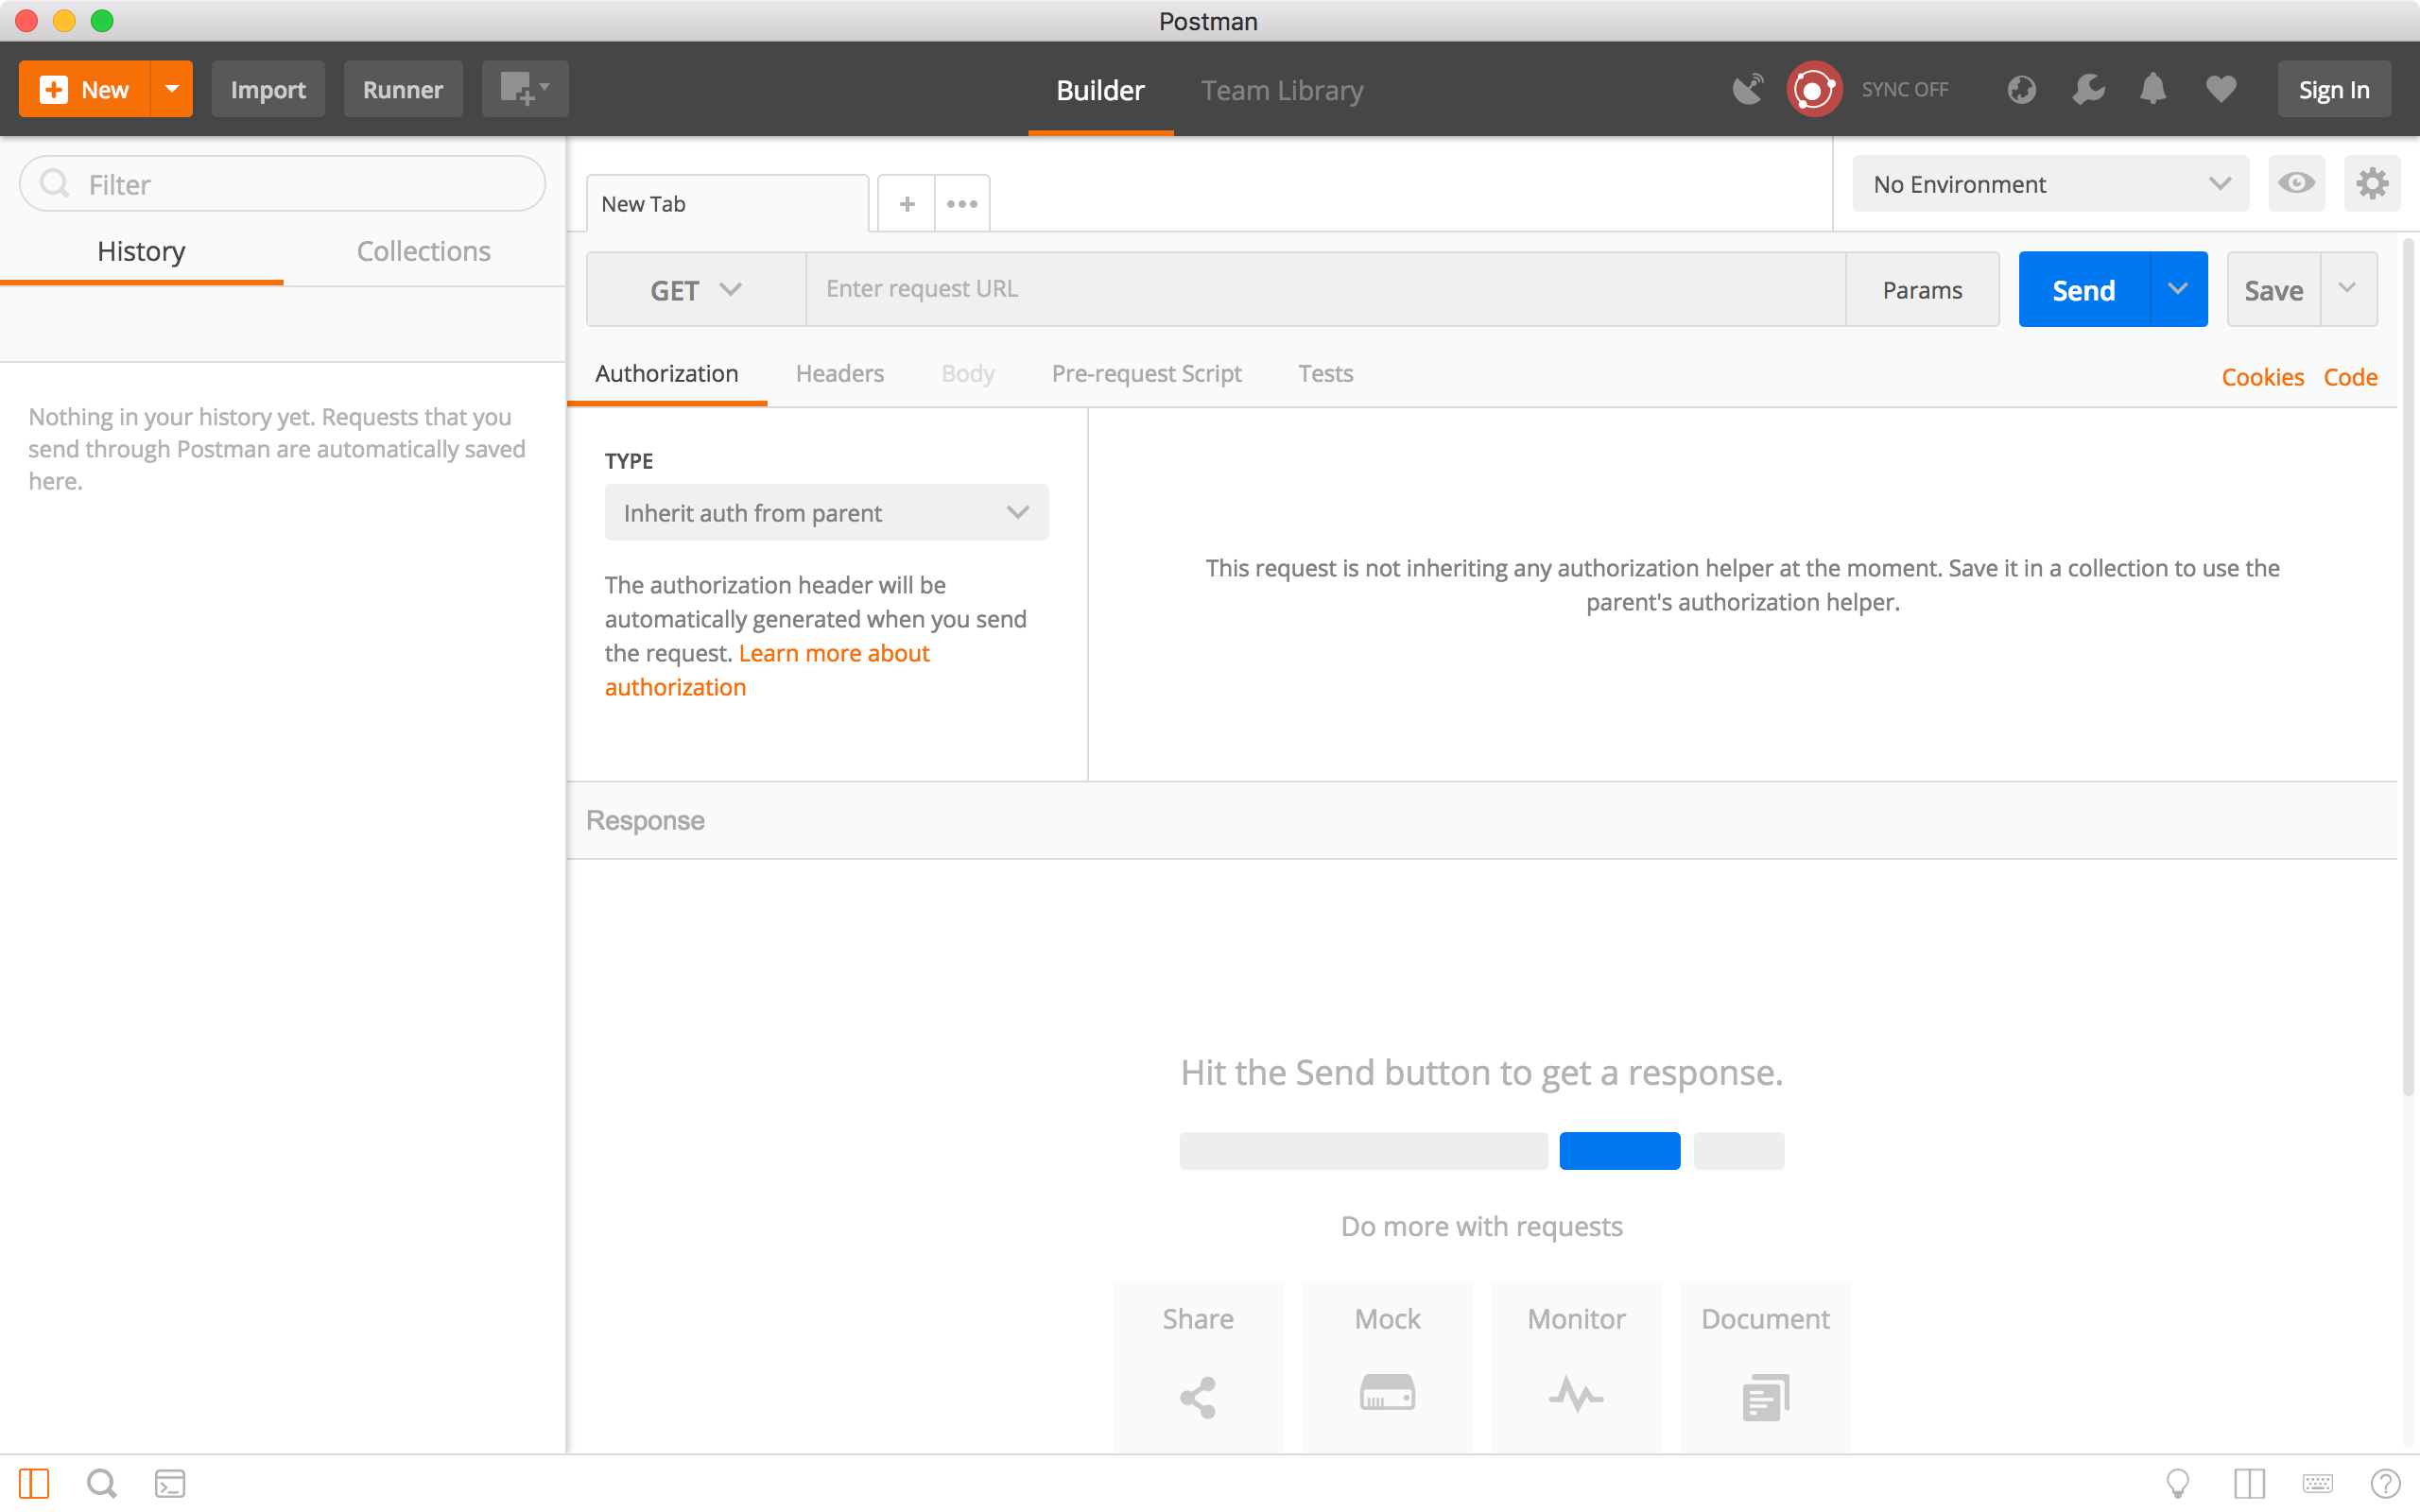
Go to https://www.getpostman.com/apps, select ‘Postman for Mac’ to download the installer of Postman. Unzip the downloaded file, and click on the ‘Postman’ file to launch it.
3. APIs for Testing
In the posting Building RESTful API with ASP.NET Core, I introduced how to create RESTful APIs with C#. Now, let’s use Postman to test these APIs.
| API | Description | Request body | Response body |
|---|---|---|---|
| GET http://localhost:5000/api/products | Get all products | None | Array of Products |
| GET http://localhost:5000/api/products/1 | Get a product by ID | None | Product |
| POST http://localhost:5000/api/products | Add a new product | Product | Product |
| PUT http://localhost:5000/api/products/1 | Update a product | Product | None |
| DELETE http://localhost:5000/api/products/1 | Delete a product | None | None |
| POST http://localhost:5000/api/upload | Upload an image | Image File | Image URL |
4. Testing
4.1 Creating New Collection
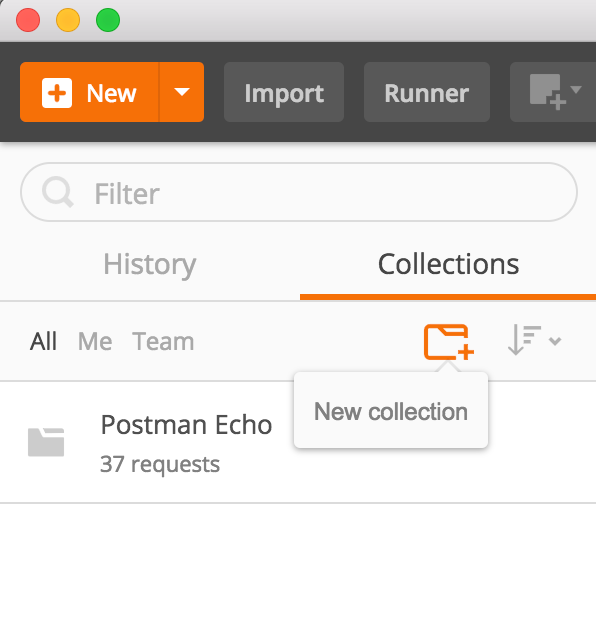
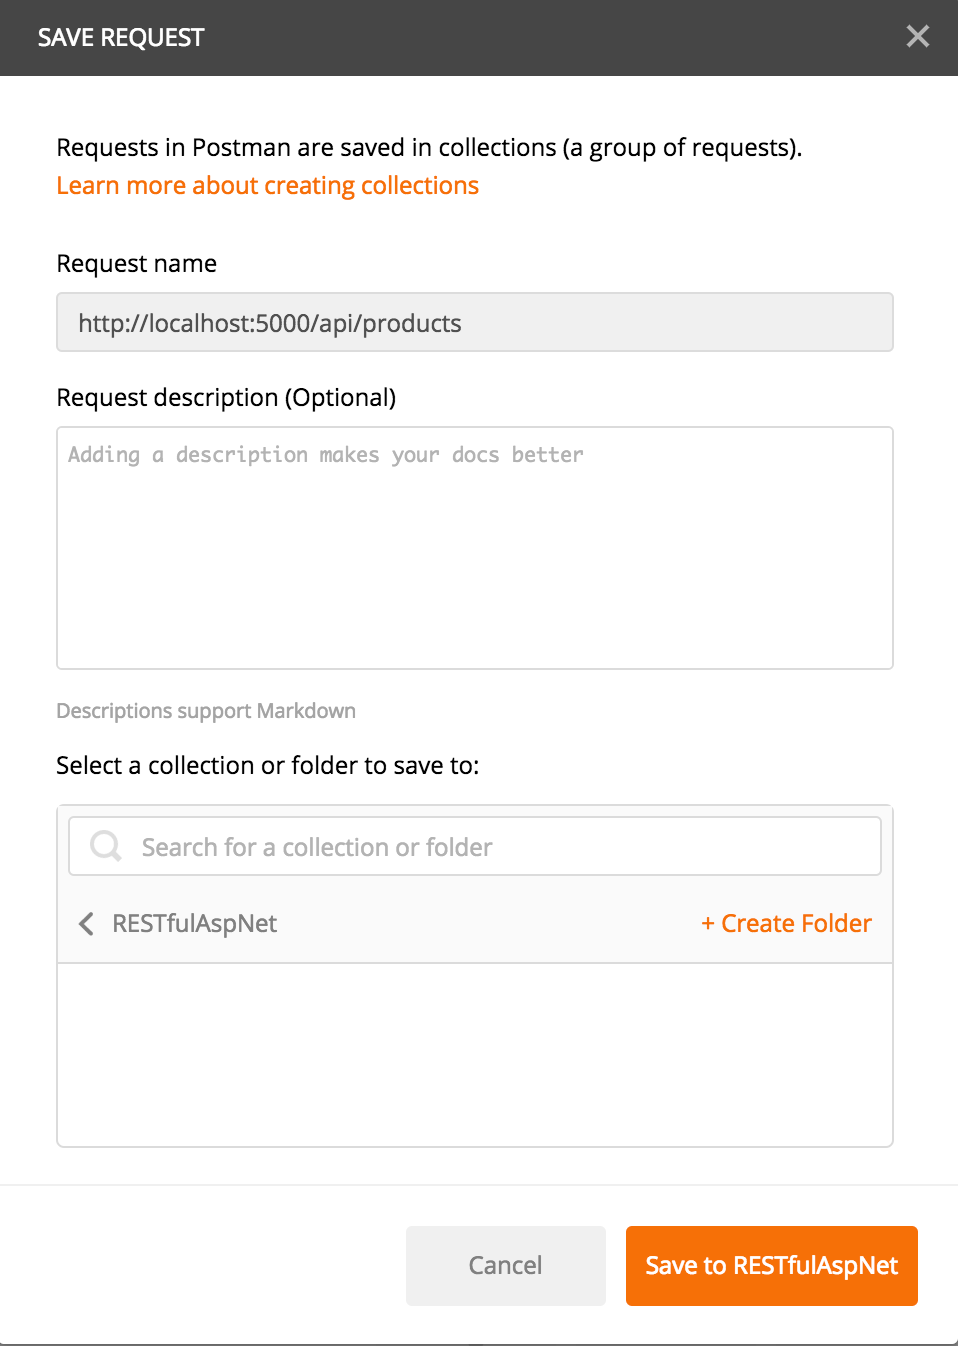
In Postman, switch to ‘Collections’ tab, click on the ‘New collection’ button.
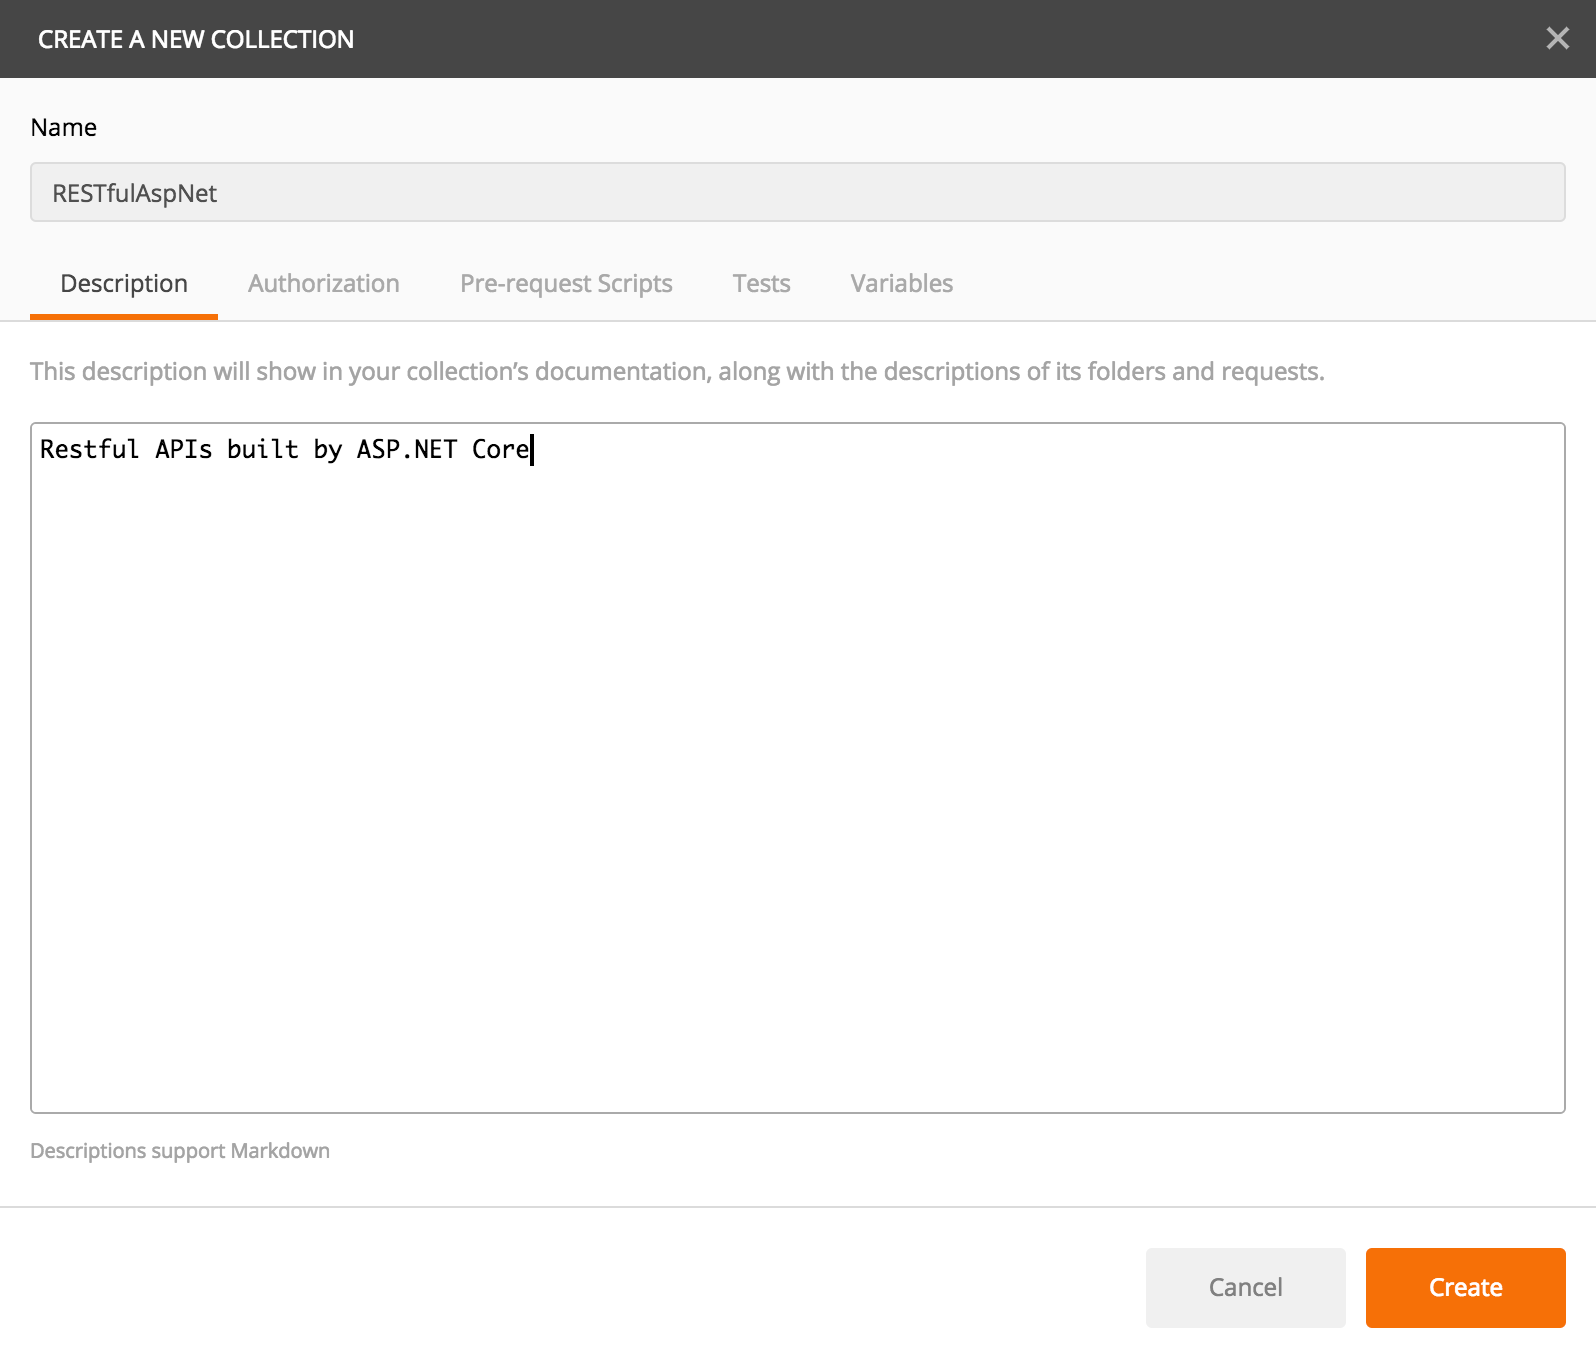
Provide the Name and Description, Create.
4.2 Creating Requests
1) Get all products.
Select the ‘RESTfulAspNet’ collection, click ‘Add requests’ link. Provide Name and Description, save it to the new collection folder.
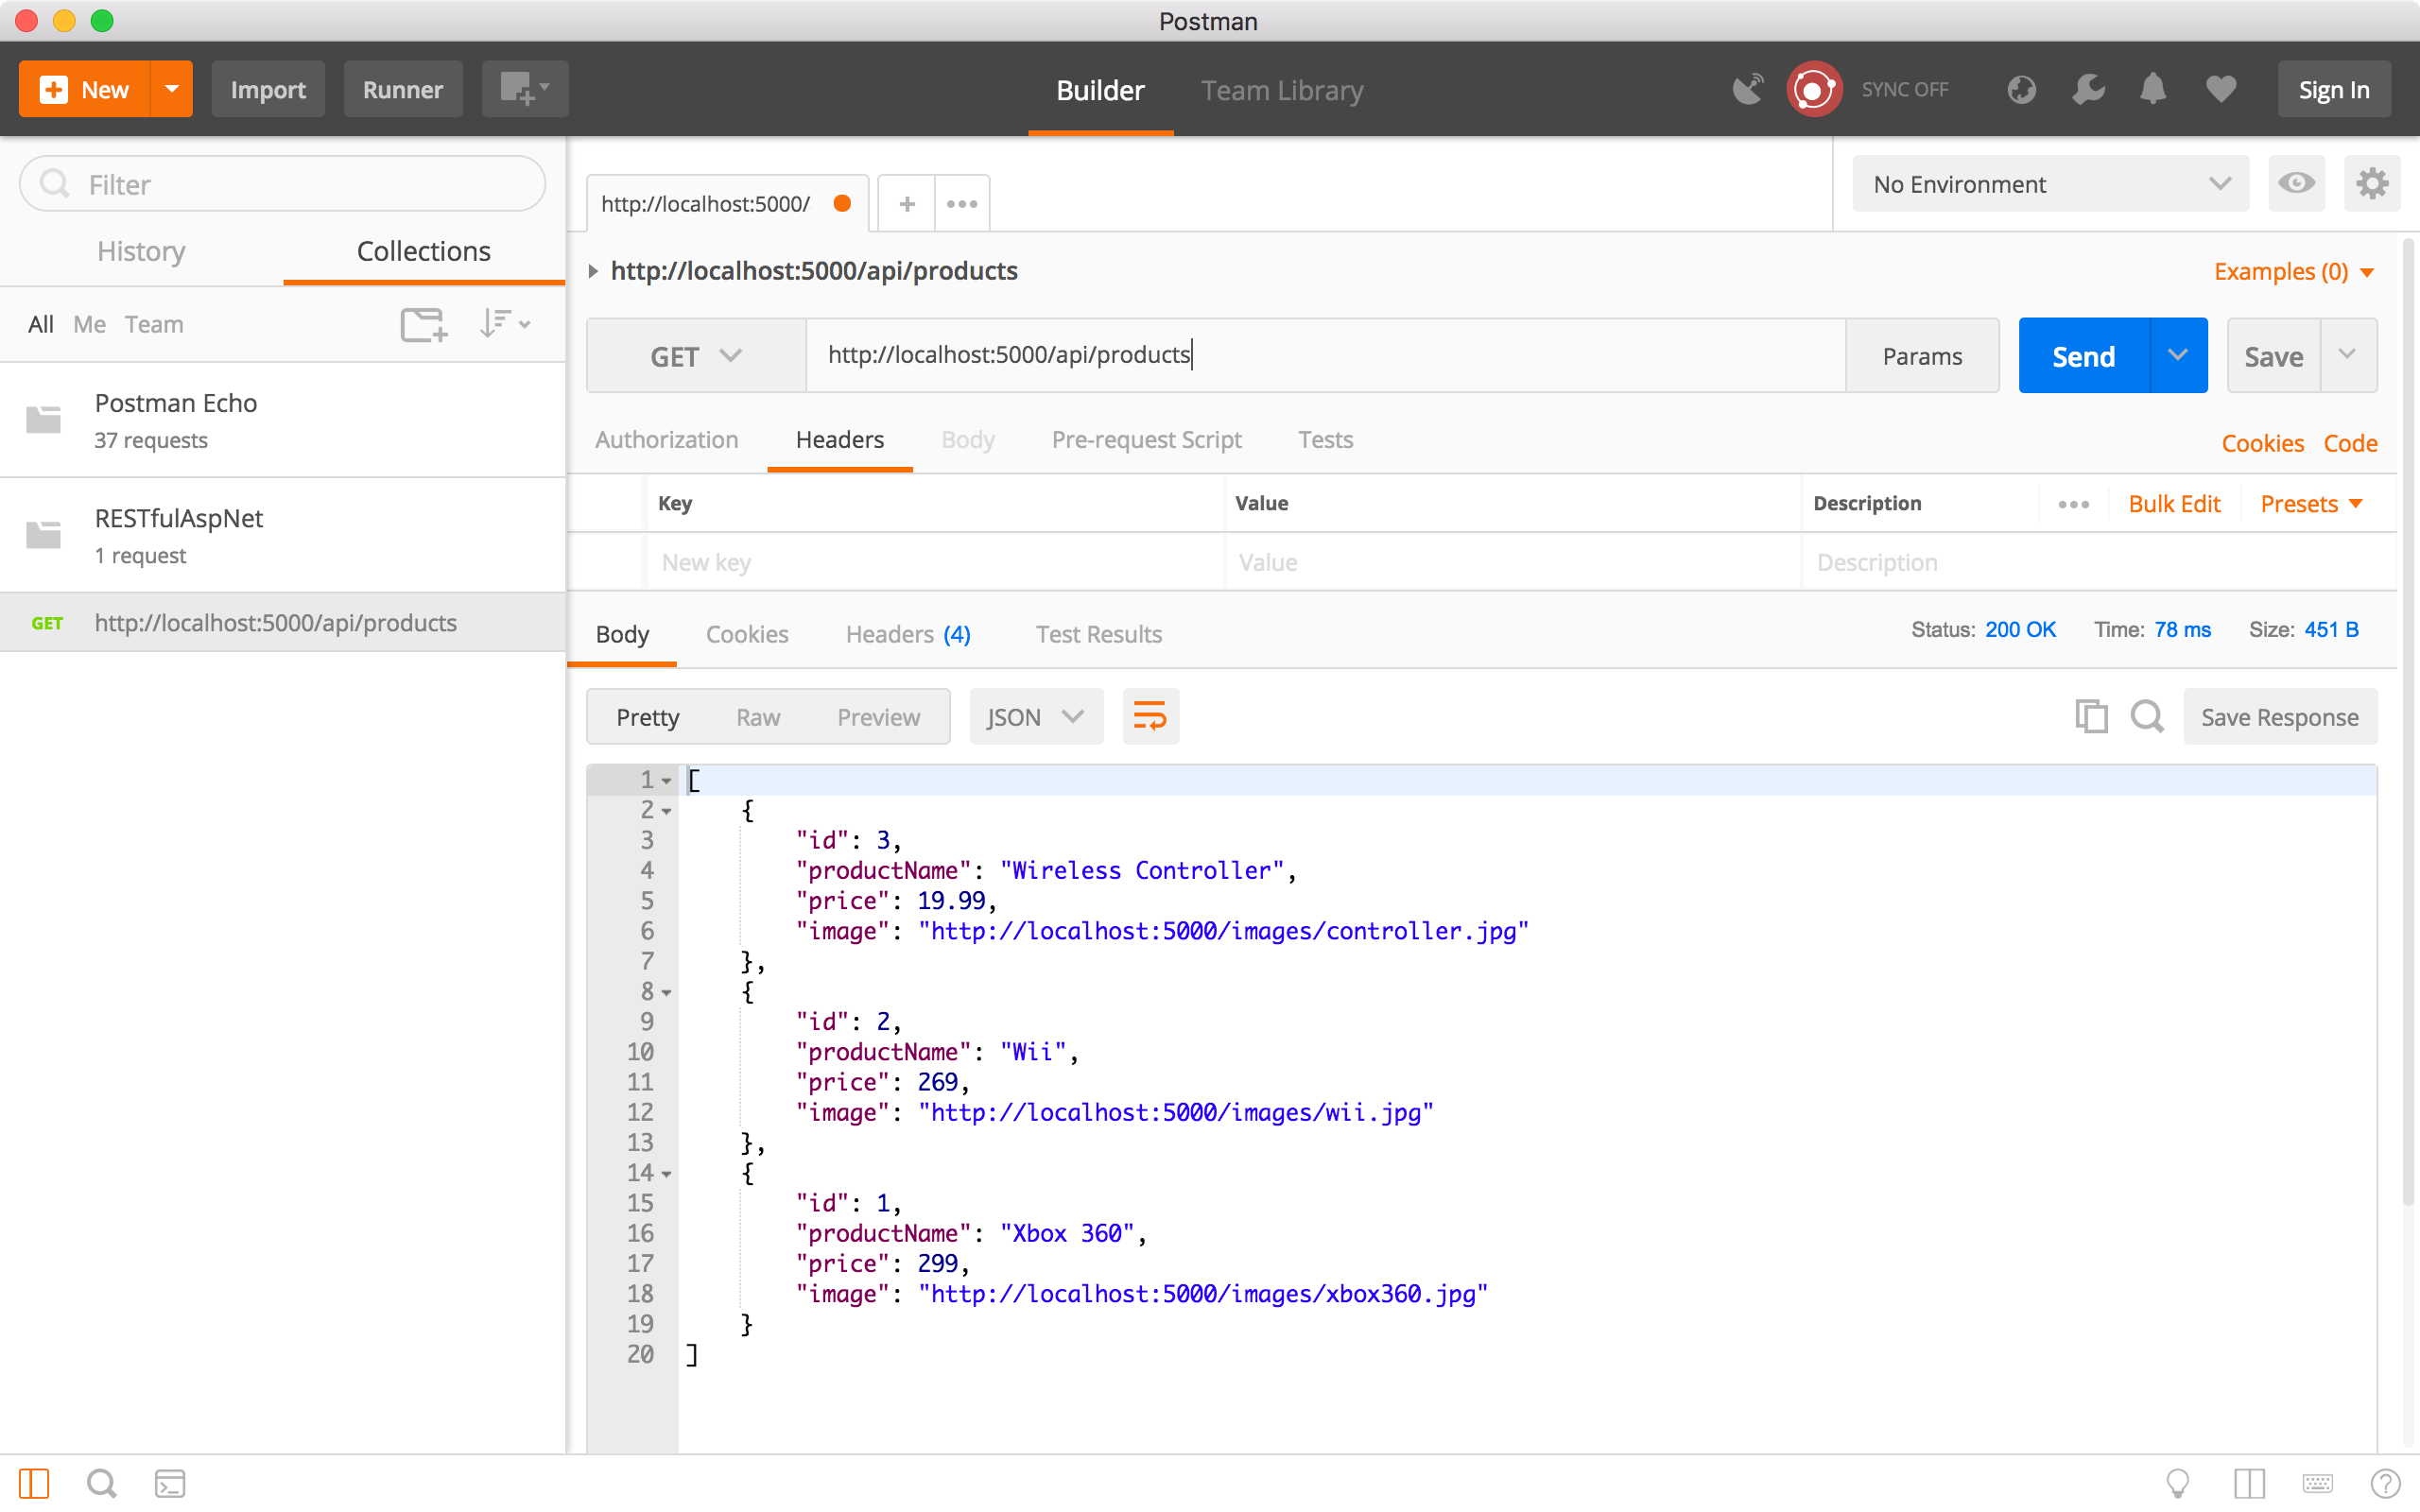
Edit the request, choose the ‘GET’ method and specify ‘http://localhost:5000/api/products’ as the URL, click the blue Send button. All three products are returned in the response body.
 2) Get a product by ID.
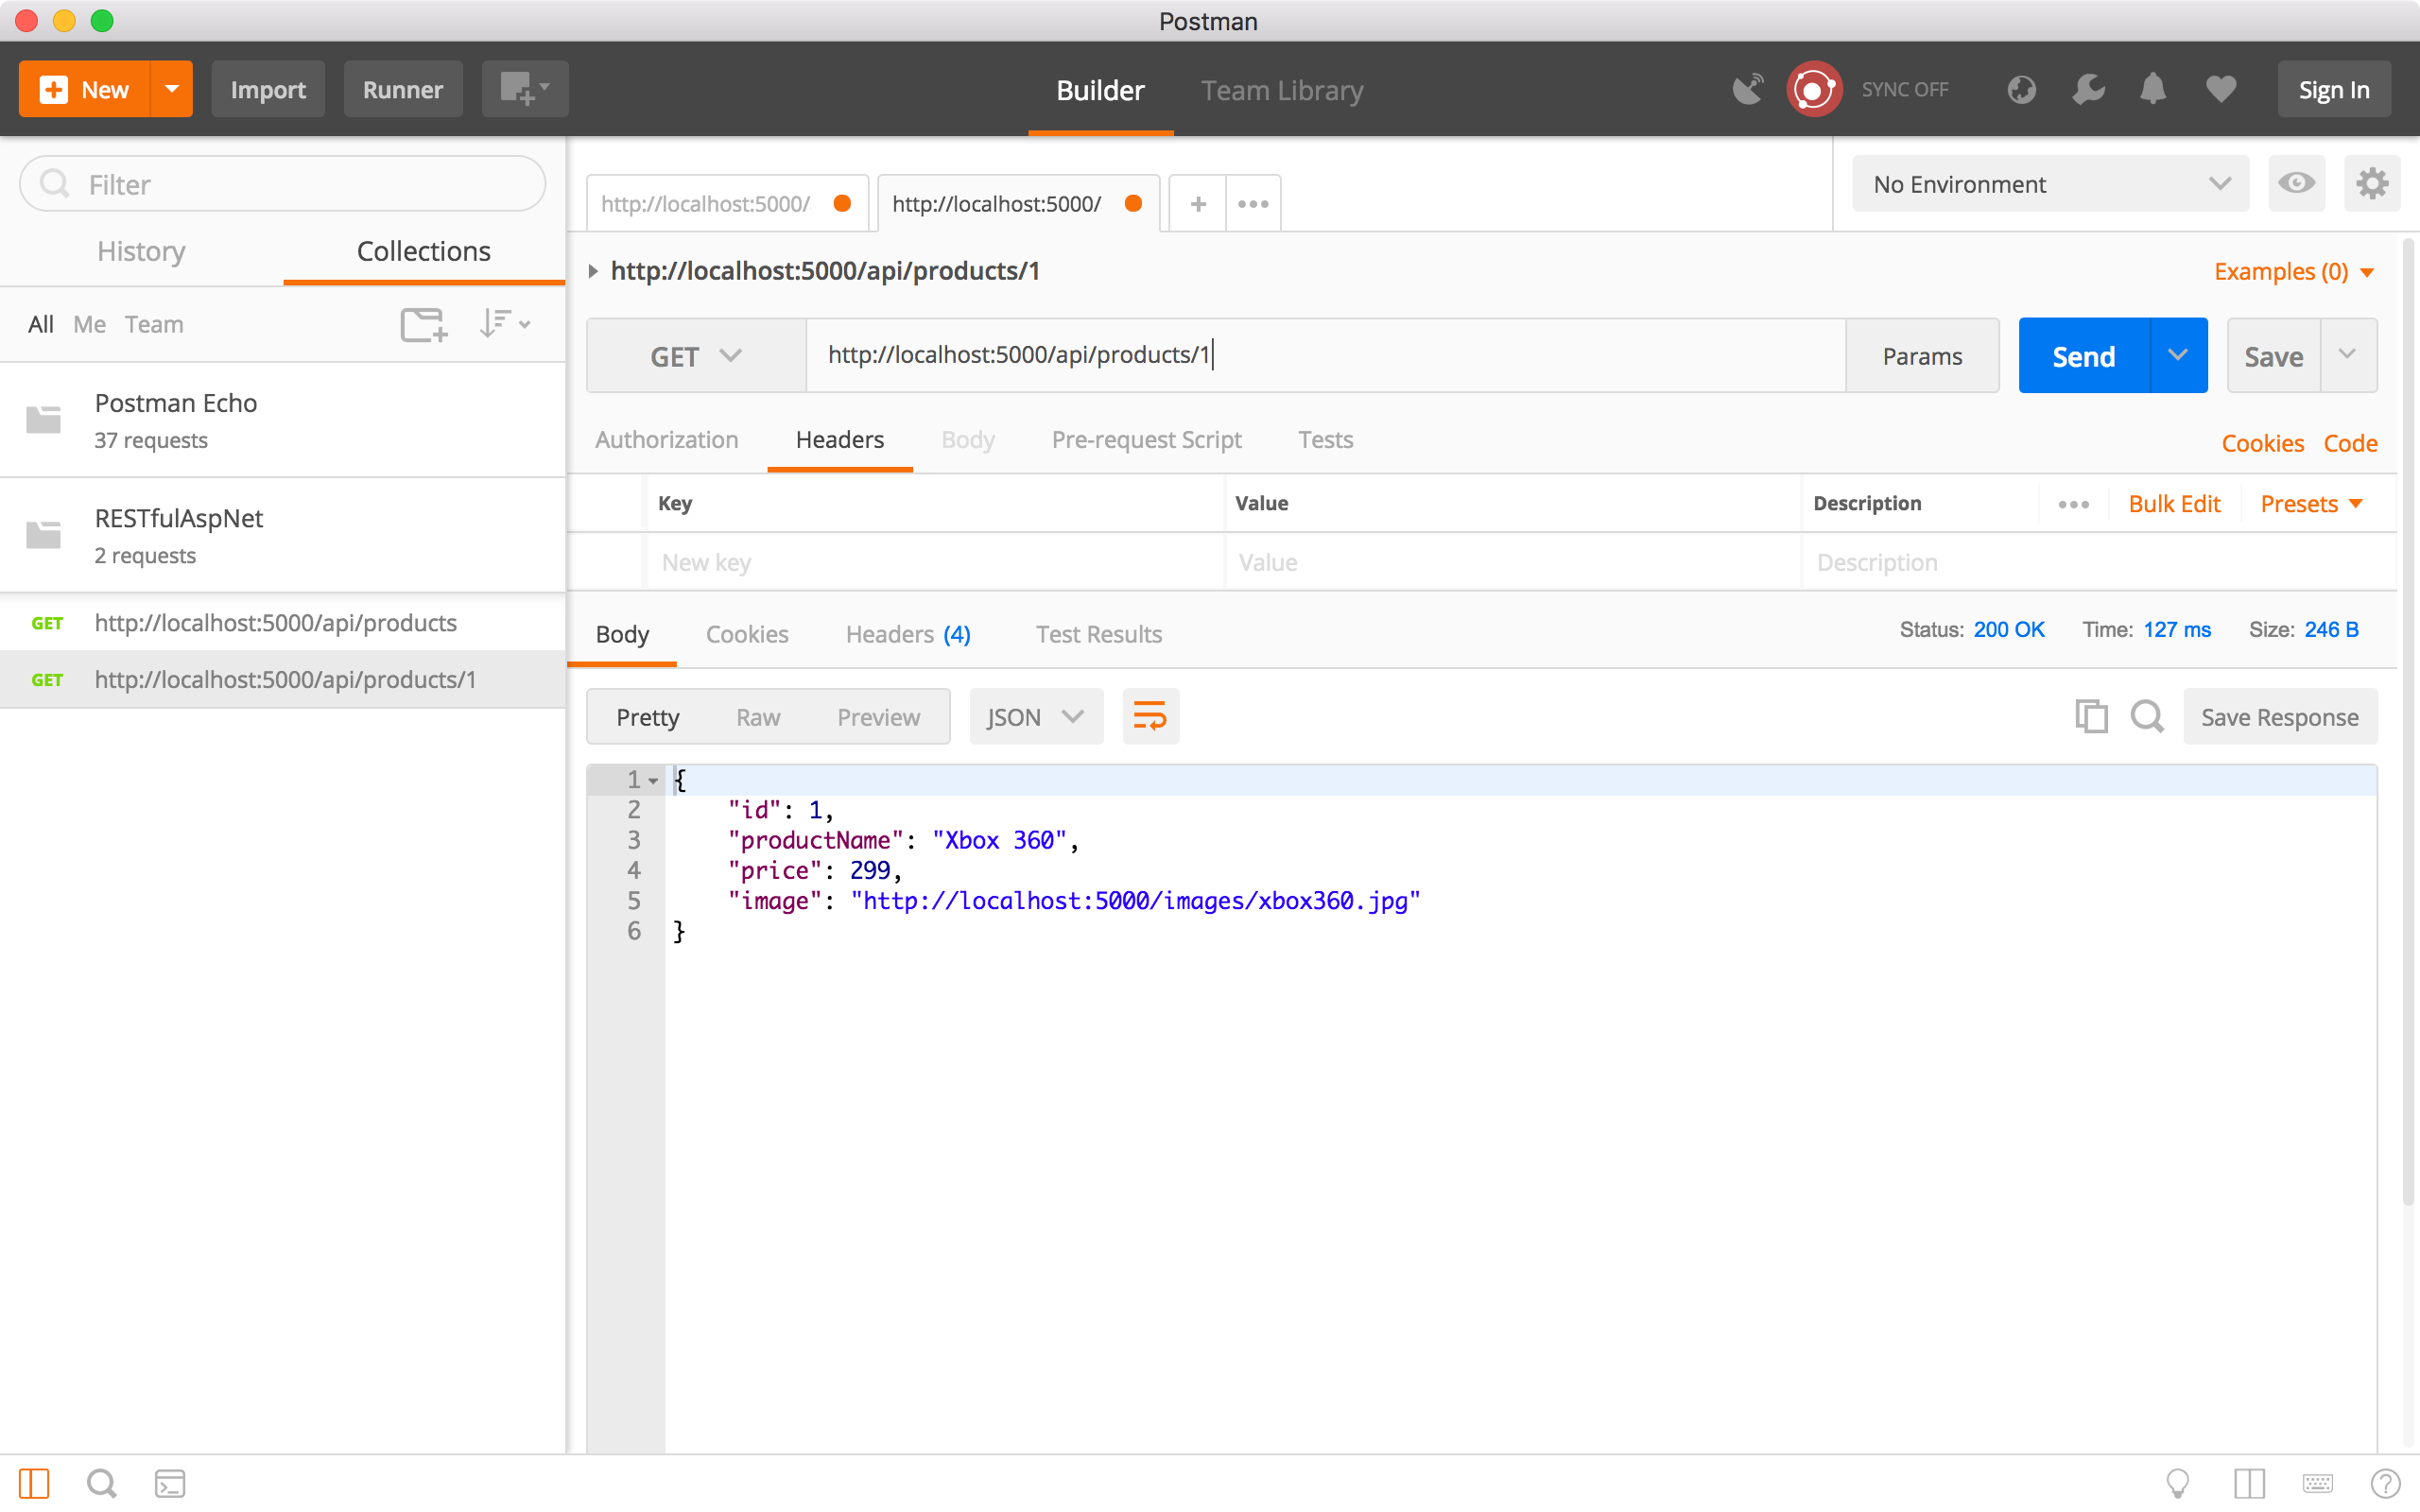
Create a new request, choose the ‘GET’ method and specify ‘http://localhost:5000/api/products/1’ as the URL, click the Send button. Product with ID equals to ‘1’ is returned in the response body.
 3) Add a new product.
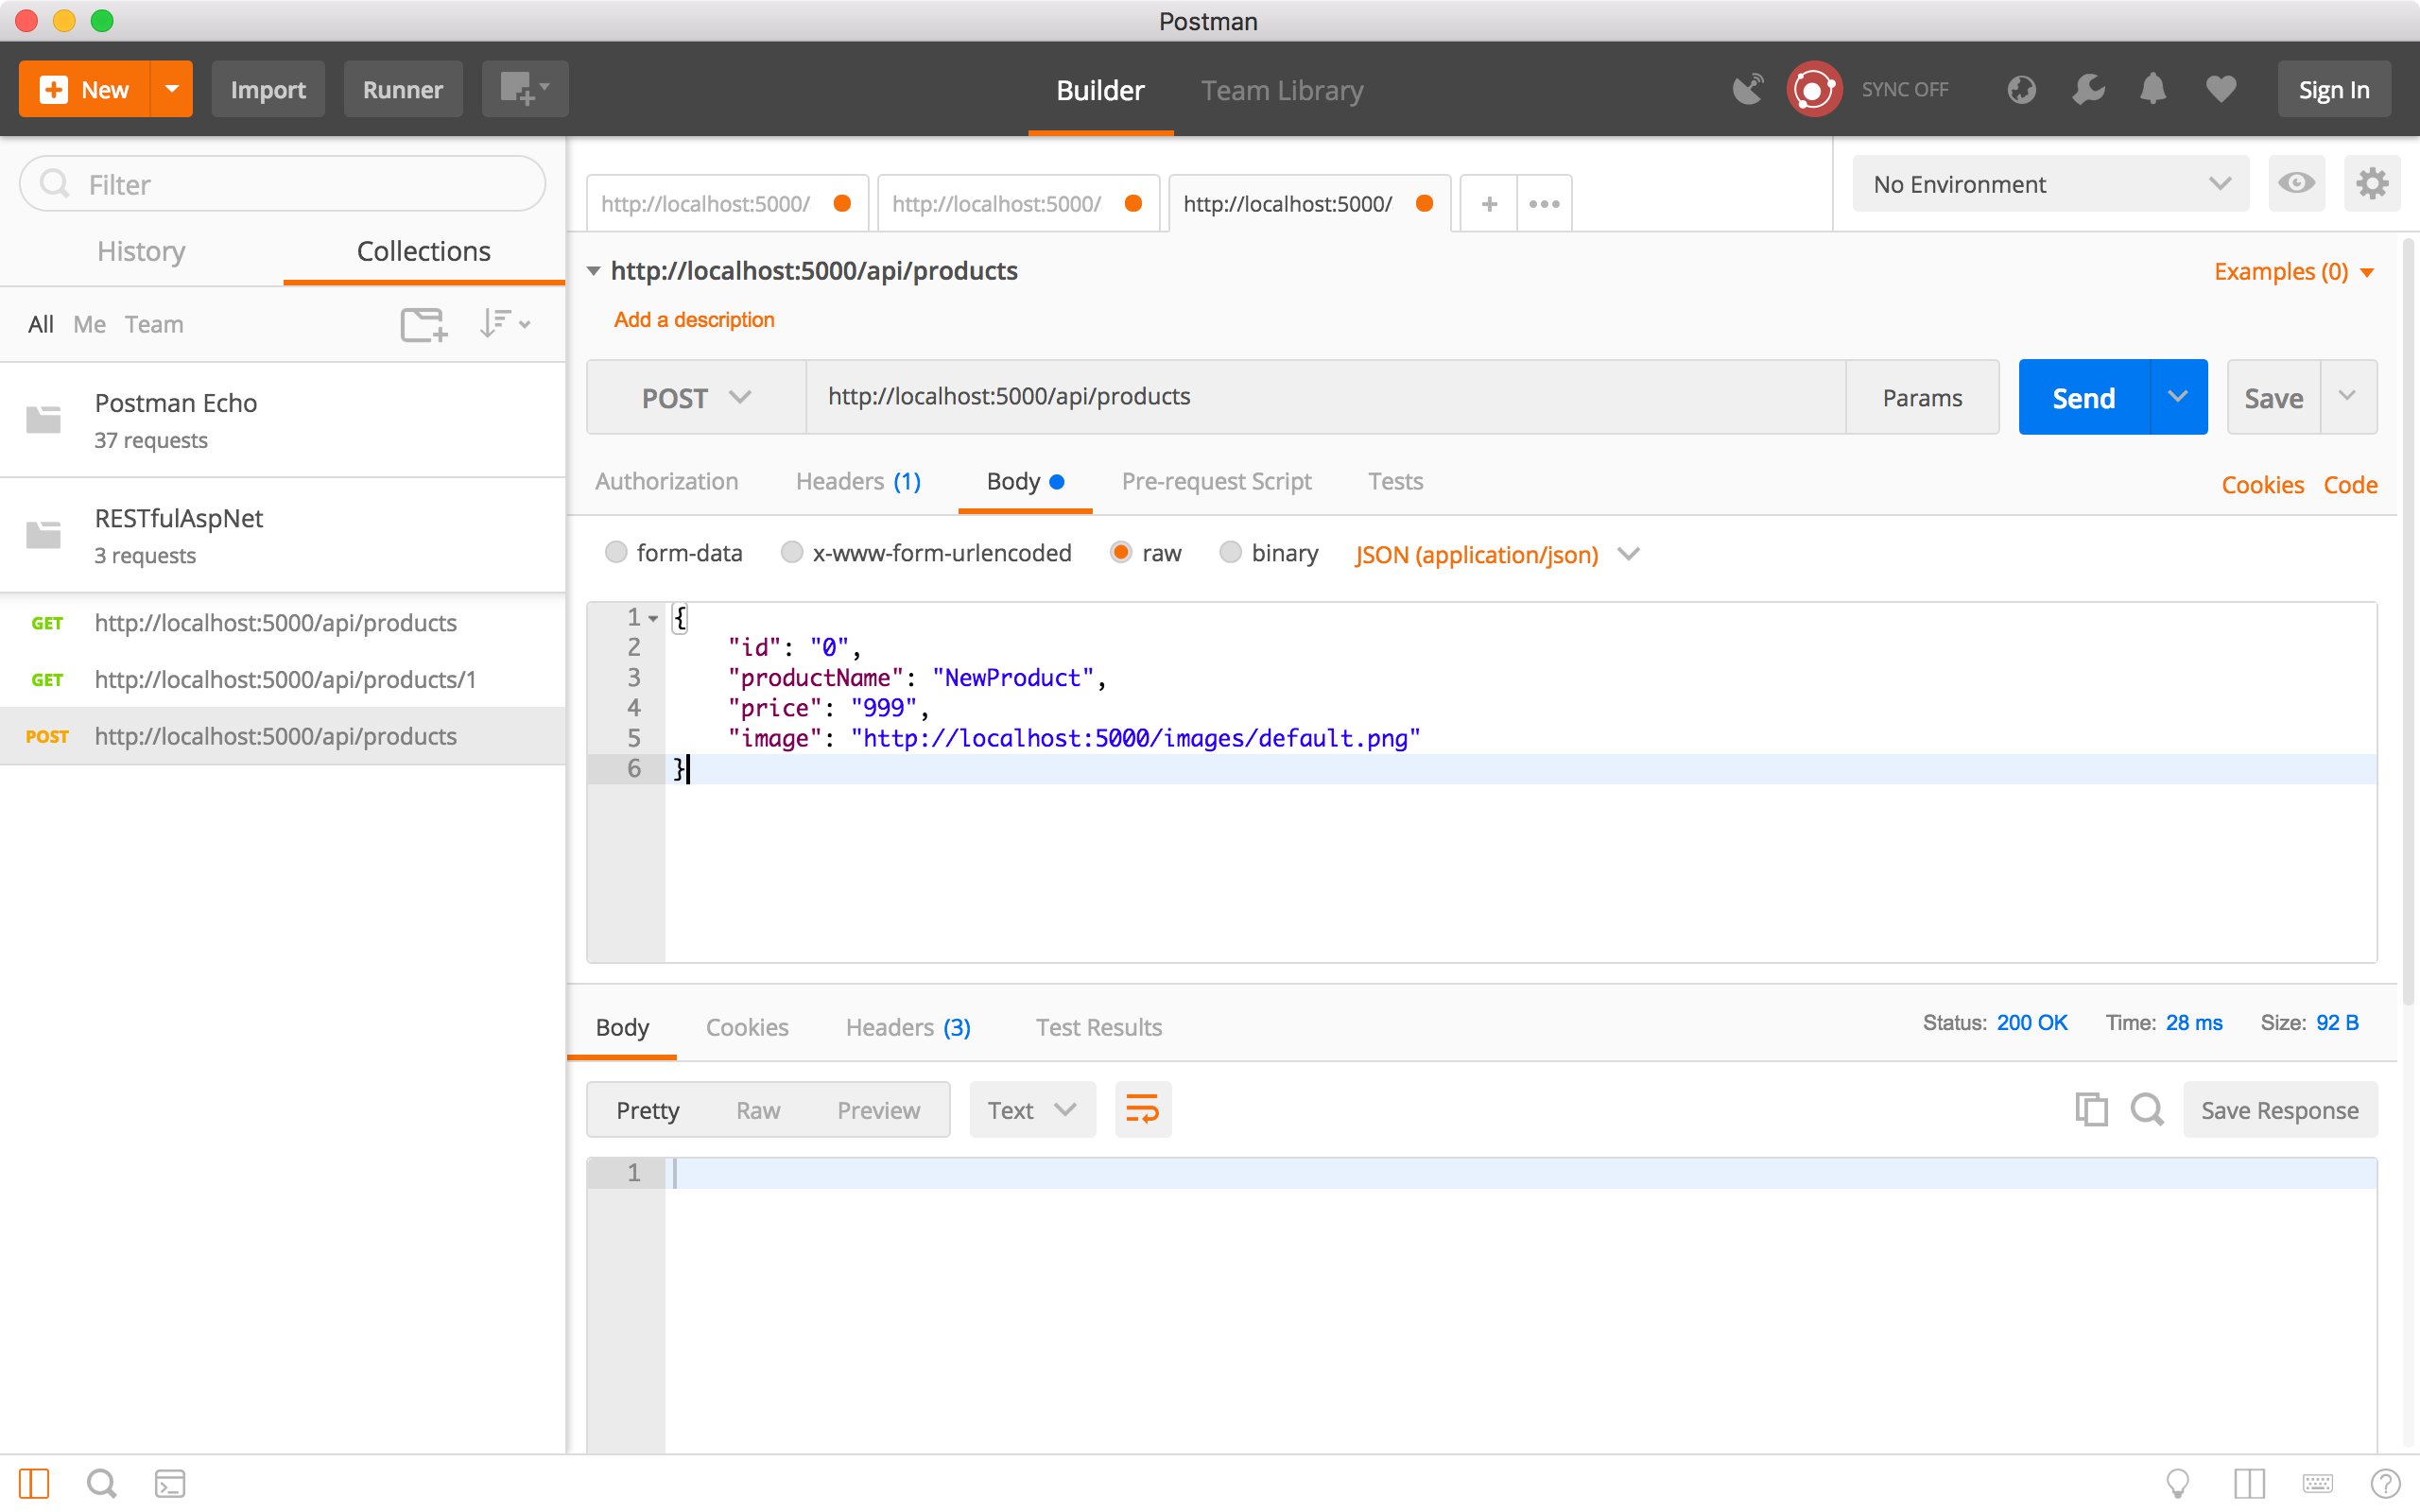
Create another request, choose the ‘POST’ method and specify ‘http://localhost:5000/api/products/’ as the URL. In the Request Body, select ‘raw’, provide the new product information in JSON format, and choose ‘JSON(application/json)’.
{
    "id": "0",
    "productName": "NewProduct",
    "price": "999",
    "image": "http://localhost:5000/images/default.png"
}
Click the Send button. There is no response body returned, but we see the status is ‘200 OK’. New product should be created.
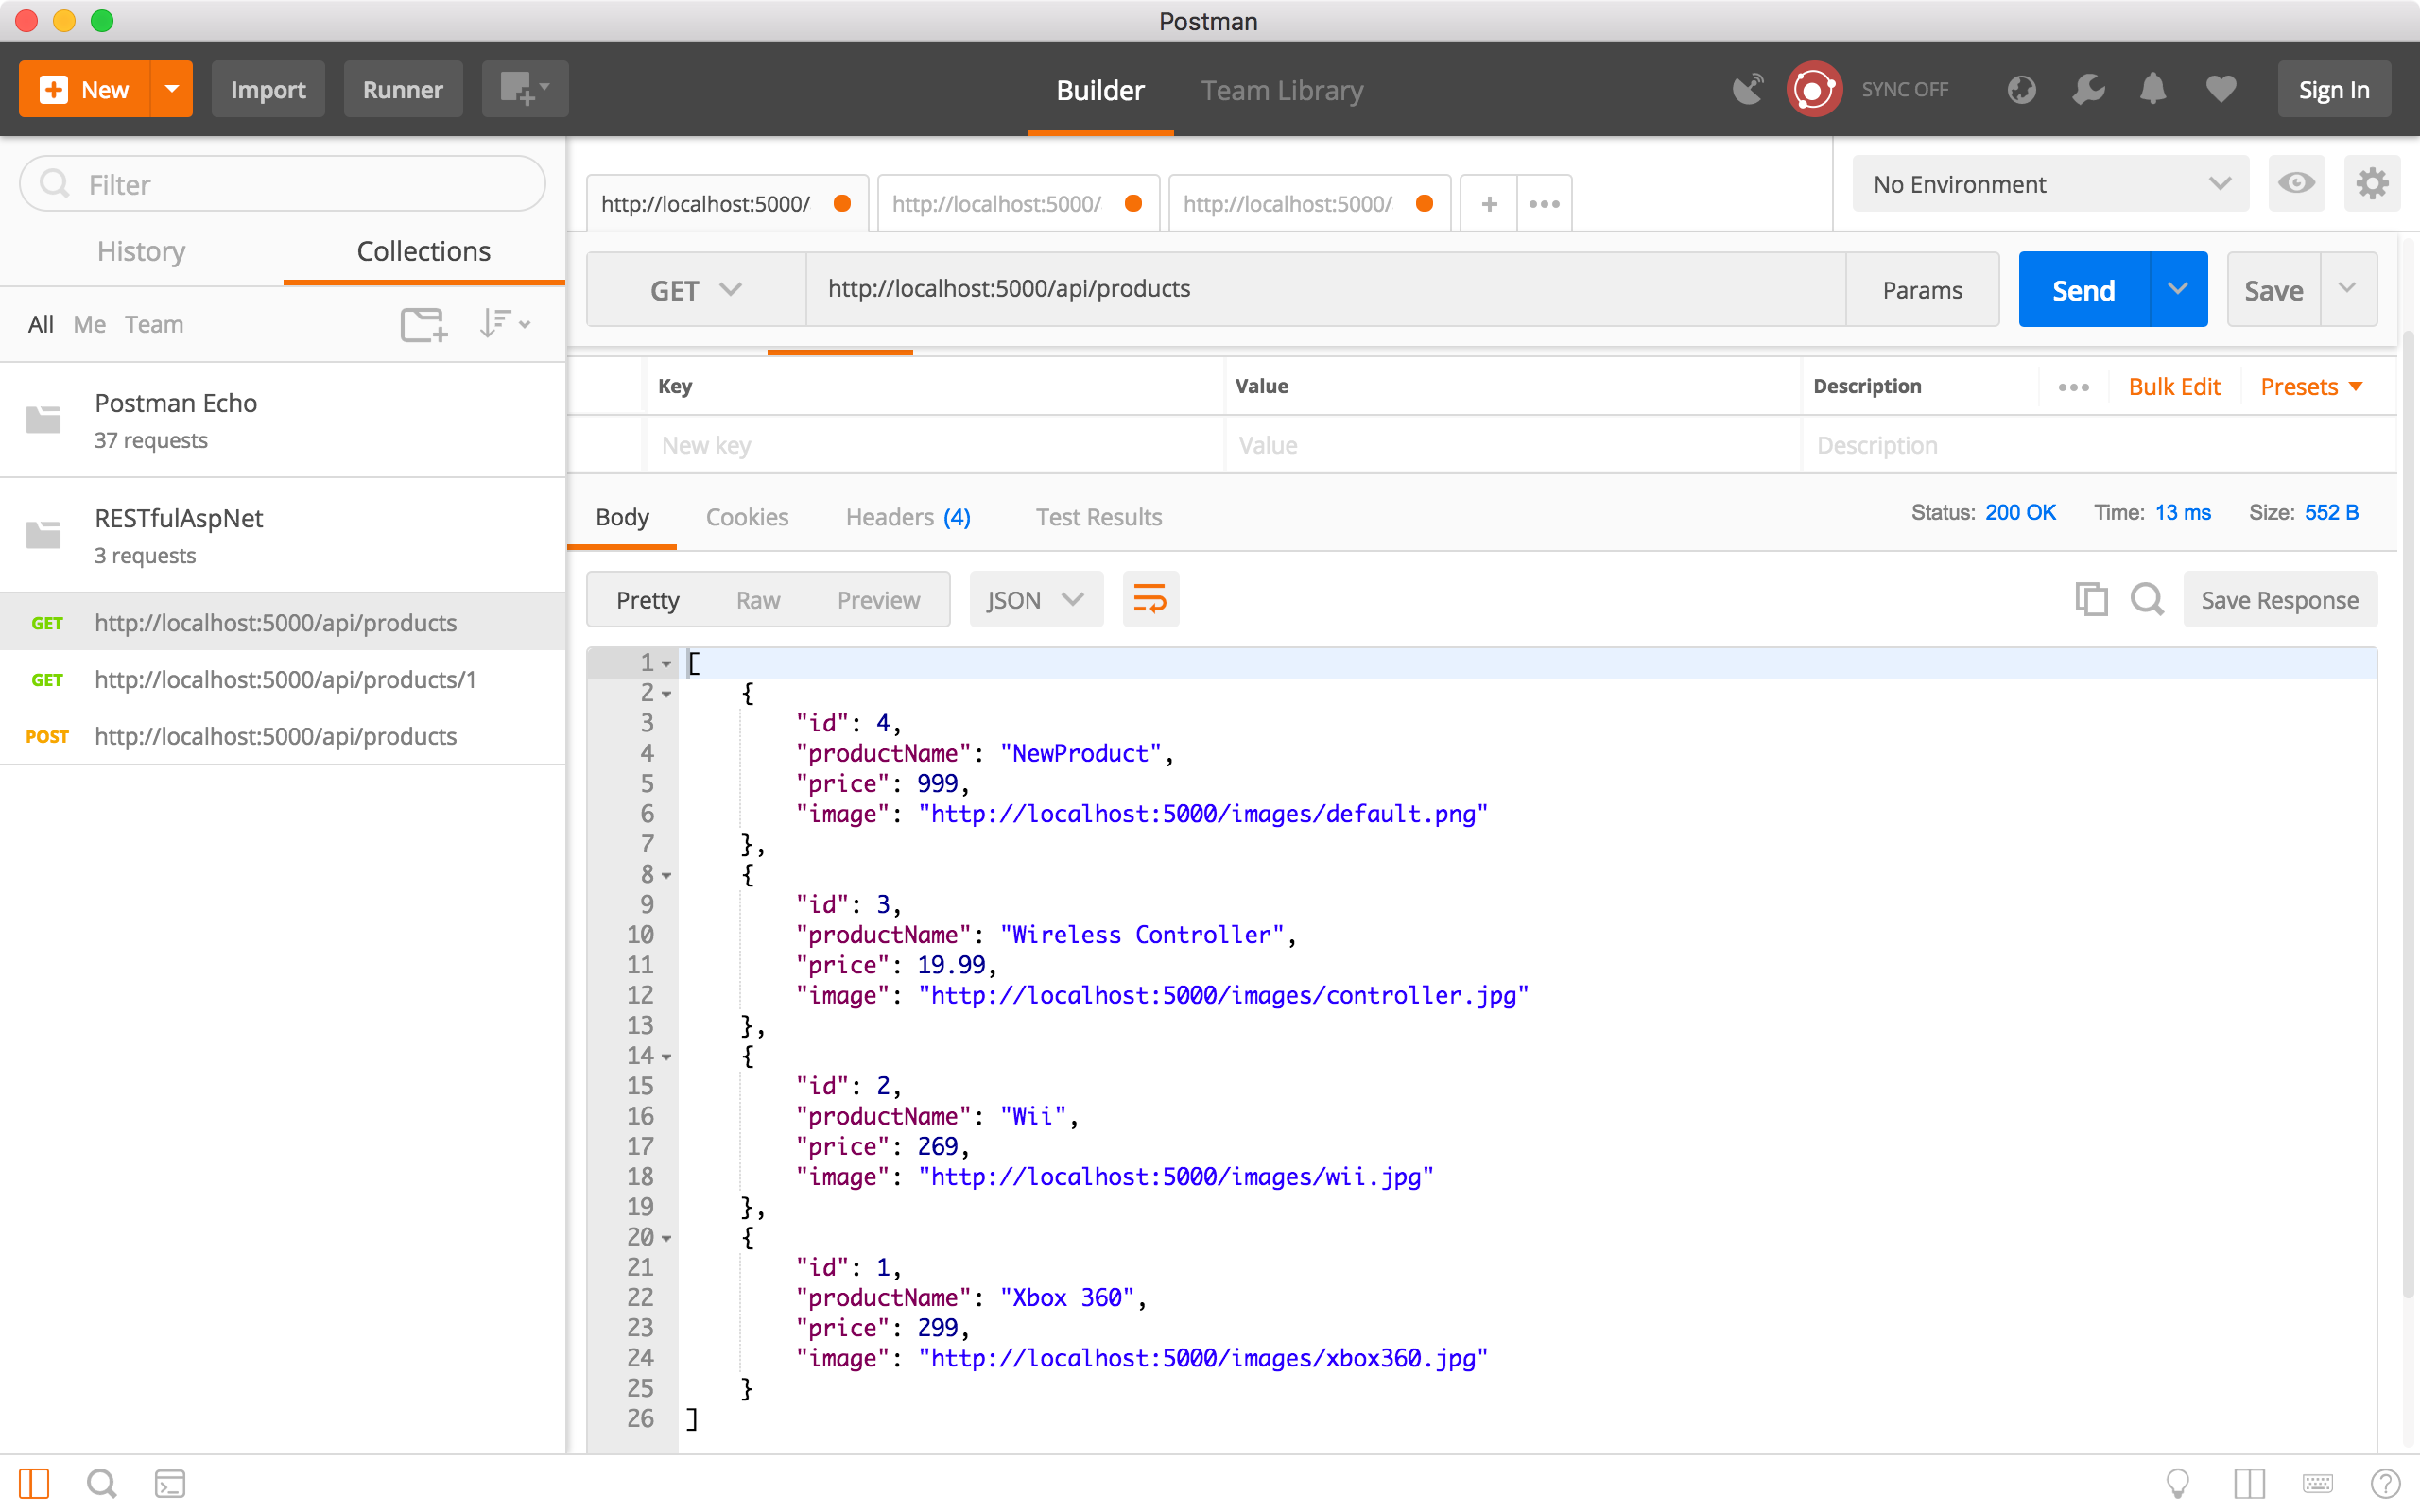
 Run the ‘Get all products’ request to verify whether the new product is created. We see there is a new product with ID equals to 4.
 4) Update a product.
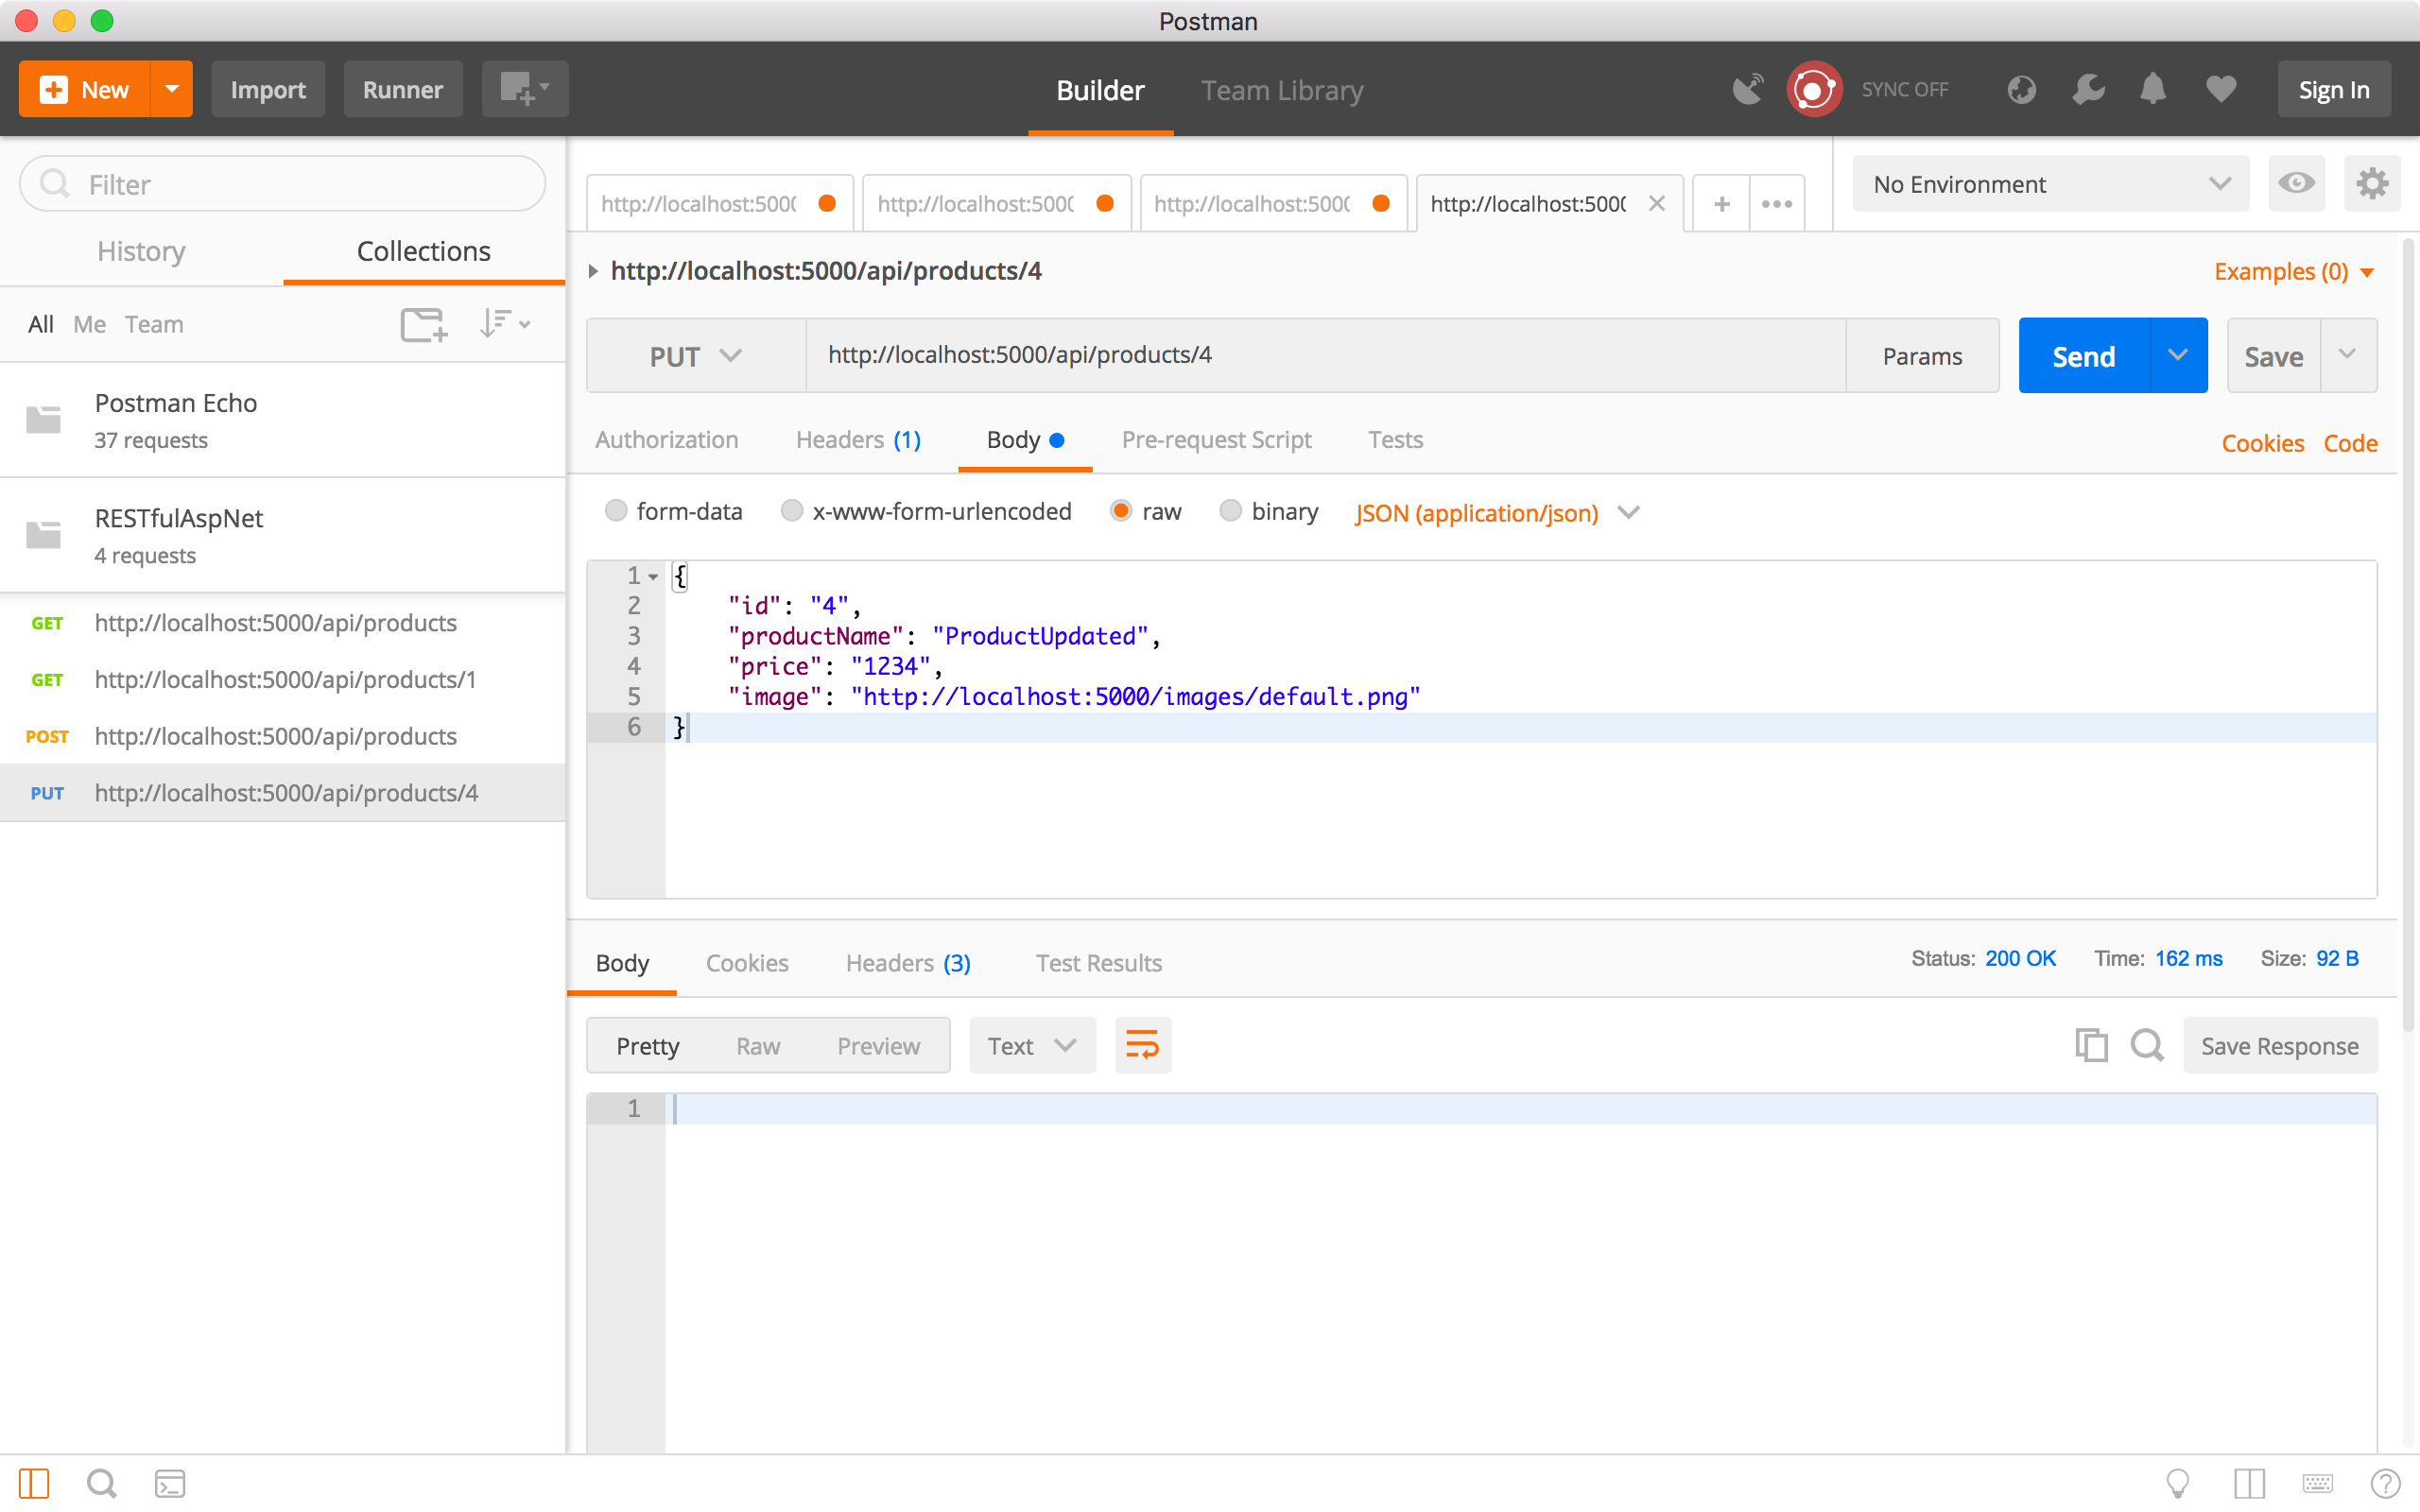
Create a new request, choose the ‘PUT’ method and specify ‘http://localhost:5000/api/products/4’ as the URL. In the Request Body, select ‘raw’, provide the new product information in JSON format, and choose ‘JSON(application/json)’.
{
    "id": "4",
    "productName": "ProductUpdated",
    "price": "1234",
    "image": "http://localhost:5000/images/default.png"
}
Click the Send button. There is no response body returned, but we see the status is ‘200 OK’. New product should be created.
 Run the ‘Get all products’ request to verify whether the product is updated. We see product 4 has new name and price.
 5) Delete a product.
Create a new request, choose ‘DELETE’ method and specify ‘http://localhost:5000/api/products/4’ as the URL, click the Send button. There is no response body returned, but we see the status is ‘200 OK’. Product 4 should be deleted.
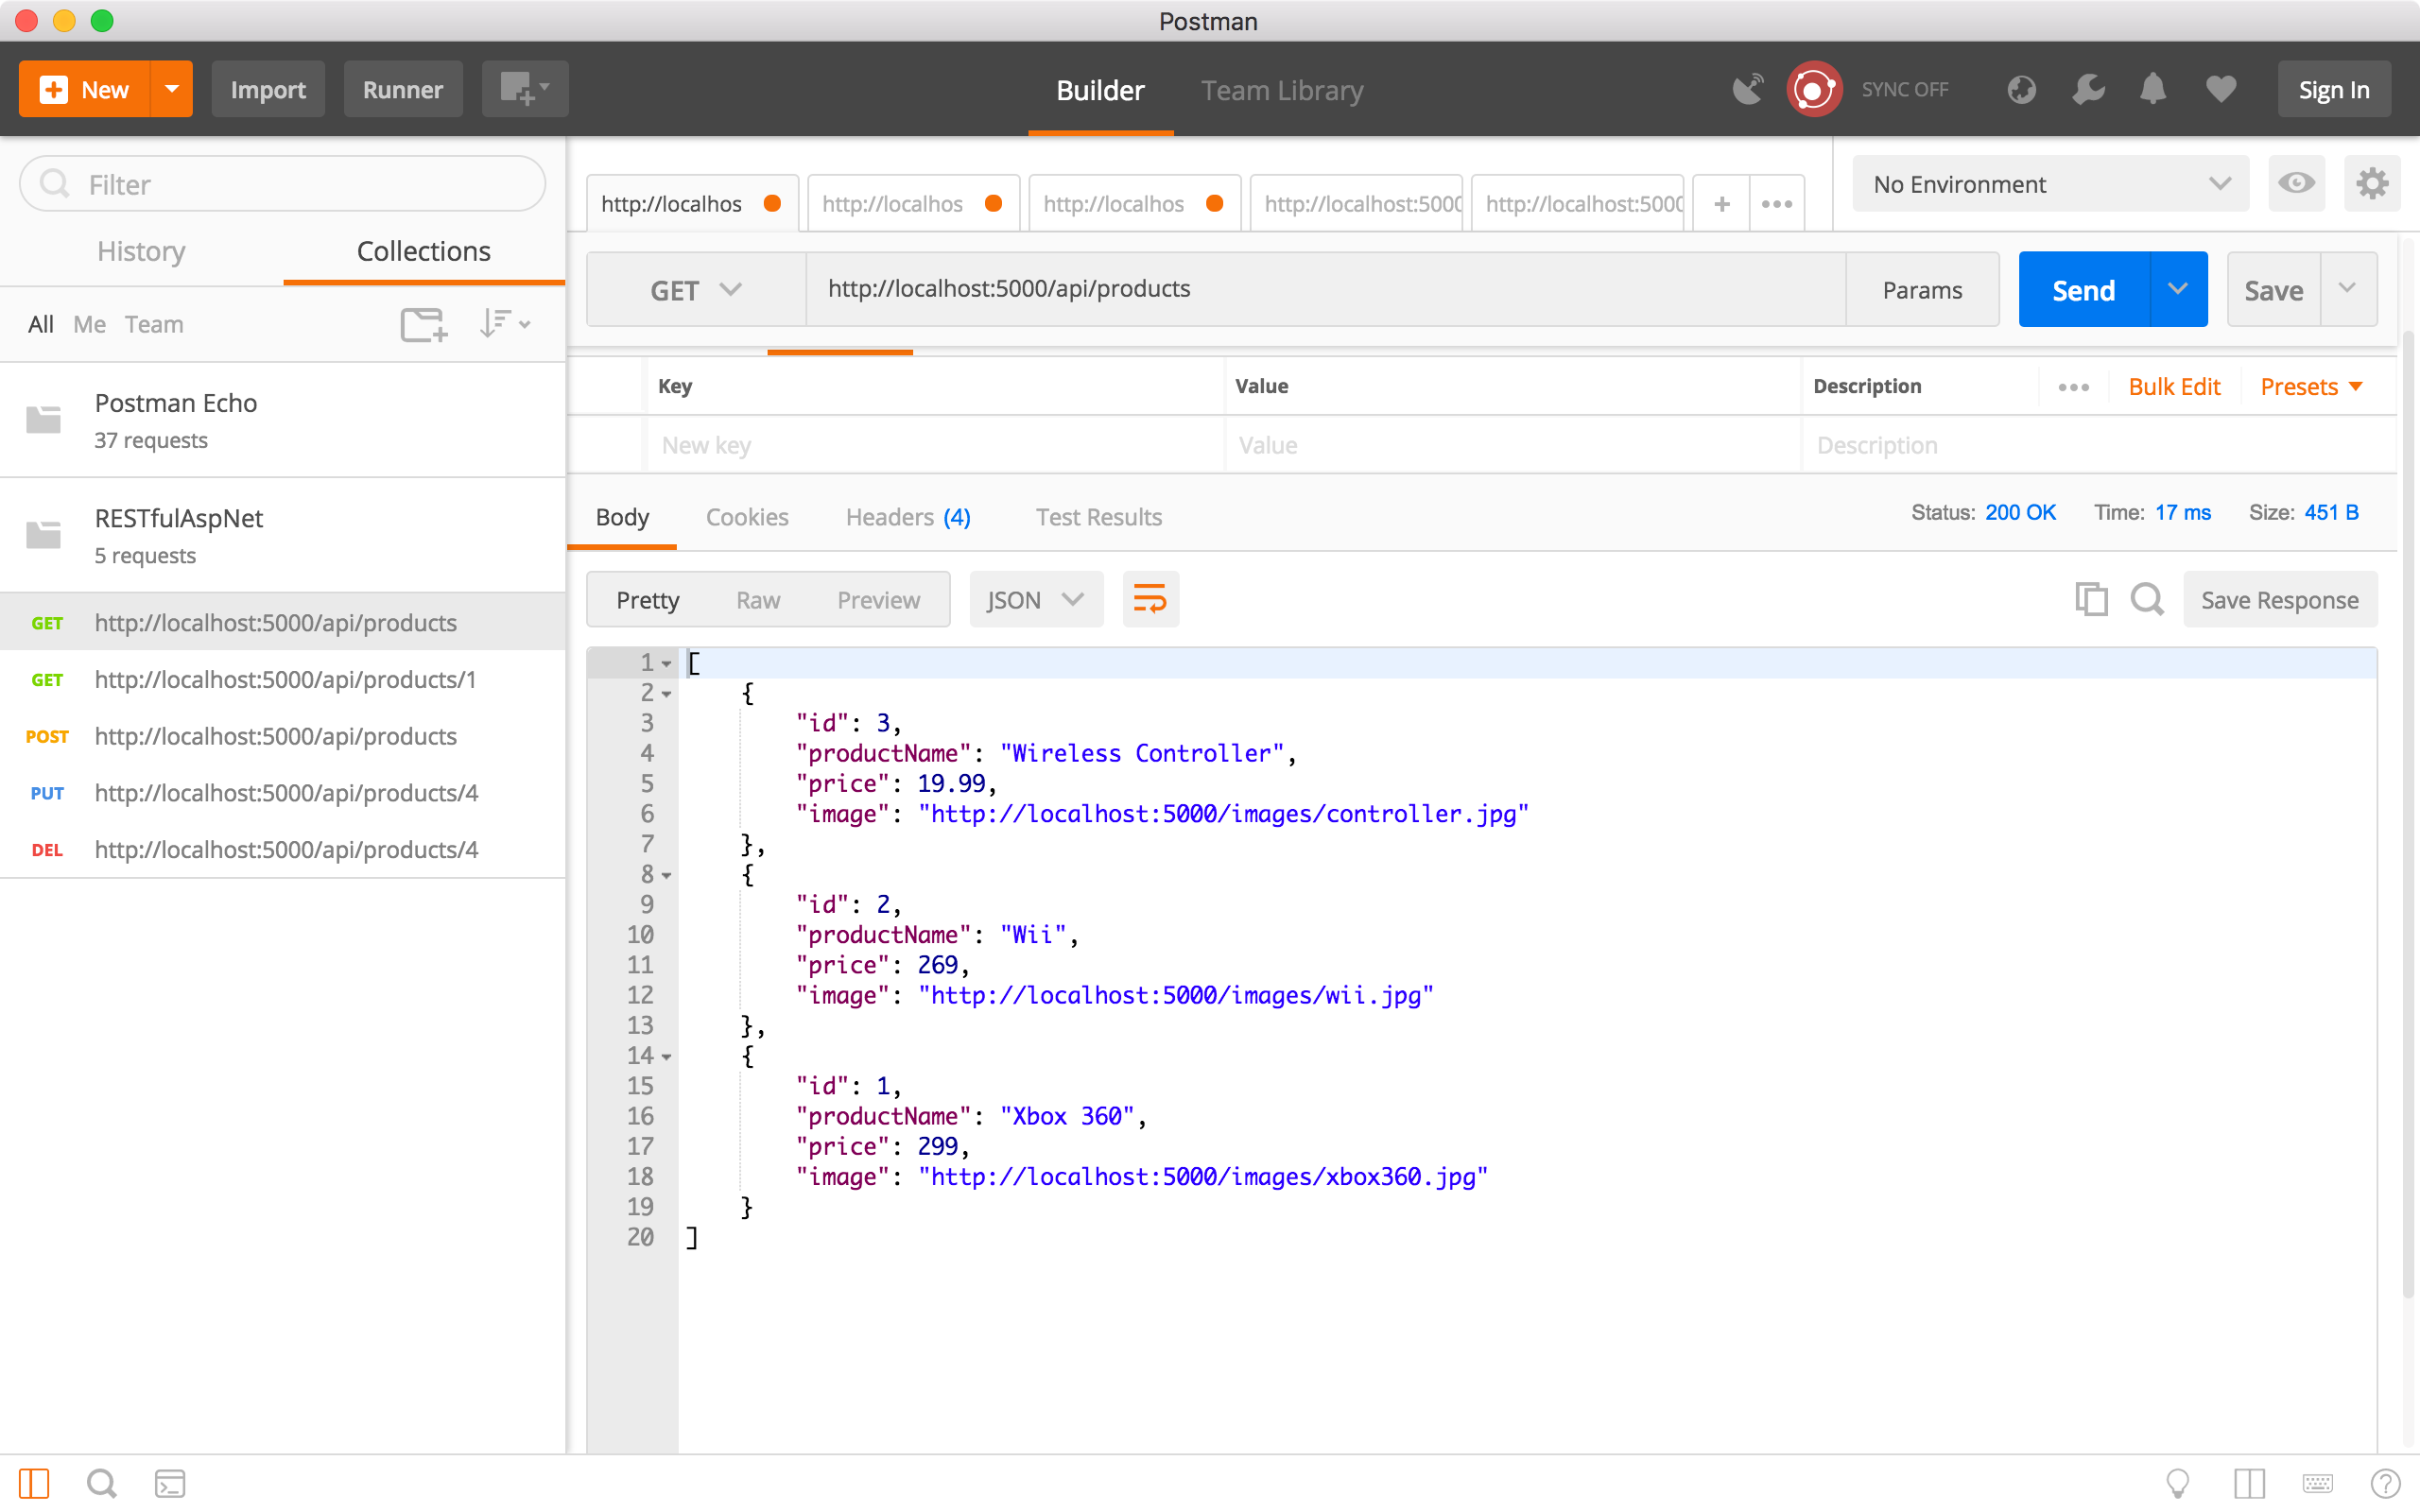
 Run the ‘Get all products’ request to verify whether product4 is deleted. We see product 4 is no longer existing.
 6) Upload an image.
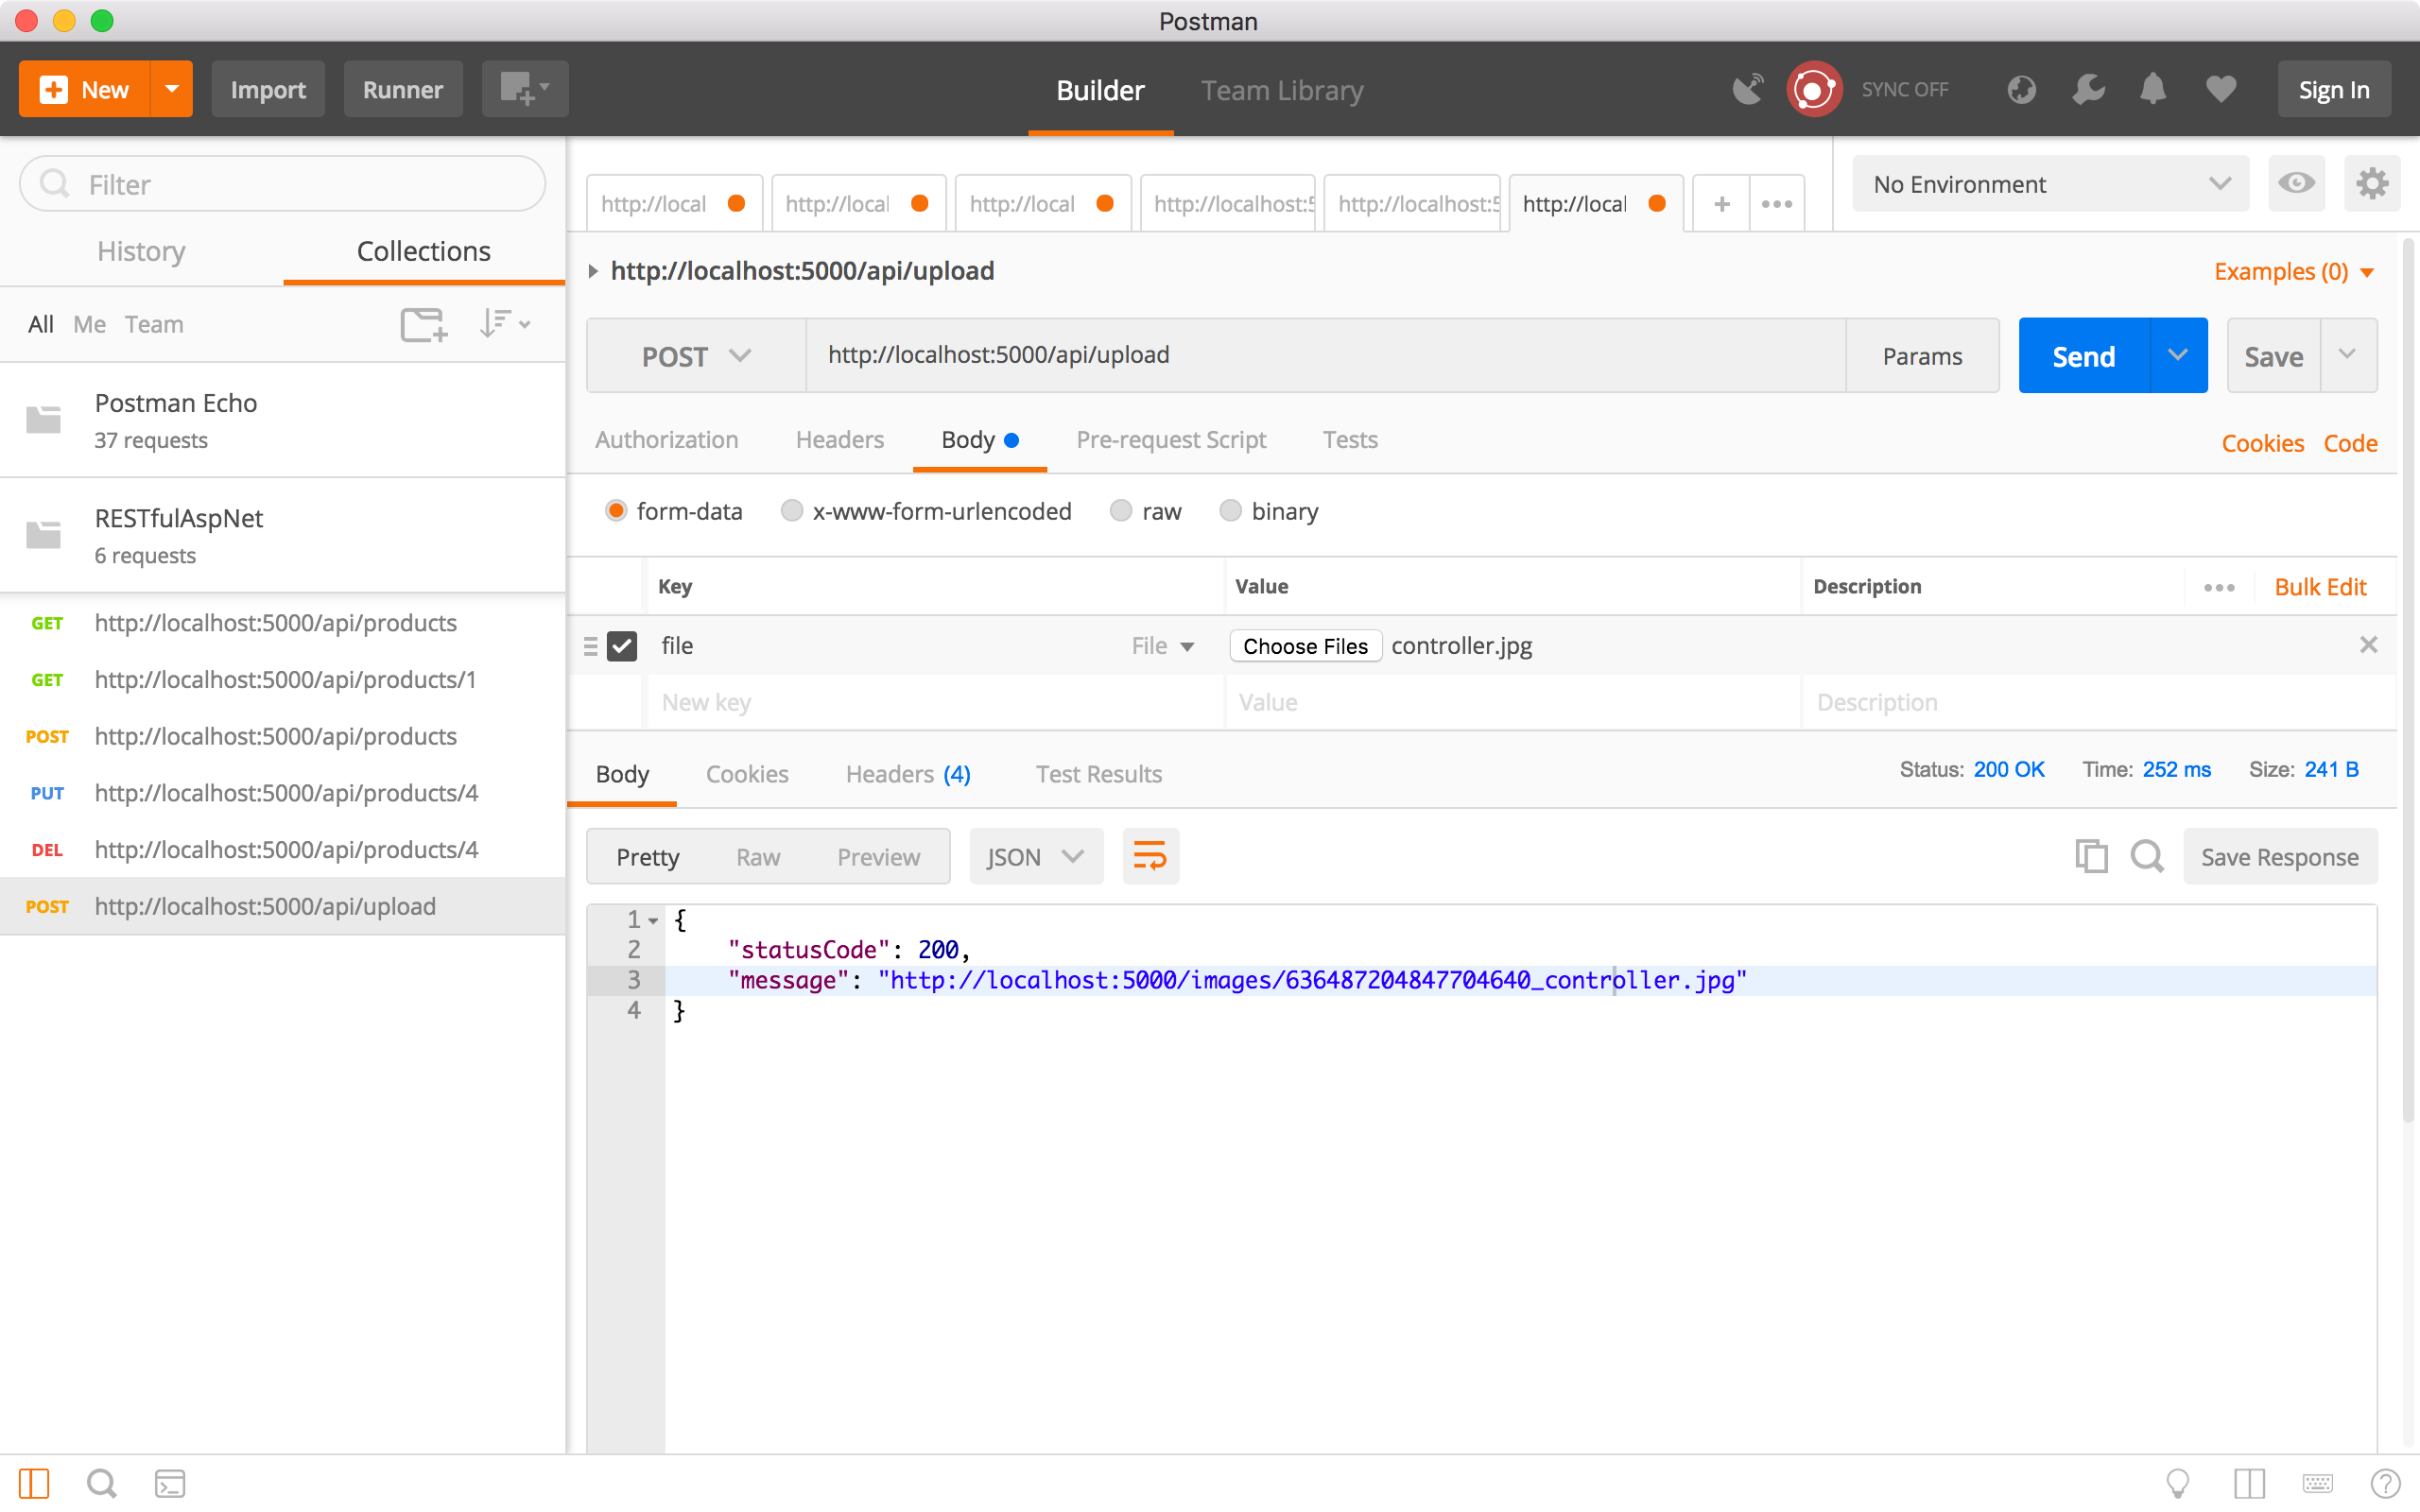
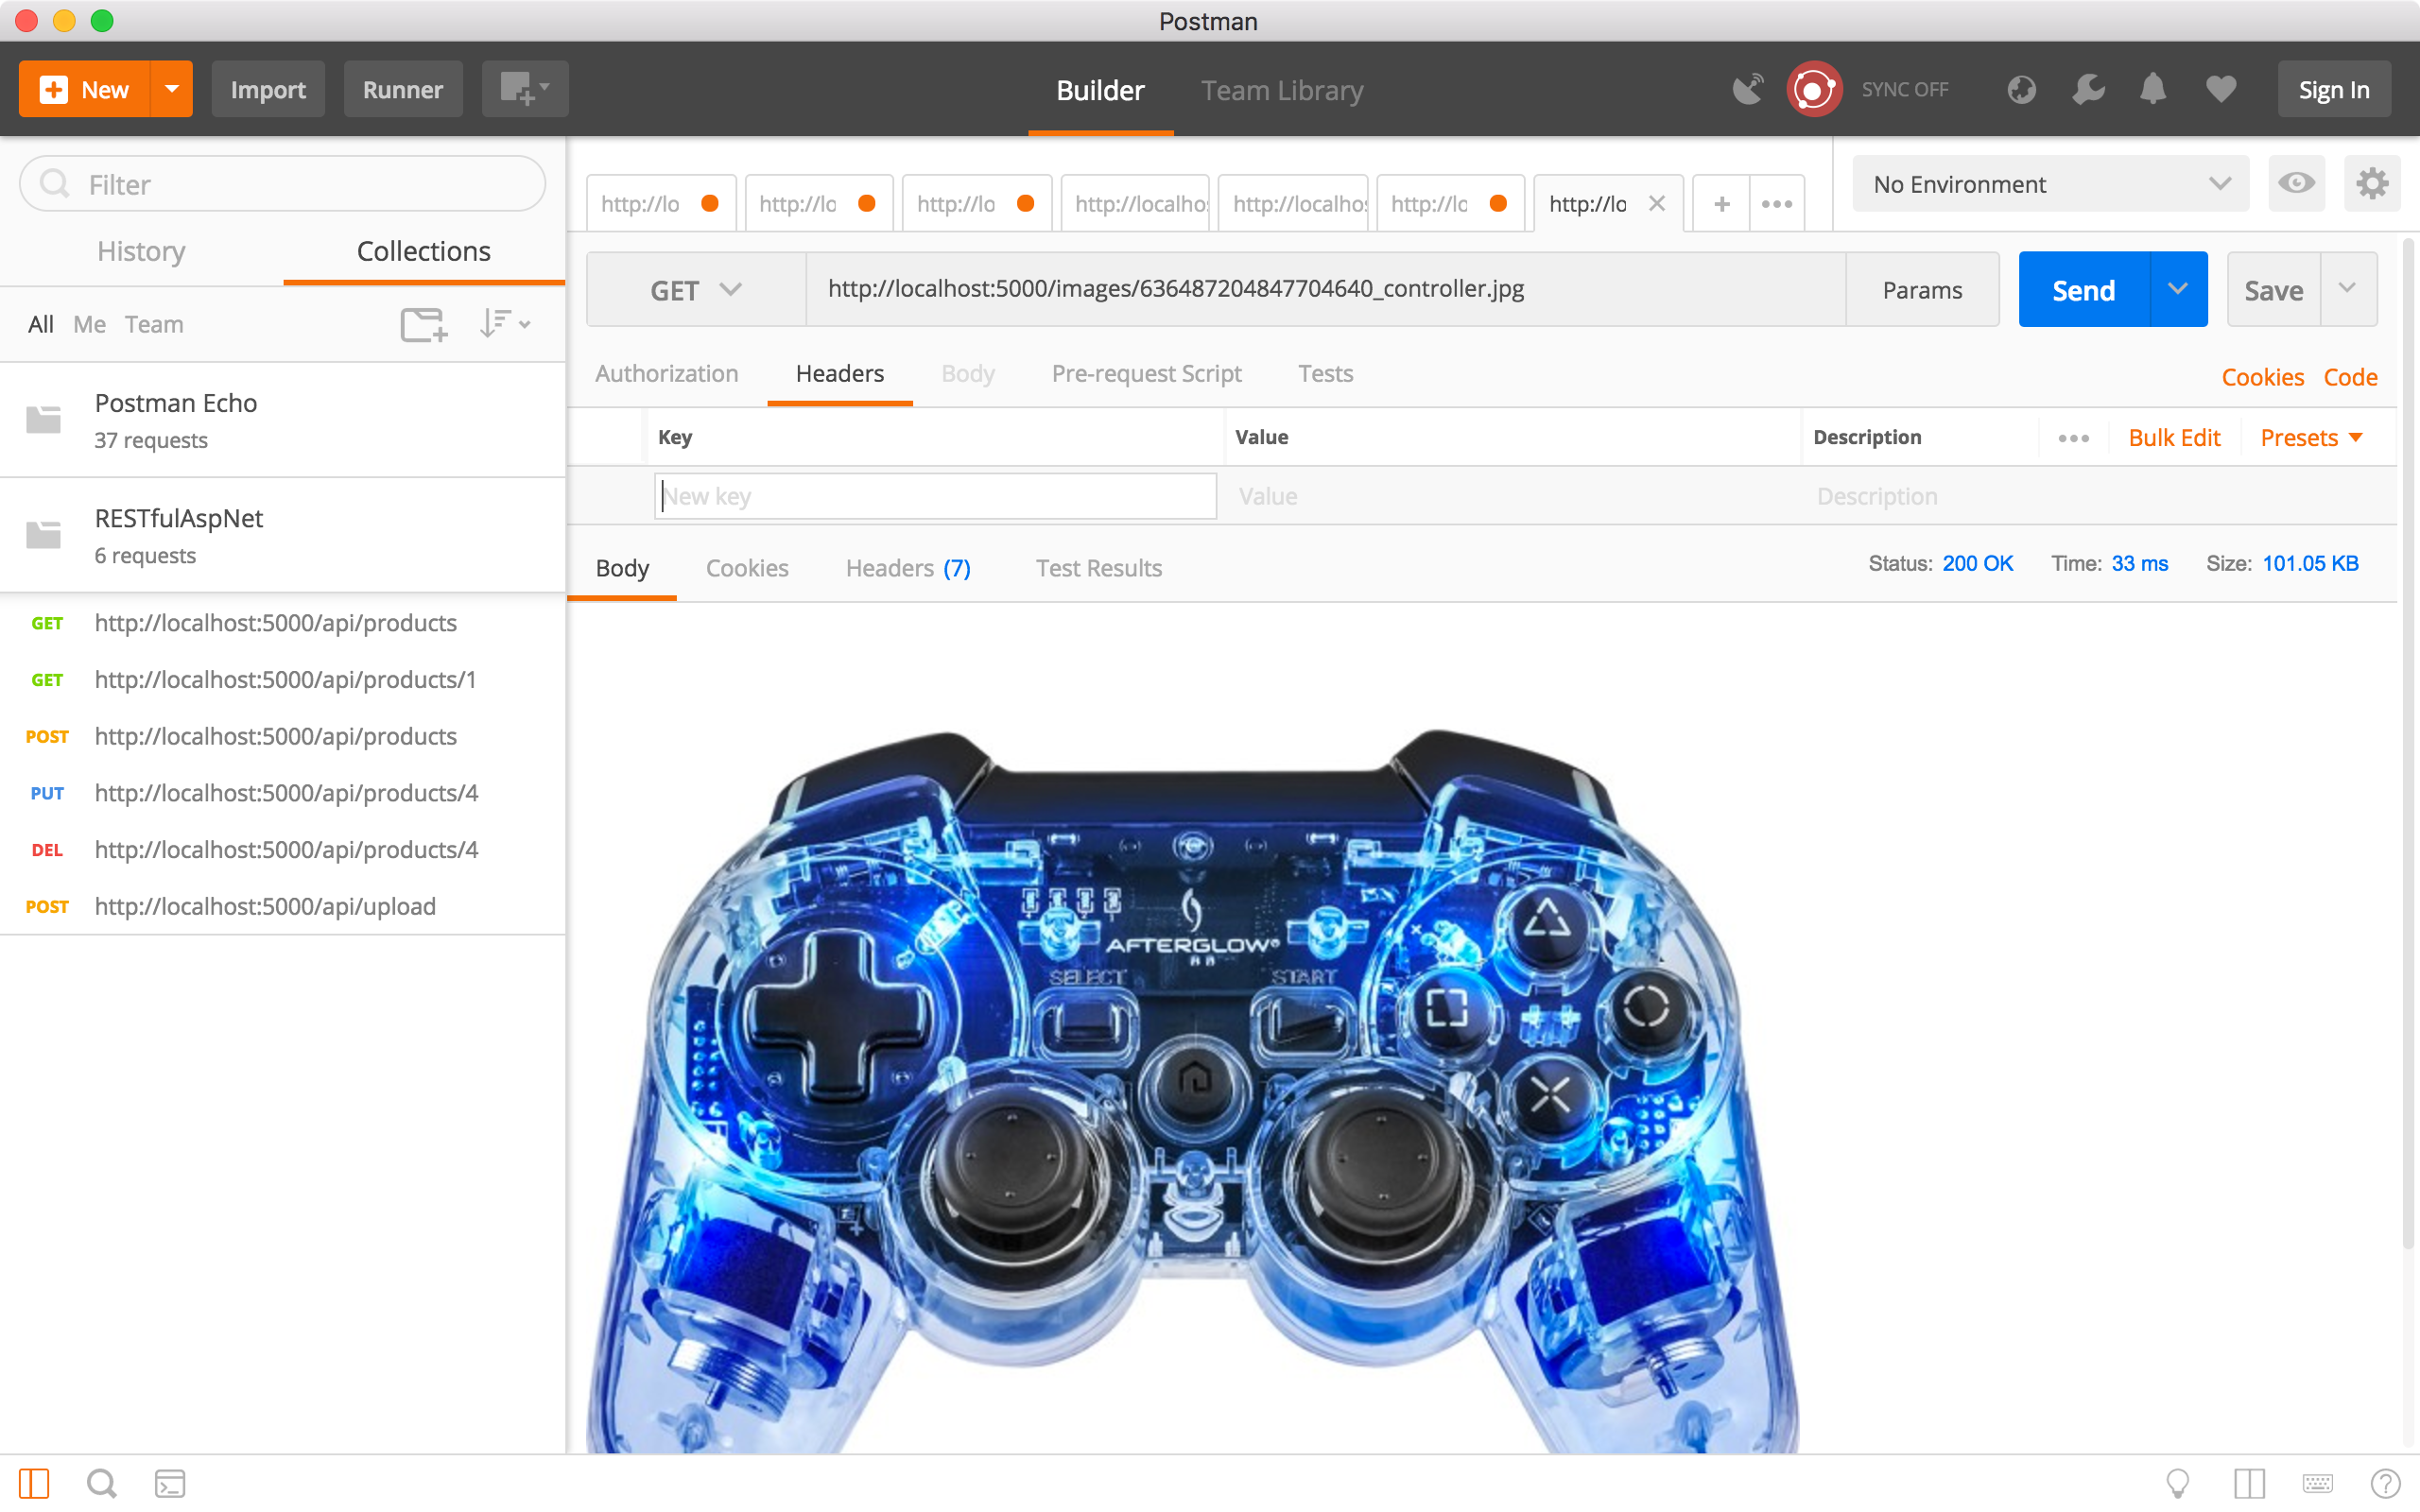
Create a new request, choose the ‘POST’ method and specify ‘http://localhost:5000/api/upload’ as the URL. In the Request Body, select ‘form-data’, add new key named ‘file’, select ‘File’ type, you will see the ‘Choose Files’ button. Select one image from your local disk, and click the Send button. In the response body, we see the status code and message. This message actually contains the URL of the uploaded image.
 Click on the image link. A new request is created automatically, click the Send button, you will see the image displayed in the response body.
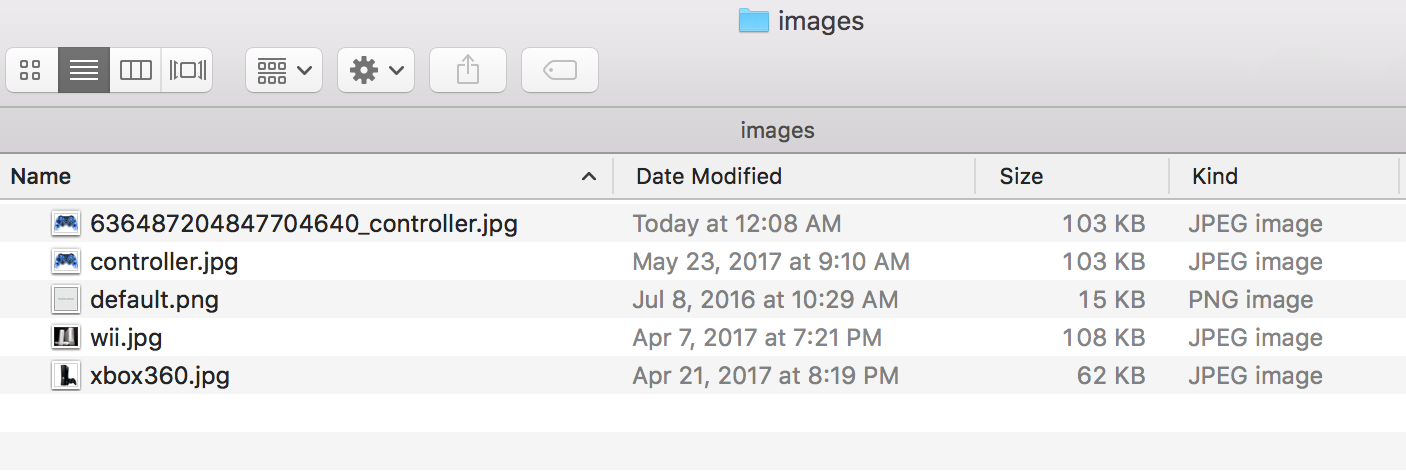
 If you go to the server folder(~/wwwwroot/images/) of RESTful APIs service, you will see this image.