8622. Building RESTful API with Spring BootSpring Boot, RESTful, and Maven
Create Restful Web Service with Spring Boot for Angular/ReactJS App to consume.
1. RESTful APIs
In the posting Building RESTful API with ASP.NET Core, I introduced how to create RESTful APIs with ASP.NET Core in C#. In this tutorial, we will create the same APIs with Spring Boot in Java.
| API | Description | Request body | Response body |
|---|---|---|---|
| GET /api/products | Get all products | None | Array of Products |
| GET /api/products/{id} | Get a product by ID | None | Product |
| POST /api/products | Add a new product | Product | Product |
| PUT /api/products/{id} | Update a product | Product | None |
| DELETE /api/products/{id} | Delete a product | None | None |
| POST /api/upload | Upload an image | Image File | Image URL |
2. Maven Project
2.1 Creating Project
1) In Eclipse, File -> New -> ‘Maven Project’, check the box ‘Create a simple project’-> Next, Name: SpringBootTutorial
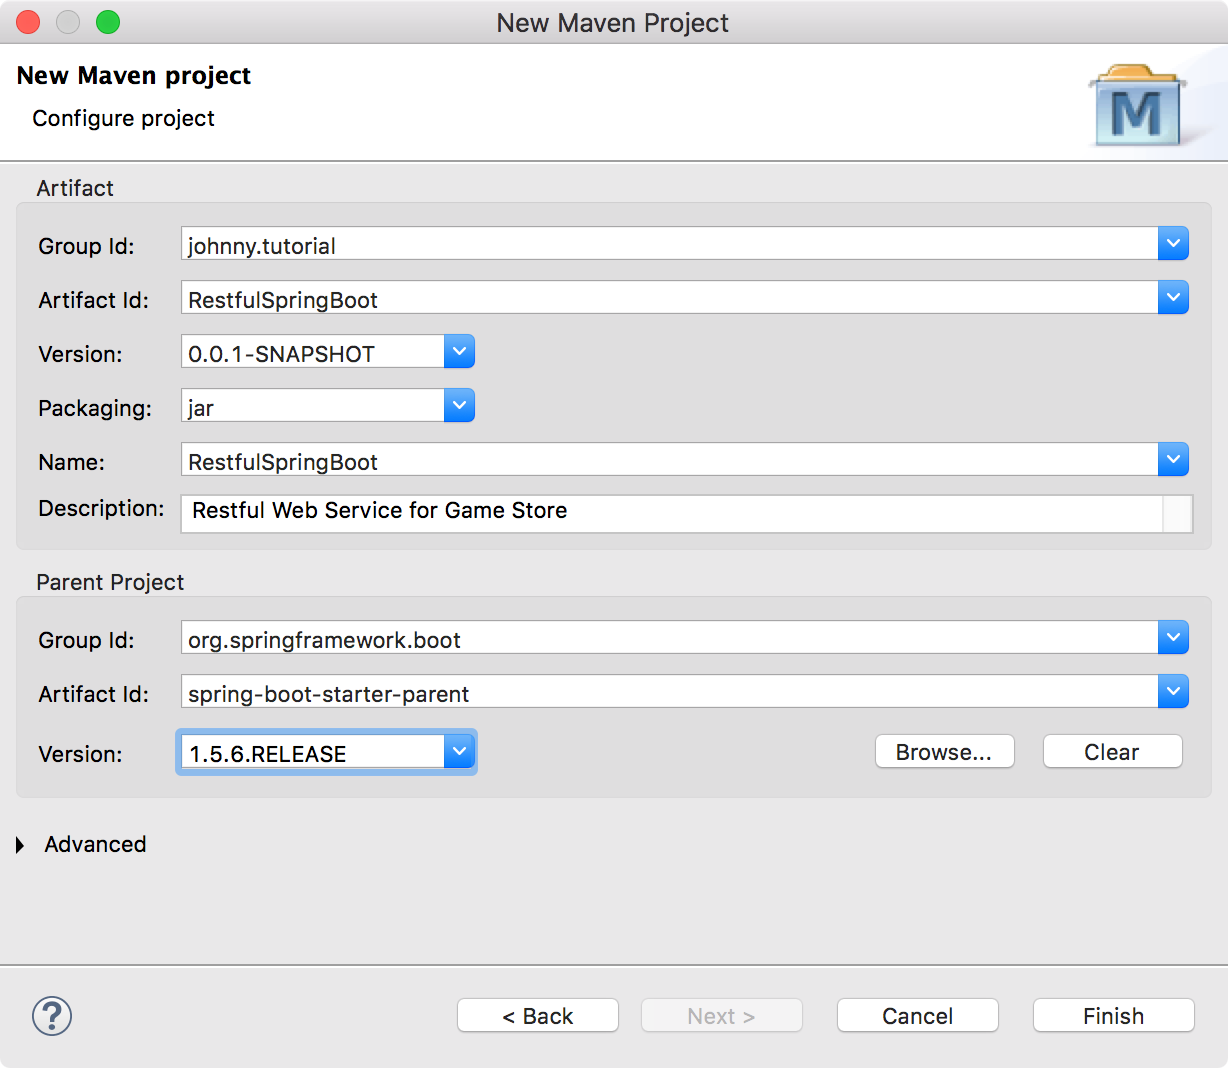
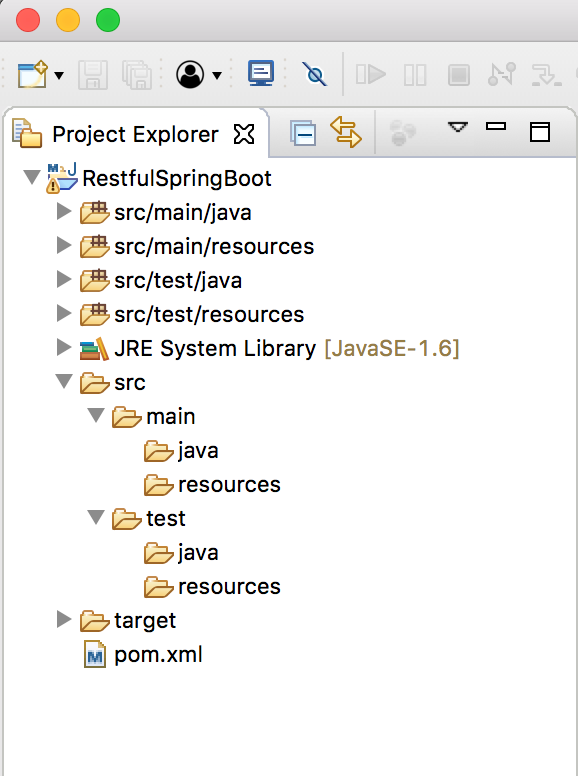
In the new created project, there are two main branches, one is for source code, another is for test.
2.2 Specifying Java Version
Since, we will use lamda expression, specify java version to java 8 in pom.xml.
<properties>
  <project.build.sourceEncoding>UTF-8</project.build.sourceEncoding>
  <java.version>1.8</java.version>
</properties>
2.3 Adding Dependency
Add spring boot dependency to pom.xml.
<dependencies>
  <dependency>
    <groupId>org.springframework.boot</groupId>
    <artifactId>spring-boot-starter-web</artifactId>
  </dependency>
</dependencies>
Starter for using Spring Data JPA with Hibernate.
<dependency>
  <groupId>org.springframework.boot</groupId>
  <artifactId>spring-boot-starter-data-jpa</artifactId>
</dependency>
Use H2 in-memory database.
<dependency>
  <groupId>com.h2database</groupId>
  <artifactId>h2</artifactId>
  <scope>runtime</scope>
</dependency>
2.4 Executable Application
Right click project RestfulSpringBoot->src->main->java>New->Package, Package Name: johnny.tutorial.restfulspringboot. Then create an Executable Application named ‘RestApplication’ with dummy data.
@SpringBootApplication
public class RestApplication {

    public static void main(String[] args) {
        SpringApplication.run(RestApplication.class, args);
    }

    @Bean
    CommandLineRunner runner(ProductRepository productRepository) {
        return args -> {

            Product product1 = new Product("Xbox 156");
            product1.setPrice(299.00);
            product1.setImage("http://localhost:8080/images/xbox156.jpg");
            productRepository.save(product1);

            Product product2 = new Product("Wii");
            product2.setPrice(269.00);
            product2.setImage("http://localhost:8080/images/wii.jpg");
            productRepository.save(product2);

            Product product3 = new Product("Wireless Controller");
            product3.setPrice(19.99);
            product3.setImage("http://localhost:8080/images/controller.jpg");
            productRepository.save(product3);

        };
    }
}
2.5 Model Classes
Create new package named ‘johnny.tutorial.restfulspringboot.domain’. Define a class named ‘Product’ with four properties: id, name, price and a photo of the product.
package johnny.tutorial.restfulspringboot.domain;

import javax.persistence.Entity;
import javax.persistence.GeneratedValue;
import javax.persistence.Id;

import org.hibernate.validator.constraints.NotBlank;

@Entity
public class Product {
    @Id
    @GeneratedValue
    private Long id;

    @NotBlank
    private String productname;
    private double price;
    private String image;

    @SuppressWarnings("unused")
    private Product(){}

    public Product(String productname) {
        this.productname = productname;
    }

    public Long getId() {
        return id;
    }

    public void setId(Long id) {
        this.id = id;
    }

    public String getProductName() {
        return productname;
    }

    public void setProductName(String productname) {
        this.productname = productname;
    }

    public double getPrice() {
        return price;
    }

    public void setPrice(double price) {
        this.price = price;
    }

    public String getImage() {
        return image;
    }

    public void setImage(String image) {
        this.image = image;
    }

    @Override
    public String toString() {
        return "Product [productname=" + productname + ", price=" + price + "]";
    }

}
2.5 ProductRepository Interface
Create new package named ‘johnny.tutorial.restfulspringboot.repository’ and create interface ProductRepository which inherits CrudRepository.
package johnny.tutorial.restfulspringboot.repository;

import org.springframework.data.repository.CrudRepository;

import johnny.tutorial.restfulspringboot.domain.Product;

public interface ProductRepository extends CrudRepository<Product, Long> {

}
2.6 Controller
Finally, create package ‘johnny.tutorial.restfulspringboot.controller’ and controller ‘ProductController’ as follows.
package johnny.tutorial.restfulspringboot.controller;

import johnny.tutorial.restfulspringboot.domain.Product;
import johnny.tutorial.restfulspringboot.repository.ProductRepository;

@RestController
@RequestMapping("/api/products")
public class ProductController {
    ProductRepository productRepository;

    @Autowired
    public ProductController(ProductRepository productRepository){
        this.productRepository = productRepository;
    }

    // GET /products
    @GetMapping("")
    public Iterable<Product> findAll(){
        List<Product> products = new ArrayList<>();
        Iterator<Product> iterator = productRepository.findAll().iterator();
        iterator.forEachRemaining(products::add);
        Collections.reverse(products);
        return products;
    }

    // GET /products/5
    @GetMapping("/{id}")
    public ResponseEntity<Product> findOne(@PathVariable(value = "id") long id) {
        Product product = productRepository.findOne(id);
        if(product == null) {
            return ResponseEntity.notFound().build();
        }
        return ResponseEntity.ok().body(product);
    }

    // POST /products
    @PostMapping("")
    public ResponseEntity<Product> create(@Valid @RequestBody Product product){
        Product newProduct = productRepository.save(product);
        return ResponseEntity.ok(newProduct);
    }

    // PUT /products/5
    @PutMapping("/{id}")
    public ResponseEntity<Product> update(@PathVariable(value = "id") Long id,
                                          @Valid @RequestBody Product product) {
        Product oldProduct = productRepository.findOne(id);
        if(oldProduct == null) {
            return ResponseEntity.notFound().build();
        }
        oldProduct.setProductName(product.getProductName());
        oldProduct.setPrice(product.getPrice());
        oldProduct.setImage(product.getImage());

        Product updProduct = productRepository.save(oldProduct);
        return ResponseEntity.ok(updProduct);
    }

    // DELETE /products/5
    @DeleteMapping("/{id}")
    public ResponseEntity<Product> delete(@PathVariable(value = "id") long id) {
        Product product = productRepository.findOne(id);
        if(product == null) {
            return ResponseEntity.notFound().build();
        }

        productRepository.delete(product);
        return ResponseEntity.ok().build();
    }
}
Some important points here.
- Define 5 CRUD methods(GetAll, GetOne, Create, Update and Delete).
- Use ResponseEntity as return type. Return Ok() and proper data if everything is fine, otherwise, return status code of error.
- Use the injected ProductRepository to utilize Spring CRUD framework to get data from H2 database.
3. Uploading Images
When creating or updating product, user can upload an image for the product.
3.1 Model Class
Create a class named ‘UploadModel’ in package ‘johnny.tutorial.restfulspringboot.domain’. It uses MultipartFile provided by Spring Framework to get uploaded files.
package johnny.tutorial.restfulspringboot.domain;

import org.springframework.web.multipart.MultipartFile;

public class UploadModel {
    private String extraField;

    private MultipartFile[] files;

    public UploadModel(){}

    public String getExtraField() {
        return extraField;
    }

    public void setExtraField(String extraField) {
        this.extraField = extraField;
    }

    public MultipartFile[] getFiles() {
        return files;
    }

    public void setFiles(MultipartFile[] files) {
        this.files = files;
    }
}
Create another class named ‘ResponseResult’ in package ‘johnny.tutorial.restfulspringboot.domain’. It will be used for response. It has two properties, status code and message.
package johnny.tutorial.restfulspringboot.domain;

public class ResponseResult {
    private int statusCode;
    private String message;

    public ResponseResult(){}
    public ResponseResult(int statusCode, String message){
        this.statusCode = statusCode;
        this.message = message;
    }

    public int getstatusCode() {
        return statusCode;
    }

    public void setstatusCode(int statusCode) {
        this.statusCode = statusCode;
    }

    public String getMessage() {
        return message;
    }

    public void setMessage(String message) {
        this.message = message;
    }
}
3.2 Controller
Create a new controller named ‘UploadController’ in package ‘johnny.tutorial.restfulspringboot.controller’.
package johnny.tutorial.restfulspringboot.controller;

import johnny.tutorial.restfulspringboot.domain.ResponseResult;
import johnny.tutorial.restfulspringboot.domain.UploadModel;

@RestController
@RequestMapping("/api/upload")
public class UploadController {

    String IMAGE_FOLDER = "./src/main/resources/images/";

    @PostMapping("")
    public ResponseEntity<?> uploadFile(@RequestParam("file") MultipartFile uploadfile) {

        ResponseResult rr = new ResponseResult();

        if (uploadfile.isEmpty()) {
            return ResponseEntity.ok().body("please select a file!");
        }

        try {
            String[] fileUrls = saveUploadedFiles(Arrays.asList(uploadfile));
            rr.setMessage(fileUrls[0]);
        } catch (IOException e) {
            return ResponseEntity.badRequest().build();
        }

        rr.setstatusCode(200);
        return ResponseEntity.ok(rr);
    }

    //save file
    private String[] saveUploadedFiles(List<MultipartFile> files) throws IOException {
        String[] fileUrls = new String[files.size()];
        int index = 0;
        for (MultipartFile file : files) {
            if (file.isEmpty()) {
                continue;
            }

            byte[] bytes = file.getBytes();
            long TICKS_AT_EPOCH = 621355968000000000L;
            long tick = System.currentTimeMillis()*10000 + TICKS_AT_EPOCH;
            String filename = String.valueOf(tick).concat("_").concat(file.getOriginalFilename());

            Path path = Paths.get(IMAGE_FOLDER+filename);
            Files.write(path, bytes);
            fileUrls[index] = getBaseEnvLinkURL() + "/images/"+filename;
            index++;
        }
        return fileUrls;
    }

    protected String getBaseEnvLinkURL() {
        String baseEnvLinkURL=null;
        HttpServletRequest currentRequest =
           ((ServletRequestAttributes)RequestContextHolder.currentRequestAttributes()).getRequest();
        baseEnvLinkURL = "http://" + currentRequest.getLocalName();
        if(currentRequest.getLocalPort() != 80) {
            baseEnvLinkURL += ":" + currentRequest.getLocalPort();
        }
        if(!StringUtils.isEmpty(currentRequest.getContextPath())) {
            baseEnvLinkURL += currentRequest.getContextPath();
        }
        return baseEnvLinkURL;
    }
}
Some important points here.
- The image folder is ‘./src/main/resources/images/’;
- Rename the uploaded image with DateTime Ticks to make sure it is identical.
- Combine the image folder and image name to get the full path of the image and save it to disk.
- Return the image URL for the client to access it.
4. Advanced Configuration
4.1 Enabling CORS
Create configuration class named ‘RestConfiguration’ in package ‘johnny.tutorial.restfulspringboot’. This configuration class and class ‘RestApplication’ must be in the same package.
package johnny.tutorial.restfulspringboot;
import org.springframework.boot.web.servlet.FilterRegistrationBean;
import org.springframework.context.annotation.Bean;
import org.springframework.context.annotation.Configuration;
import org.springframework.web.cors.CorsConfiguration;
import org.springframework.web.cors.UrlBasedCorsConfigurationSource;
import org.springframework.web.filter.CorsFilter;

@Configuration
public class RestConfiguration {

    @Bean
    public FilterRegistrationBean corsFilter() {
        UrlBasedCorsConfigurationSource source = new UrlBasedCorsConfigurationSource();
        CorsConfiguration config = new CorsConfiguration();
        config.setAllowCredentials(true);
        config.addAllowedOrigin("*");
        config.addAllowedHeader("*");
        config.addAllowedMethod("*");
        source.registerCorsConfiguration("/**", config);
        FilterRegistrationBean bean = new FilterRegistrationBean(new CorsFilter(source));
        bean.setOrder(0);
        return bean;
    }
}
4.2 Serving Static Files(Images)
Spring Boot will automatically add static web resources located within any of the following directories:
- /META-INF/resources/
- /resources/
- /static/
- /public/
Static files should be served from resources, not from controller. Put images in ‘/src/main/resources/images/’ folder. As you see, the images are uploaded to this folder.
The static directory is loaded at startup. So when you upload images or make changes to any files or folder under the Static folder that will not reflect as ApplicationContext is already initialized.
There are two options to show image after upload.
Option 1: In eclipse, Preferences > General > Workspaces > “Refresh using native hooks or polling”
Option 2: Create class ‘WebMvcConfigurer’ in package ‘johnny.tutorial.restfulspringboot’. It extends class ‘WebMvcConfigurerAdapter’. Provide the resource location in method addResourceHandlers().
package johnny.tutorial.restfulspringboot;
import org.springframework.context.annotation.Configuration;
import org.springframework.web.servlet.config.annotation.ResourceHandlerRegistry;
import org.springframework.web.servlet.config.annotation.WebMvcConfigurerAdapter;

@Configuration
class WebMvcConfigurer extends WebMvcConfigurerAdapter {
    @Override
    public void addResourceHandlers(ResourceHandlerRegistry registry) {
        registry.addResourceHandler("/**").addResourceLocations(
            "file:./src/main/resources/"
        );
    }
}
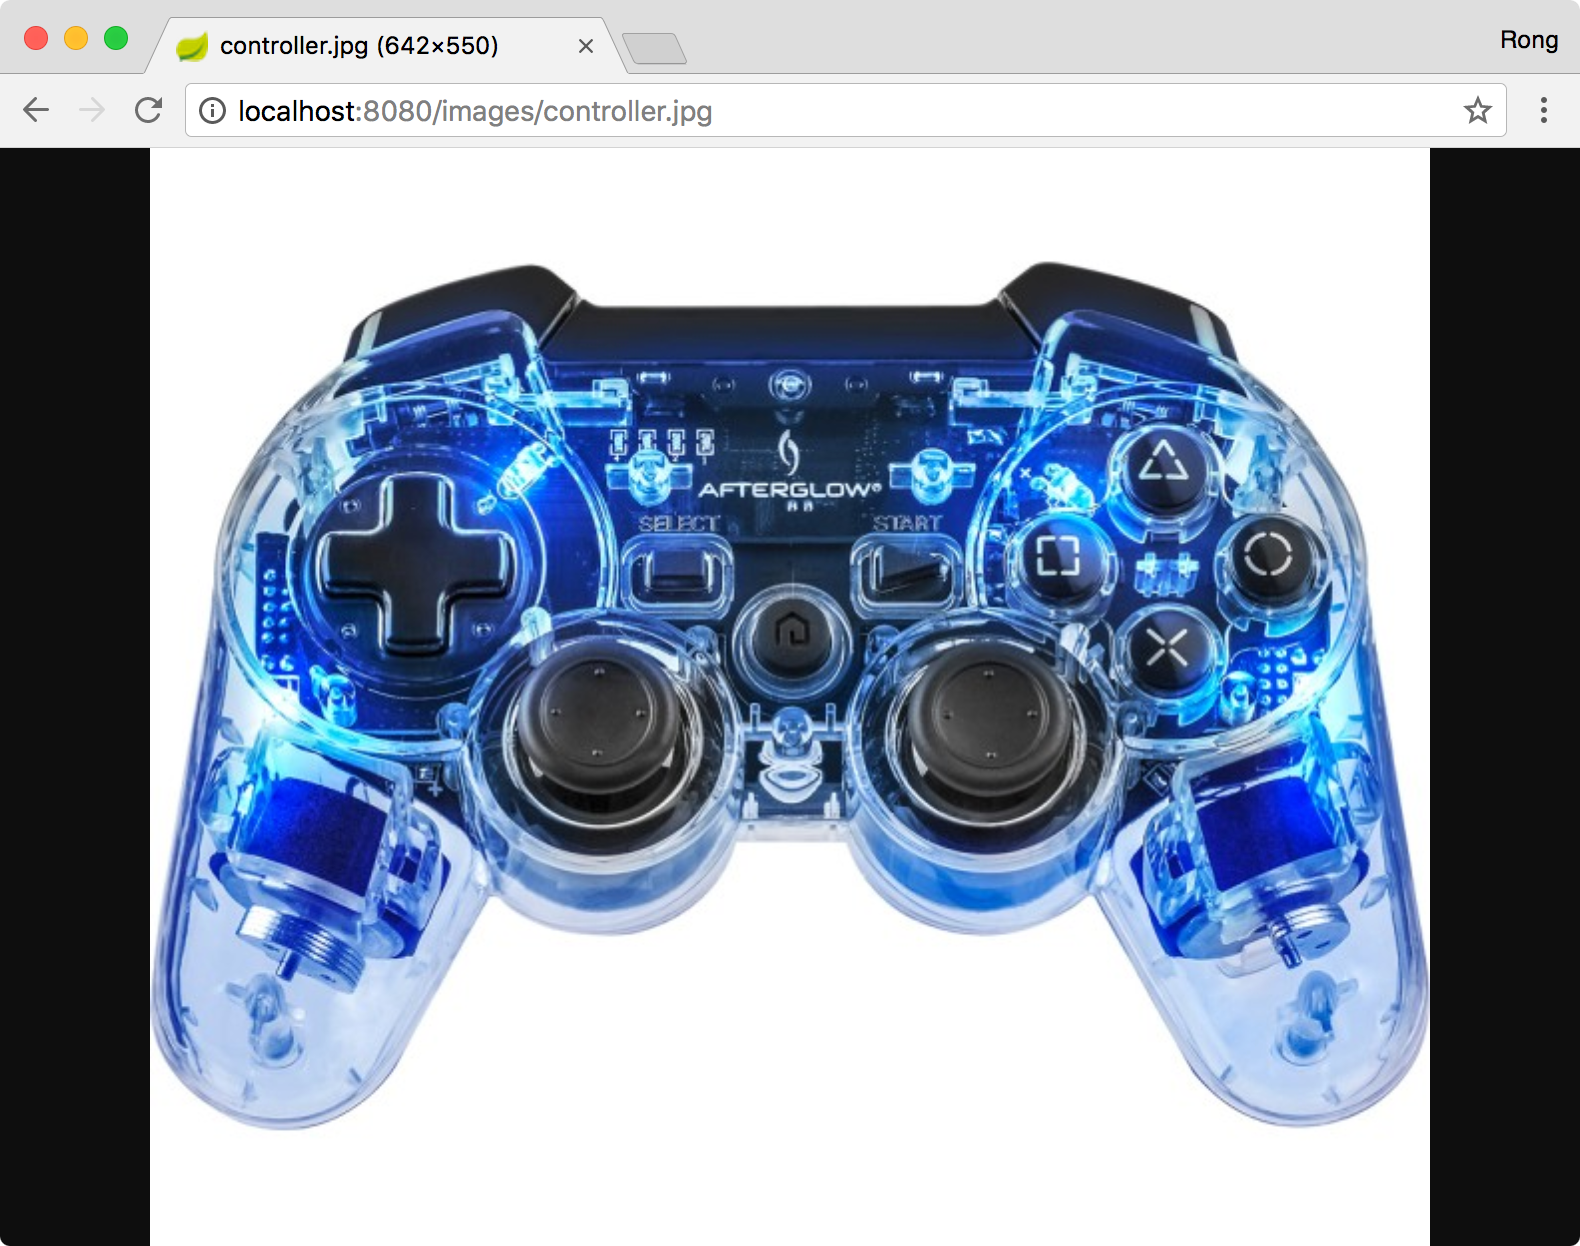
When accessing the URL ‘http://localhost:8080/images/controller.jpg’. The image with name ‘controller.jpg’ is displayed in the browser.
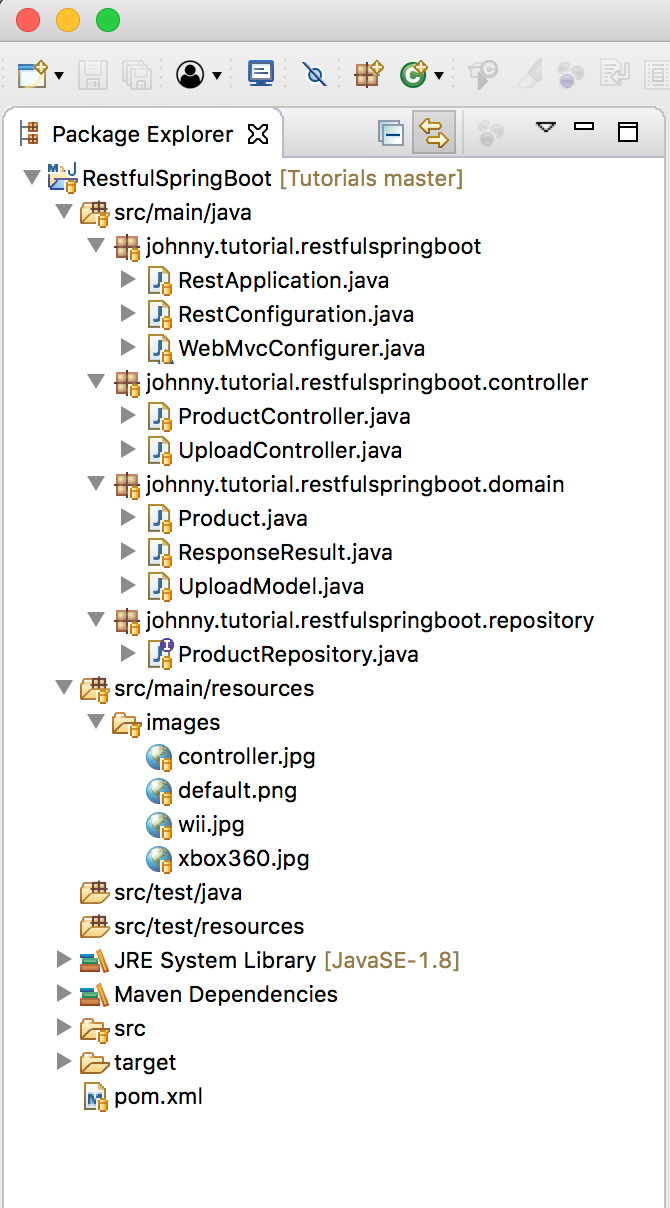
4.5 Final Project Structure
The final structure of the Web API project.
We created 6 APIs and will test them through Postman, see next blog.
| API | Description | URL |
|---|---|---|
| GET /api/products | Get all products | GET http://localhost:8080/api/products |
| GET /api/products/{id} | Get a product by ID | GET http://localhost:8080/api/products/1 |
| POST /api/products | Add a new product | POST http://localhost:8080/api/products |
| PUT /api/products/{id} | Update a product | PUT http://localhost:8080/api/products/1 |
| DELETE /api/products/{id} | Delete a product | DELETE http://localhost:8080/api/products/1 |
| POST /api/upload | Upload an image | POST http://localhost:8080/api/upload |
5. Running and Testing
Run this spring boot project with maven.
$ mvn spring-boot:run
Use Postman to access http://localhost:8080/ for testing. Create new collection named ‘RESTfulSpringBoot’, all requests will be saved to this collection.
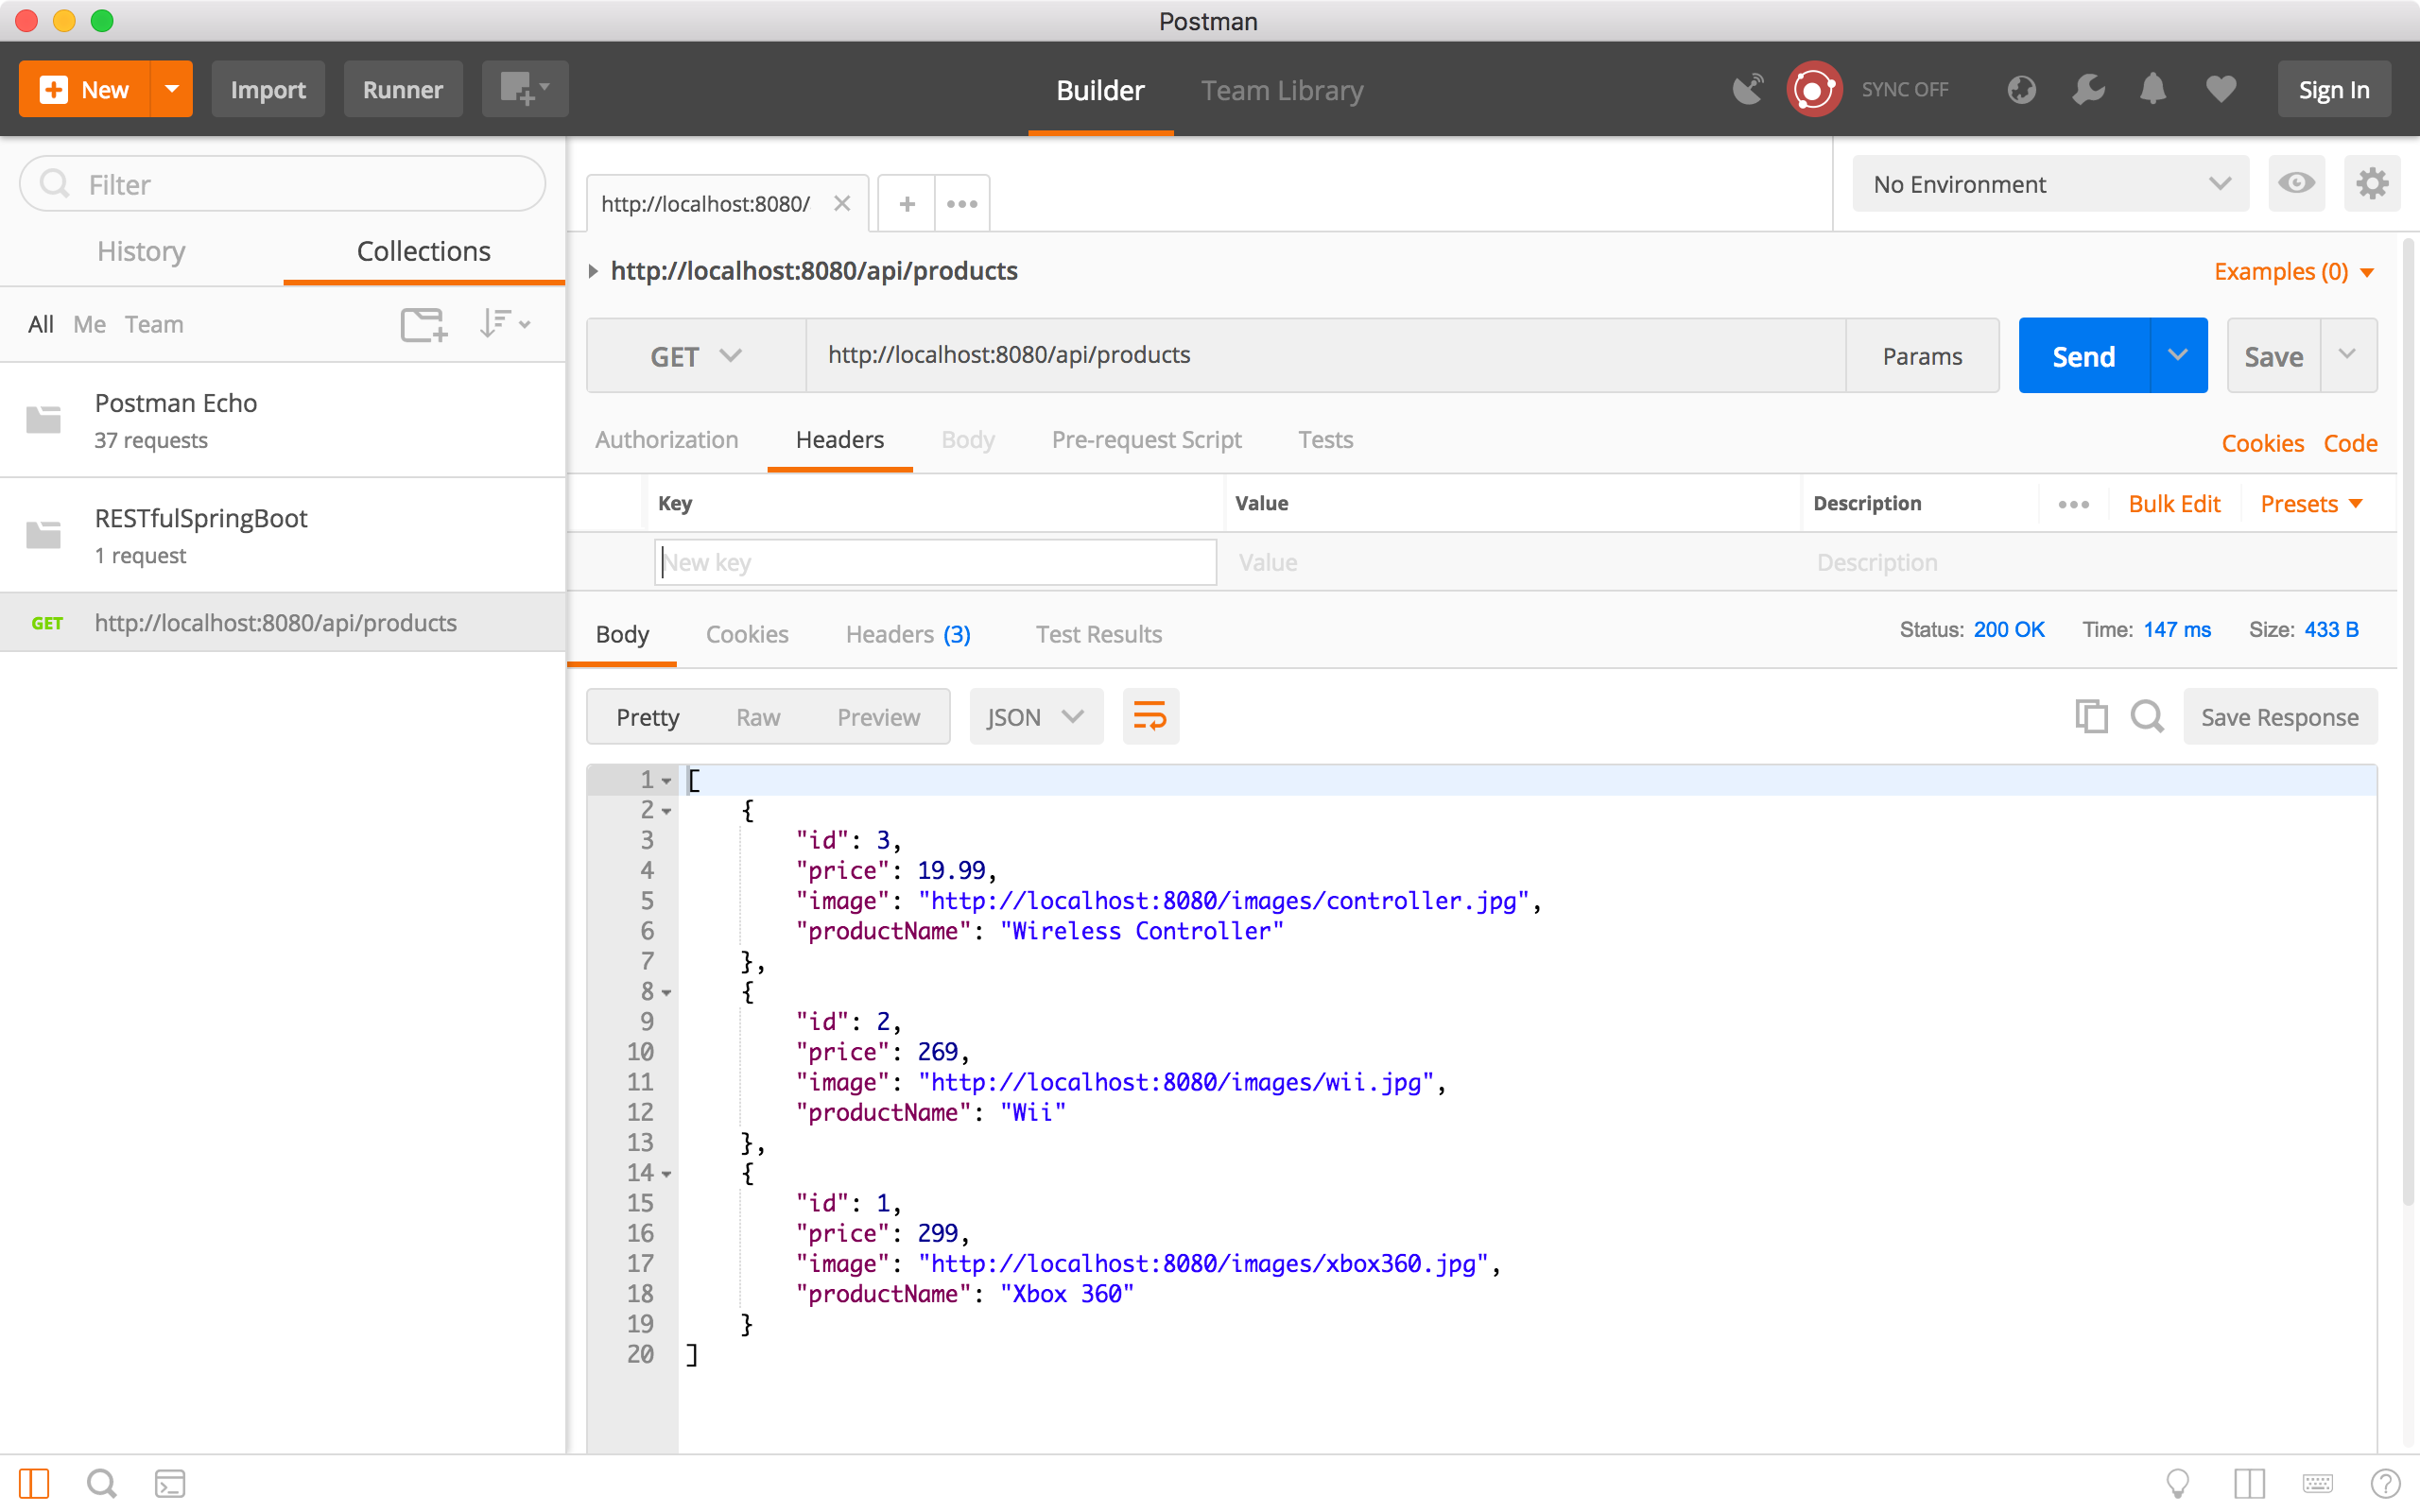
5.1 Get All Products
Create a request, choose ‘GET’ method and specify ‘http://localhost:8080/api/products’ as the URL, click the Send button. All three products are returned in the response body.
5.2 Get a product by ID
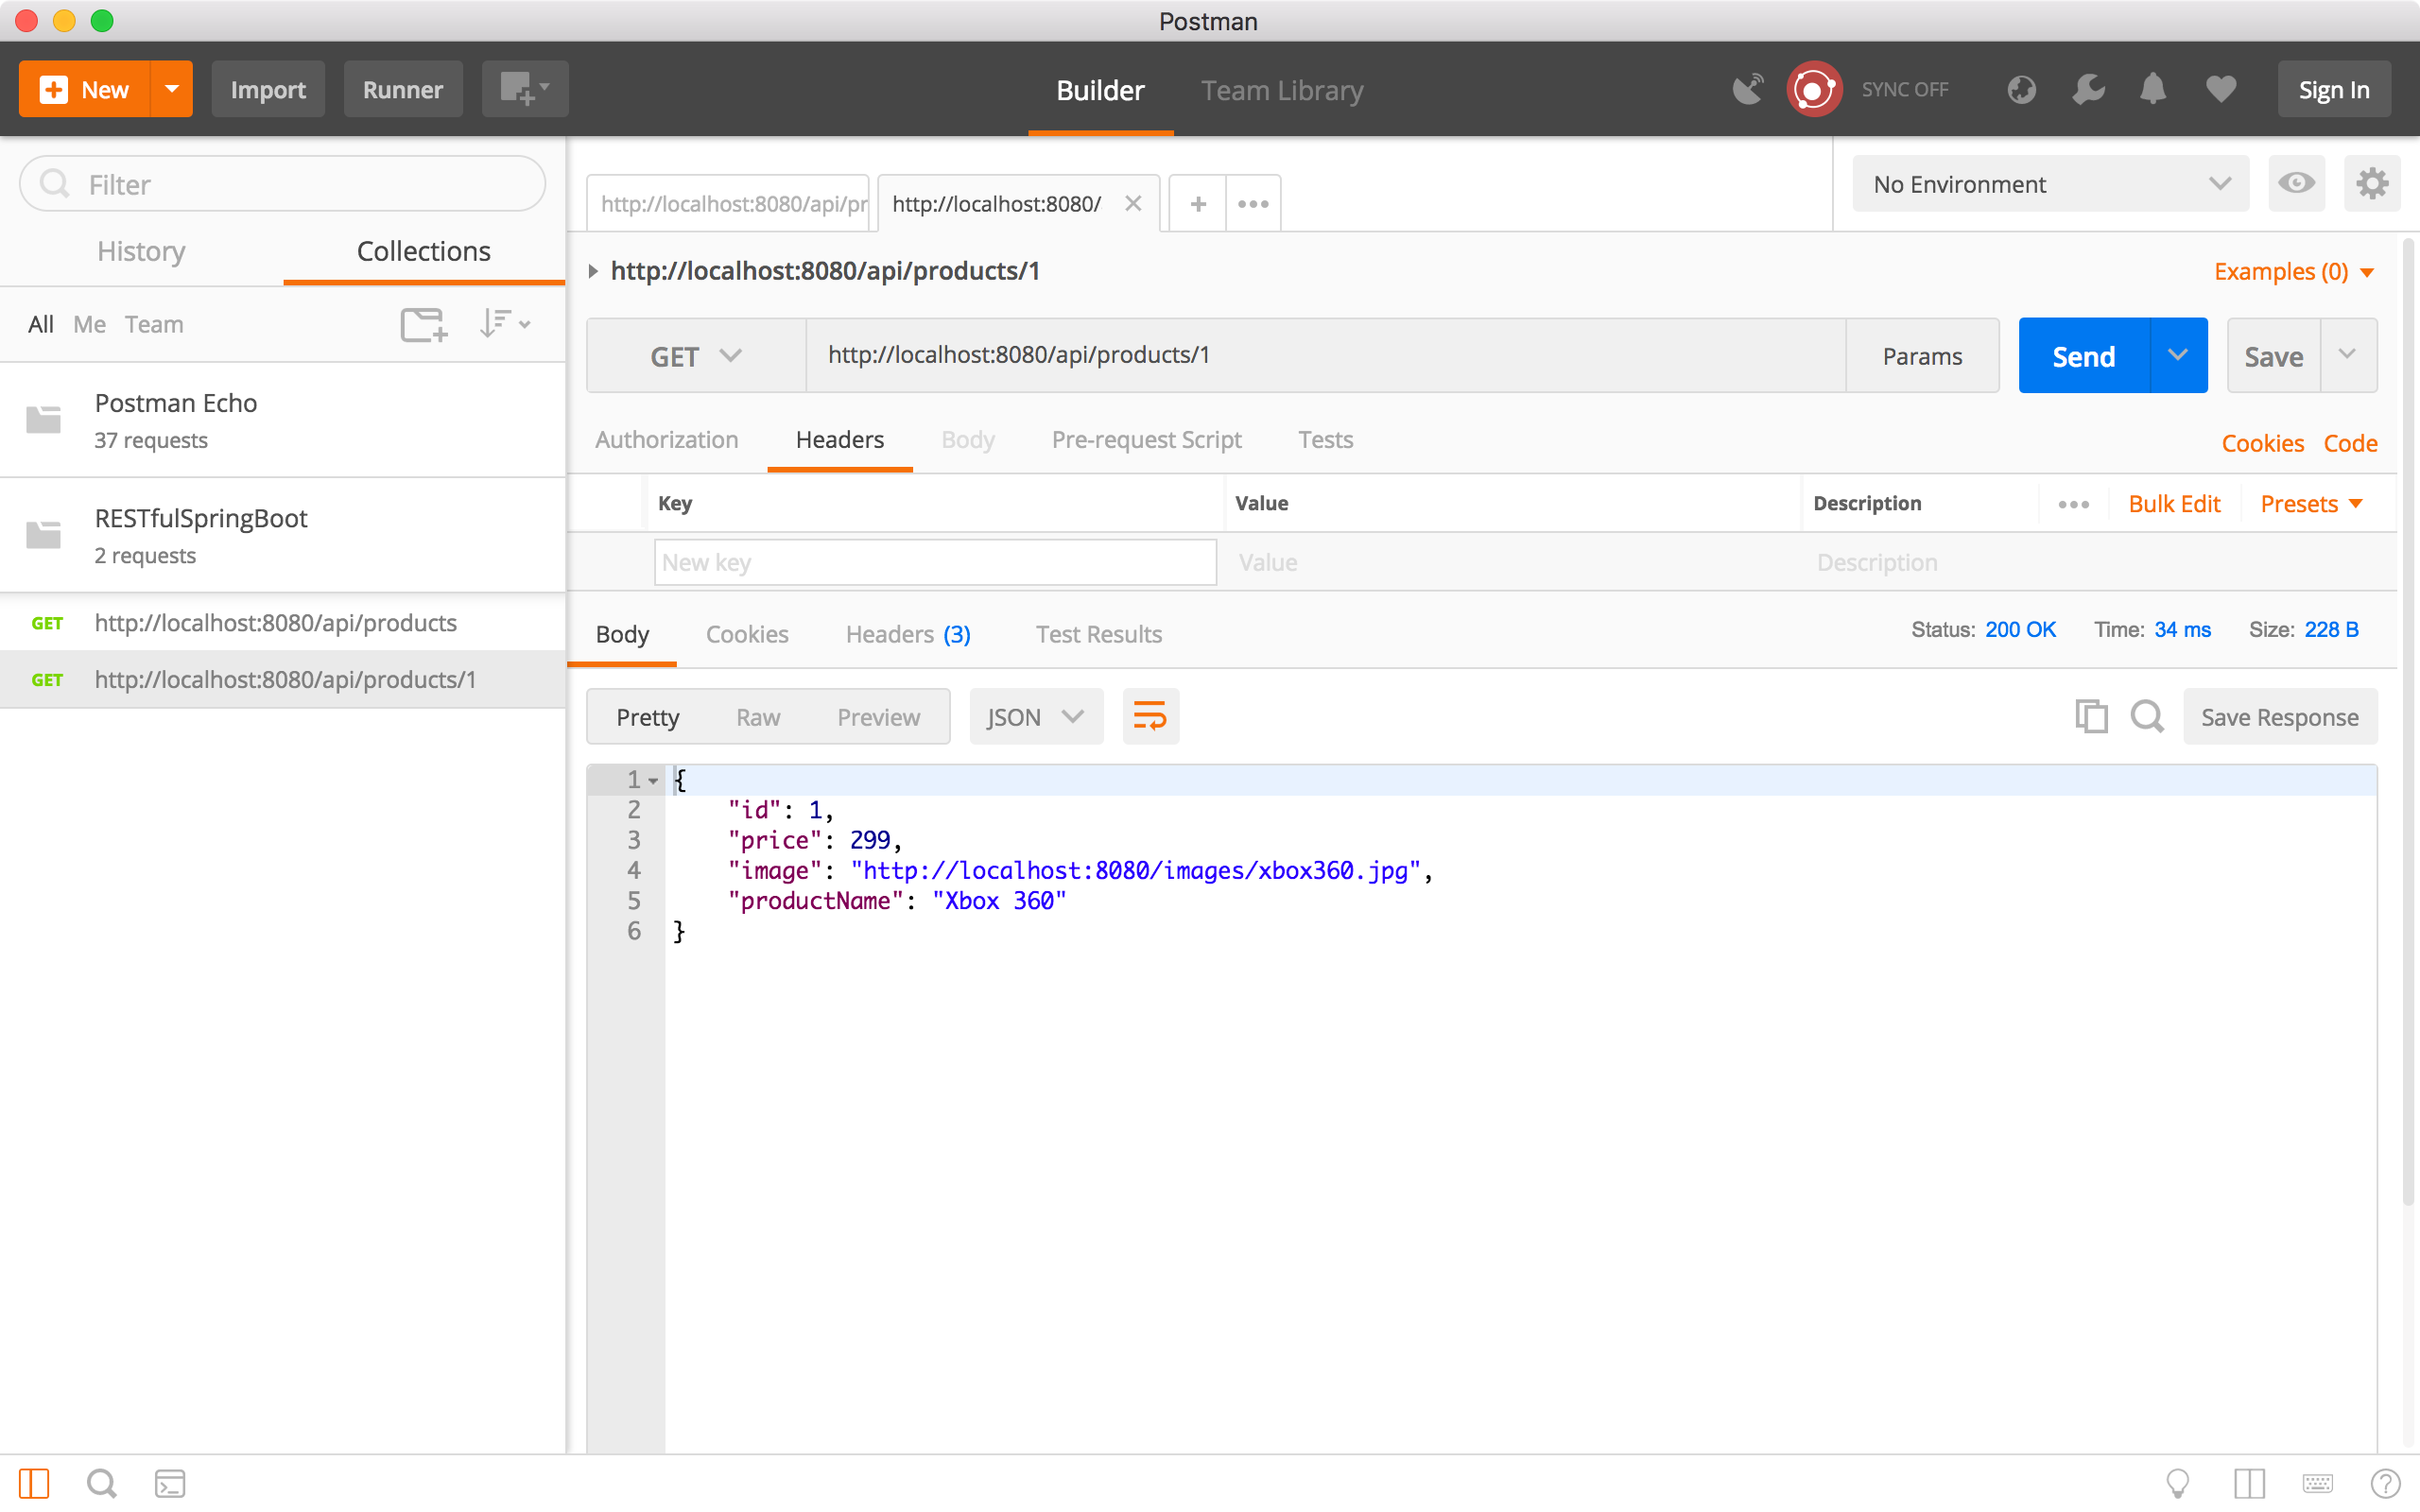
Create a new request, choose the ‘GET’ method and specify ‘http://localhost:8080/api/products/1’ as the URL, click the Send button. Product with ID equals to ‘1’ is returned in the response body.
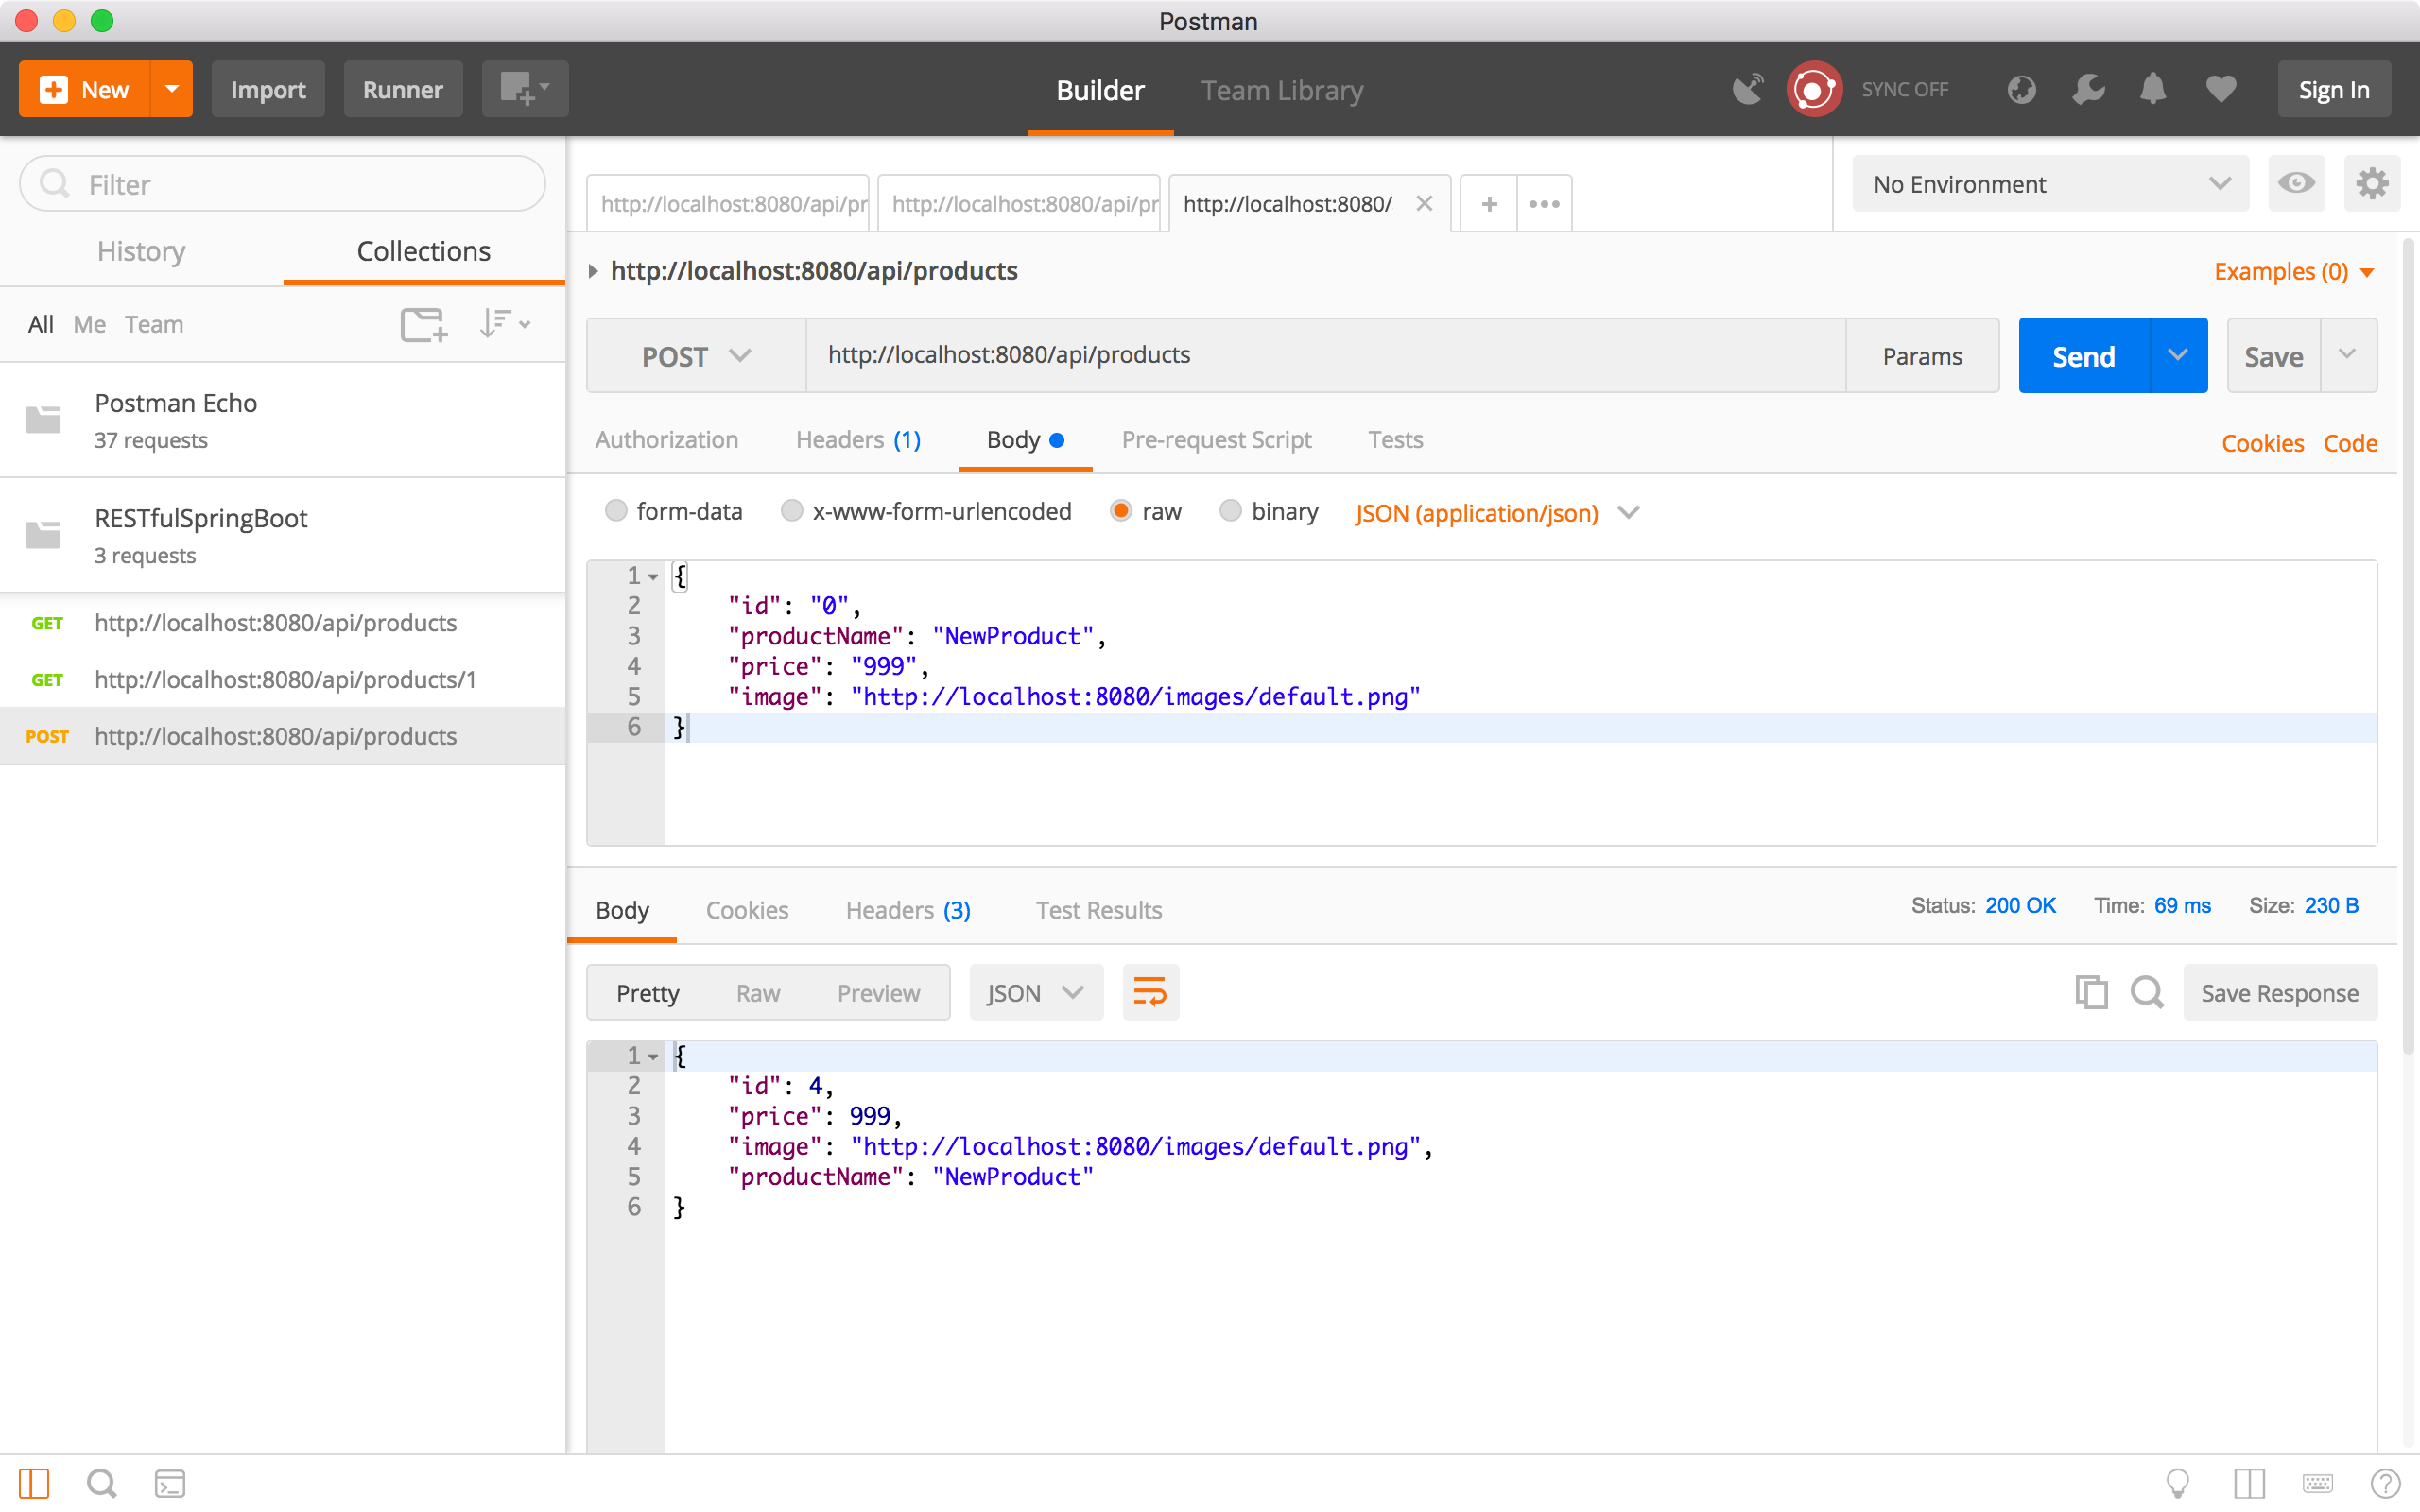
5.3 Add New Product
Create another request, choose the ‘POST’ method and specify ‘http://localhost:8080/api/products/’ as the URL. In the Request Body, select ‘raw’, provide the new product information in JSON format, and choose ‘JSON(application/json)’.
{
    "id": "0",
    "productName": "NewProduct",
    "price": "999",
    "image": "http://localhost:8080/images/default.png"
}
Click the Send button. In the response body, we see the new product.
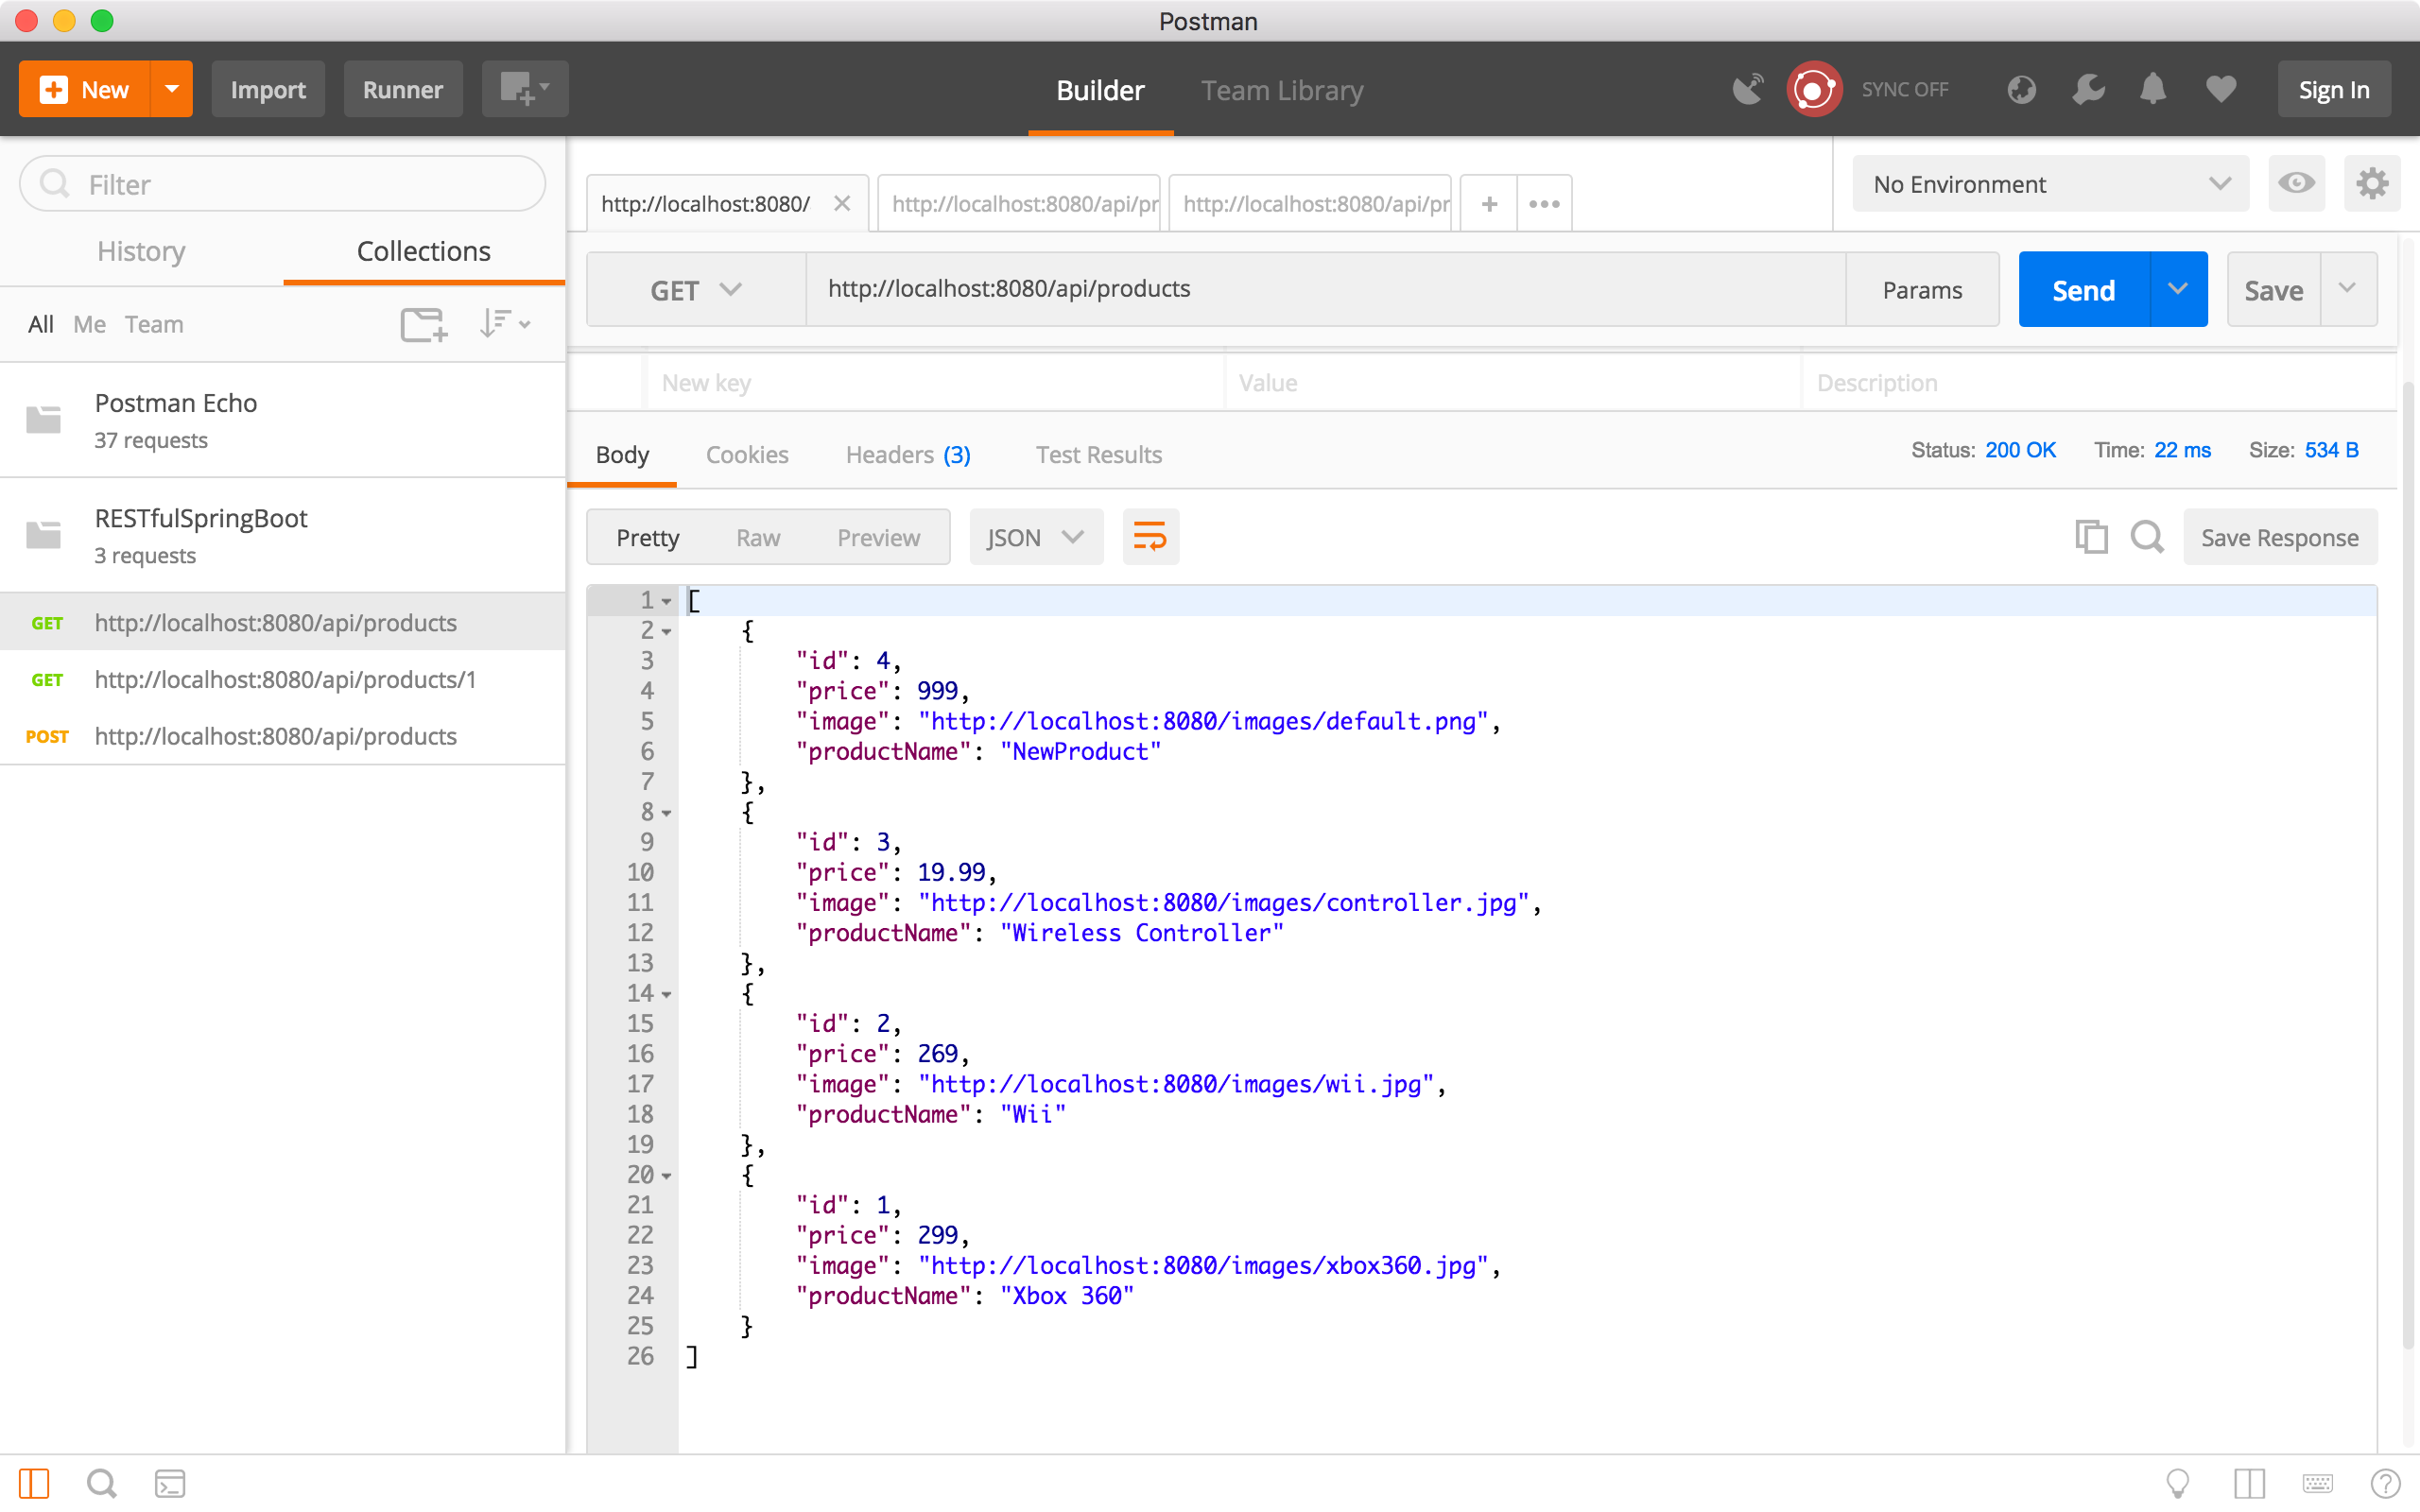
 Run the ‘Get all products’ request to verify whether the new product is created. We see there is a new product with ID equals to 4.
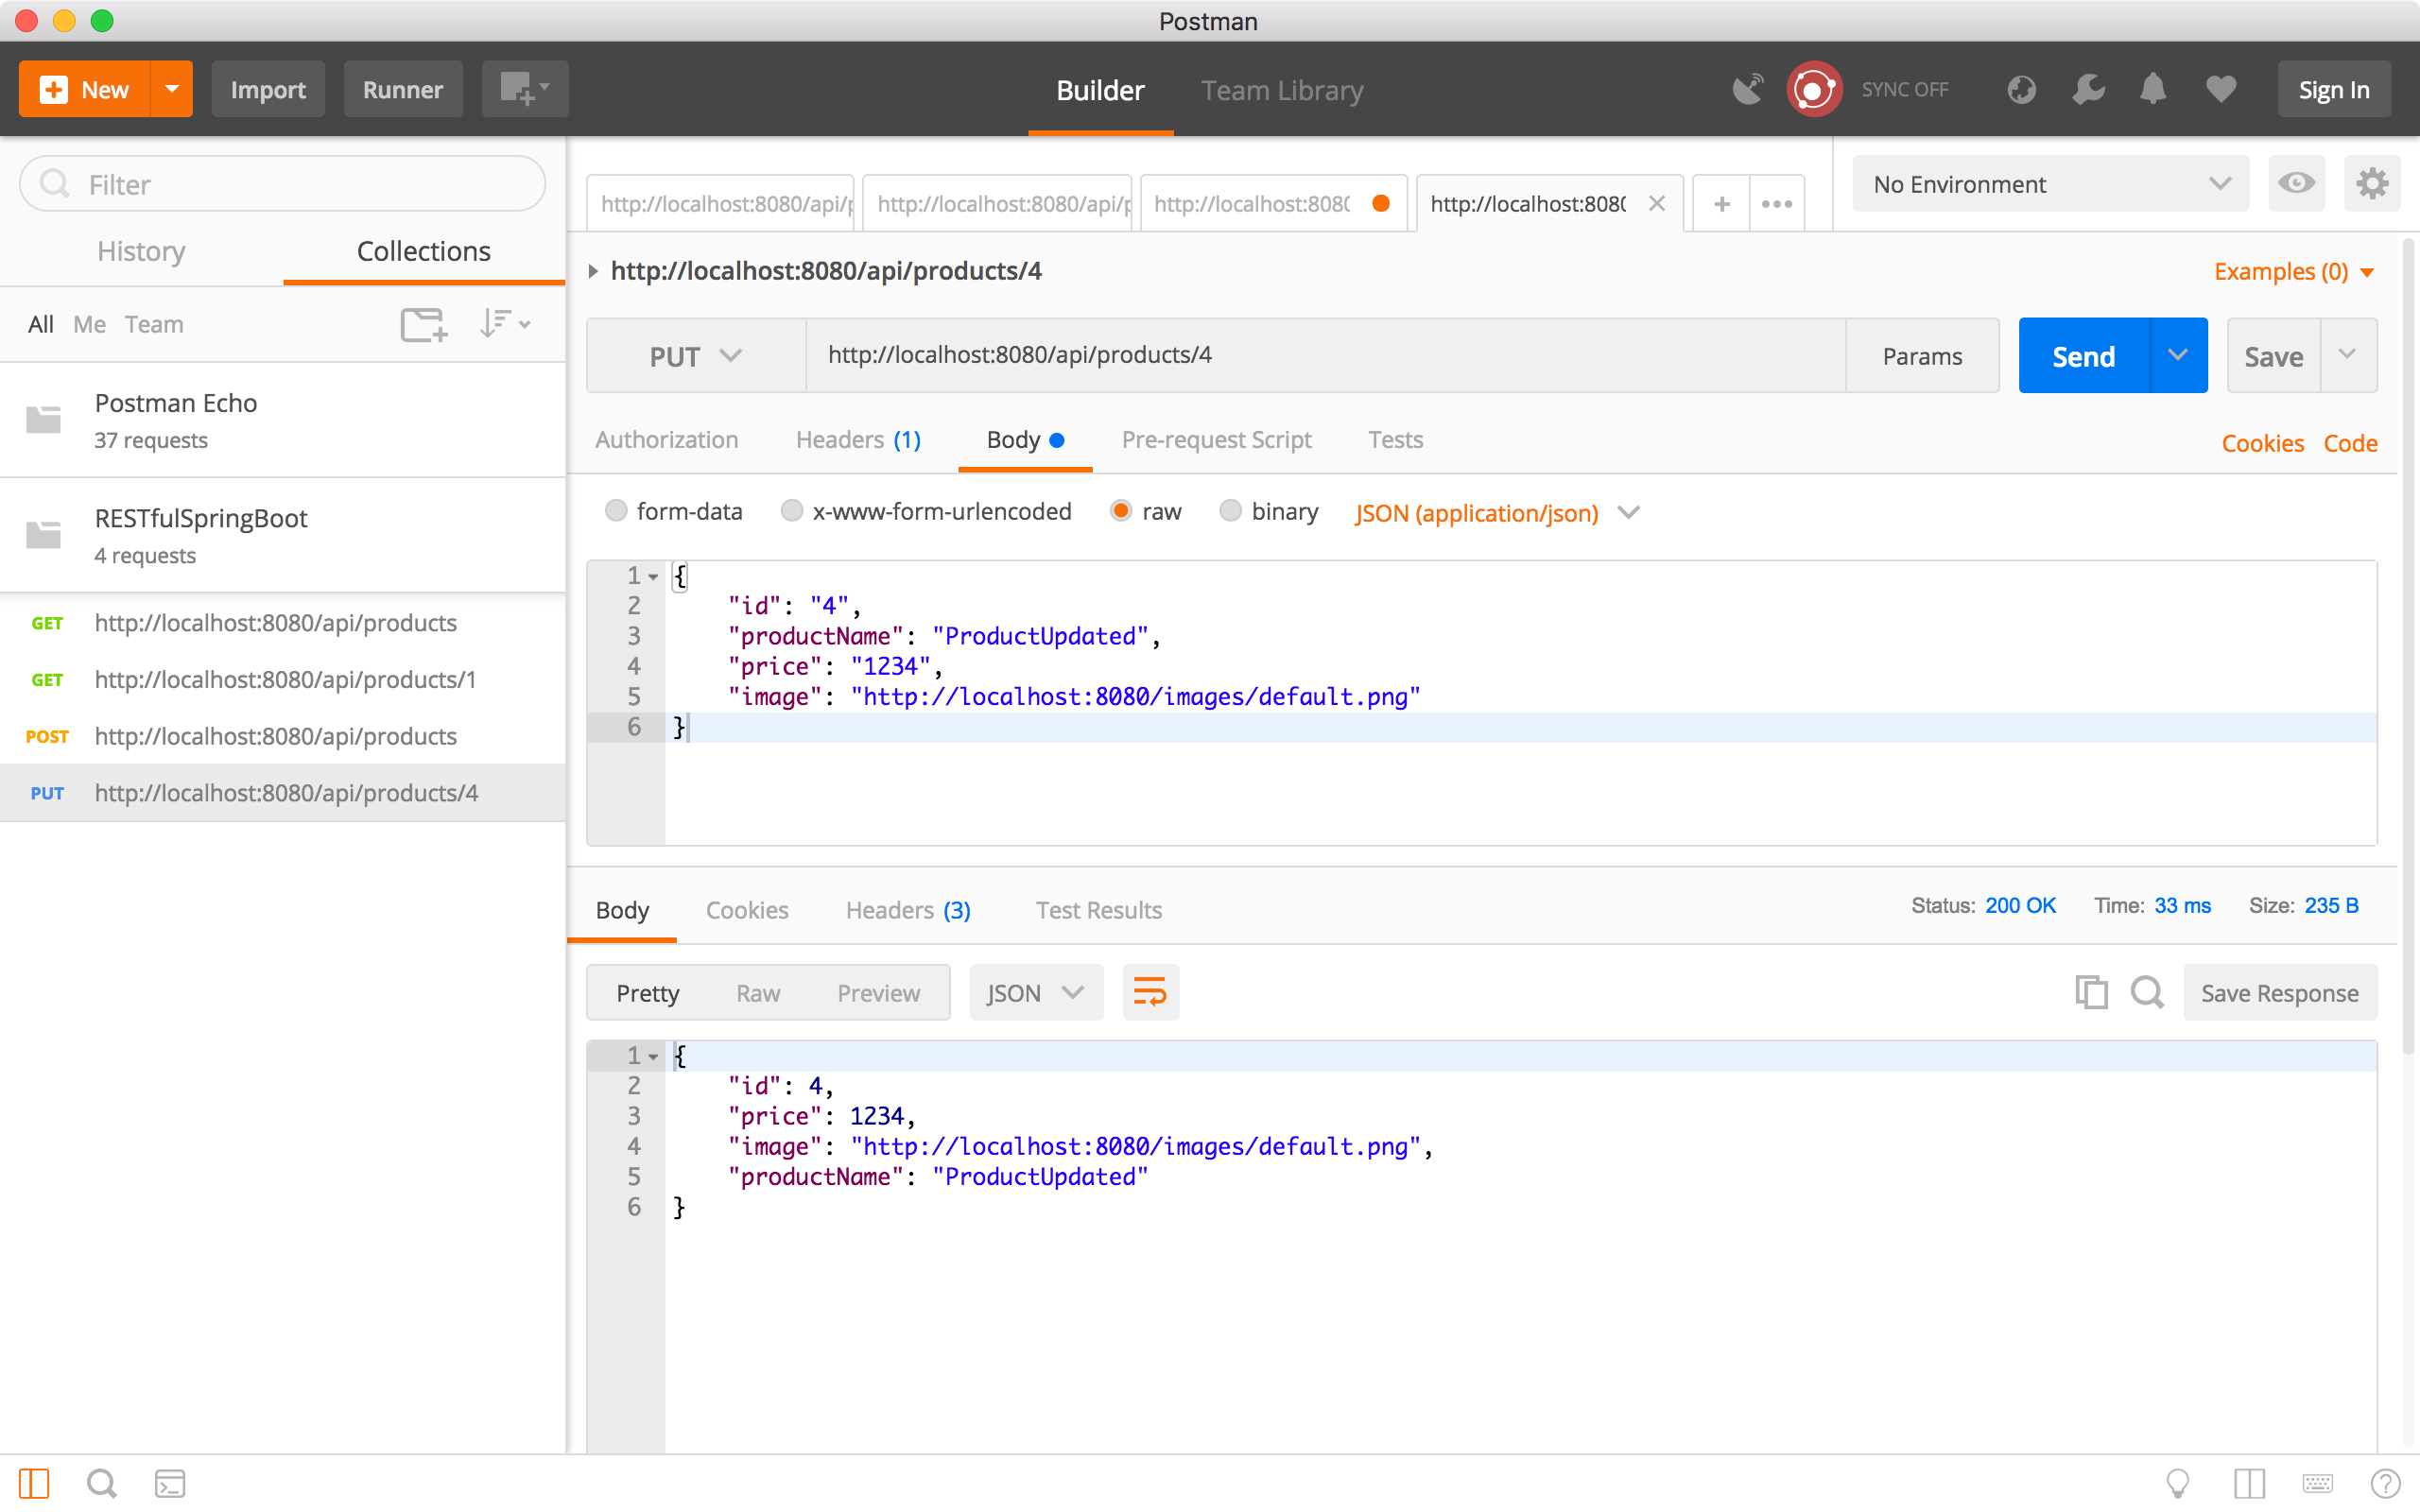
5.4 Update Product
Create a new request, choose ‘PUT’ method and specify ‘http://localhost:8080/api/products/4’ as the URL. In the Request Body, select ‘raw’, provide the new product information in JSON format, and choose ‘JSON(application/json)’.
{
    "id": "4",
    "productName": "ProductUpdated",
    "price": "1234",
    "image": "http://localhost:8080/images/default.png"
}
Click the Send button. In the response body, we see the product has new name and price.
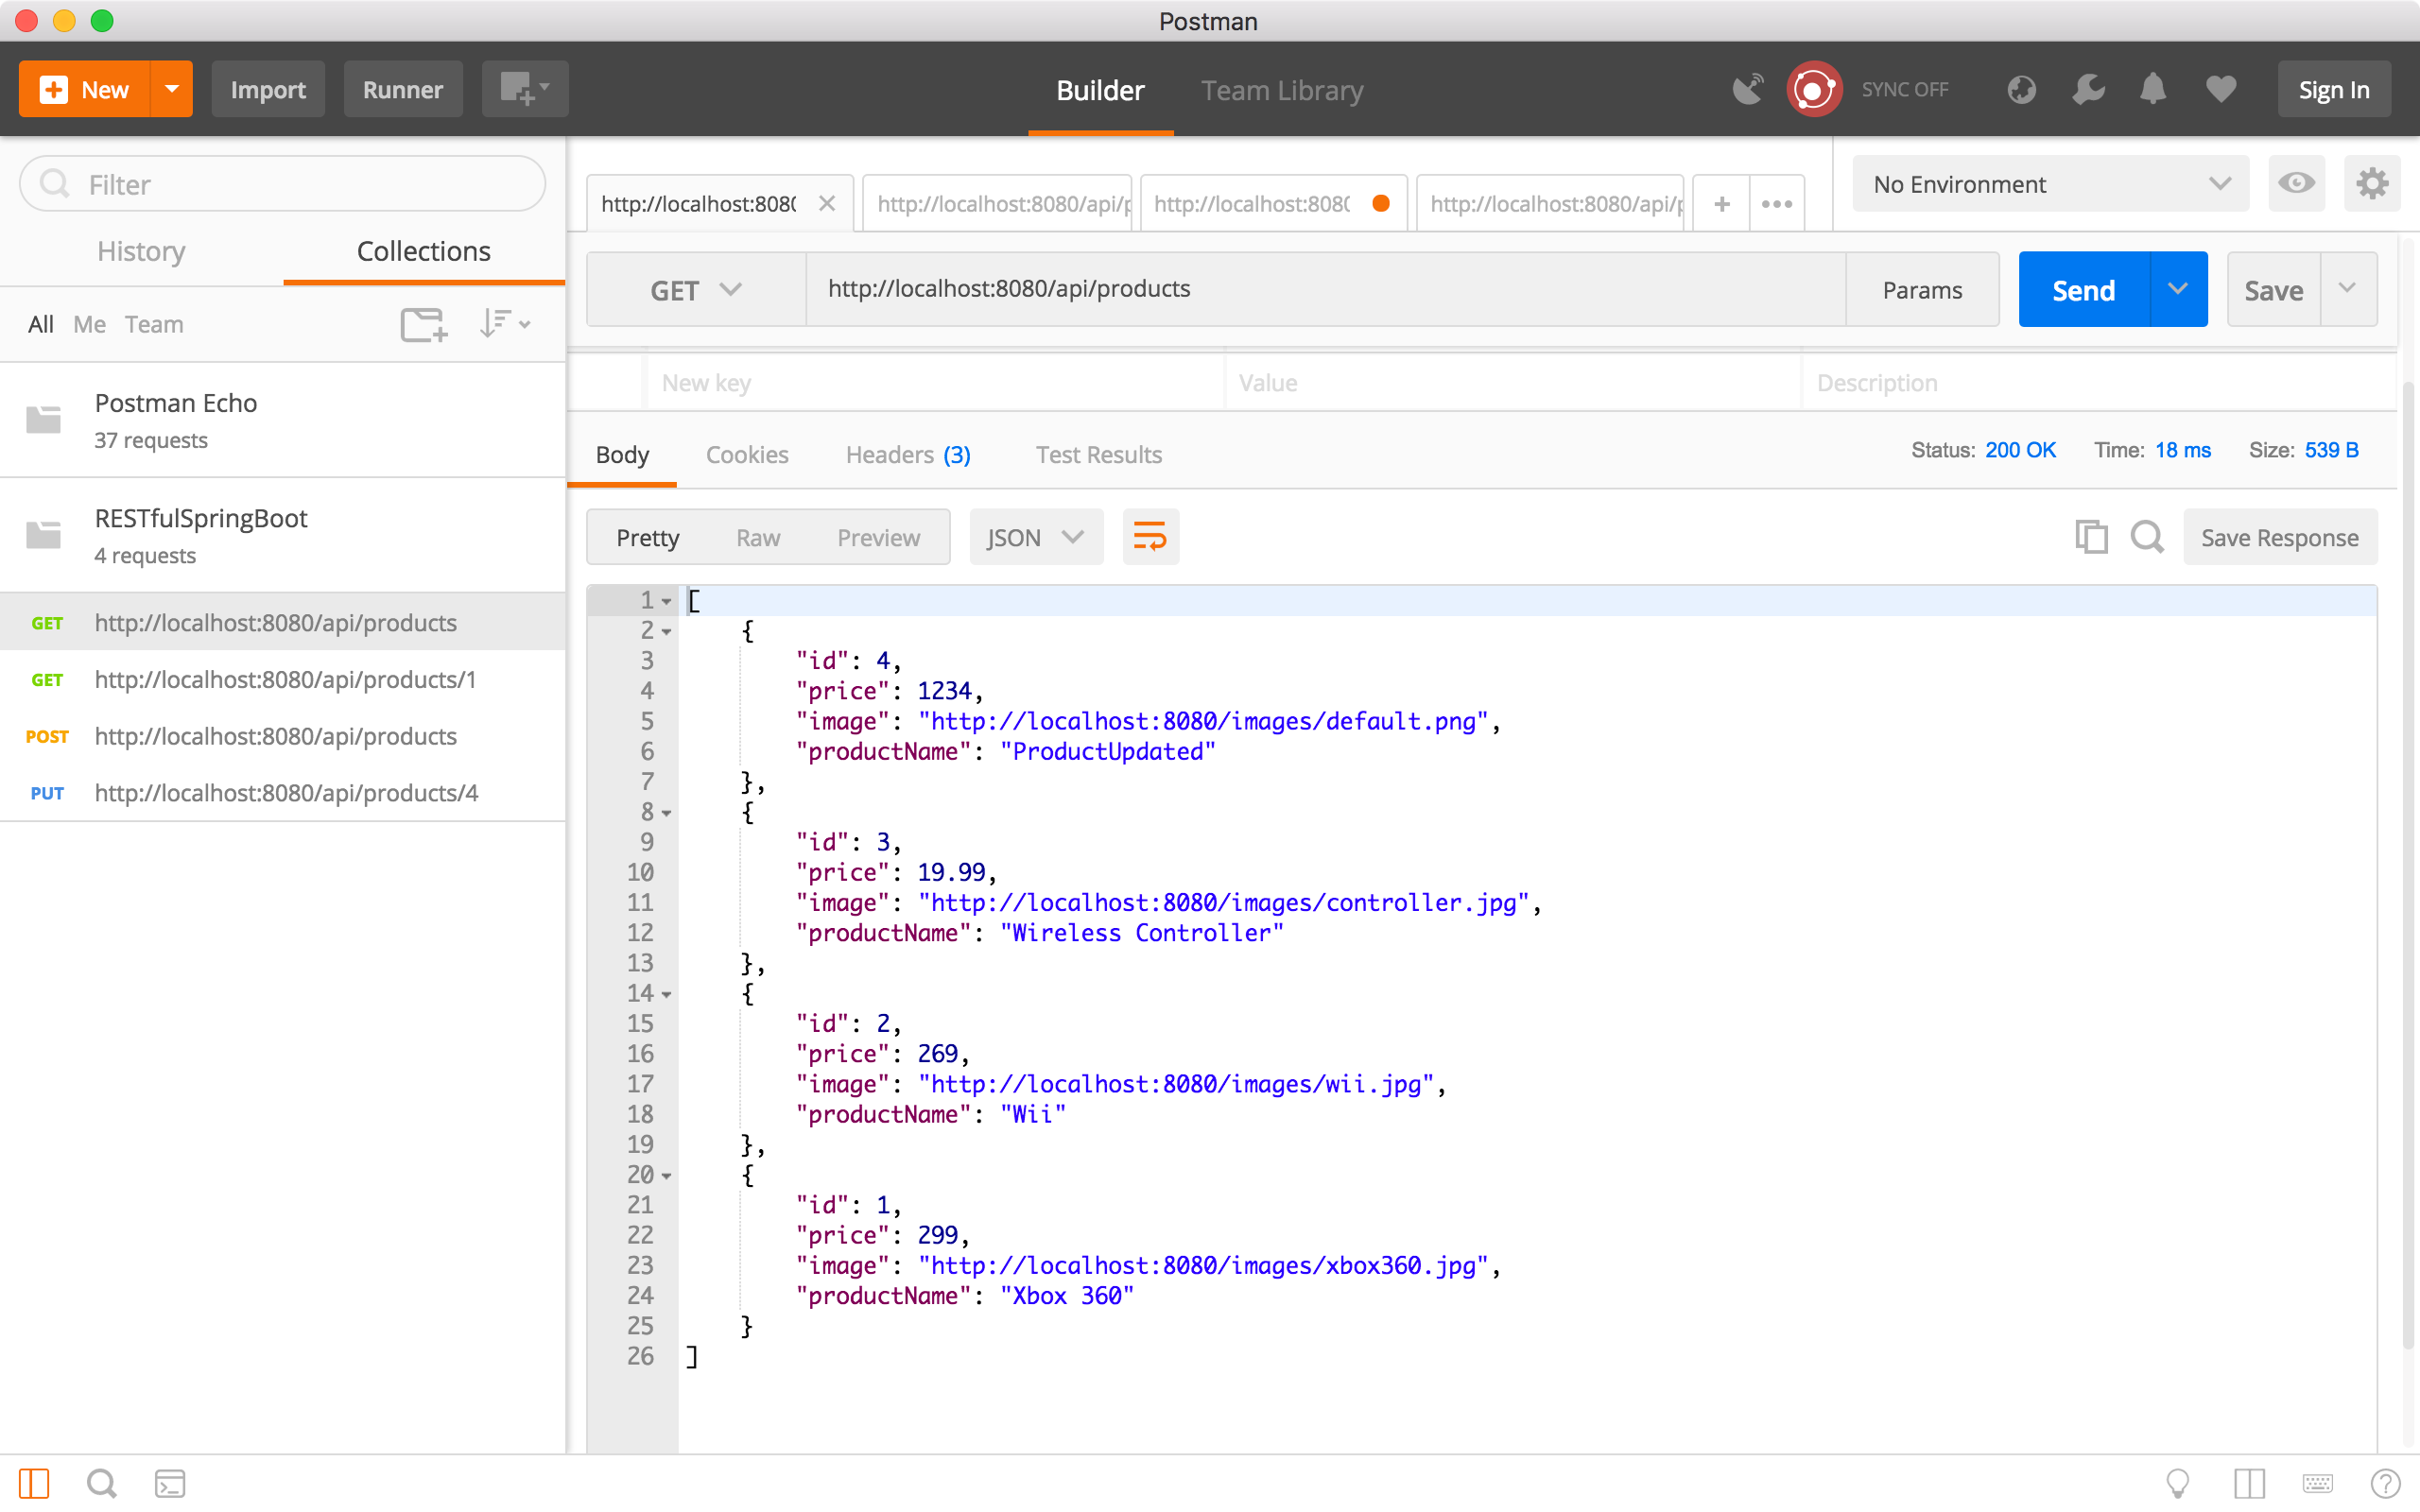
 Run the ‘Get all products’ request to verify whether the product is updated. We see product 4 has new name and price.
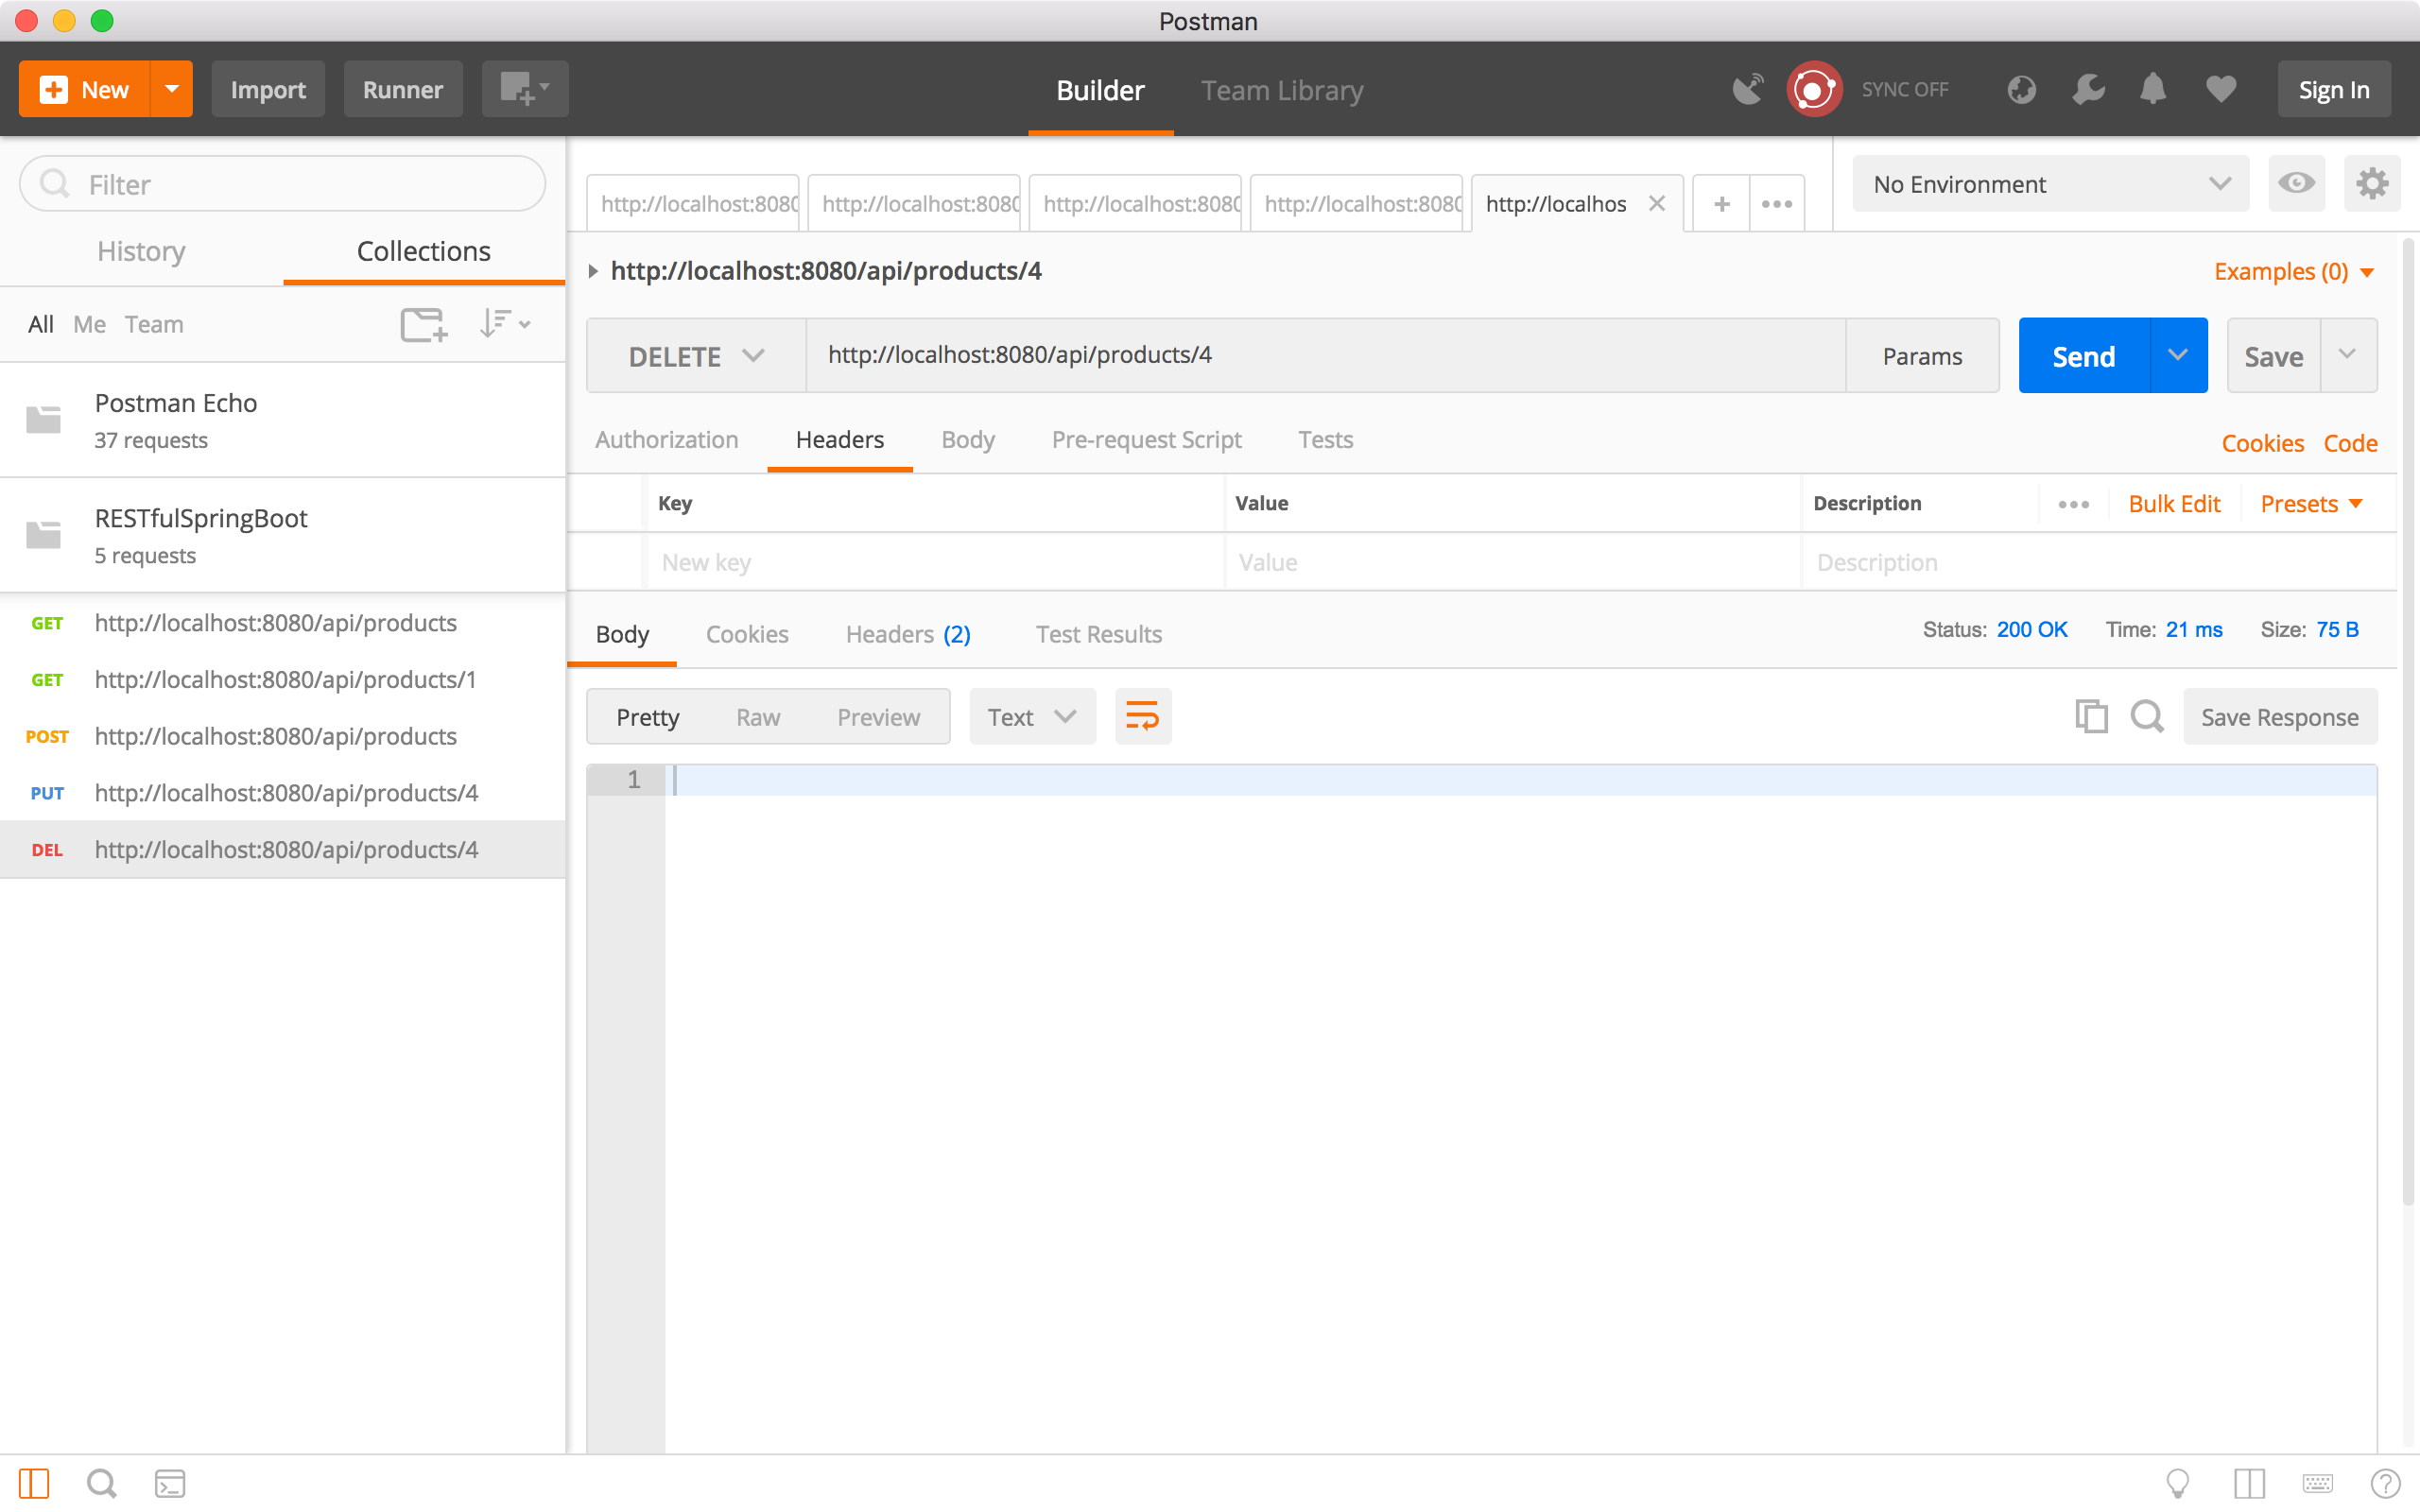
5.5 Delete Product
Create a new request, choose ‘DELETE’ method and specify ‘http://localhost:8080/api/products/4’ as the URL, click the Send button. There is no response body returned, but we see the status is ‘200 OK’. Product 4 should be deleted.
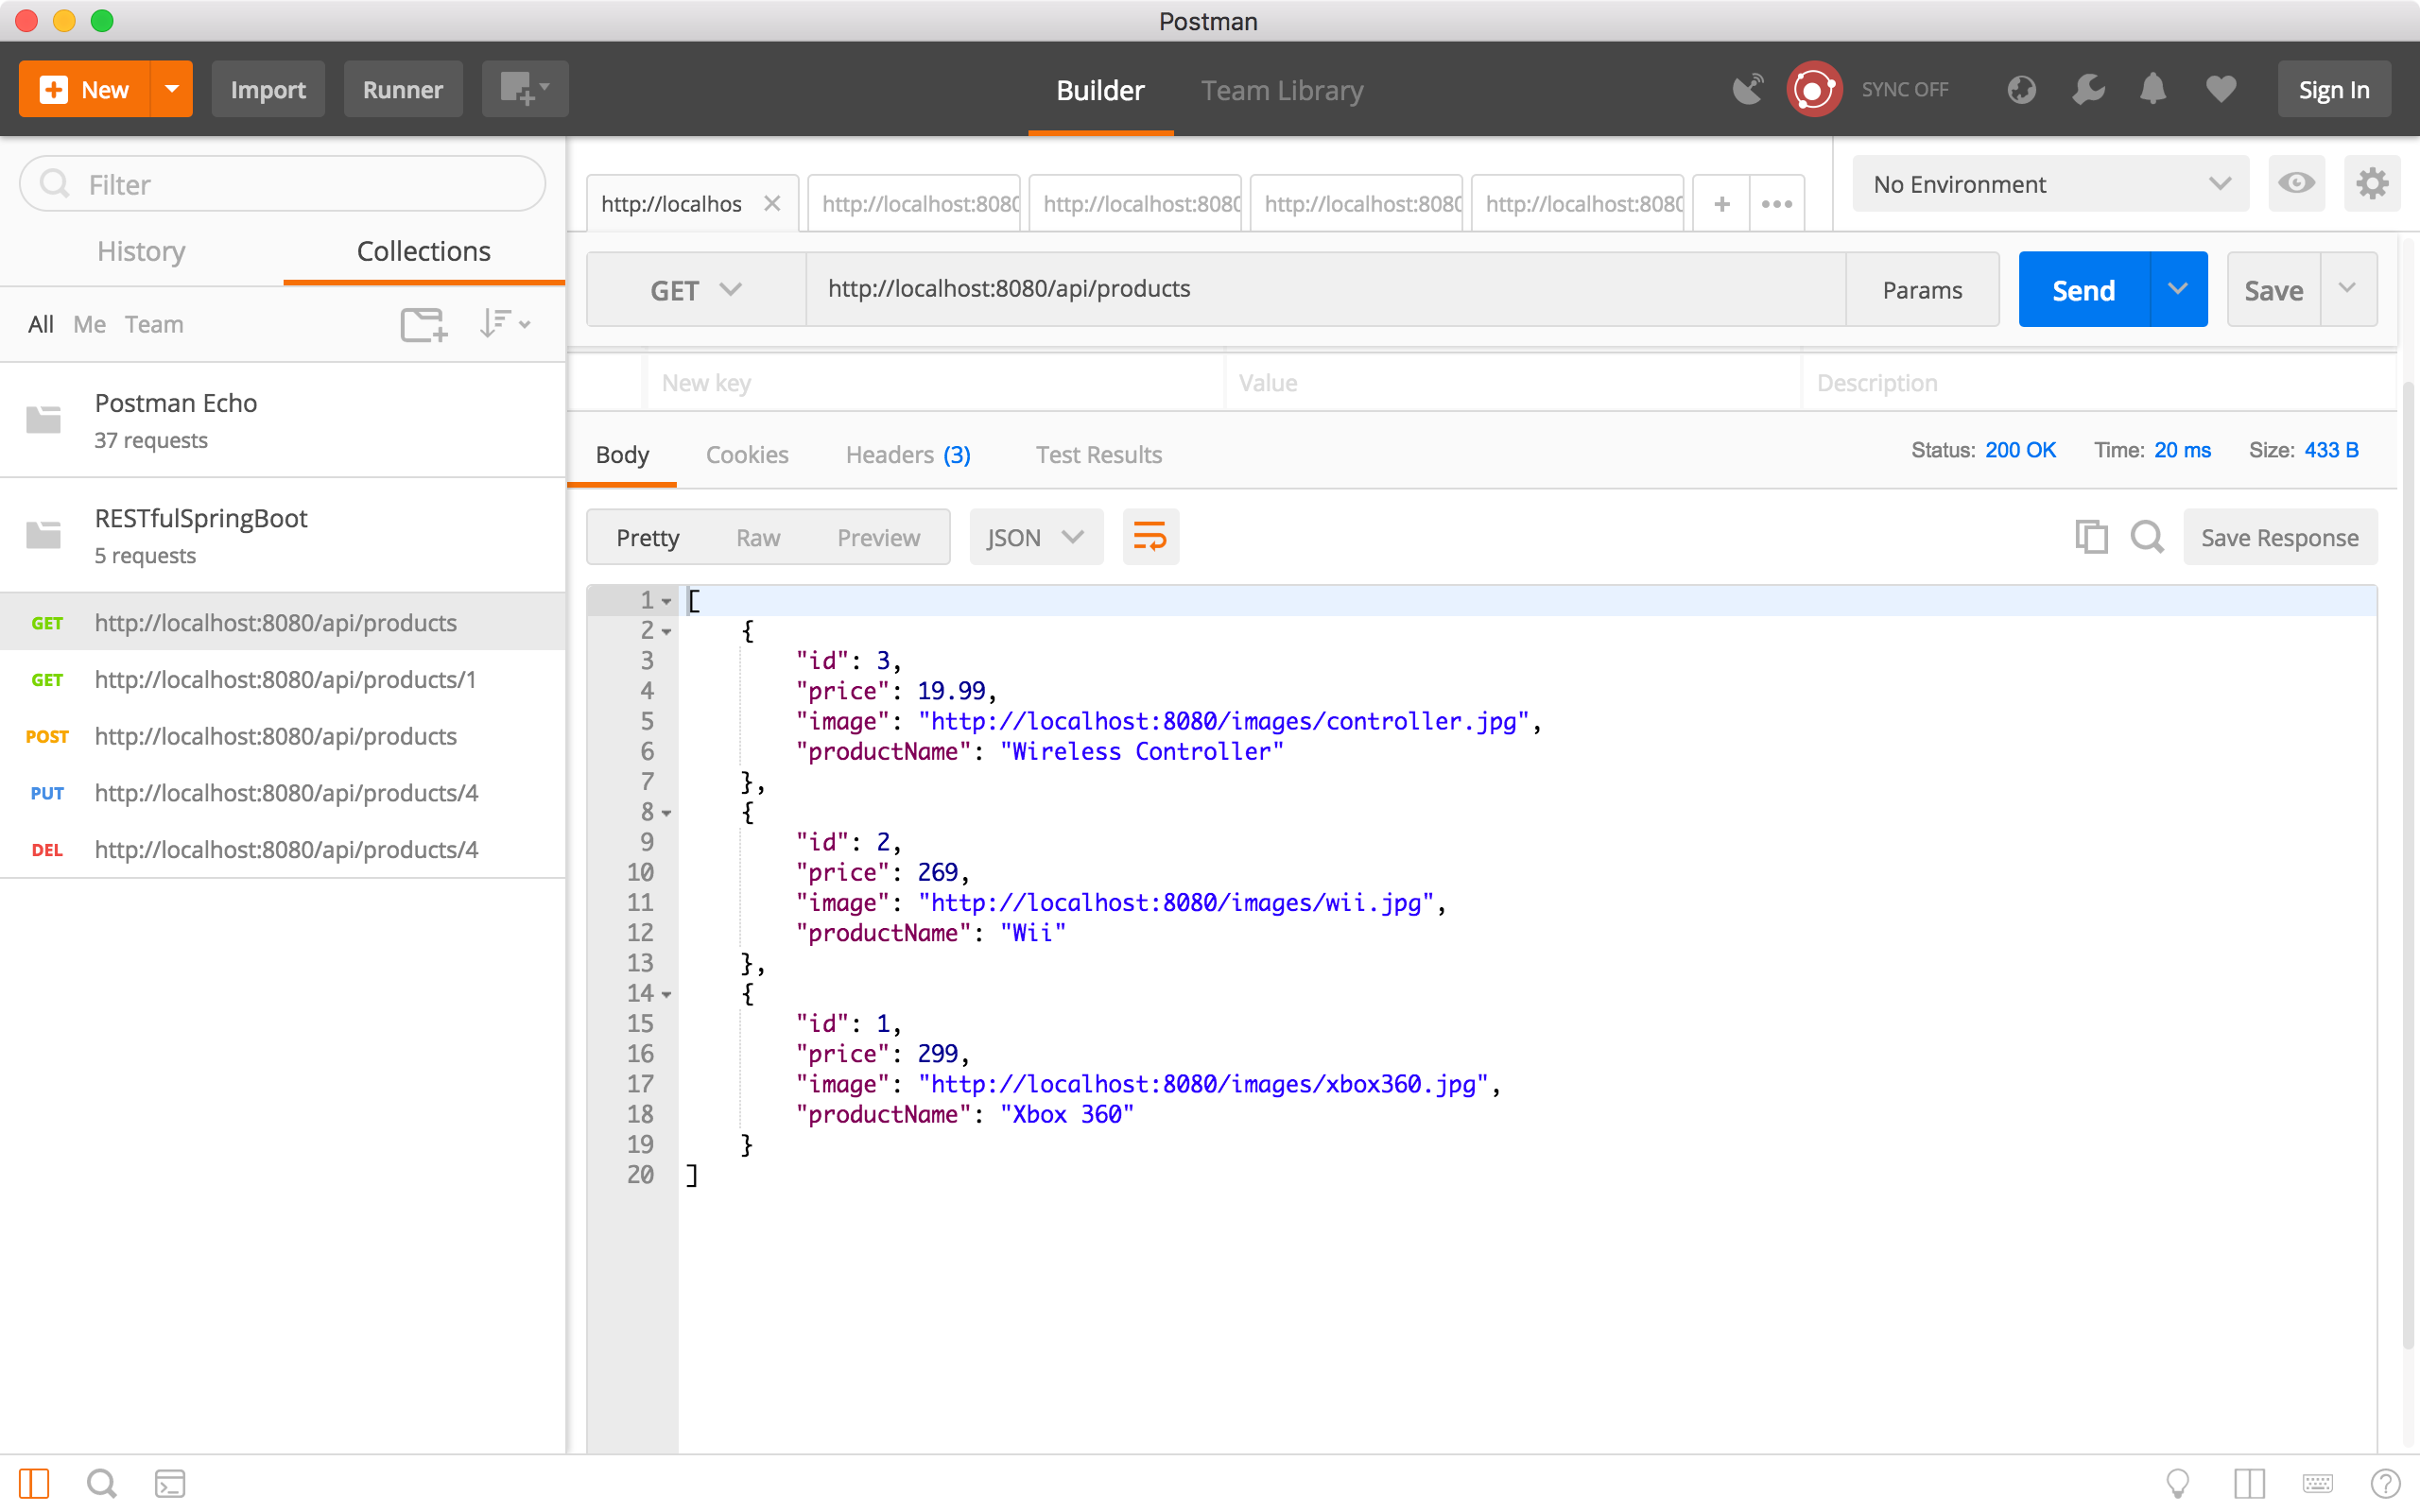
 Run the ‘Get all products’ request to verify whether product4 is deleted. We see product 4 is no longer existing.
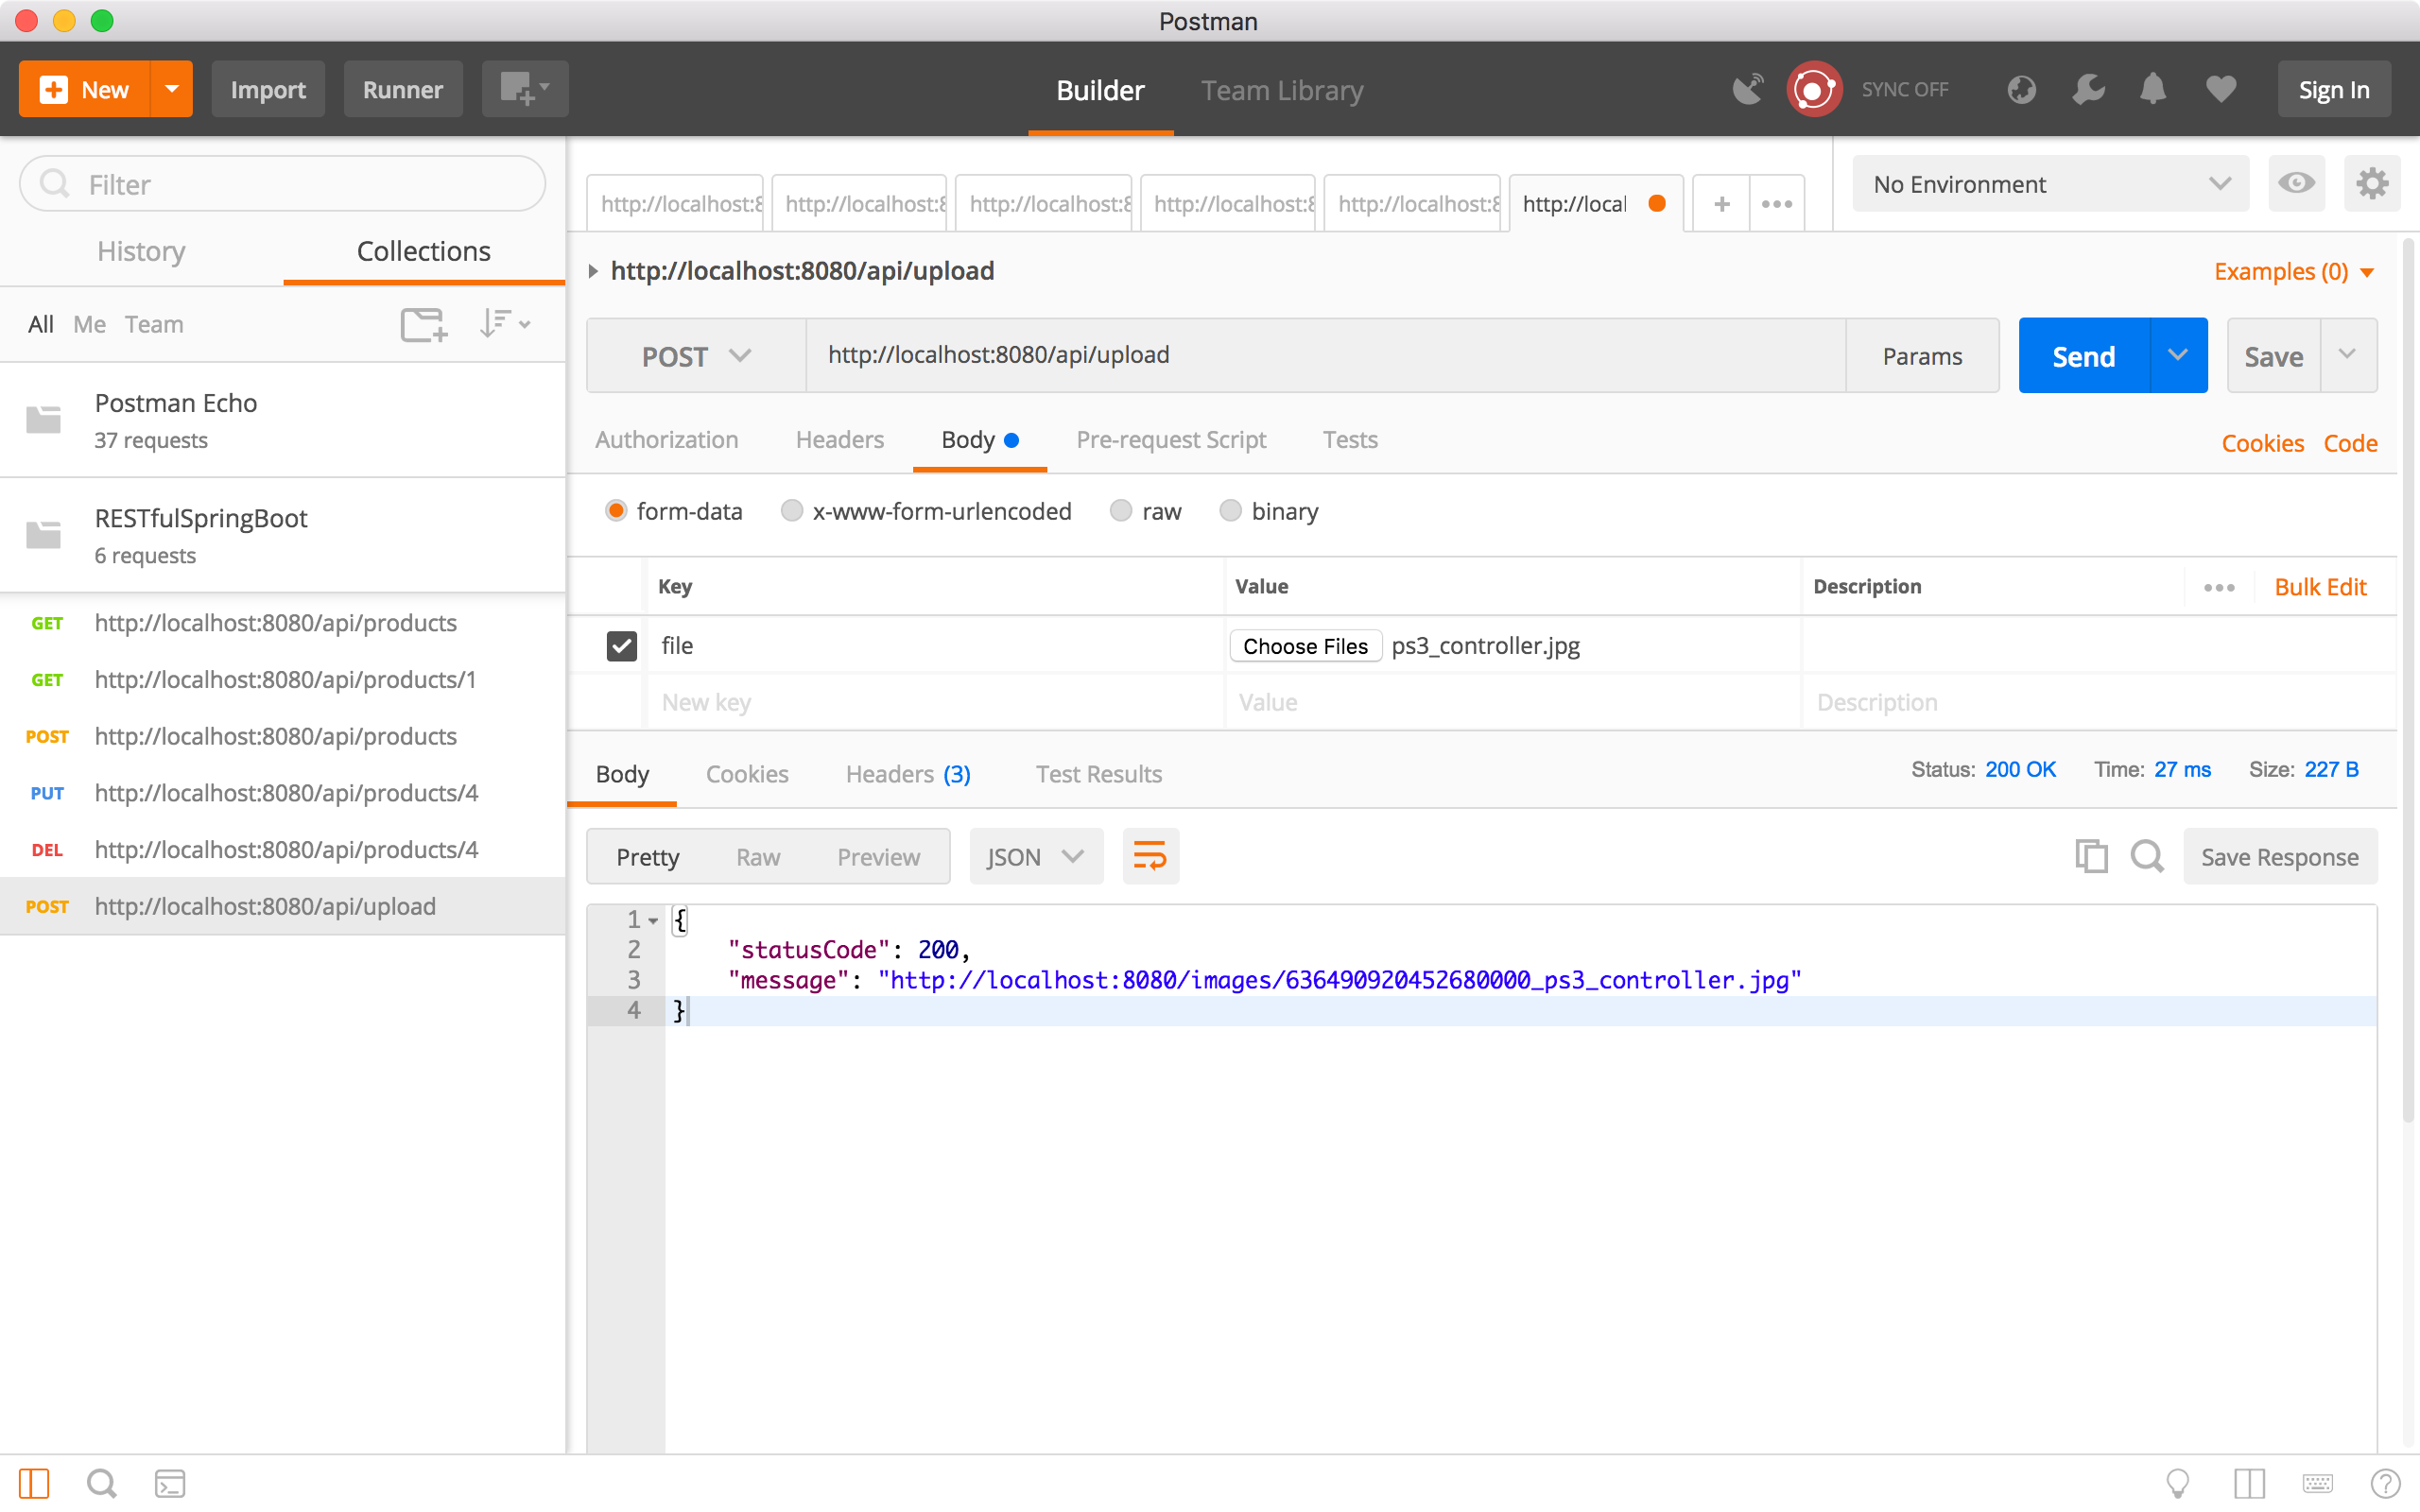
5.5 Upload Image
Create a new request, choose the ‘POST’ method and specify ‘http://localhost:8080/api/upload’ as the URL. In the Request Body, select ‘form-data’, add new key named ‘file’, select ‘File’ type, you will see the ‘Choose Files’ button. Select one image from your local disk, and click the Send button. In the response body, we see the status code and message. This message actually contains the URL of the uploaded image.
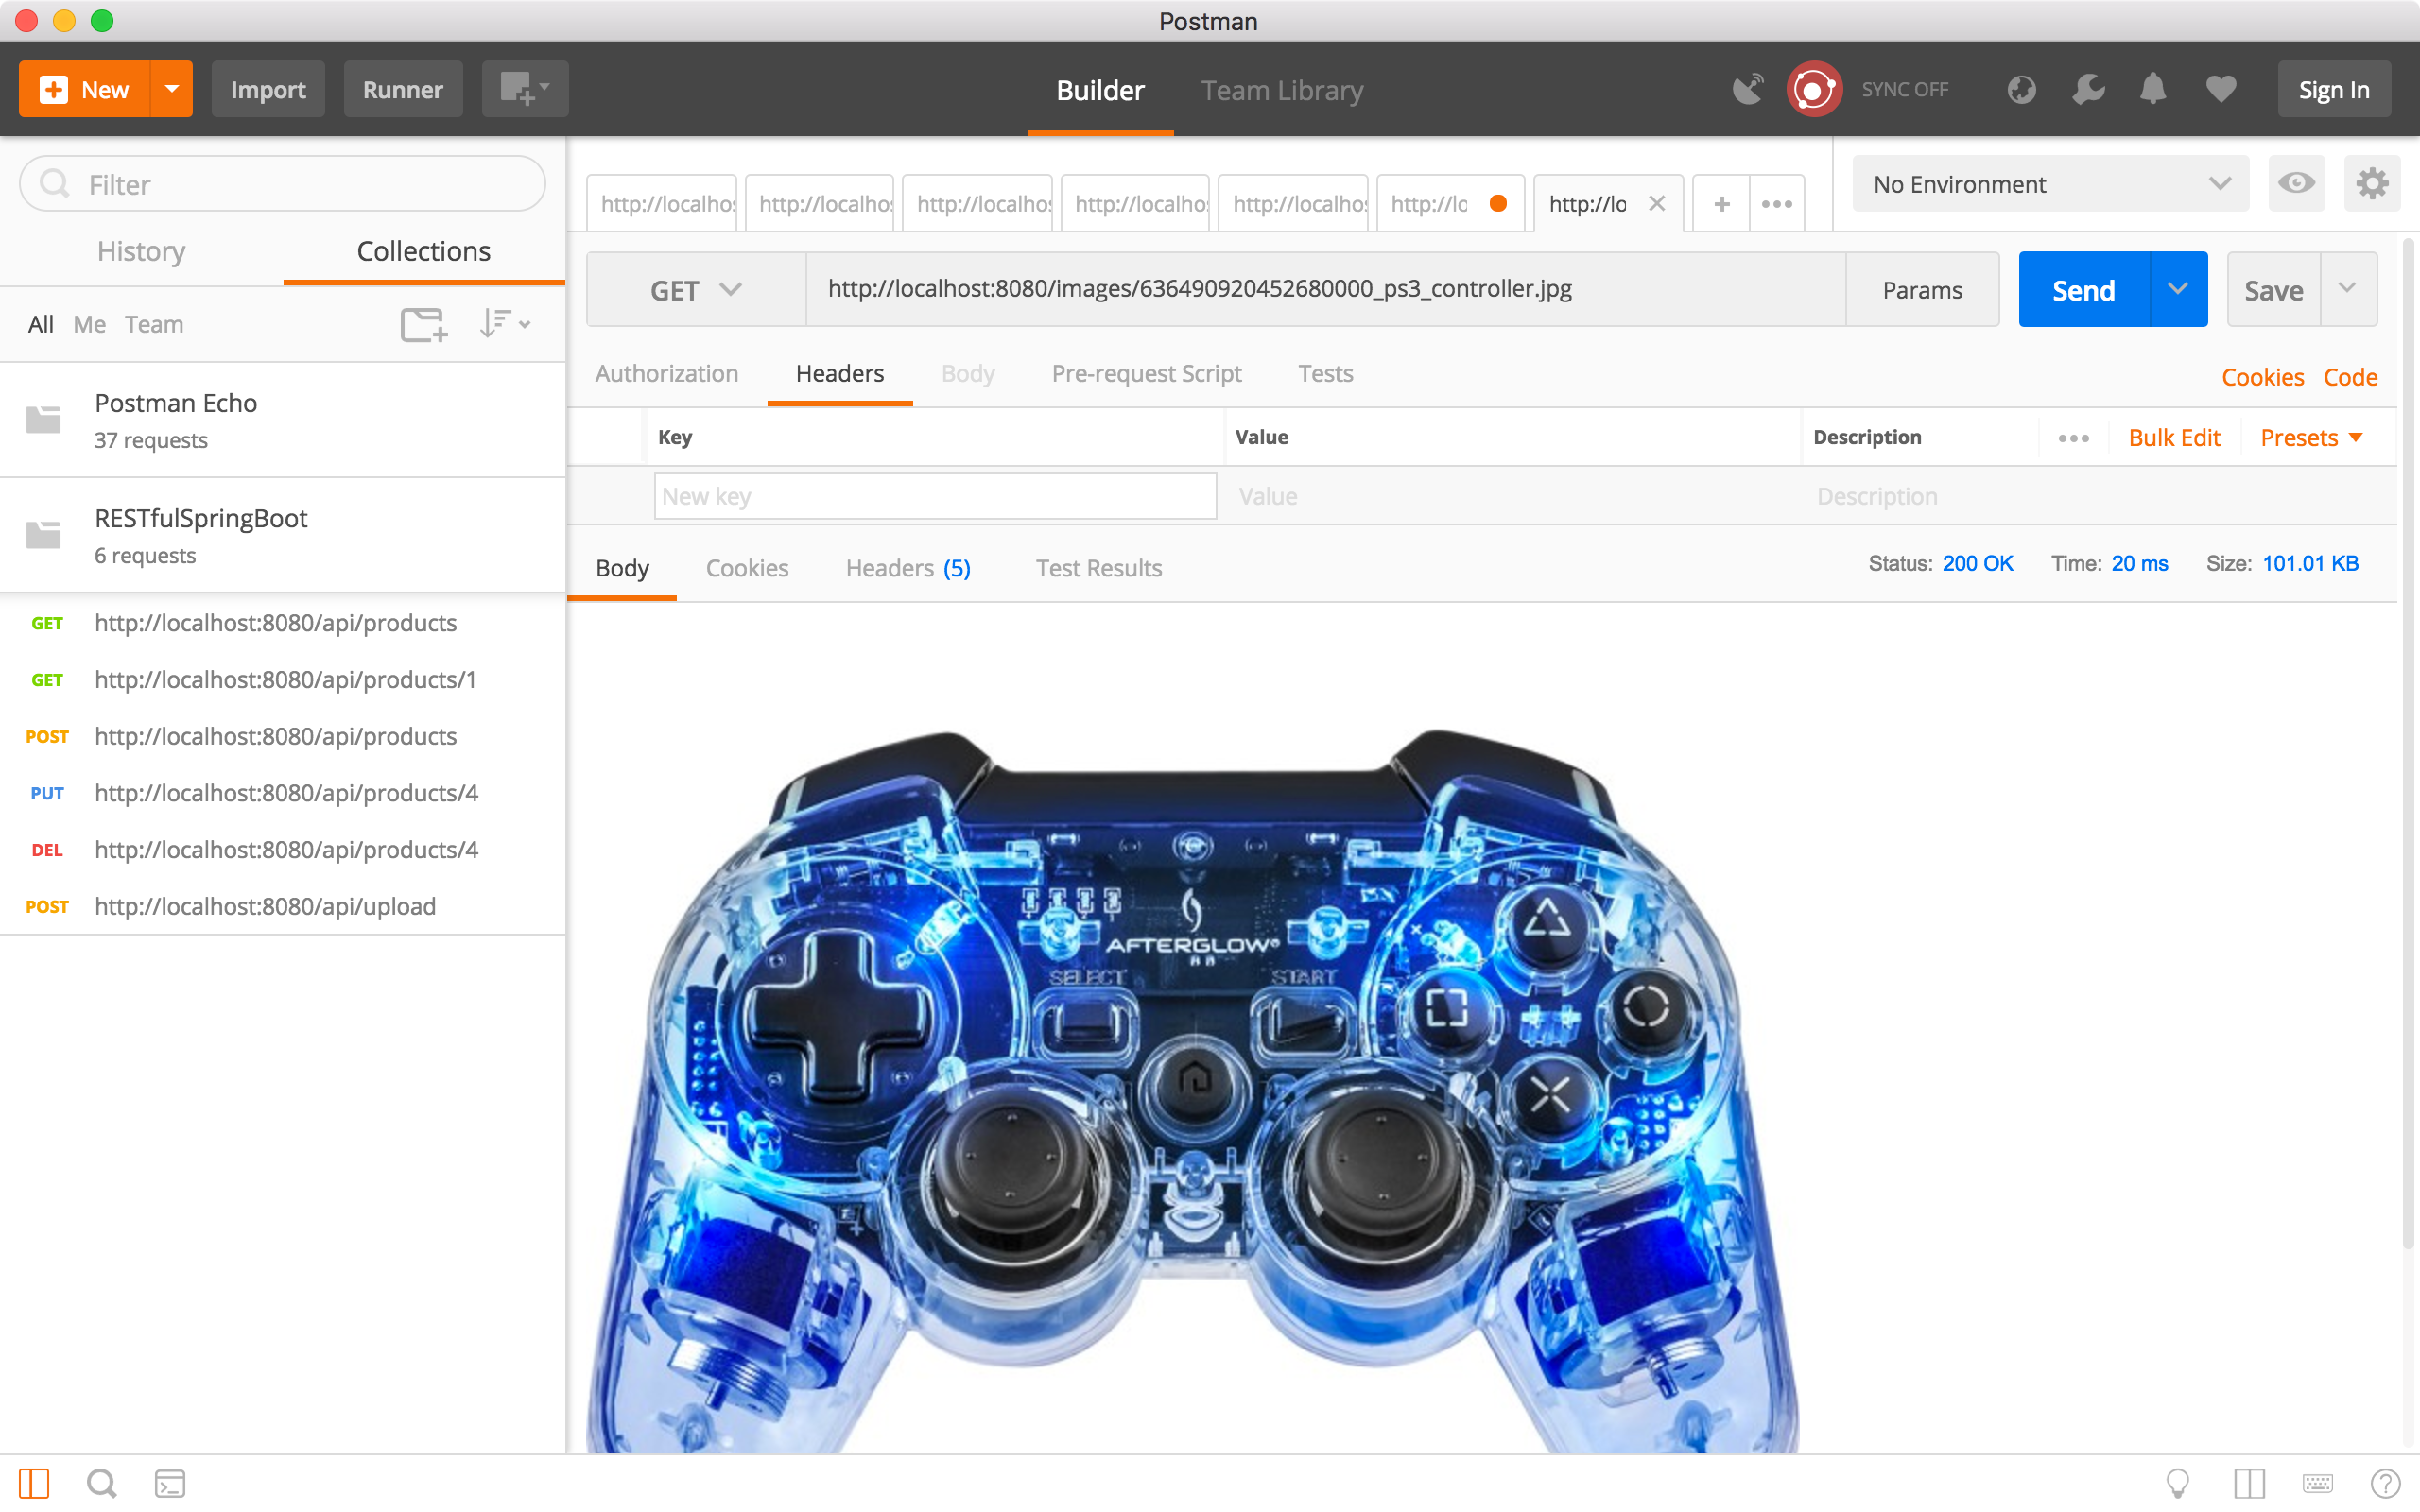
 Click on the image link. A new request is created automatically, click the Send button, you will see the image displayed in the response body.
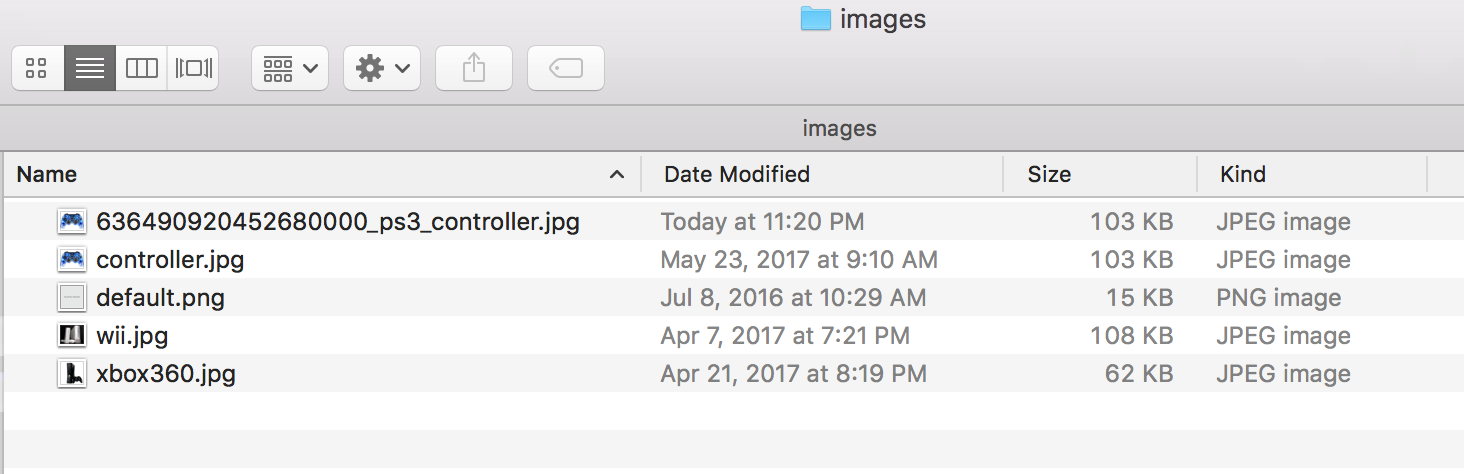
 If you go to the project’s image folder ‘/src/main/resources/images/’, you will see this image.
6. Source Files
7. References
- Spring Boot, MySQL, JPA, Hibernate Restful CRUD API Tutorial
- CORS support in Spring Framework
- Spring Boot file upload example – Ajax and REST
- Uploading Files
- Spring File Uploading Sample
- Serving Static Web Content with Spring Boot
- uploaded image does not display until I refresh the page Spring Mvc
- Refreshing static content with Spring MVC and Boot
- Spring boot load image after upload
- Spring Boot File Upload / Download Rest API Example
- Spring Boot File Upload / Download Rest API Example(Source Code on GitHub)
- Serve Static Resources with Spring