8123. Jekyll - HighlightingHighlighting and highlight.js
Highlighting with highlight.js.
1. Code Syntax Highlighting
1.1 Adding Code into Markdown
When insert codes to markdown, you can specify the programming language of the code. For example:
```java
java code
```
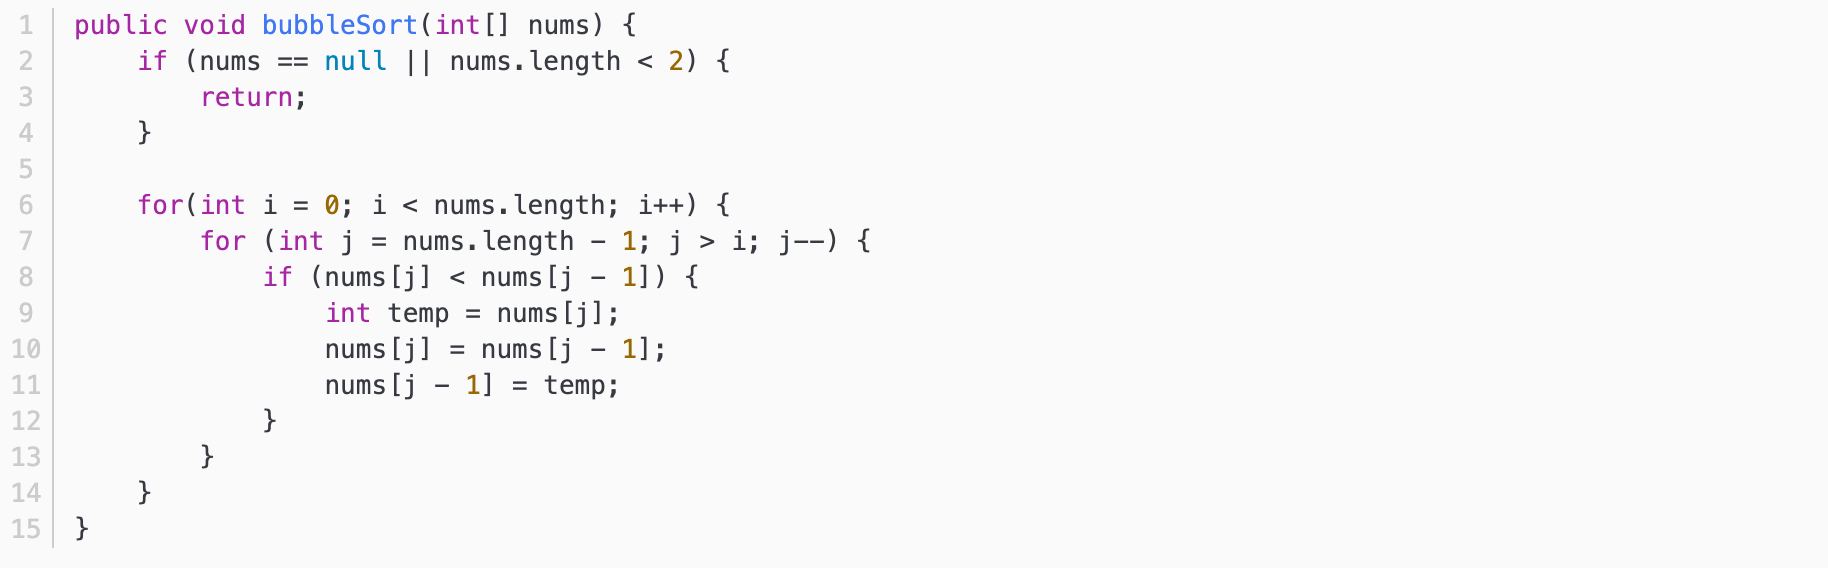
Be default, there is only a grey rectangle as background, no highlighting on the codes. See the below screenshot.
1.2 Highlighting in Jekyll Site
To enable the highlighting, you need to edit _config.yml file which is located in the root directory of the website, add following lines.
markdown: kramdown
highlighter: rouge
Then, create css file, for example, highlight.scss. And include this css file to the page.
<link href="/assets/css/highlight.css" rel="stylesheet" />
Refresh the page. The highlighting is working now.
2. Generic Highlighting Solution
2.1 highlight.js
There is another generic solution for code highlighting. highlight.js is a syntax highlighter written in JavaScript. It works in the browser as well as on the server. It works with pretty much any markup, doesn’t depend on any framework, and has automatic language detection.
2.2 Installing highlight.js
Add highlight js and css of the color scheme you want in the header page. Either you can add cdn url as shown below or copy it in your project and give local path. This will find and all highlight the code inside of <pre><code> tags.
<link rel="stylesheet" href="//cdnjs.cloudflare.com/ajax/libs/highlight.js/9.15.8/styles/default.min.css">
<script src="//cdnjs.cloudflare.com/ajax/libs/highlight.js/9.15.8/highlight.min.js"></script>
<script>hljs.initHighlightingOnLoad();</script>
- You can download the latest highlight.js and css from https://highlightjs.org/download/.
Besides, add customized css.
pre {
  font-size: 13px;
  line-height: 1.42857143;
  border: 1px solid #ccc;
  border-radius: 4px;
}
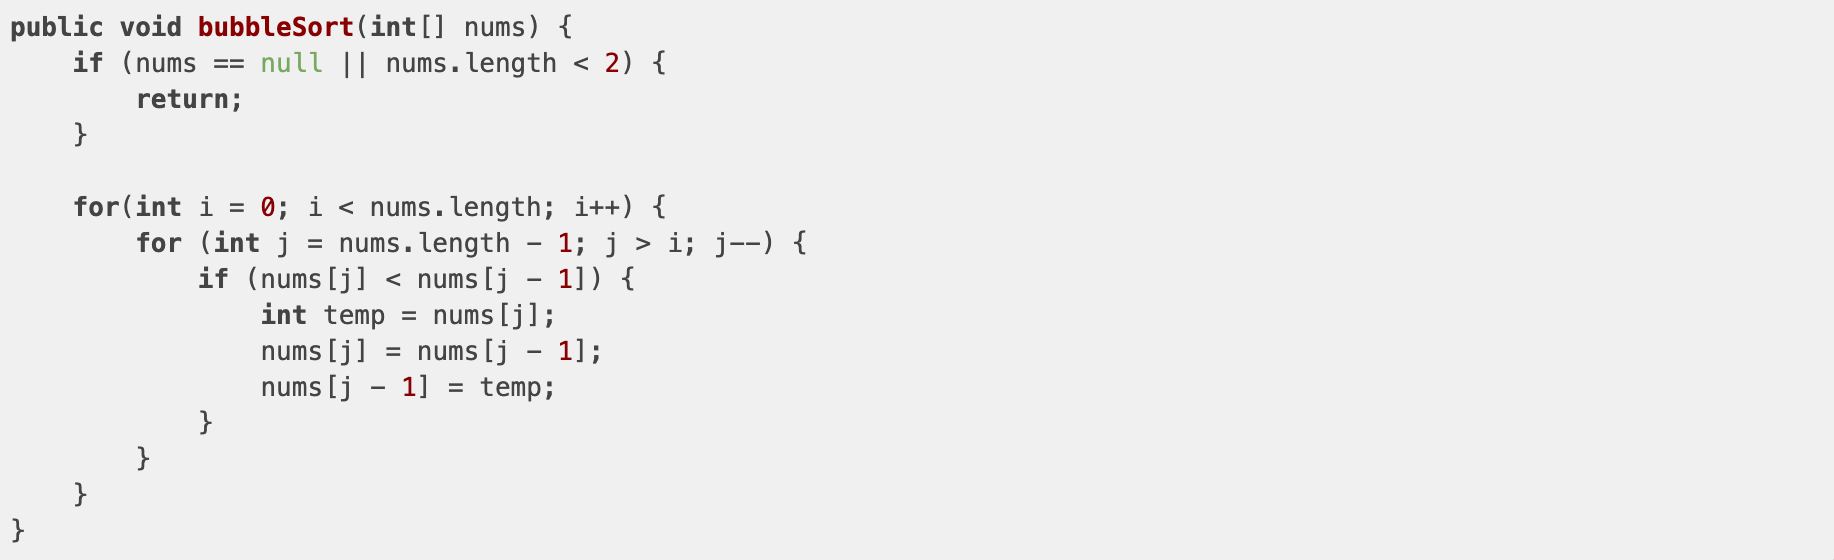
The highlighting works as follows.
2.3 Line Numbers
Add line numbers with highlightjs-line-numbers.js, which is a plug-in for highlight.js.
<script src="//cdnjs.cloudflare.com/ajax/libs/highlightjs-line-numbers.js/2.7.0/highlightjs-line-numbers.min.js"></script>
<script>hljs.initLineNumbersOnLoad();</script>
Add additional CSS style.
table.hljs-ln {
  width: auto;
  border-width: 0px;
}
table.hljs-ln td {
  border-width: 0px;
}

/* for block of numbers */
.hljs-ln-numbers {
  -webkit-touch-callout: none;
  -webkit-user-select: none;
  -khtml-user-select: none;
  -moz-user-select: none;
  -ms-user-select: none;
  user-select: none;

  text-align: center;
  color: #ccc;
  border-right: 1px solid #CCC !important;
  vertical-align: top;
	padding-right: 5px !important;
}

/* for block of code */
.hljs-ln-code {
  padding-left: 10px !important;
}
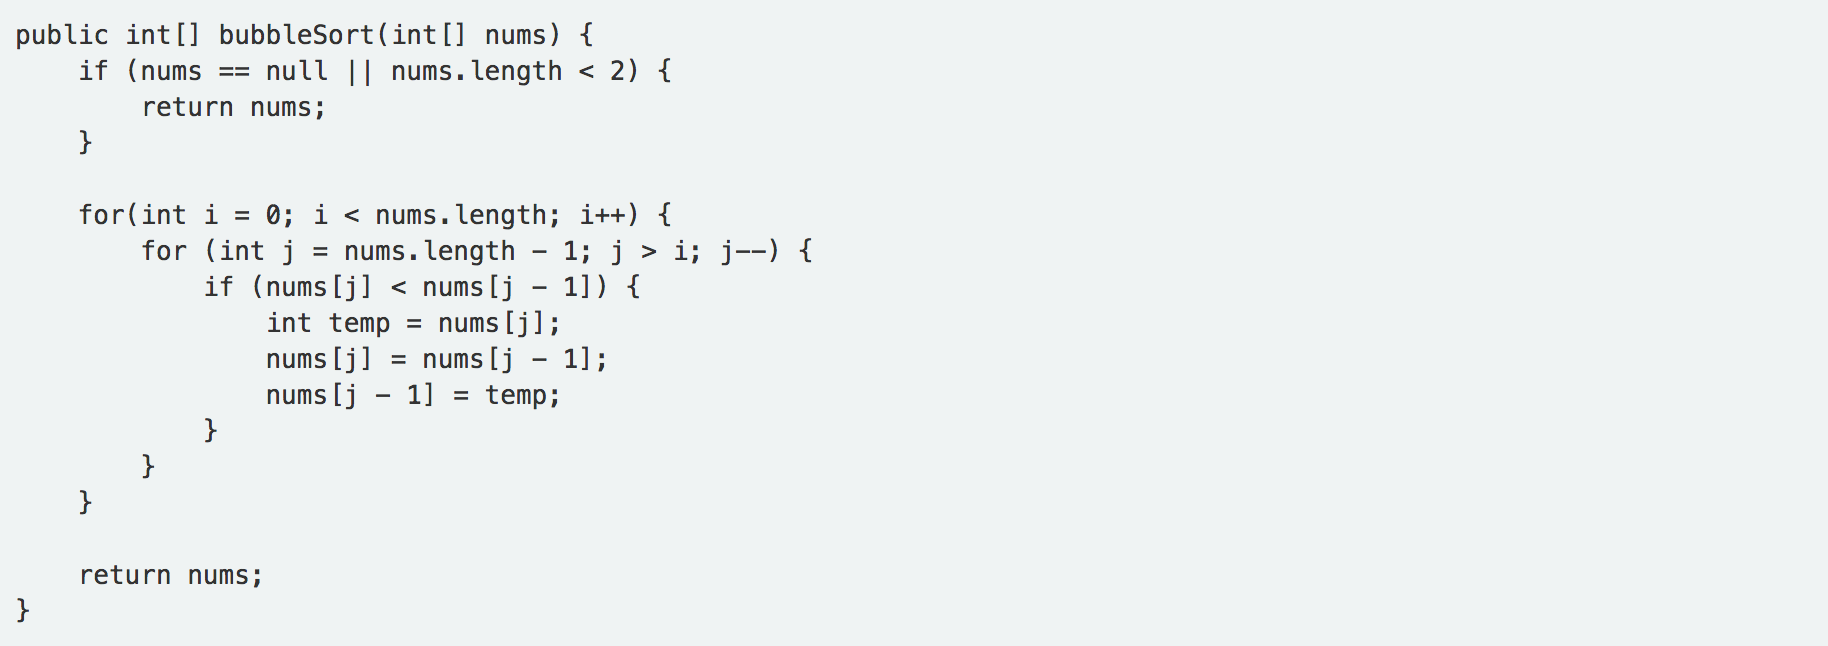
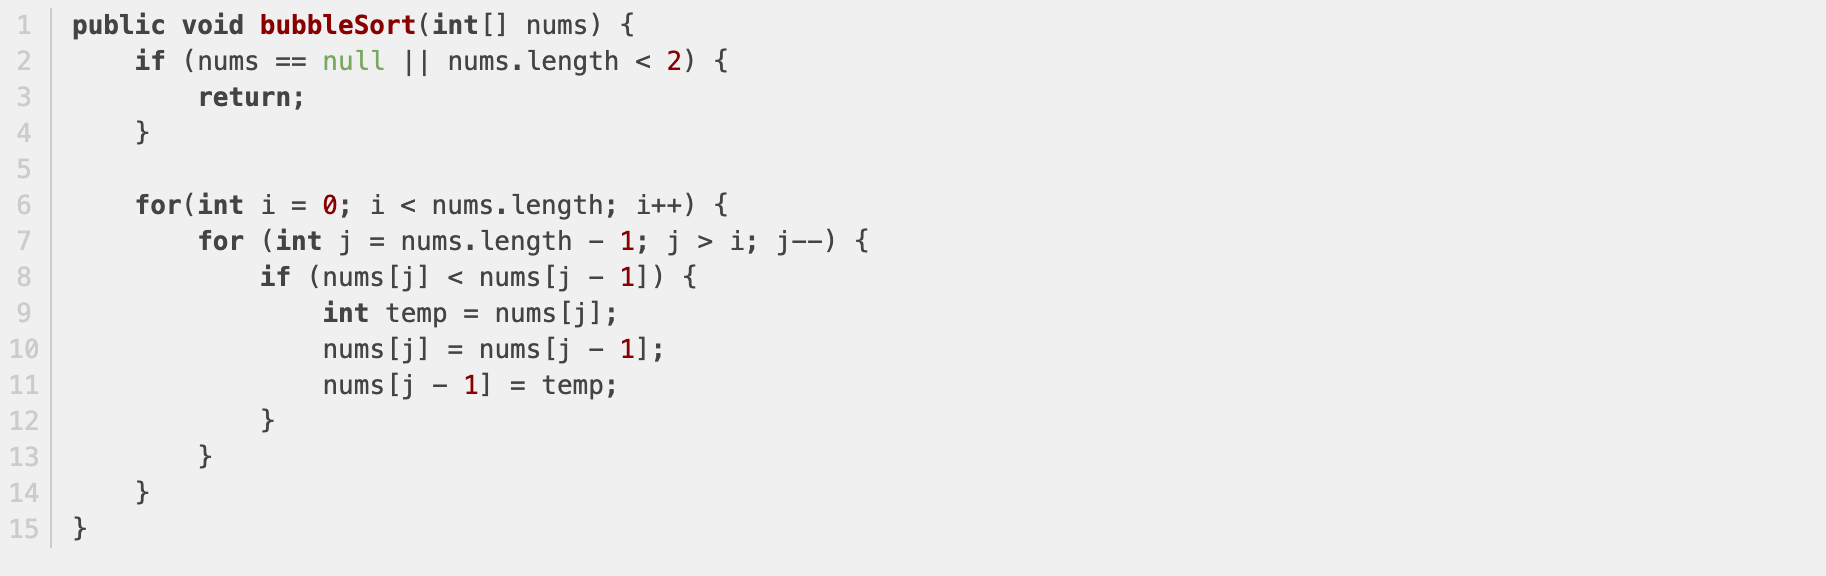
The line numbers are displayed as follows.
2.4 Styles
If you don’t like the default style, you can change it with other styles. highlight.js supports 185 languages and 89 styles. Check all styles through the demo page, then pick up your favorite one.
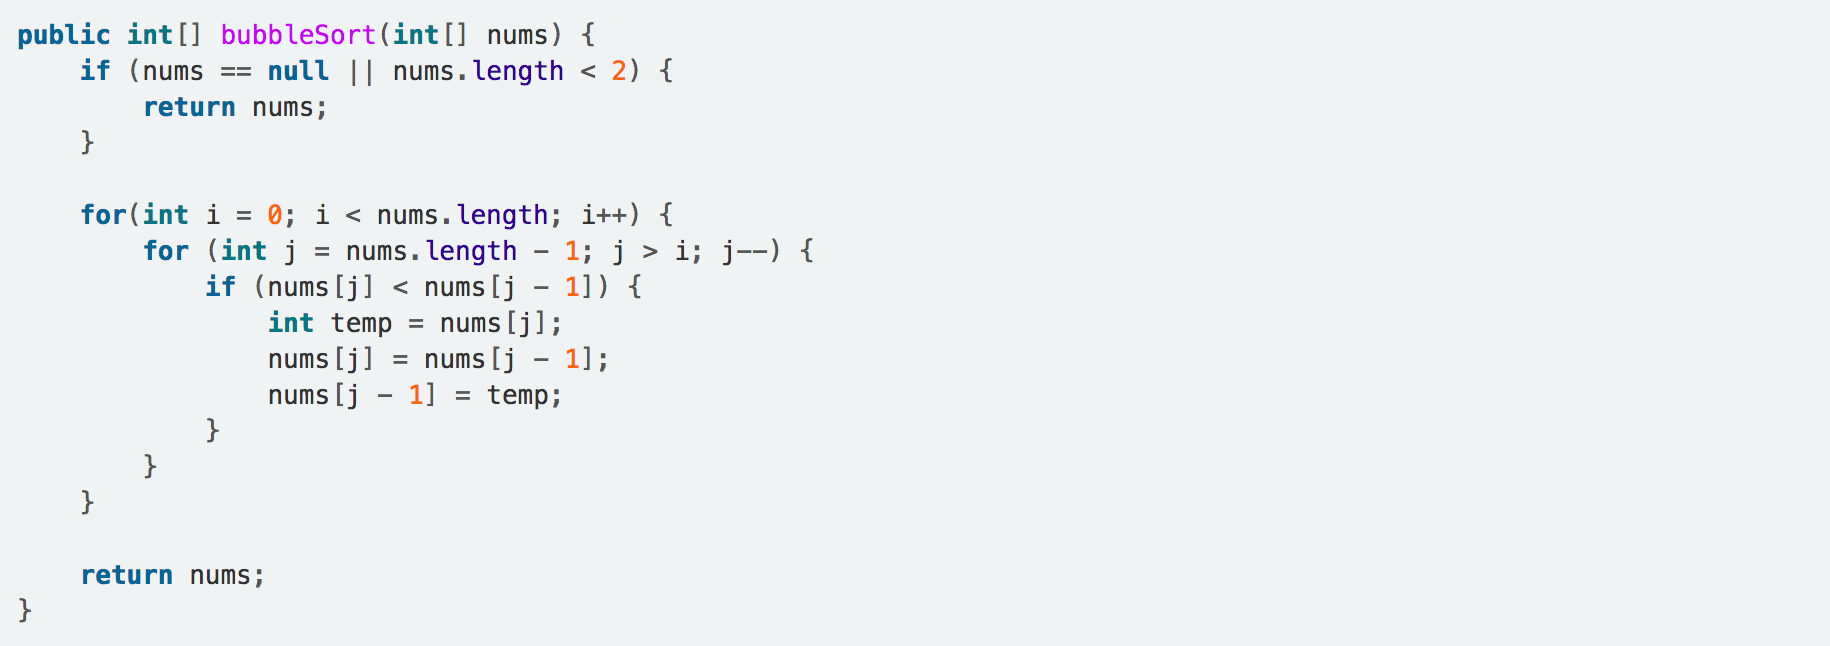
For example, I choose the style which is named Atom One Light. Concatenate all words of the style name with dash and append ‘.min.css’ to get the css file name. For example, the css file name for Atom One Light style is atom-one-light.min.css. The entire url from cloudflare looks as follows.
https://cdnjs.cloudflare.com/ajax/libs/highlight.js/9.15.8/styles/atom-one-light.min.css
Replace the URL for the default style with the URL for the new style. Refresh the page to see the new style.