8477. Deploying Socket.IO App to AzureAzure
Deploy the Course Player app built with Socket.IO from GitHub to Azure.
1. Socket.IO Project
1.1 Cloning Source Code
$ git clone https://github.com/jojozhuang/course-player-socketio.git
1.2 IIS
Azure uses Internet Information Services(IIS) to host web applications, including the Node.js apps. More specifically, IIS uses the iisnode module to handle the Node.js app.
In the node.js project(express project or socket.io project), create a new file named ‘web.config’ with the following content.
<configuration>
    <system.webServer>

        <handlers>
            <!-- indicates that the app.js file is a node.js application to be handled by the iisnode module -->
            <add name="iisnode" path="server.js" verb="*" modules="iisnode" />
        </handlers>

        <rewrite>
            <rules>
                <!-- Don't interfere with requests for node-inspector debugging -->
                <rule name="NodeInspector" patternSyntax="ECMAScript" stopProcessing="true">
                    <match url="^server.js\/debug[\/]?" />
                </rule>

                <!-- First we consider whether the incoming URL matches a physical file in the /public folder -->
                <rule name="StaticContent">
                    <action type="Rewrite" url="public{REQUEST_URI}" />
                </rule>

                <!-- All other URLs are mapped to the Node.js application entry point -->
                <rule name="DynamicContent">
                    <conditions>
                        <add input="{REQUEST_FILENAME}" matchType="IsFile" negate="True" />
                    </conditions>
                    <action type="Rewrite" url="server.js" />
                </rule>
            </rules>
        </rewrite>

        <!-- You can control how Node is hosted within IIS using the following options -->
                    <!--<iisnode
                      node_env="%node_env%"
                      nodeProcessCountPerApplication="1"
                      maxConcurrentRequestsPerProcess="1024"
                      maxNamedPipeConnectionRetry="3"
                      namedPipeConnectionRetryDelay="2000"
                      maxNamedPipeConnectionPoolSize="512"
                      maxNamedPipePooledConnectionAge="30000"
                      asyncCompletionThreadCount="0"
                      initialRequestBufferSize="4096"
                      maxRequestBufferSize="65536"
                      watchedFiles="*.js"
                      uncFileChangesPollingInterval="5000"
                      gracefulShutdownTimeout="60000"
                      loggingEnabled="true"
                      logDirectoryNameSuffix="logs"
                      debuggingEnabled="true"
                      debuggerPortRange="5058-6058"
                      debuggerPathSegment="debug"
                      maxLogFileSizeInKB="128"
                      appendToExistingLog="false"
                      logFileFlushInterval="5000"
                      devErrorsEnabled="true"
                      flushResponse="false"
                      enableXFF="false"
                      promoteServerVars=""
                     />-->
        <iisnode watchedFiles="*.js;node_modules\*;routes\*.js;views\*.jade;views\account\*.jade;iisnode.yml" />
    </system.webServer>
</configuration>
‘web.config’ is the default configuration file for IIS. Notice, the path of ‘server.js’ in your project must match the path defined this configuration file
1.3 package.json
Add ‘engines’ section into ‘package.json’ of the Node.js project. It indicates that this is a Node.js app.
{
  "name": "course-player-socketio",
  "version": "1.0.0",
  "description": "Course Player built with Socket.IO",
  "main": "server.js",
  "scripts": {
    "start": "node server.js",
    "test": "echo \"Error: no test specified\" && exit 1"
  },
  "keywords": [],
  "author": {
    "name": "Johnny",
    "email": "csgeek@mail.com"
  },
  "license": "MIT",
  "dependencies": {
    "express": "^4.13.4",
    "socket.io": "^1.4.6"
  },
  "devDependencies": {},
  "engines": {
    "node": "~0.10.0 || ~0.12.0 || ~4.2.0"
  }
}
Submit all the changes to GitHub.
2. Publish
2.1 New Node.js App
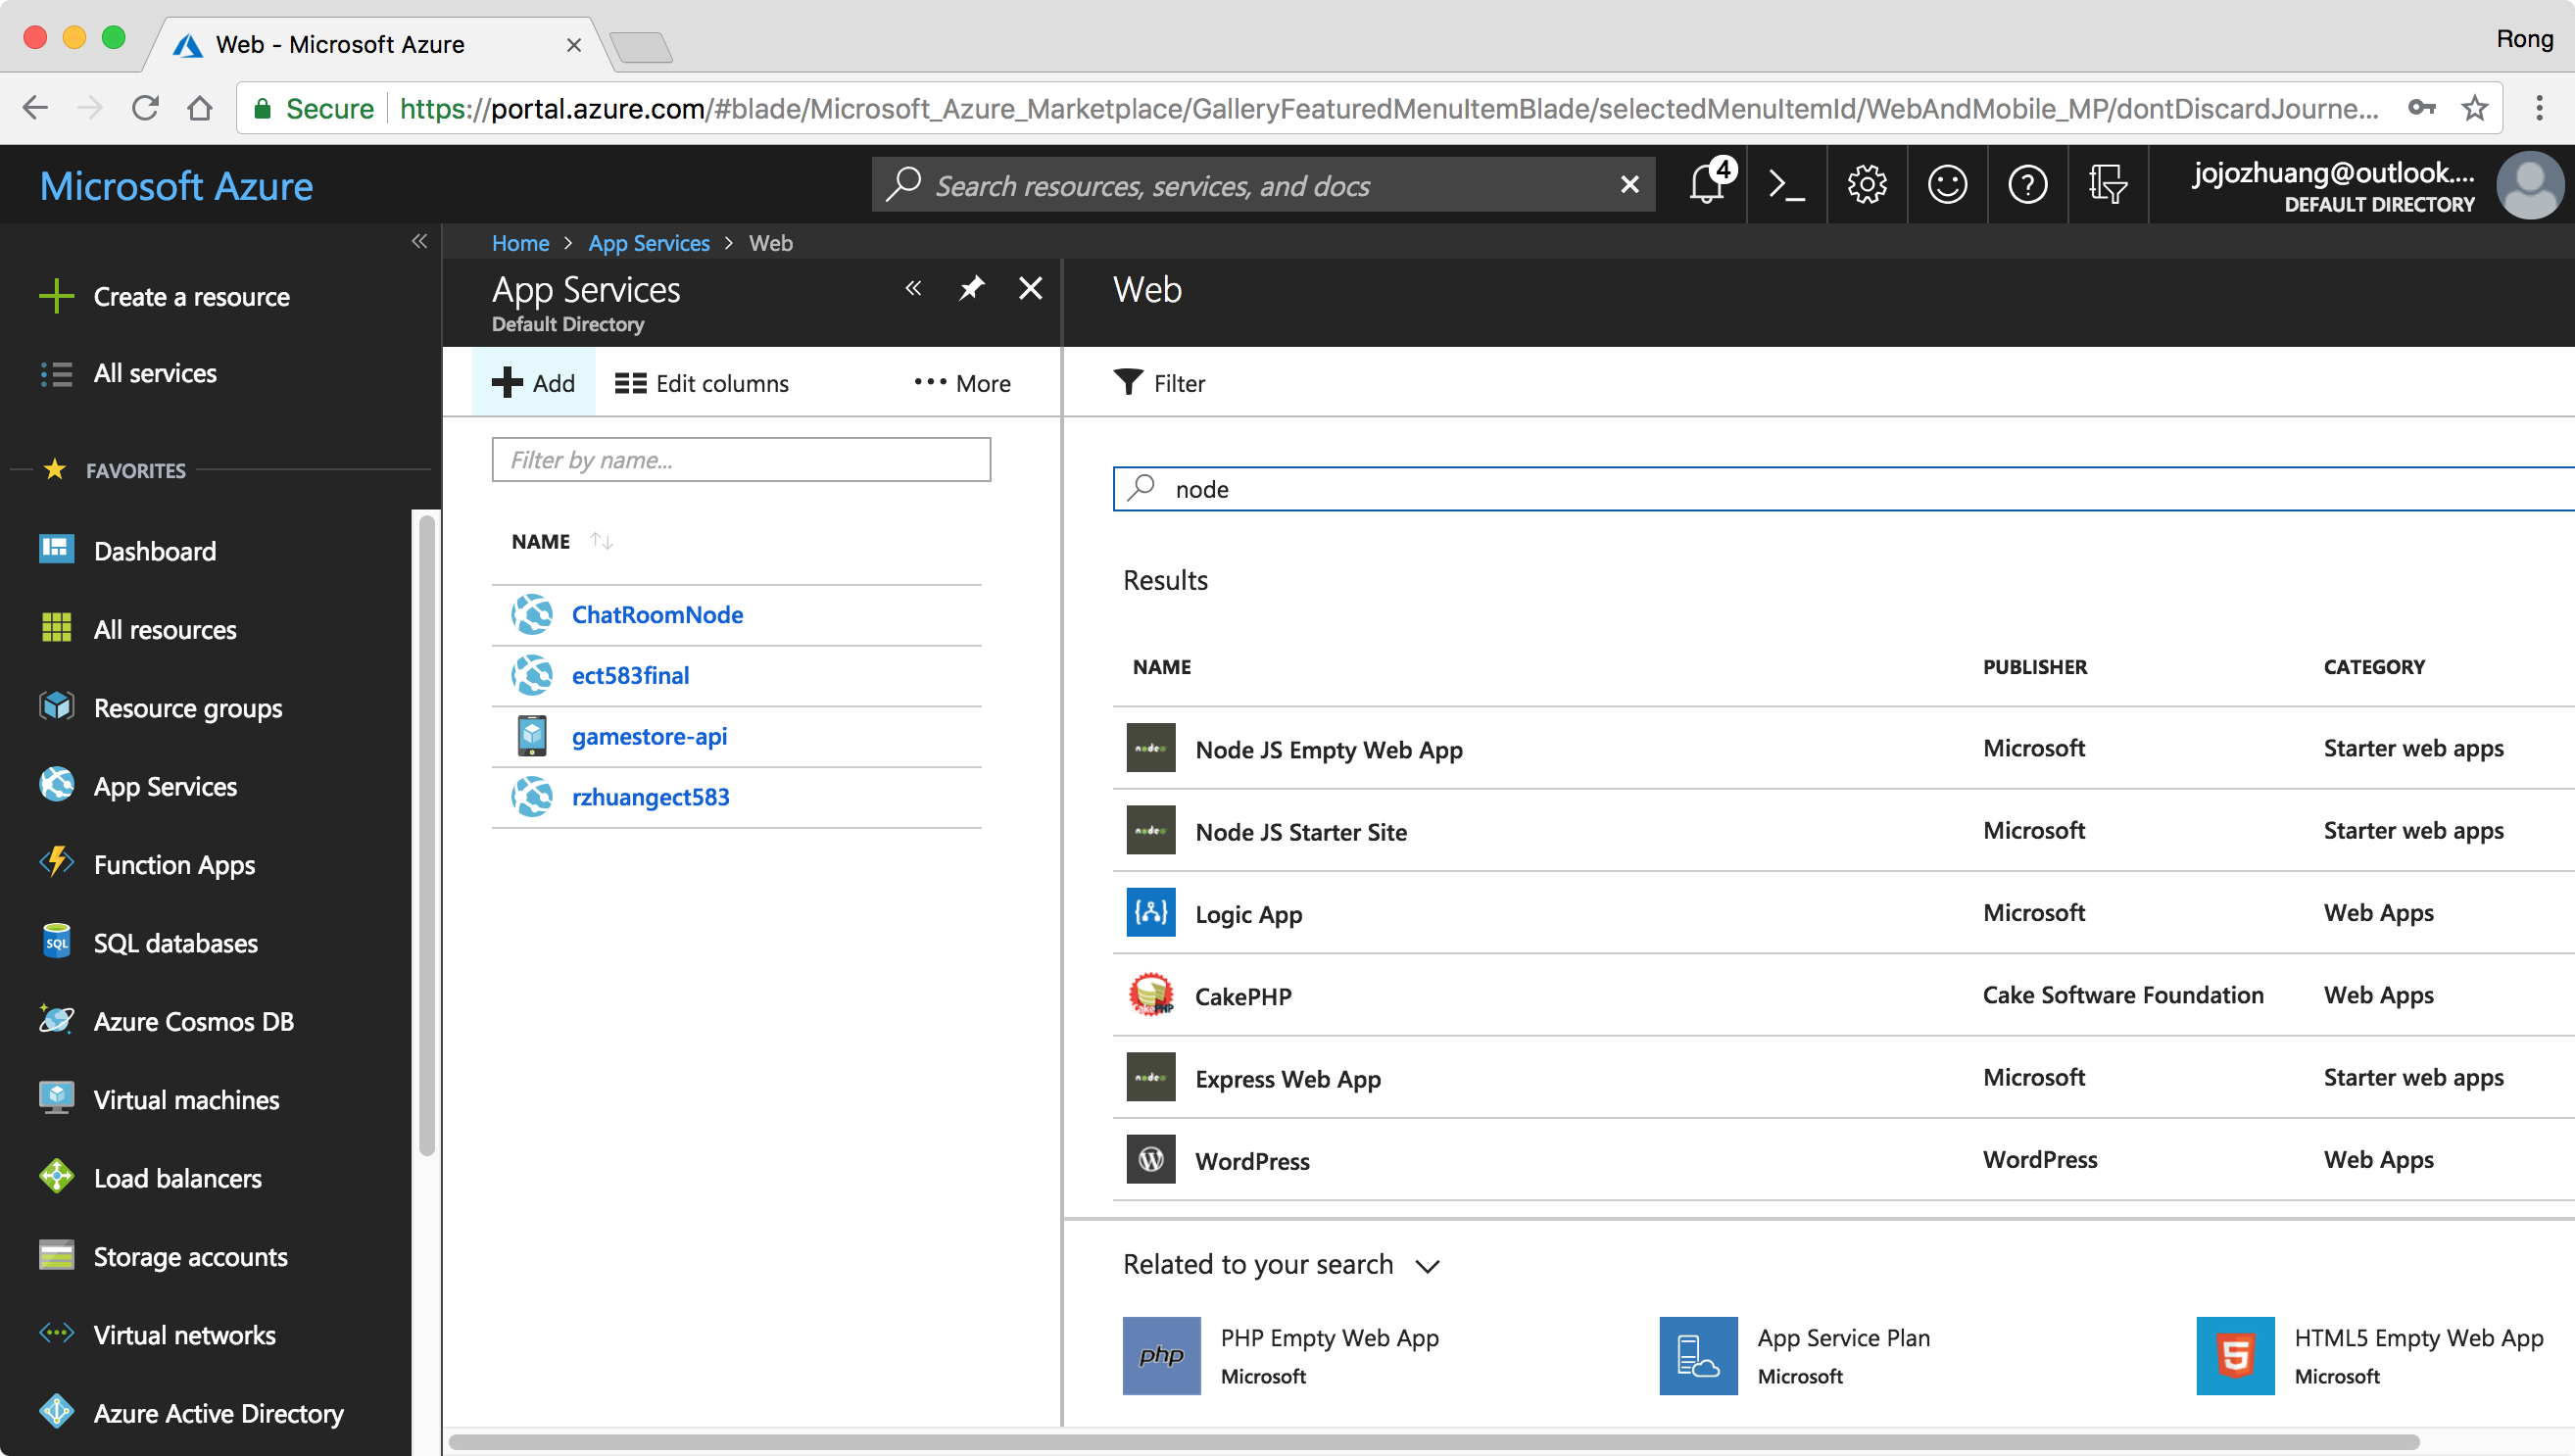
Log onto Azure Portal: https://portal.azure.com/. Go to ‘App Services’, create a new app.
We need to use the correct template for deployment. Input ‘node’ in the search box, and select ‘Node JS Starter Site’, then click ‘Create’ button.
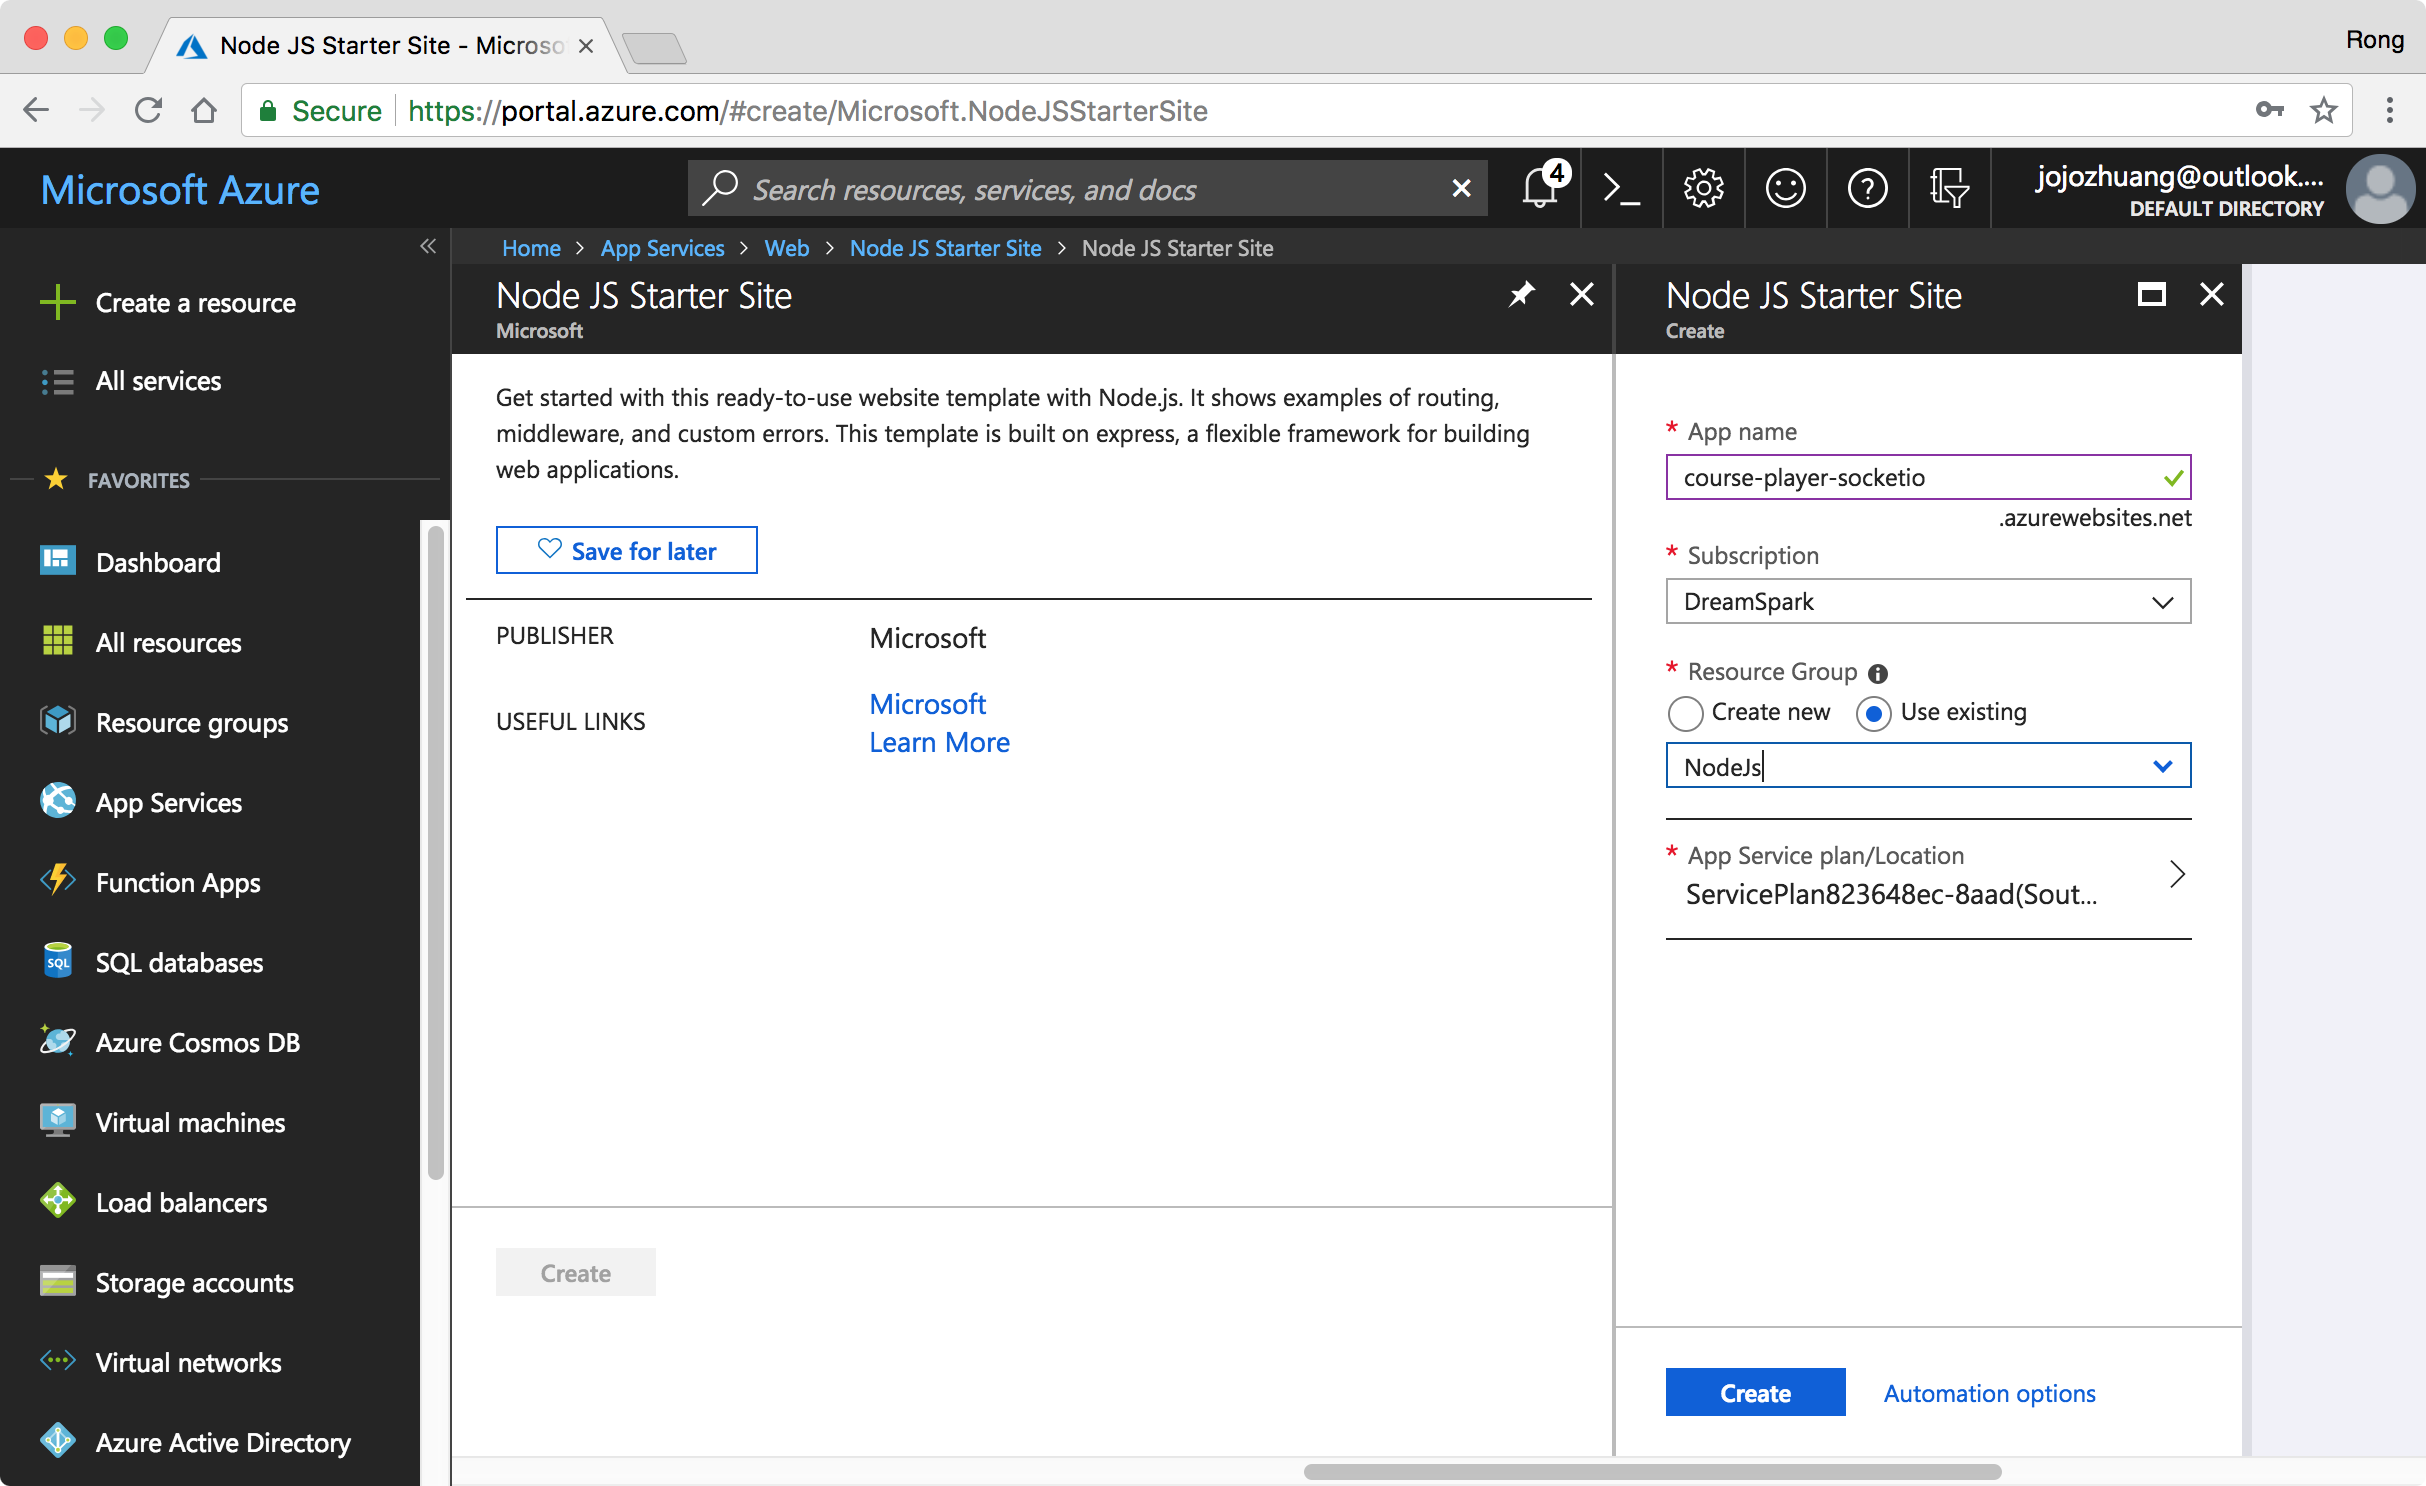
 Set app name, subscription and resource group, click ‘Create’ button.
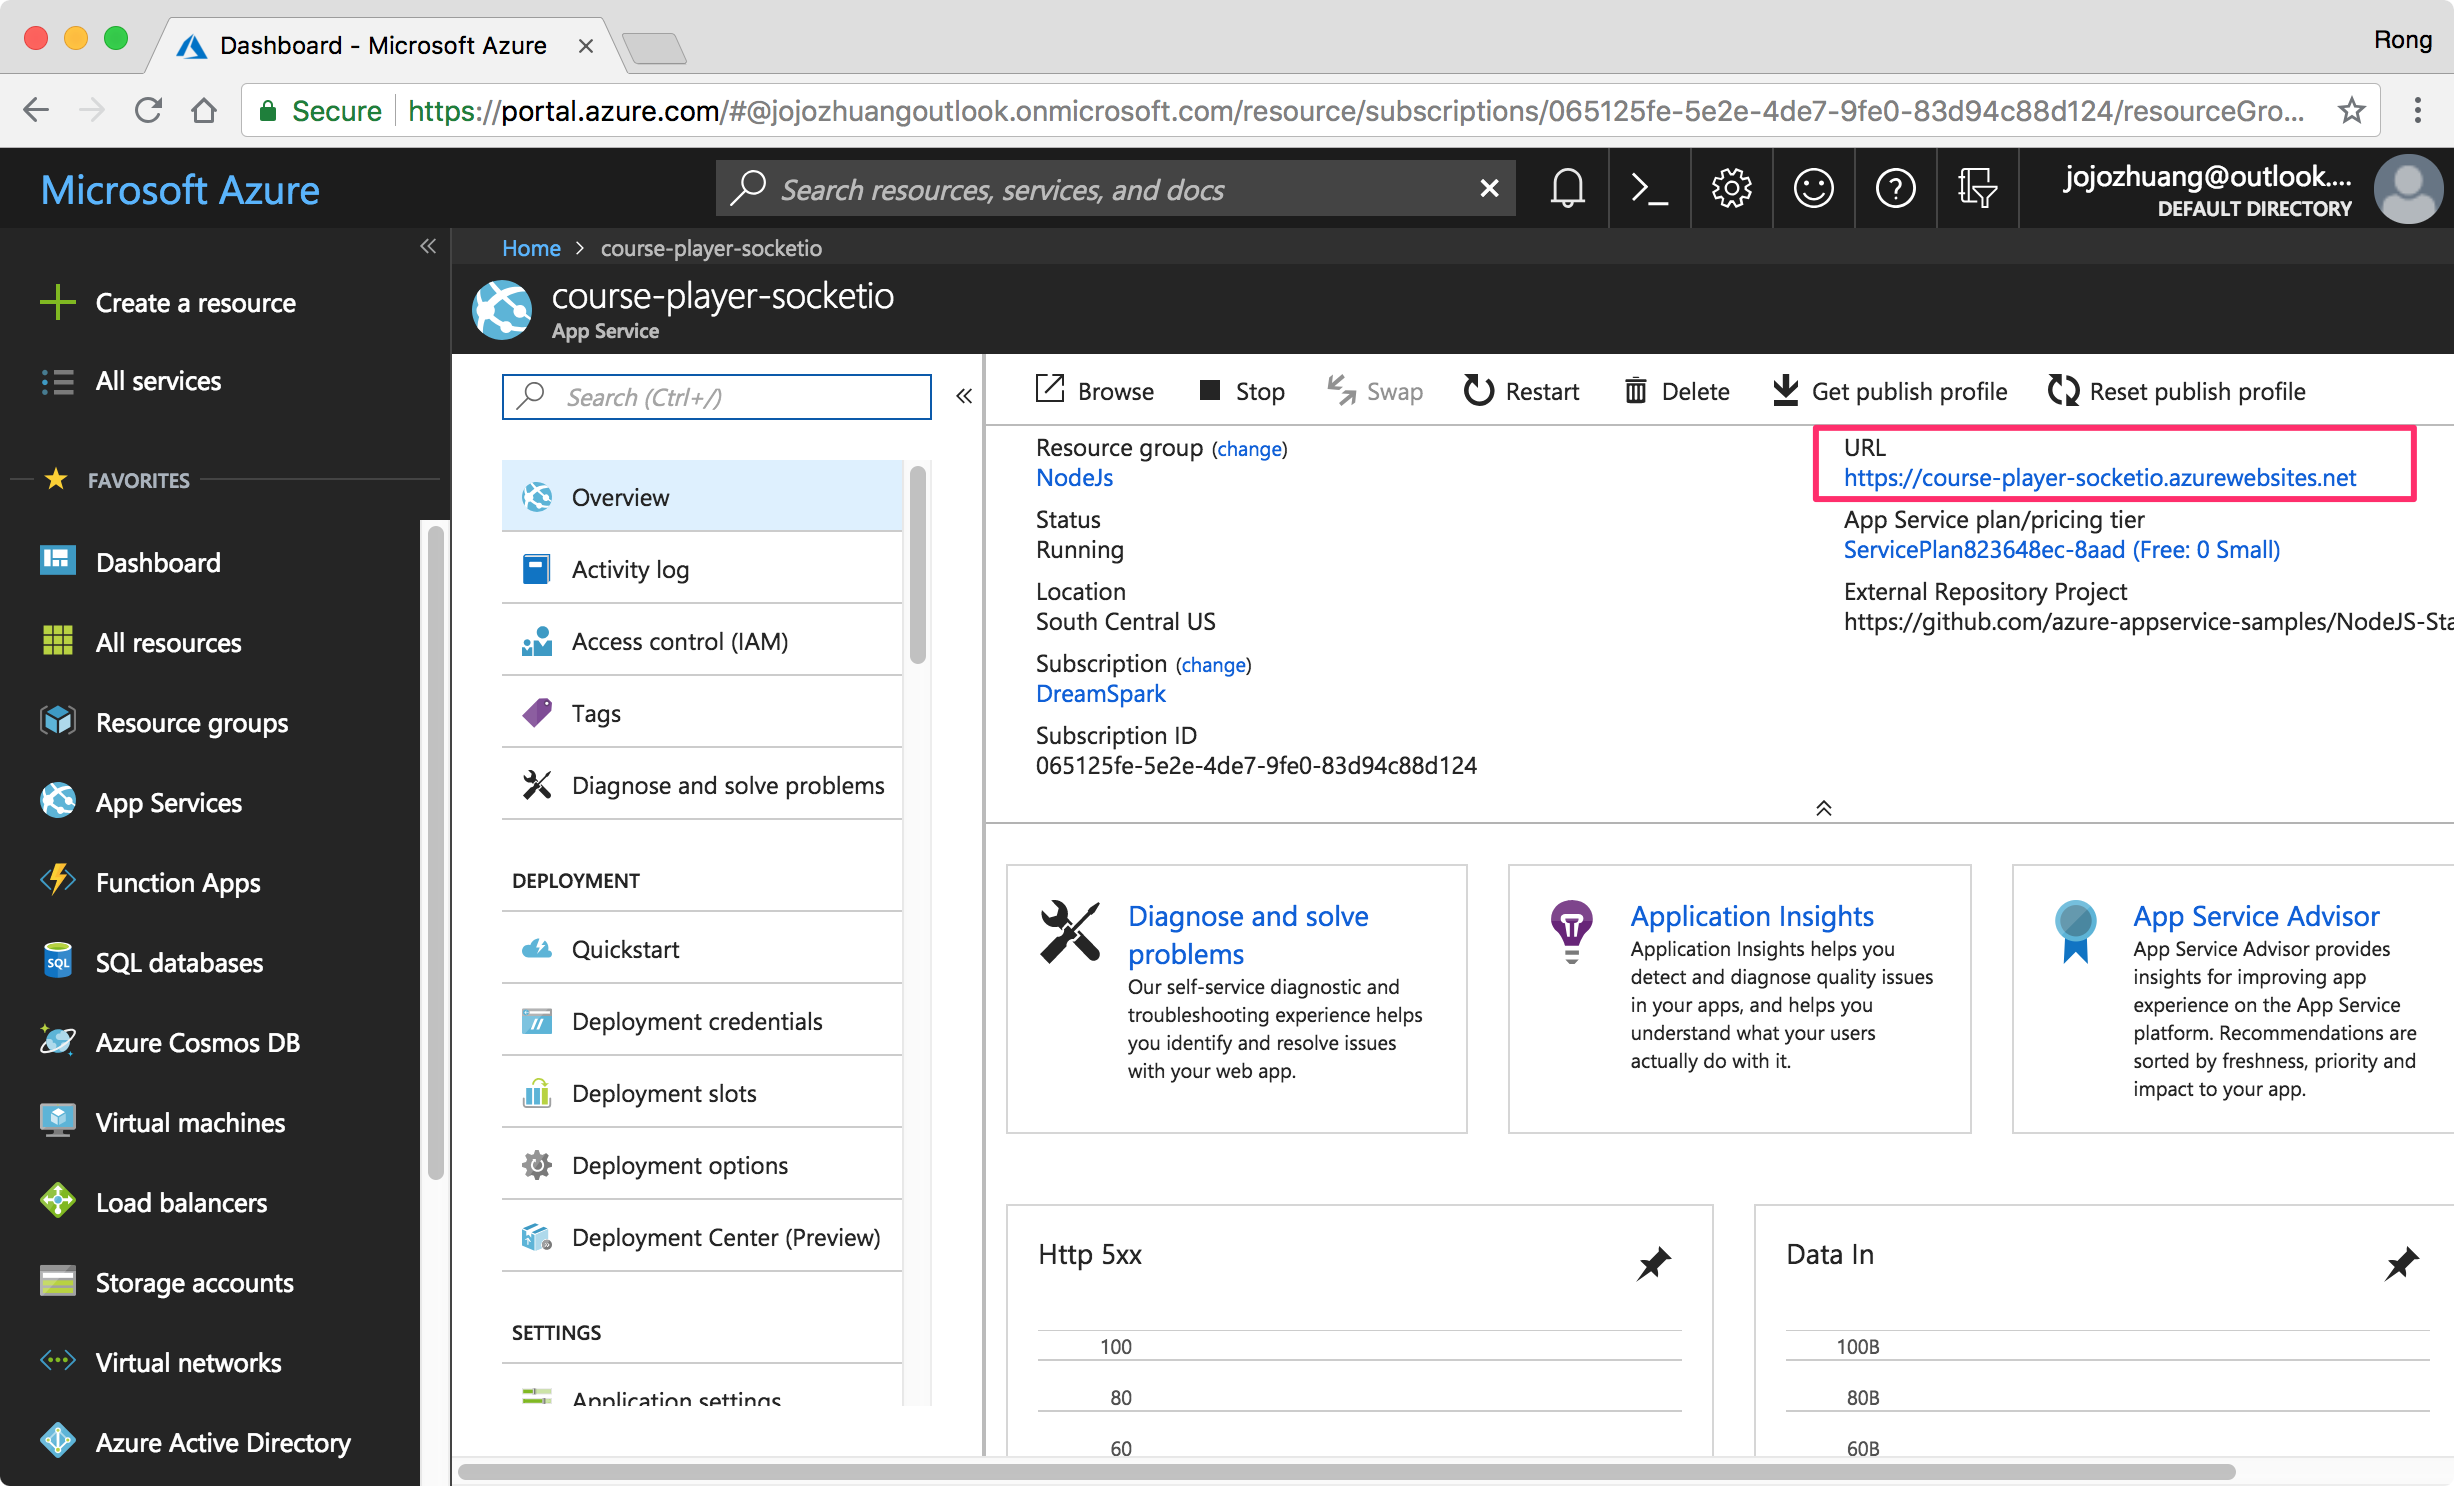
 The Node.js app will be deployed in few minutes. Find the new app in ‘App Services’, go to ‘Overview’. Click on the URL for this app.
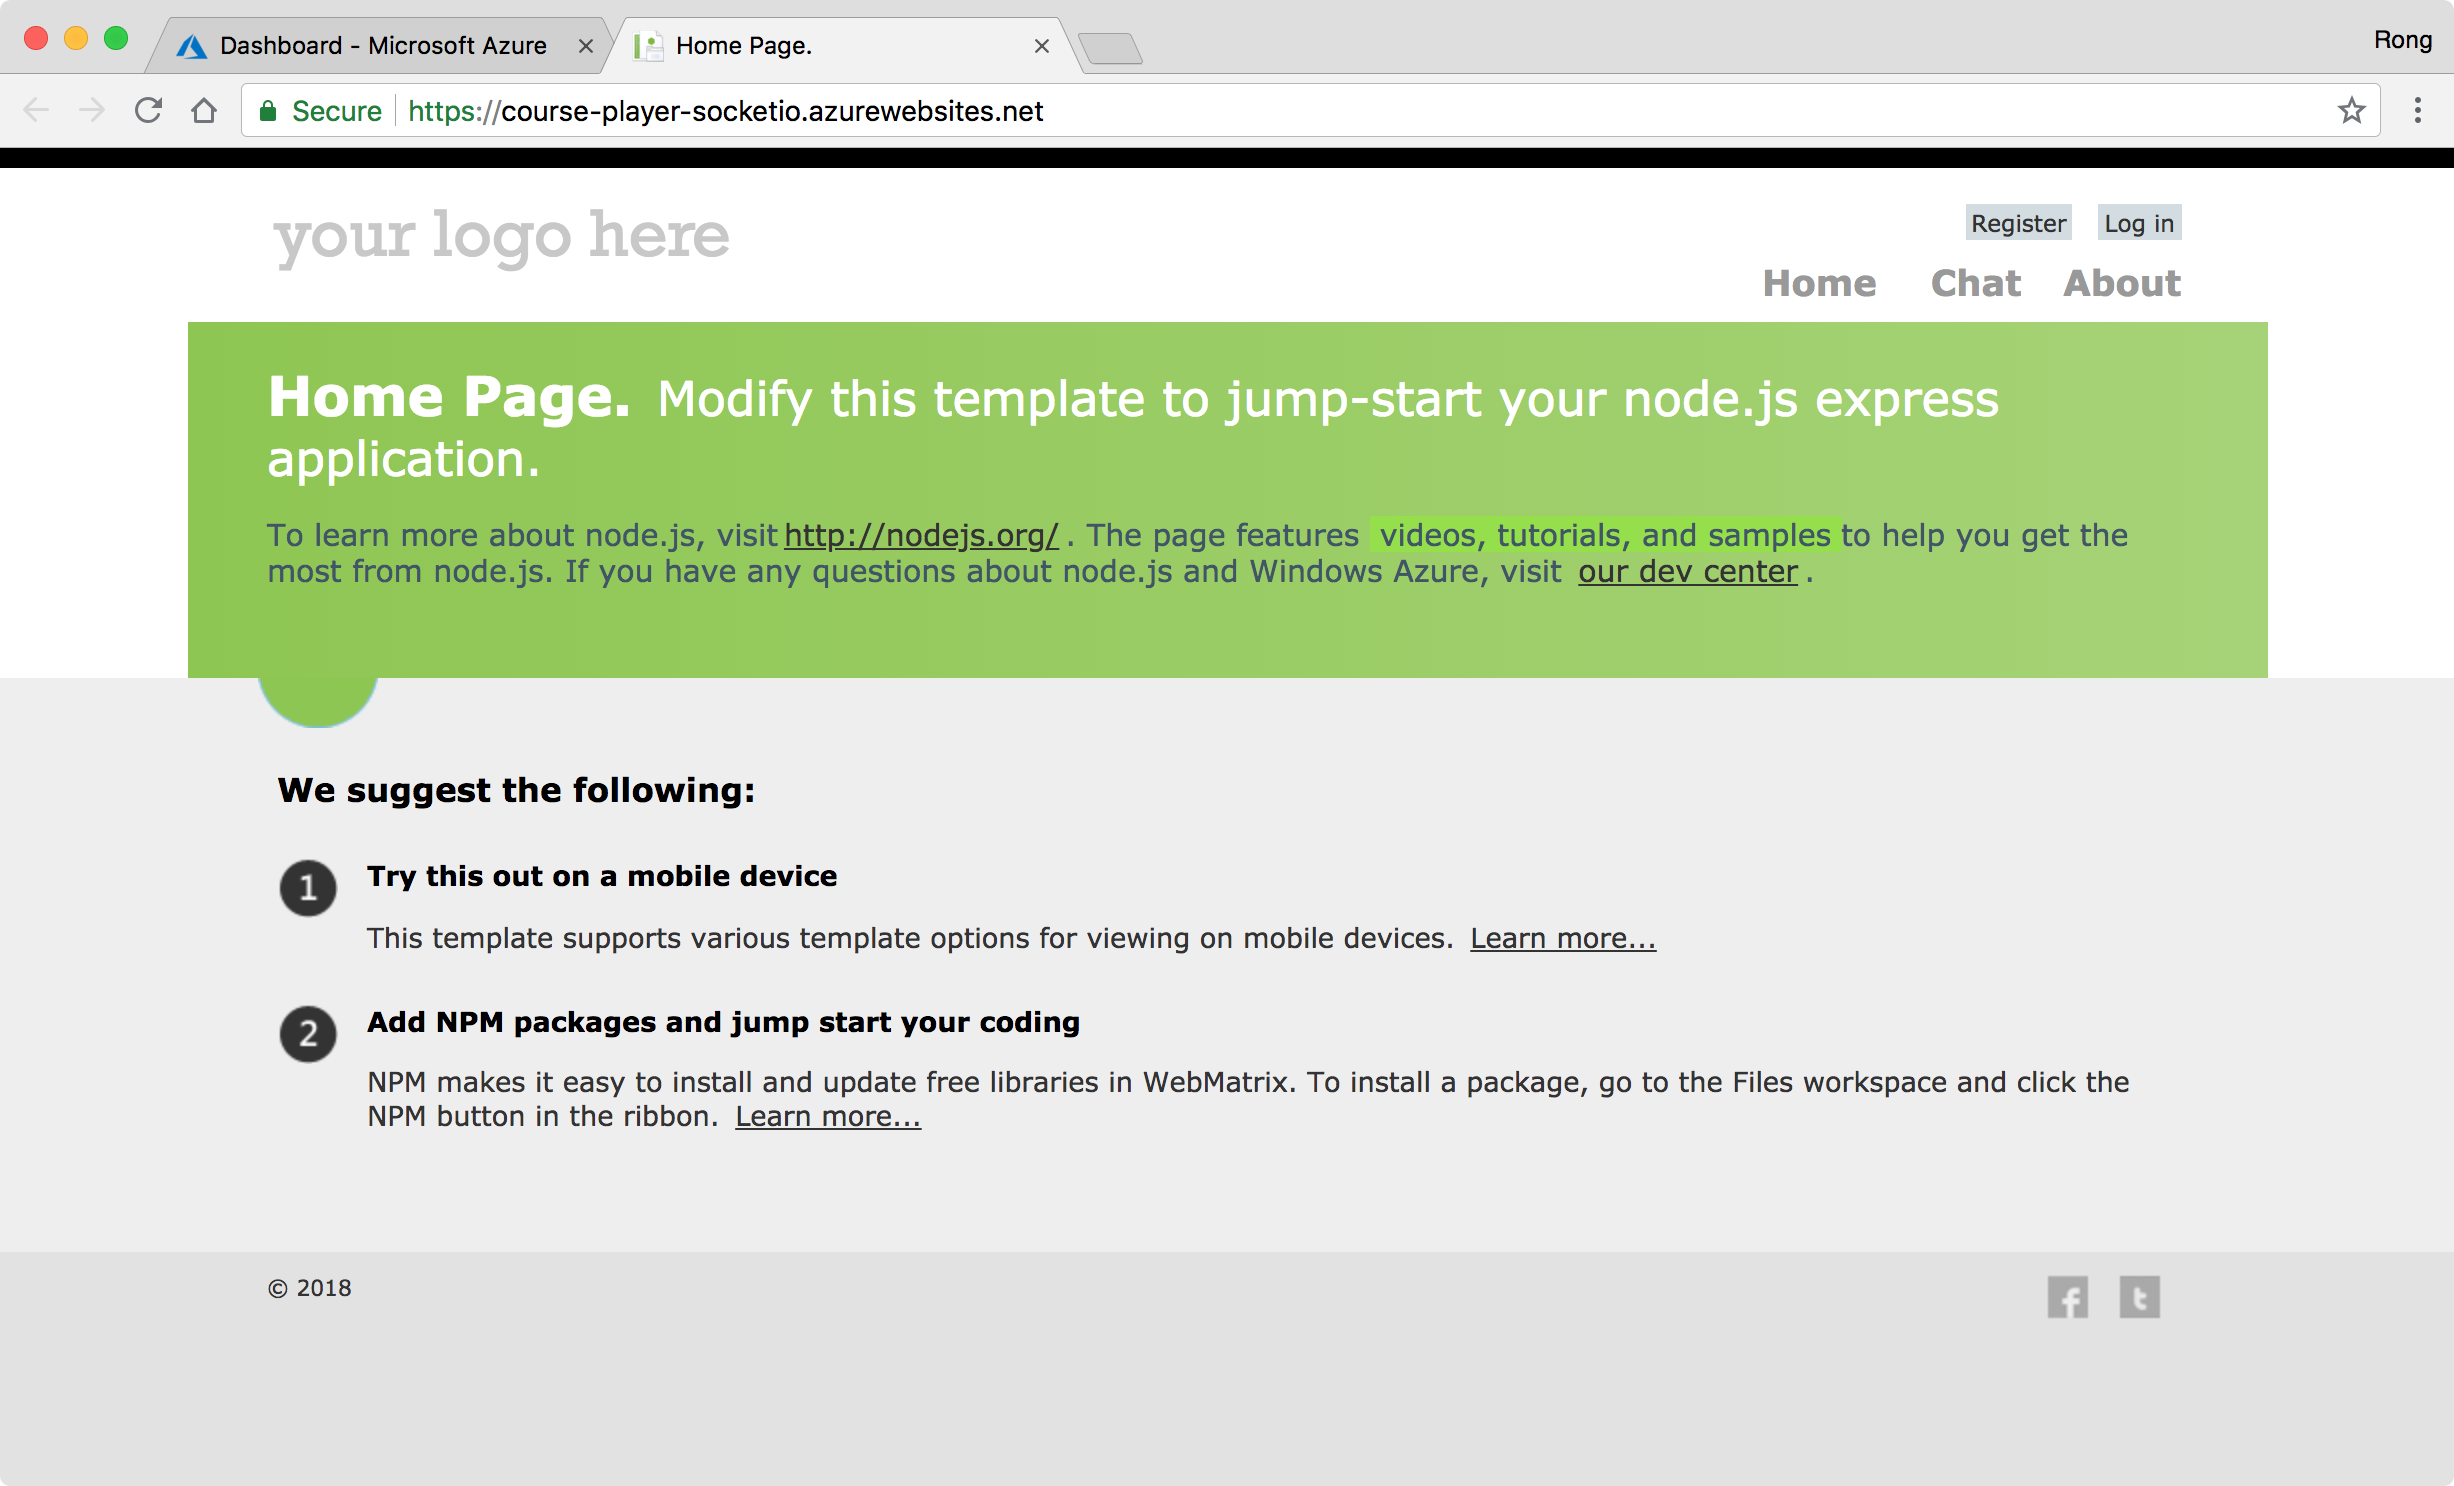
 We see the sample app in browser, it’s alive on Azure.
 If you want to know the source of the app, go to ‘Deployment Center(Preview)’. You will see the ‘External Git’. The source comes from the official Azure Services repository on GitHub.
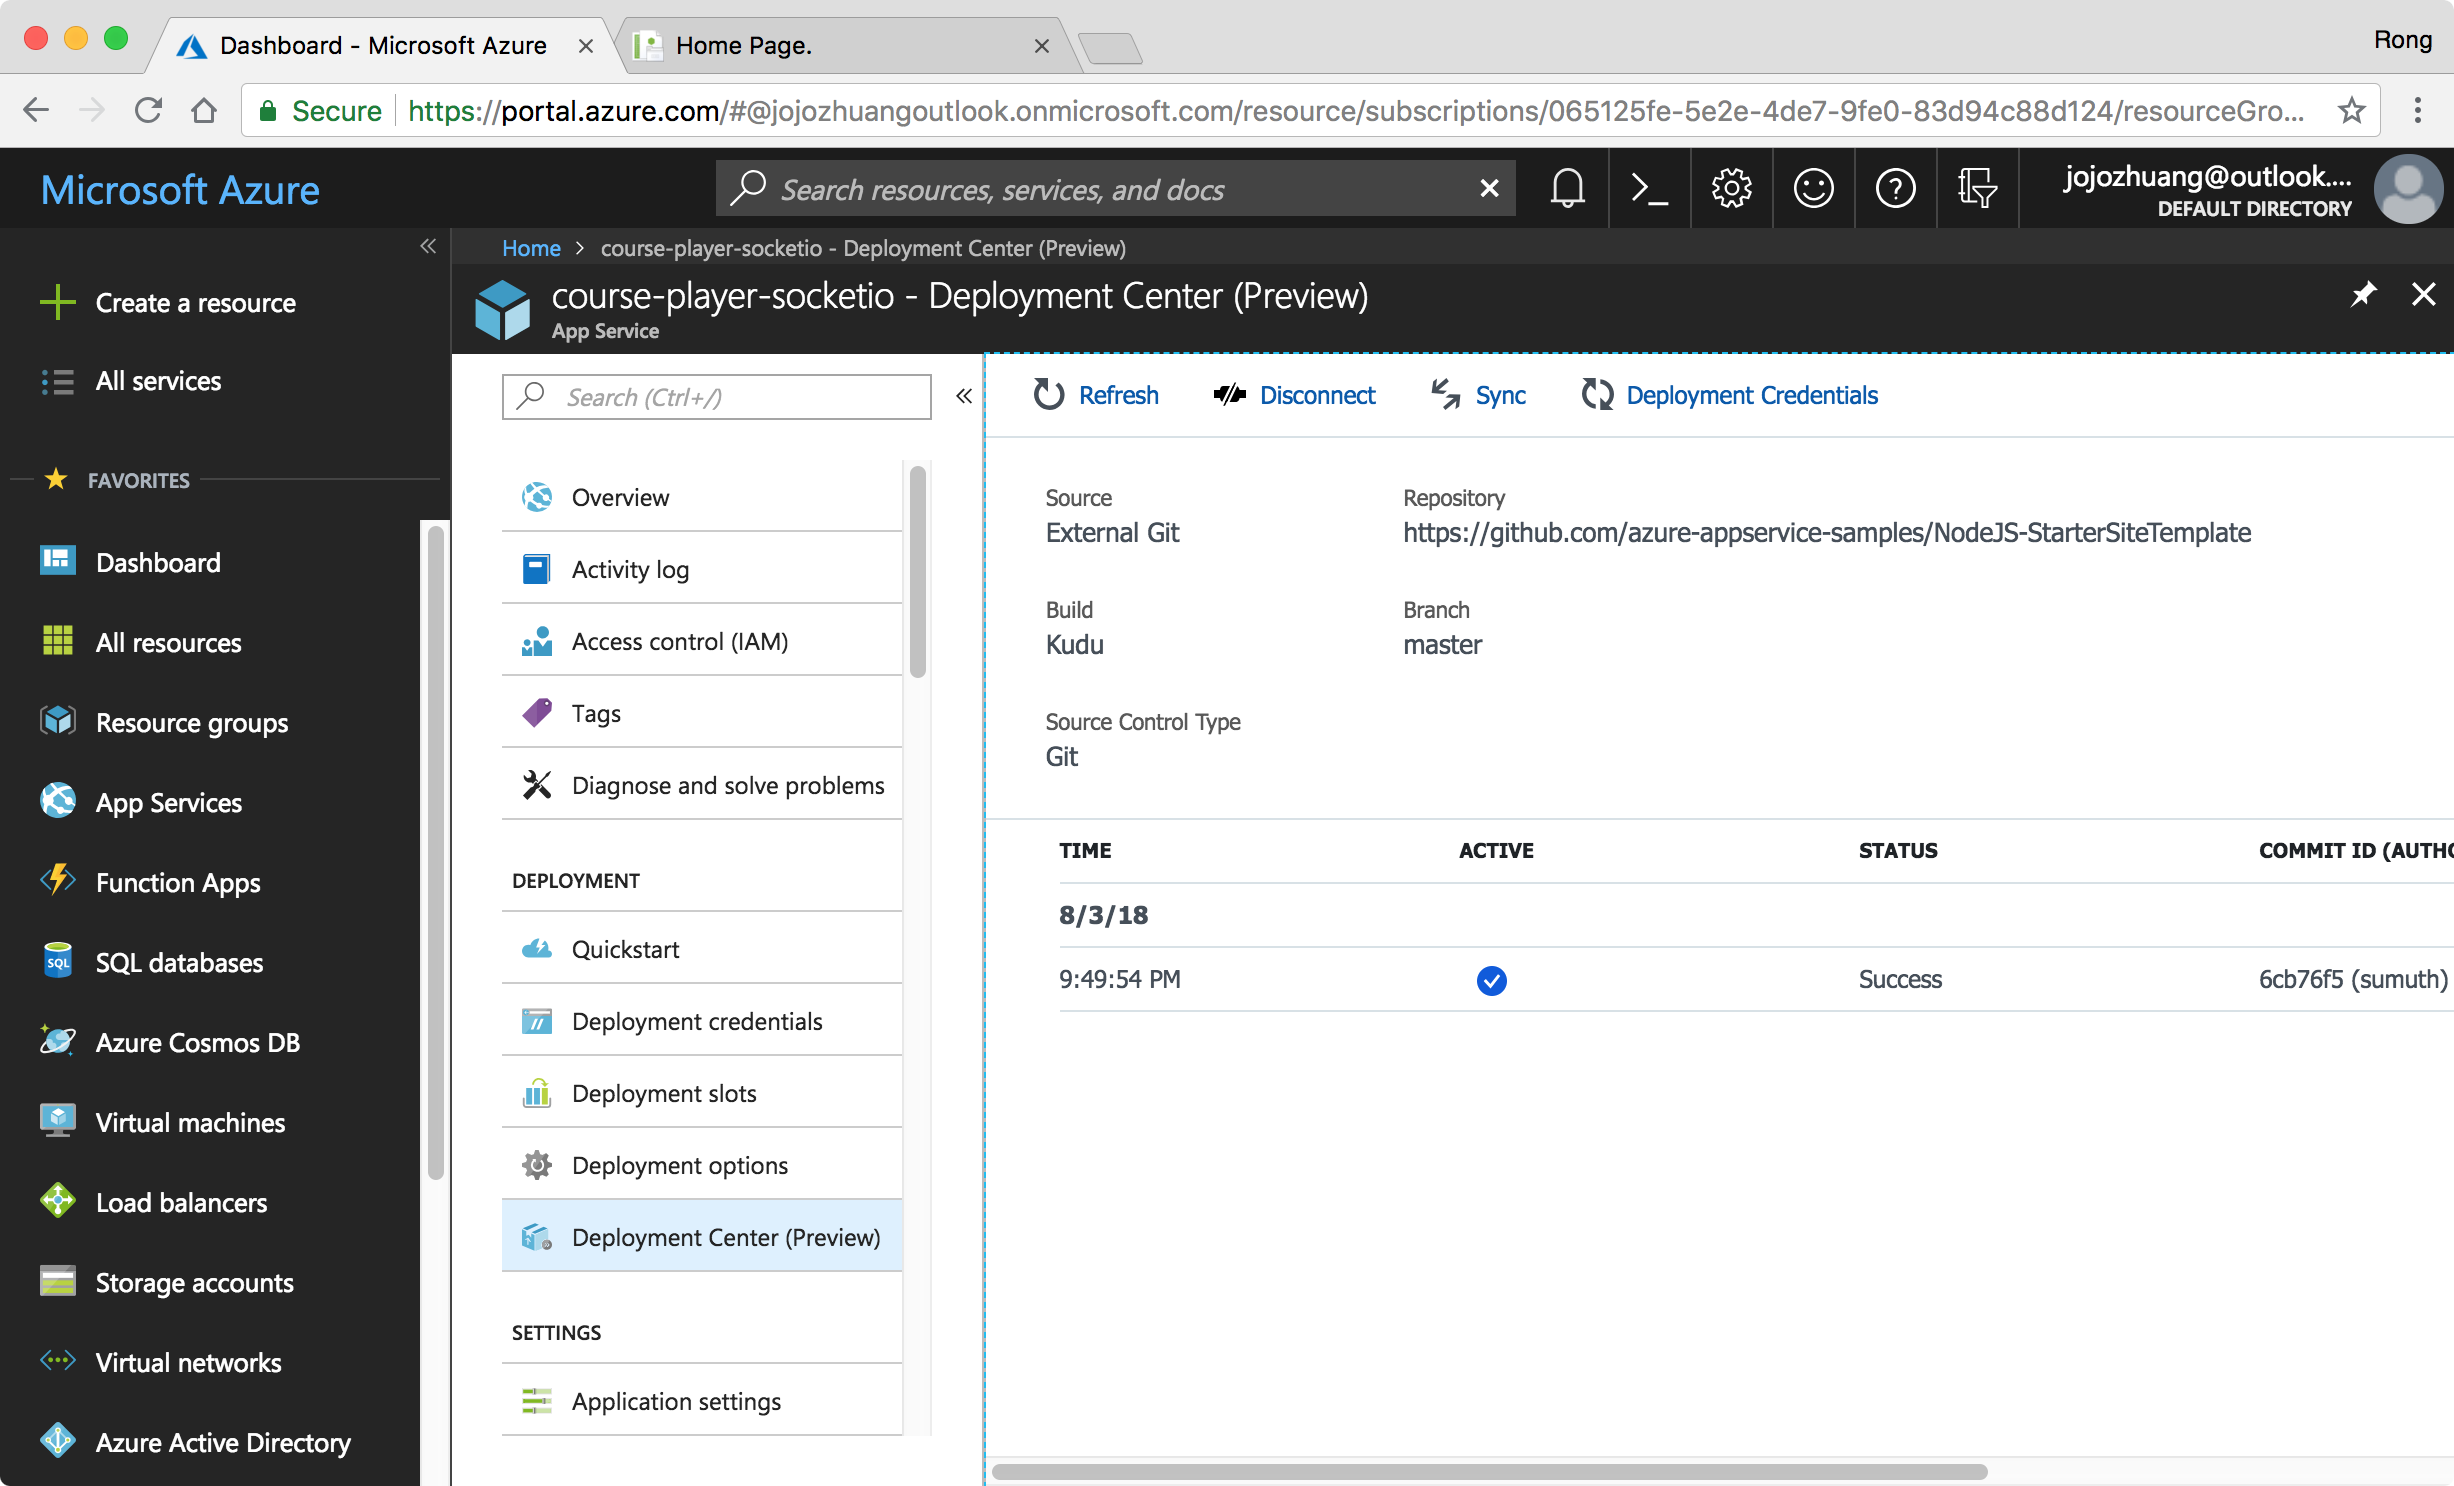
- Access this GitHub repository, open the files of ‘package.json’ and ‘web.config’ to learn how this Node.js app is configured for deploying to Azure.
2.2 Deploying Our Own App
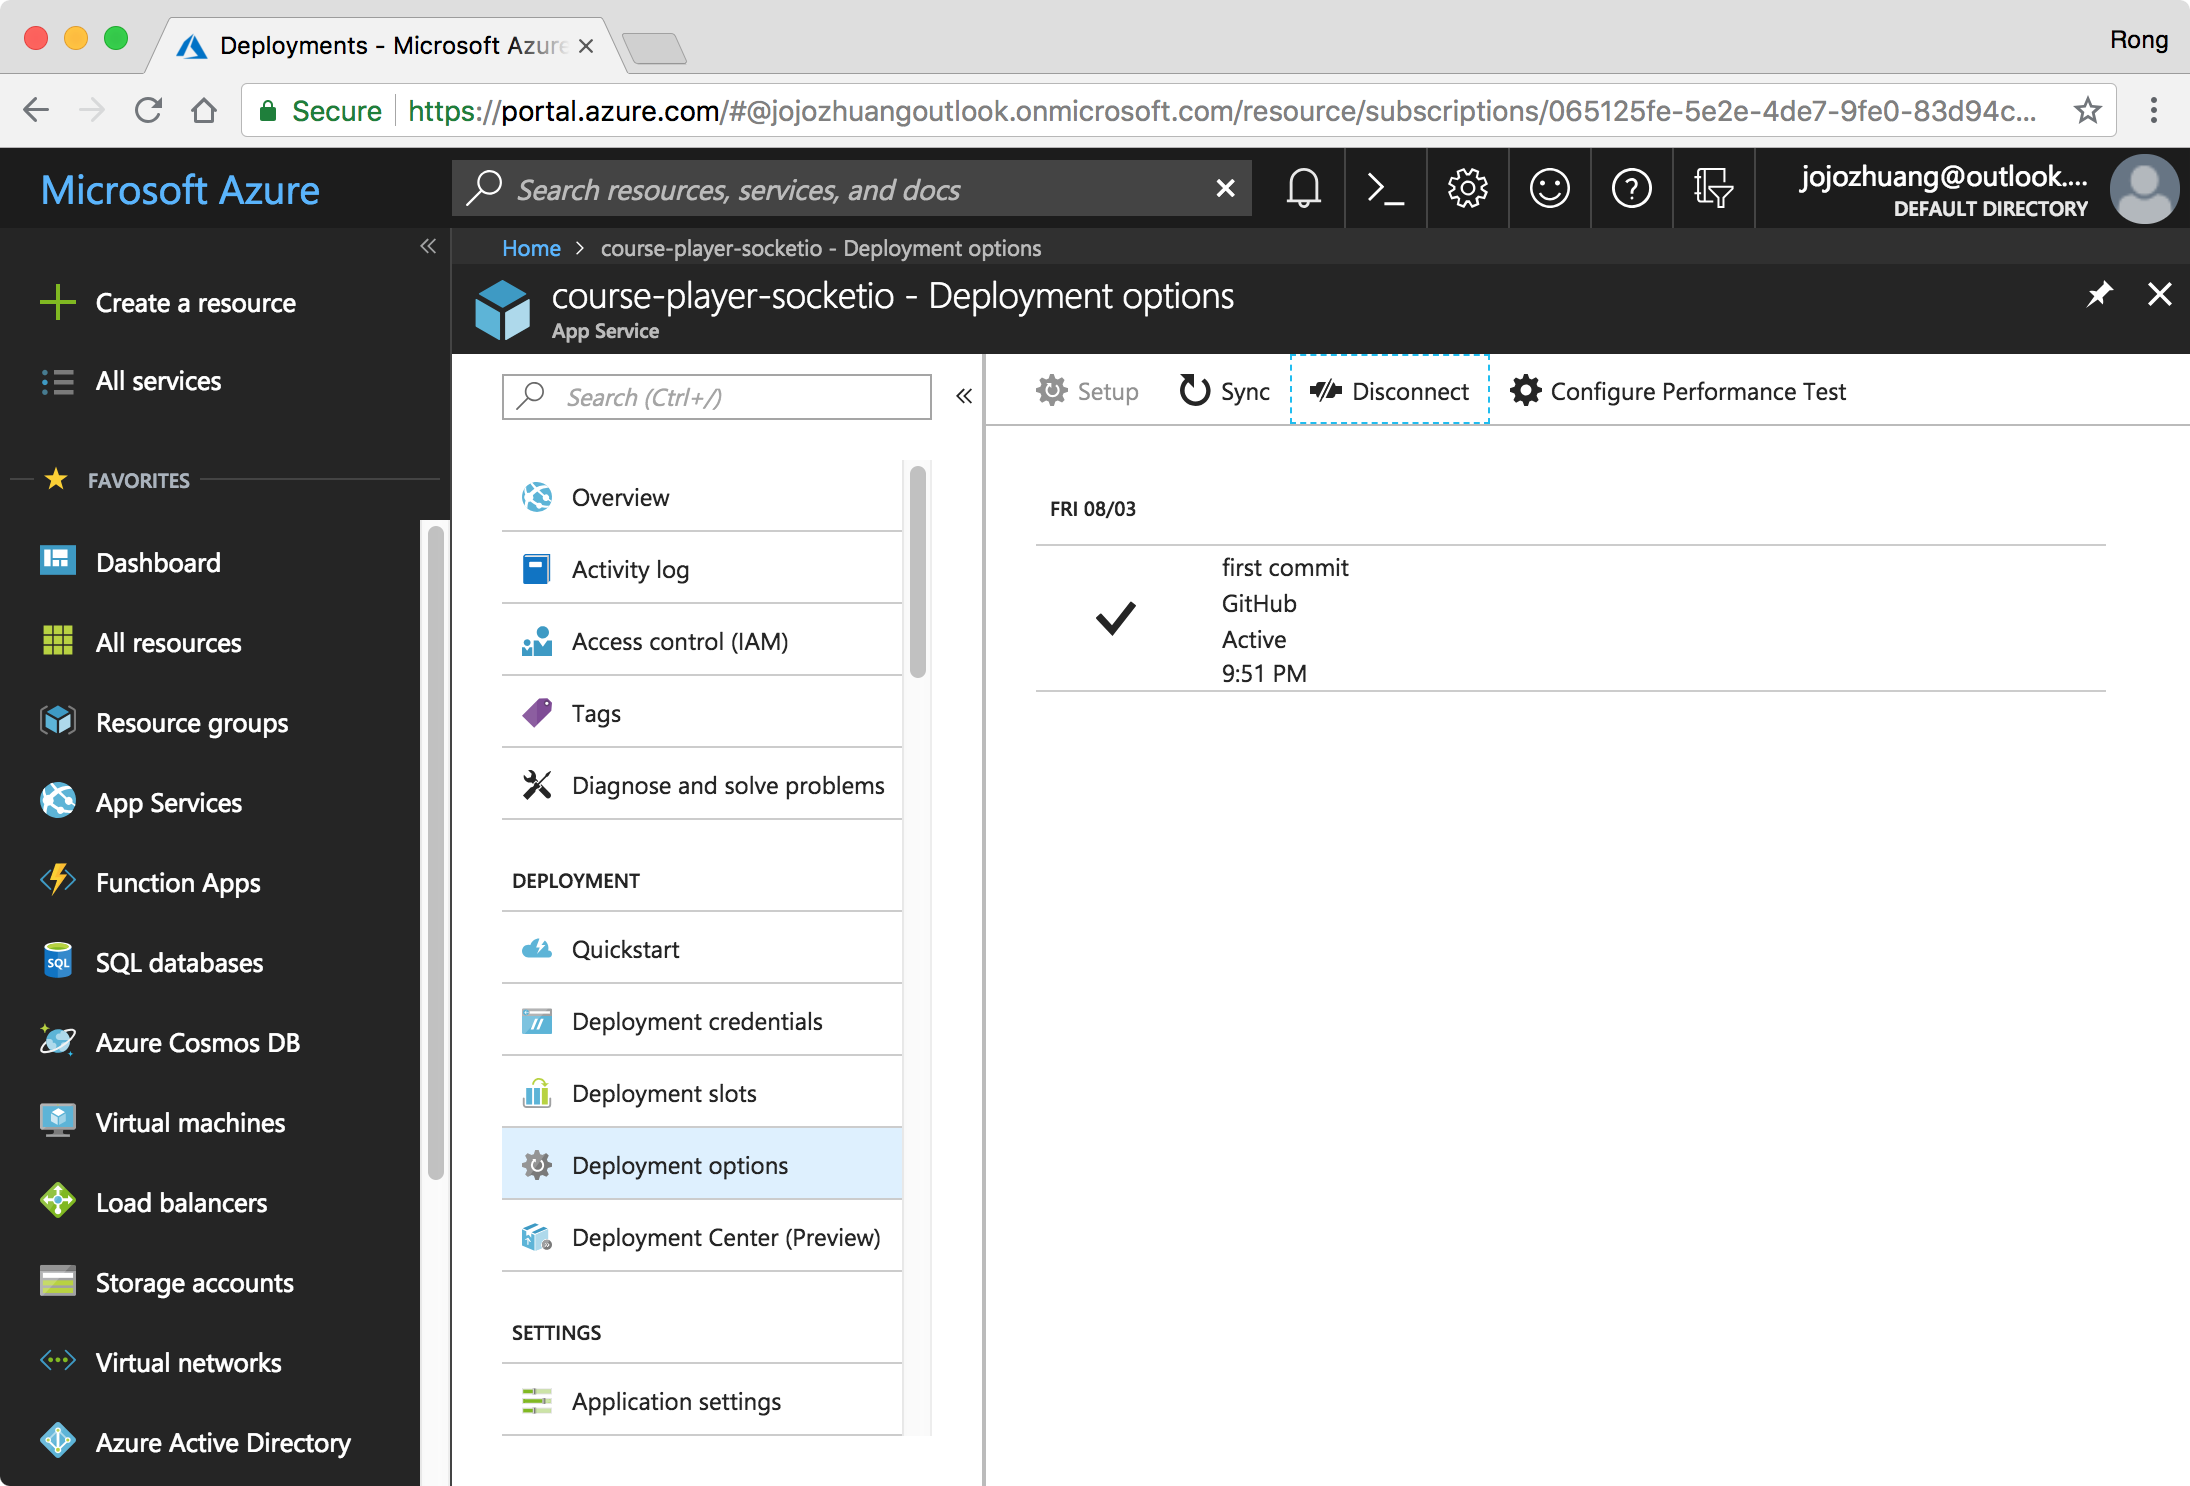
Go to ‘Deployment options’, click ‘Disconnet’ to remove the sample GitHub repository.
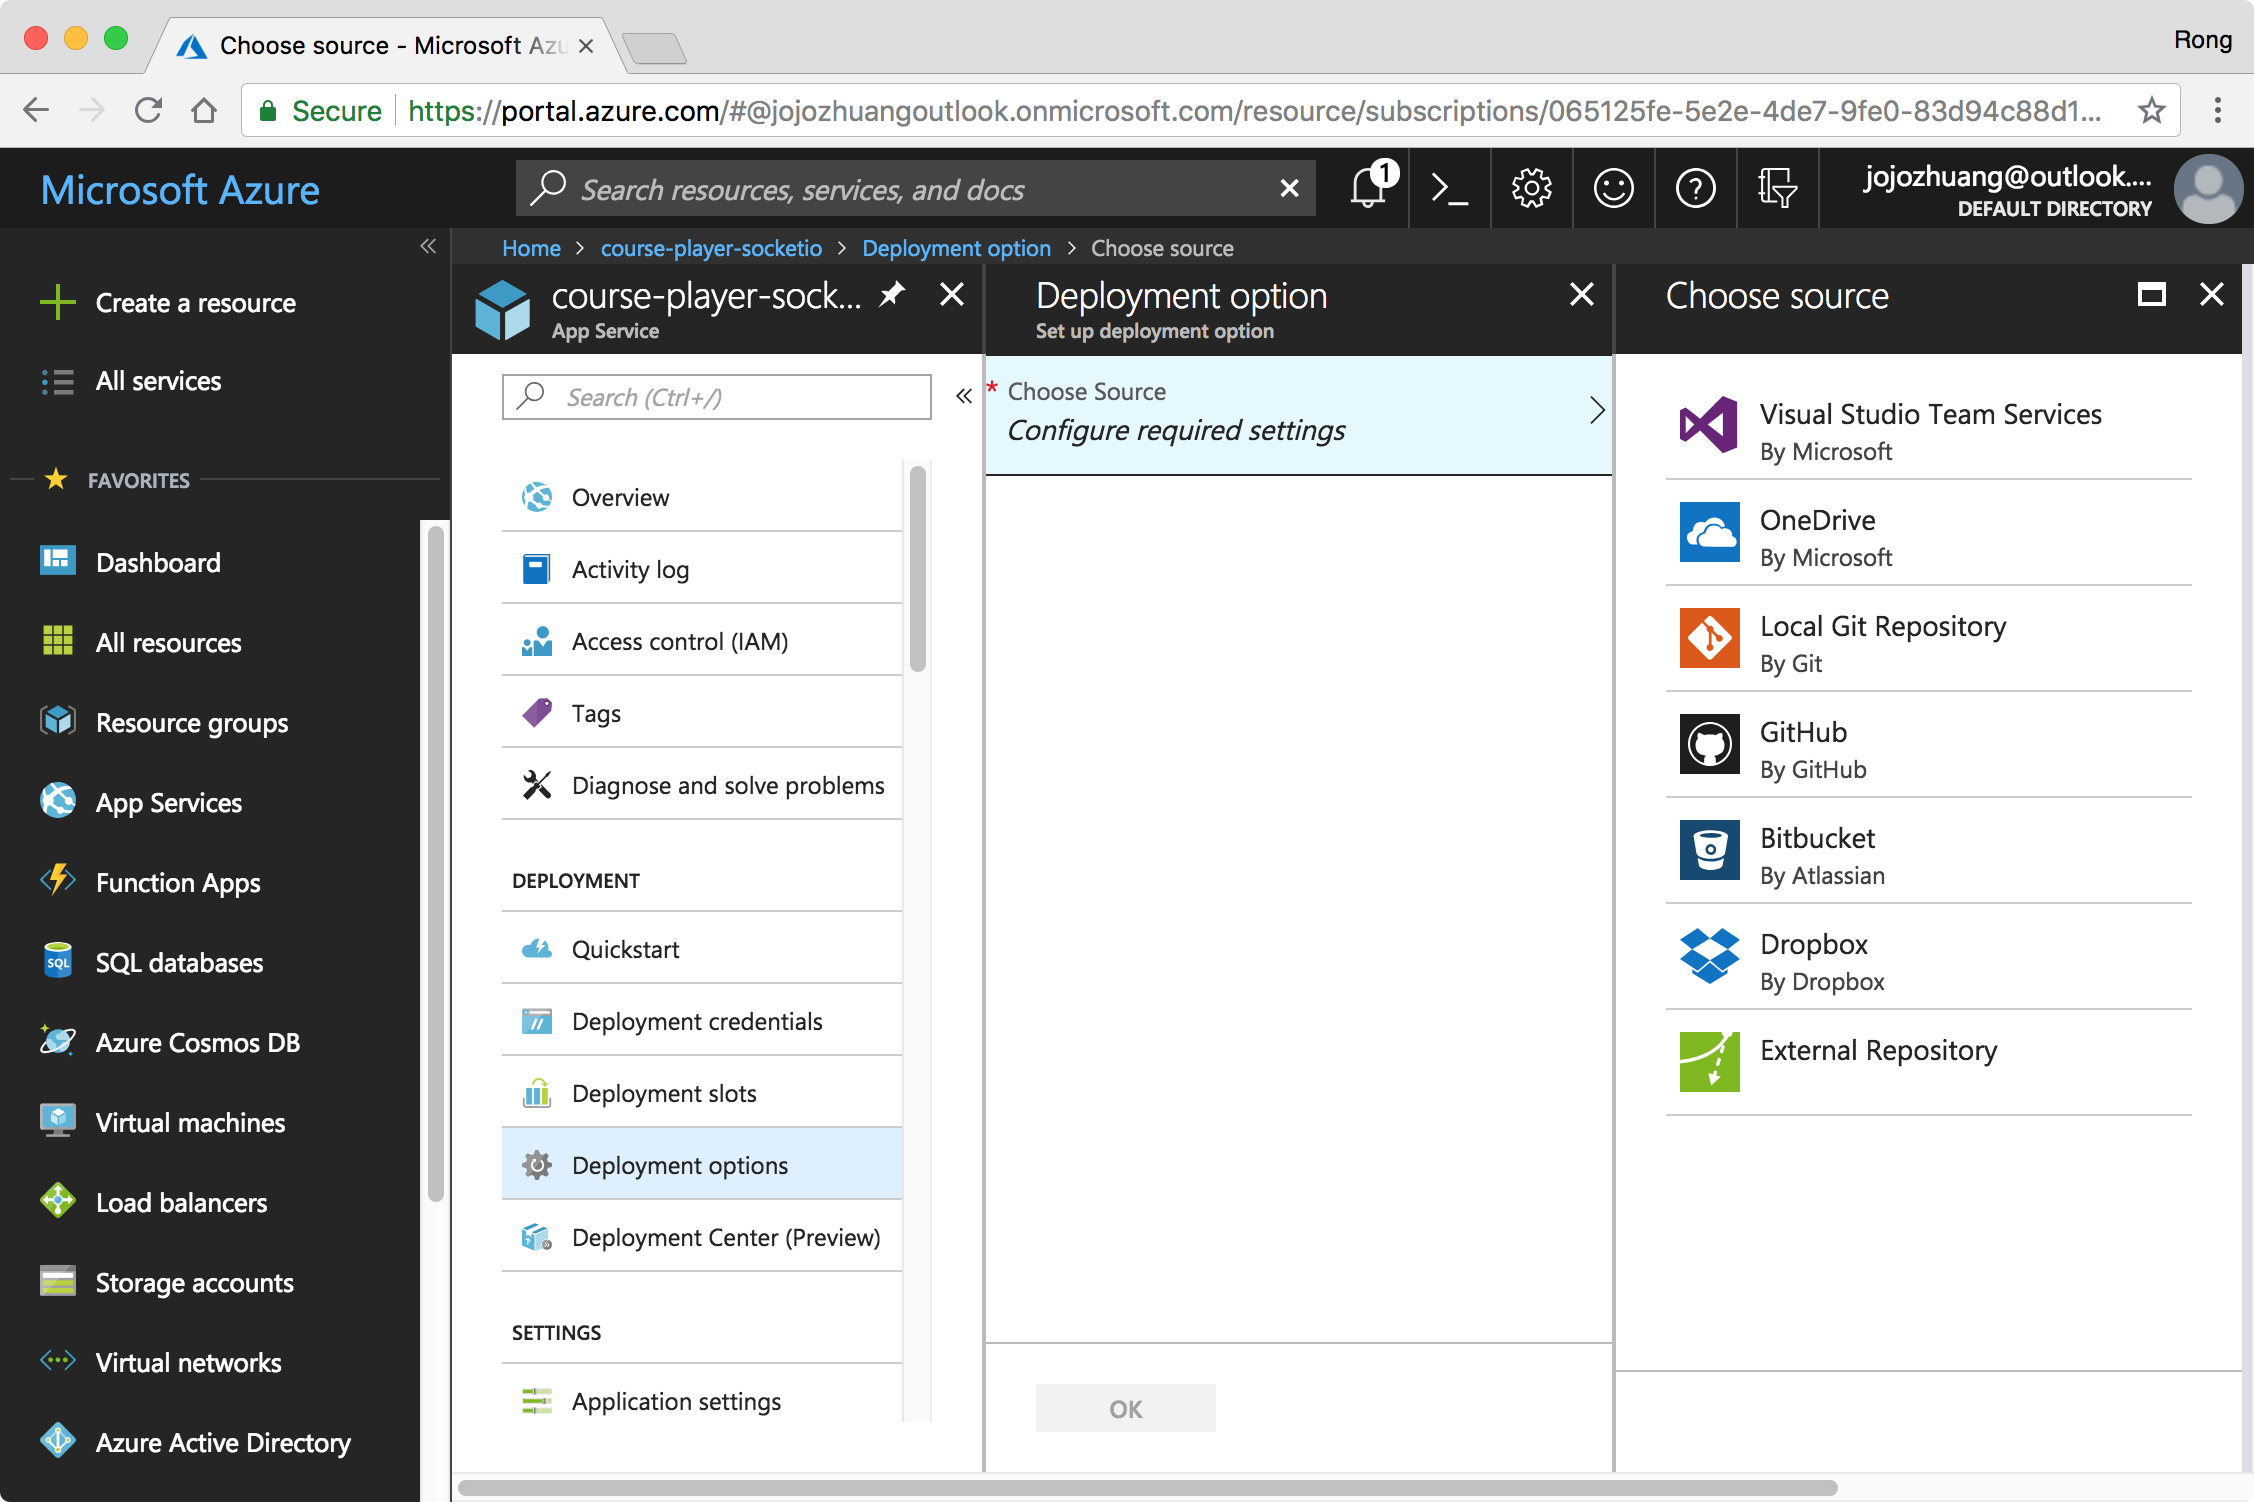
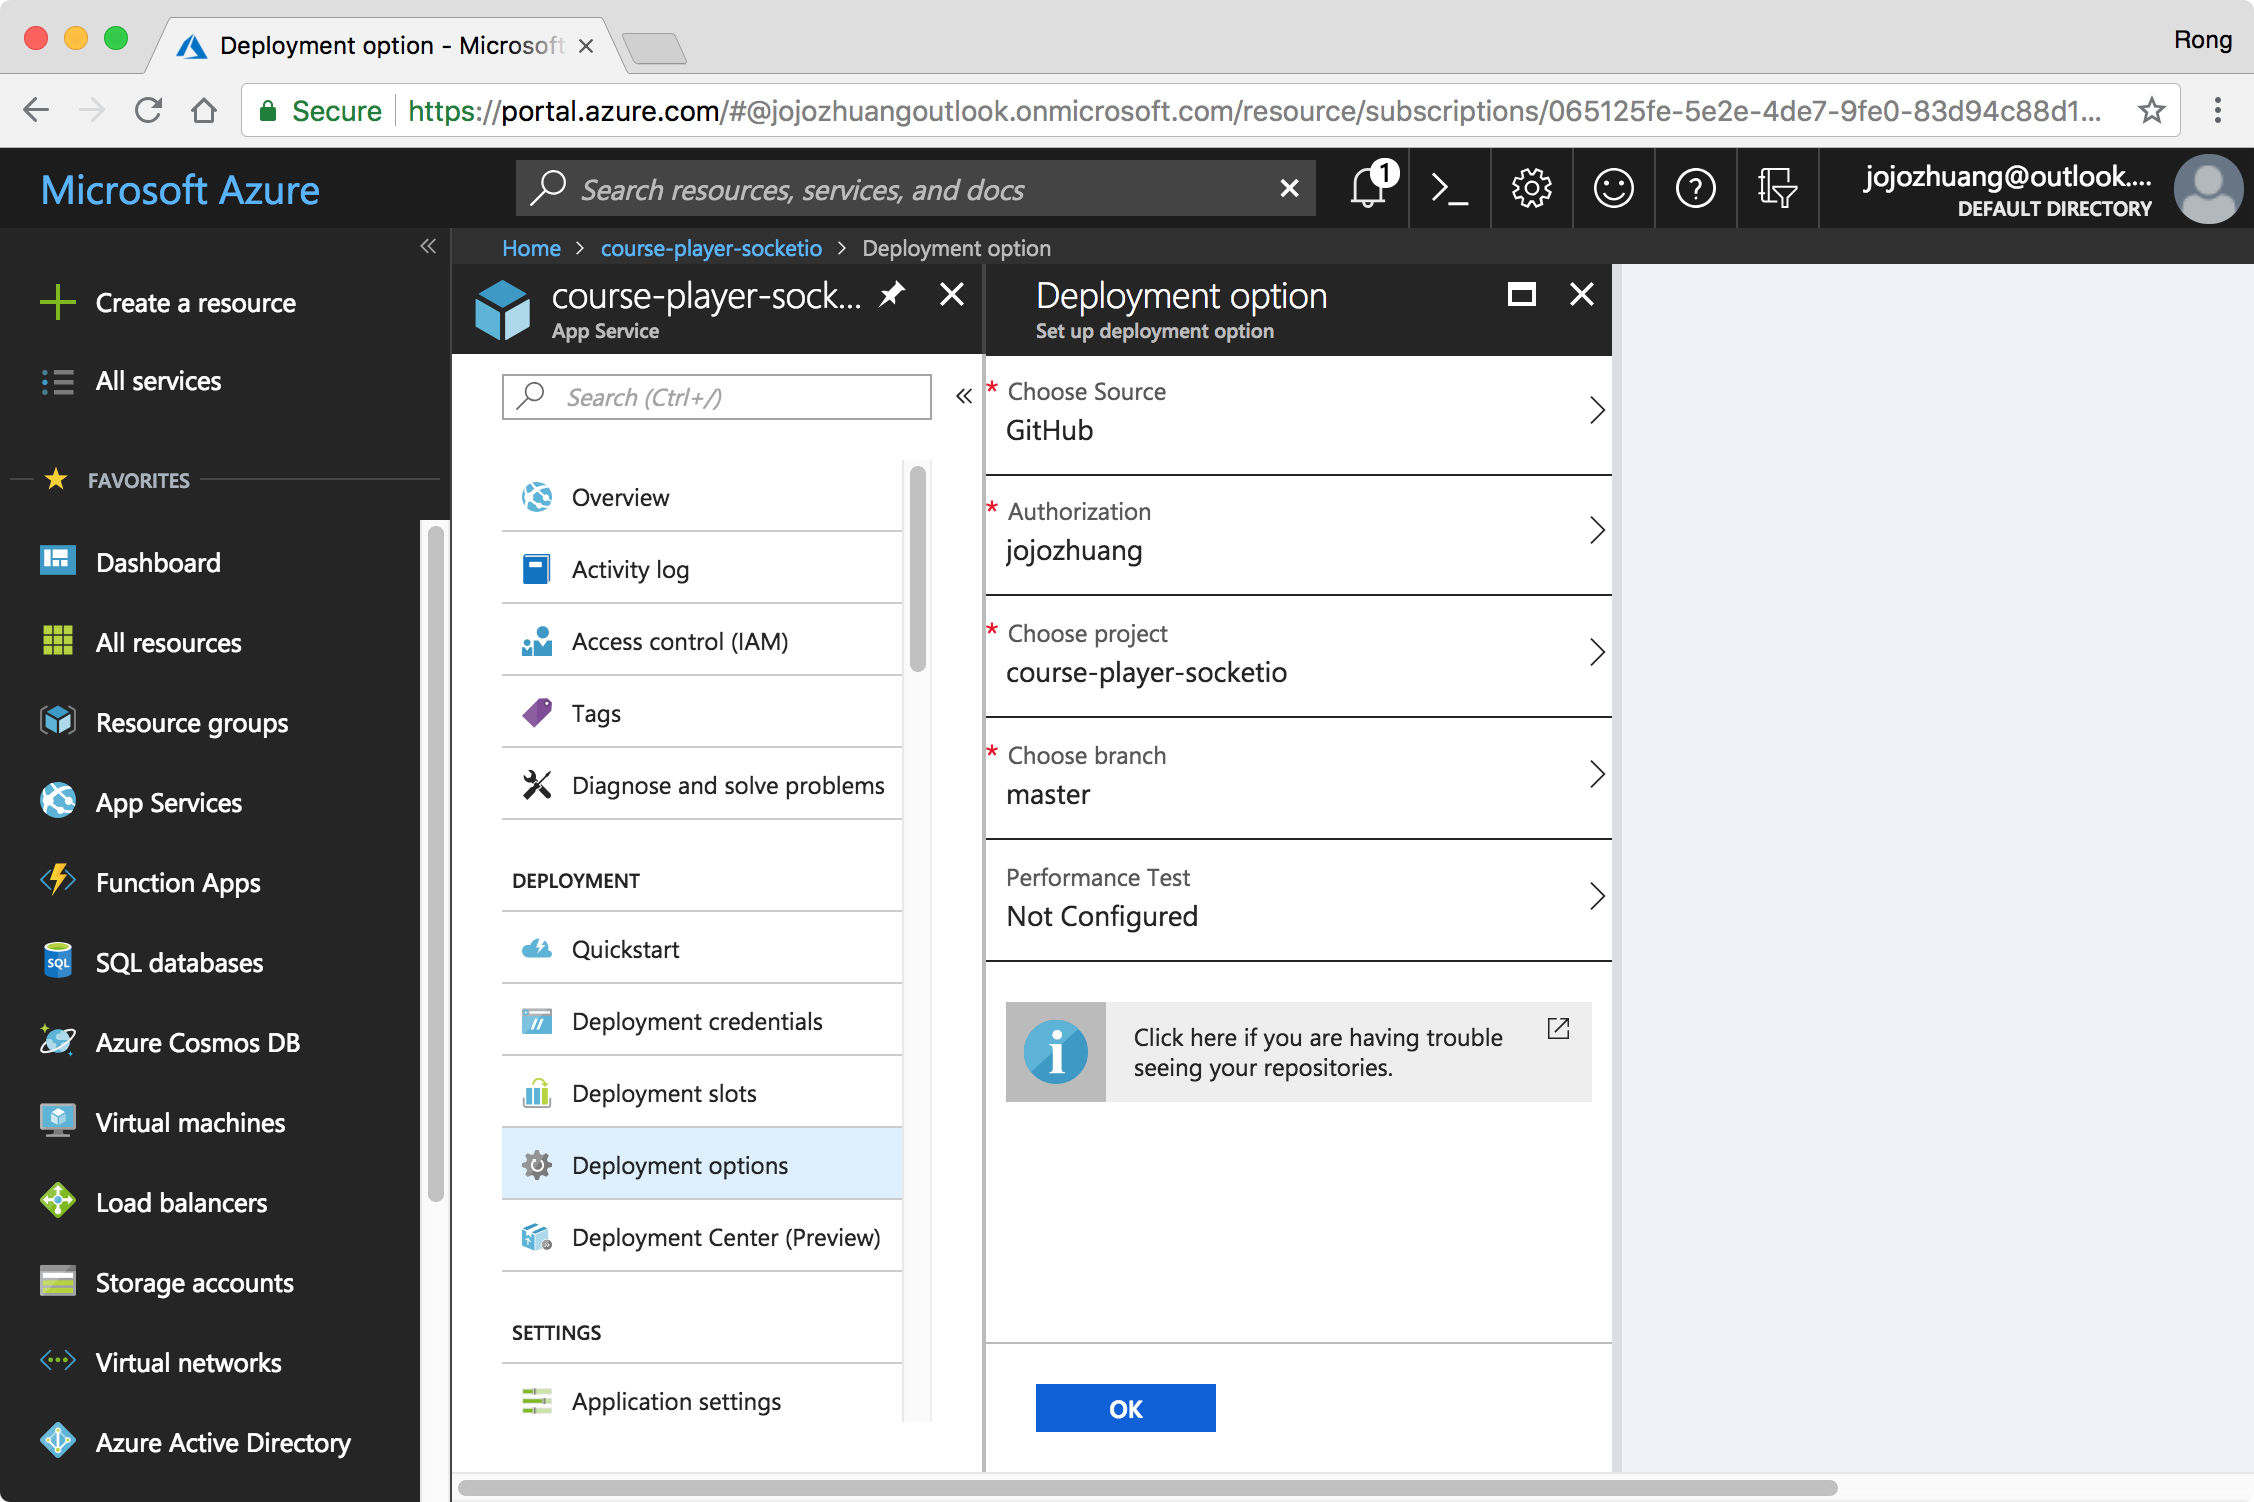
 After the ‘Disconnection’, go to ‘Deployment options’ again. Now you have the chance to choose a new source, select ‘GitHub’.
 Authorize Azure to access your GitHub account, choose the project and branch, then OK.
 Azure starts deploying the new Node.js App from your GitHub repository.
2.3 Logs
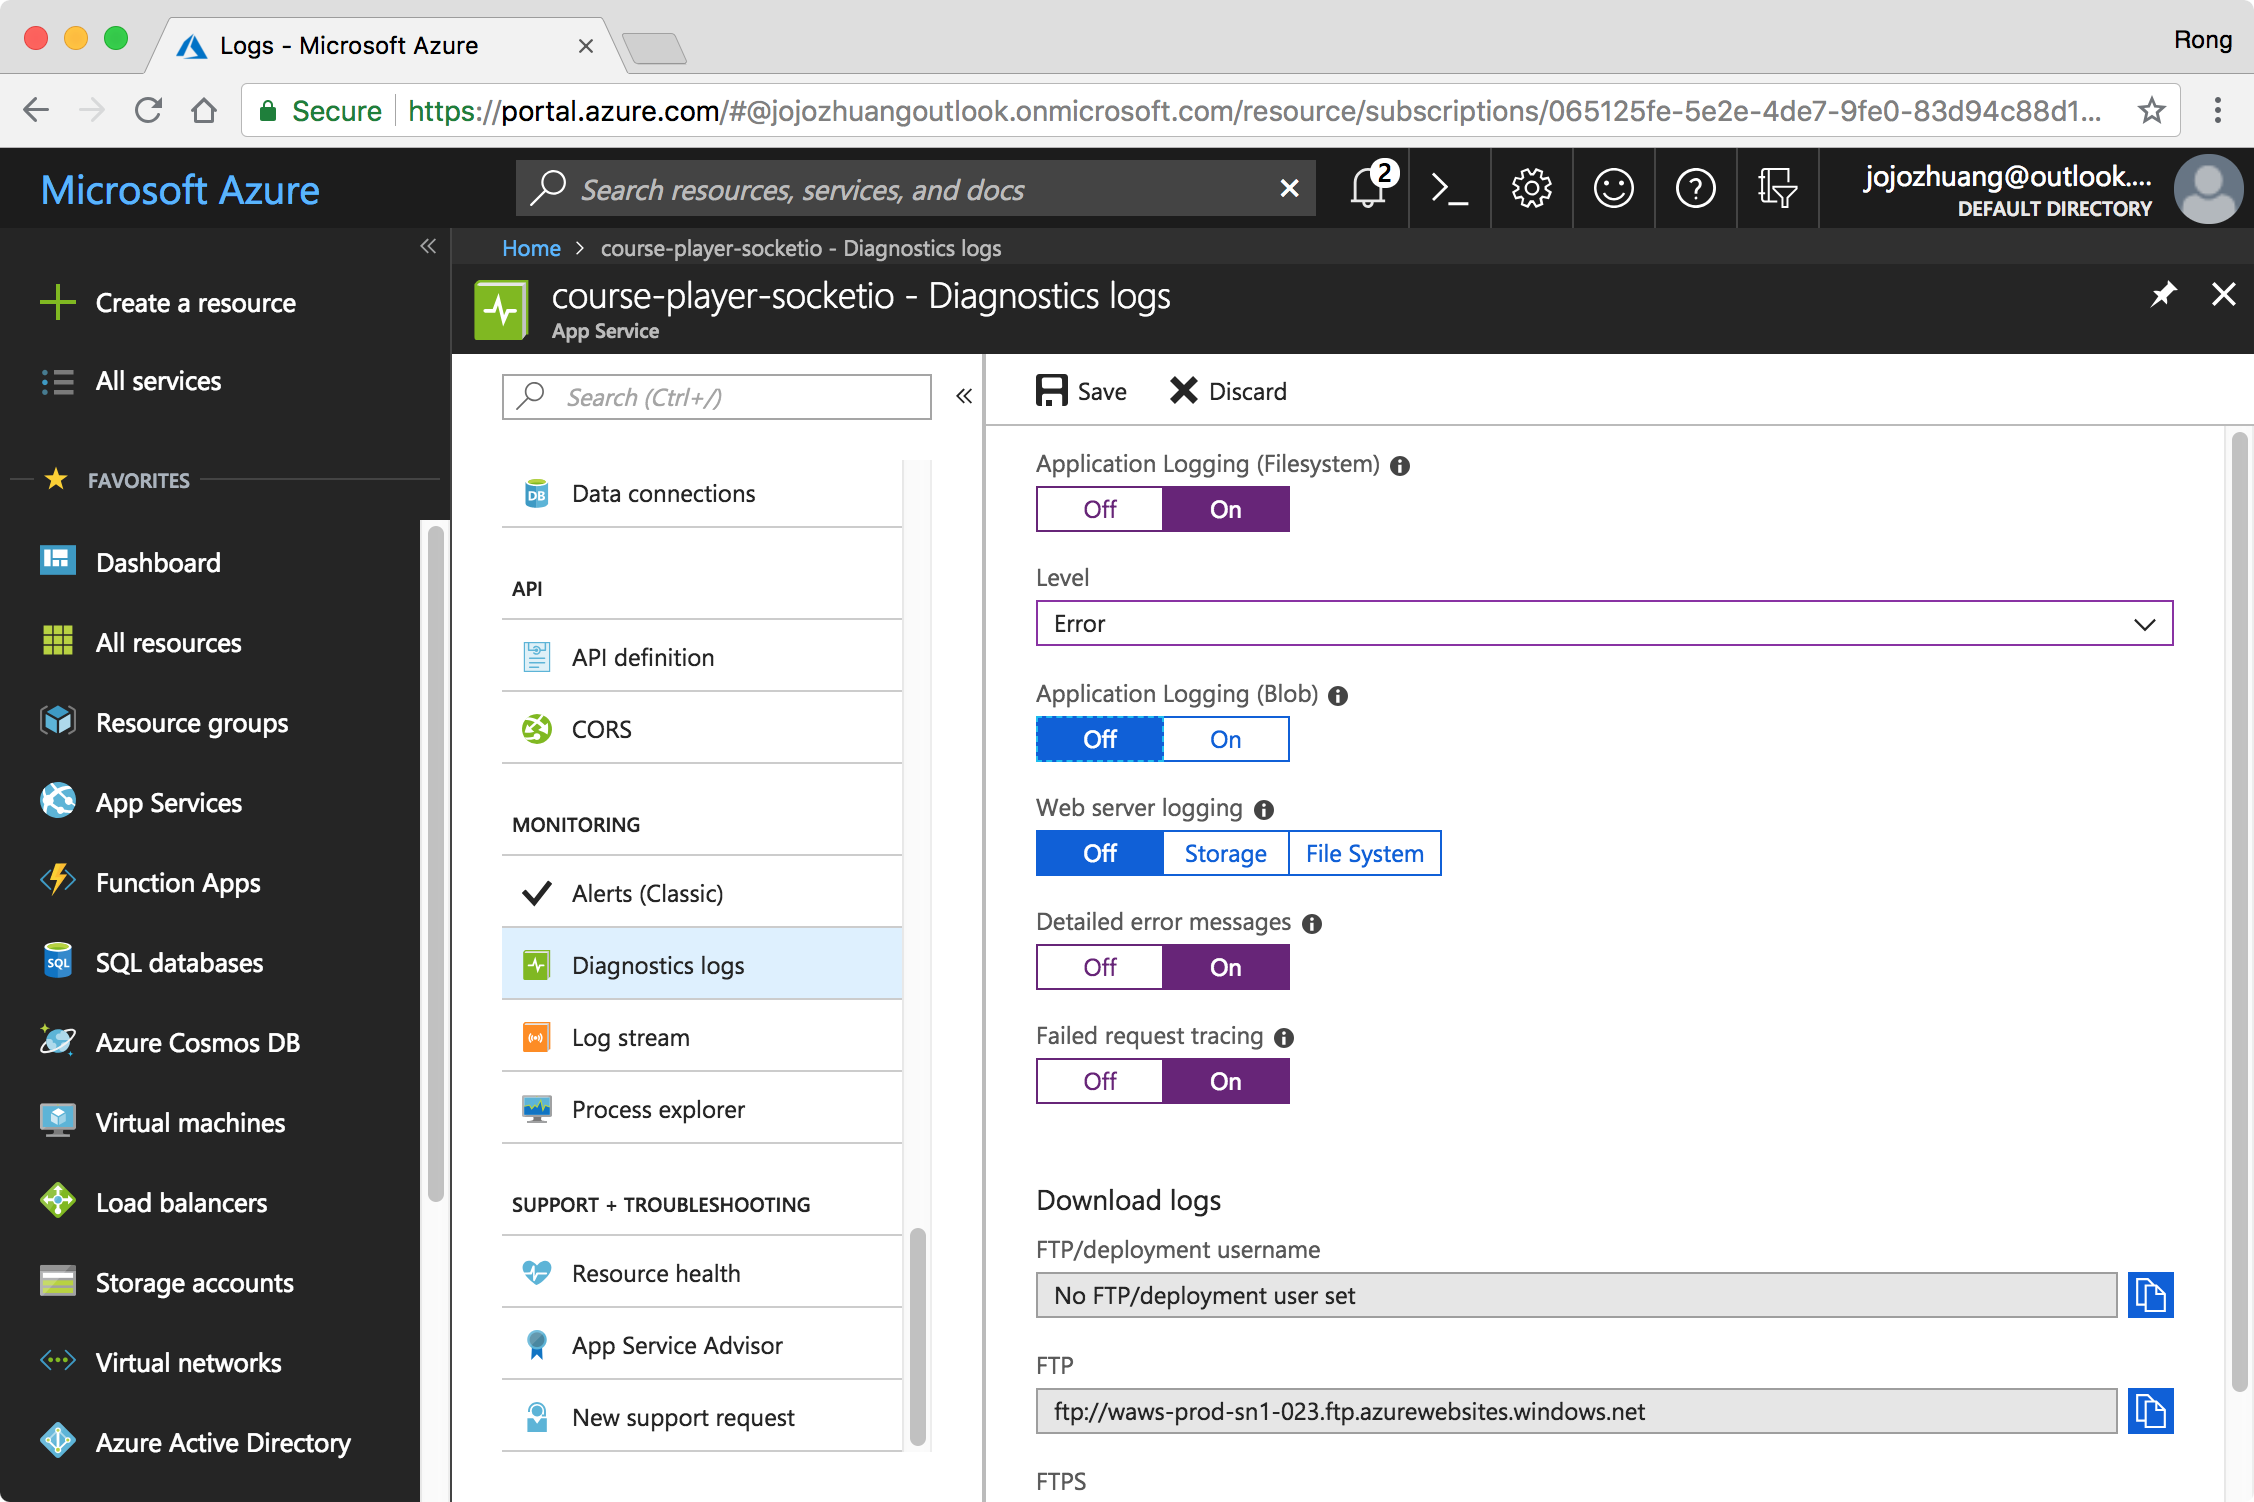
Once the deployment is finished, we can check the application log. First, go to ‘Diagnostics logs’, choose the logging categories and save.
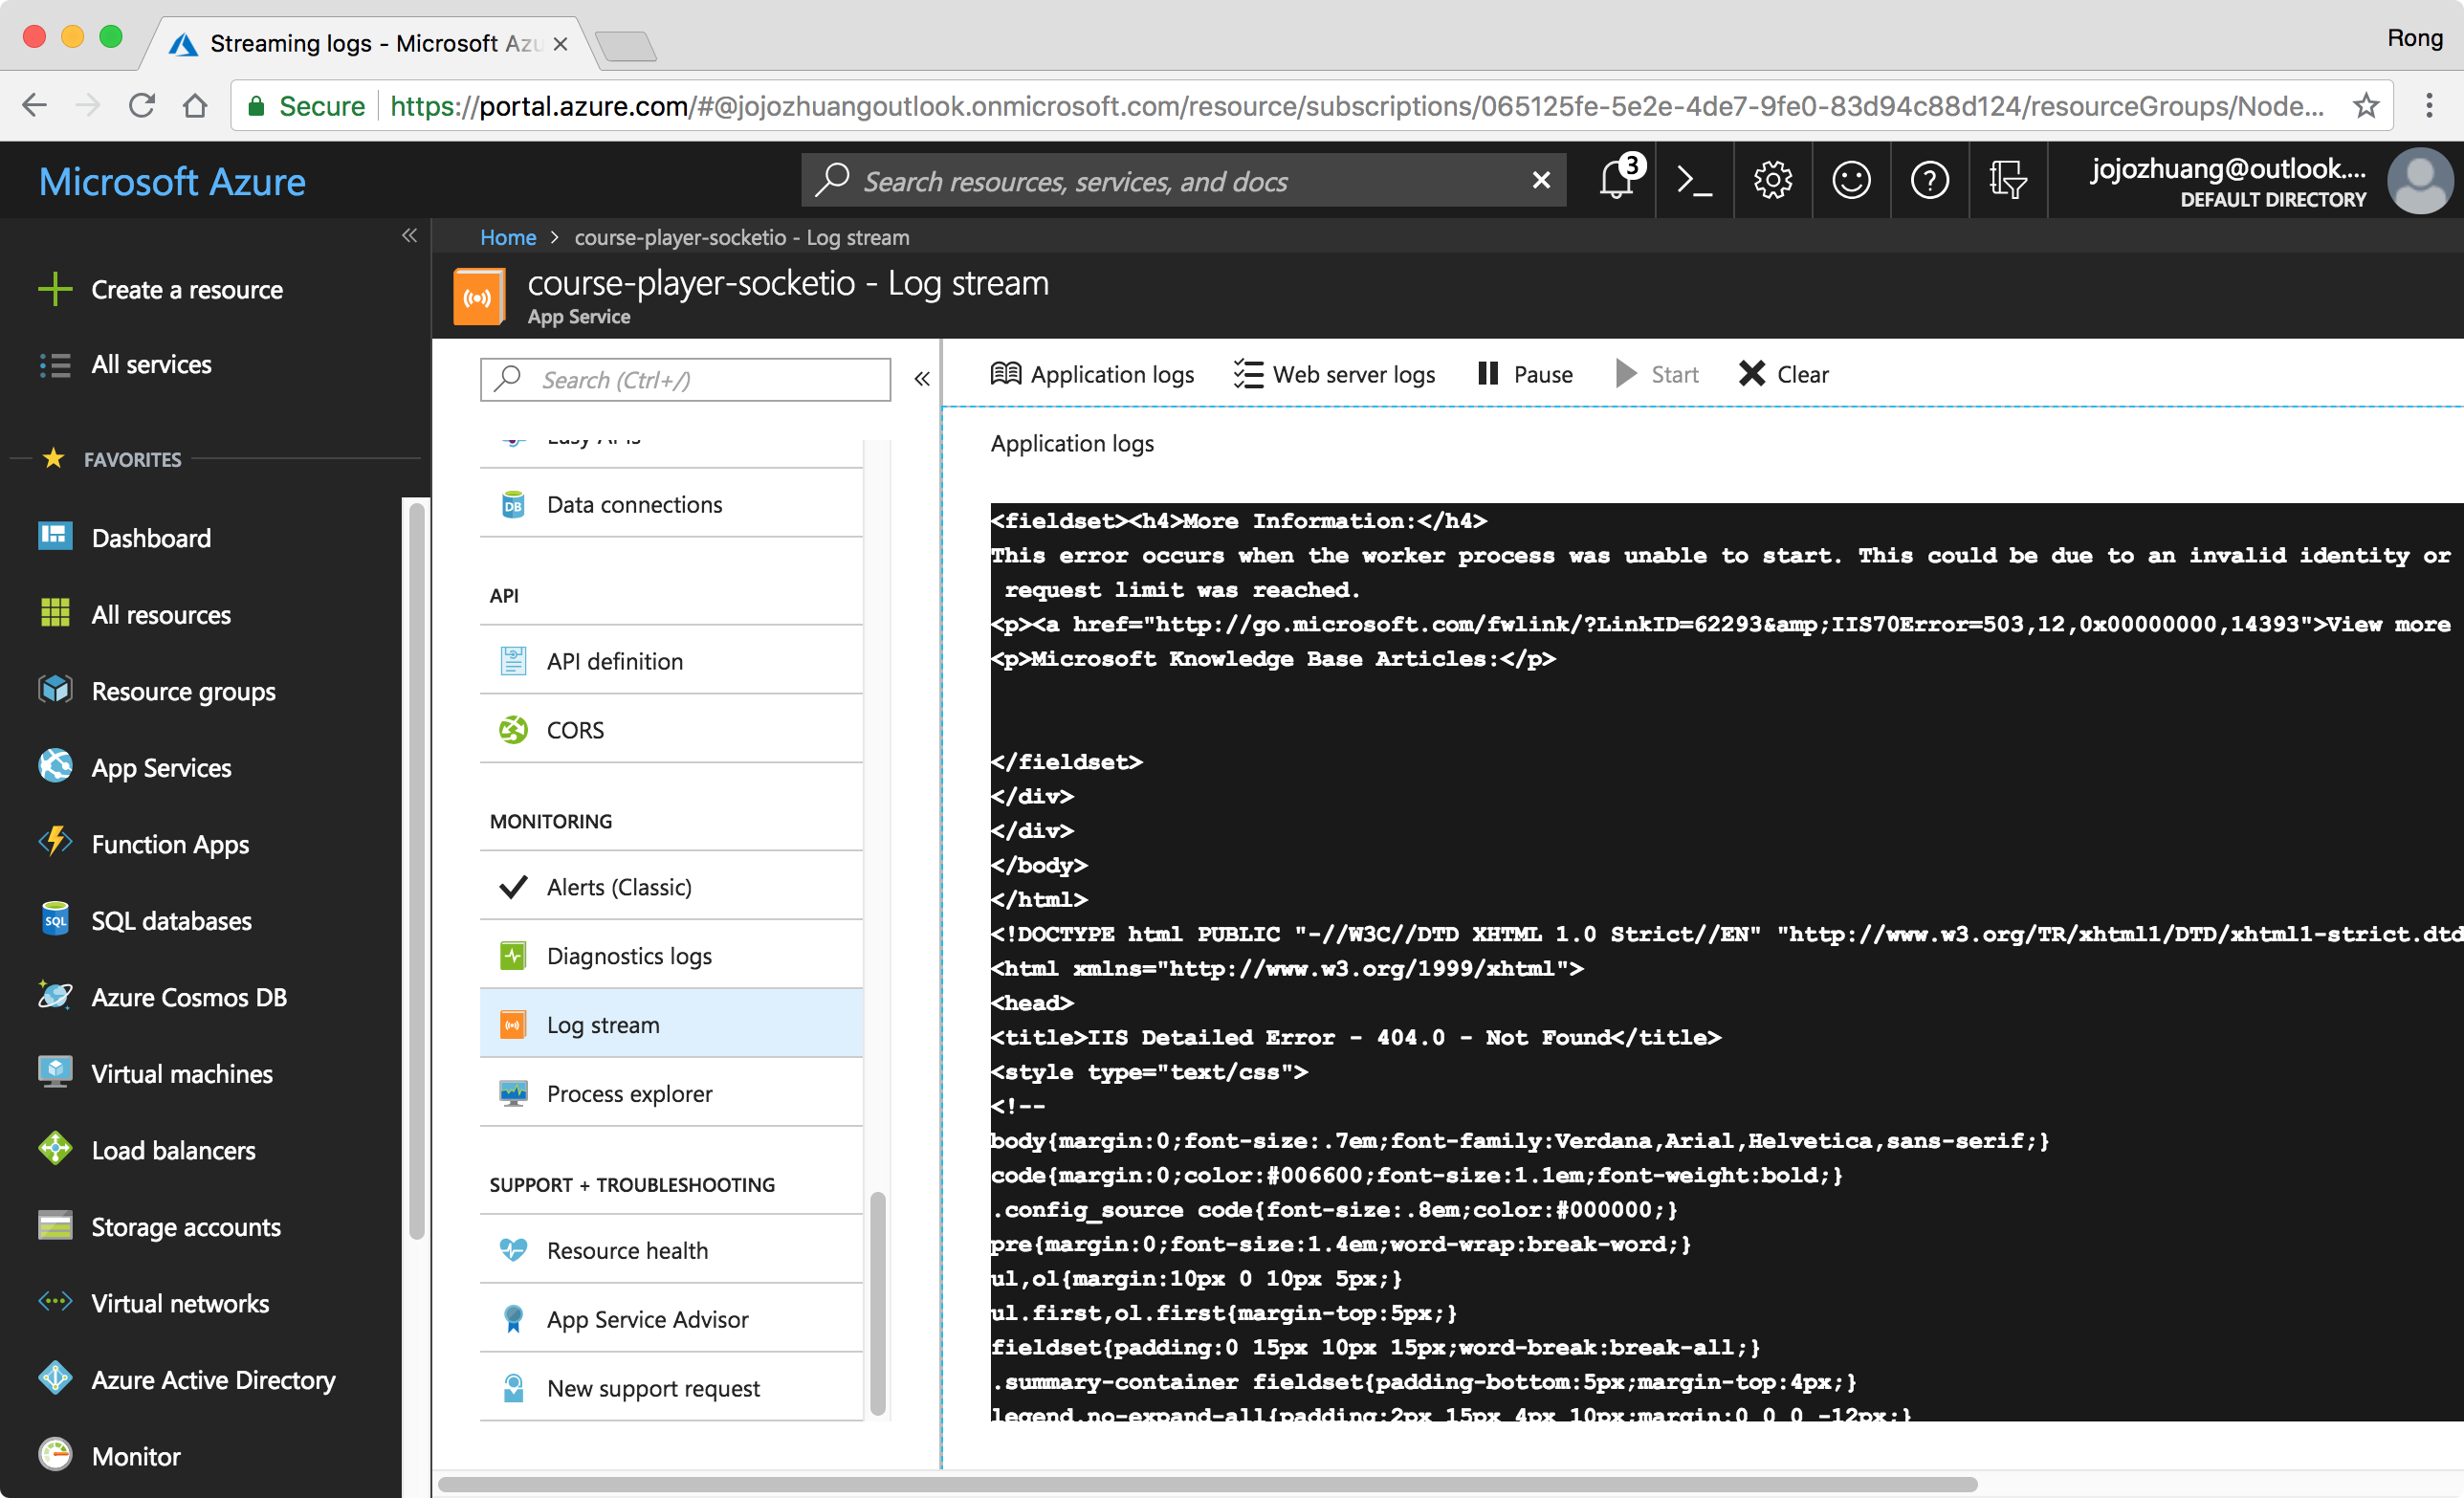
 Then, go to ‘Log stream’ to check the application logs.
3. Test
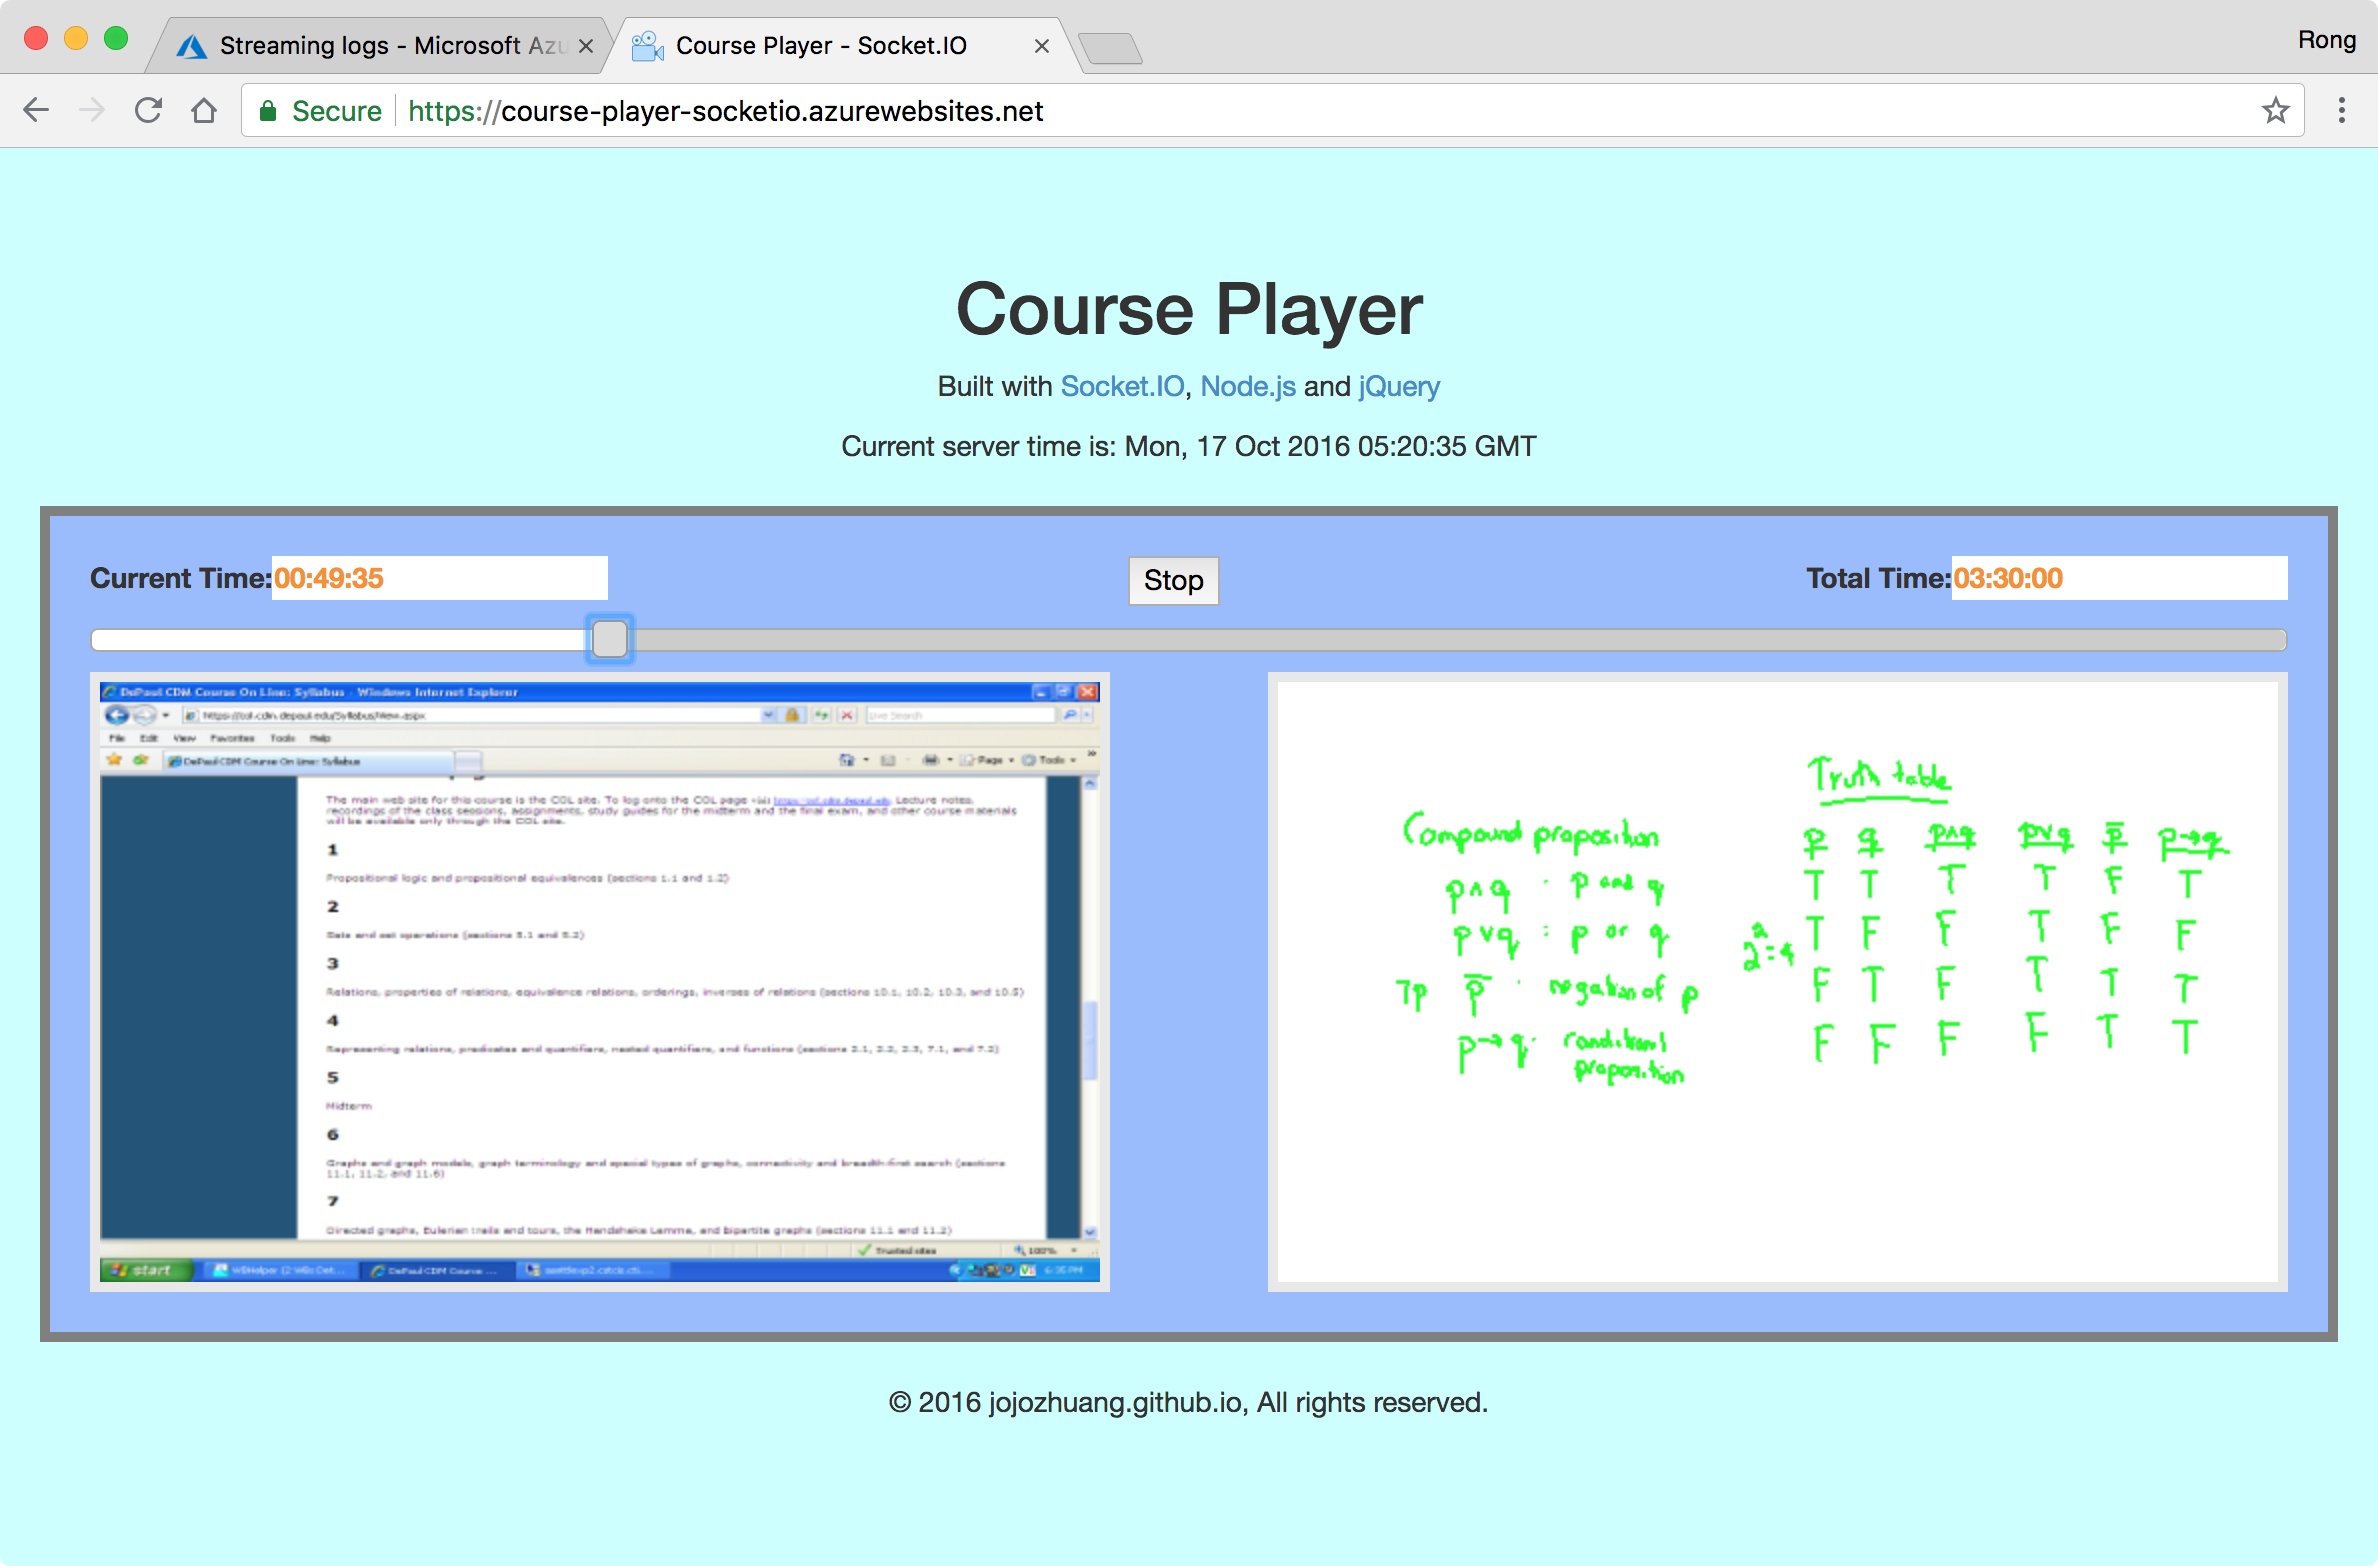
Refresh the web browser, our own app is deployed.
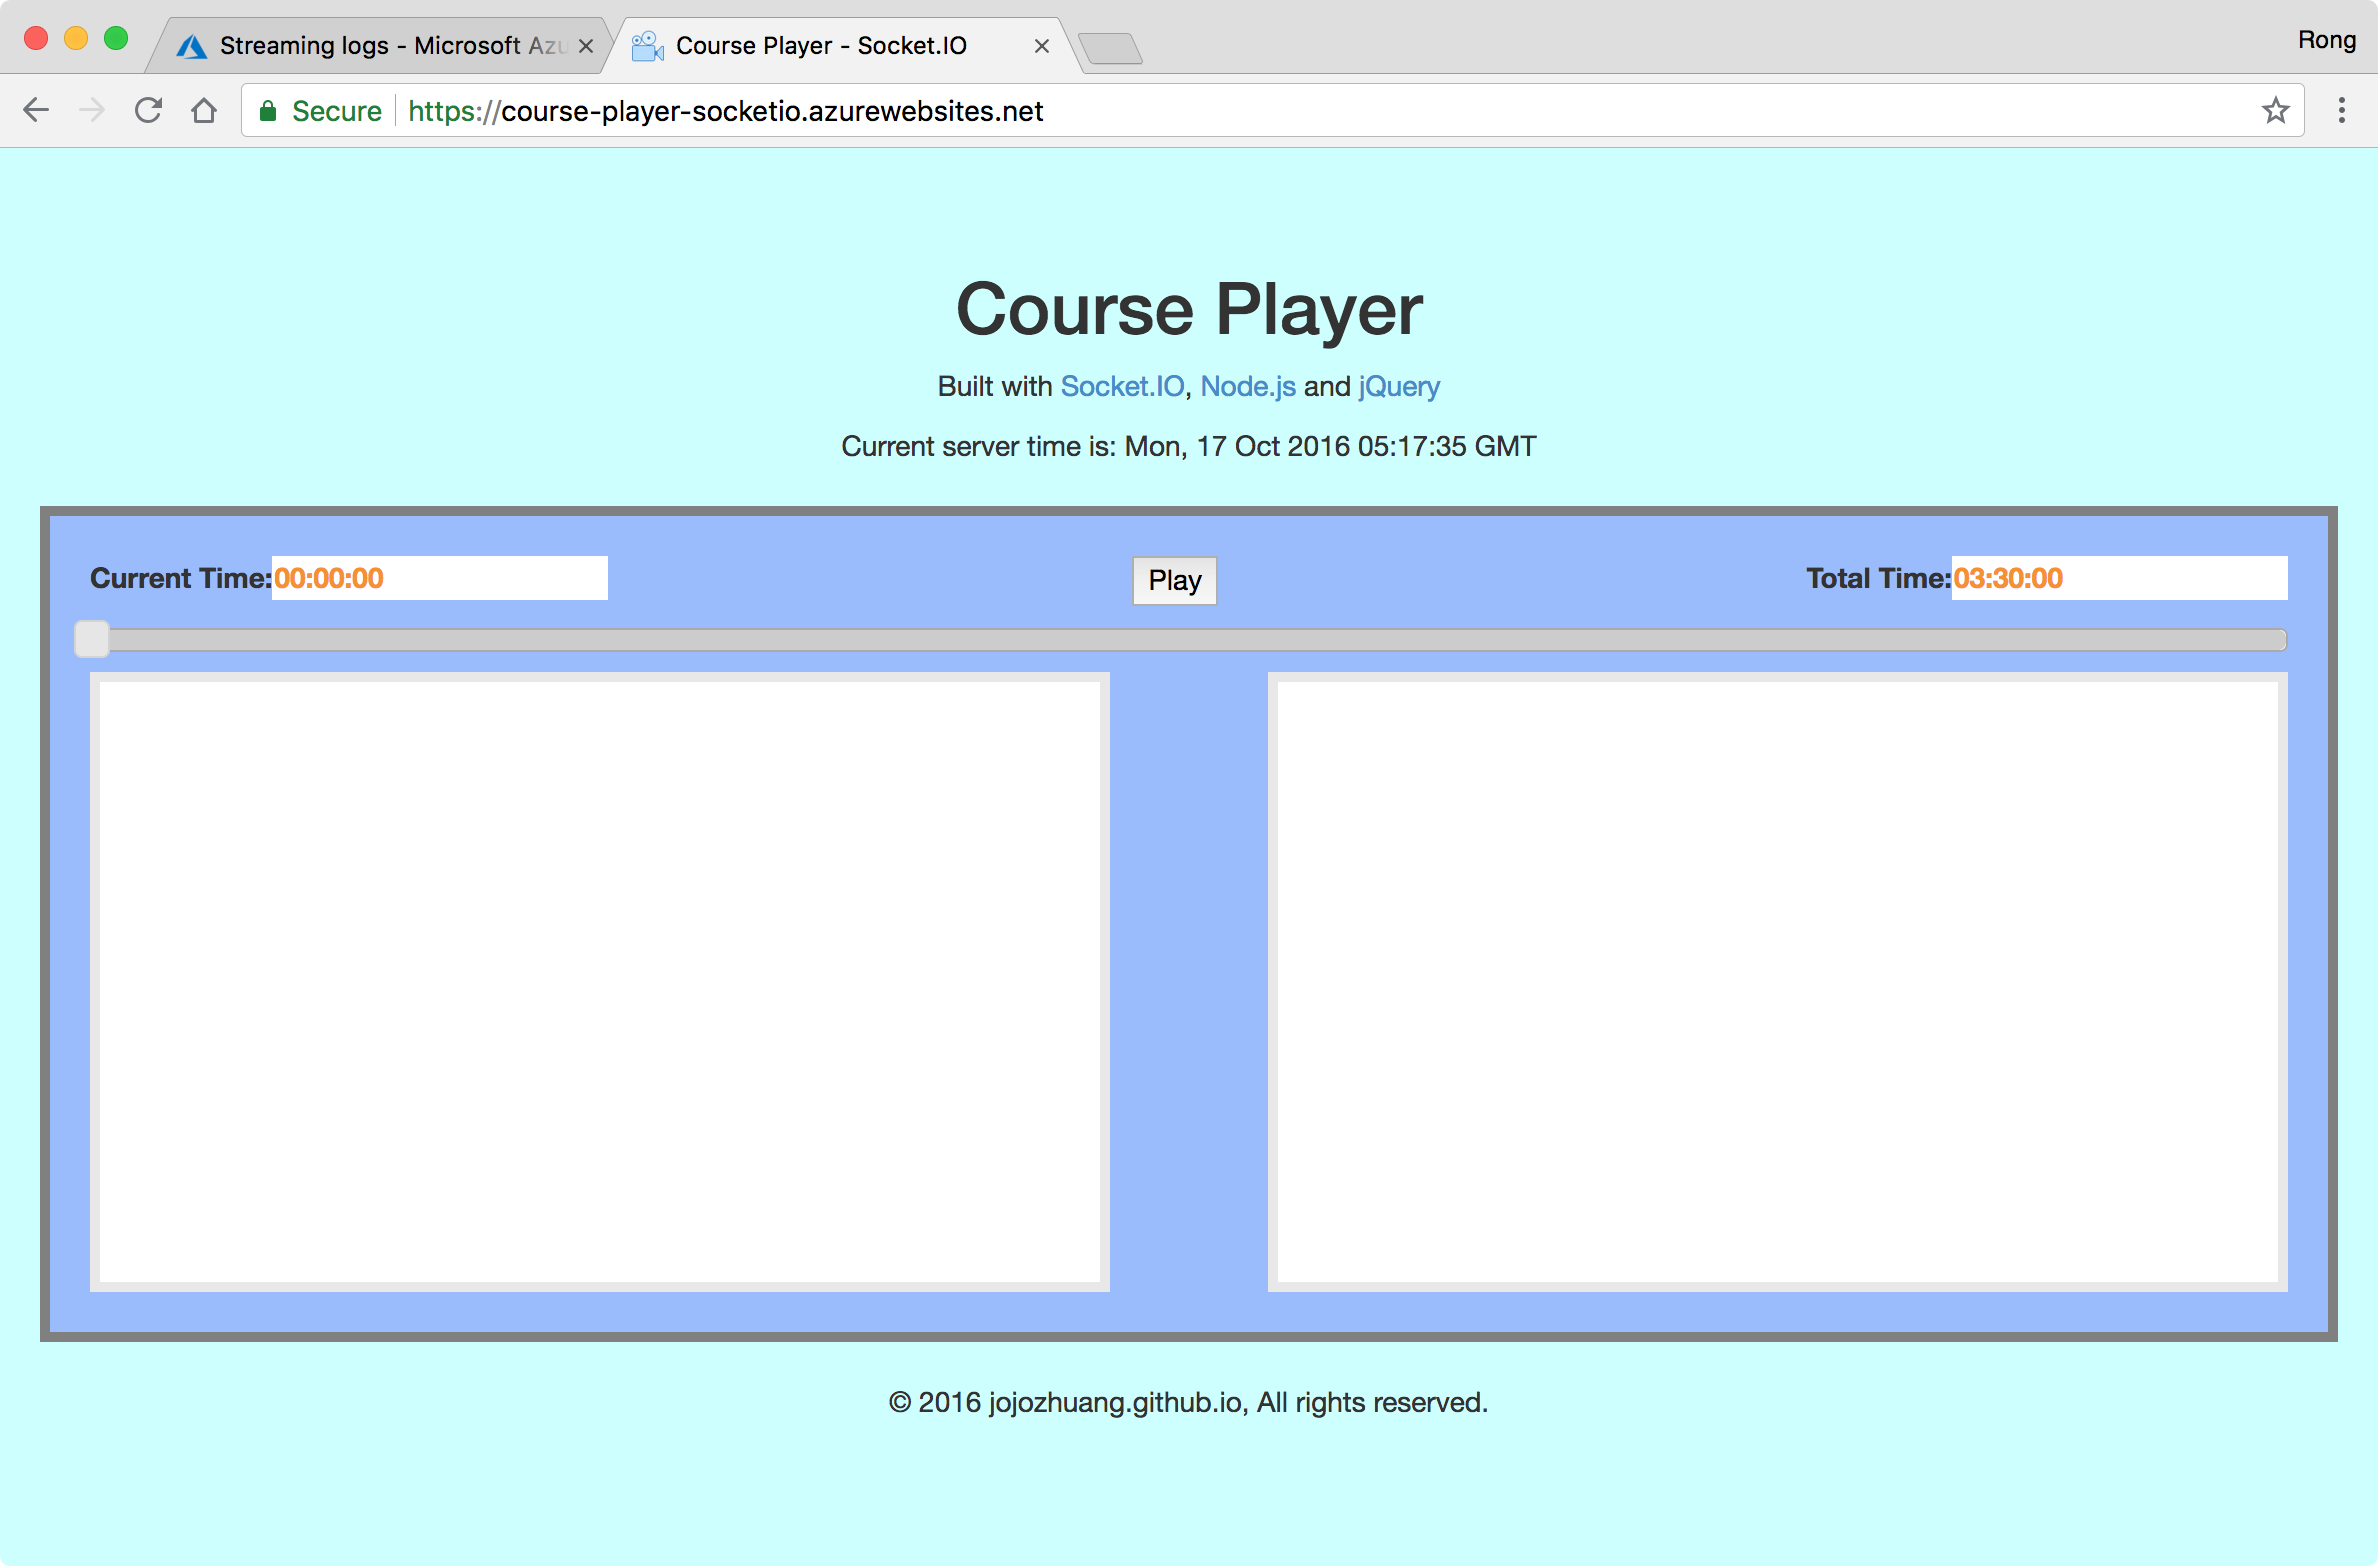 Click on the ‘Play’ button, and drag the slider bar. The player works properly.