4142. AWS-Database-RDSAWS, RDS, and MySQL
Use RDS database services.
1. Amazon RDS
1.1 What is Amazon RDS?
Amazon Relational Database Service (Amazon RDS) is a managed service that makes it easy to set up, operate, and scale a relational database in the cloud. It provides cost-efficient and resizable capacity, while managing time-consuming database administration tasks, freeing you up to focus on your applications and business.
1.2 Relational Databases Supported By Amazon RDS
Amazon RDS supports:
- Amazon Aurora
- MySQL
- MariaDB
- Oracle
- SQL Server
- PostgreSQL
2. Lab - RDS
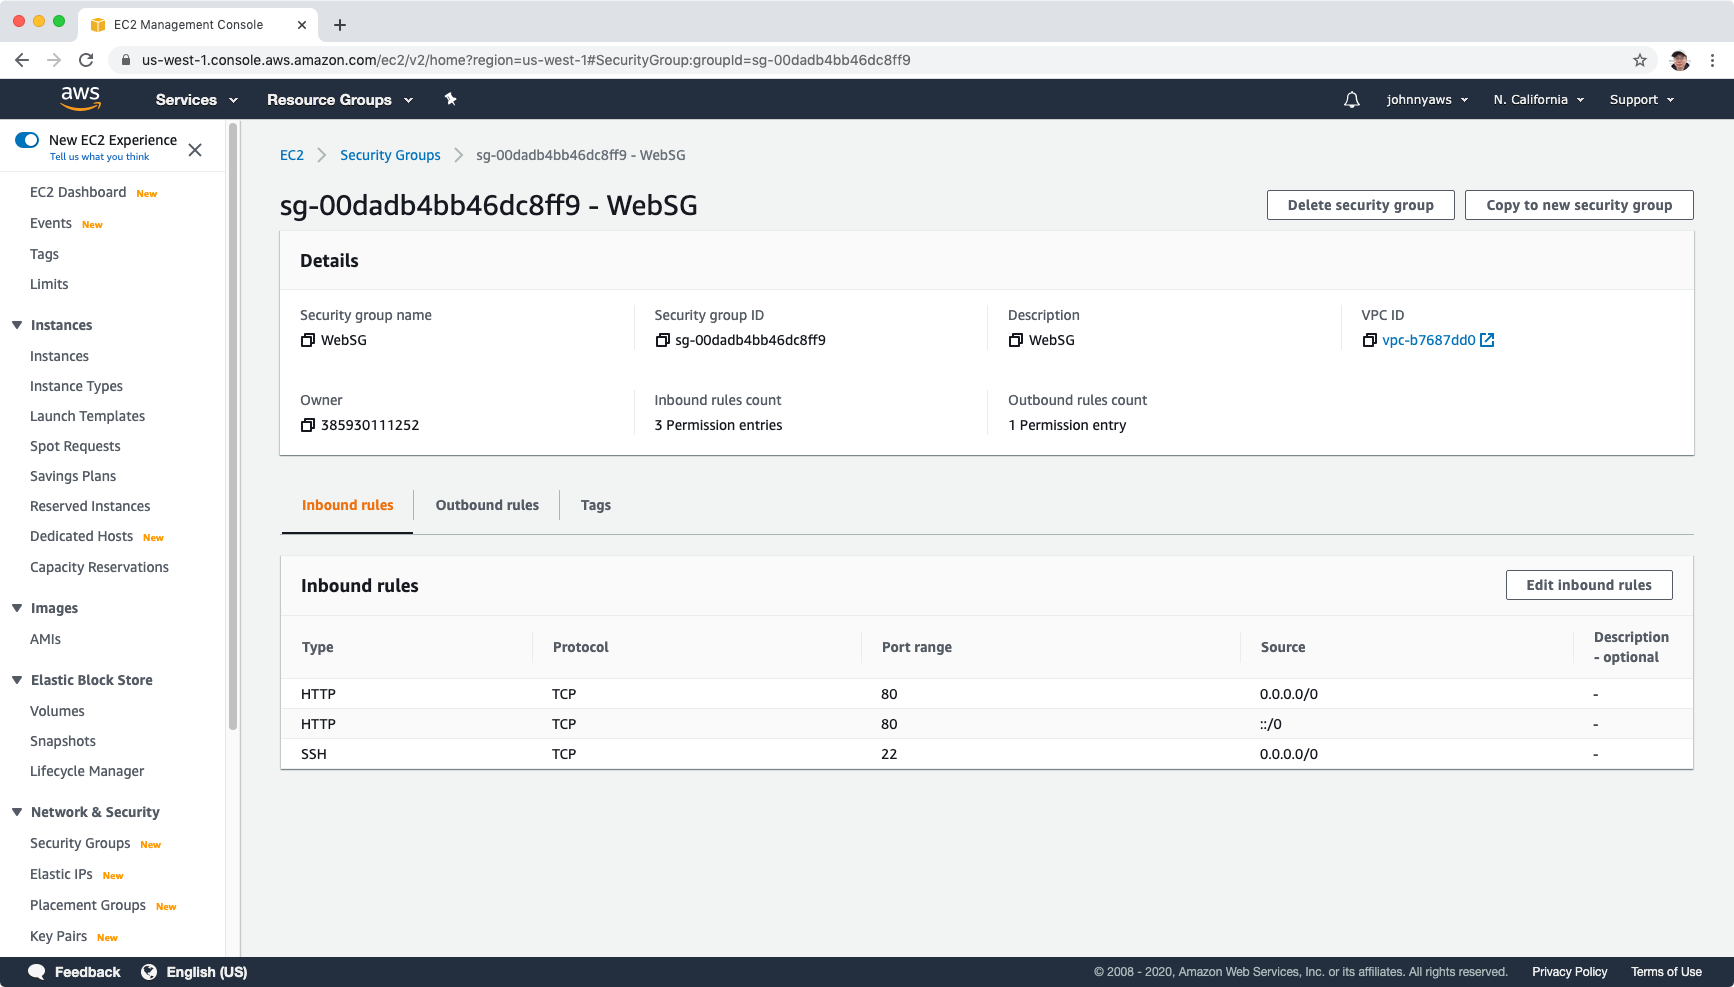
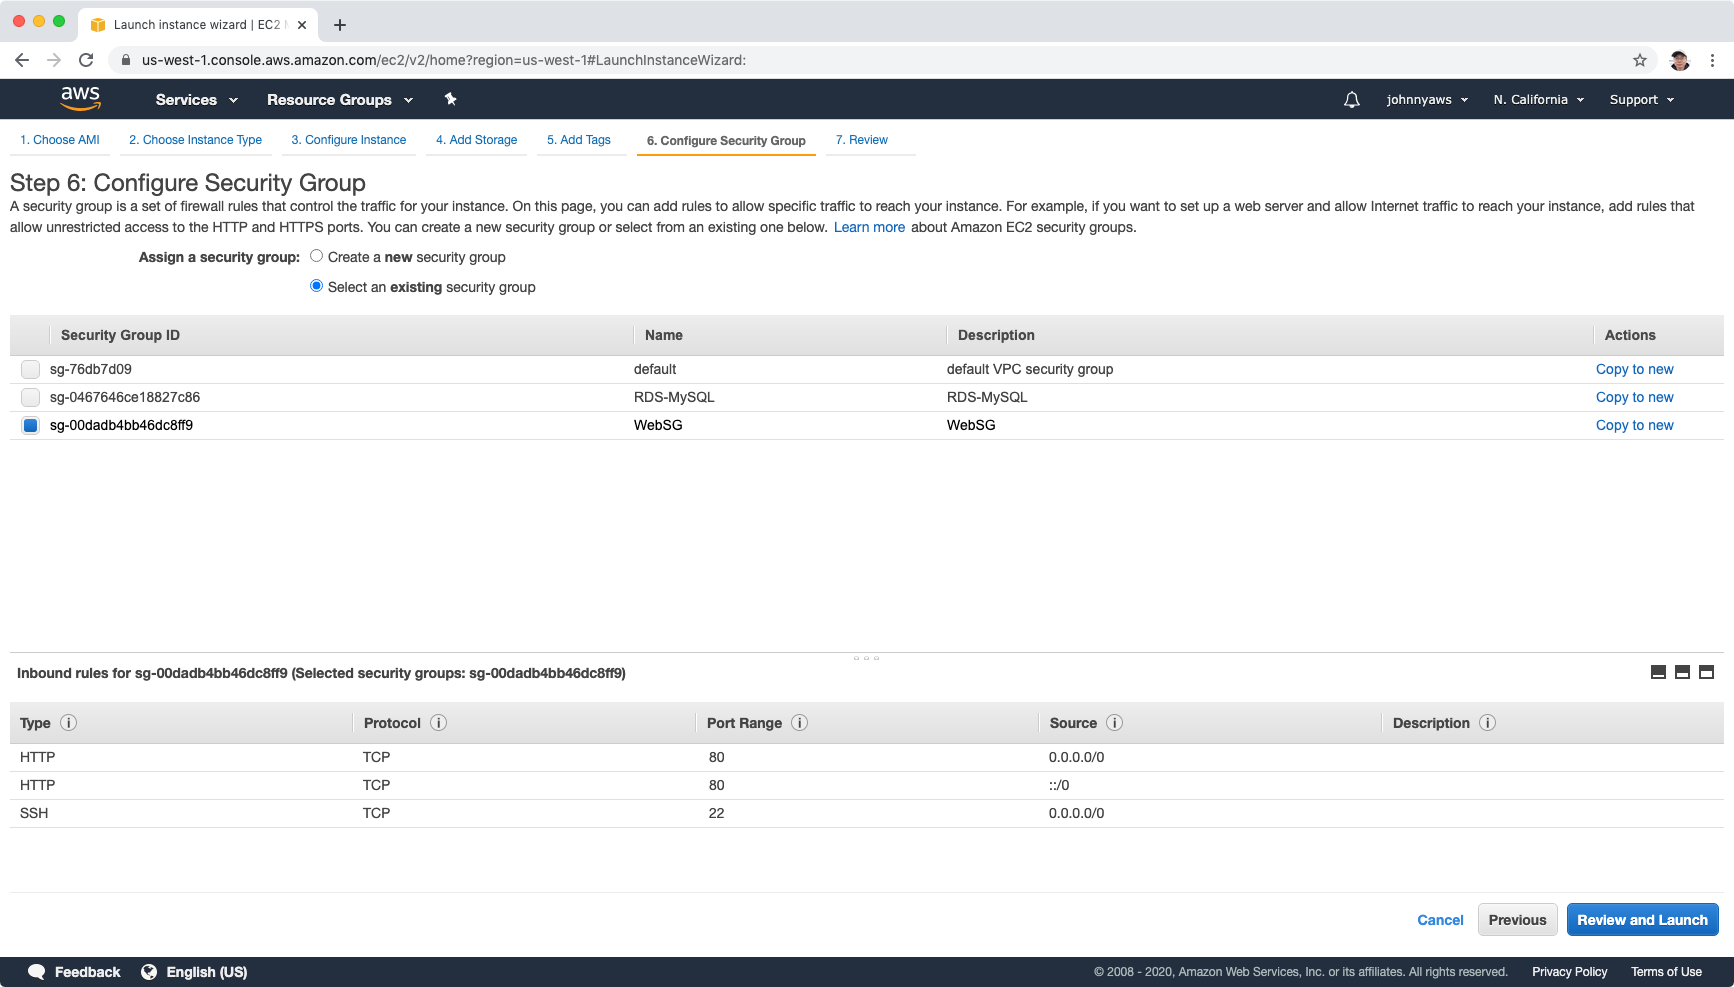
2.1 Creating Security Groups
First, create security group ‘WebSG’ for web server, expose 80 and 22 ports.
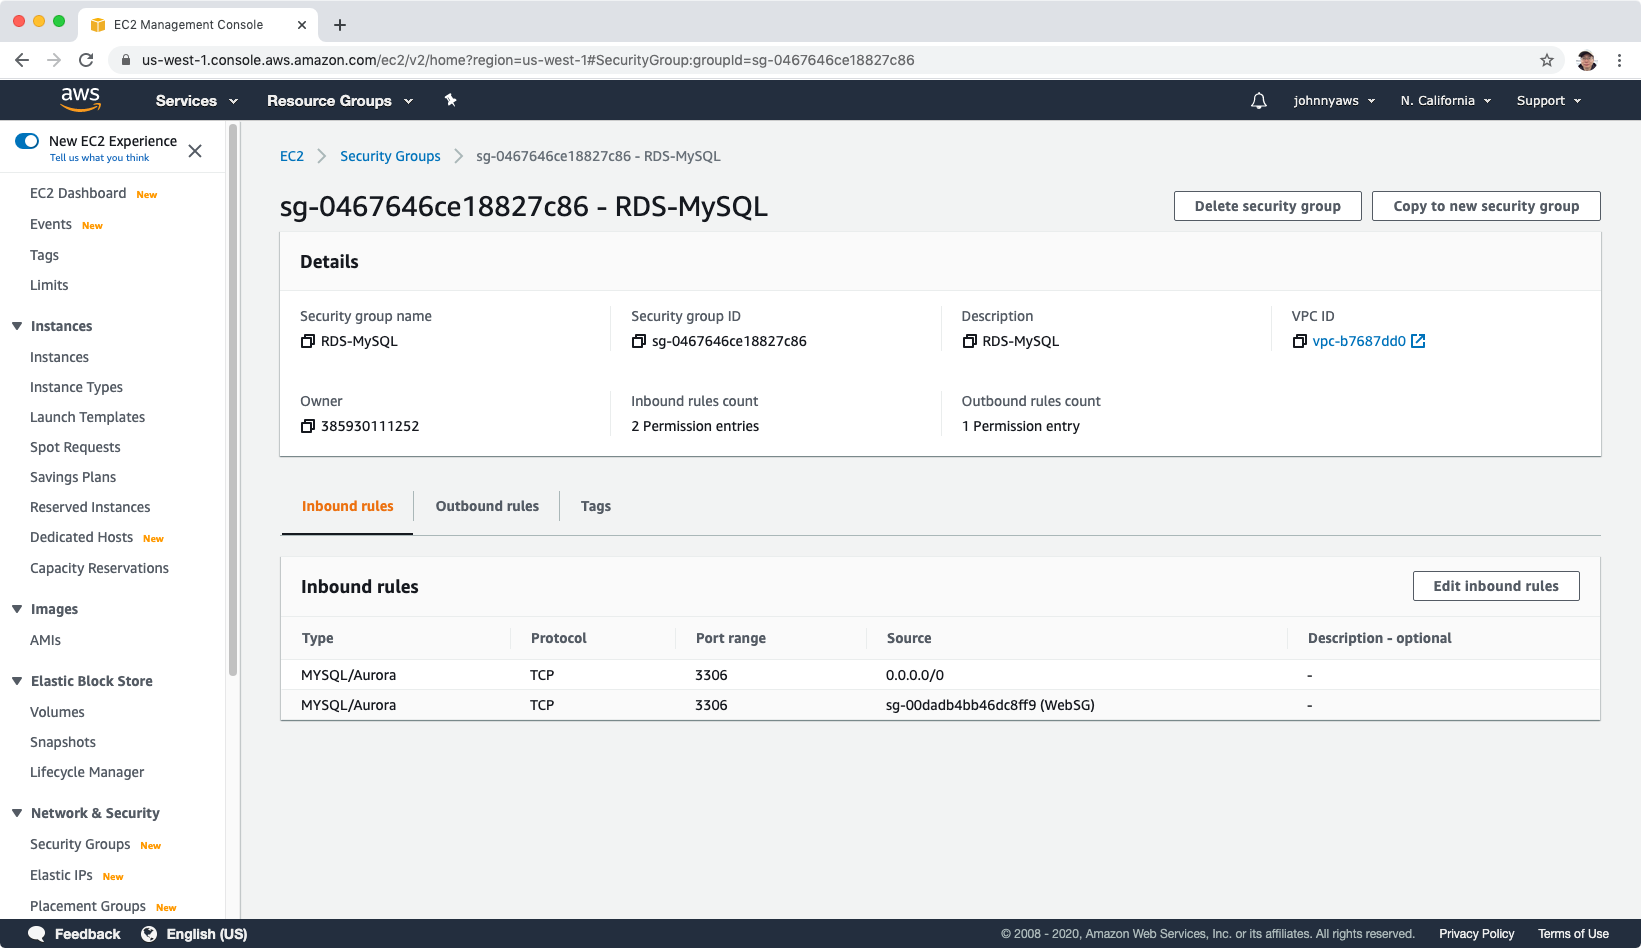
 Then, create another security group ‘RDS-MySQL’ for MySQL database, expose 3306 port to source ‘WebSG’.
2.2 Creating RDS Instance
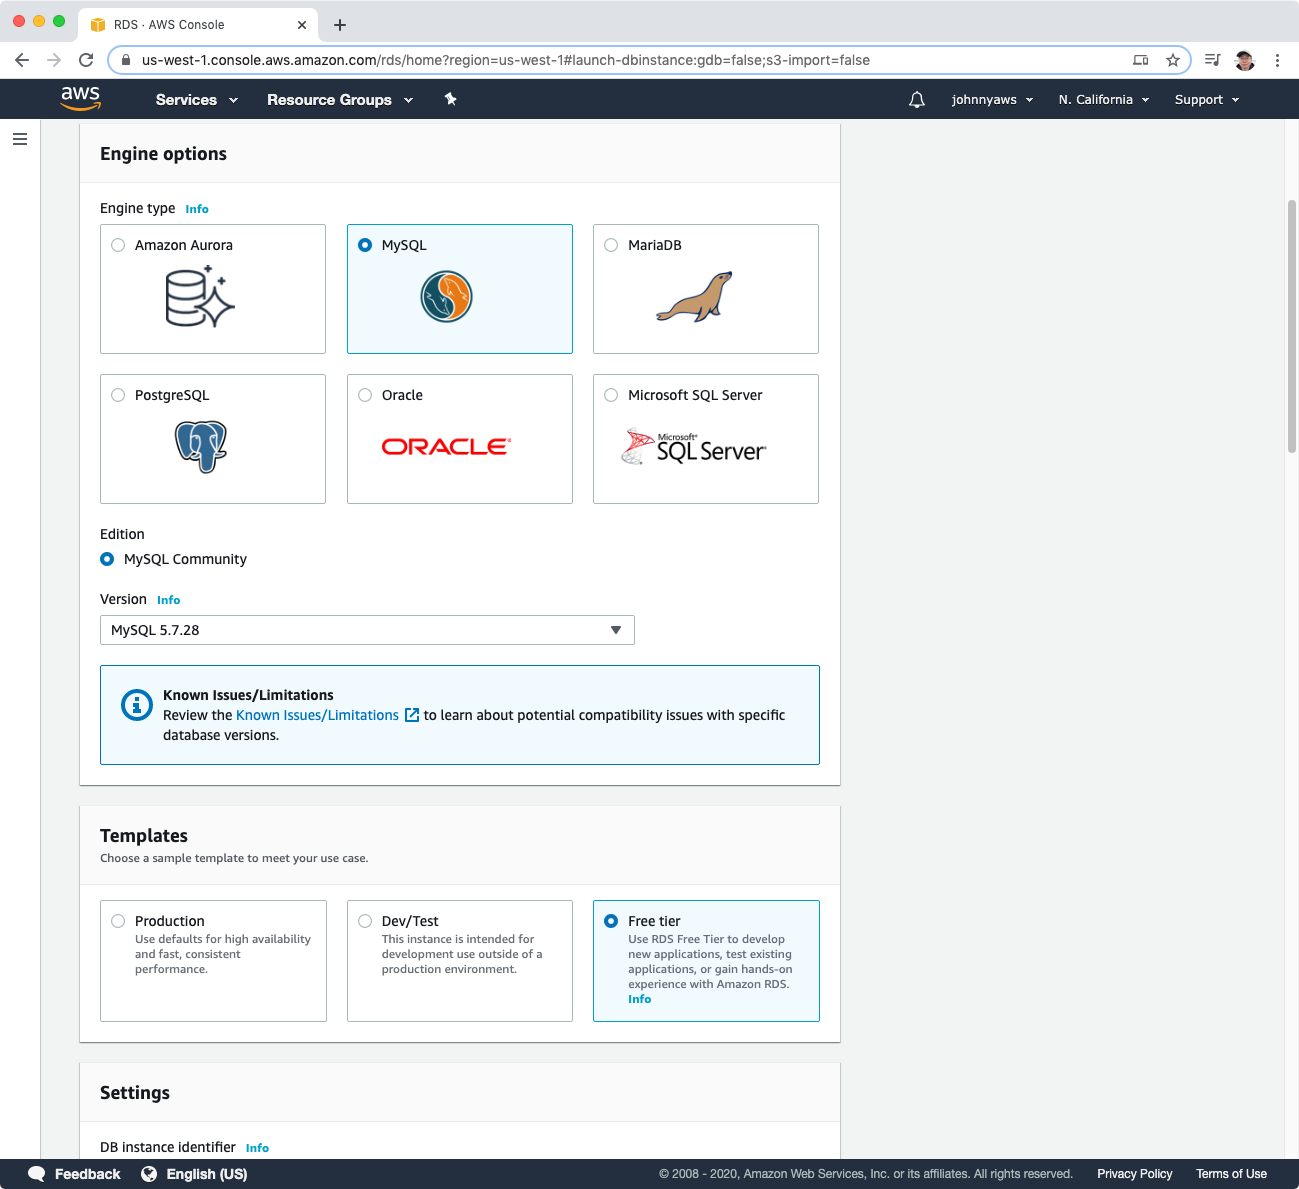
Services->Database->RDS, Create database, select MySQL, choose version and select “Free Tier”.
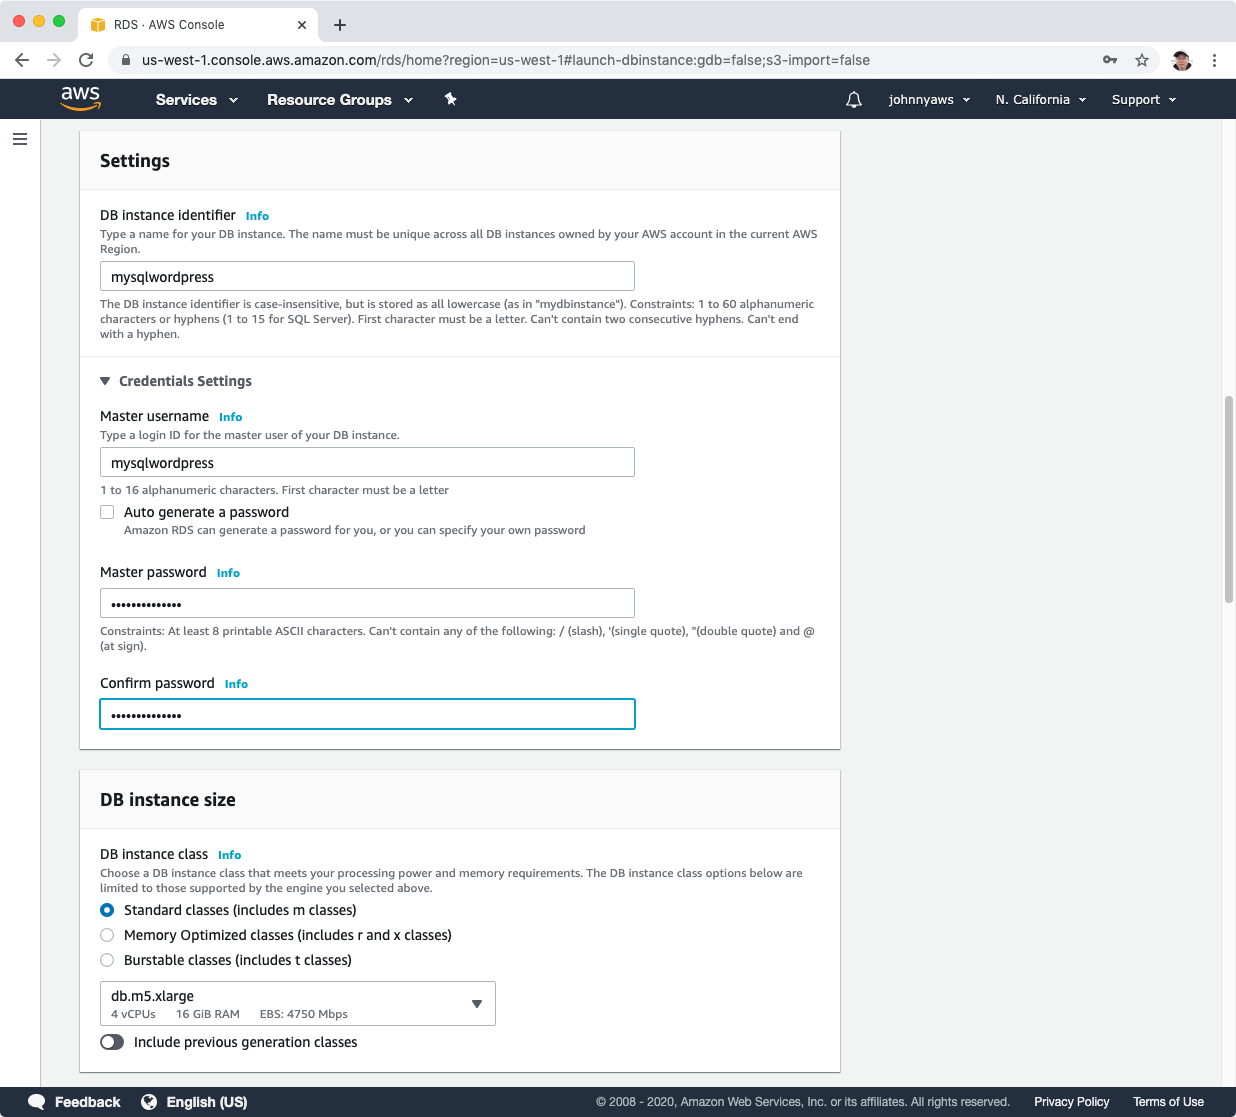
 Set DB Instance Identifier, master name and password(eg. mysqlwordpress/mysqlwordpress).
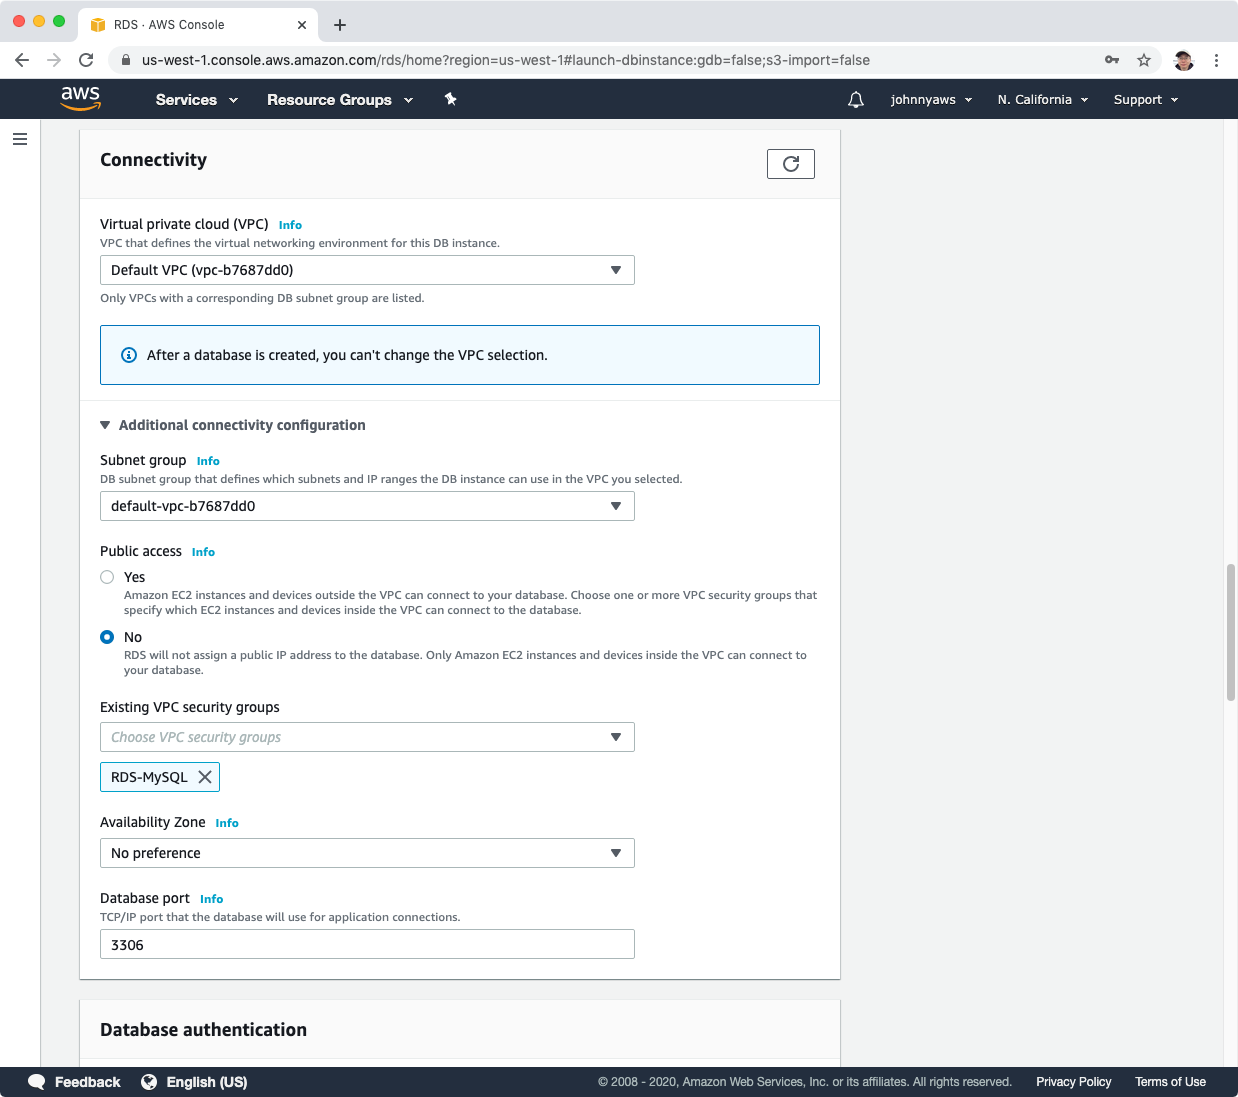
 Expand “Additional connectivity configuration”, choose “RDS-MySQL” as the security group, which allows web server instance to connect the database.
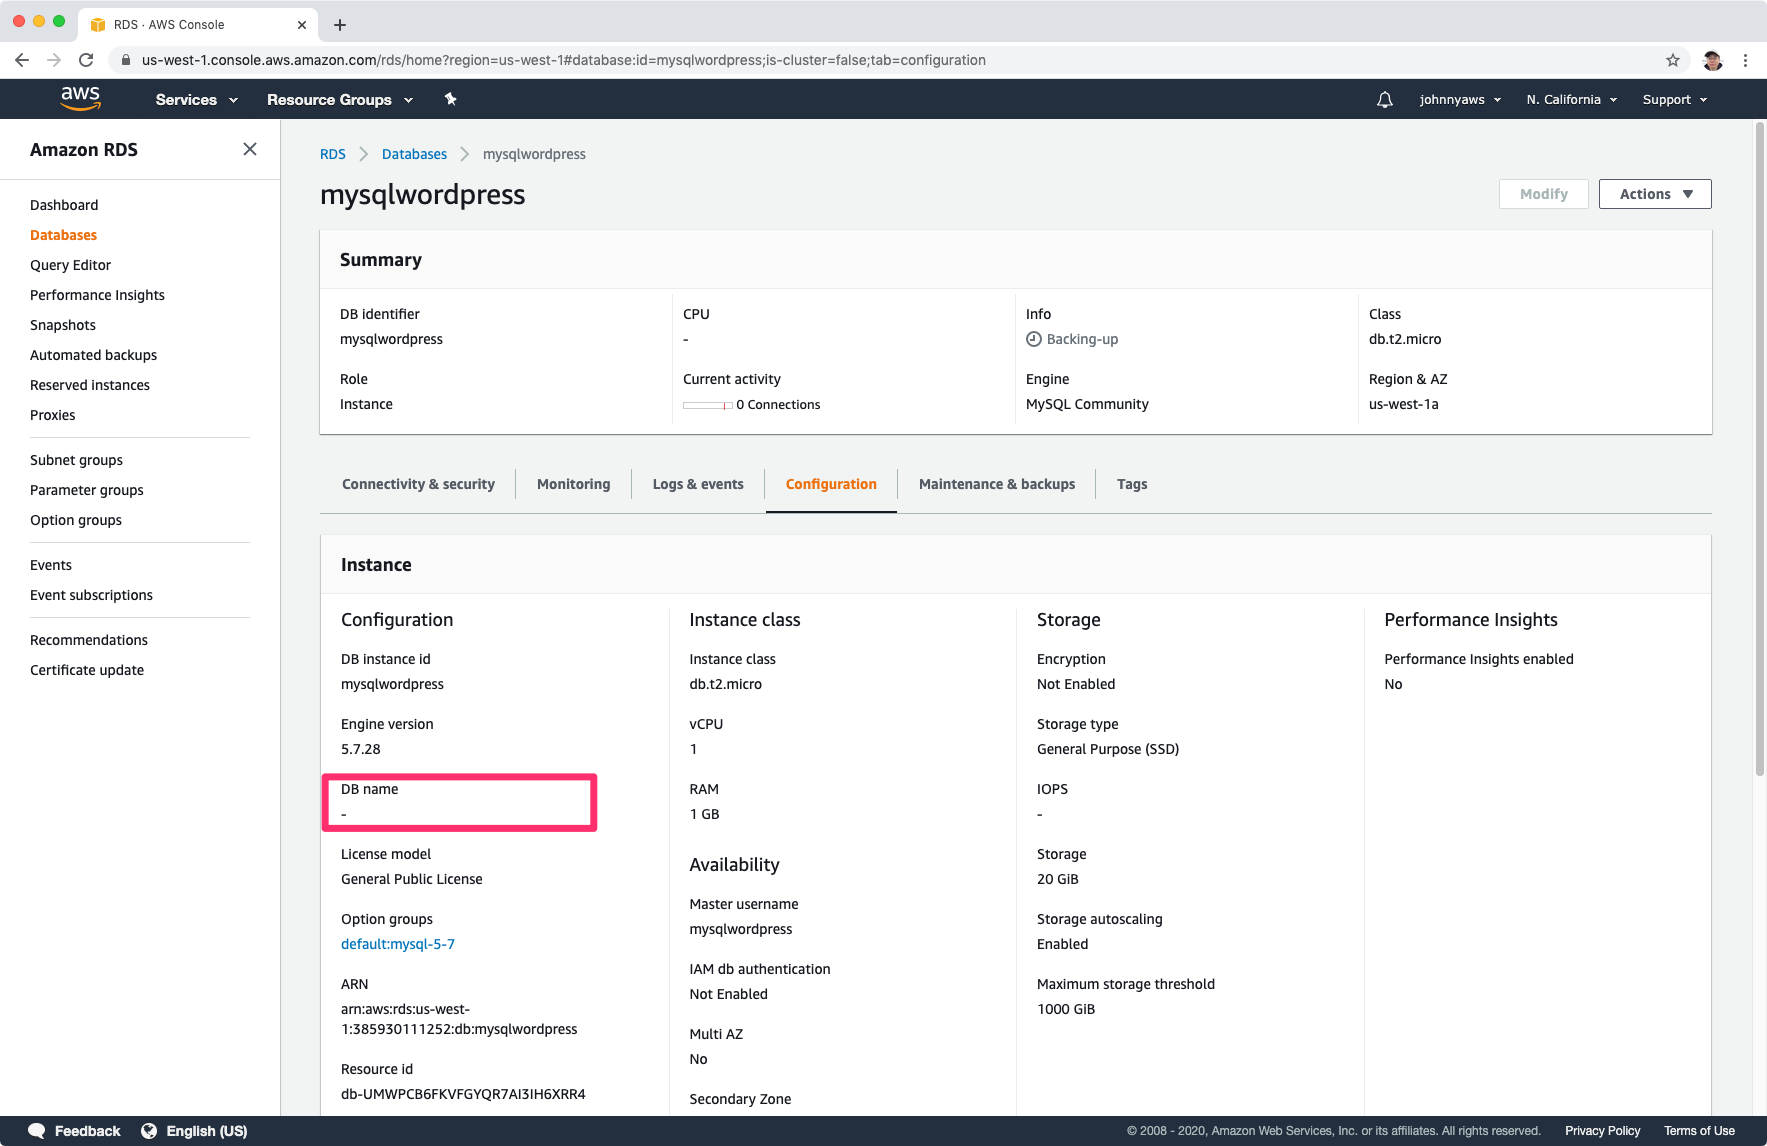
 Set the initial database name, eg. mysqlwordpress. This is important for configuring the wordpress later. If you don’t see this option, try to switch to “Production” template and switch back to “Free tier”. Sometime, there is a UI issue here. The input box for “Initial database name” may not be visible.
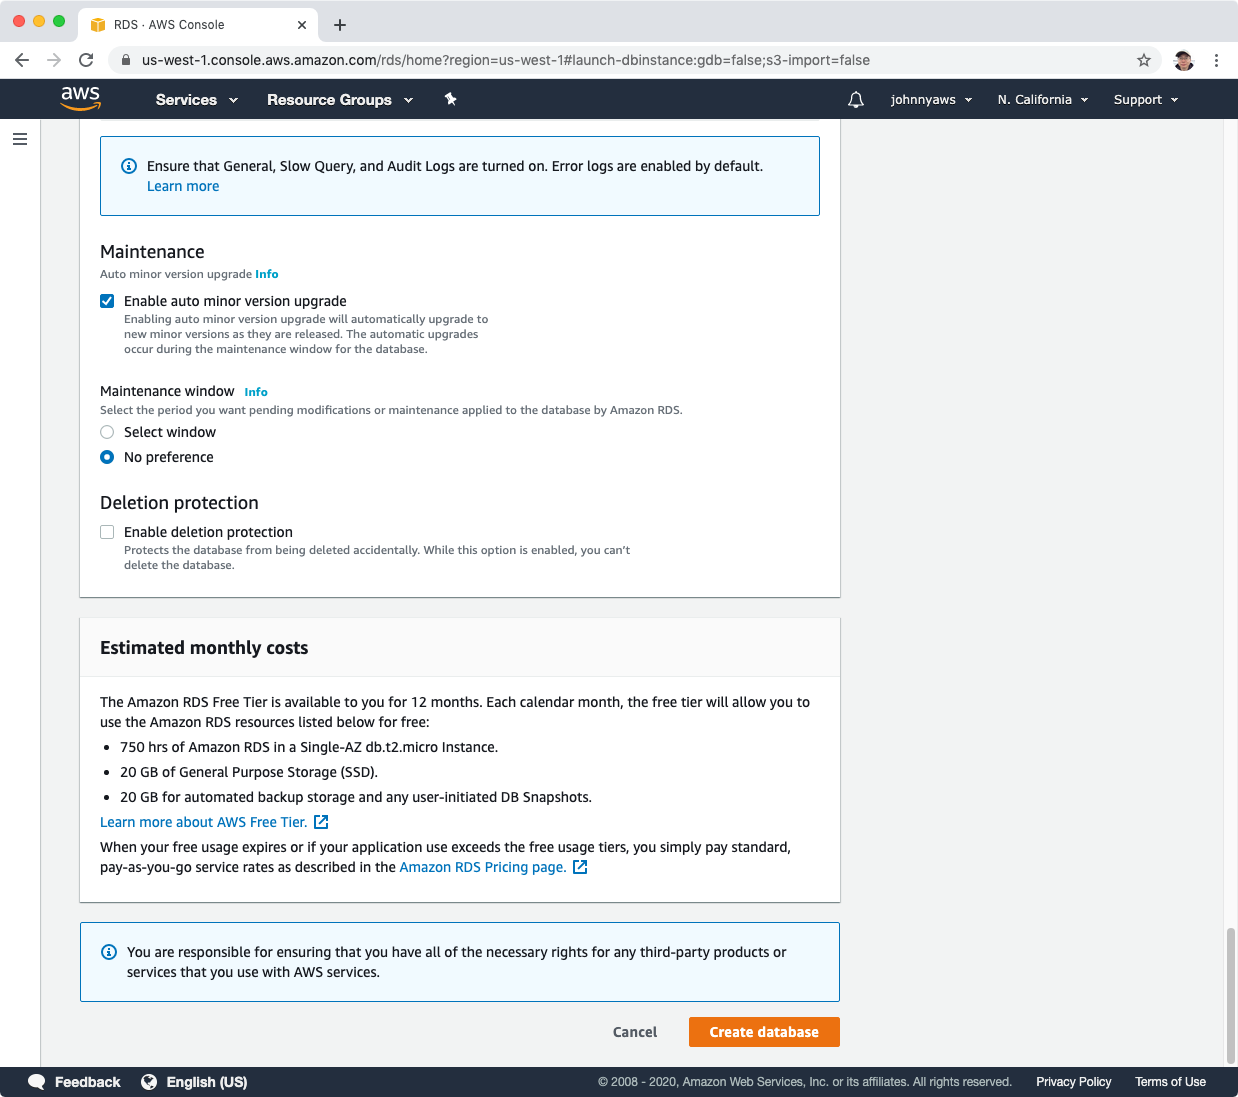
 Click ‘Create database’, a new db will be created automatically.
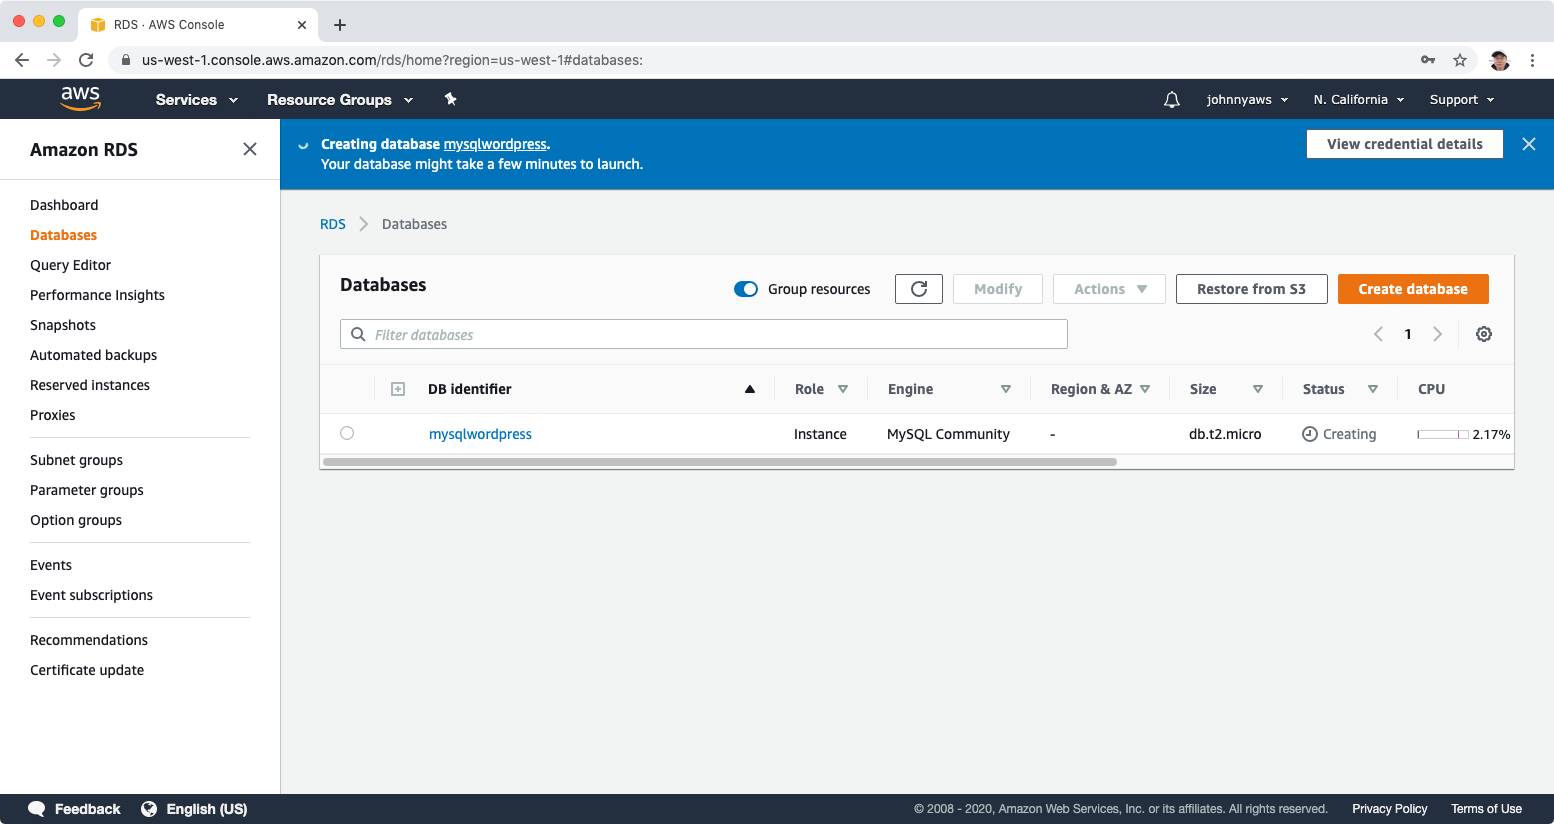
 It takes some time until the MySQL instance is launched.
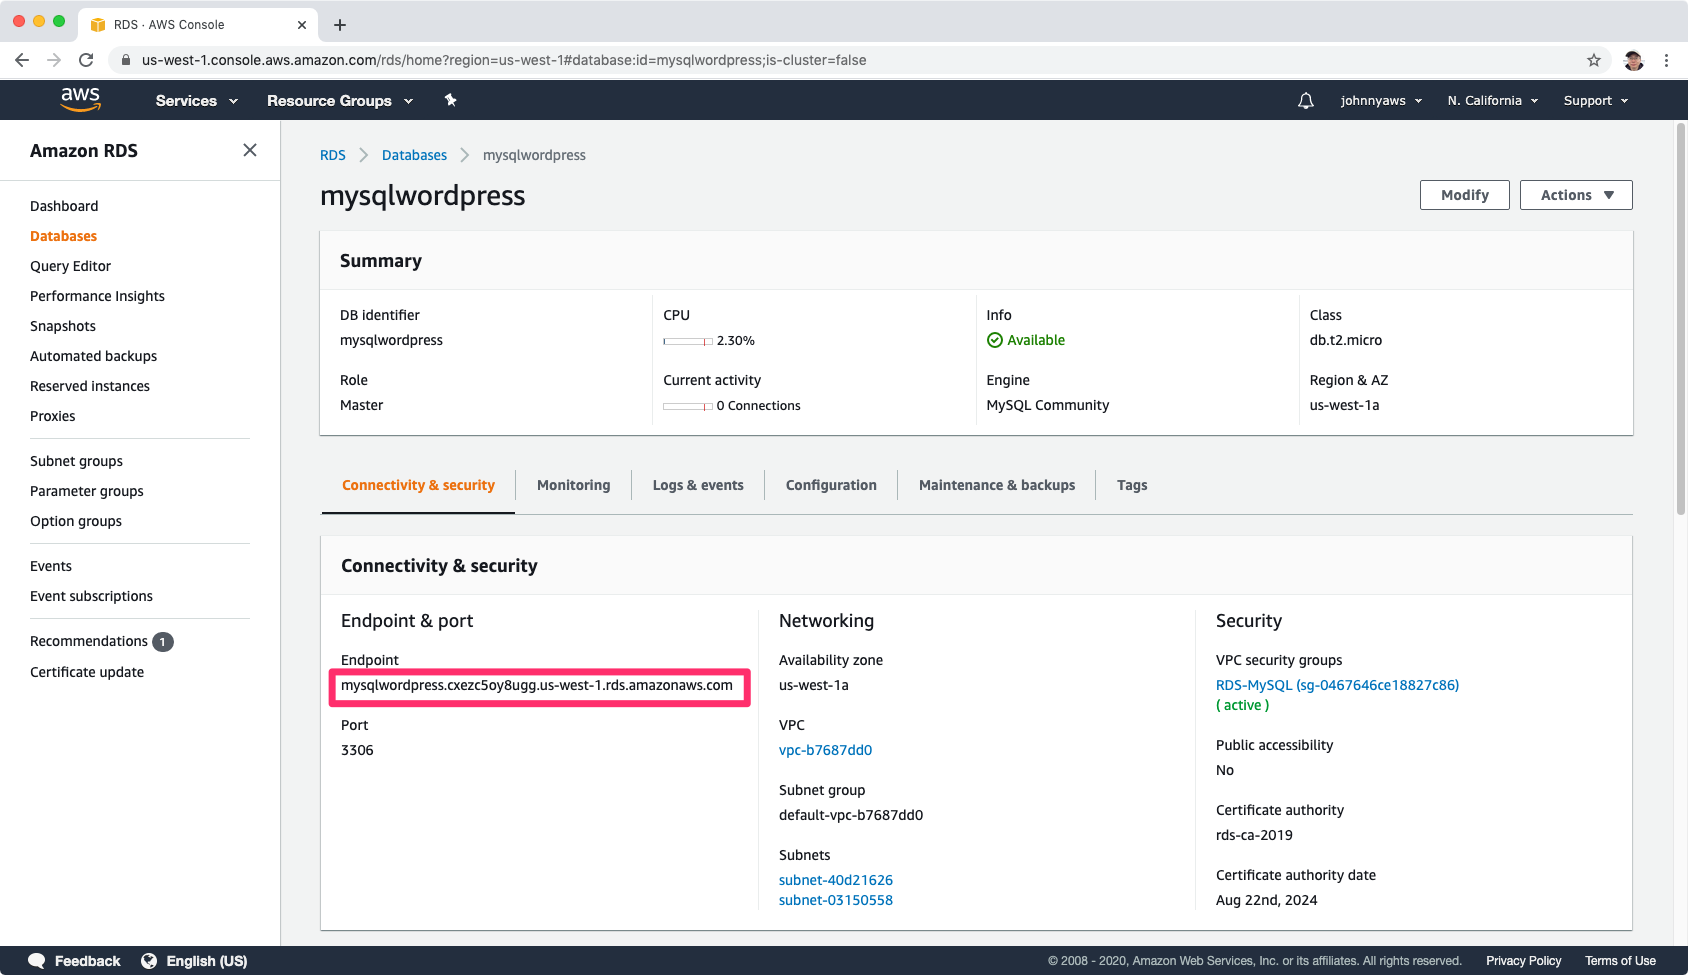
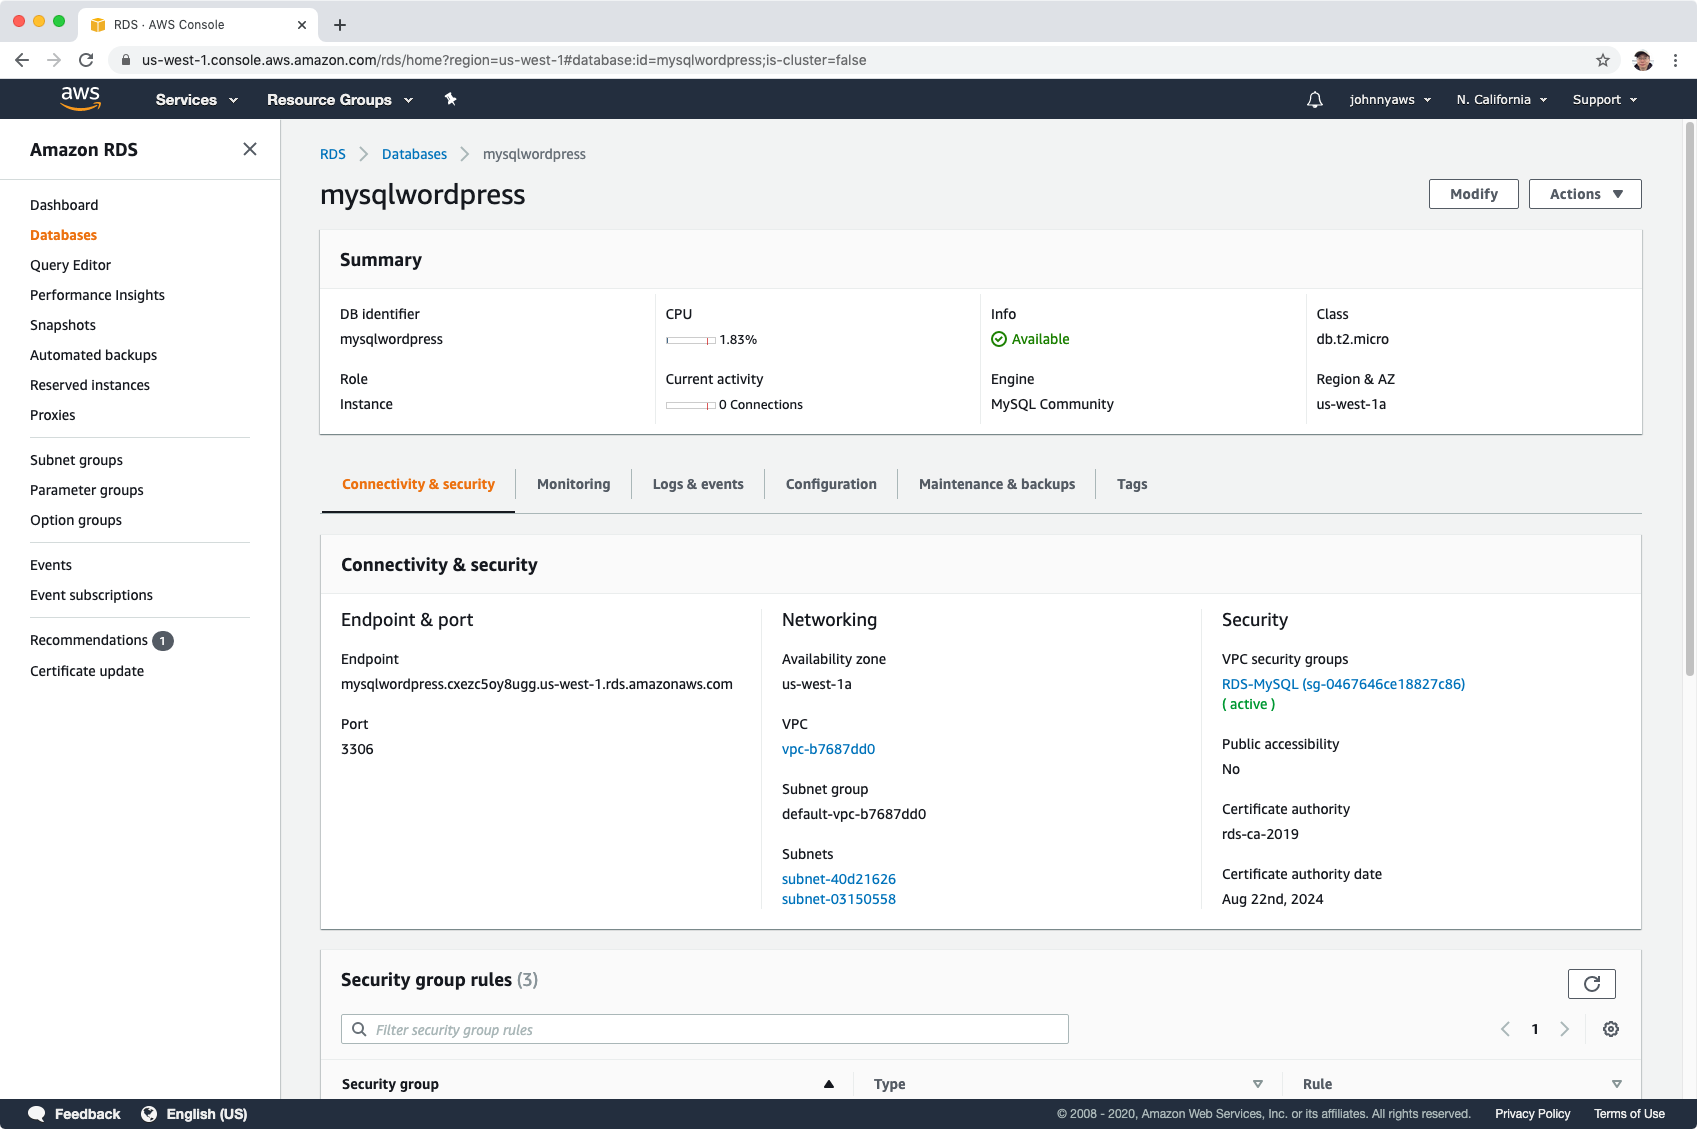
 Copy the endpoint value, we will use it later.
2.3 Creating EC2 Instance
Create new instance with the following bootstrap script, which will install Apache, php mysql driver and wordpress.
#!/bin/bash
yum install httpd php php-mysql -y
cd /var/www/html
wget https://wordpress.org/wordpress-5.1.1.tar.gz
tar -xzf wordpress-5.1.1.tar.gz
cp -r wordpress/* /var/www/html/
rm -rf wordpress
rm -rf wordpress-5.1.1.tar.gz
chmod -R 755 wp-content
chown -R apache:apache wp-content
service httpd start
chkconfig httpd on
In the step of “Configure Instance”, paste the script to the user data box.
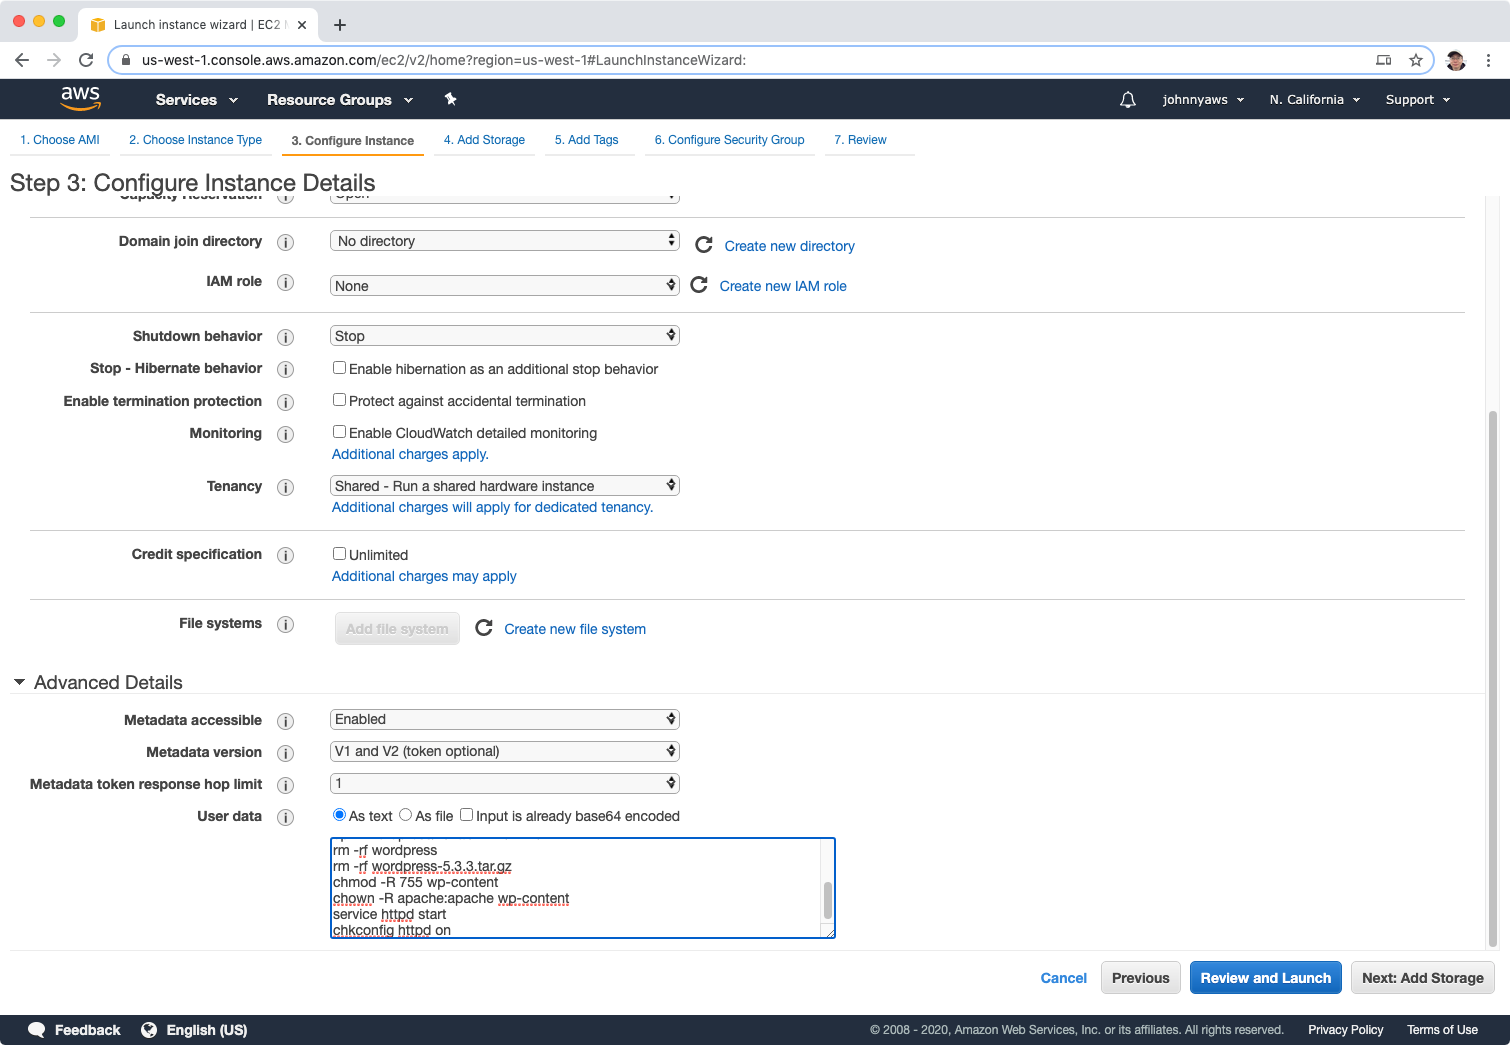 Add tag “WordPressServer”.
 Select the “WebSG” security group, Review and Launch.
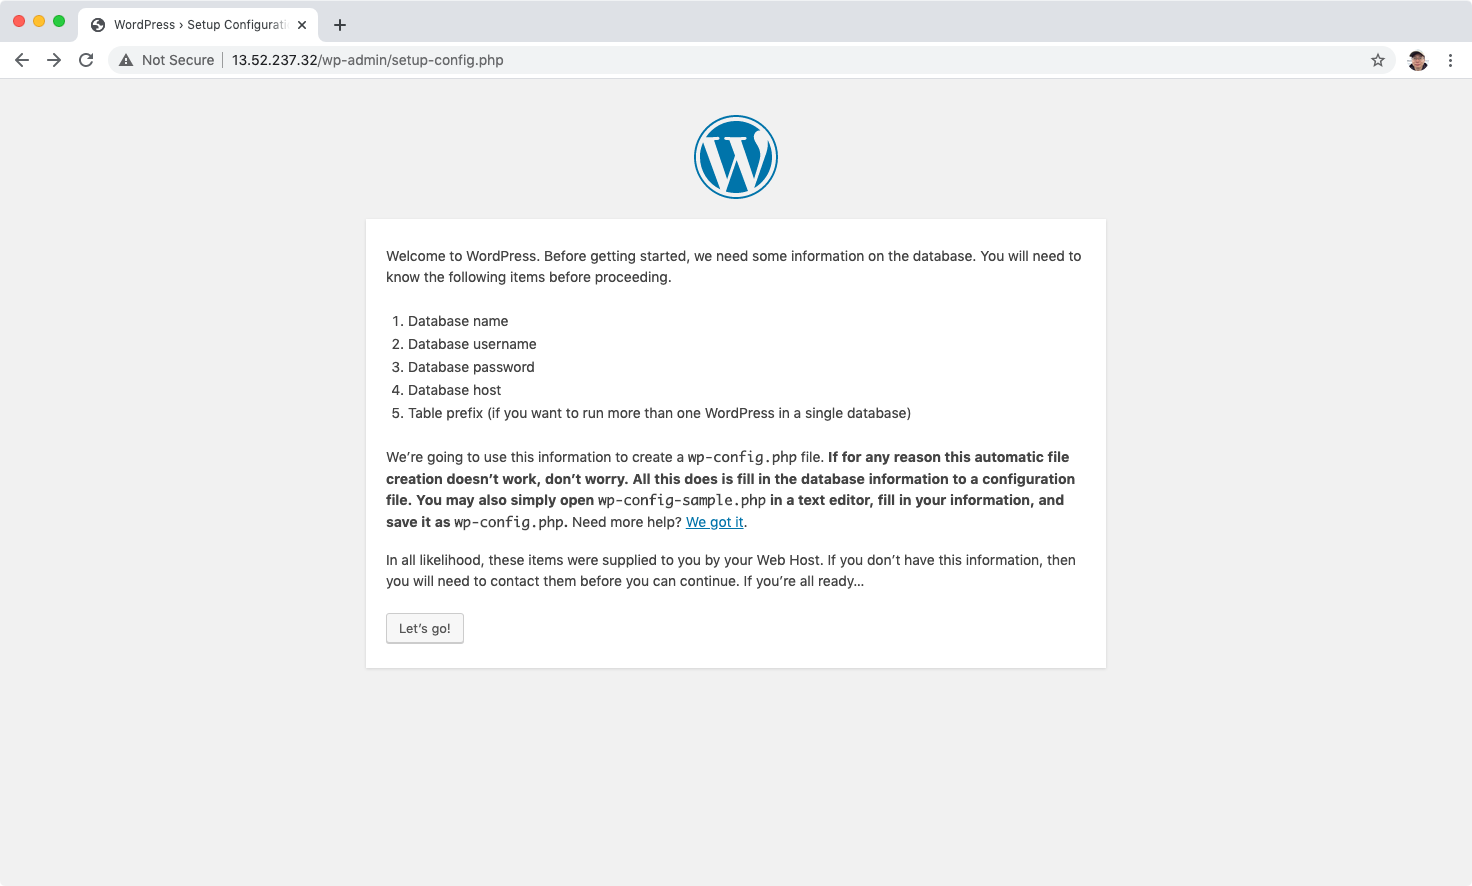
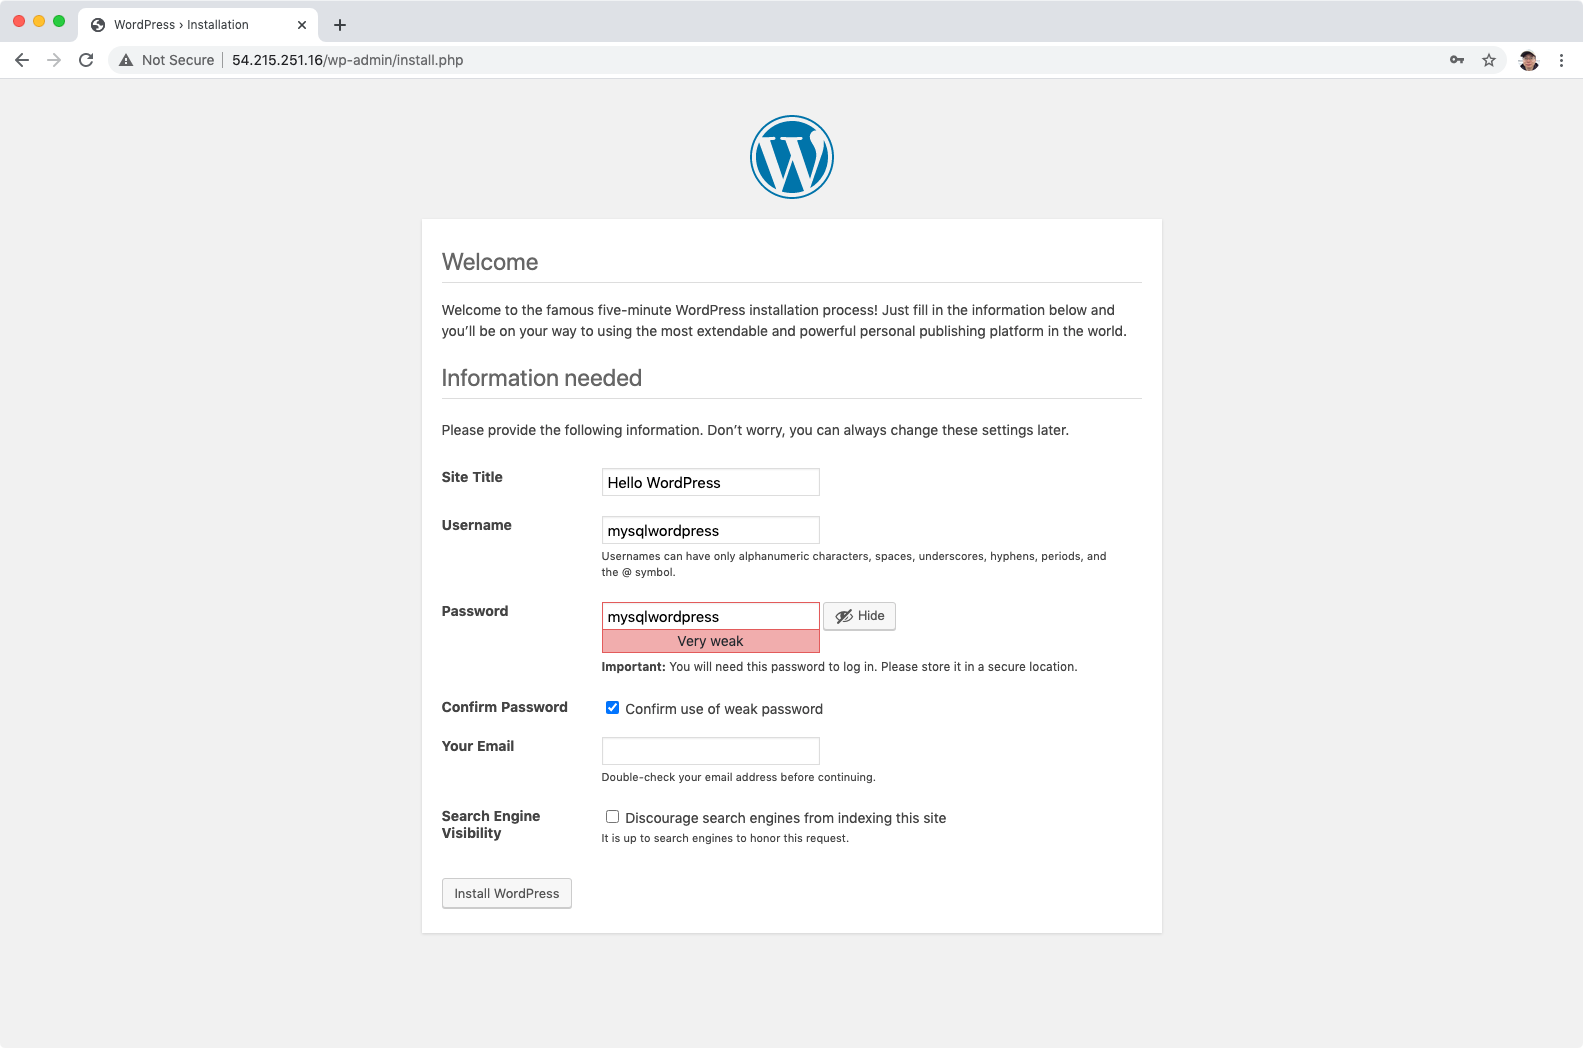
 Once the instance is launched, access the public ip of web server in browser, eg. http://13.52.237.32/wp-admin/setup-config.php. We will see the wordpress admin page.
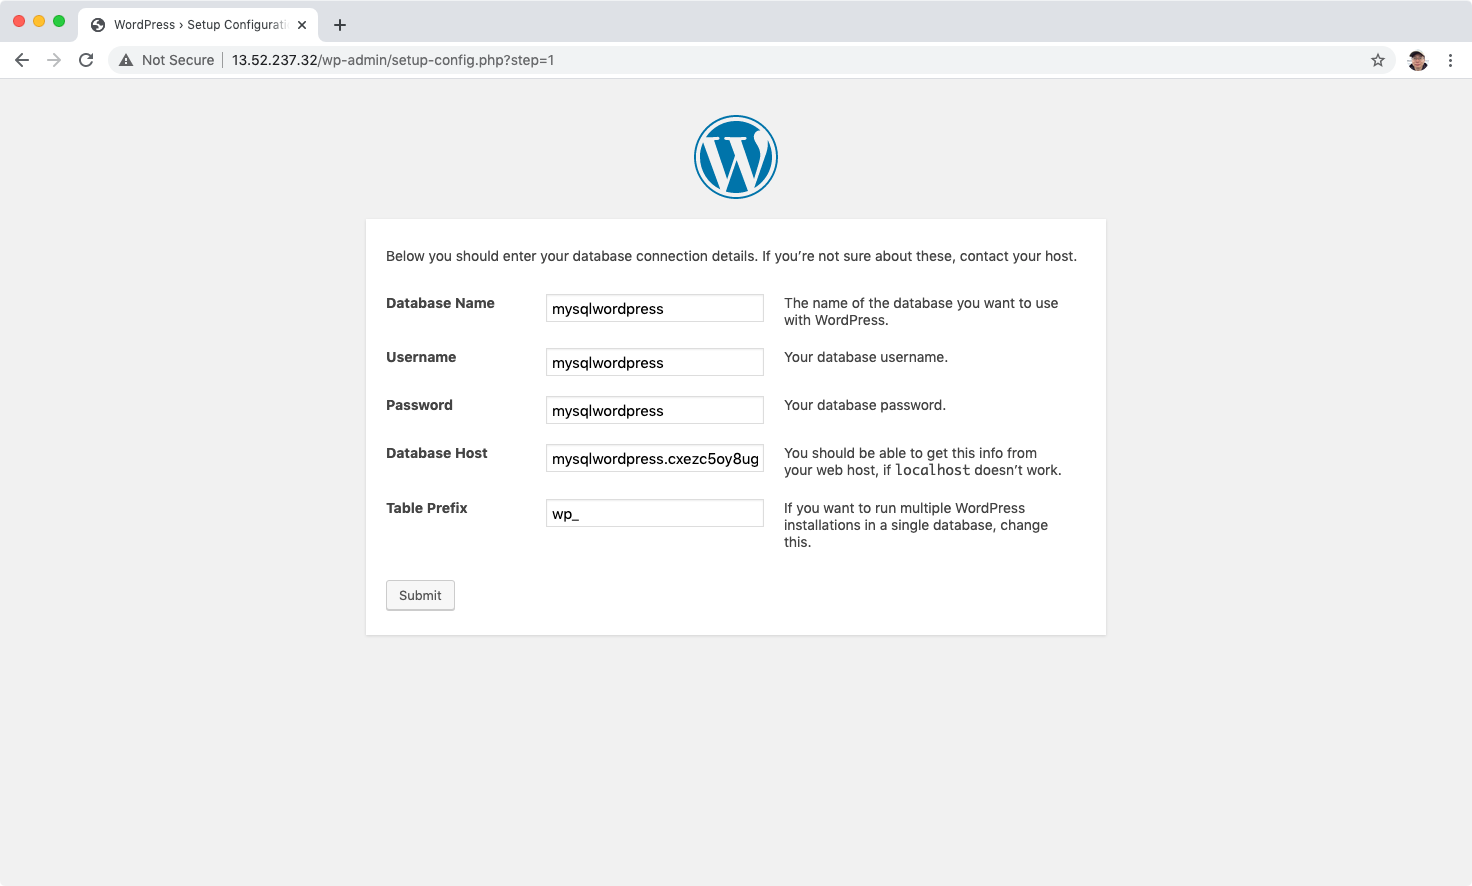
 Setup the data connection, including database name, use name, password. Put the endpoint value(MySQL instance) into Database Host.
 You may get the error: Can’t select database.
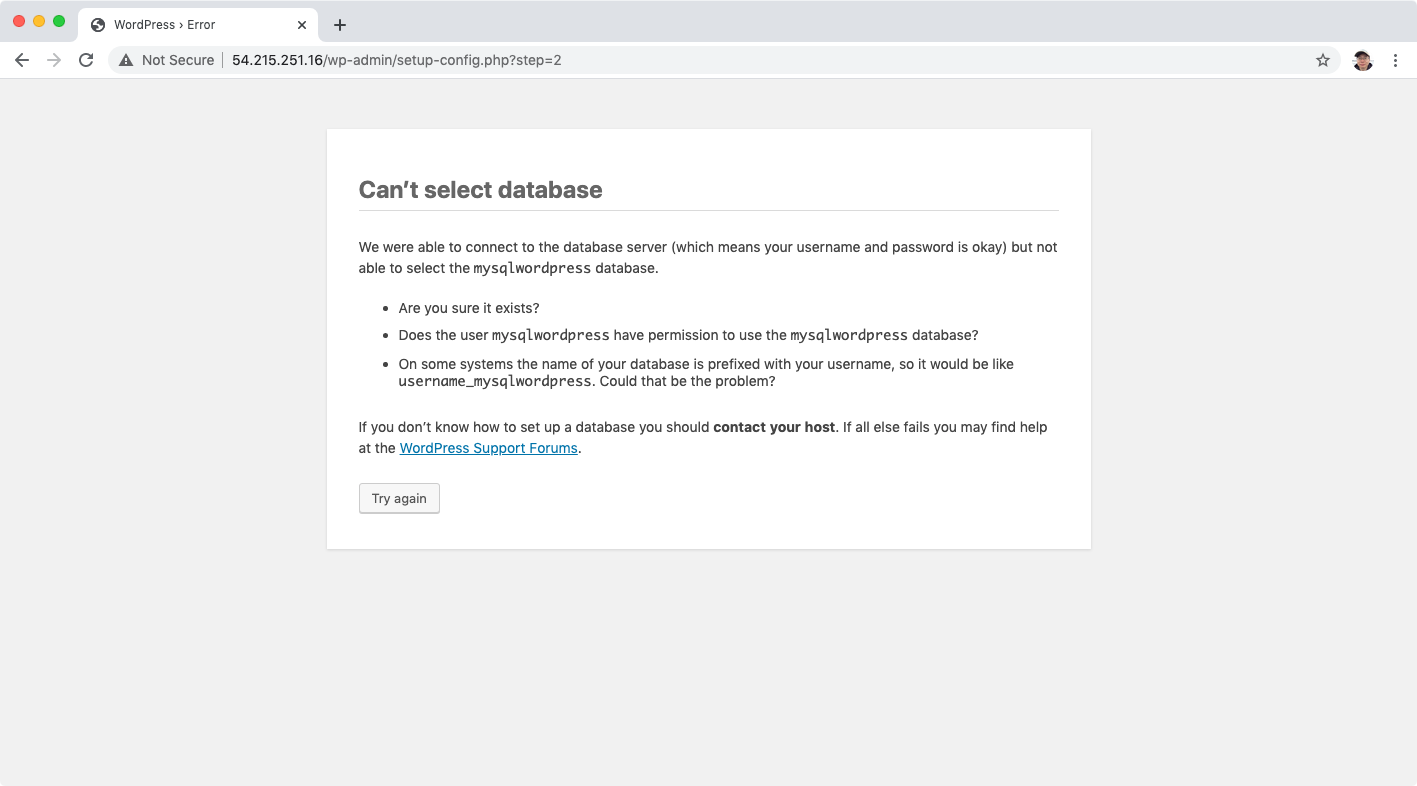 This is because you didn’t set the database name when creating the MySQL instance. Recreate the MySQL database with initial database name.
 If mysql connection is fine, we will get the following error: can’t write the wp-config.php file.
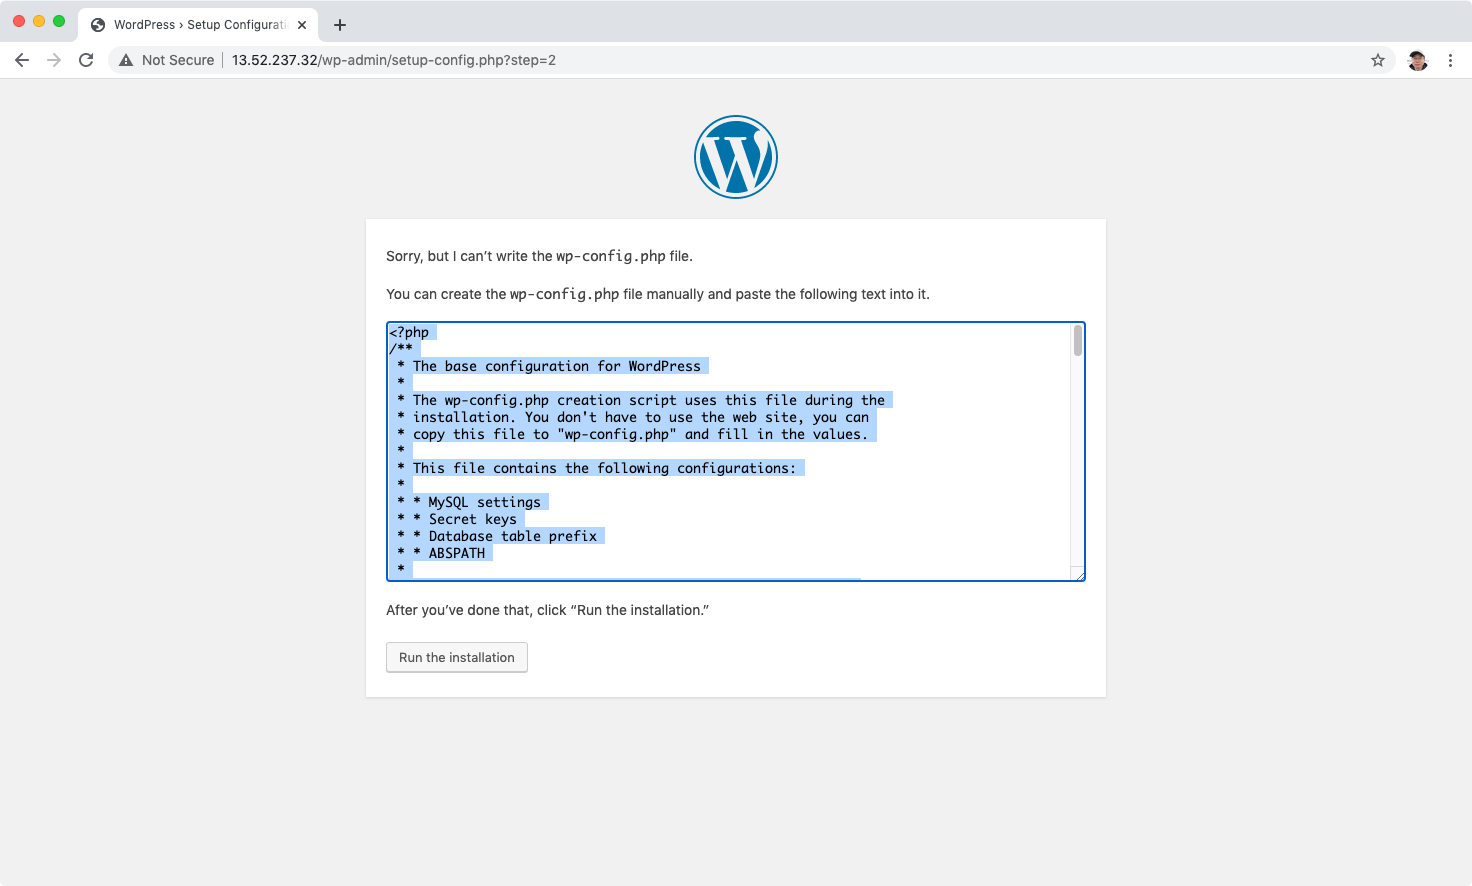 Copy the script.
<?php
/**
 * The base configuration for WordPress
 *
 * The wp-config.php creation script uses this file during the
 * installation. You don't have to use the web site, you can
 * copy this file to "wp-config.php" and fill in the values.
 *
 * This file contains the following configurations:
 *
 * * MySQL settings
 * * Secret keys
 * * Database table prefix
 * * ABSPATH
 *
 * @link https://codex.wordpress.org/Editing_wp-config.php
 *
 * @package WordPress
 */

// ** MySQL settings - You can get this info from your web host ** //
/** The name of the database for WordPress */
define( 'DB_NAME', 'mysqlwordpress' );

/** MySQL database username */
define( 'DB_USER', 'mysqlwordpress' );

/** MySQL database password */
define( 'DB_PASSWORD', 'mysqlwordpress' );

/** MySQL hostname */
define( 'DB_HOST', 'mysqlwordpress.cxezc5oy8ugg.us-west-1.rds.amazonaws.com' );

/** Database Charset to use in creating database tables. */
define( 'DB_CHARSET', 'utf8mb4' );

/** The Database Collate type. Don't change this if in doubt. */
define( 'DB_COLLATE', '' );

/**#@+
 * Authentication Unique Keys and Salts.
 *
 * Change these to different unique phrases!
 * You can generate these using the {@link https://api.wordpress.org/secret-key/1.1/salt/ WordPress.org secret-key service}
 * You can change these at any point in time to invalidate all existing cookies. This will force all users to have to log in again.
 *
 * @since 2.6.0
 */
define( 'AUTH_KEY',         '%].Fd+<w!Wn2M/doG9m7[?rm[,{ vQgo;>Rdz$gK,&tDy^(J|pviR 6O=V$Qo|dC' );
define( 'SECURE_AUTH_KEY',  'uqM];s7i#`lRh%-AhVt<D4(_c:AtM0m/xC0]uhOW>51MlFiQ7rLHr_6:3i:x$+Cf' );
define( 'LOGGED_IN_KEY',    'w@hu_^`Z%aA1j>G=o@esrk1VvReTiUS6DFWZ[=,PbRE@ ]S^P#a&6d@4#}Q?>v+i' );
define( 'NONCE_KEY',        '9o6JLTl&uFh.&0Ep.jCWhe`~<2b2!:~Z)tvak<[z~V`w}^APlZ39>ra-shN3c[{H' );
define( 'AUTH_SALT',        'zI%f1X;*Whd:$<j~Nf[:$y>H%8{BvJW8%Z=!$Ik/wM>E@;k-PBl7mh} PQhq!8^W' );
define( 'SECURE_AUTH_SALT', '2J0>Gbq>L3 {ed!;}C@R:7;mpc@g`SP?Xgu]Eqv;8;d>BDl9PPuF](UT;[wKTQmz' );
define( 'LOGGED_IN_SALT',   ']3gC1`57z}]i](#QknK:0D|zPJz;k+E$i@_tJ?SW|fmYreD^Wy.5V ,&m7;(M/(!' );
define( 'NONCE_SALT',       'j0v07]{l{6rWxZwh2H{x#BlEZtWe^*=;`(-Z{tB_GGdL=fpt<{fL7azOV==!aM^s' );

/**#@-*/

/**
 * WordPress Database Table prefix.
 *
 * You can have multiple installations in one database if you give each
 * a unique prefix. Only numbers, letters, and underscores please!
 */
$table_prefix = 'wp_';

/**
 * For developers: WordPress debugging mode.
 *
 * Change this to true to enable the display of notices during development.
 * It is strongly recommended that plugin and theme developers use WP_DEBUG
 * in their development environments.
 *
 * For information on other constants that can be used for debugging,
 * visit the Codex.
 *
 * @link https://codex.wordpress.org/Debugging_in_WordPress
 */
define( 'WP_DEBUG', false );

/* That's all, stop editing! Happy publishing. */

/** Absolute path to the WordPress directory. */
if ( ! defined( 'ABSPATH' ) ) {
	define( 'ABSPATH', dirname( __FILE__ ) . '/' );
}

/** Sets up WordPress vars and included files. */
require_once( ABSPATH . 'wp-settings.php' );
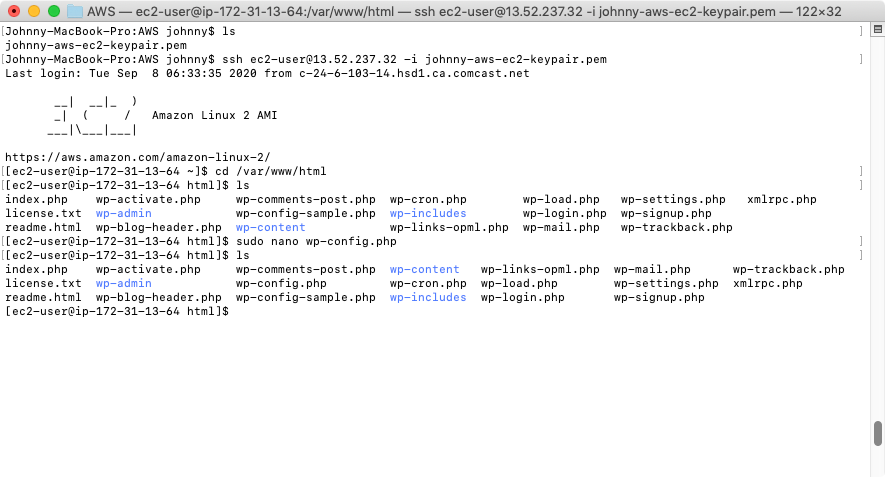
Then ssh to the web server. Create a file named wp-config.php in folder /var/www/html with the content from latest step.
 Refresh the page, now, the wordpress admin page is displayed properly. Set title, name, etc.
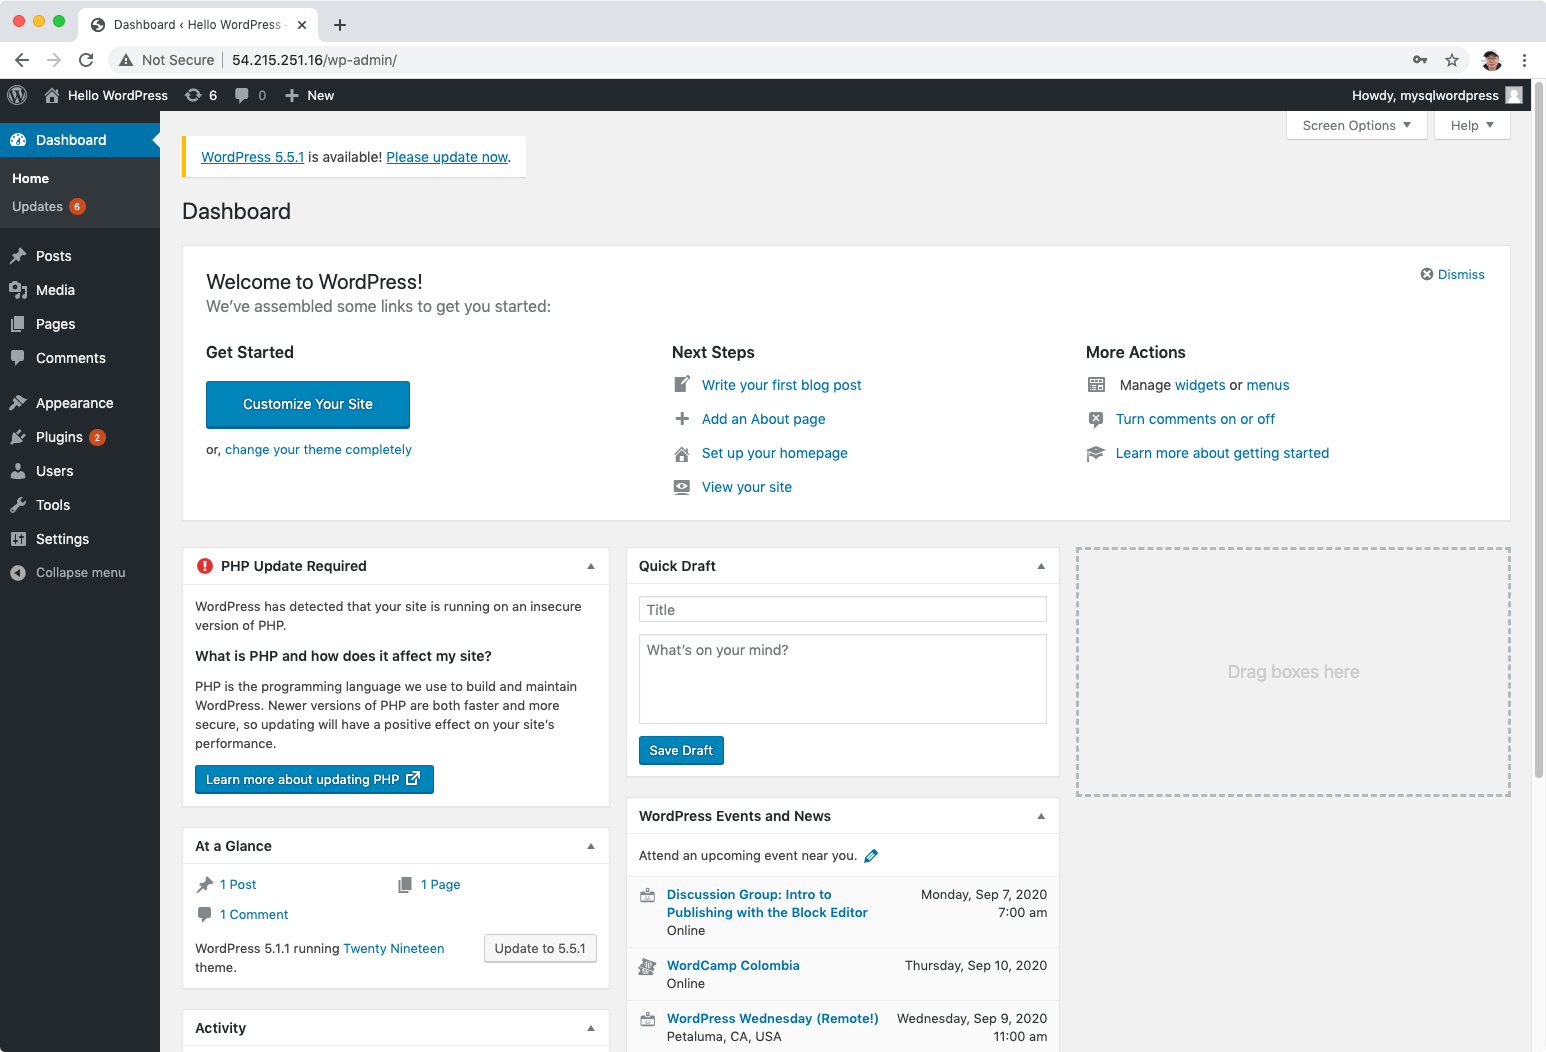
 WordPress is installed successfully.
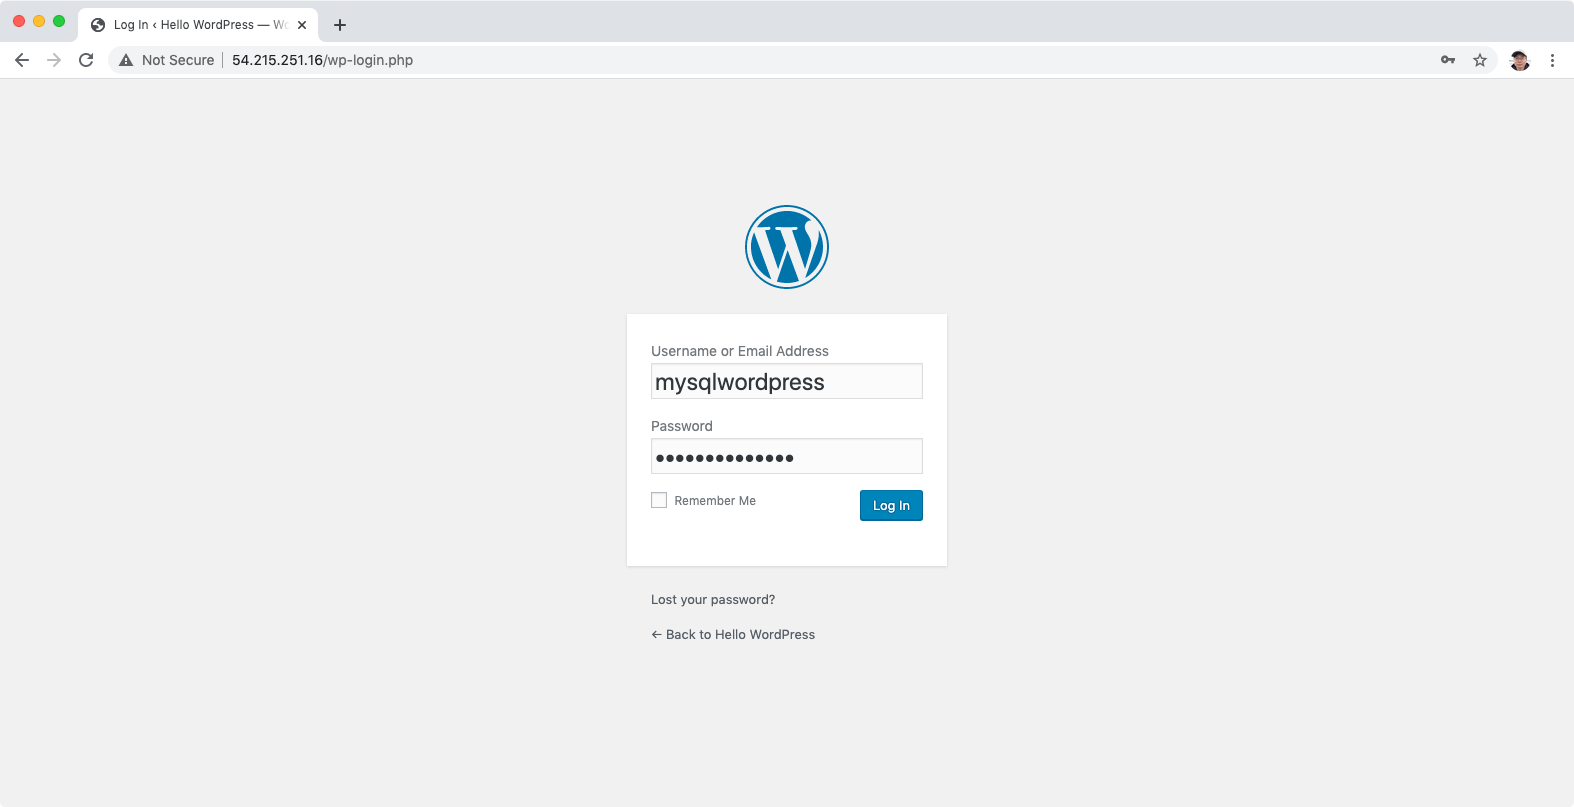
 Login.
 Home page of WordPress.
3. RDS Backups
3.1 Backup Types
There are two different types of Backups for RDS:
- Automated Backups
- Database Snapshots
Automated Backups allow you to recover your database to any point in time within a “retention period”. The retention period can be between one and 35 days. Automated Backups will take a full daily snapshot and will also store transaction logs throughout the day. When you do a recovery, AWS will first choose the most recent daily back up, and then apply transaction logs relevant to that day. This allows you to do a point in time recovery down to a second, within the retention period.
DB Snapshots are done manually (ie they are user initiated.) They are stored even after you delete the original RDS instance, unlike automated backups.
Whenever you restore either an Automatic Backup or a manual Snapshot, the restored version of the database will be a new RDS instance with a new DNS endpoint.
Encryption at rest is supported for MySQL, Oracle, SQL Server, PostgreSQL, MariaDB & Aurora. Encryption is done using the AWS Key Management Service (KMS) service. Once your RDS instance is encrypted, the data stored at rest in the underlying storage is encrypted, as are its automated backups, read replicas, and snapshots.
3.2 What Is Multi-AZ?
- Multi-AZ allows you to have an exact copy of your production database in another Availability Zone. AWS handles the replication for you, so when your production database is written to, this write will automatically be synchronized to the stand by database.
- In the event of planned database maintenance, DB Instance failure, or an Availability Zone failure, Amazon RDS will automatically failover to the standby so that database operations can resume quickly without administrative intervention.
- Multi-AZ is for Disaster Recovery only.
- It is not primarily used for improving performance. For performance improvement, you need Read Replicas.
Multi-AZ is available for the following databases
- SQL Server
- Oracle
- MySQL
- PostgreSQL
- MariaDB
3.3 What Is A Read Replica?
Read replicas allow you to have a read-only copy of your production database. This is achieved by using Asynchronous replication from the primary RDS instance to the read replica. You use read replicas primarily for very read-heavy database workloads.
Read Replicas are available for the following databases:
- MySQL
- PostgreSQL
- MariaDB
- Aurora
Things to know about Read Replicas:
- Used for scaling, not for DR!
- Must have automatic backups turned on in order to deploy a read replica.
- You can have up to 5 read replica copies of any database.
- You can have read replicas of read replicas (but watch out for latency.)
- Each read replica will have its own DNS end point.
- You can have read replicas that have Multi-AZ.
- You can create read replicas of Multi-AZ source databases.
- Read replicas can be promoted to be their own databases. This breaks the replication.
- You can have a read replica in a second region.
3.4 RDS Backups Lab
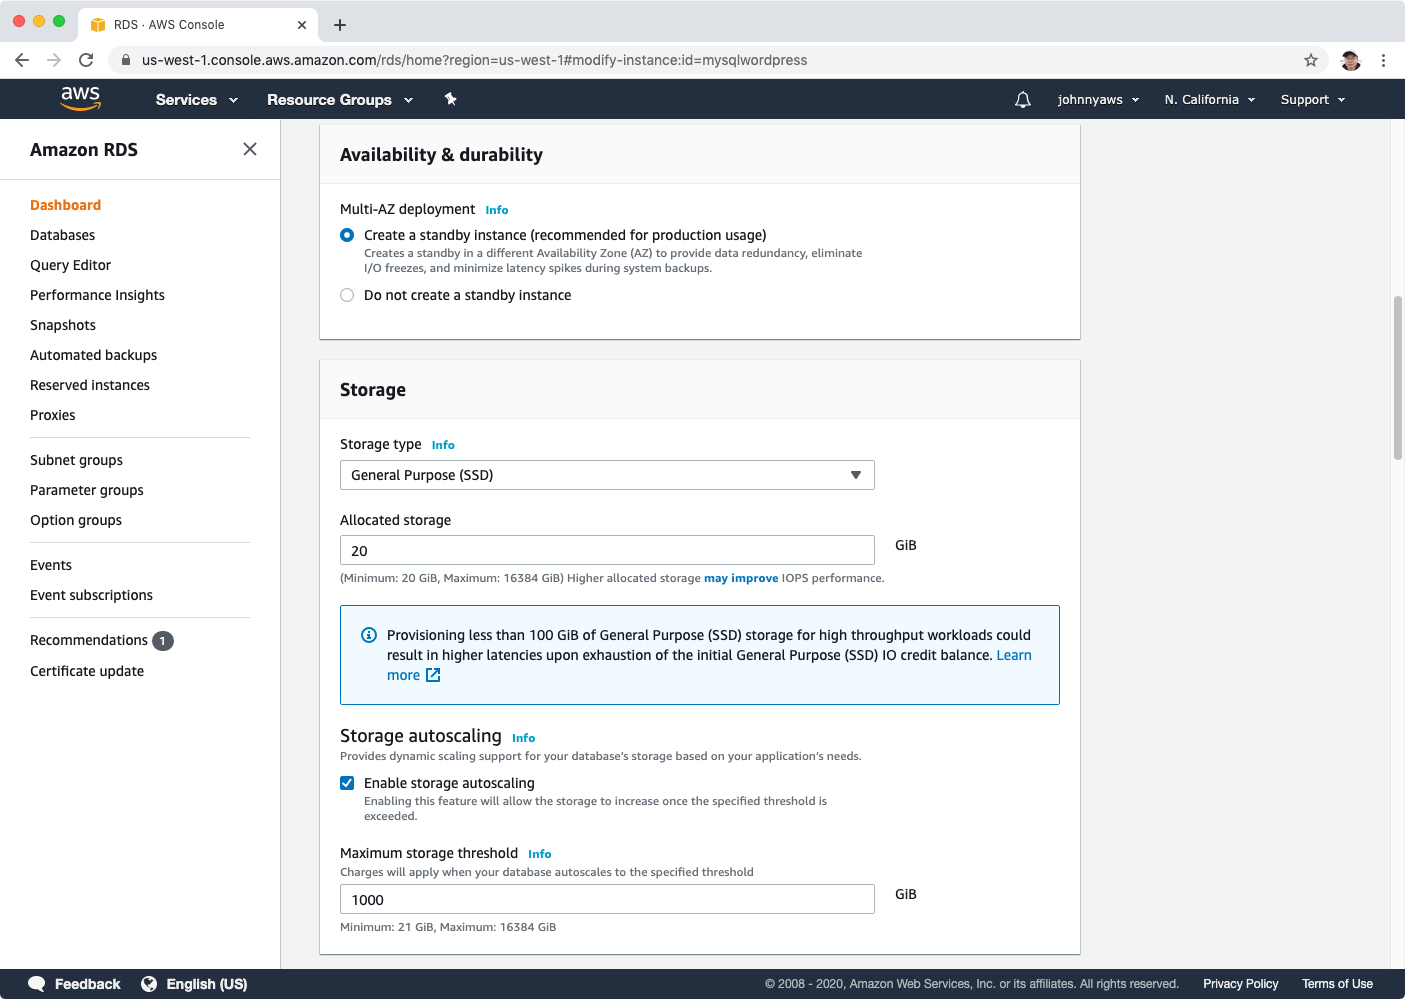
Choose the Mysql database created in previously, click Modify button.
 Enable Multi-AZ deployment.
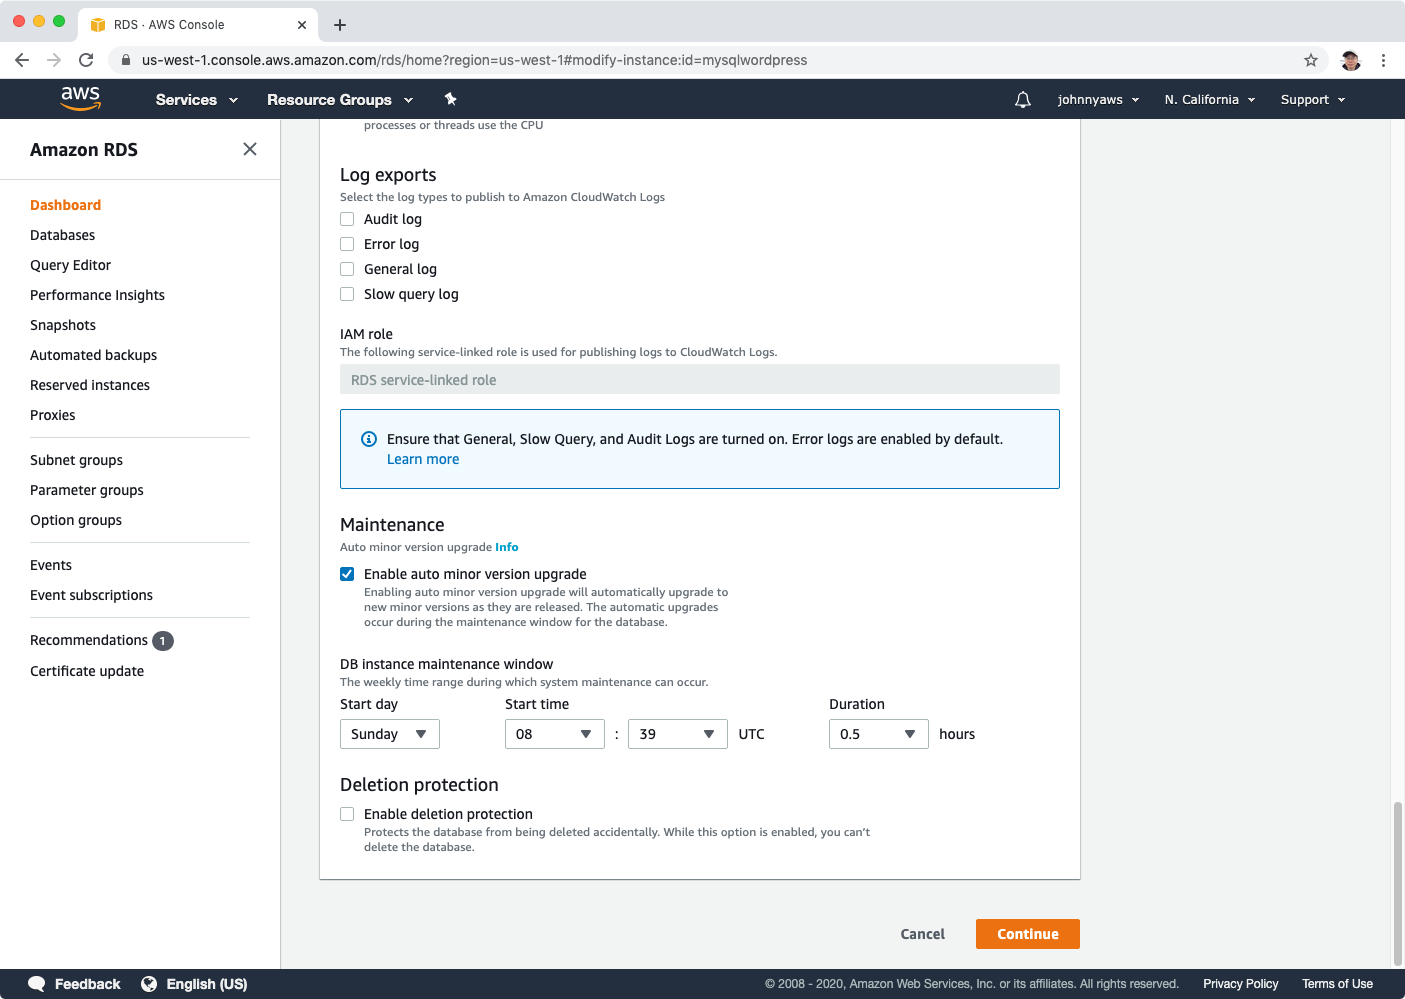
 Scroll down to the bottom, click Continue.
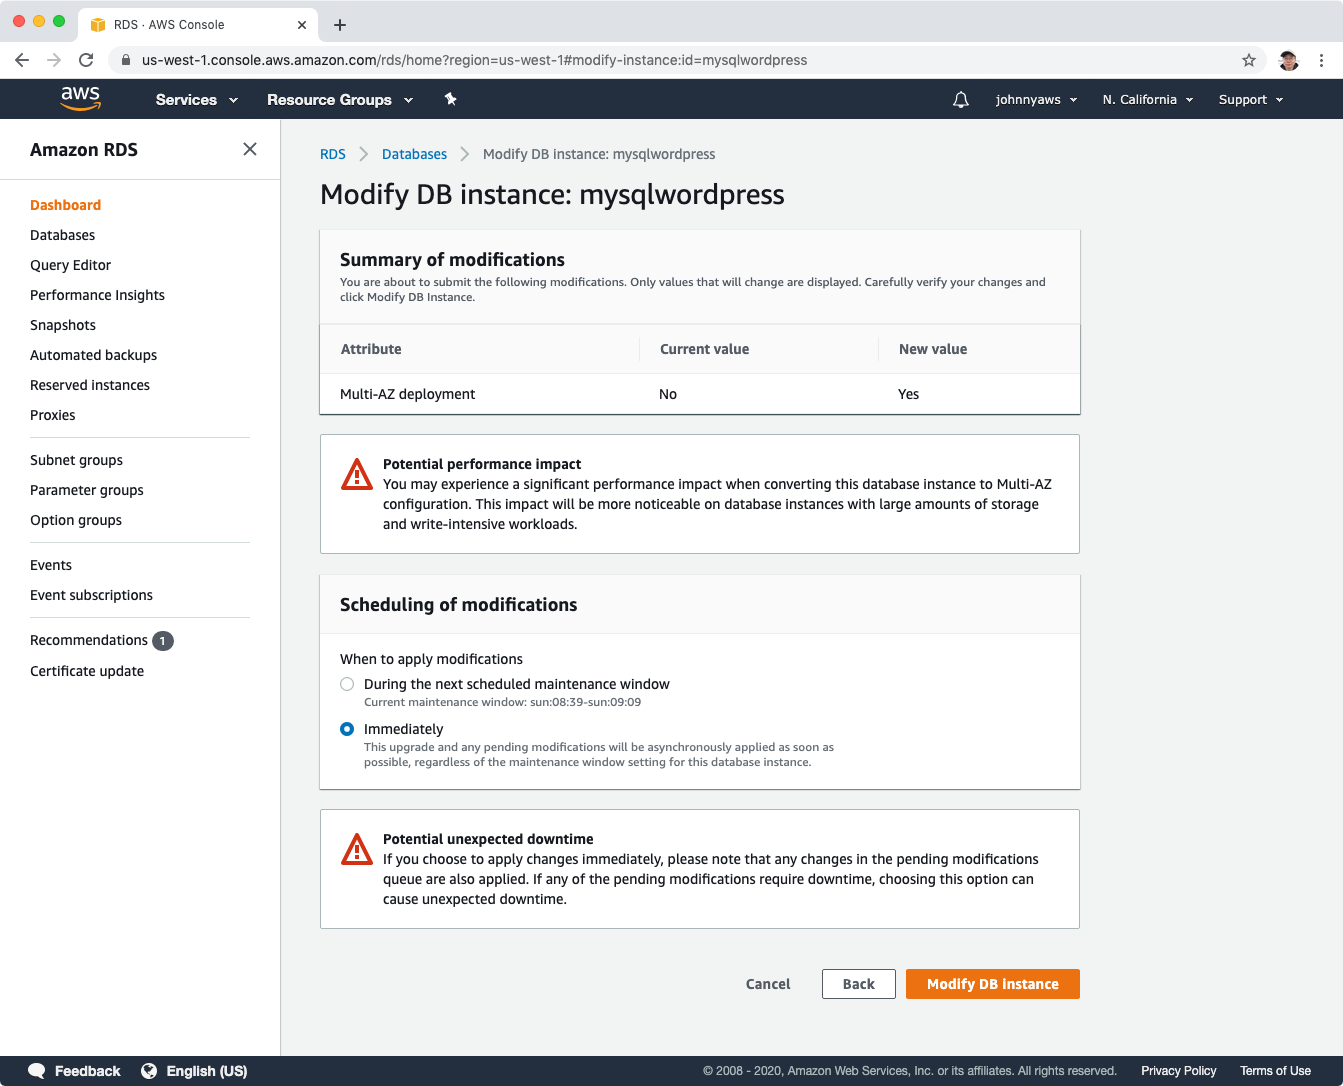
 Select ‘Apply immediately’ option and click ‘Modify DB Instance’ button.
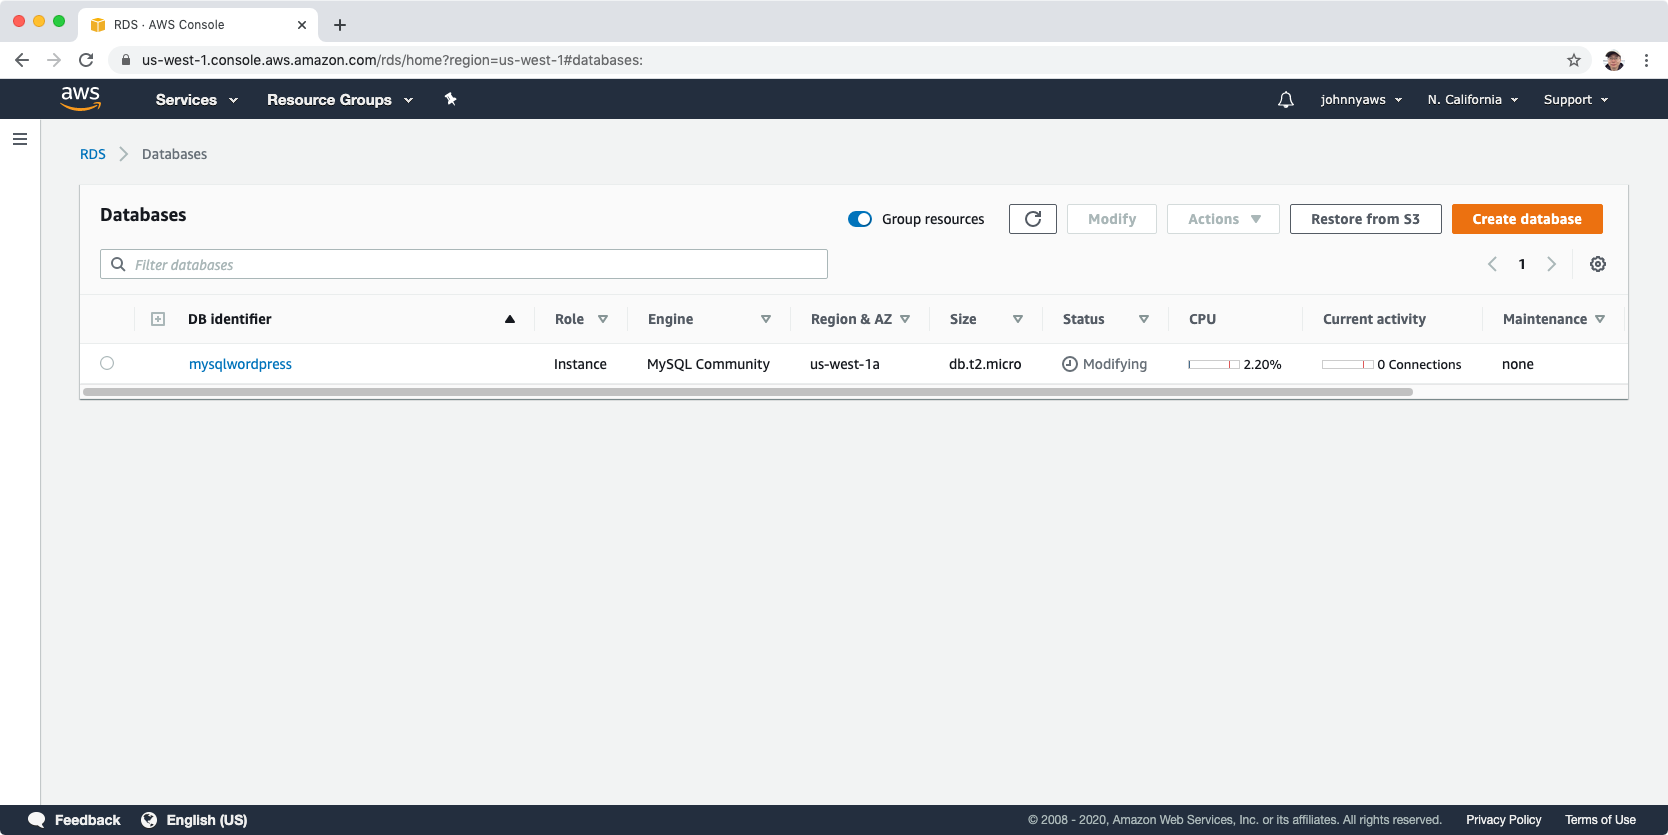
 The status of the database instance will be in modifying status. Wait for a while until the status is changed to ‘Available’.
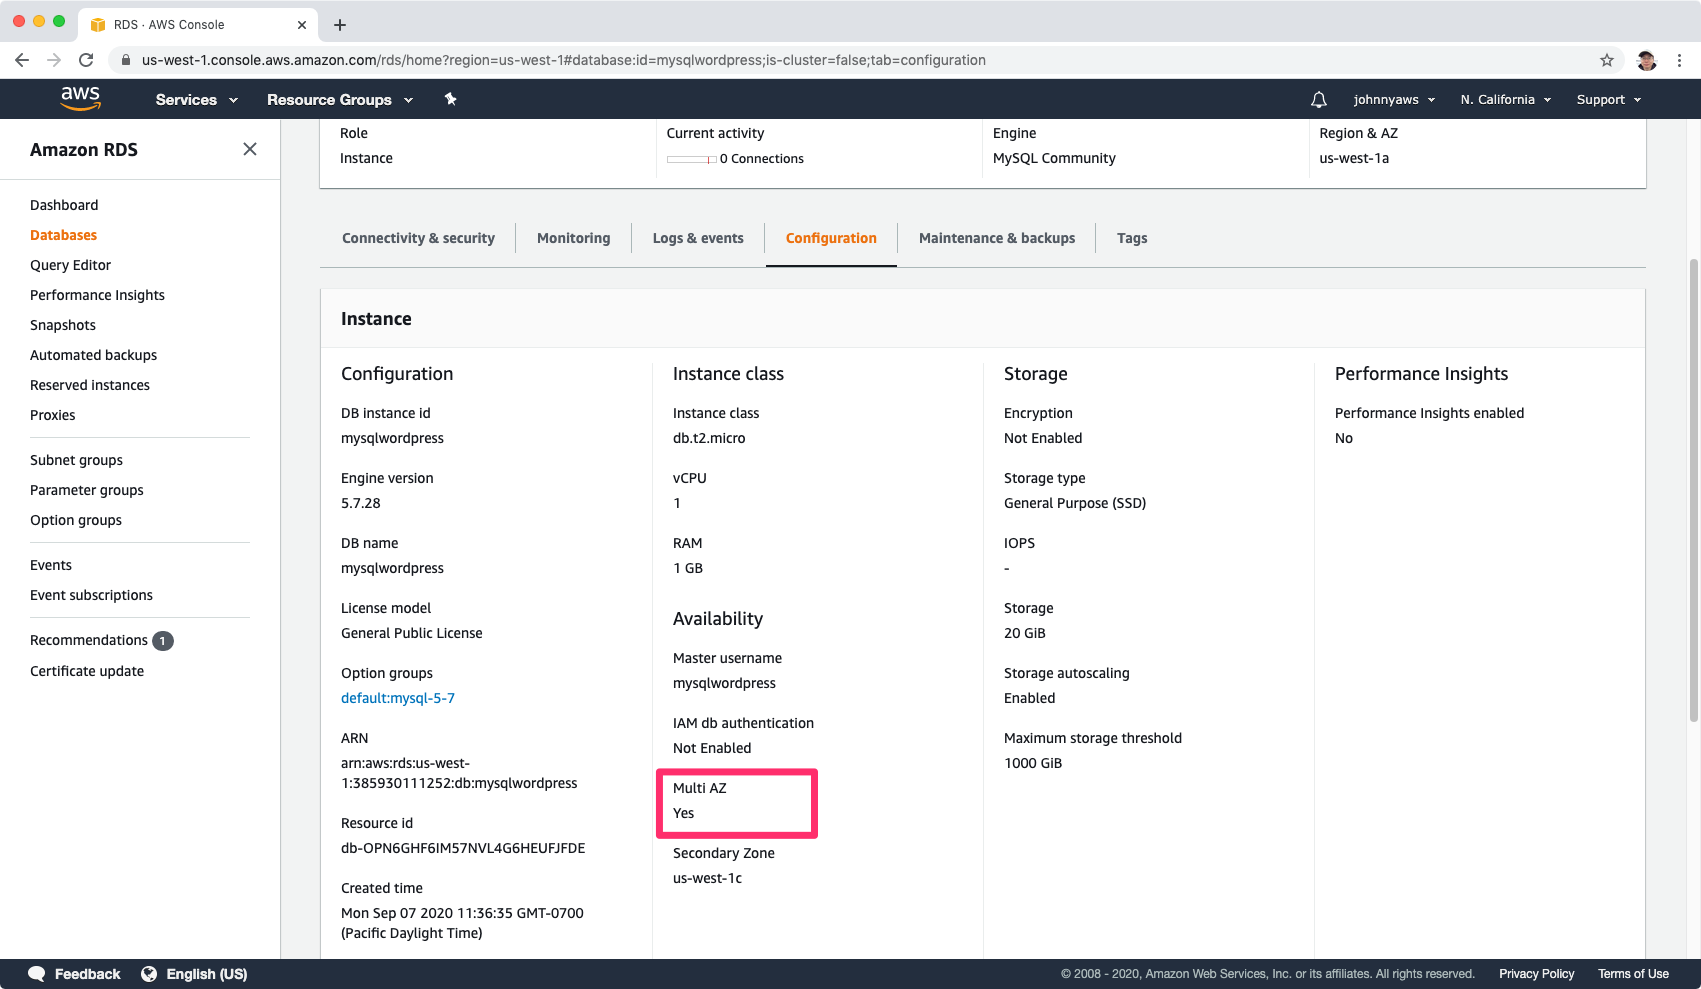
 Click it to see the details, switch to Configuration tab, you can see Multi AZ is set to yes.
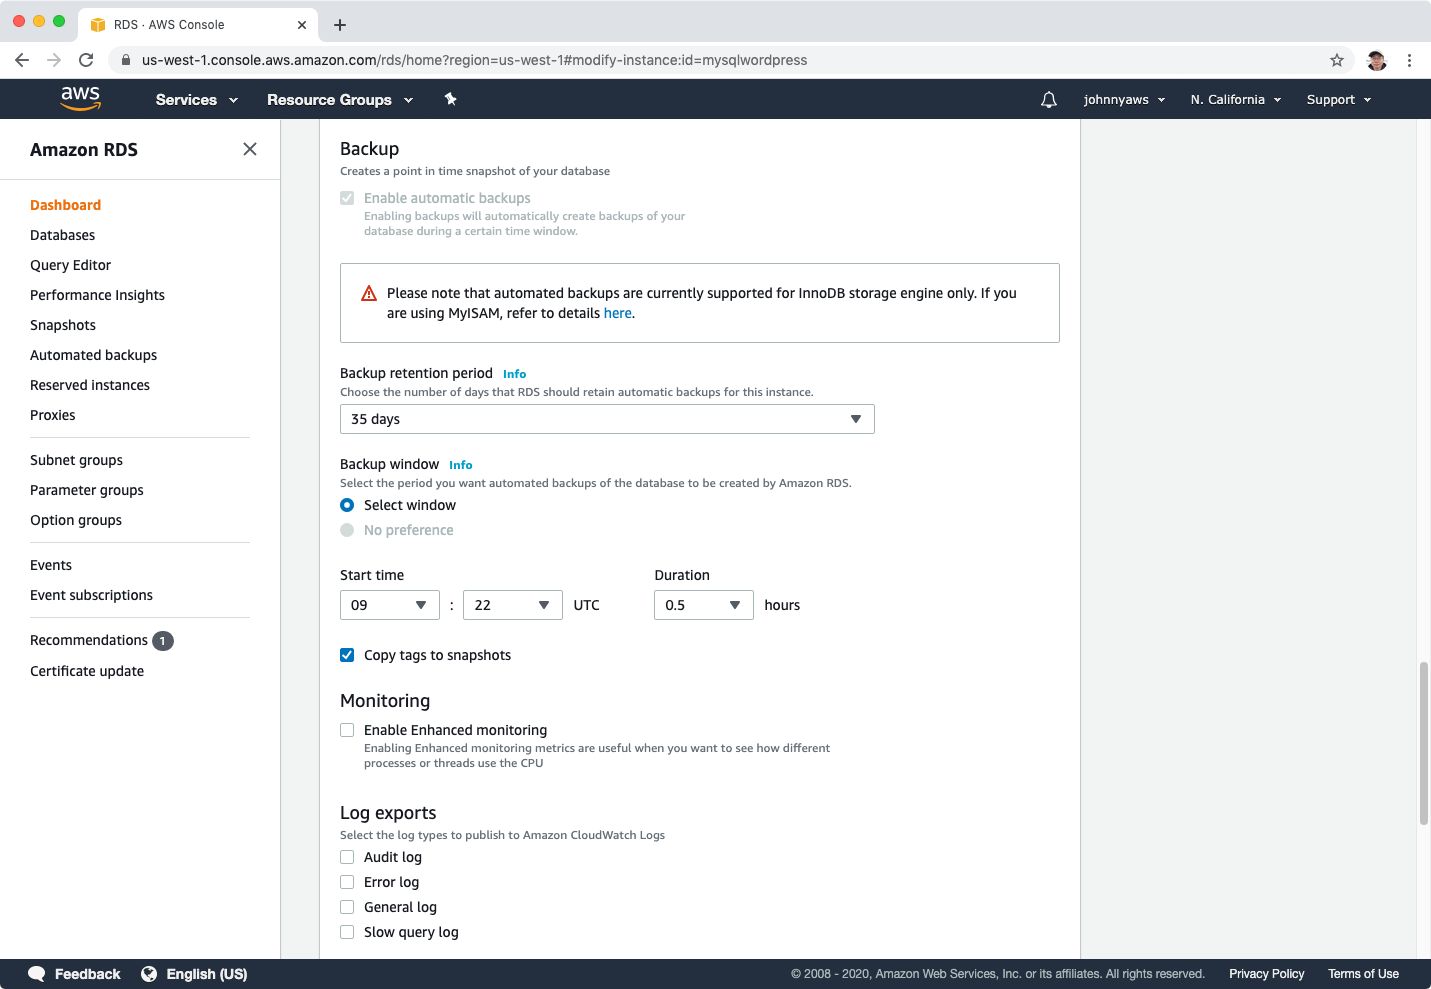
 Modify the database instance, turn on backup by setting the retention period to 35 days, then choose “Apply immediately” option.
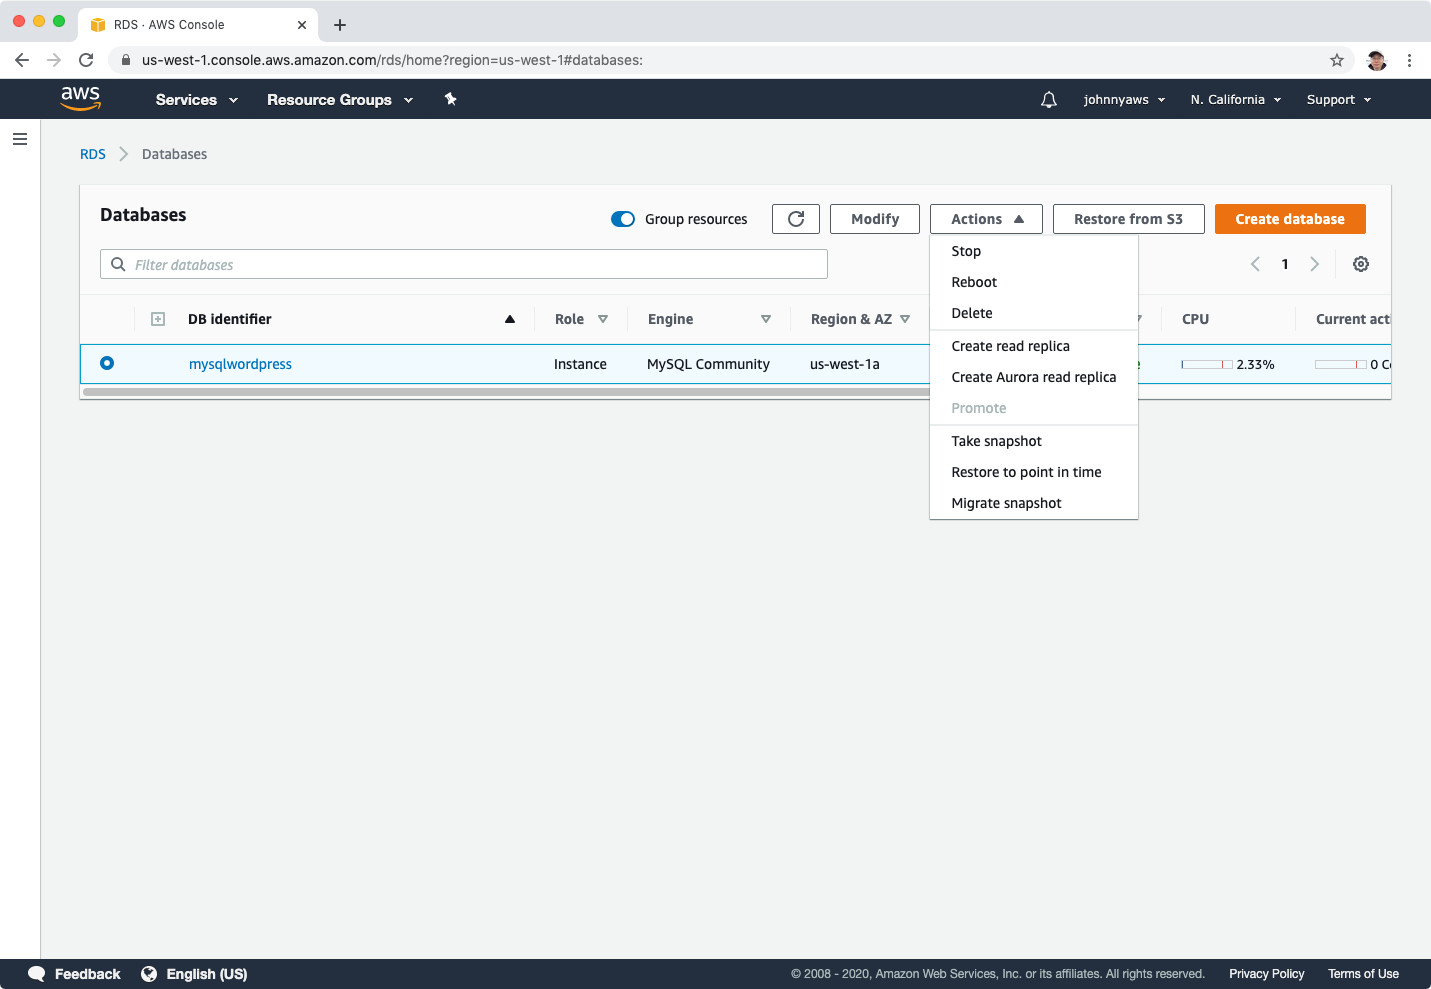
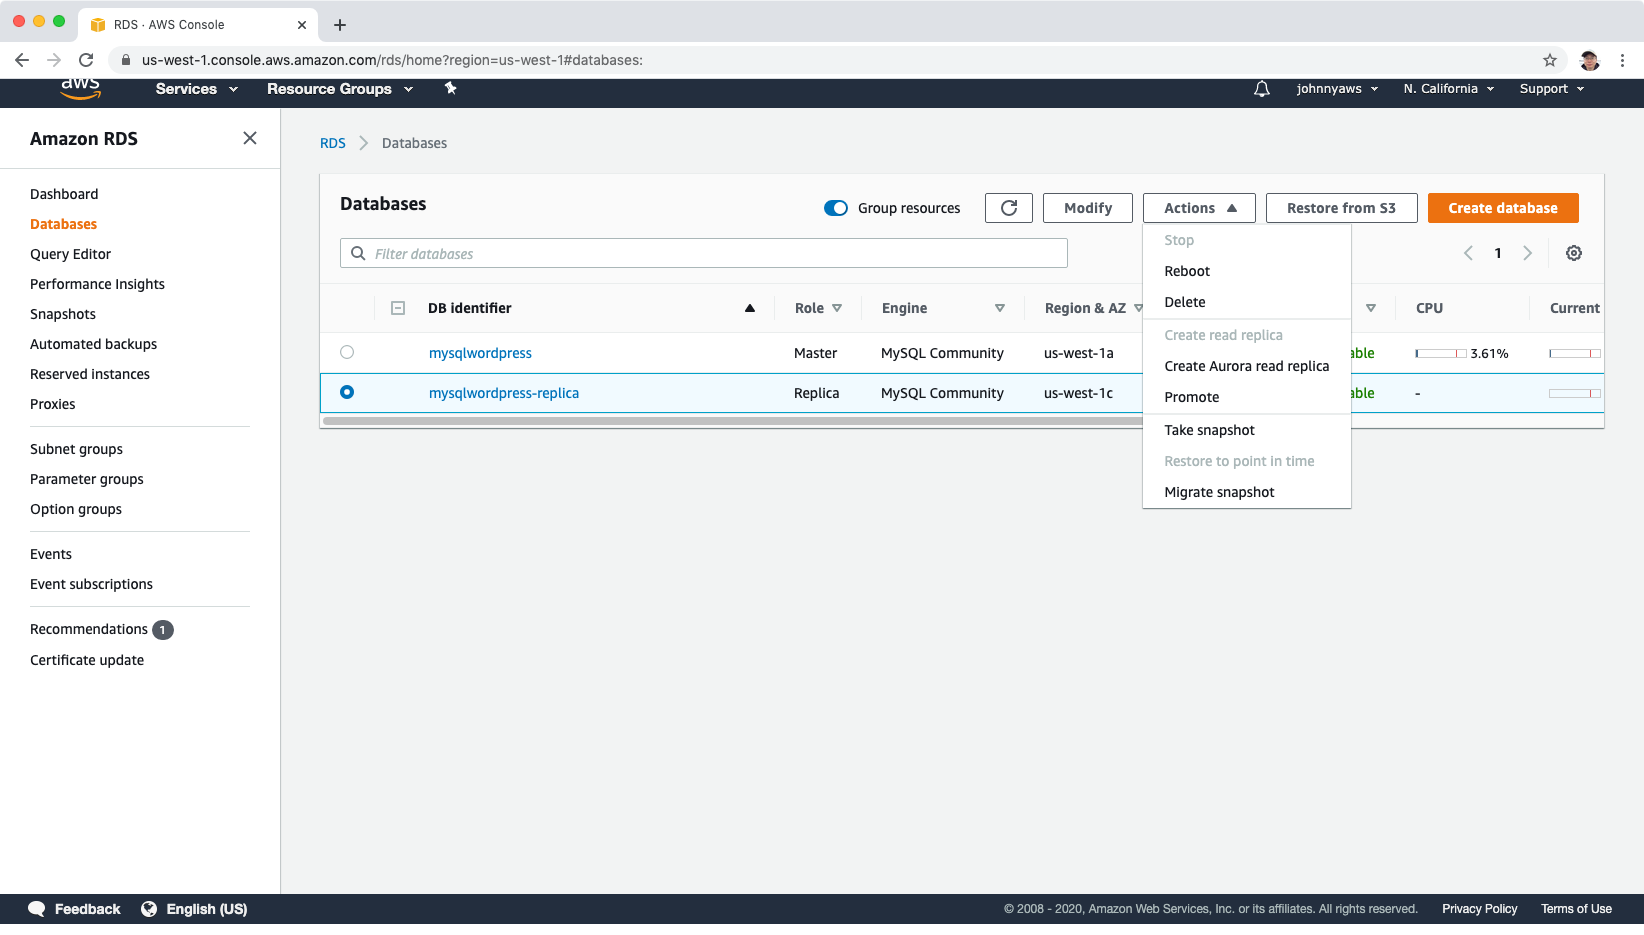
 The database instance will change to modifying status again, wait until it becomes to Available status. Actions->Create read replica.
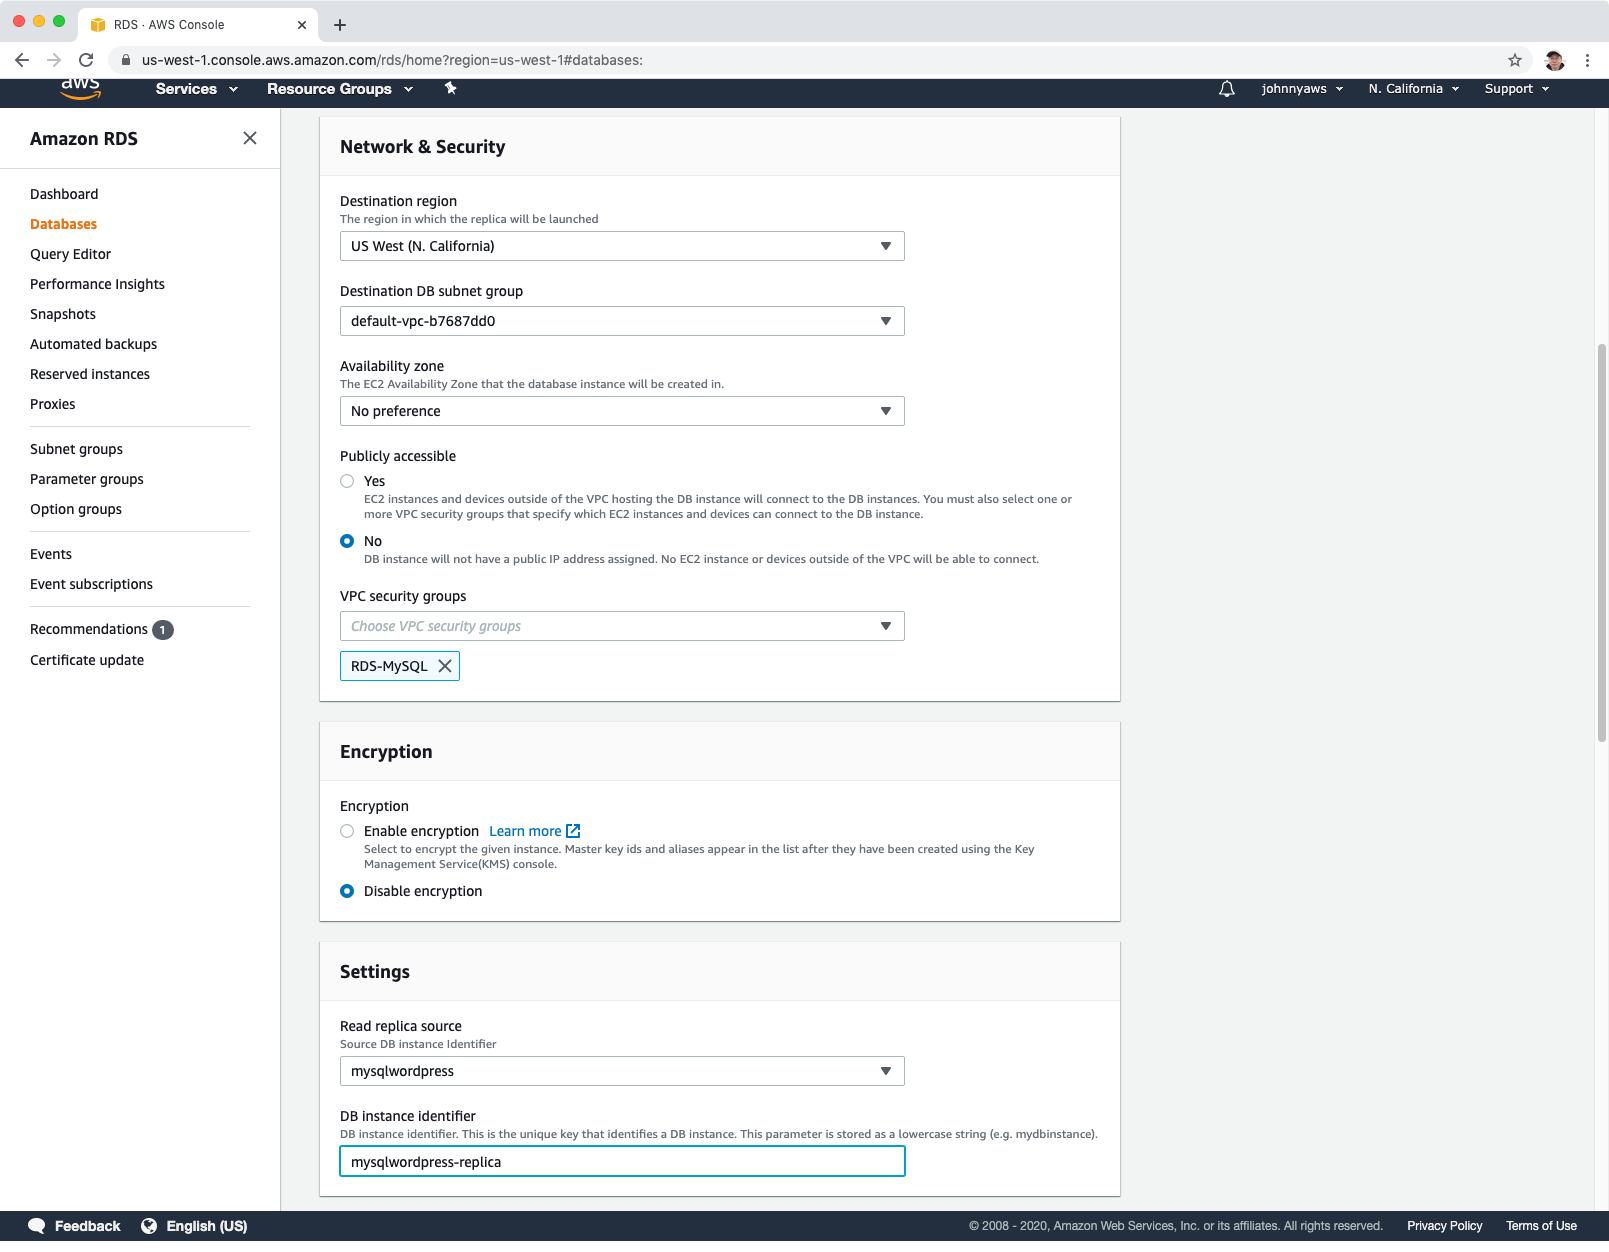
 Choose a different region to replica, eg. US West(N. California). Provide database identify name(eg. mysqlwordpress-replica) and keep other settings as default, click “Create read replica”.
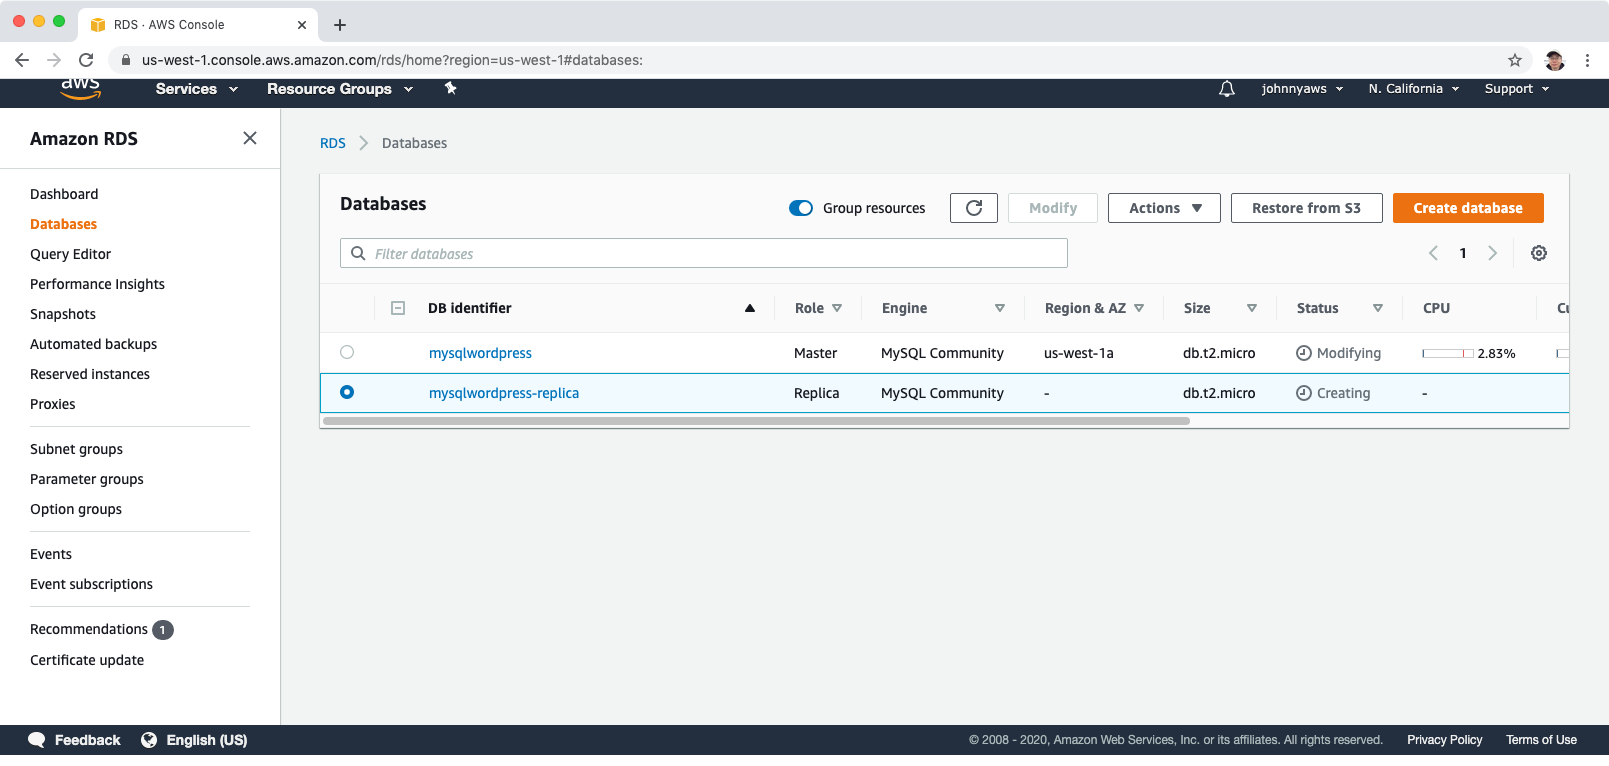
 A new database instance is created with role ‘Replica’ in a different AZ.
 Click Actions->Promote to convert a MySQL Read Replica into a “standalone” RDS database instance.
3.5 Summary of RDS Backup
Read Replicas:
- Can be Multi-AZ.
- Used to increase performance.
- Must have backups turned on.
- Can be in different regions.
- Can be Aurora or MySQL.
- Can be promoted to master, this will break the Read Replica.
MuItiAZ:
- Used For DR.
- You can force a failover from one AZ to another by rebooting the RDS instance.