4171. AWS-Elastic Load BalancerAWS and Load Balancer
Build high availability applications with Elastic Load Balancer.
1. Elastic Load Balancer
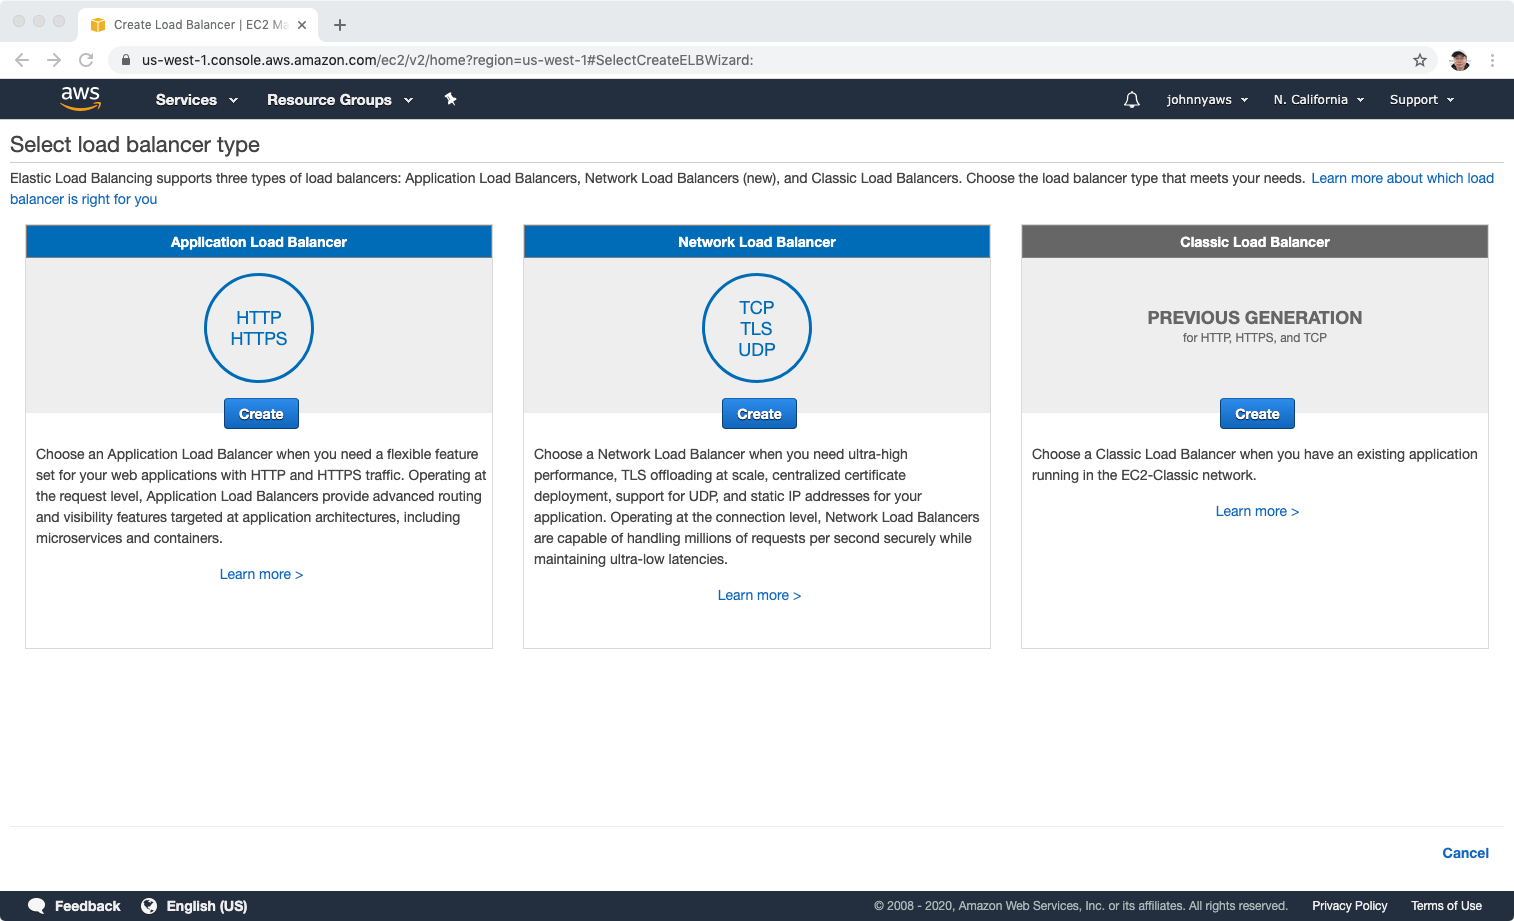
1.1 Load Balancer Types
- Application Load Balancer
- Network Load Balancer
- Classic Load Balancer
1.2 Application Load Balancer
Application Load Balancers are best suited for load balancing of HTTP and HTTPS traffic. They operate at Layer 7 and are application-aware. They are intelligent, and you can create advanced request routing, sending specified requests to specific web servers.
1.3 Network Load Balancer
Network Load Balancers are best suited for load balancing of TCP traffic where extreme performance is required. Operating at the connection level (Layer 4), Network Load Balancer are capable of handling millions of requests per second, while maintaining ultra-low latencies. Use for extreme performance!
1.4 Classic Load Balancer
Classic Load Balancers are the legacy Elastic Load Balancers. You can load balance HTTP/HTTPS applications and use Layer 7-specific features, such as X-Forwarded and sticky sessions. You can also use strict Layer 4 load balancing for applications that rely purely on the TCP protocol.
1.5 Errors in Load Balancing
Classic Load Balancers if your application stops responding, the ELB (Classic Load Balancer) responds with a 504 error. This means that the application is having issues. This could be either at the Web Server layer or at the Database Layer. Identify where the application is failing, and scale it up or out where possible.
1.6 X-Forwarded-For
If you need the IPv4 address of your end user, look for the X-Forwarded-For header.
1.7 Summary of ELB
- Instances monitored by ELB are reported as InService or OutofService
- Health Checks check the instance health by talking to it.
- Load Balances have their own DNS name. You are never given an IP address.
- Read the ELB FAQ for Classic Load Balancers.
2. Load Balancer and Health Check
The architecture of Load Balancer and Health Check.
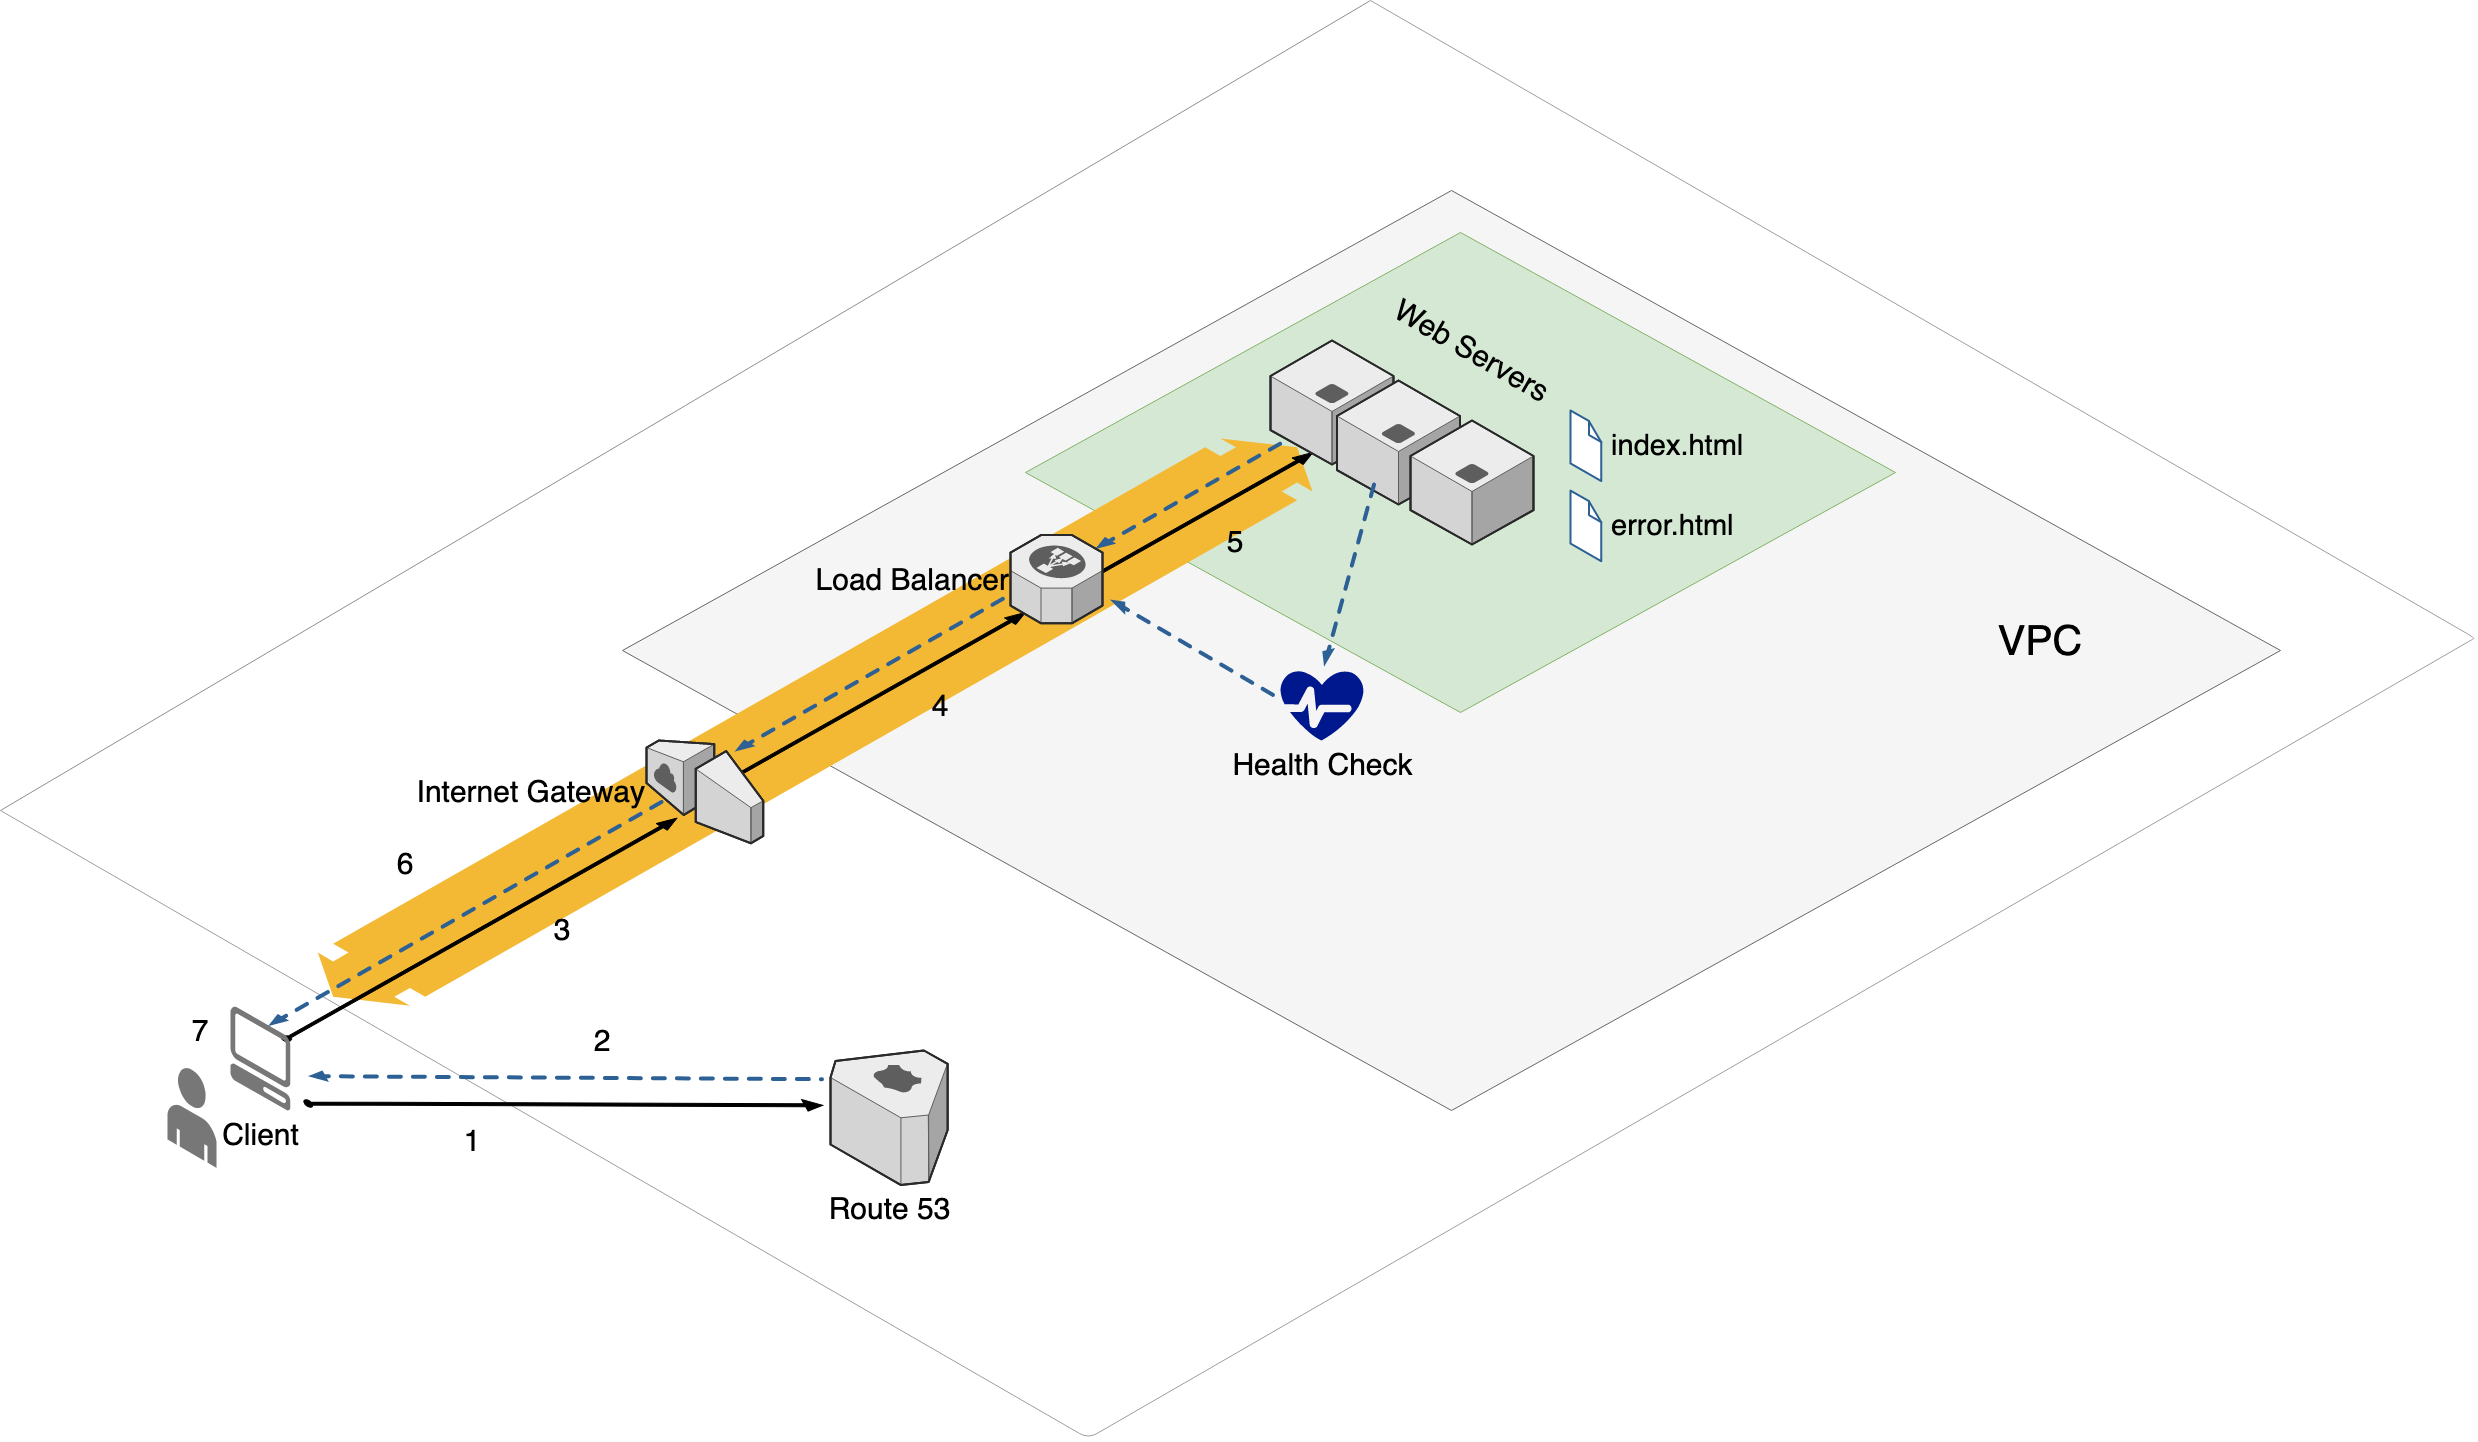 The flow of the http request:
1) Client(Web browser) requests the IP address of the Load Balancer from DNS.
2) DNS returns the IP address of the Load Balancer.
3) Client uses the IP address to request the web page.
4) Internet Gateway checks and forwards the request to the Load Balancer.
5) The Load Balancer finds an active web server and forwards the request.
6) The selected web server returns the requested html file.
7) Client receives and processes the html file.
The Load Balancer checks the health of each web server via the health check service.
3. Lab - Classic Load Balancer
Create two instances with showing different web pages, then create a classic load balancer.
- Reminder: Load Balancers are
not free.
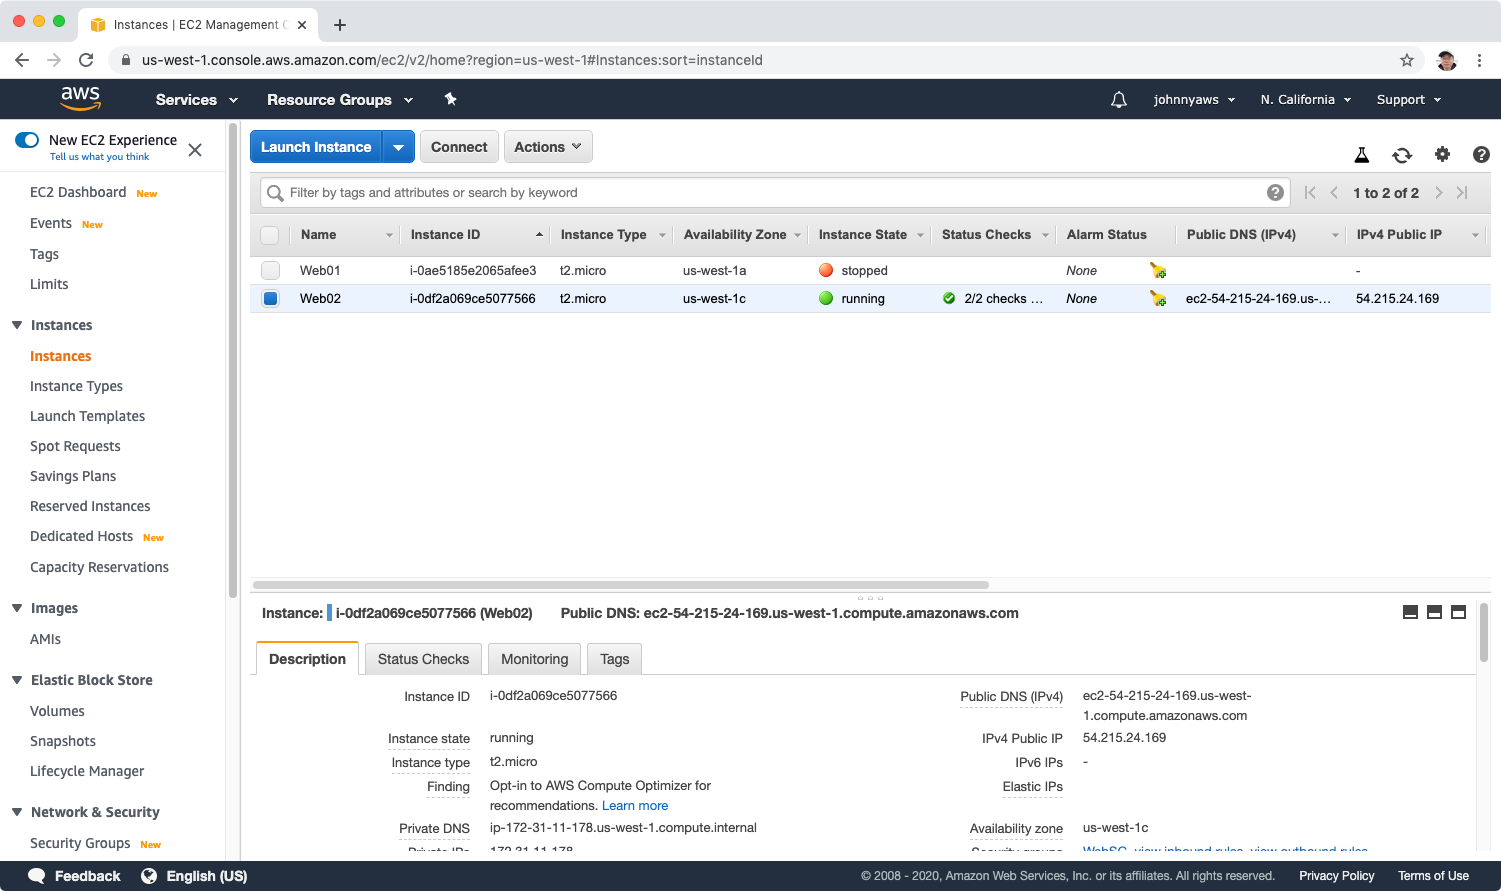
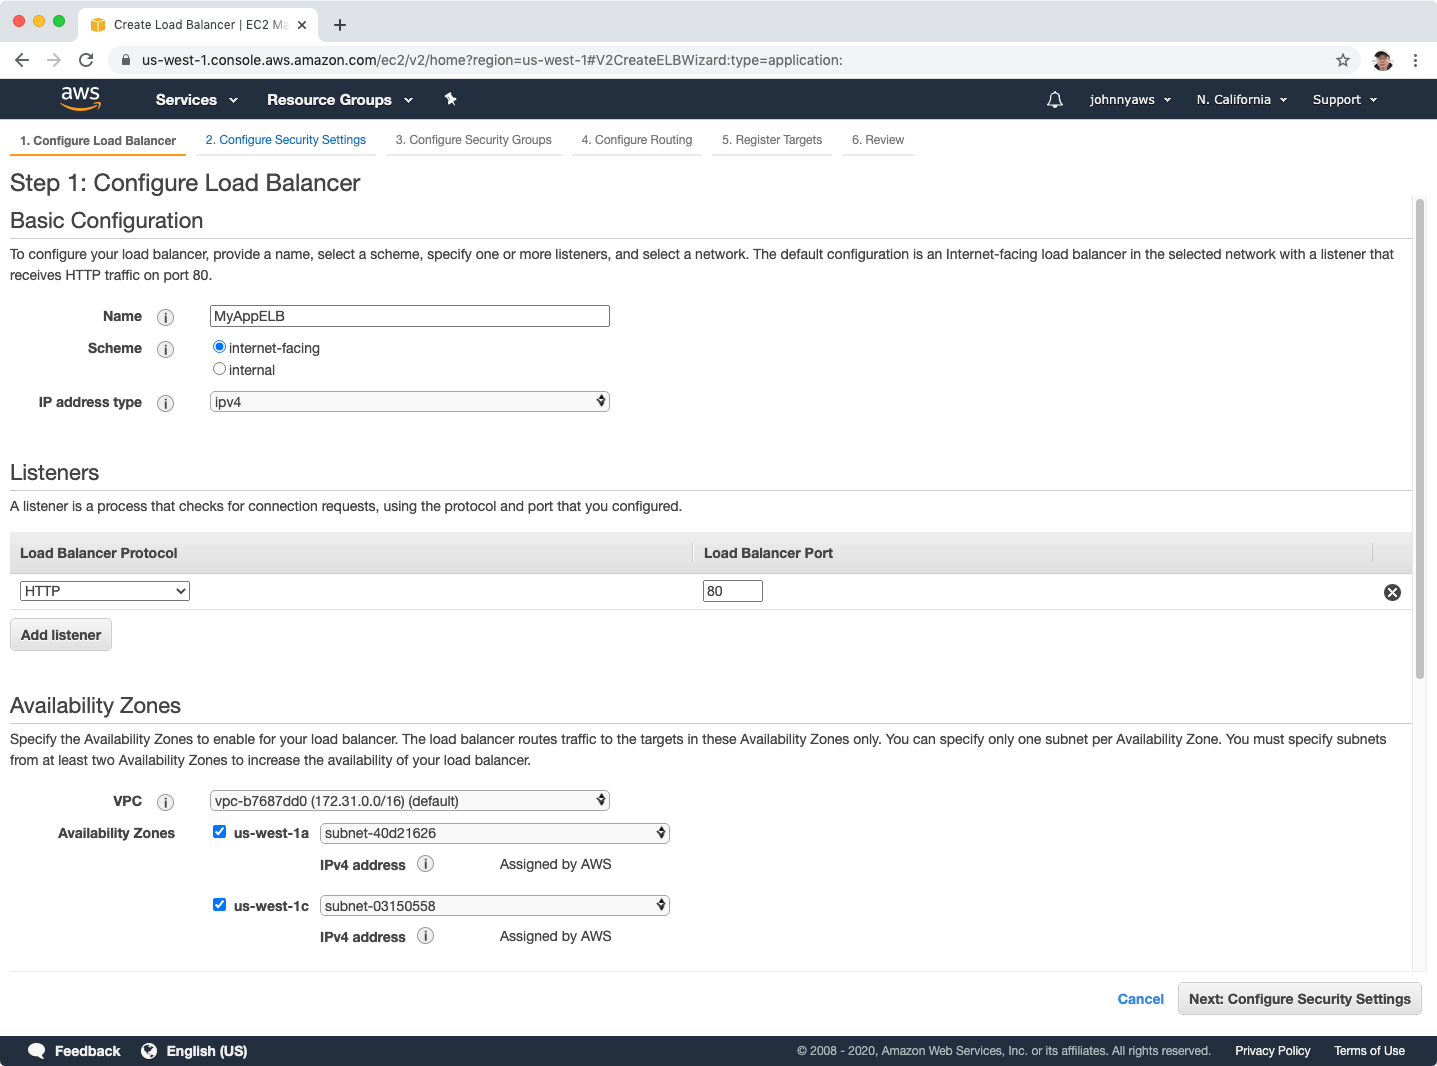
3.1 Create Two EC2 Instances
Create first instance with the following bootstrap script, make it showing “This is WebServer 01” in the web page.
#!/bin/bash
yum update -y
yum install httpd -y
service httpd start
chkconfig httpd on
cd /var/www/html
echo "<html><h1>This is WebServer 01</h1></html>" > index.html
Specify the subnet/AZ to ‘us-west-1a’.
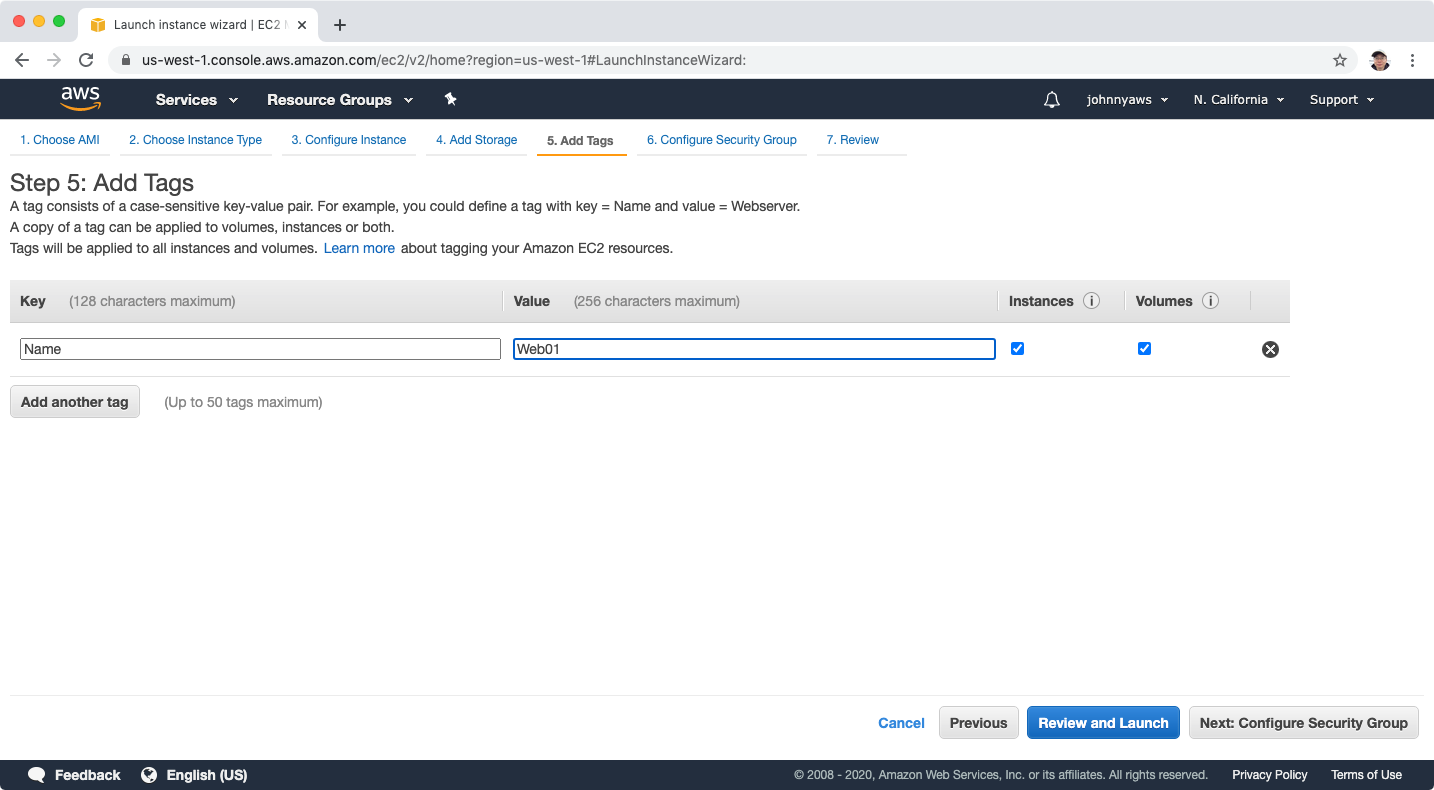
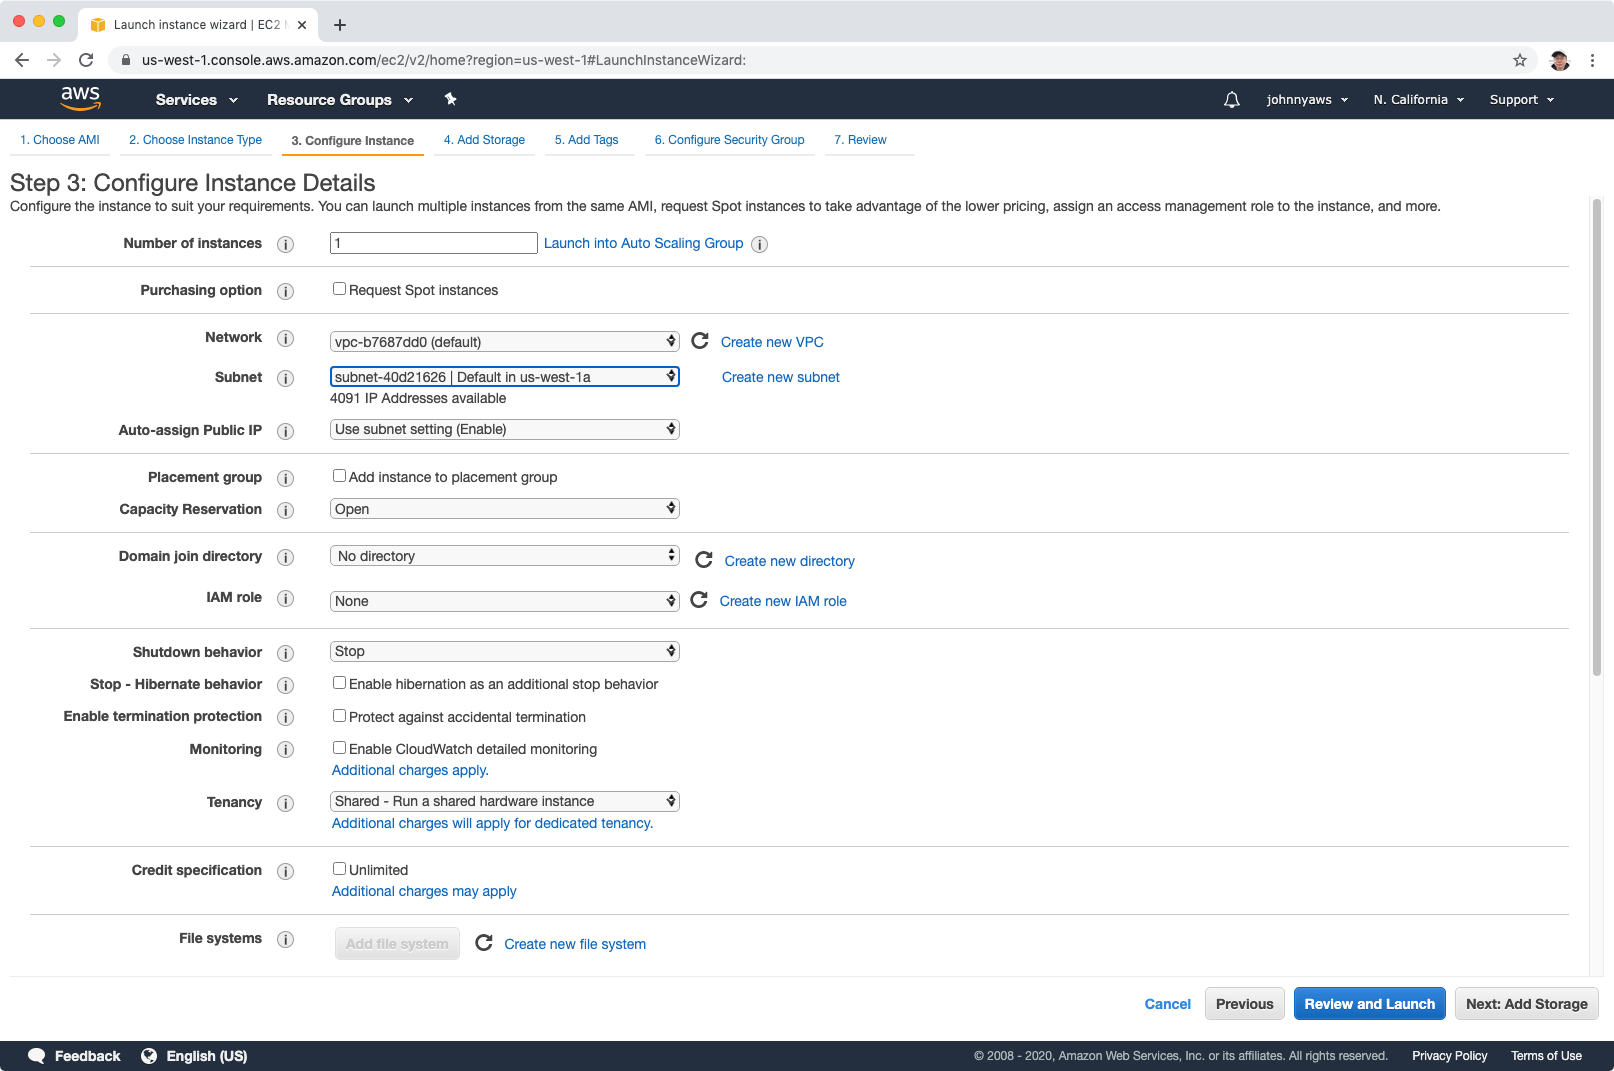 Add tag, Name=Web01.
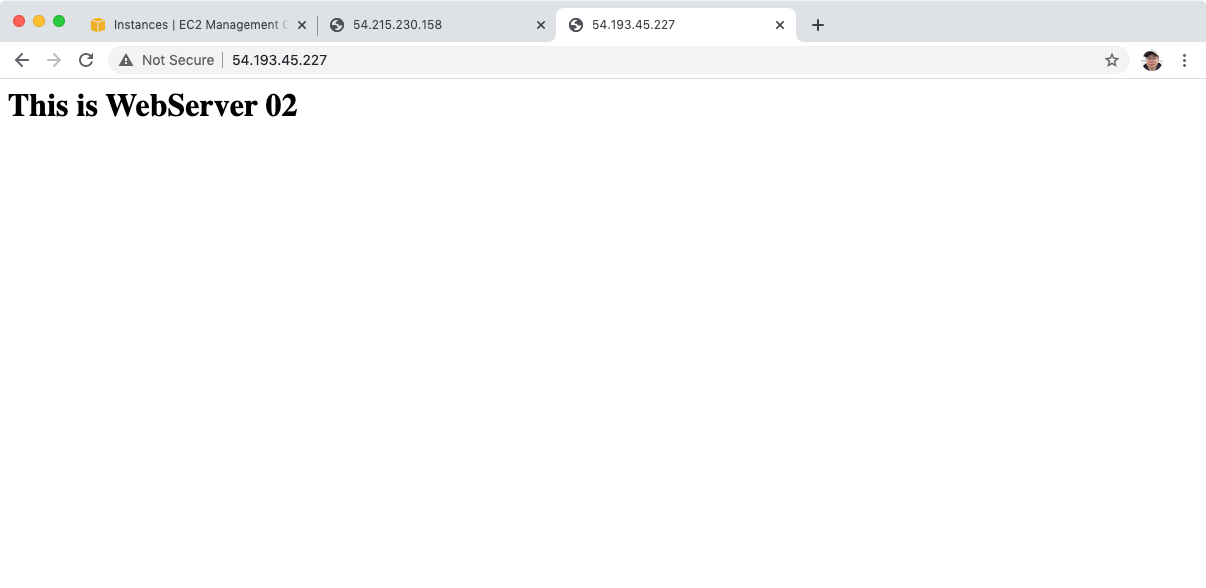
 Create second instance with the same bootstrap script, make it showing “This is WebServer 02” in the web page. Specify the subnet/AZ to ‘us-west-1c’. Add tag, Name=Web02. Now, we have two instances running in different AZs.
 If we access the public id address, we will see the “This is WebServer 01” or “This is WebServer 02” respectively.
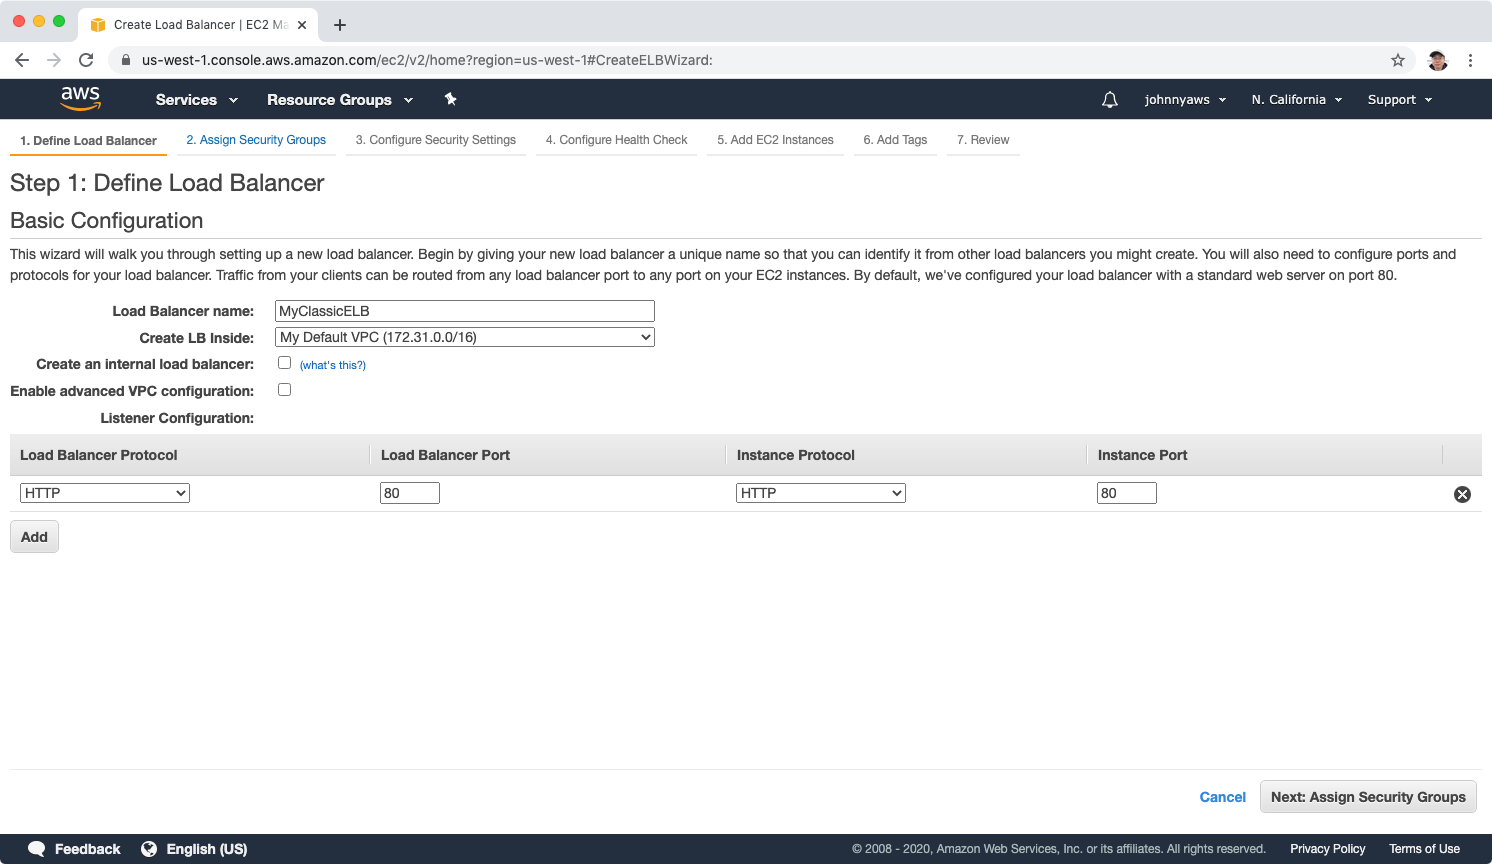
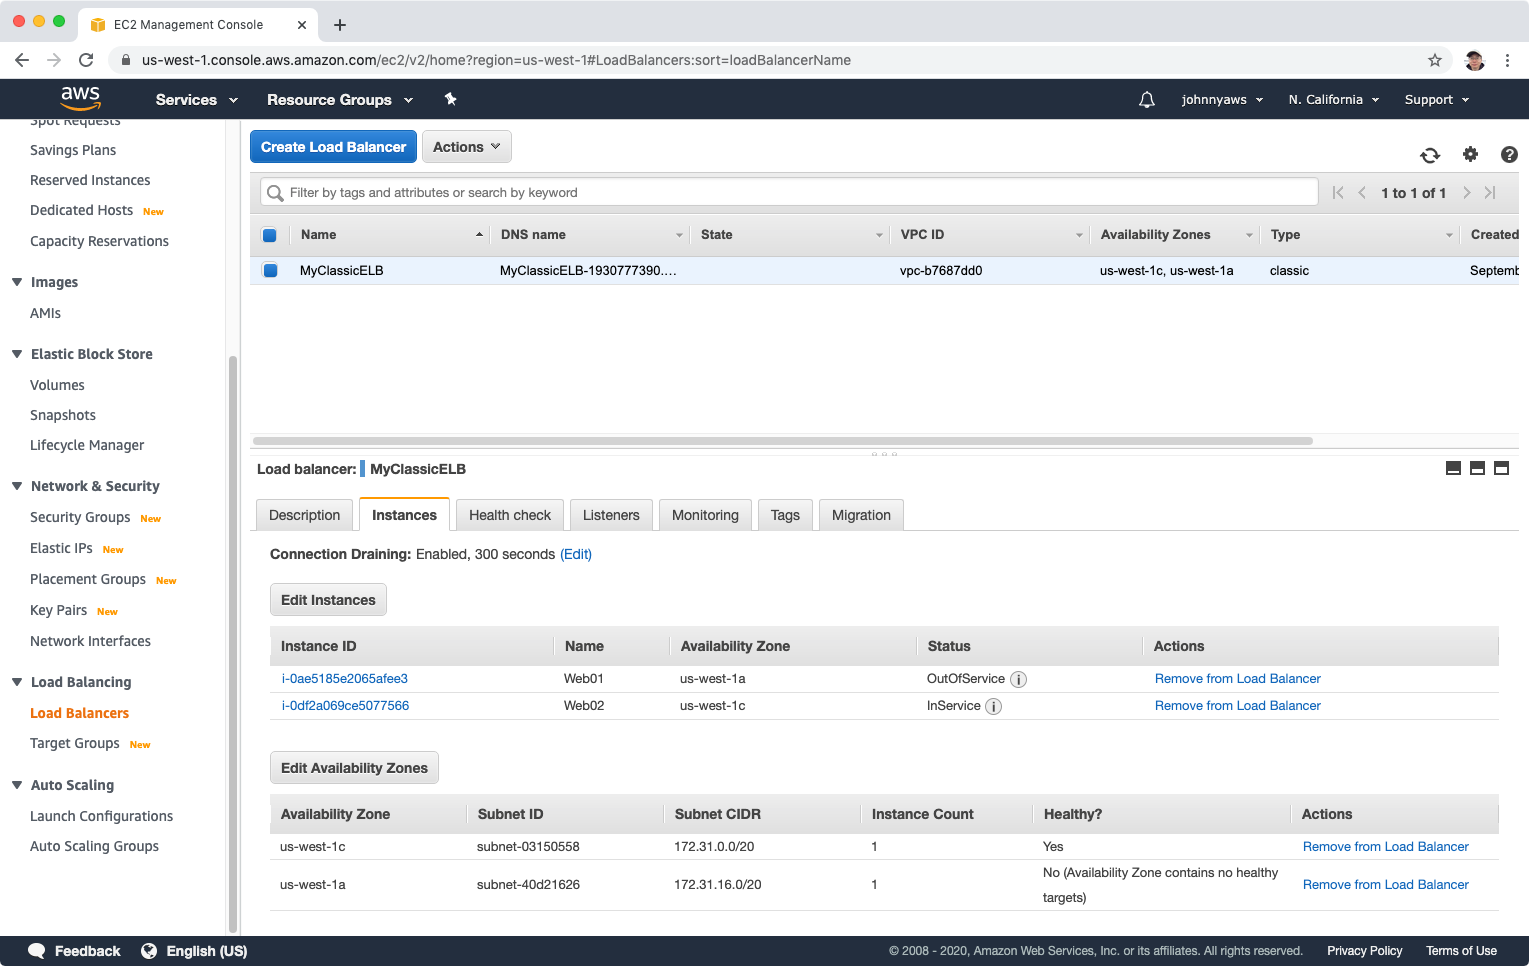
3.2 Create Classic Load Balancer
Go to Services->EC2->Load Balancers, Create Load Balancer, select “Classic Load Balancer”.
 provider name for it.
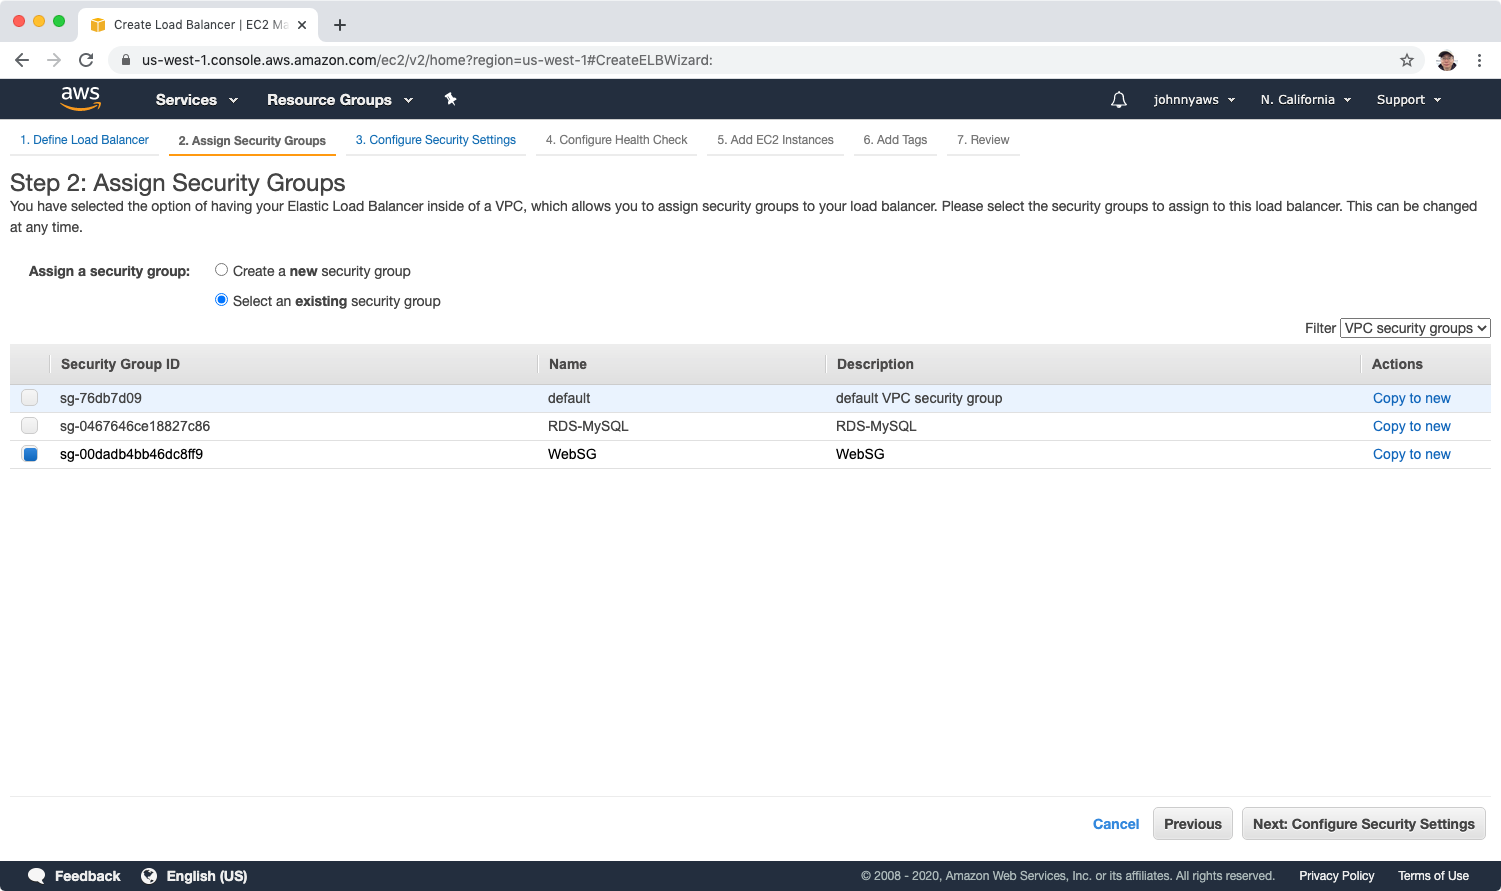
 Choose the same security group with EC2 instance, eg. WebSG.
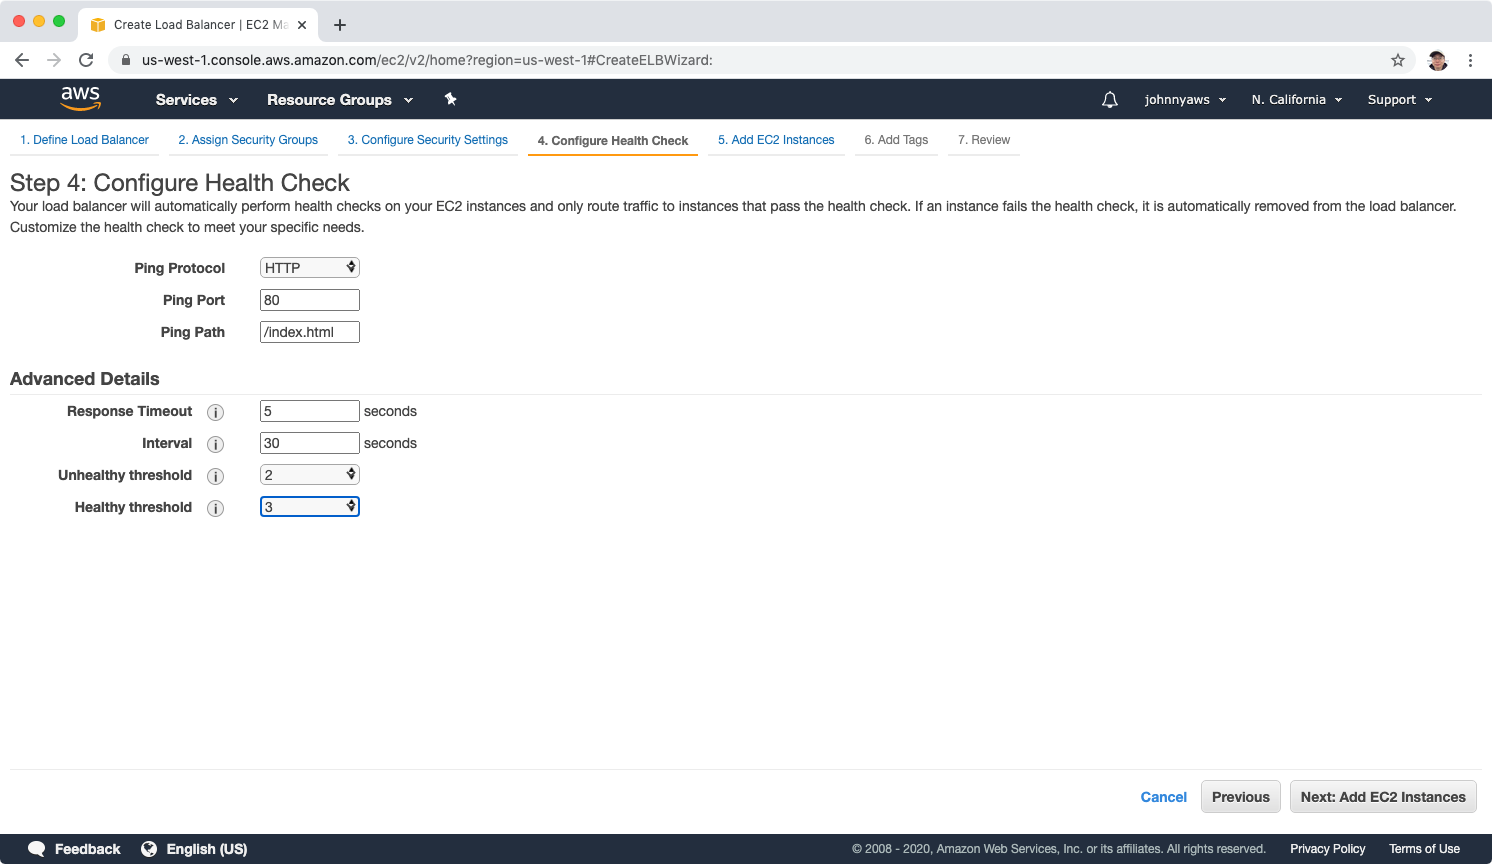
 Configure health check.
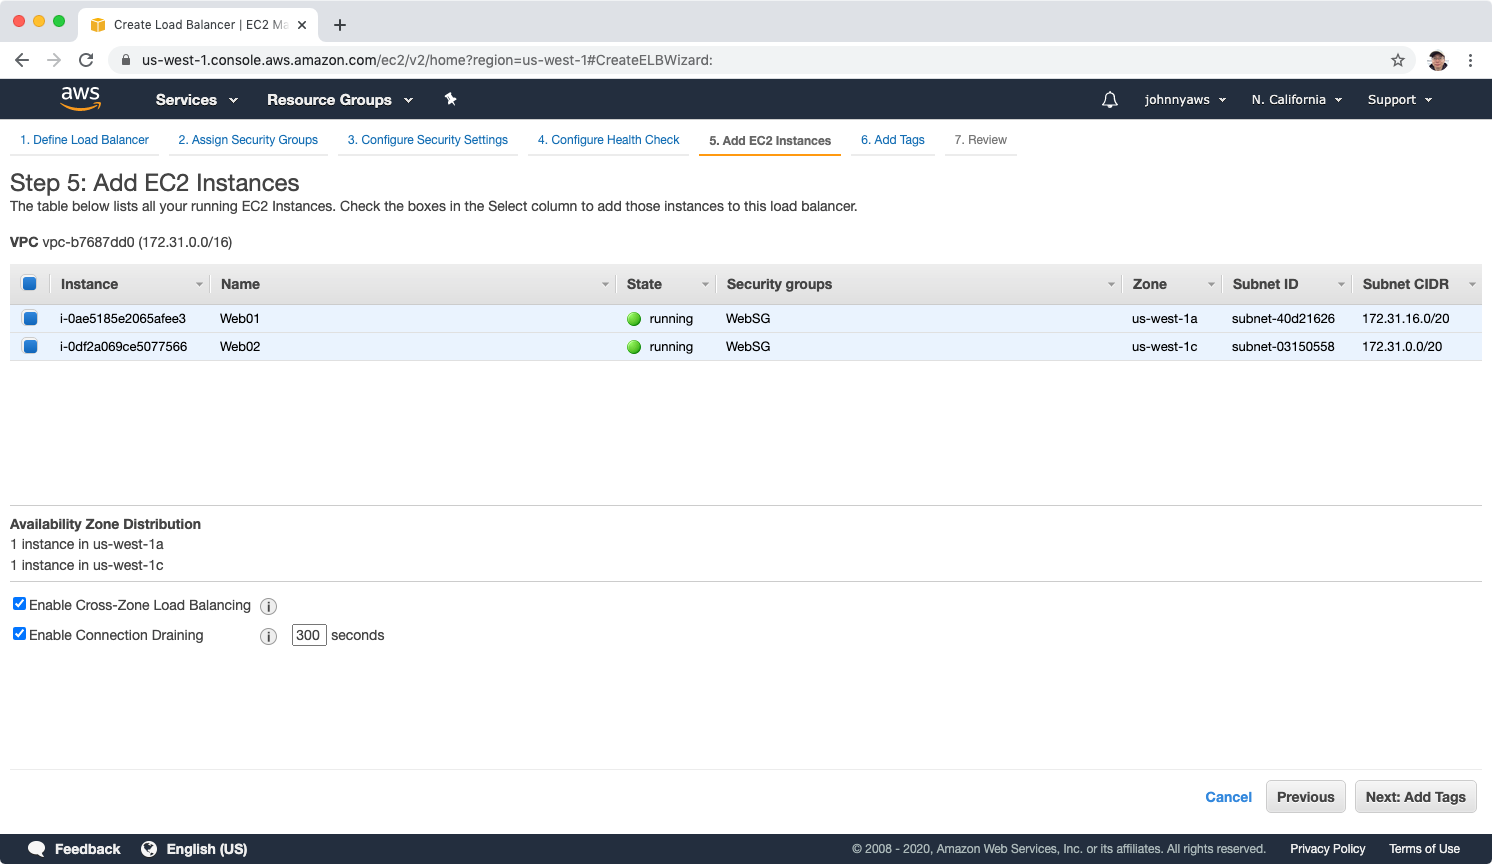
 Add two EC2 instances.
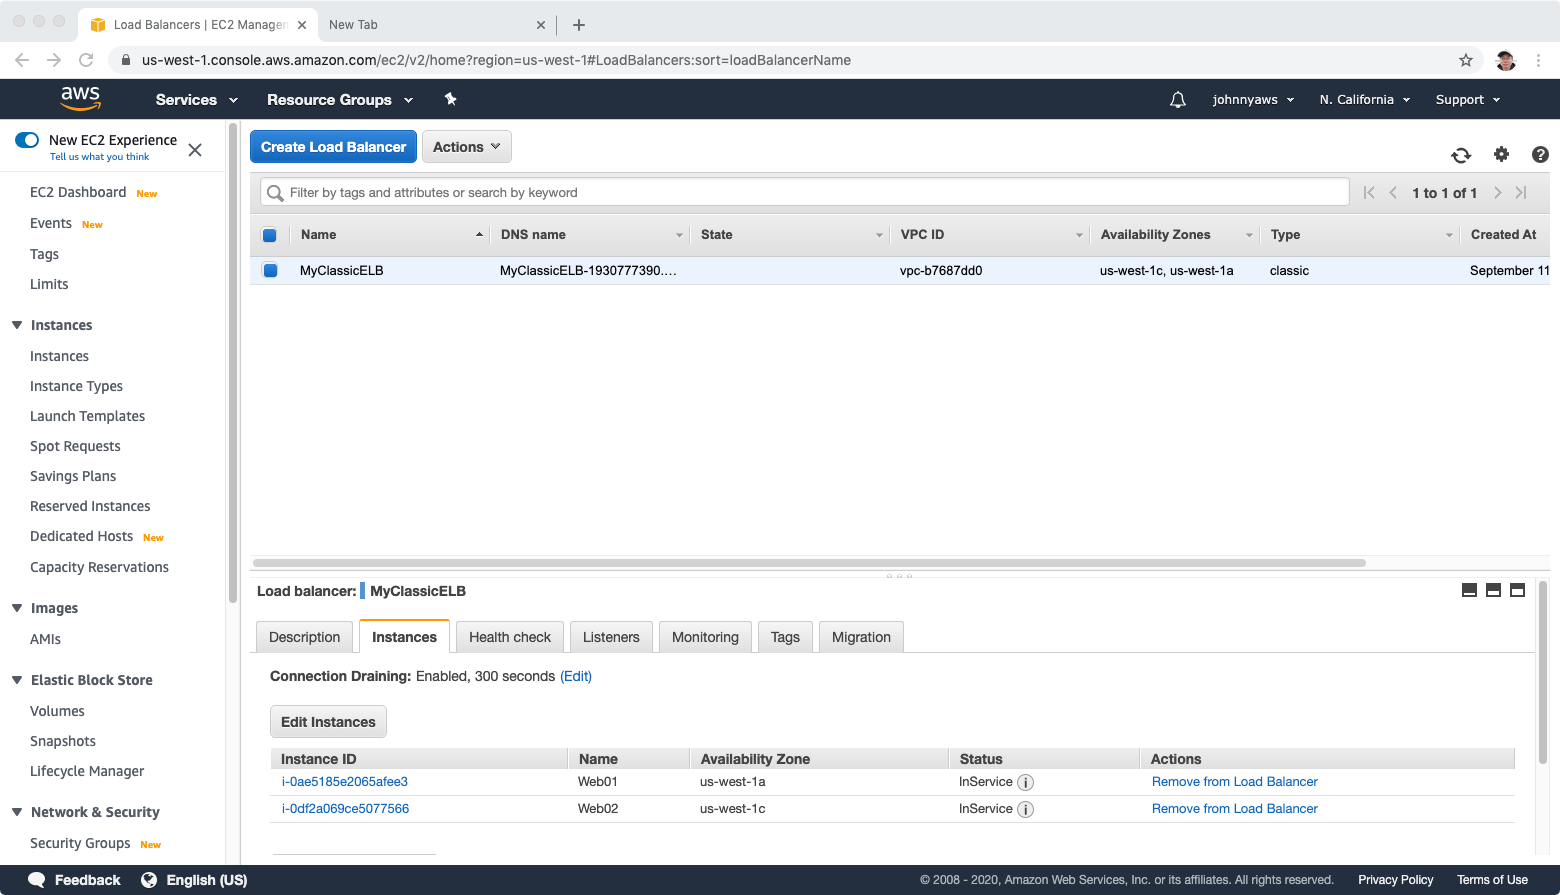
 Keep tag empty and create. The load balancer is created, wait until the status is changed from “OutService” to “InService”.
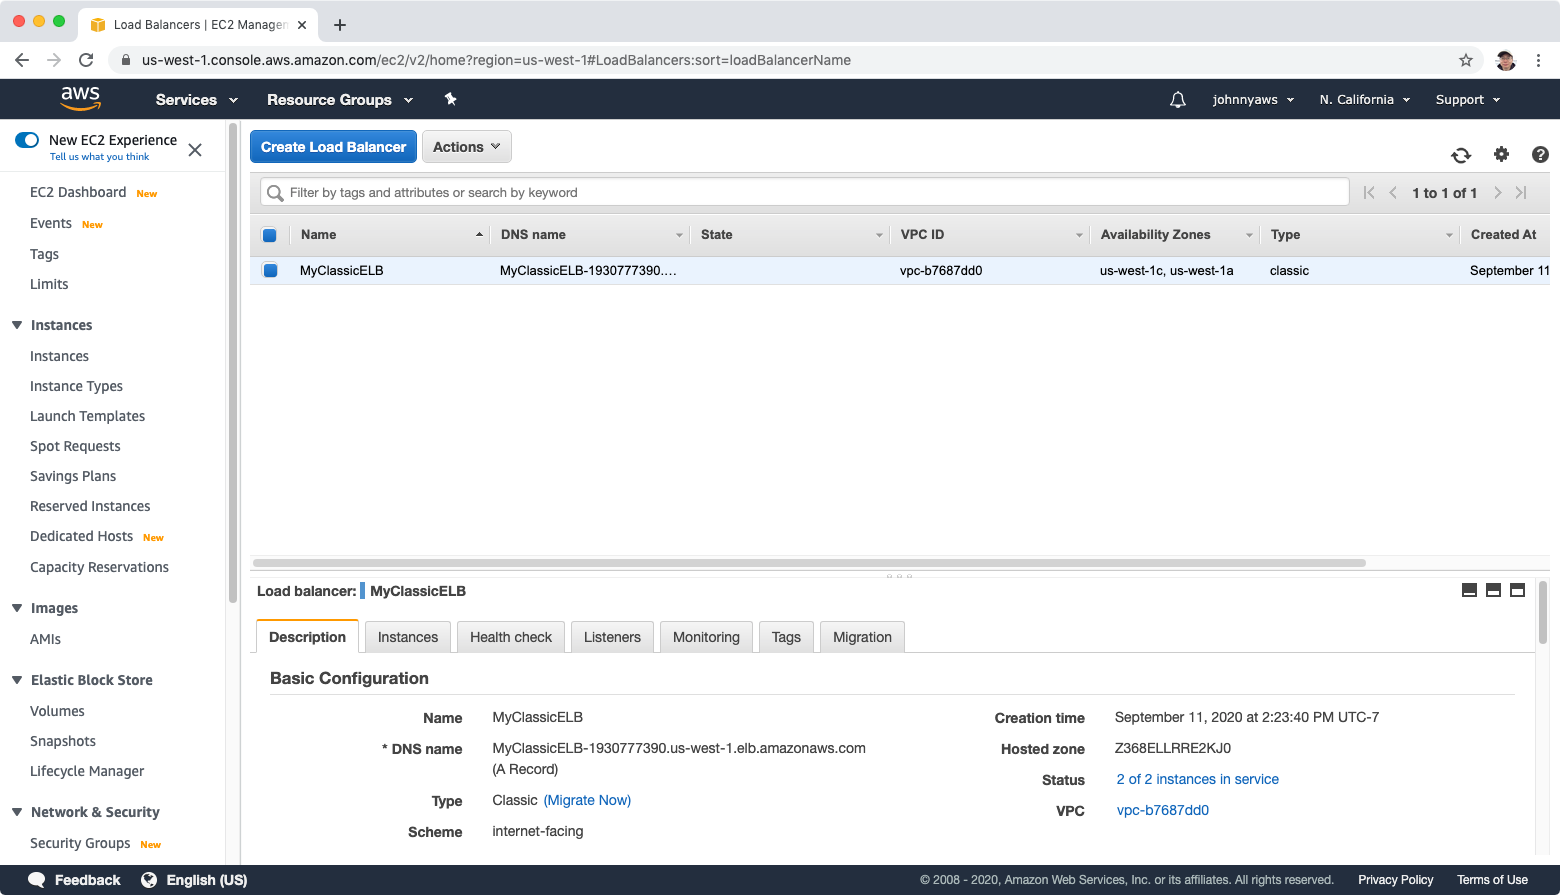
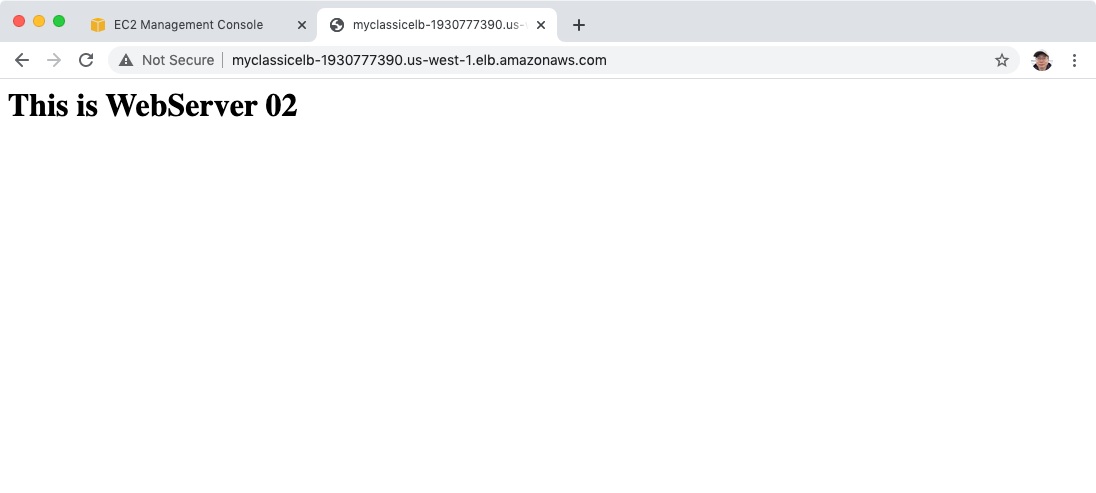
 Copy the dns name and visit it in web browser.
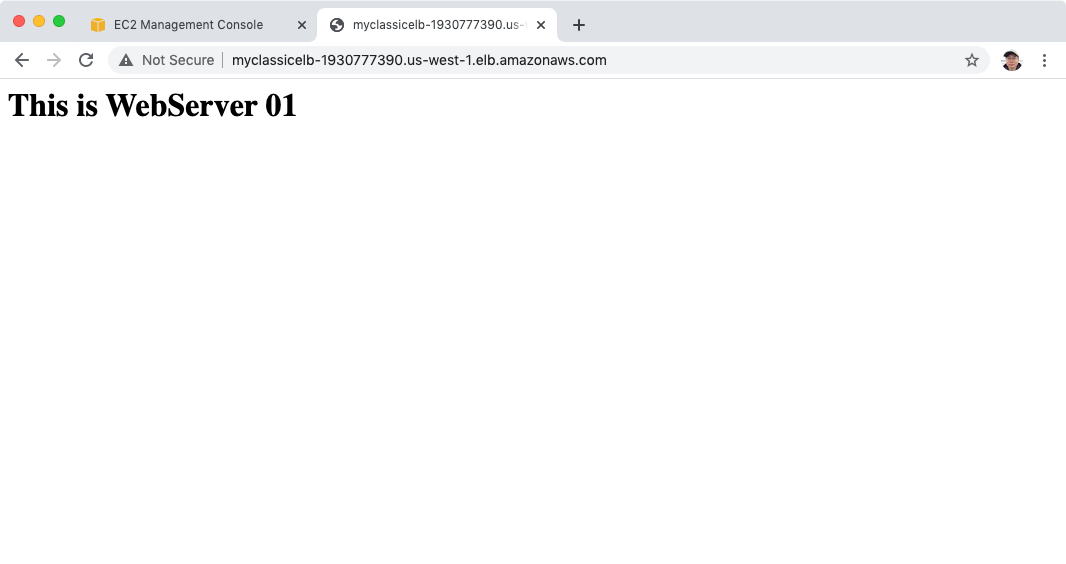
 We will see the content. Keep refreshing the page, sometimes we hit WebServer 1 and sometime we hit WebServer 2.
 Stop the first instance which is Webserver 1.
 The health check will notice this and the status of web server 1 instance is changed to “OutService”.
 If we refresh the page, we will only see webserver 2, as load balancer detects webserver 1 is not available, it is sending all traffic to web server 2.
4. Lab - Application Load Balancer
Create target group and application load balancer.
Launch the two web server instances.
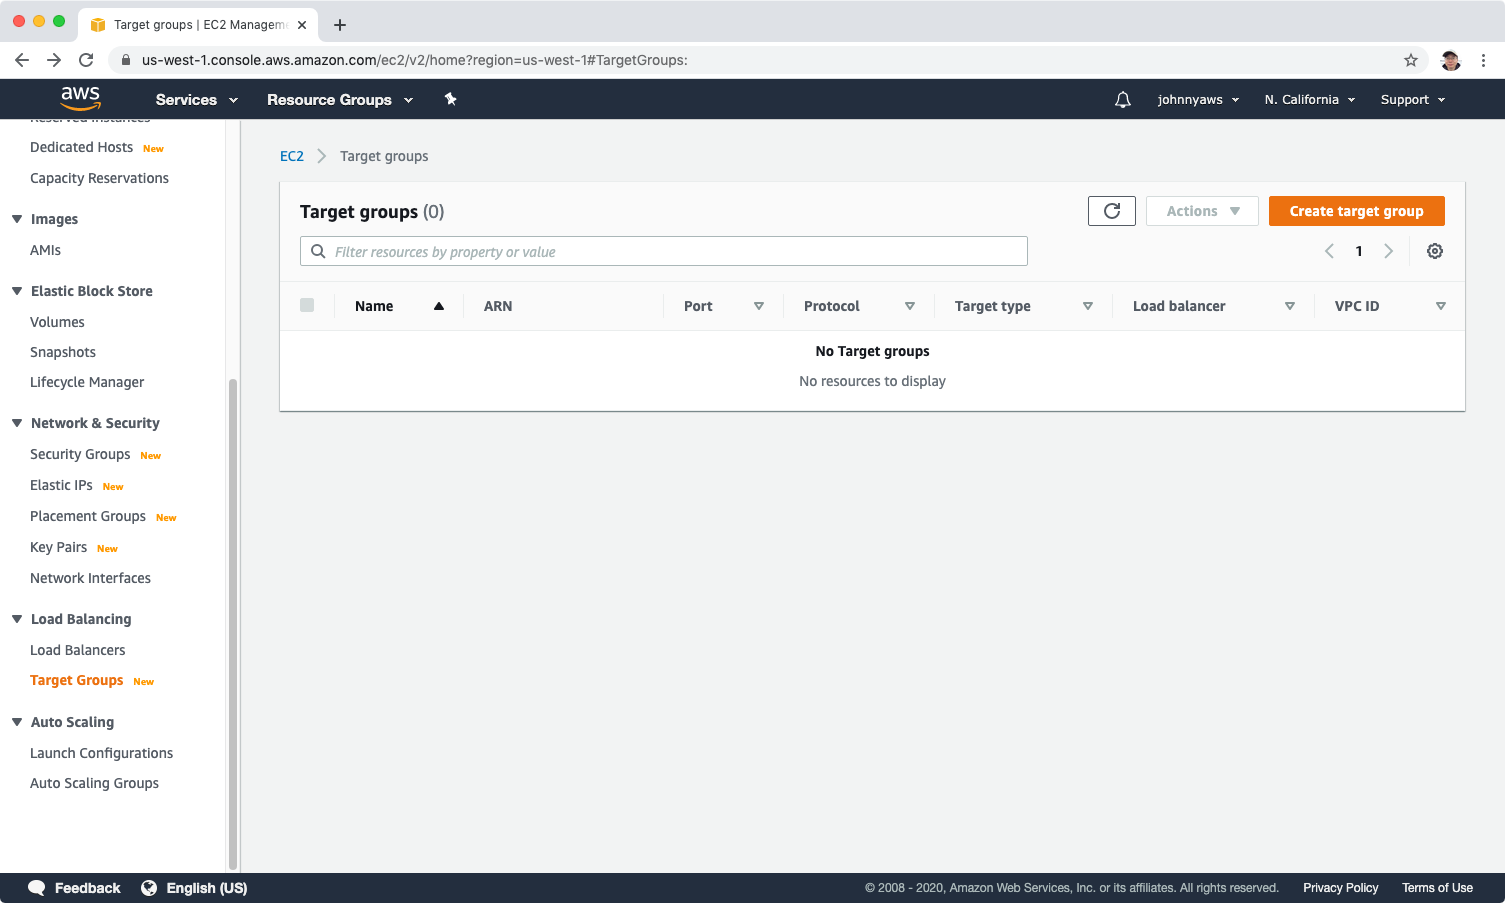
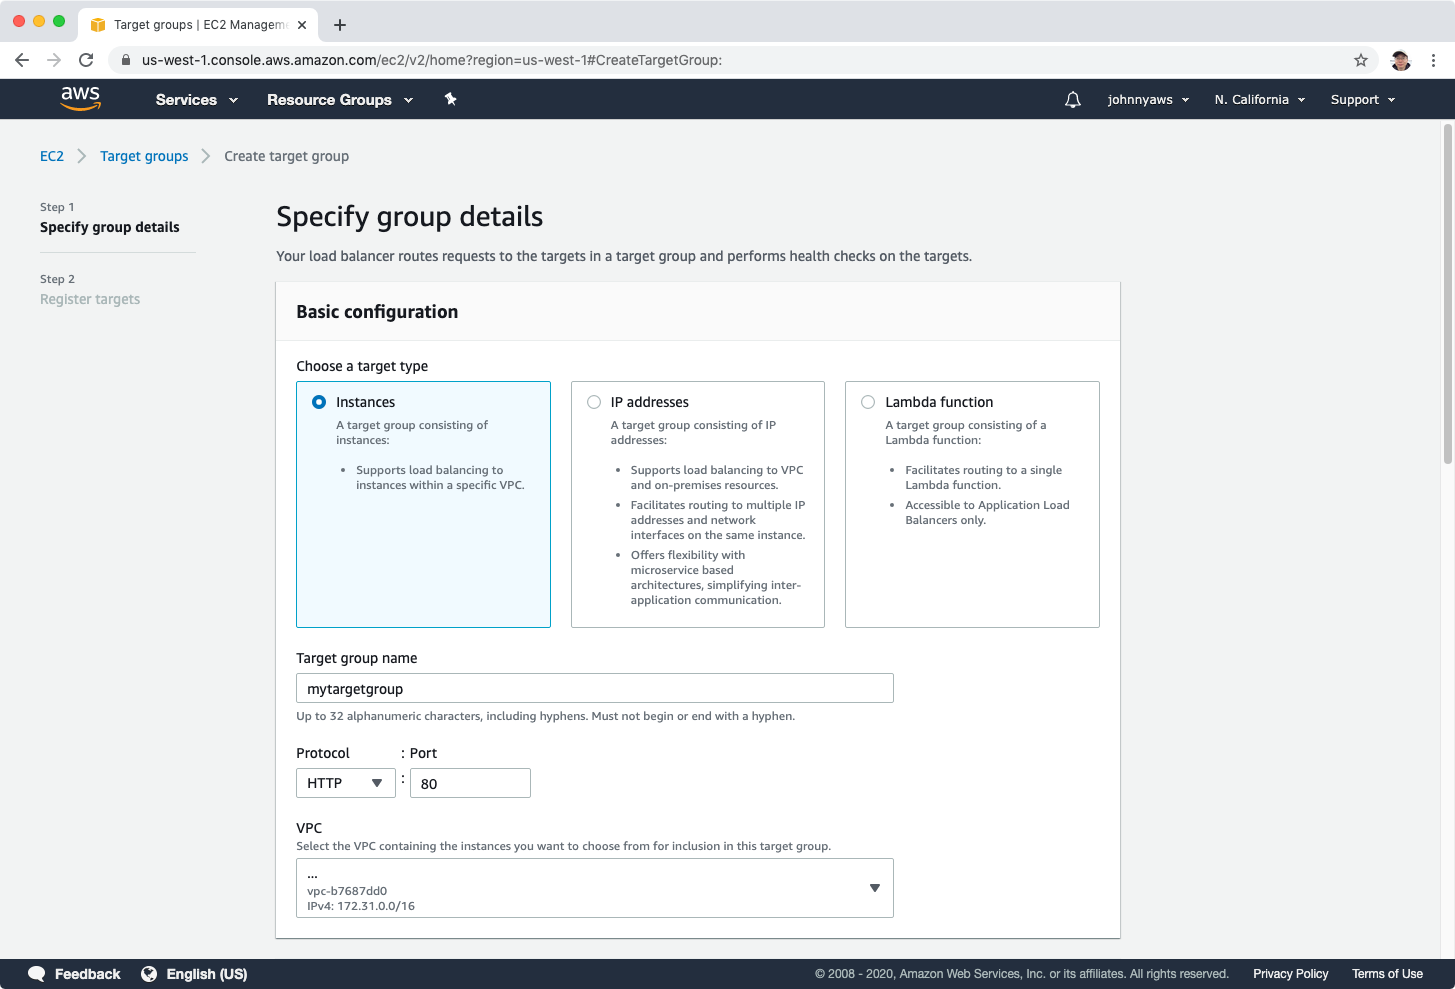
4.1 Create Target Group
Go to Services->EC2->Target Groups, Create target group
 Select “Instances” as target type, provide the group name.
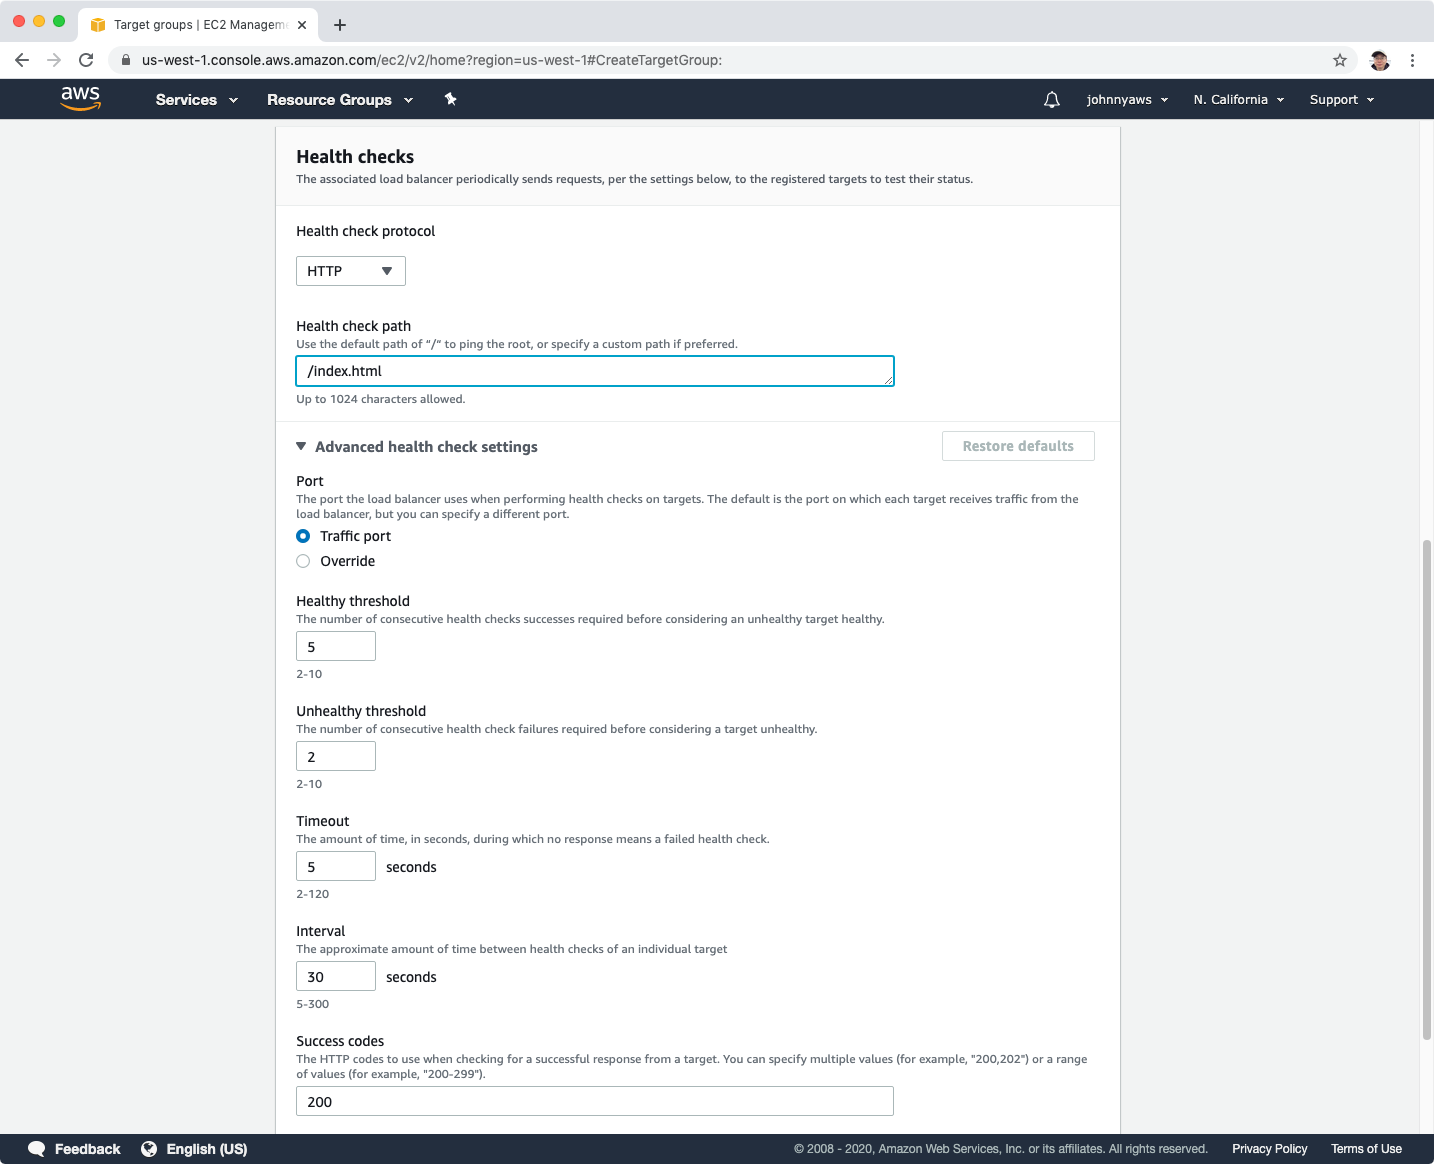
 Set path, threshold, timeout and interval for health checks, next.
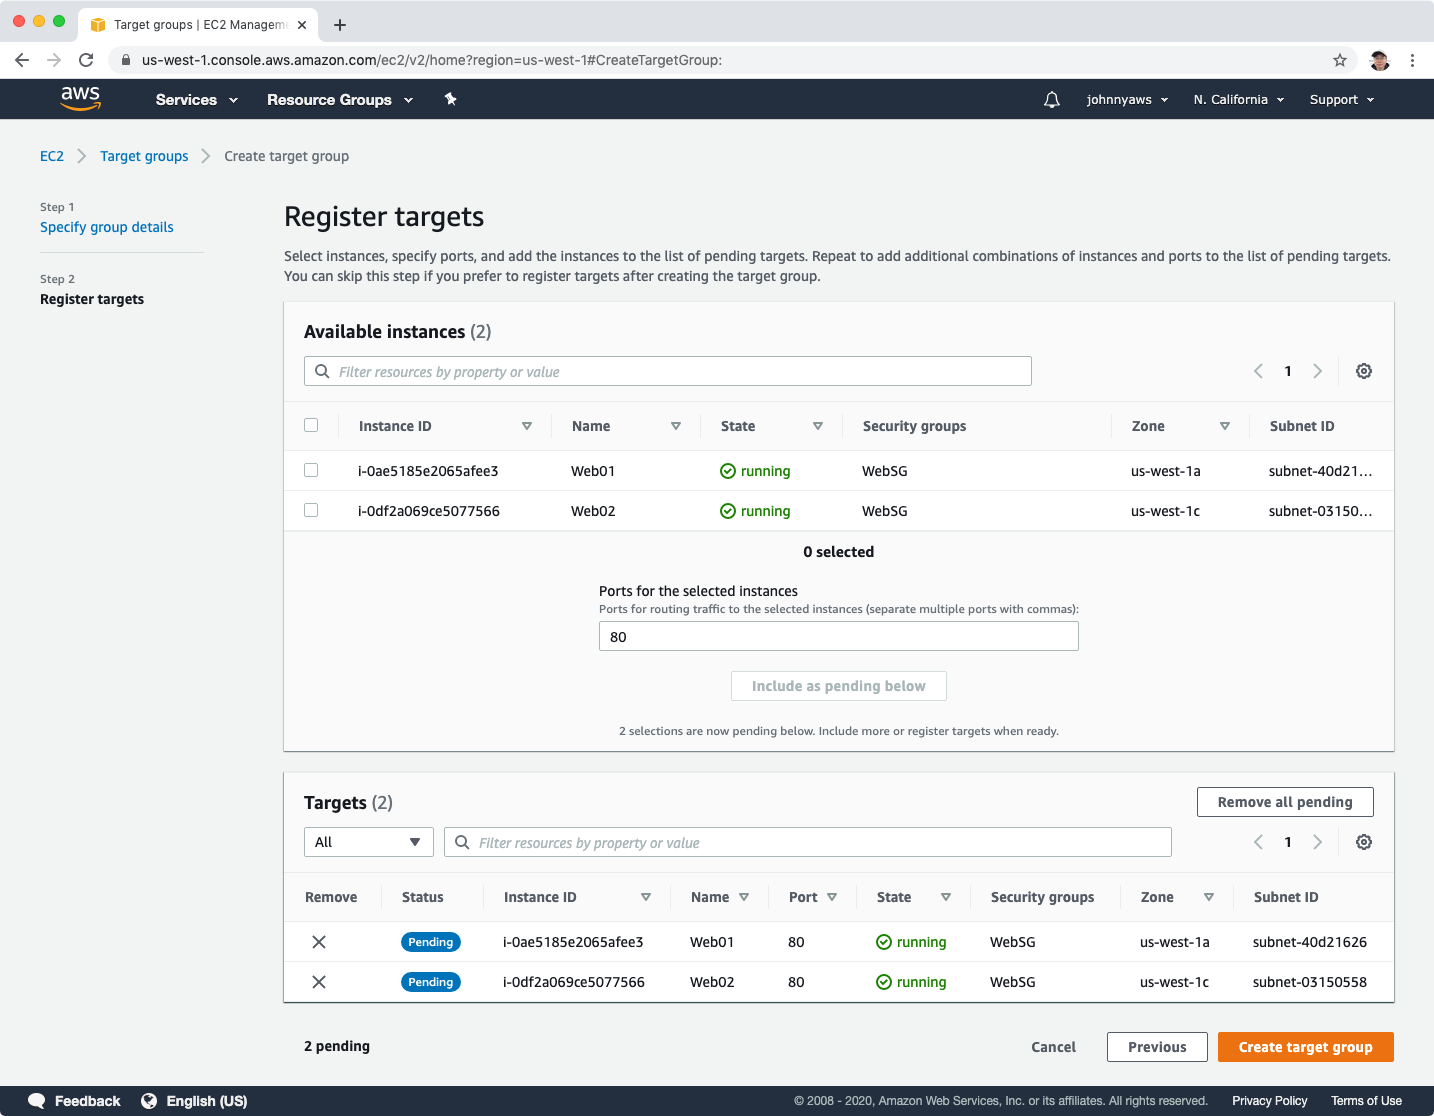
 Select the two web server instances, click “Include as pending below”, then “Create target group”.
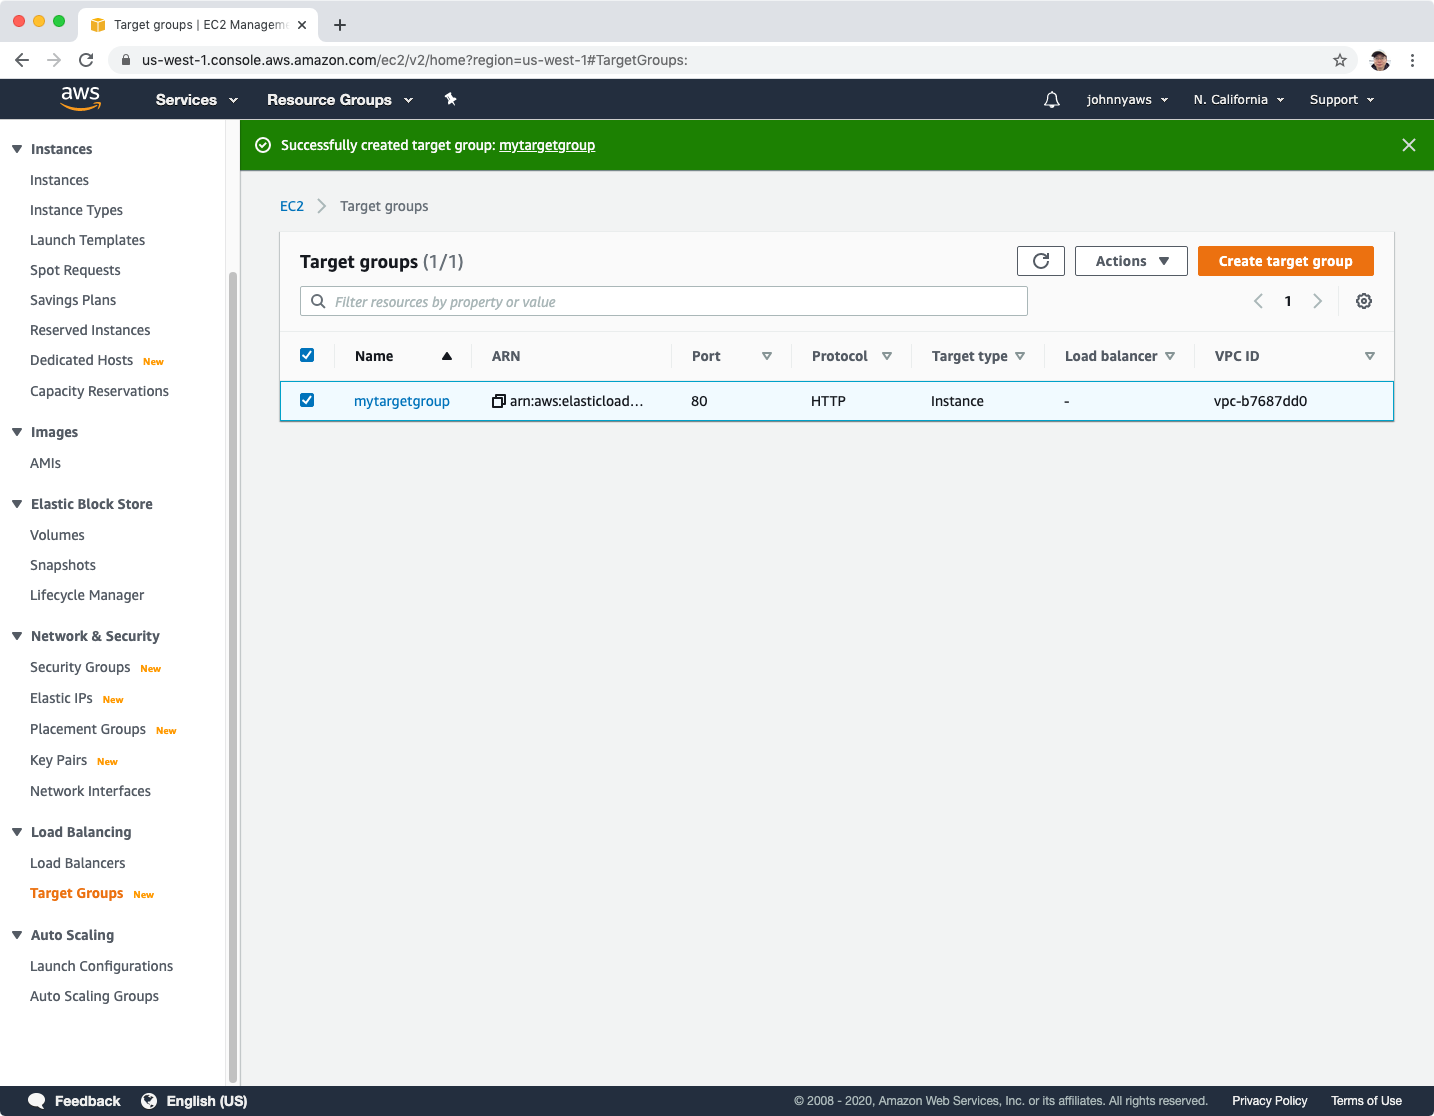
 The target group is created.
4.2 Create Application Load Balancer
Go to Services->EC2->Load Balancers, Create Load Balancer, select “Application Load Balancer”, provider name and select all availability zones, next.
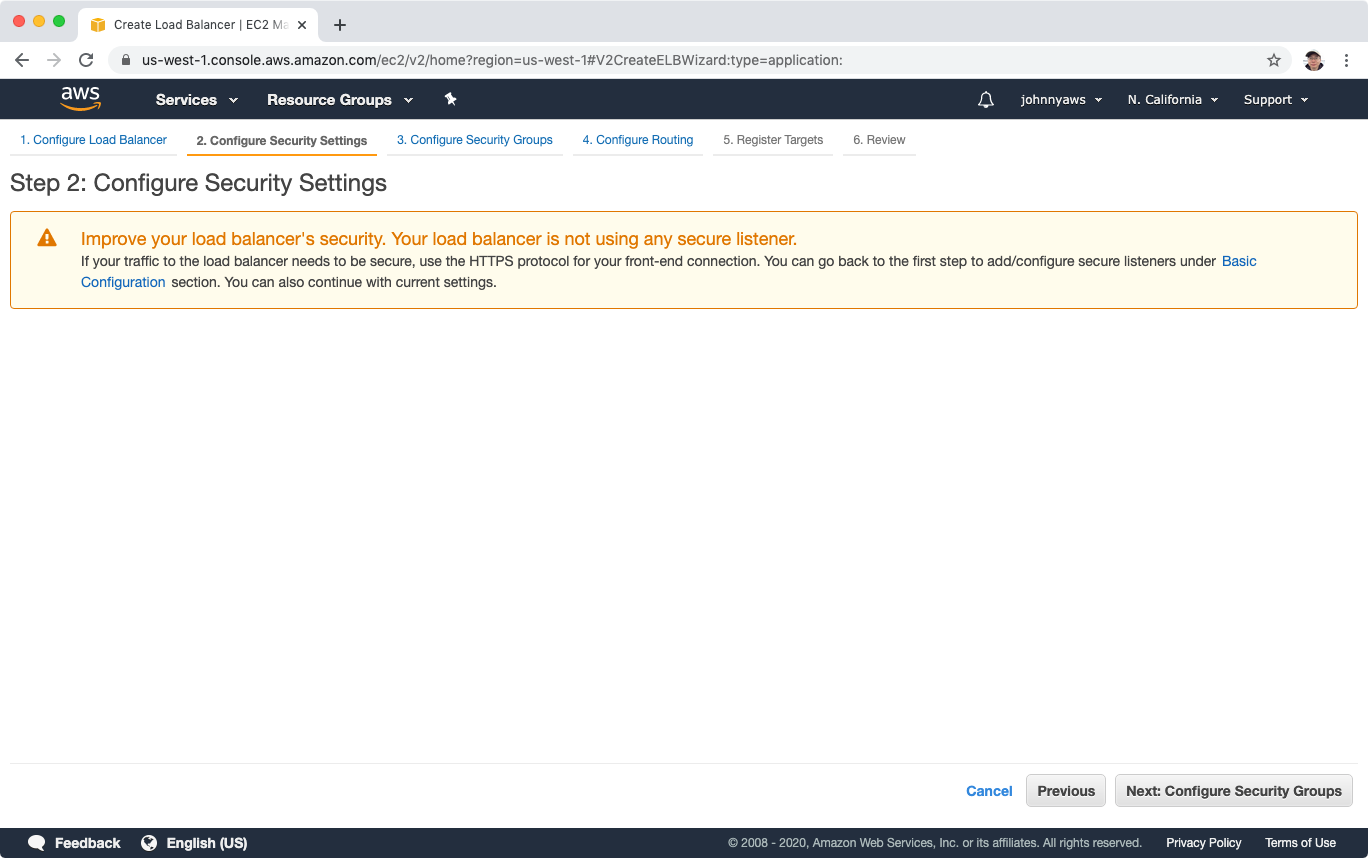
 Skip the warning, next.
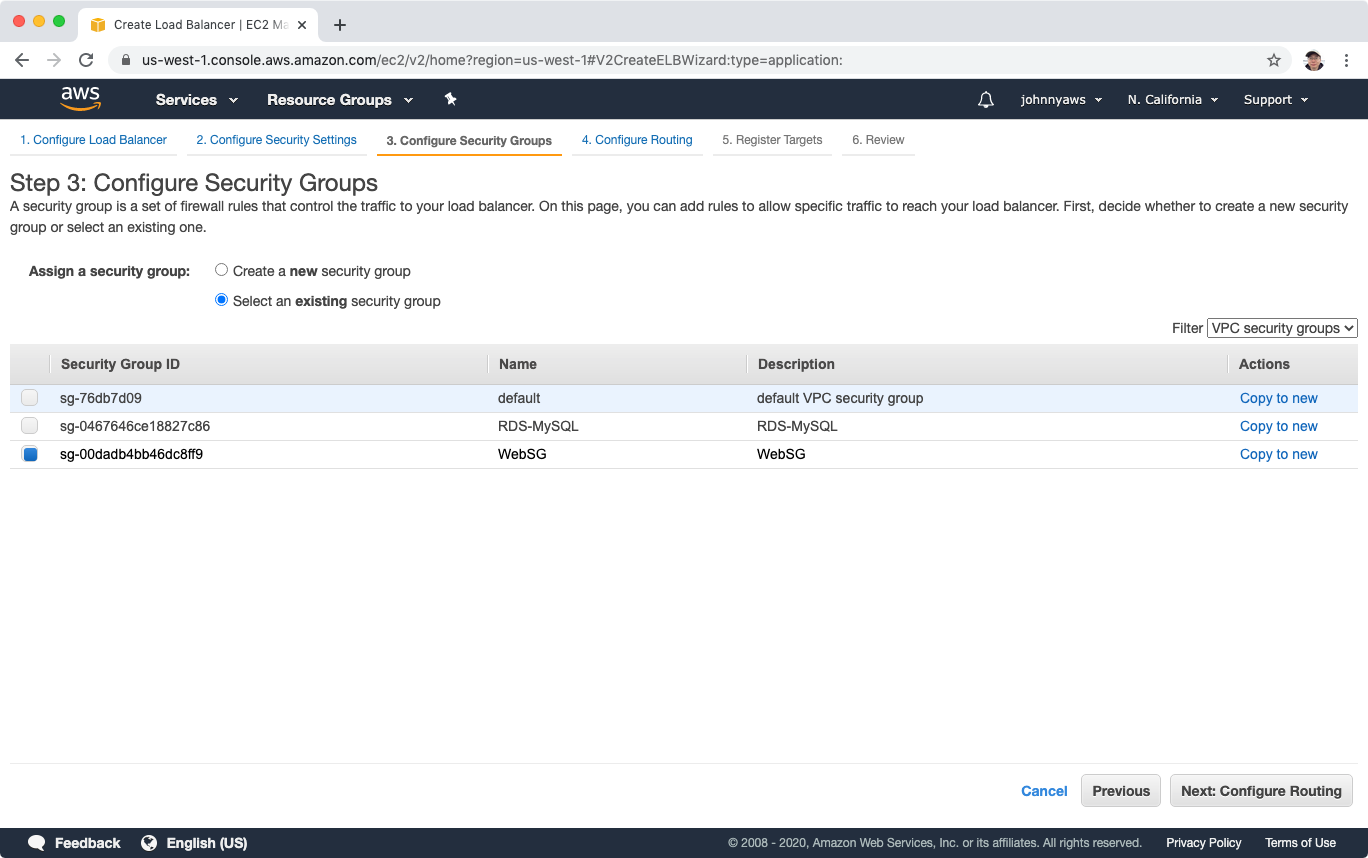
 Select the WebSG security group, next.
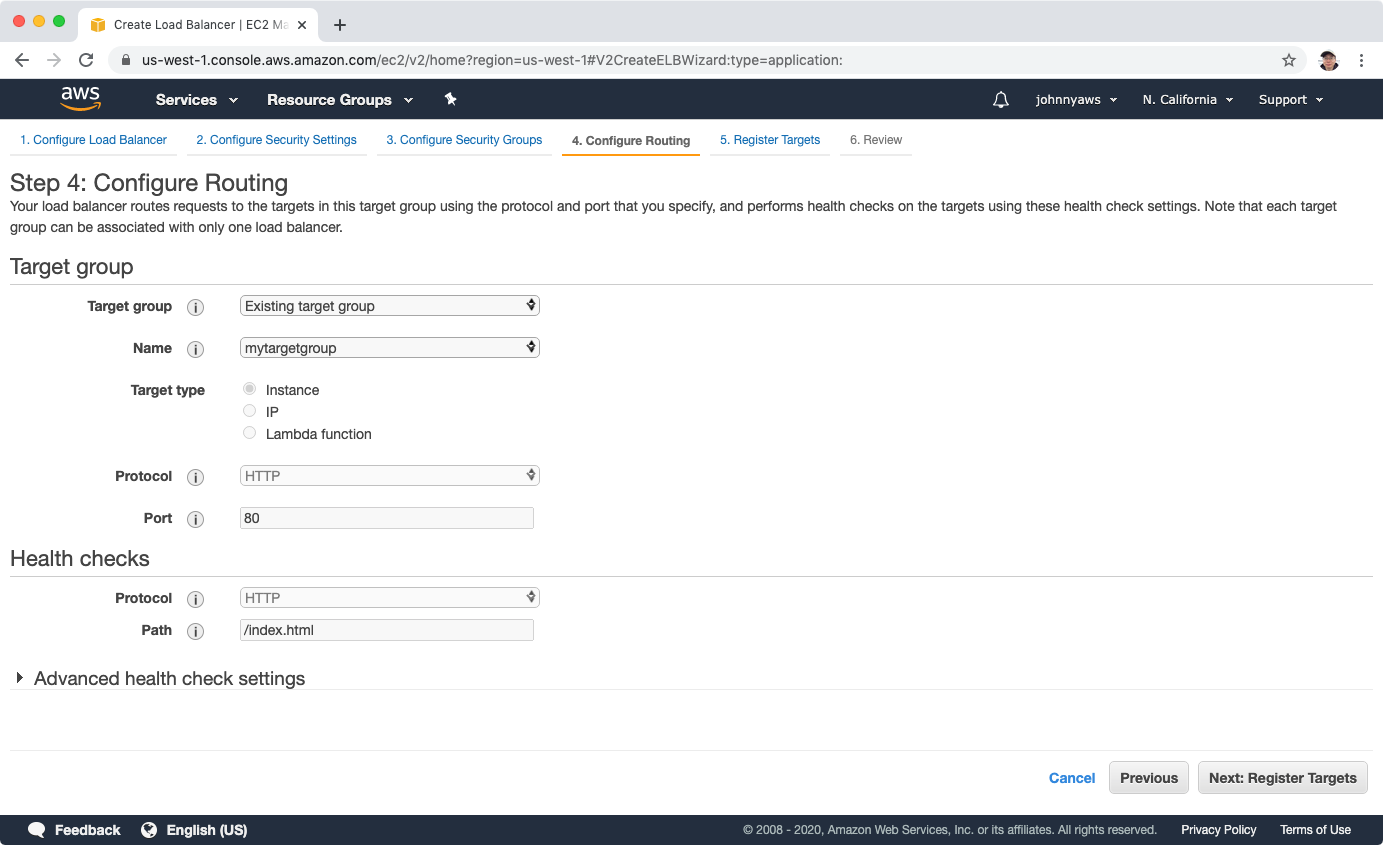
 Select the existing group created in previous lab, next.
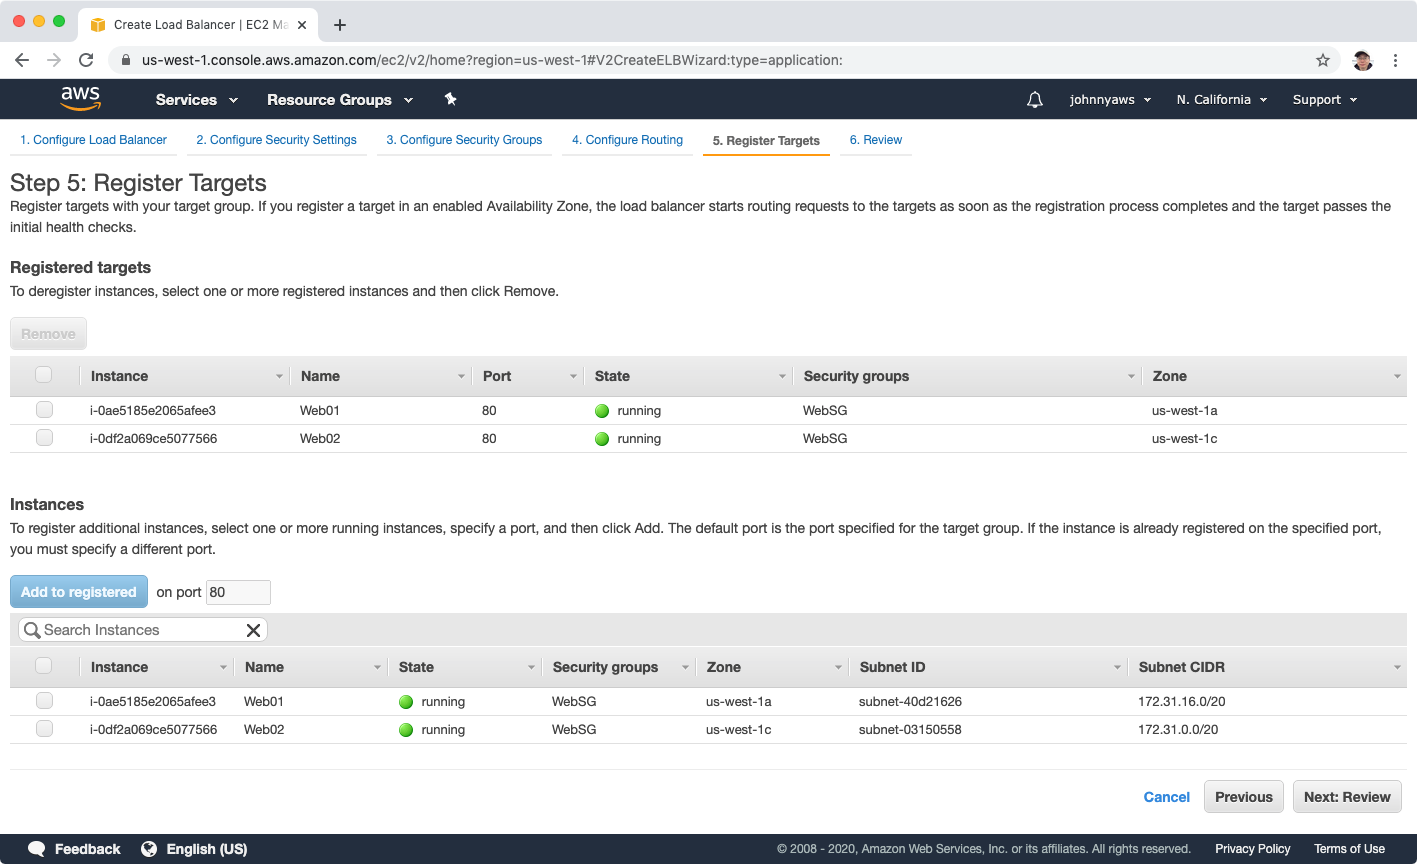
 Select the two instances and click ‘Add to registered’, next.
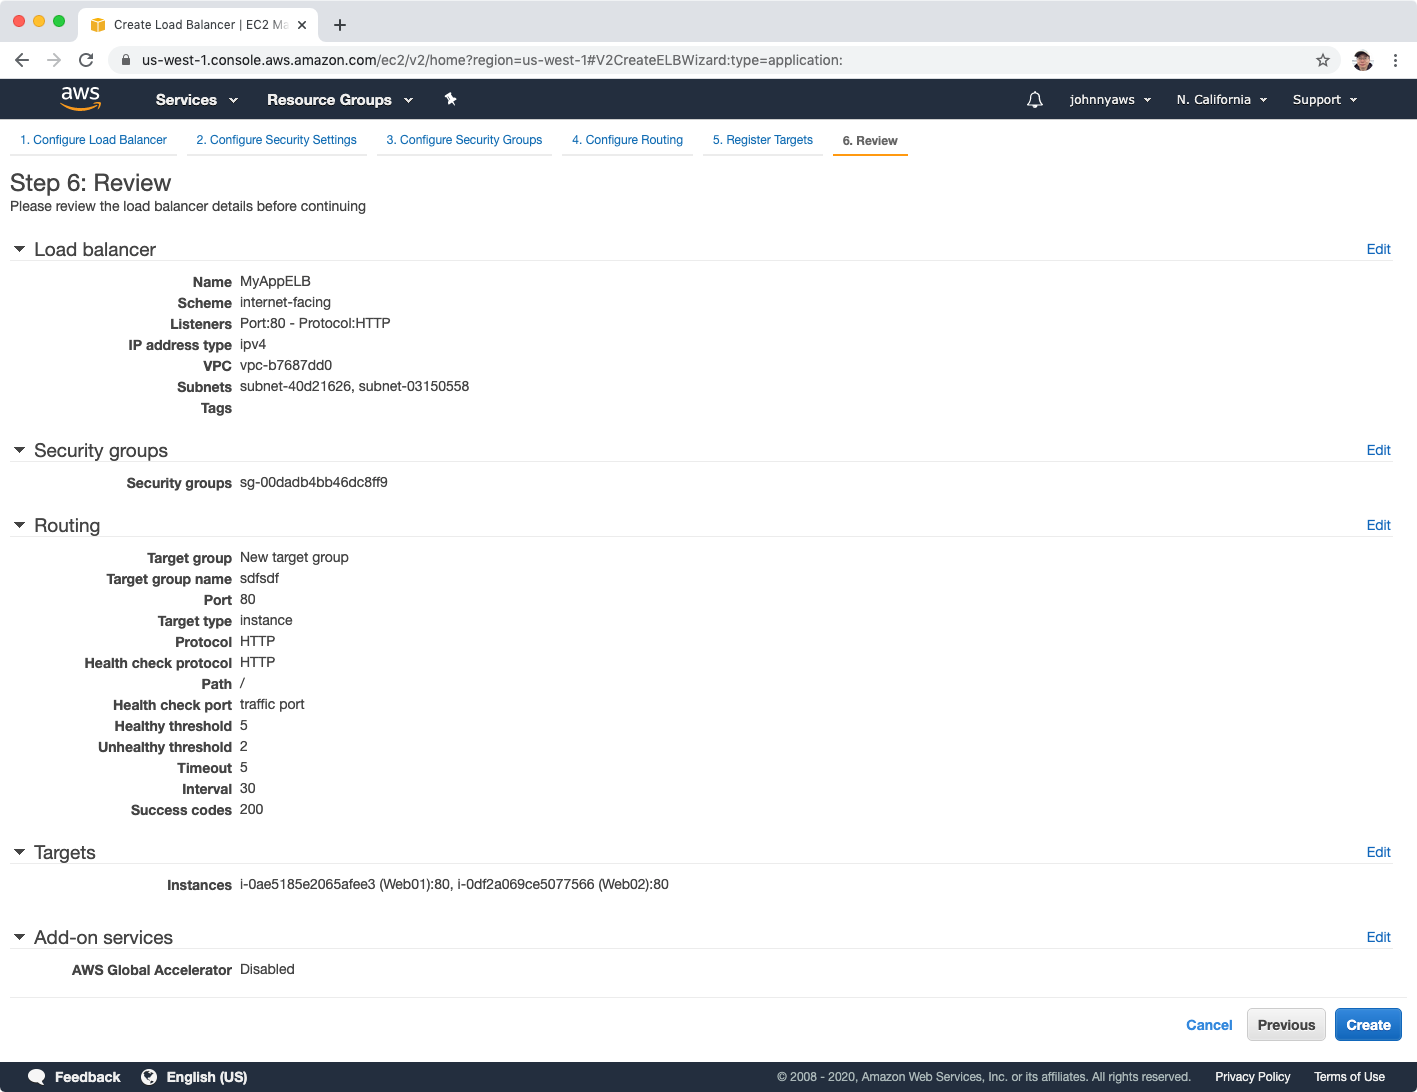
 Review, create.
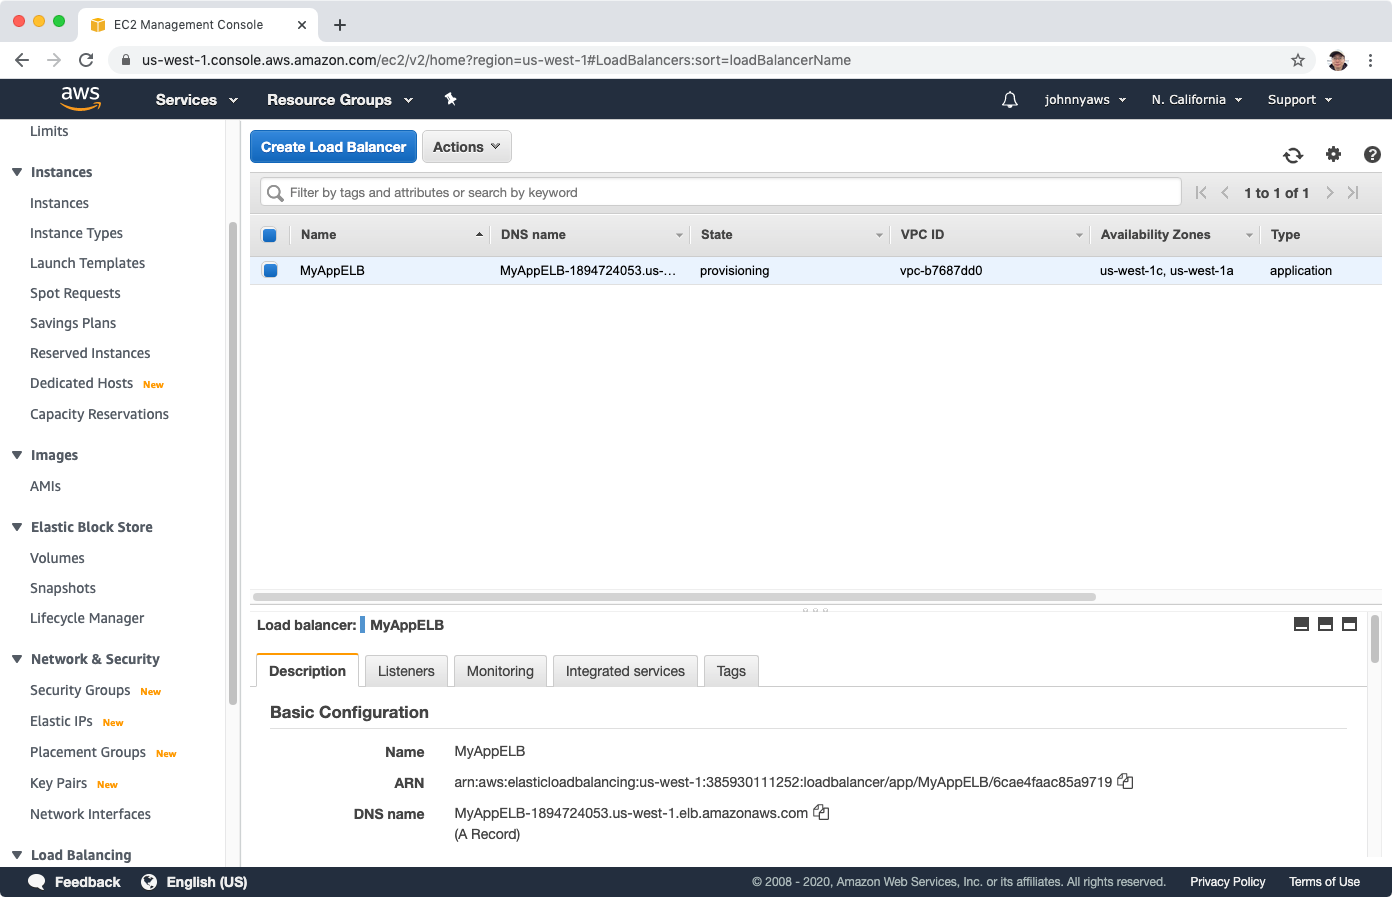
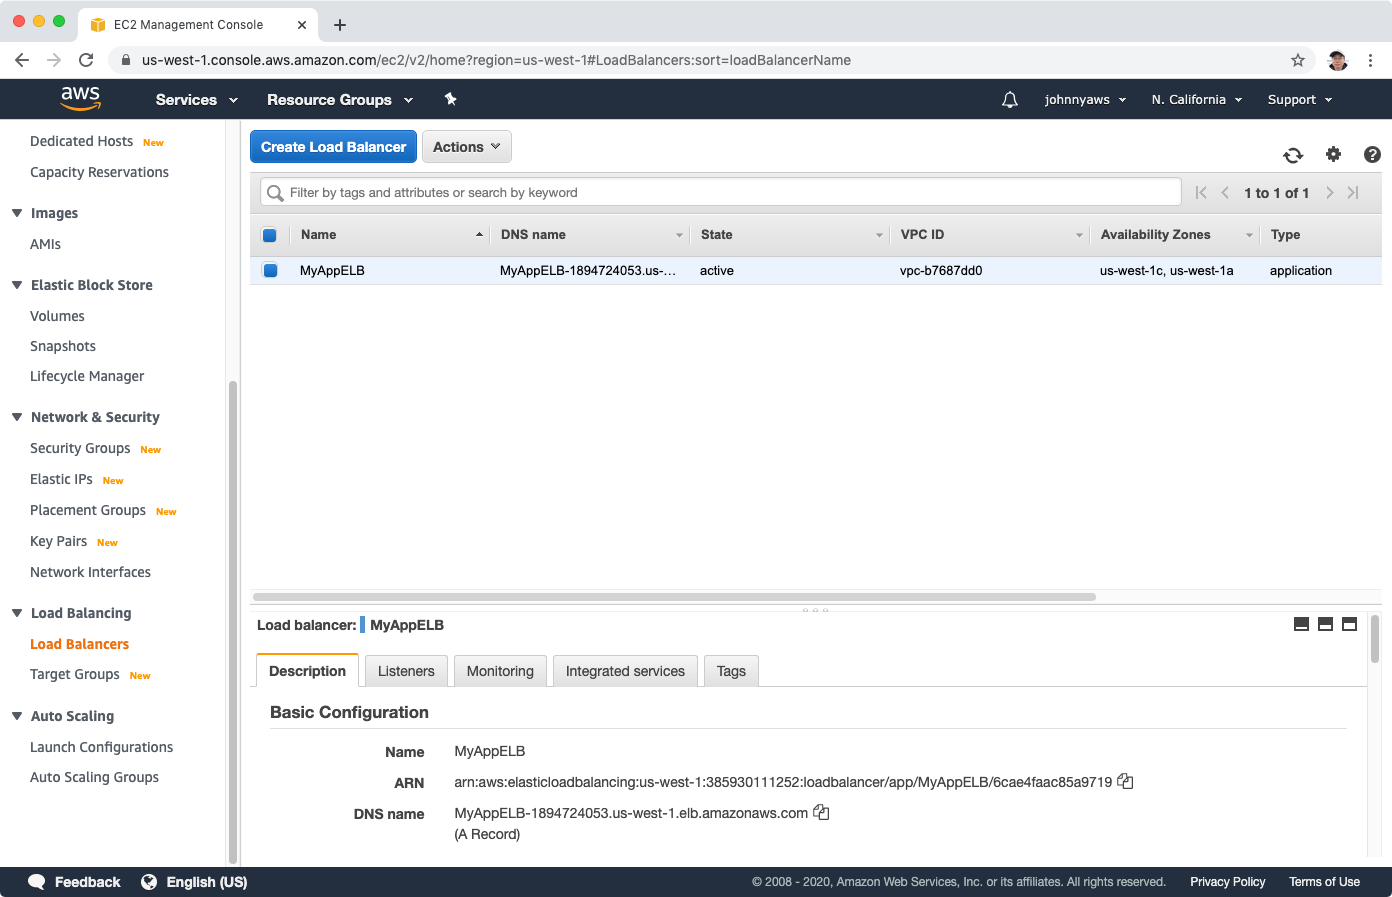
 ELB is created.
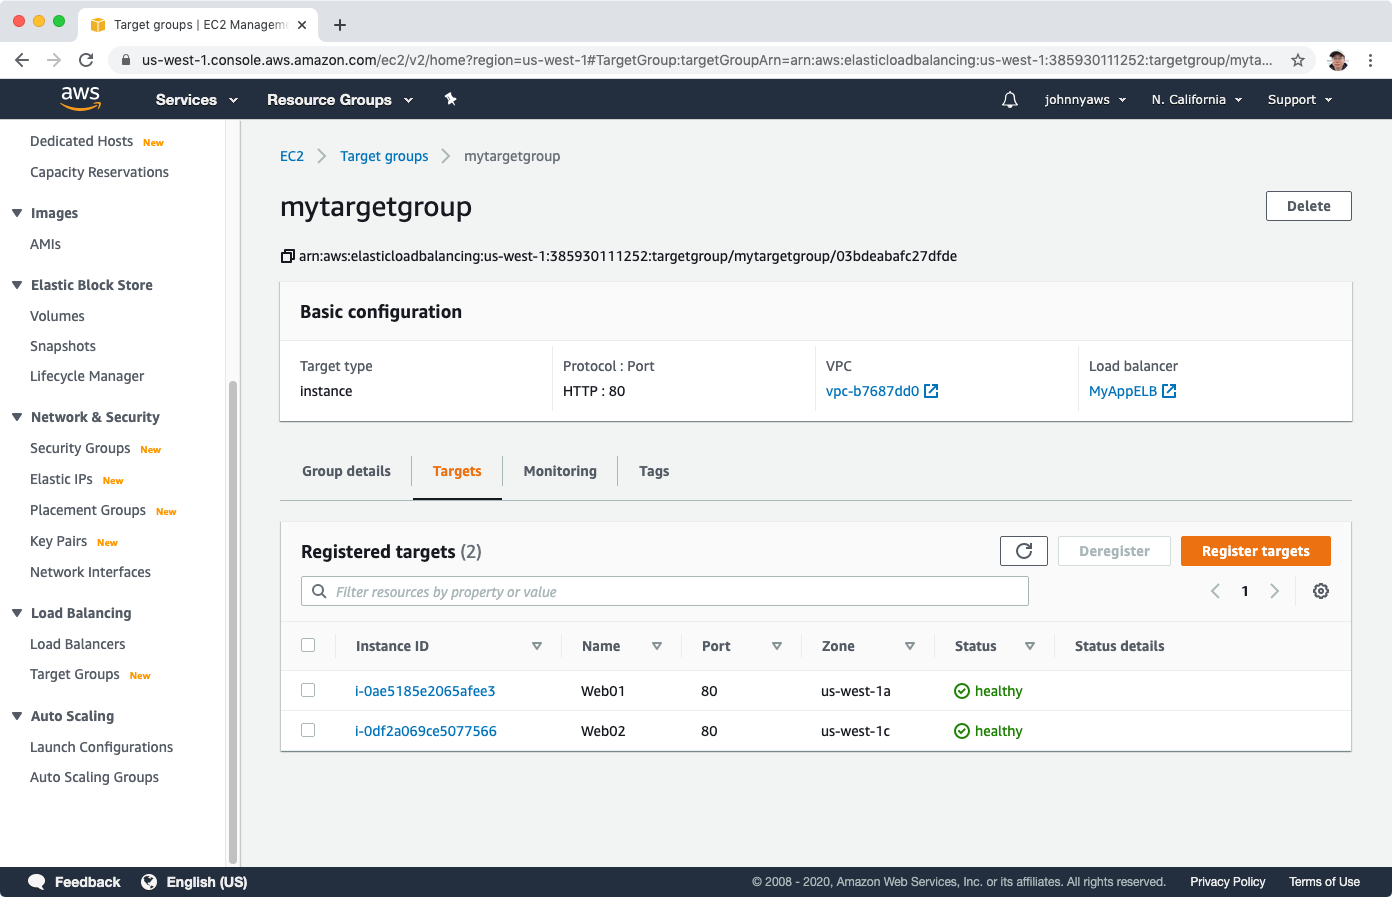
 Go to target group, wait for a while, until the status become ‘healthy’.
 Go to the load balancer, copy the dns name, visit it in the web browser.
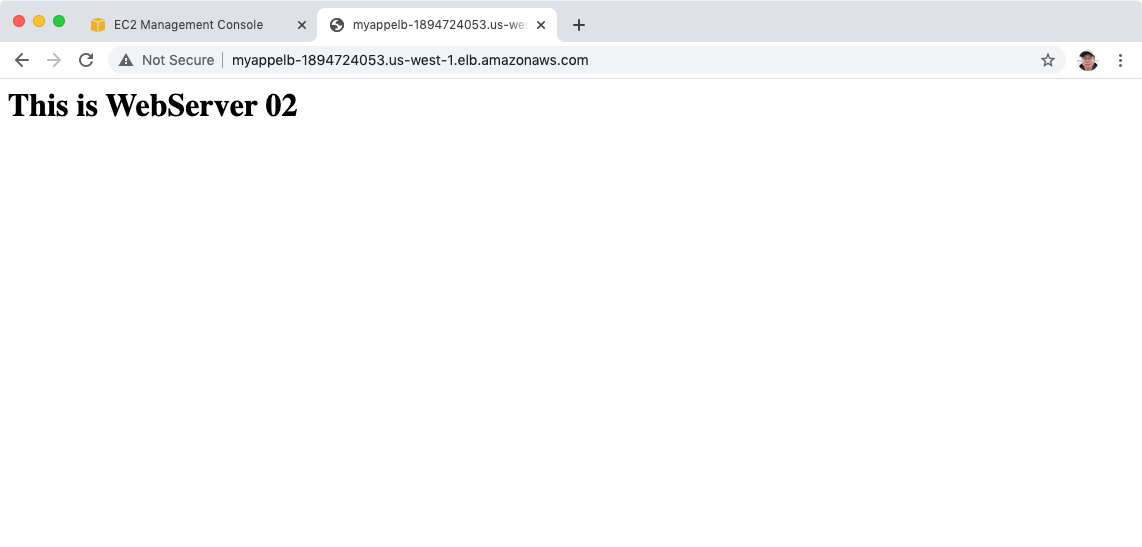
 We will see the content. Keep refreshing the page, sometimes we hit WebServer 1 and sometime we hit WebServer 2.
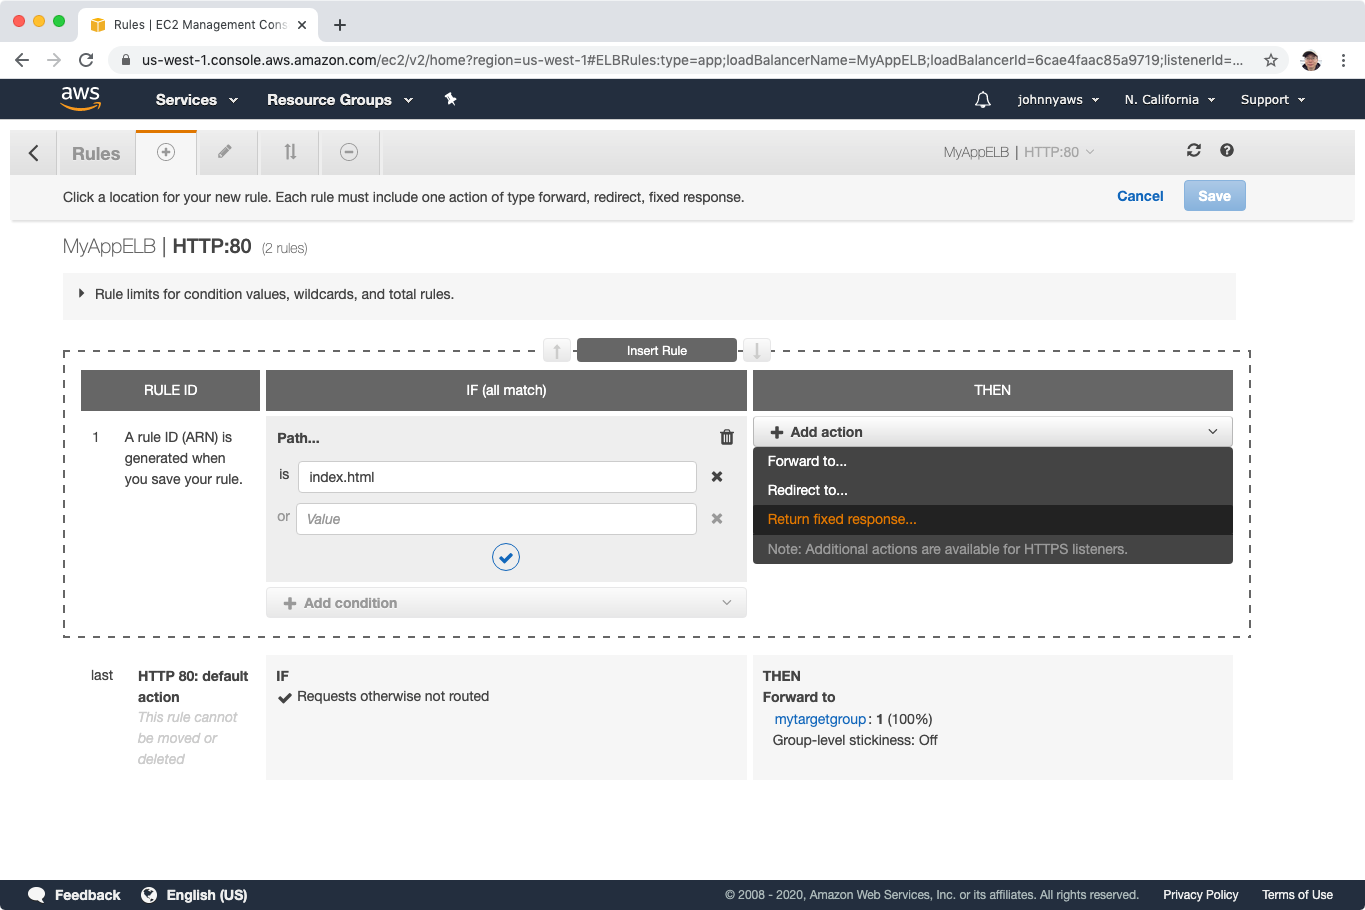
 Why application load balancer is more intelligent than classic load balancer? Check the listeners in the load balancer, click on the listener.
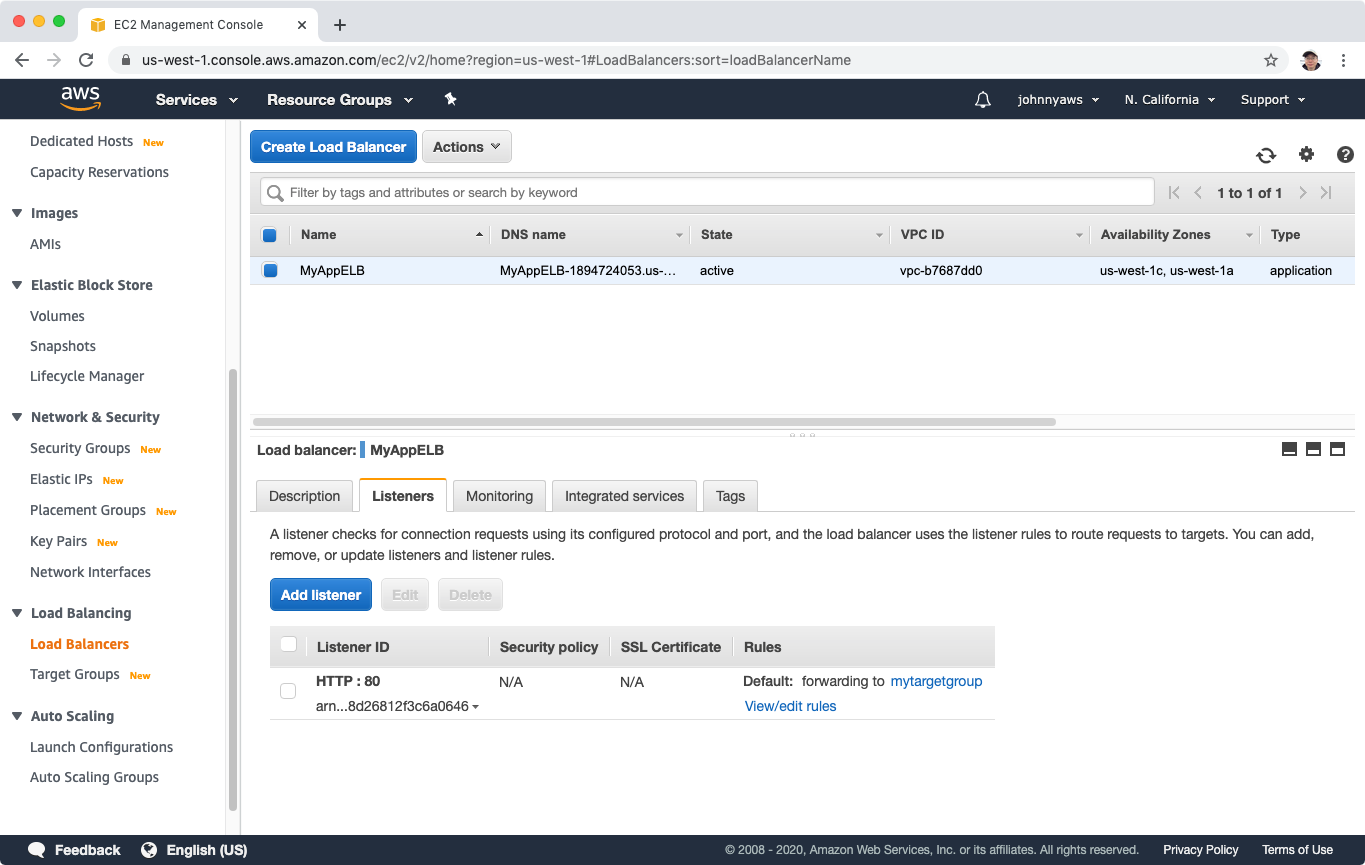 You can create rules with conditions and corresponding actions.
5. Advanced Load Balancer
5.1 Sticky Sessions
Classic Load Balancer routes each request independently to the registered EC2 instance with the smallest load. Sticky sessions allow you to bind a user’s session to a specific EC2 instance. This ensures that all requests from the user during the session are sent to the same instance.
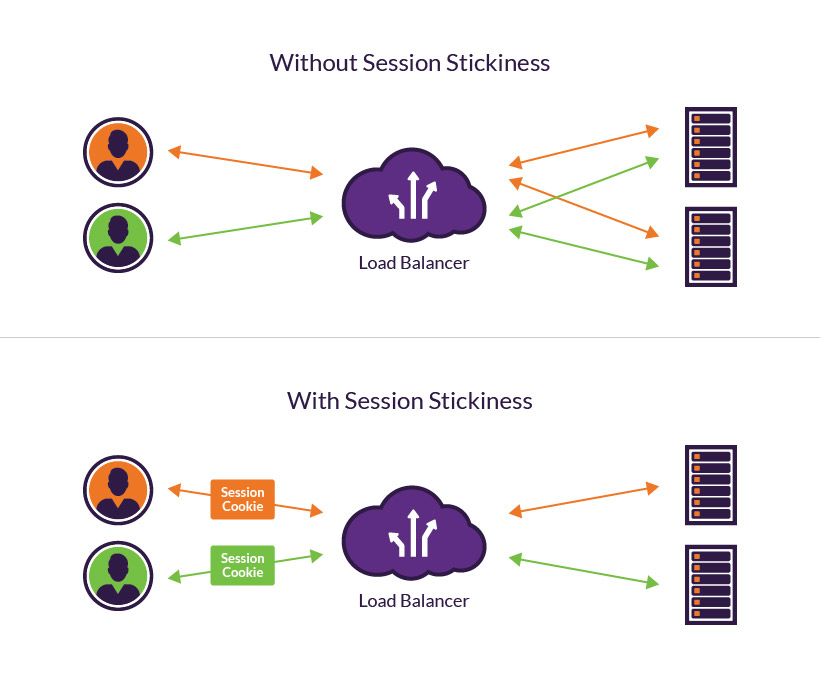 You can enable Sticky Sessions for Application Load Balancers as well, but the traffic will be sent at the Target Group Level.
5.2 Cross Zone load Balancing
With cross-zone load balancing, each load balancer node for your Classic Load Balancer distributes requests evenly across the registered instances in all enabled Availability Zones. If cross-zone load balancing is disabled, each load balancer node distributes requests evenly across the registered instances in its Availability Zone only.

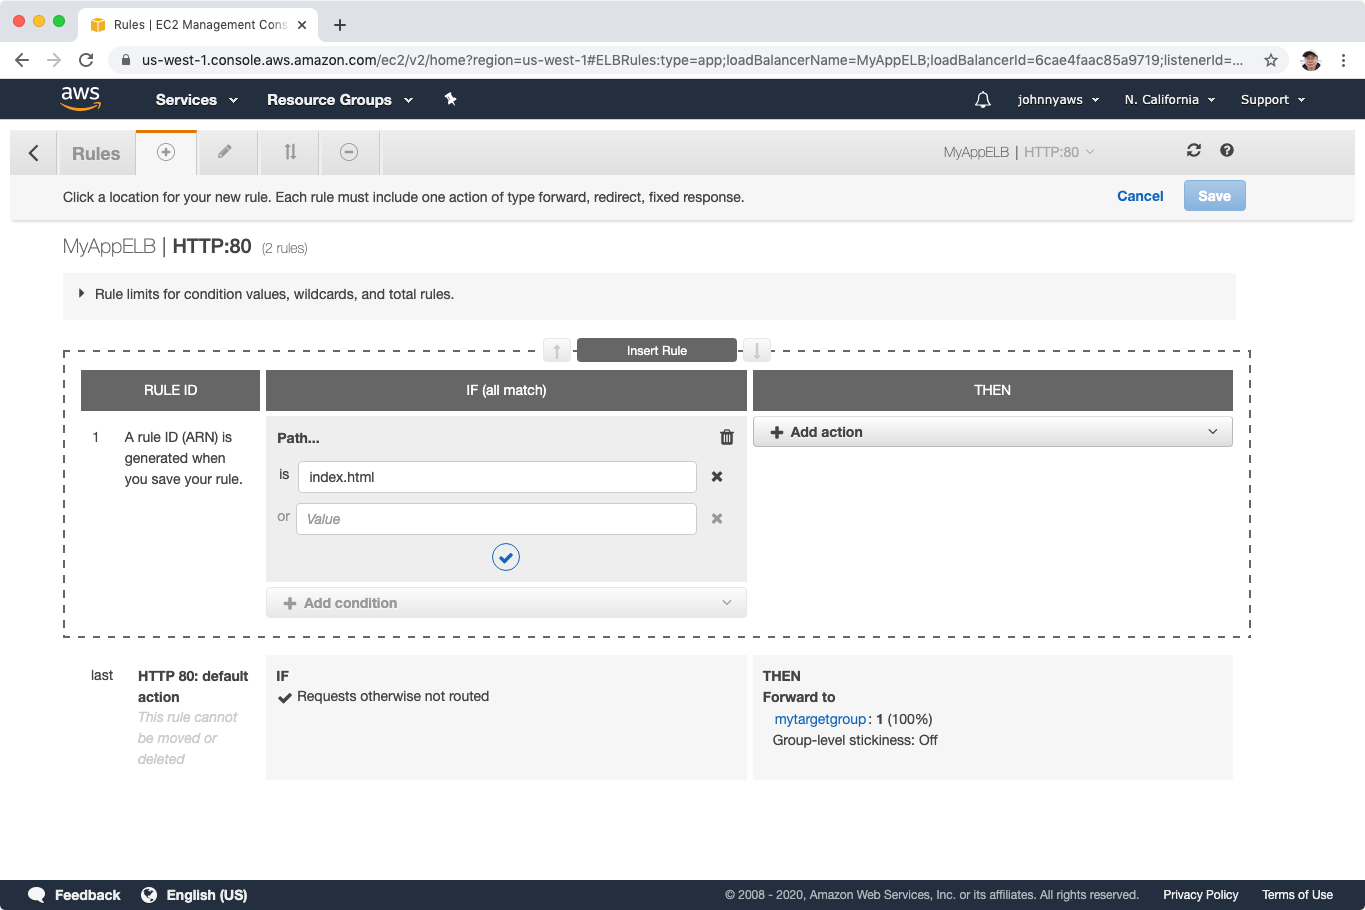
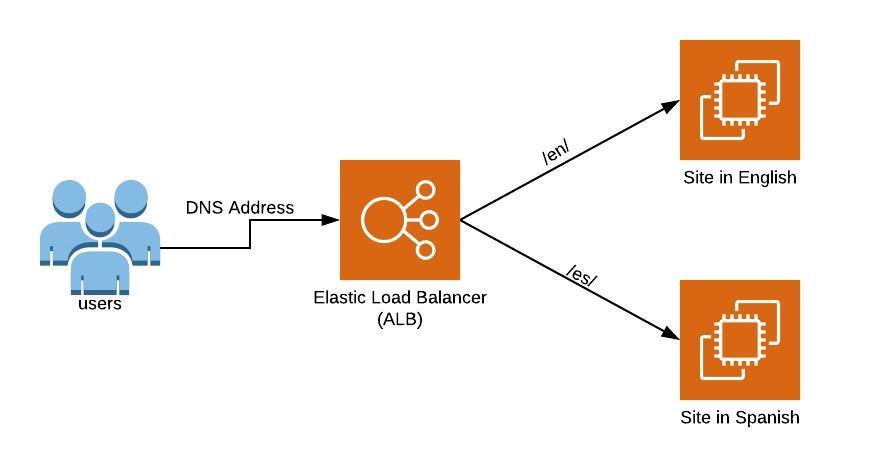
5.3 Path Patterns
You can create a listener with rules to forward requests based on the URL path. This is known as path-based routing. If you are running microservices, you can route traffic to multiple back-end services using path-based routing. For example, you can route general requests to one target group and requests to render images to another target group.
5.4 Summary
- Sticky Sessions enable your users to stick to the same EC2 instance. Can be useful if you are storing information locally to that instance.
- Cross Zone Load Balancing enables you to load balance across multiple availability zones.
- Path patterns allow you to direct traffic to different EC2 instances based on the URL contained in the request.