2513. Java Remote Debugging with EclipseEclipse and Debugging
Tutorial for how to remote debugging with Eclipse.
1. Introduction
In the posting Using Java Debugger, we learned how to debug a Java application with Java debugger (JDB). In this posting, I will introduce how to debug the same Java application in Eclipse, which would be much easier and more convenient than using JDB.
2. Debugging in Eclipse
2.1 Preparing Project
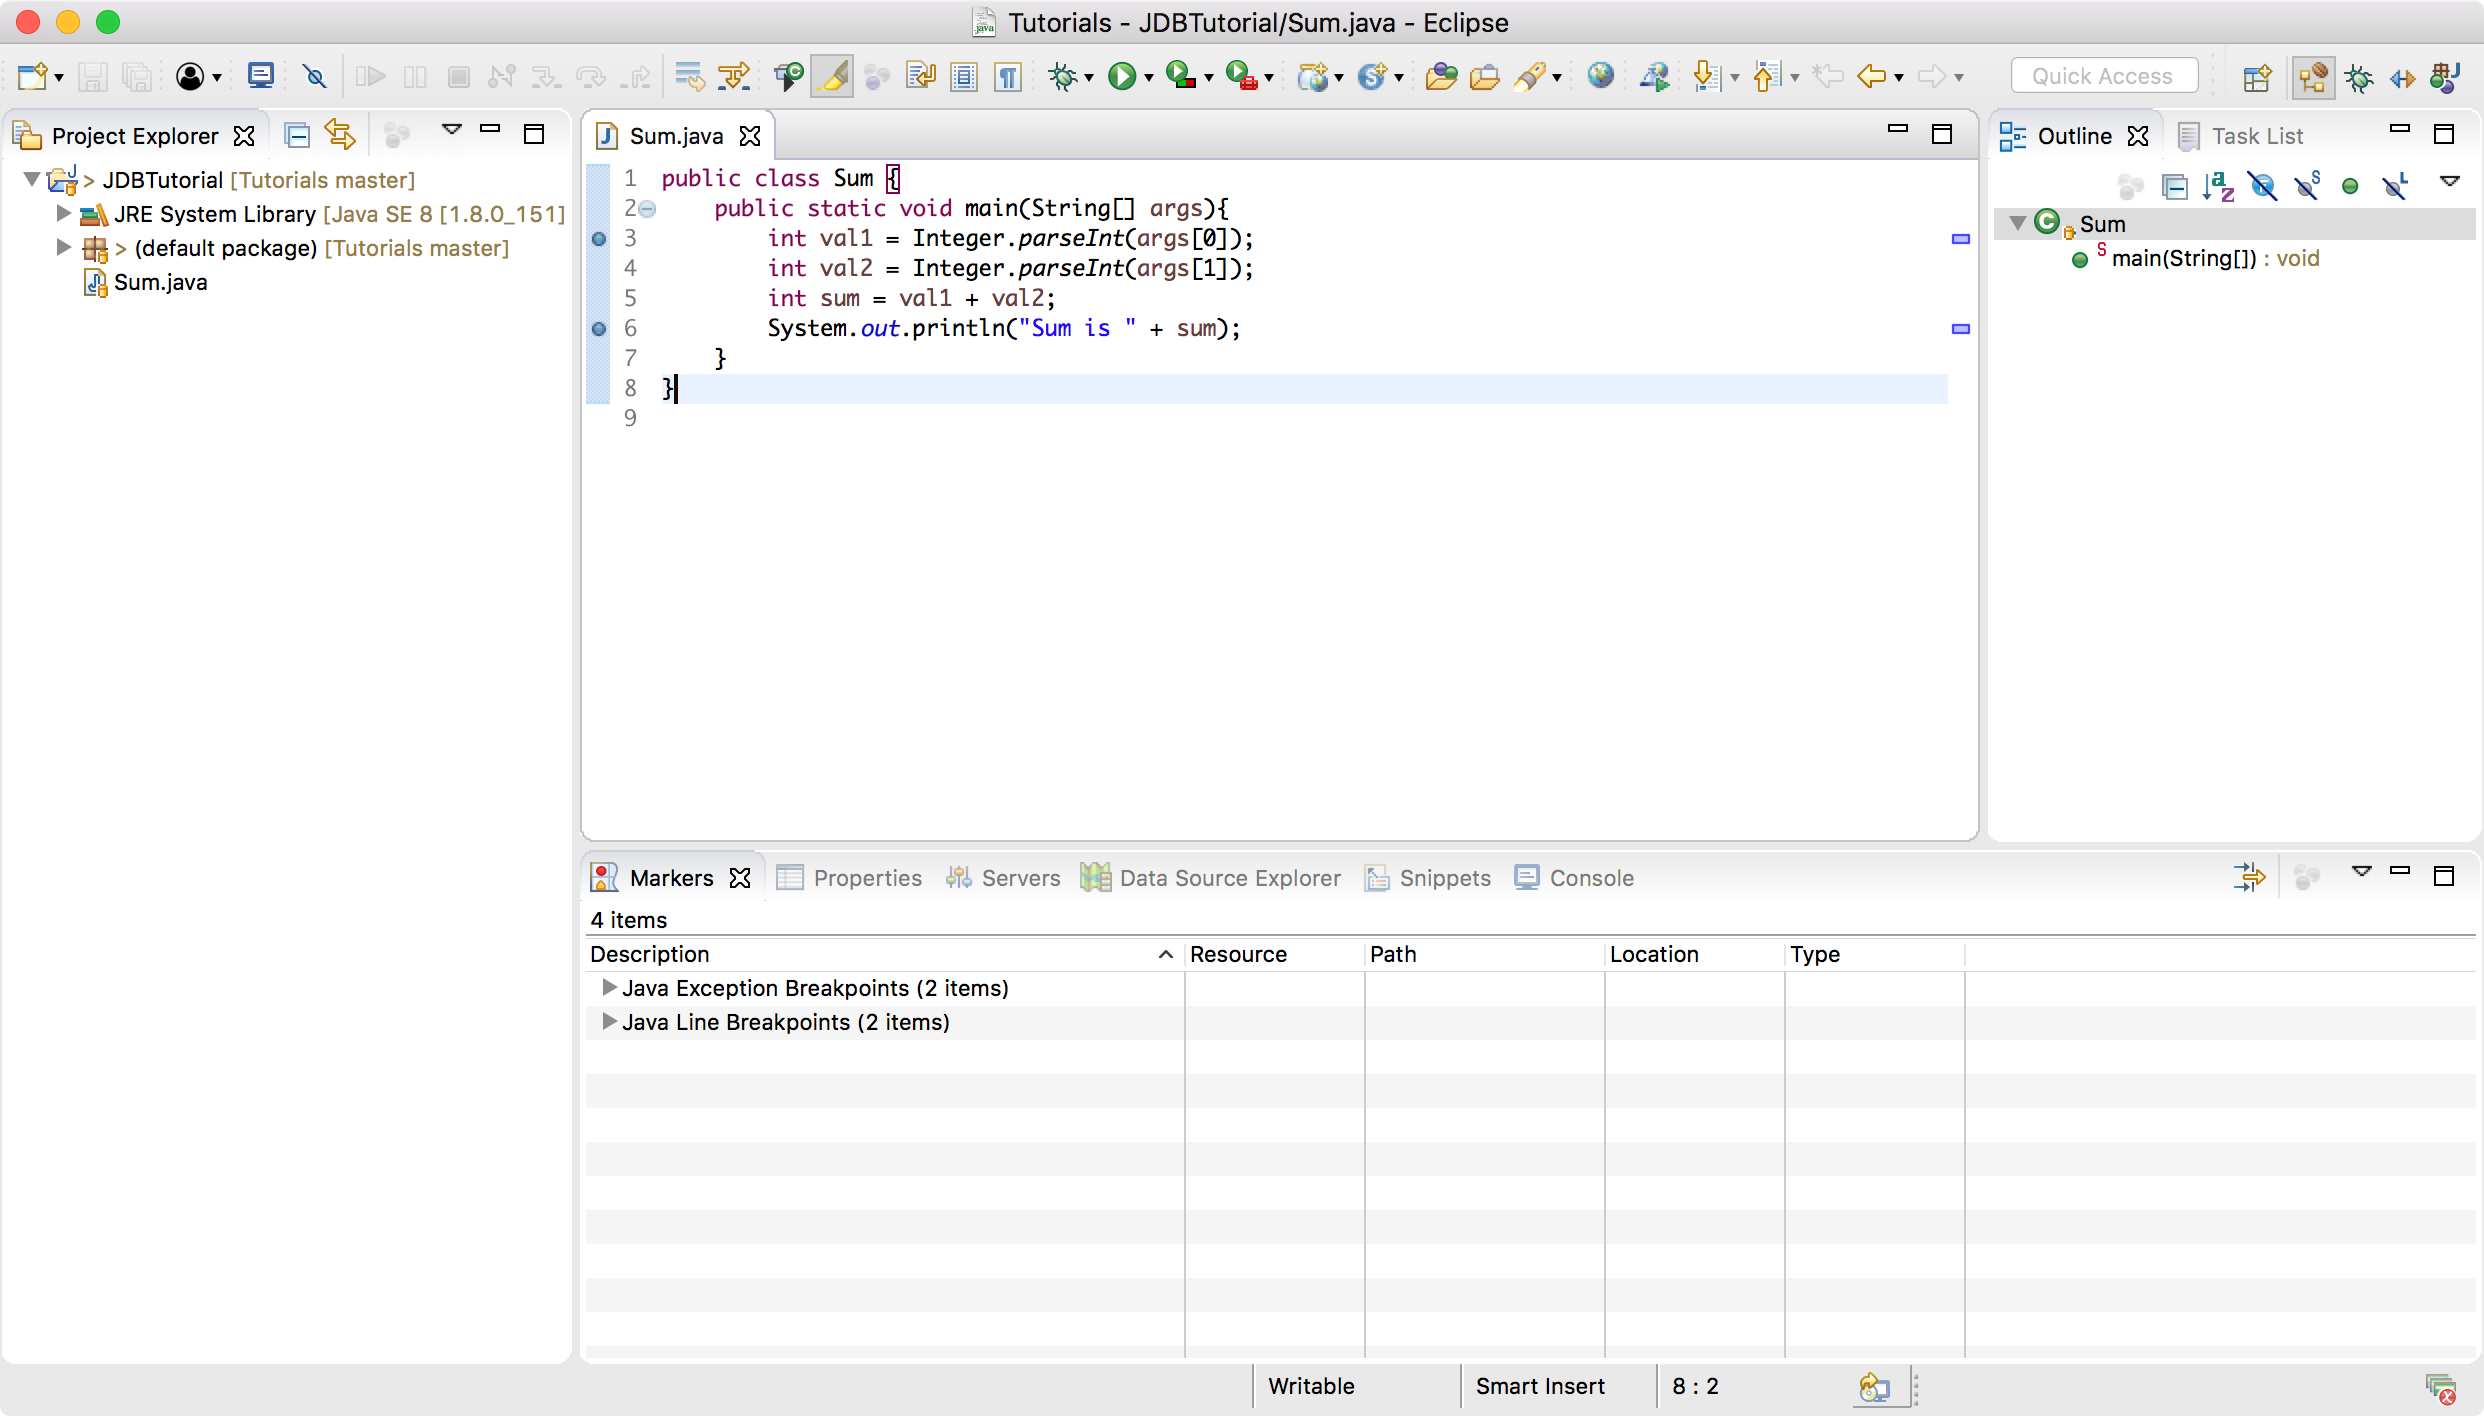
In Eclipse, create a new Java Project. Add one class named Sum.java into the project with following content.
public class Sum {
    public static void main(String[] args){
        int val1 = Integer.parseInt(args[0]);
        int val2 = Integer.parseInt(args[1]);
        int sum = val1 + val2;
        System.out.println("Sum is " + sum);
    }
}
Set breakpoints to line 3 and line 6 in Sum.java.
2.2 Creating Debug Configuration
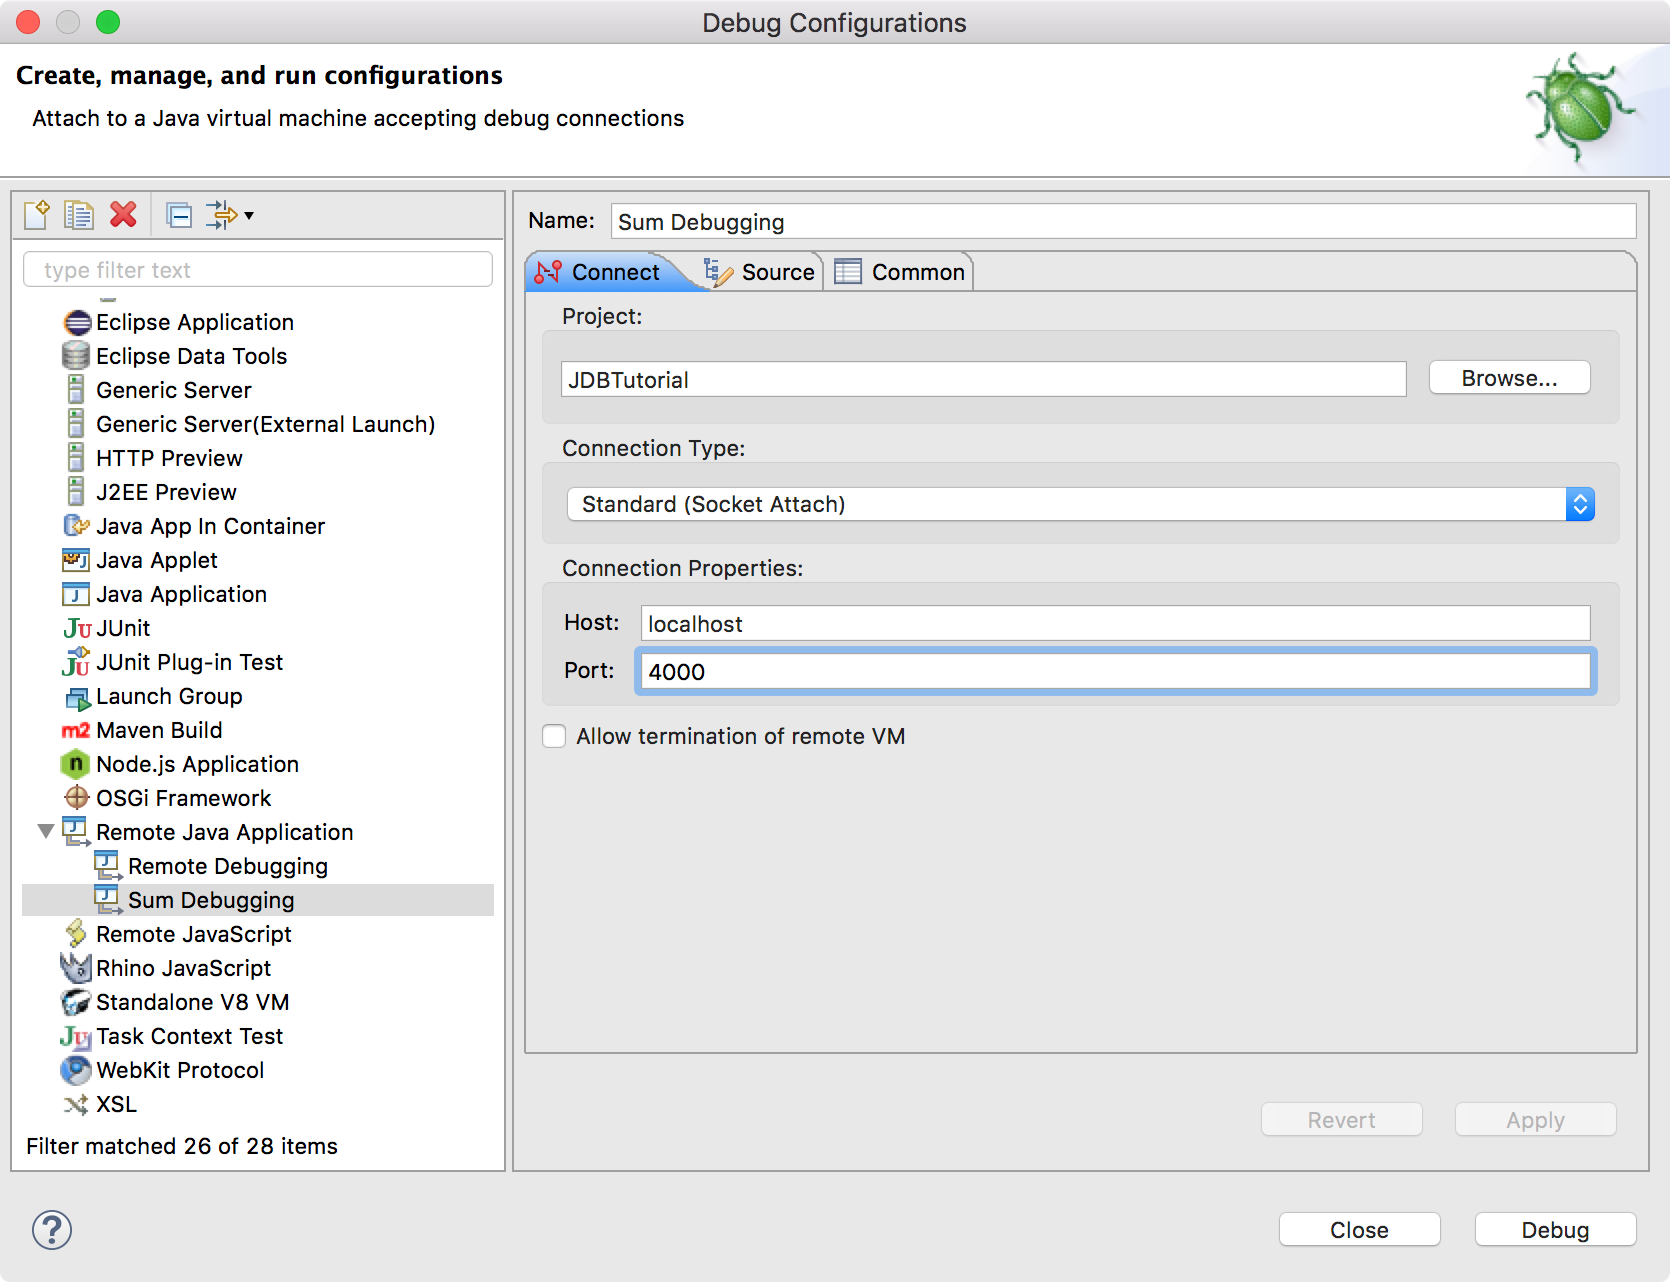
In Eclipse, Run -> Debug Configurations…, create a new ‘Remote Java Application’ named Sum Debugging. Specify the Host to localhost and Port to 4000.
2.3 Compiling and Running
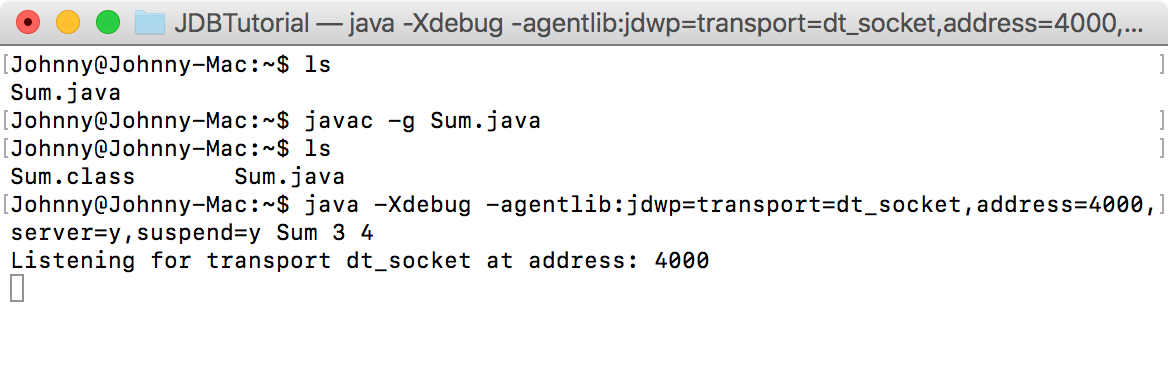
Open terminal, navigate to the folder where Sum.java locates, use javac to compile it. The g option adds extra debug info to the class.
$ javac -g Sum.java
Run Sum in debug mode with providing two input parameters, 3 and 4. Now we have the application listening on port 4000 waiting for connections.
$ java -Xdebug -agentlib:jdwp=transport=dt_socket,address=4000,server=y,suspend=y Sum 3 4
- With
suspend=ythe Java-process will wait until the debugger connects, with suspend=n you will be also able to debug the application servers startup process. - The option
server=yopens a socket and listens for incoming debugger requests. With server=n the debugged application will try to connect actively to a debugger and run therefore as a client.
2.4 Debugging
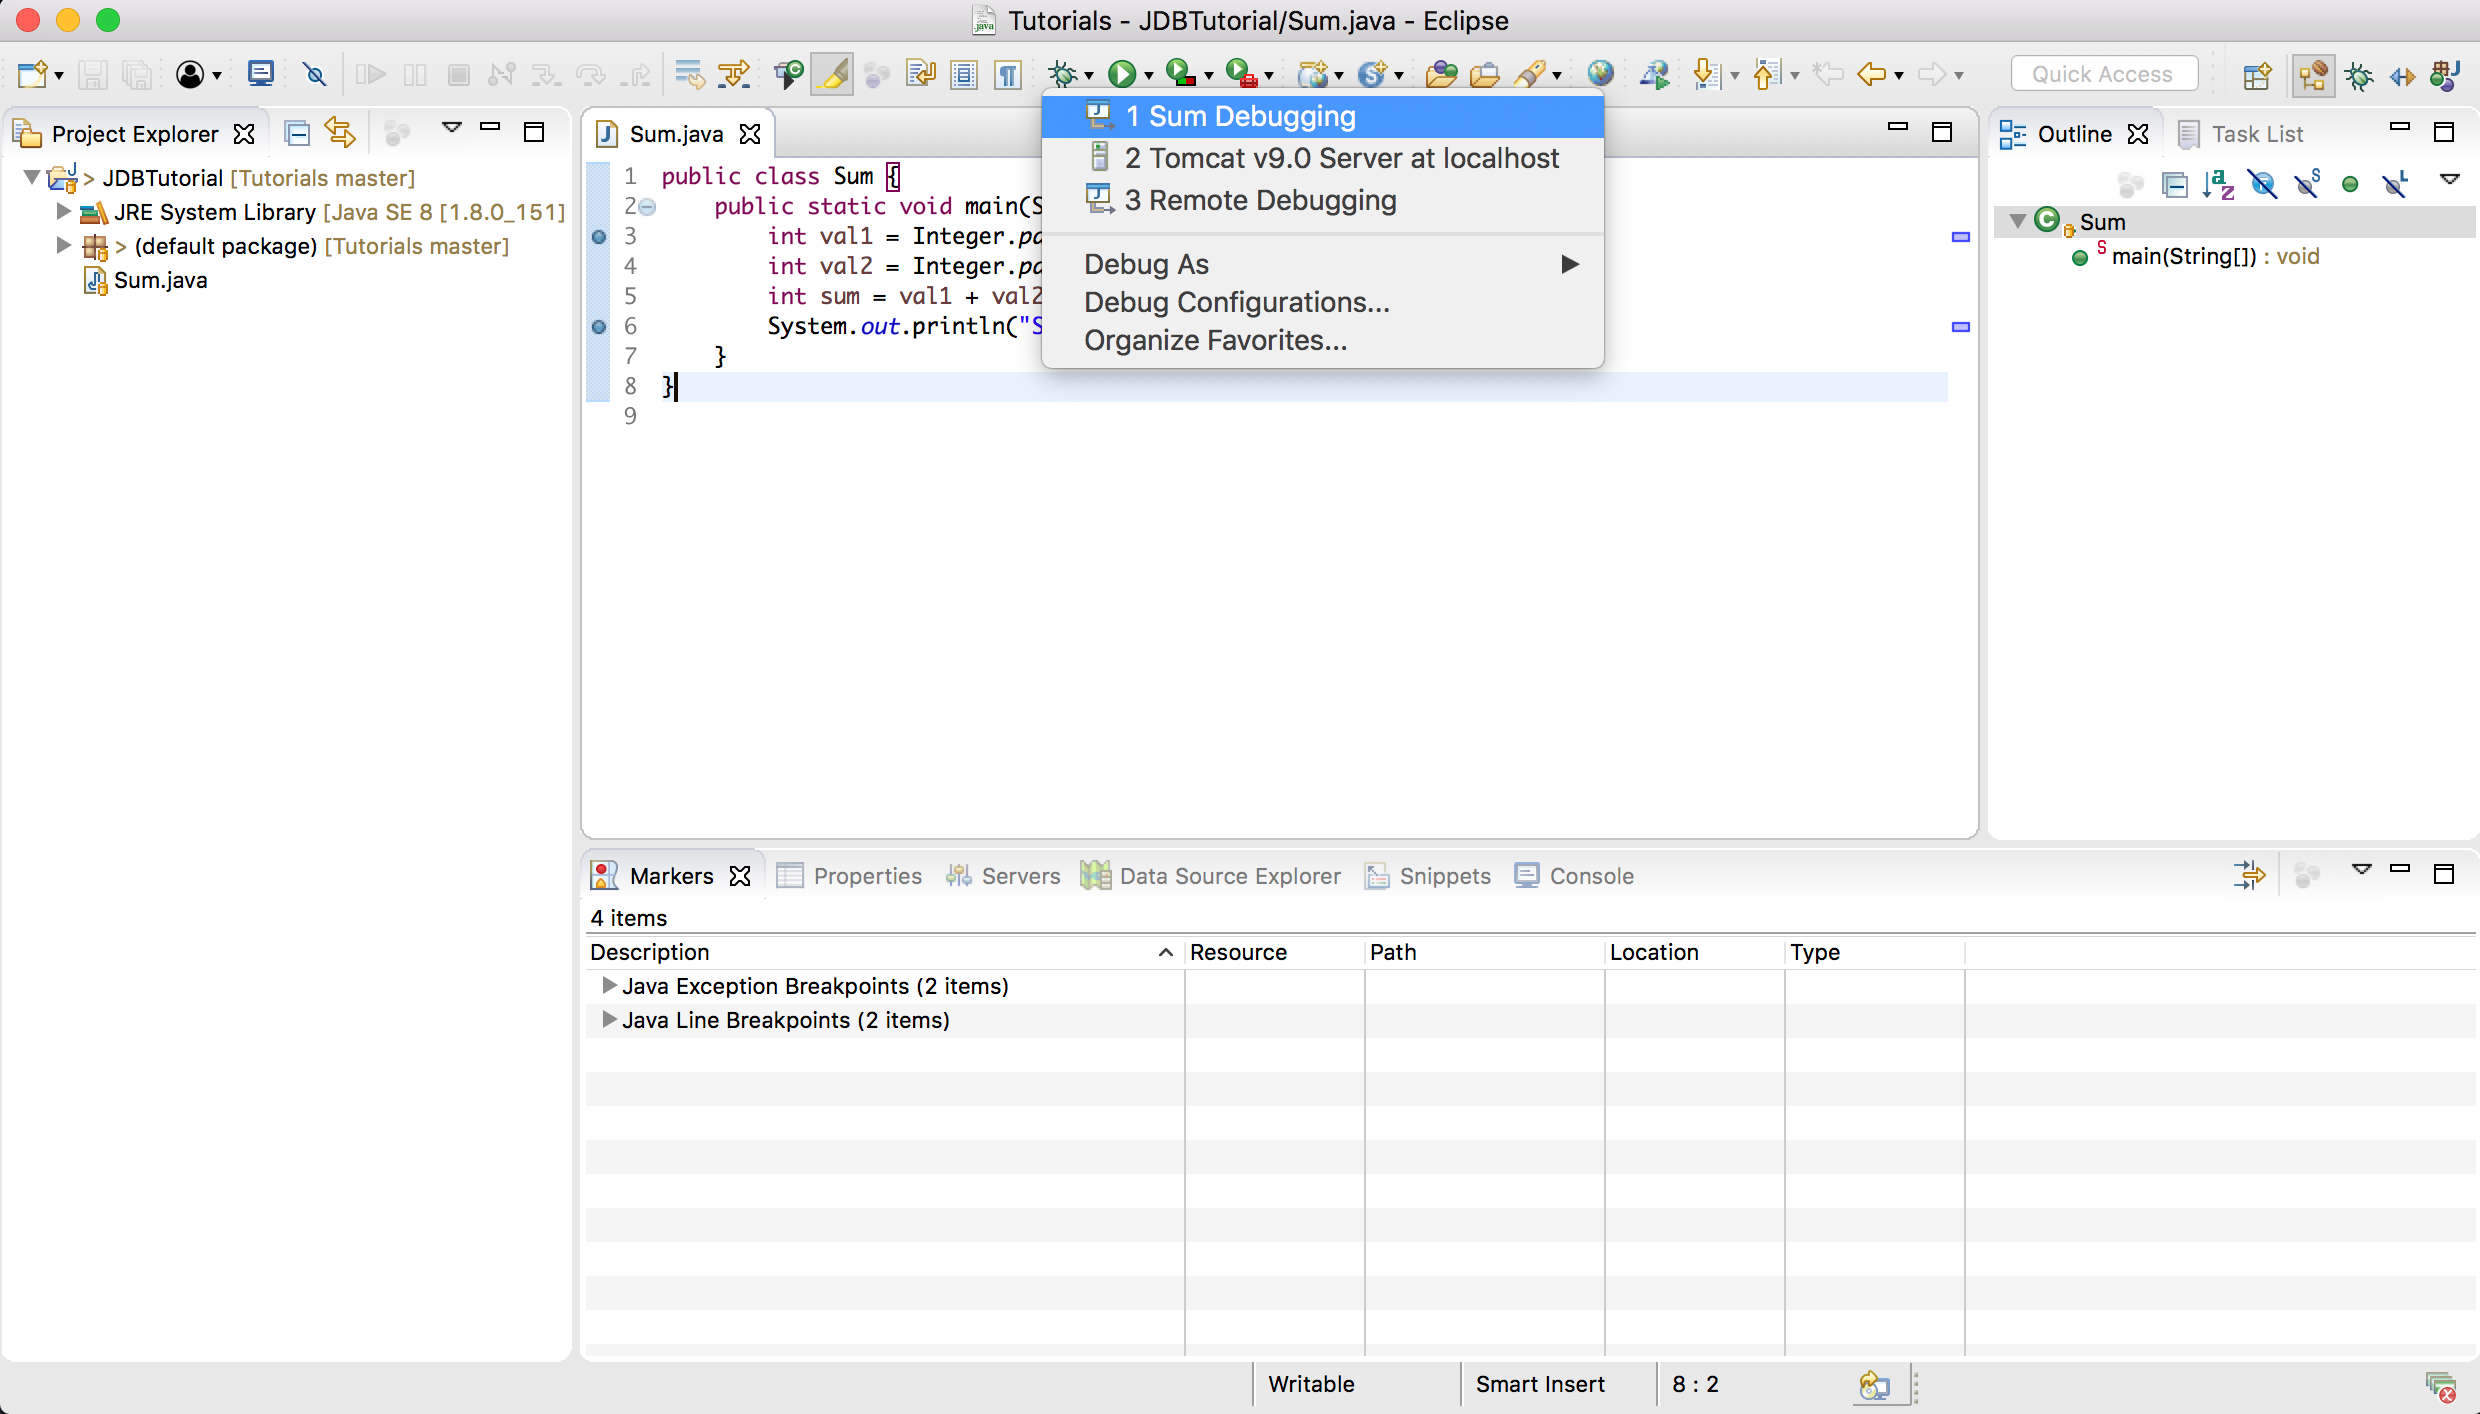
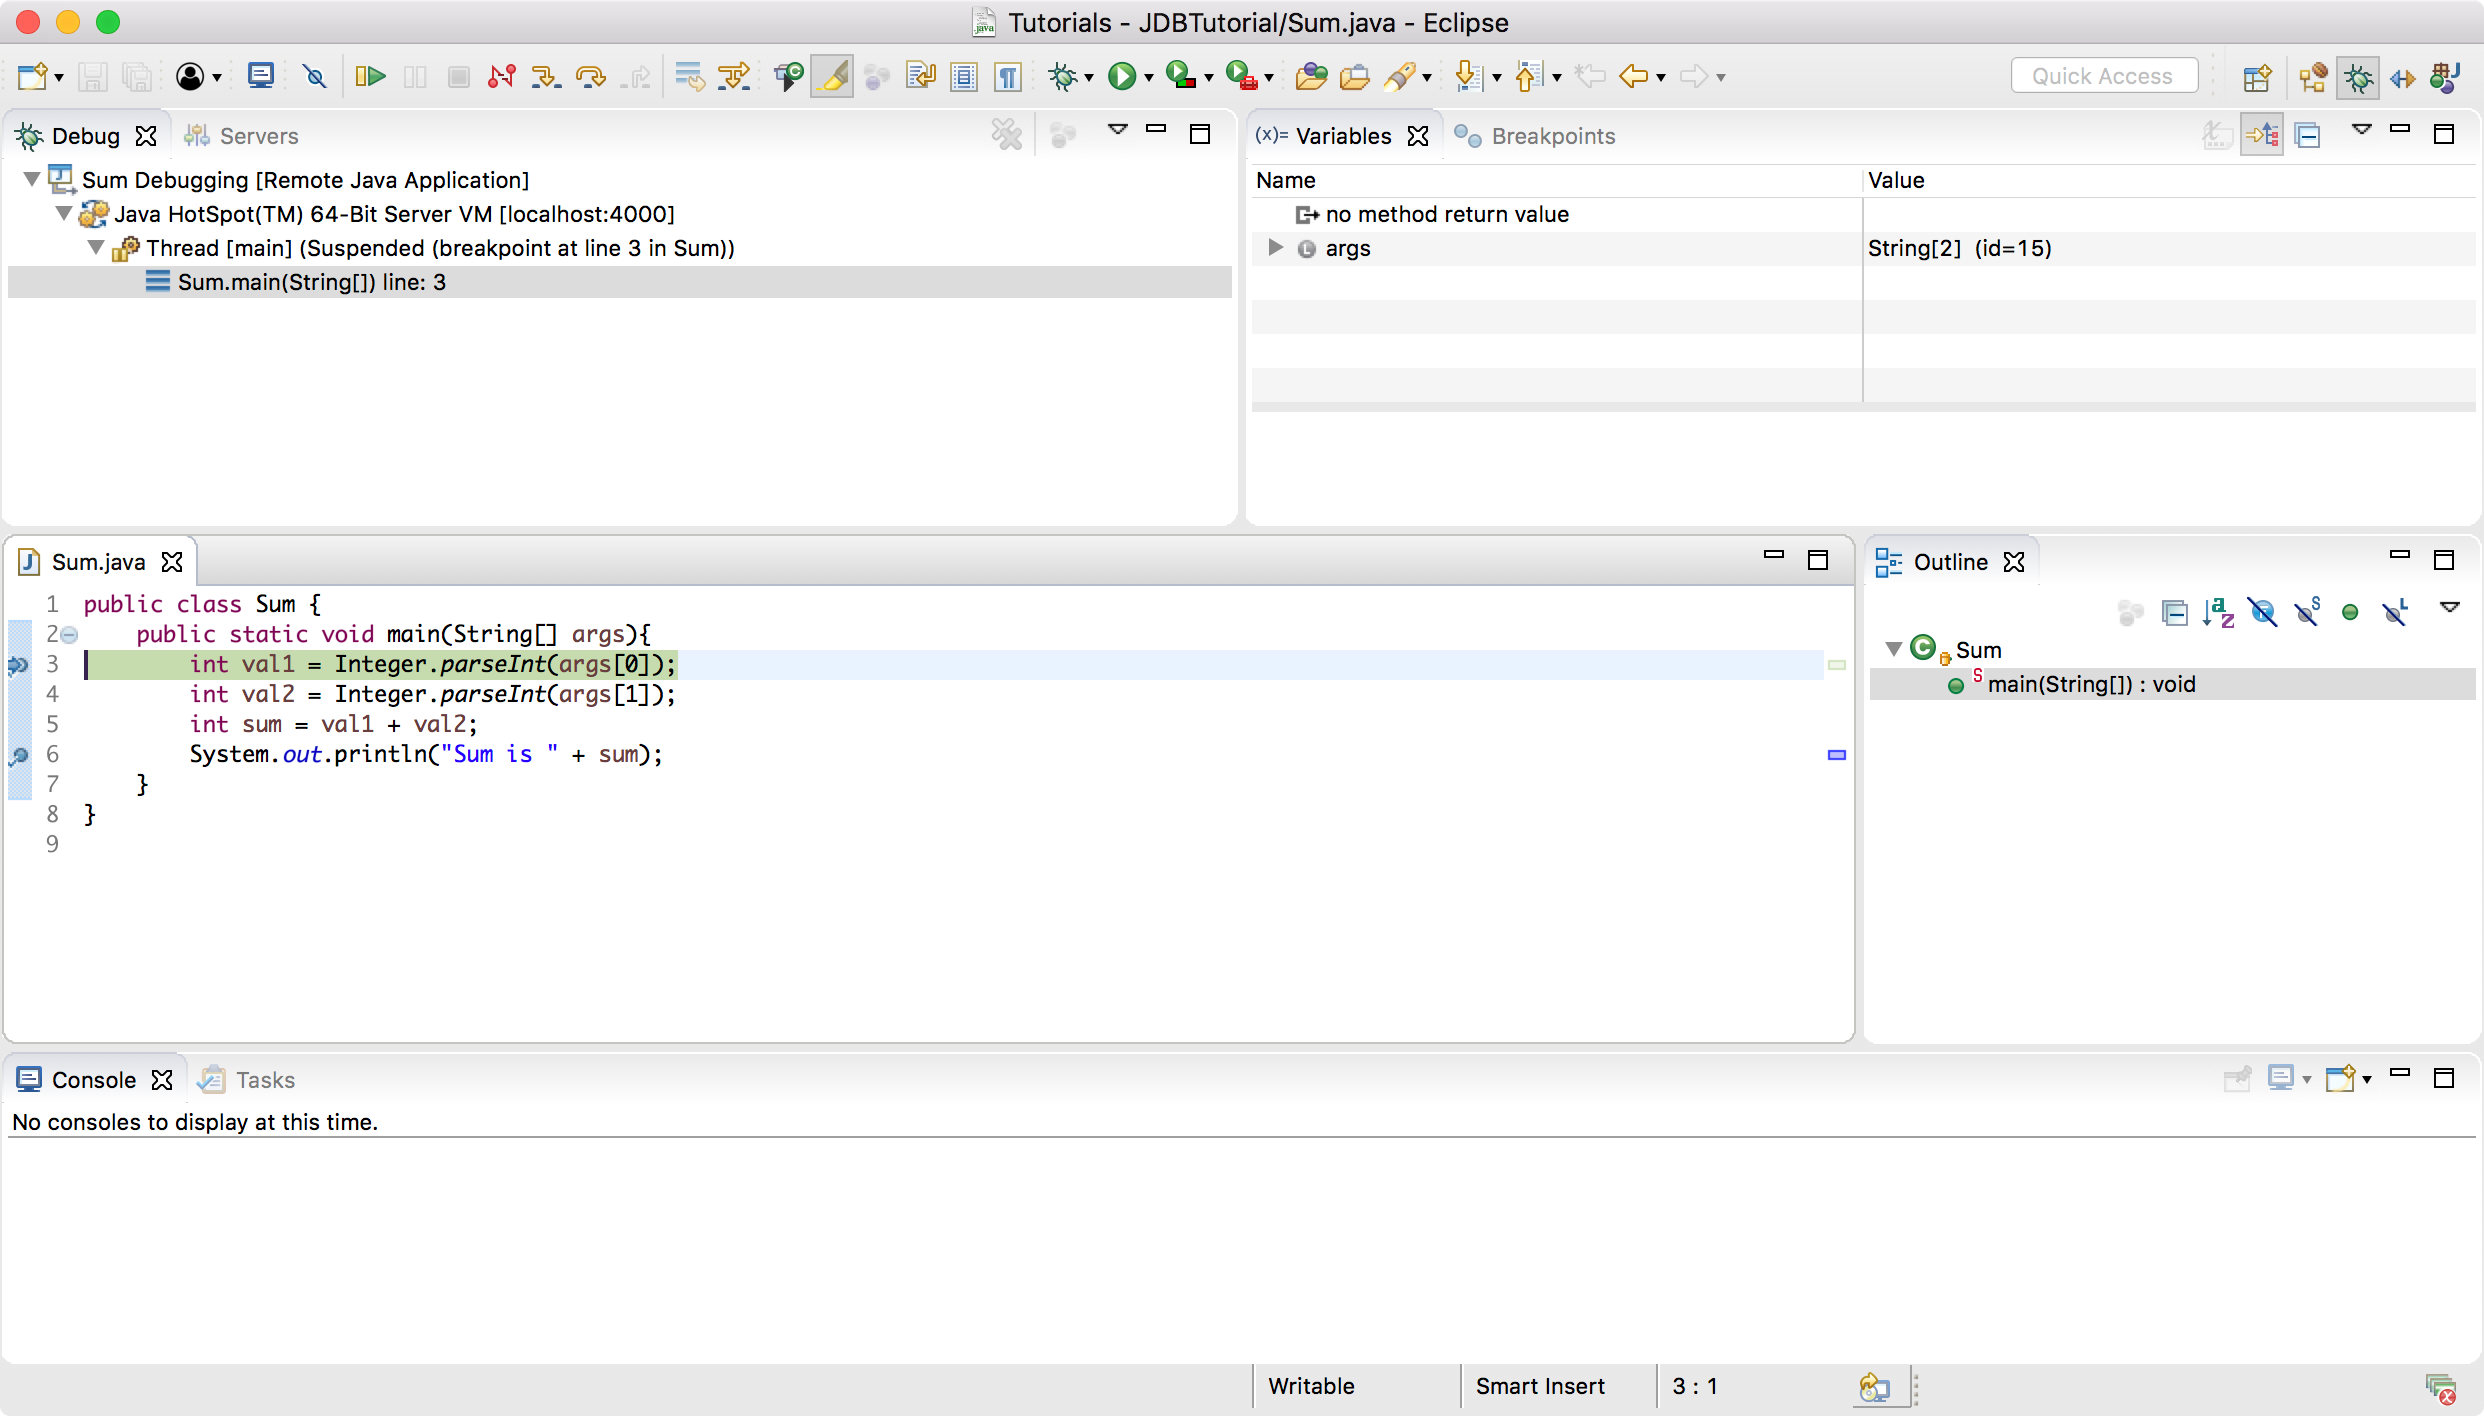
In Eclipse, click the Debug As.. button on toolbar and select Sum Debugging.
 You will see the debugging is working now. The first breakpoint is activated.
 Click the
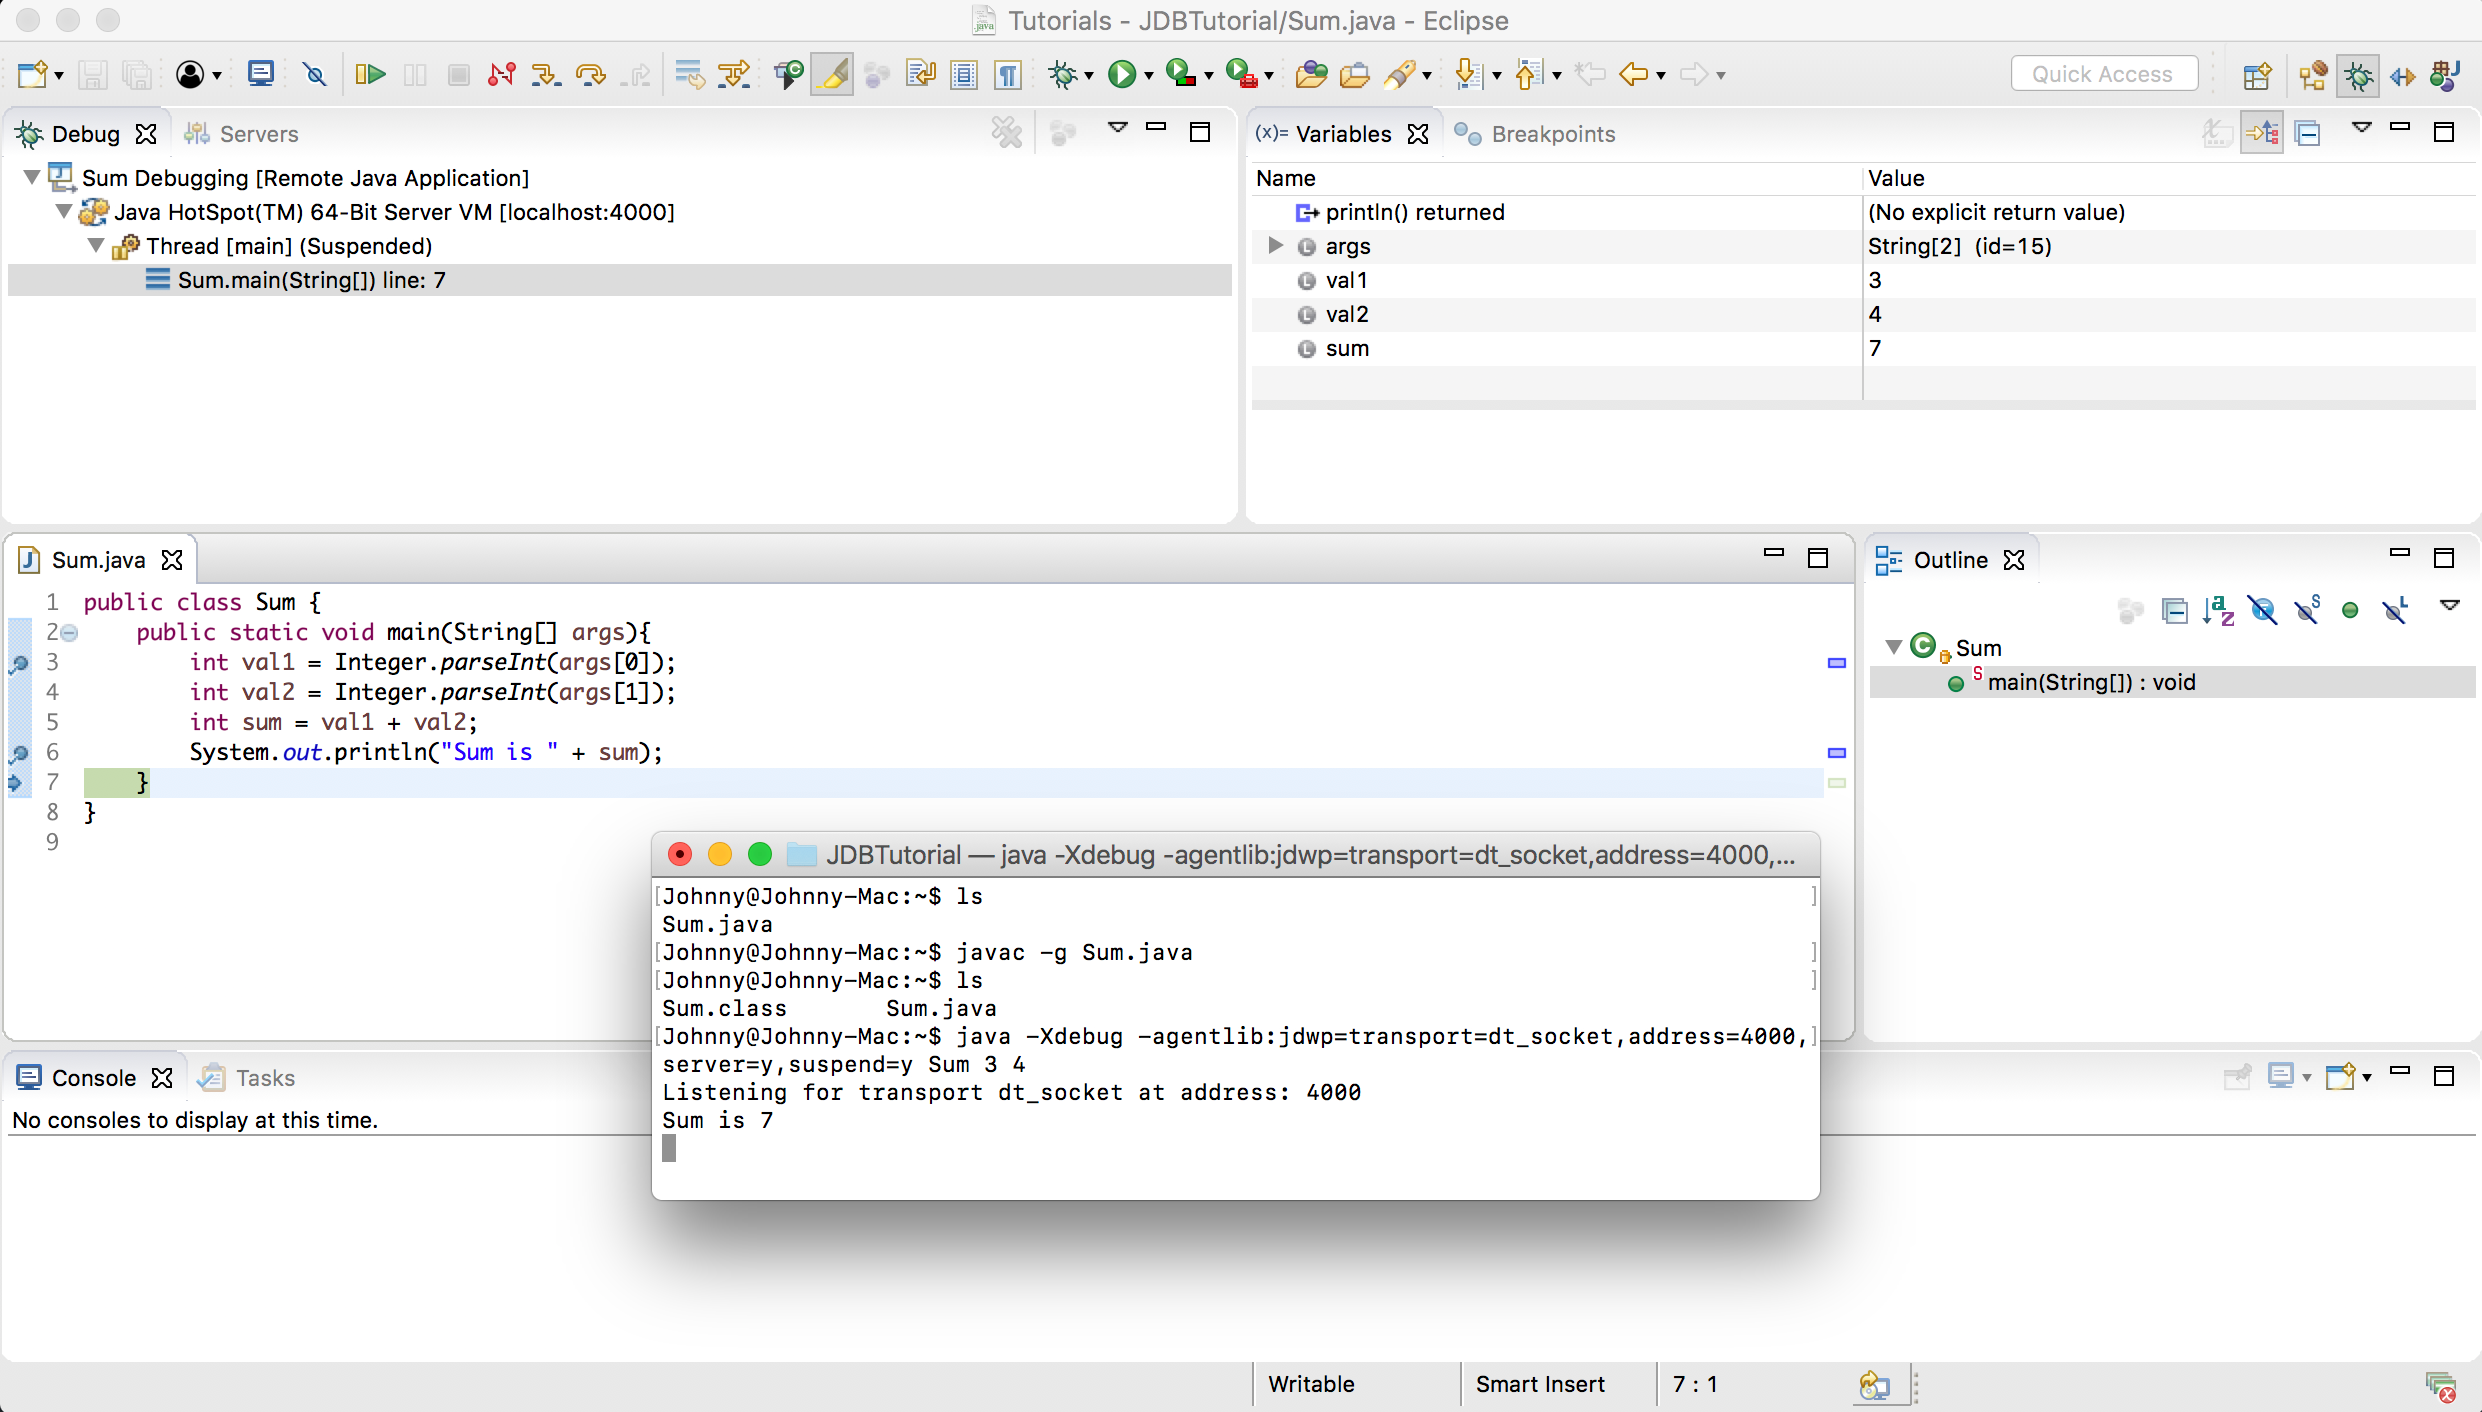
 Step Over button(F6) in the tool bar to step the execution to the next line. Meanwhile, you see the values of local variables are changing.
 Step over line 6 and switch to the terminal. The result is just printed out in the terminal.
 Click the
 Resume button(F8), the debugging session ends in Eclipse. Meanwhile, the debug process ends in terminal.
