2514. Remote Debugging JSP ApplicationEclipse and Debugging
Introduce how to remote debug JSP application which is hosted in Tomcat.
1. Introduction
In the posting Building Website with JSP and MySQL, we created a JSPTutorial application to manage products. This application is hosted on Tomcat web server, and it uses MySQL for storing data. Suppose there is an issue that the update function is not working. We need to debug the application to figure out what is happening.
2. Setting up MySQL Database
2.1 Creating Connection
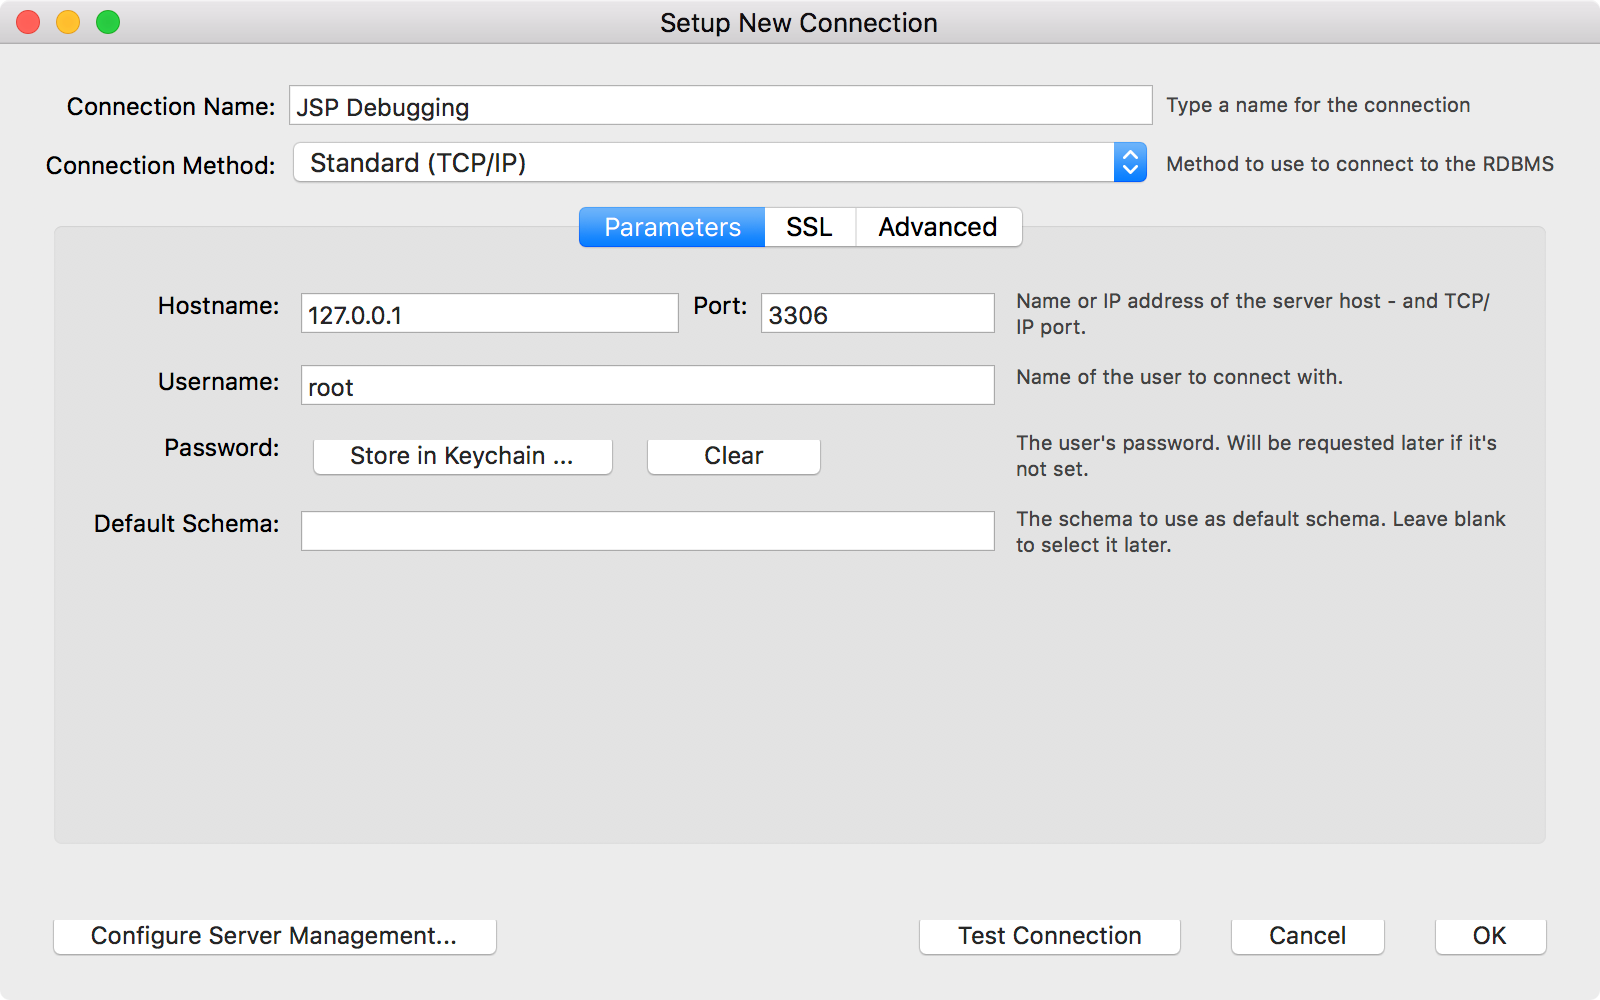
In MySQL Workbench, create a new connection to local MySQL database, specify the connection name JSP Debugging.
2.2 Creating Database and Table
In Query tab of Workbench, execute following sql script to create a new database named jsptutorial.
CREATE DATABASE IF NOT EXISTS `jsptutorial`
Create a table named Product, which contains three columns.
USE `jsptutorial`;
CREATE TABLE `Product` (
  `ProductId` int(11) NOT NULL AUTO_INCREMENT,
  `ProductName` varchar(50) DEFAULT NULL,
  `Price` double NOT NULL,
  PRIMARY KEY (`ProductId`)
) ENGINE=InnoDB AUTO_INCREMENT=7 DEFAULT CHARSET=utf8;
Create initial data.
INSERT INTO `Product` VALUES (1,'Xbox',100),(2,'PS4',400),(3,'iPhone',699);
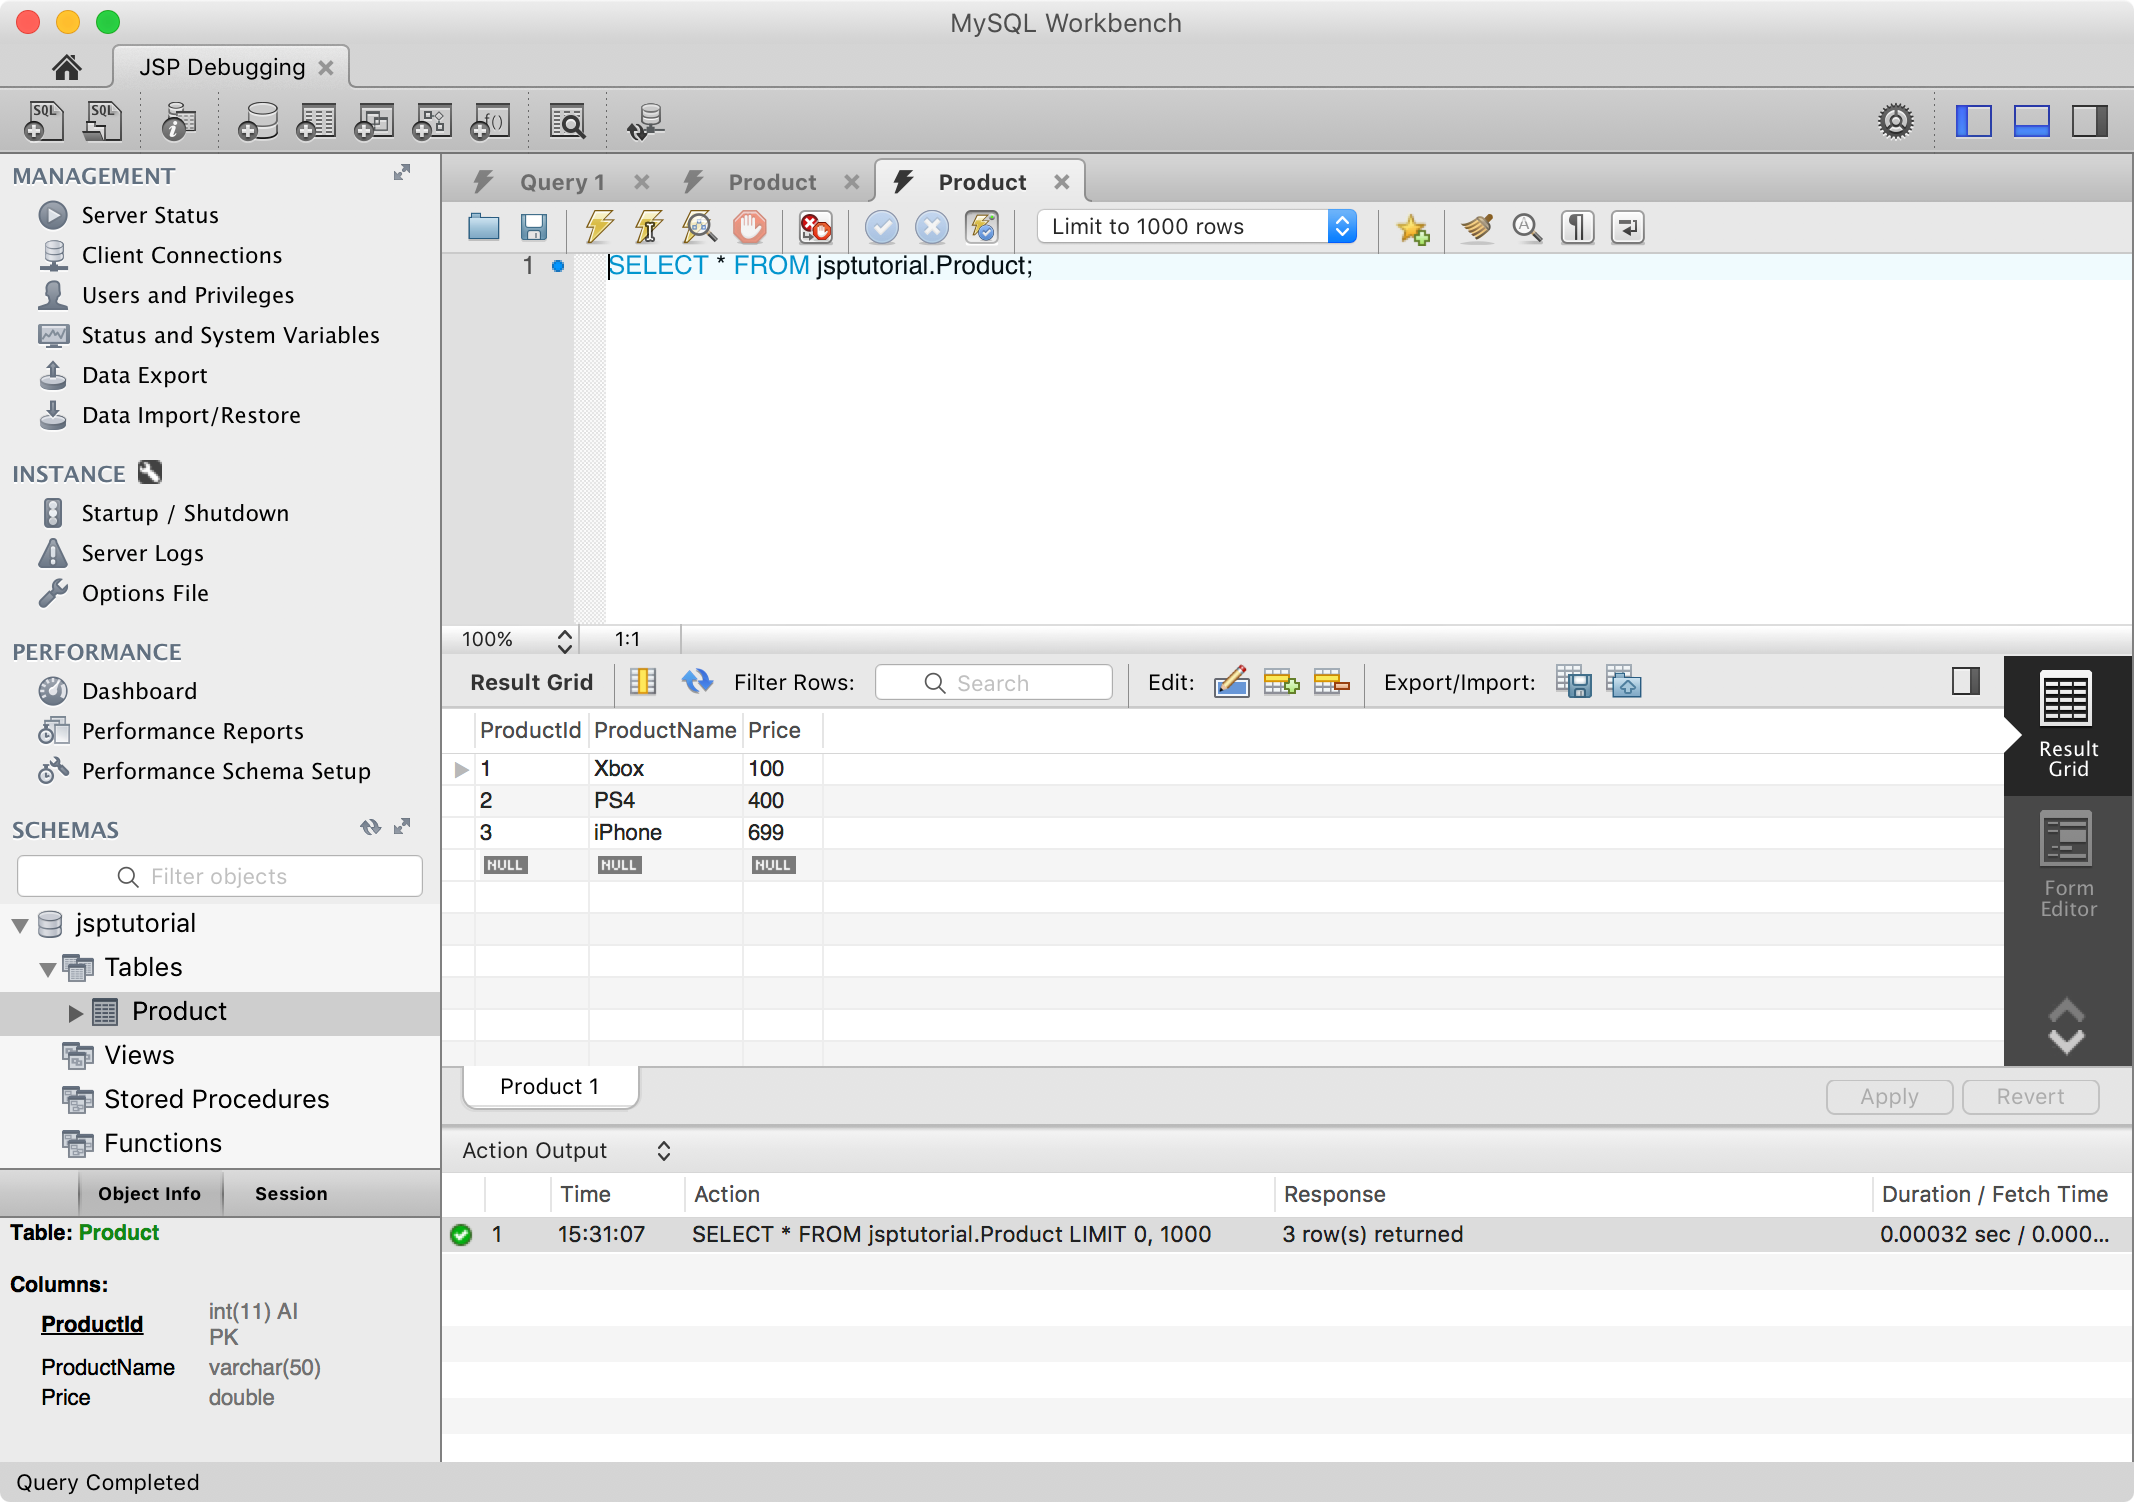
Run the following script to show all data in table Product.
SELECT * FROM jsptutorial.Product;
3. Setting Up JSP Project
3.1 Getting JSP Project
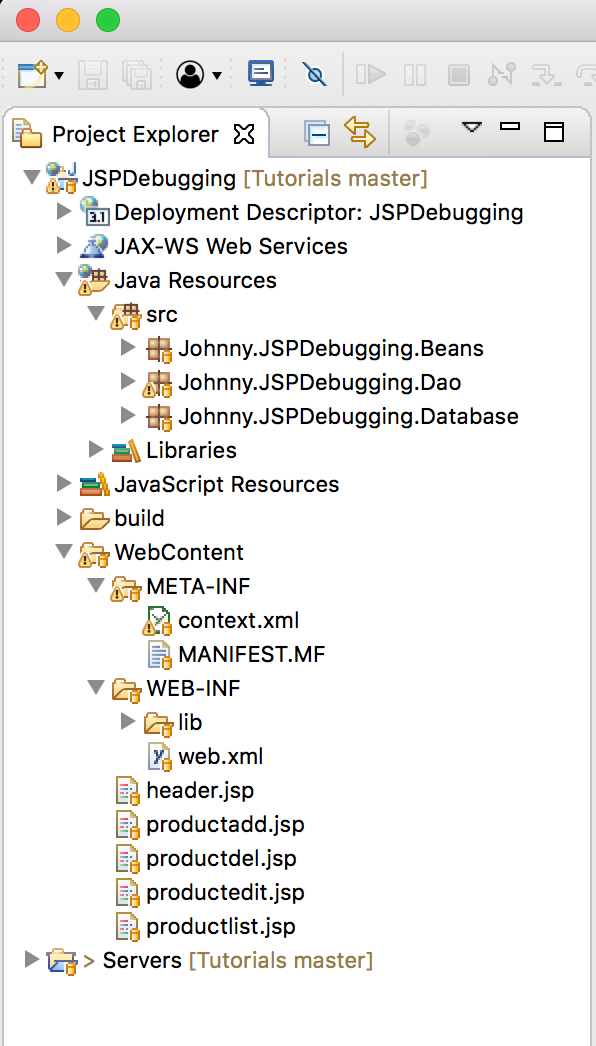
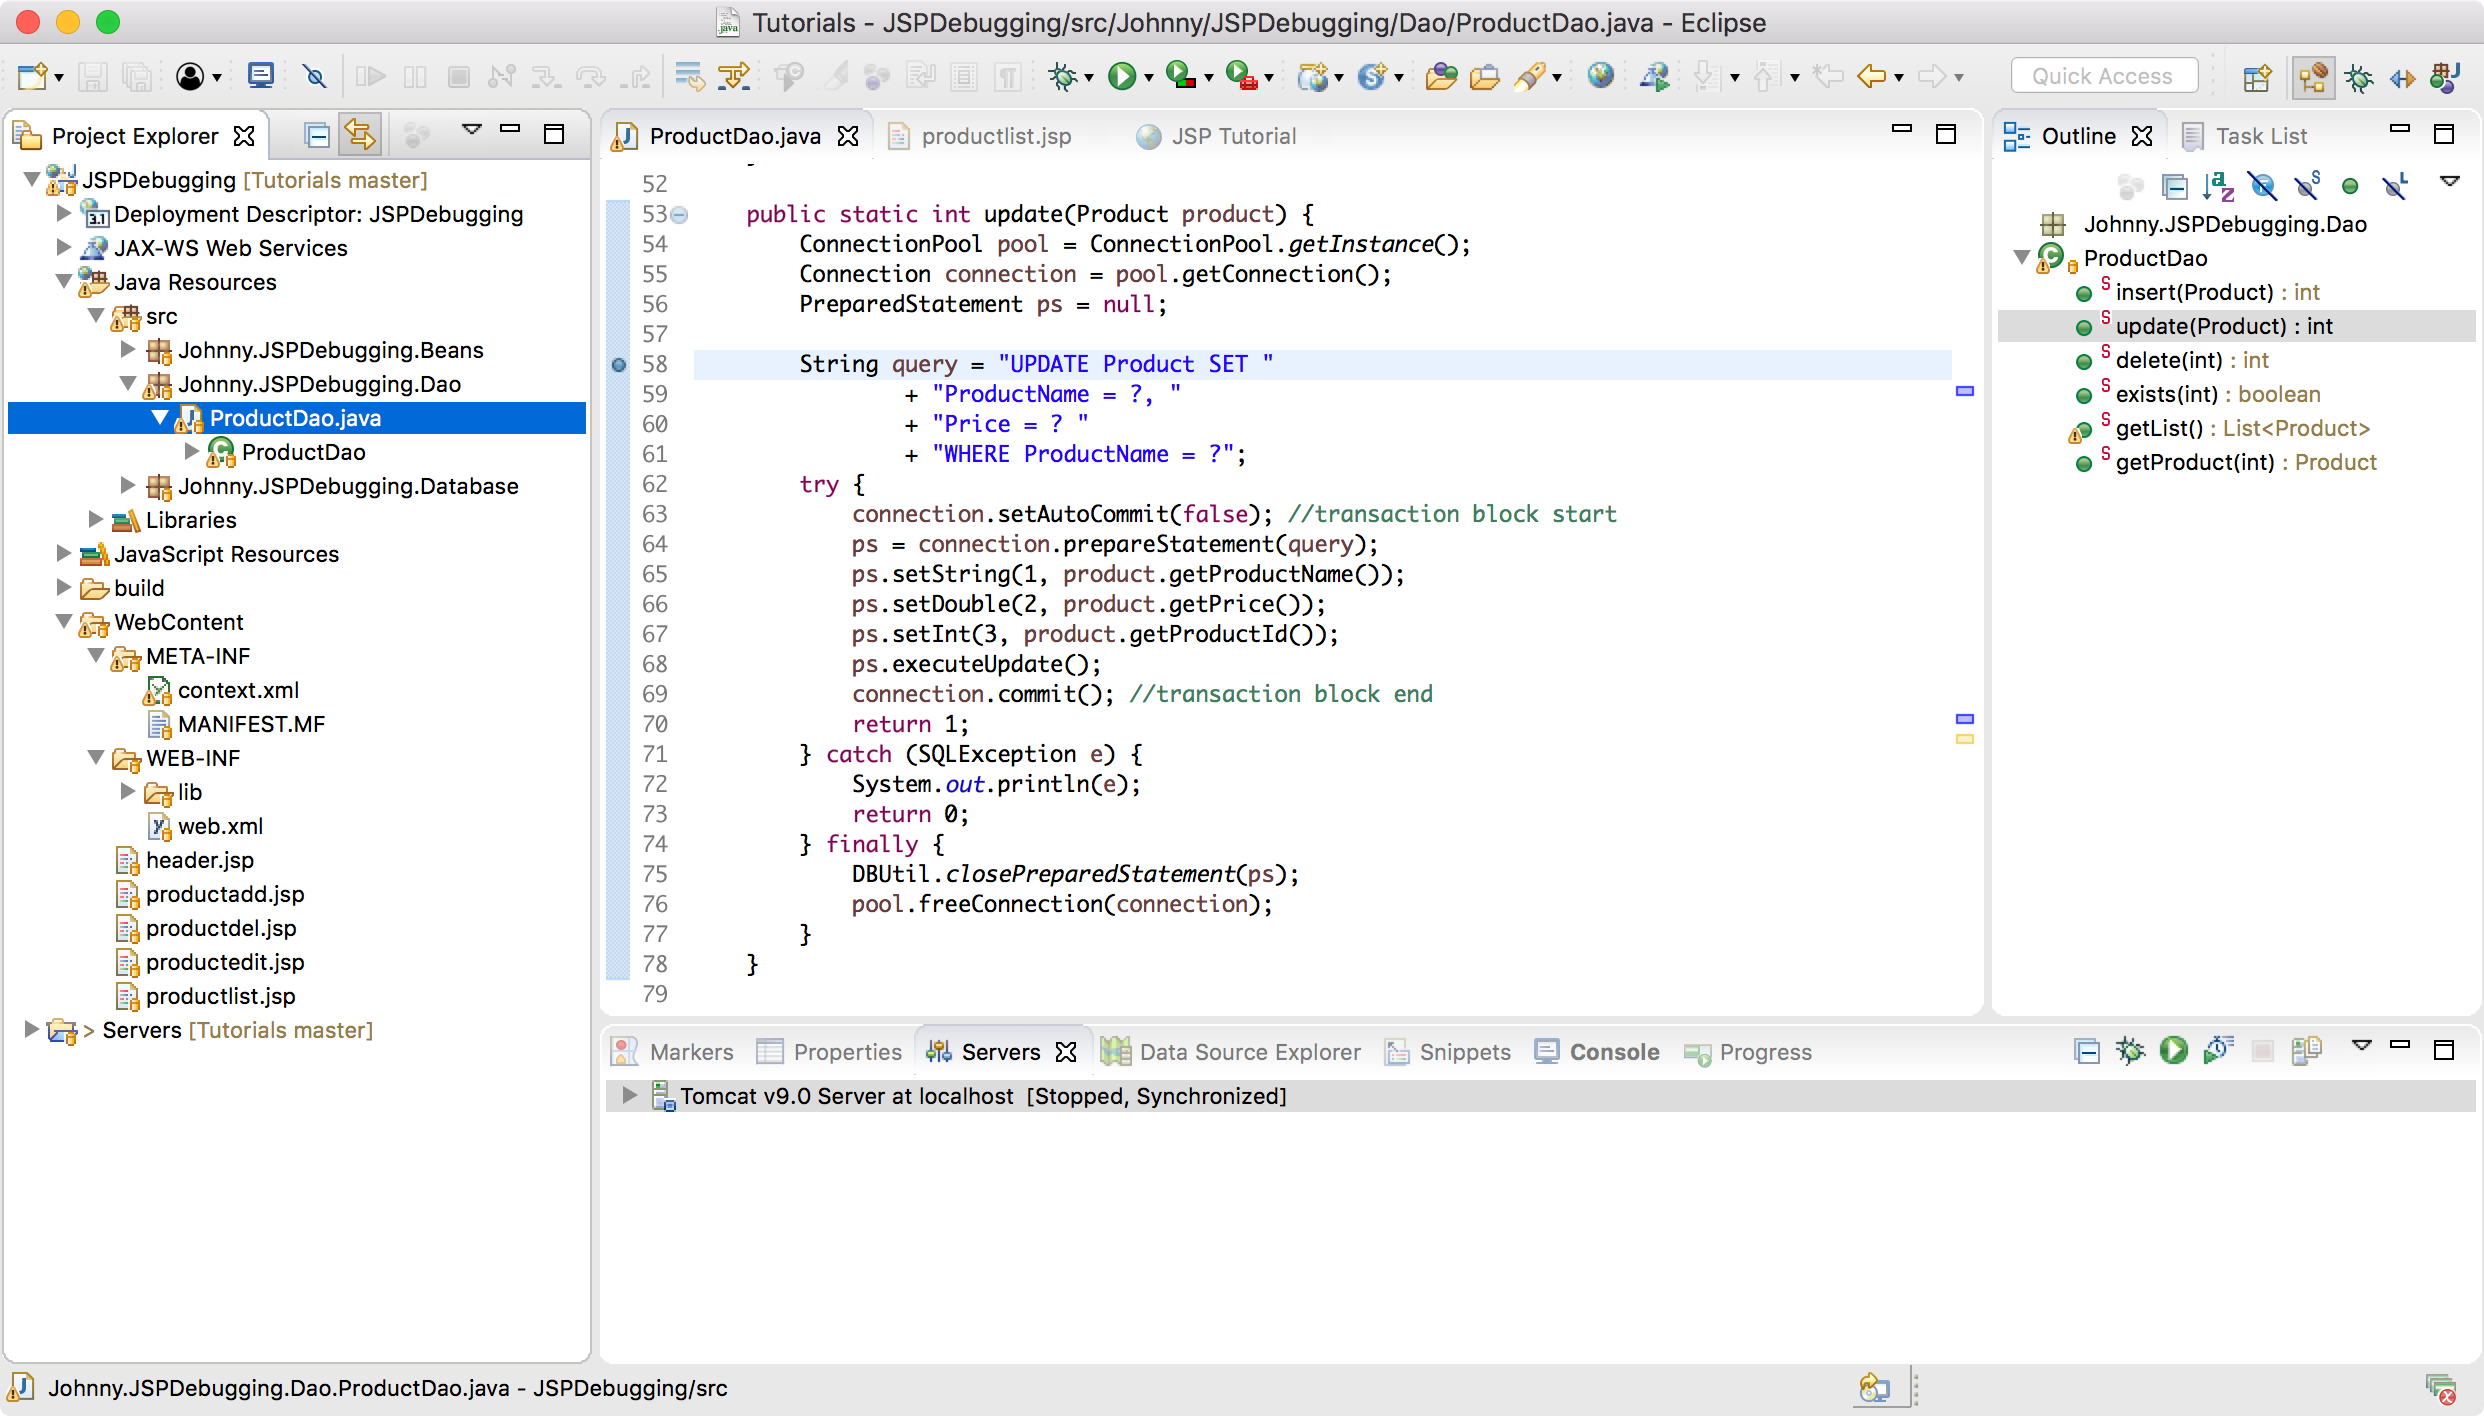
We will use the same JSP application for Building Website with JSP and MySQL. Download the source files from JSPTutorial on GitHub. Rename it to JSPDebugging and refactor package names accordingly. The project in Eclipse looks like this.
 Build the project, then deploy it to tomcat’s default web folder
 /usr/local/apache-tomcat-9.0.1/webapps.
1) Create a new folder jspdeployed under webapps.
2) Copy all of the files from /JSPDebugging/WebContent/ to /usr/local/apache-tomcat-9.0.1/webapps/jspdeployed/.
3) Copy the entire ‘classes’ folder from /JSPDebugging/build/ to /usr/local/apache-tomcat-9.0.1/webapps/jspdeployed/WEB-INF/.
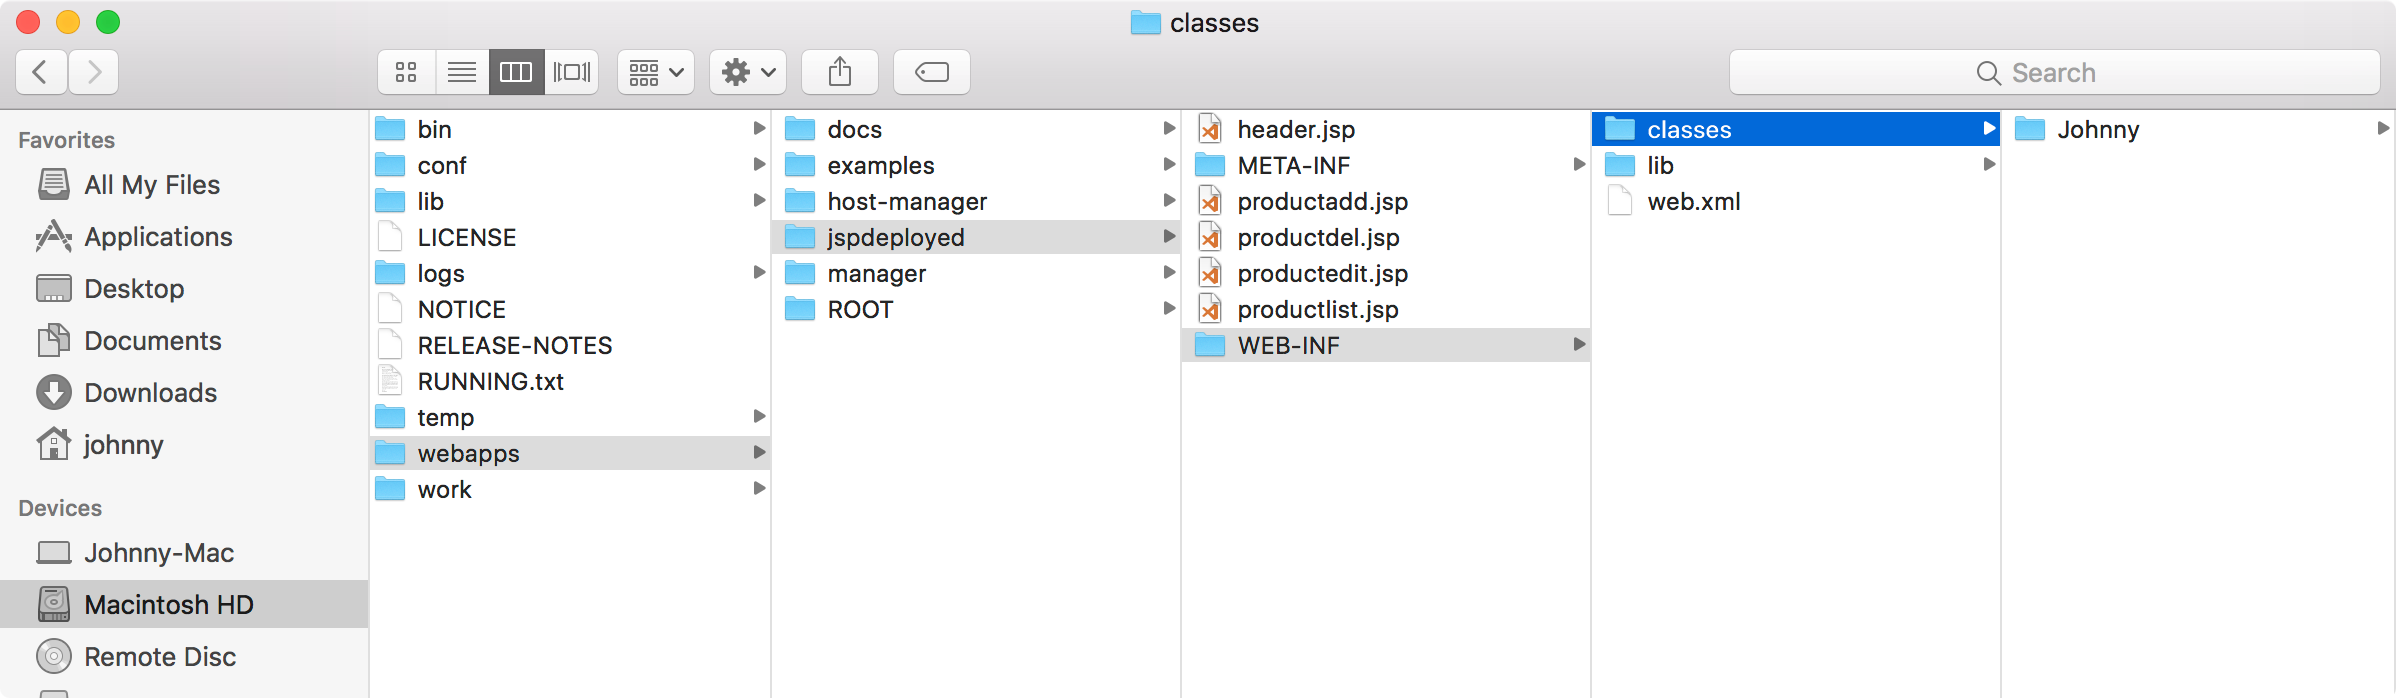
4) The final structure of jspdeployed folder looks like below. All the files for this JSP Tutorial application are deployed.
3.2 Starting Tomcat
Run following command to start tomcat.
$ /usr/local/apache-tomcat-9.0.1/bin/startup.sh
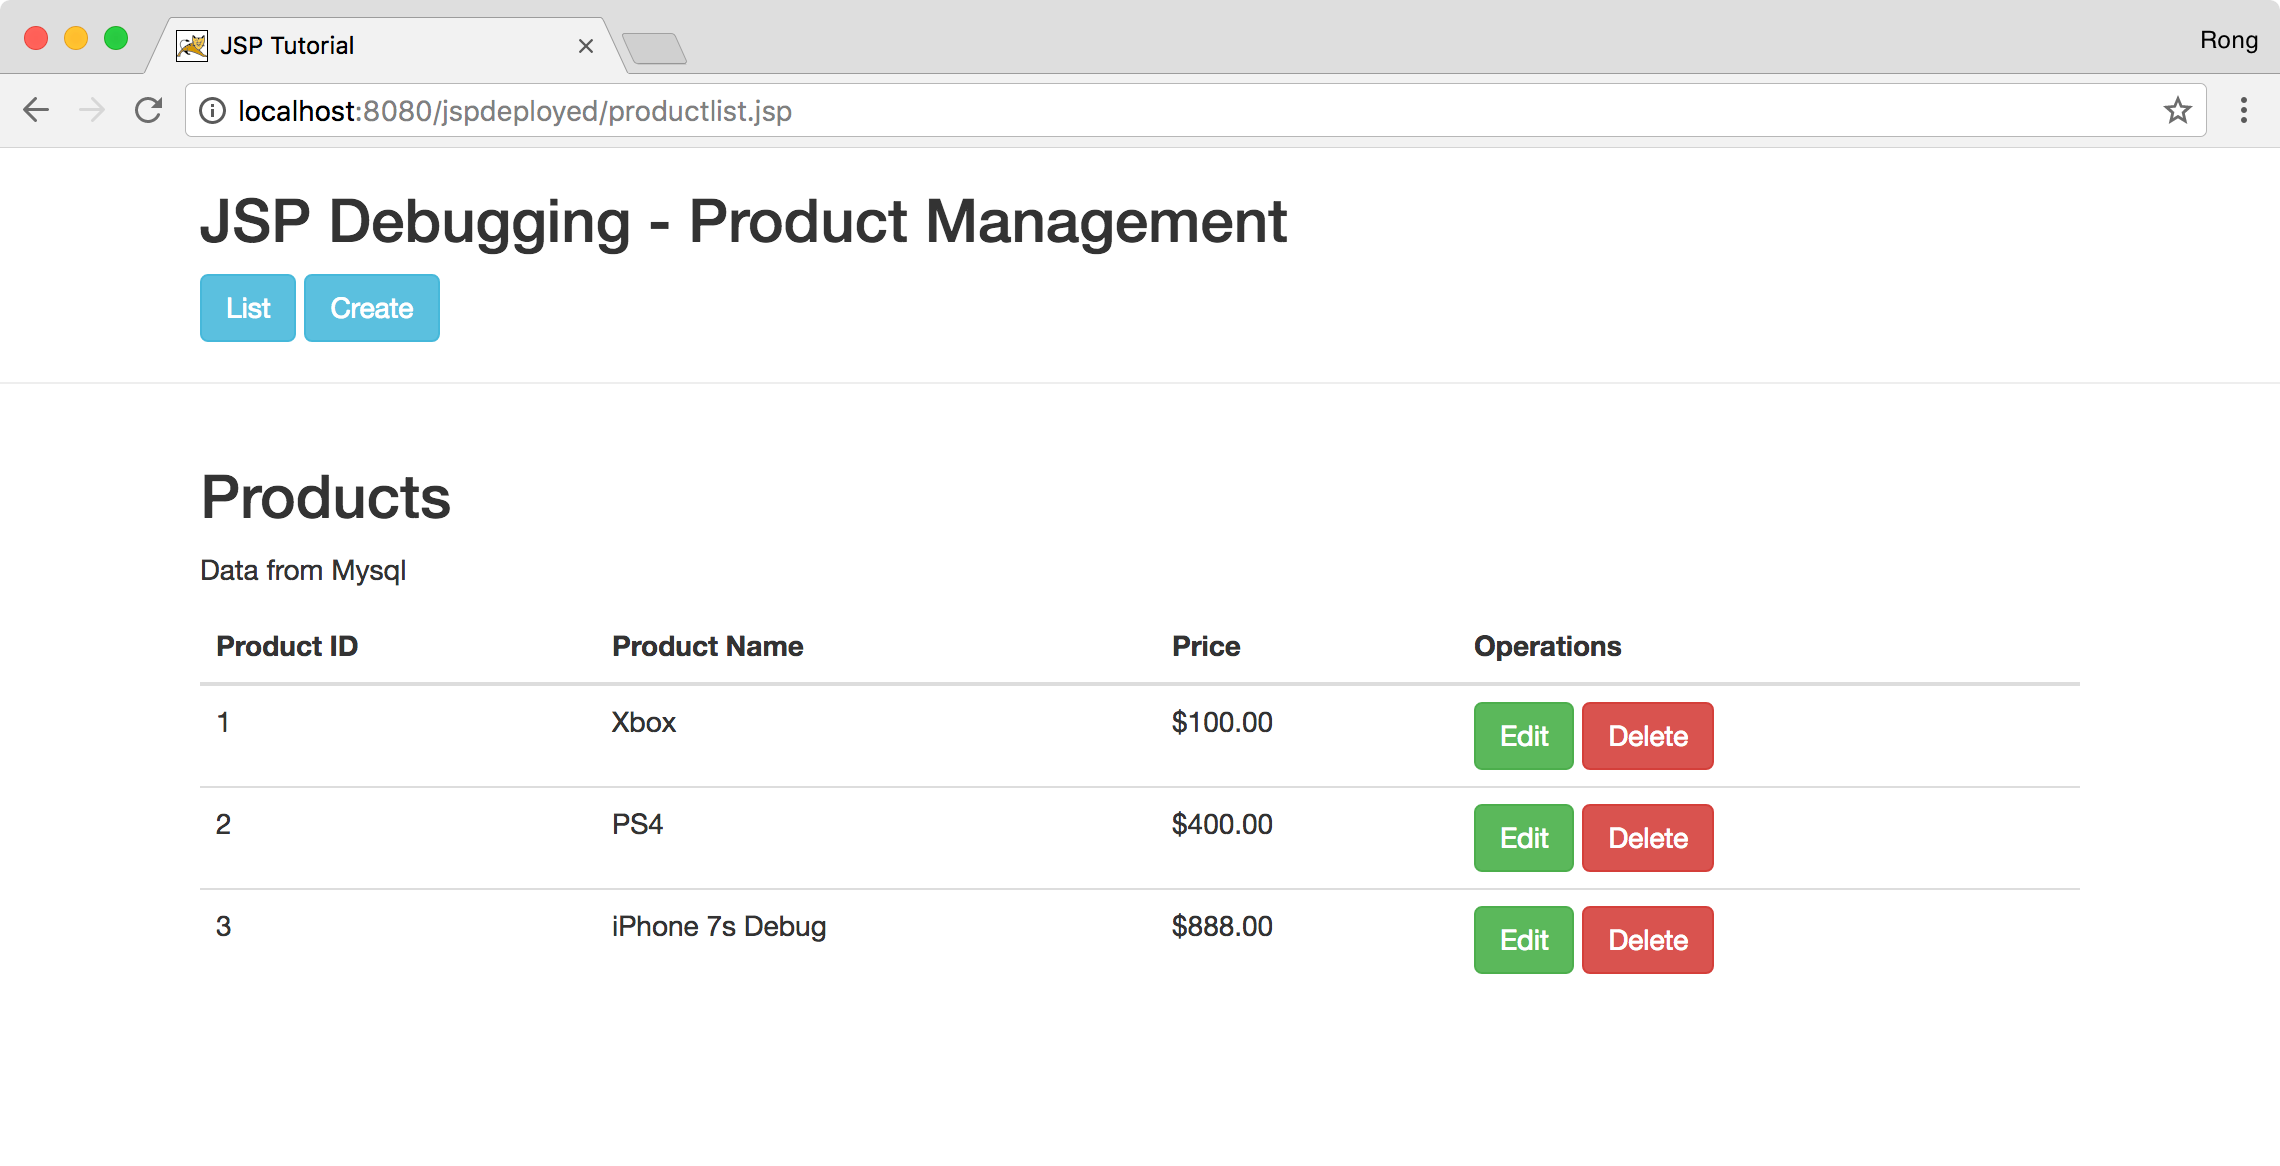
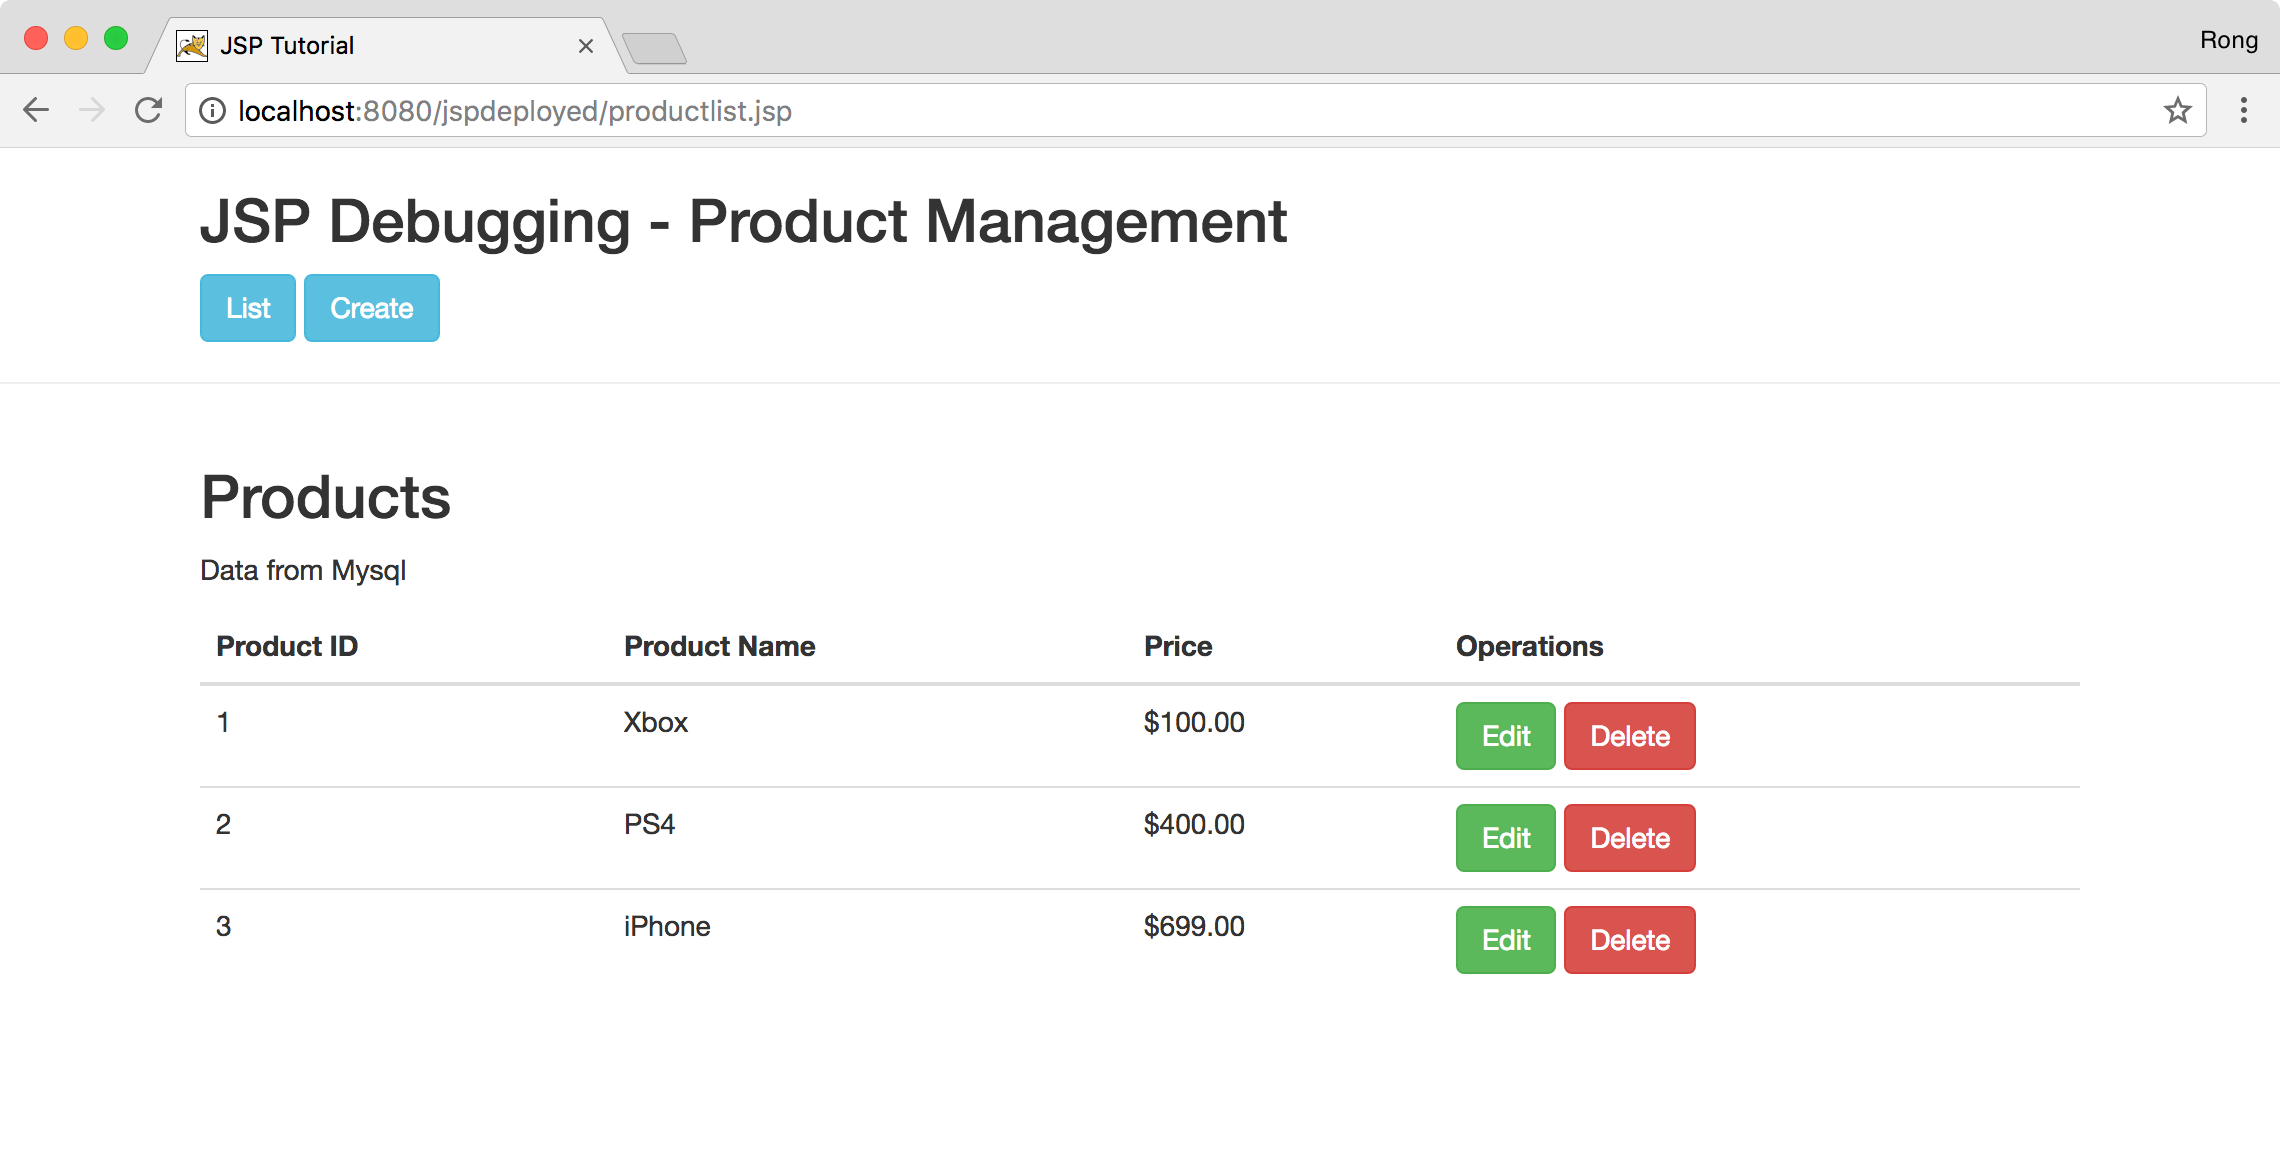
Access http://localhost:8080/jspdeployed/productlist.jsp in web browser. You should see three products in the list.
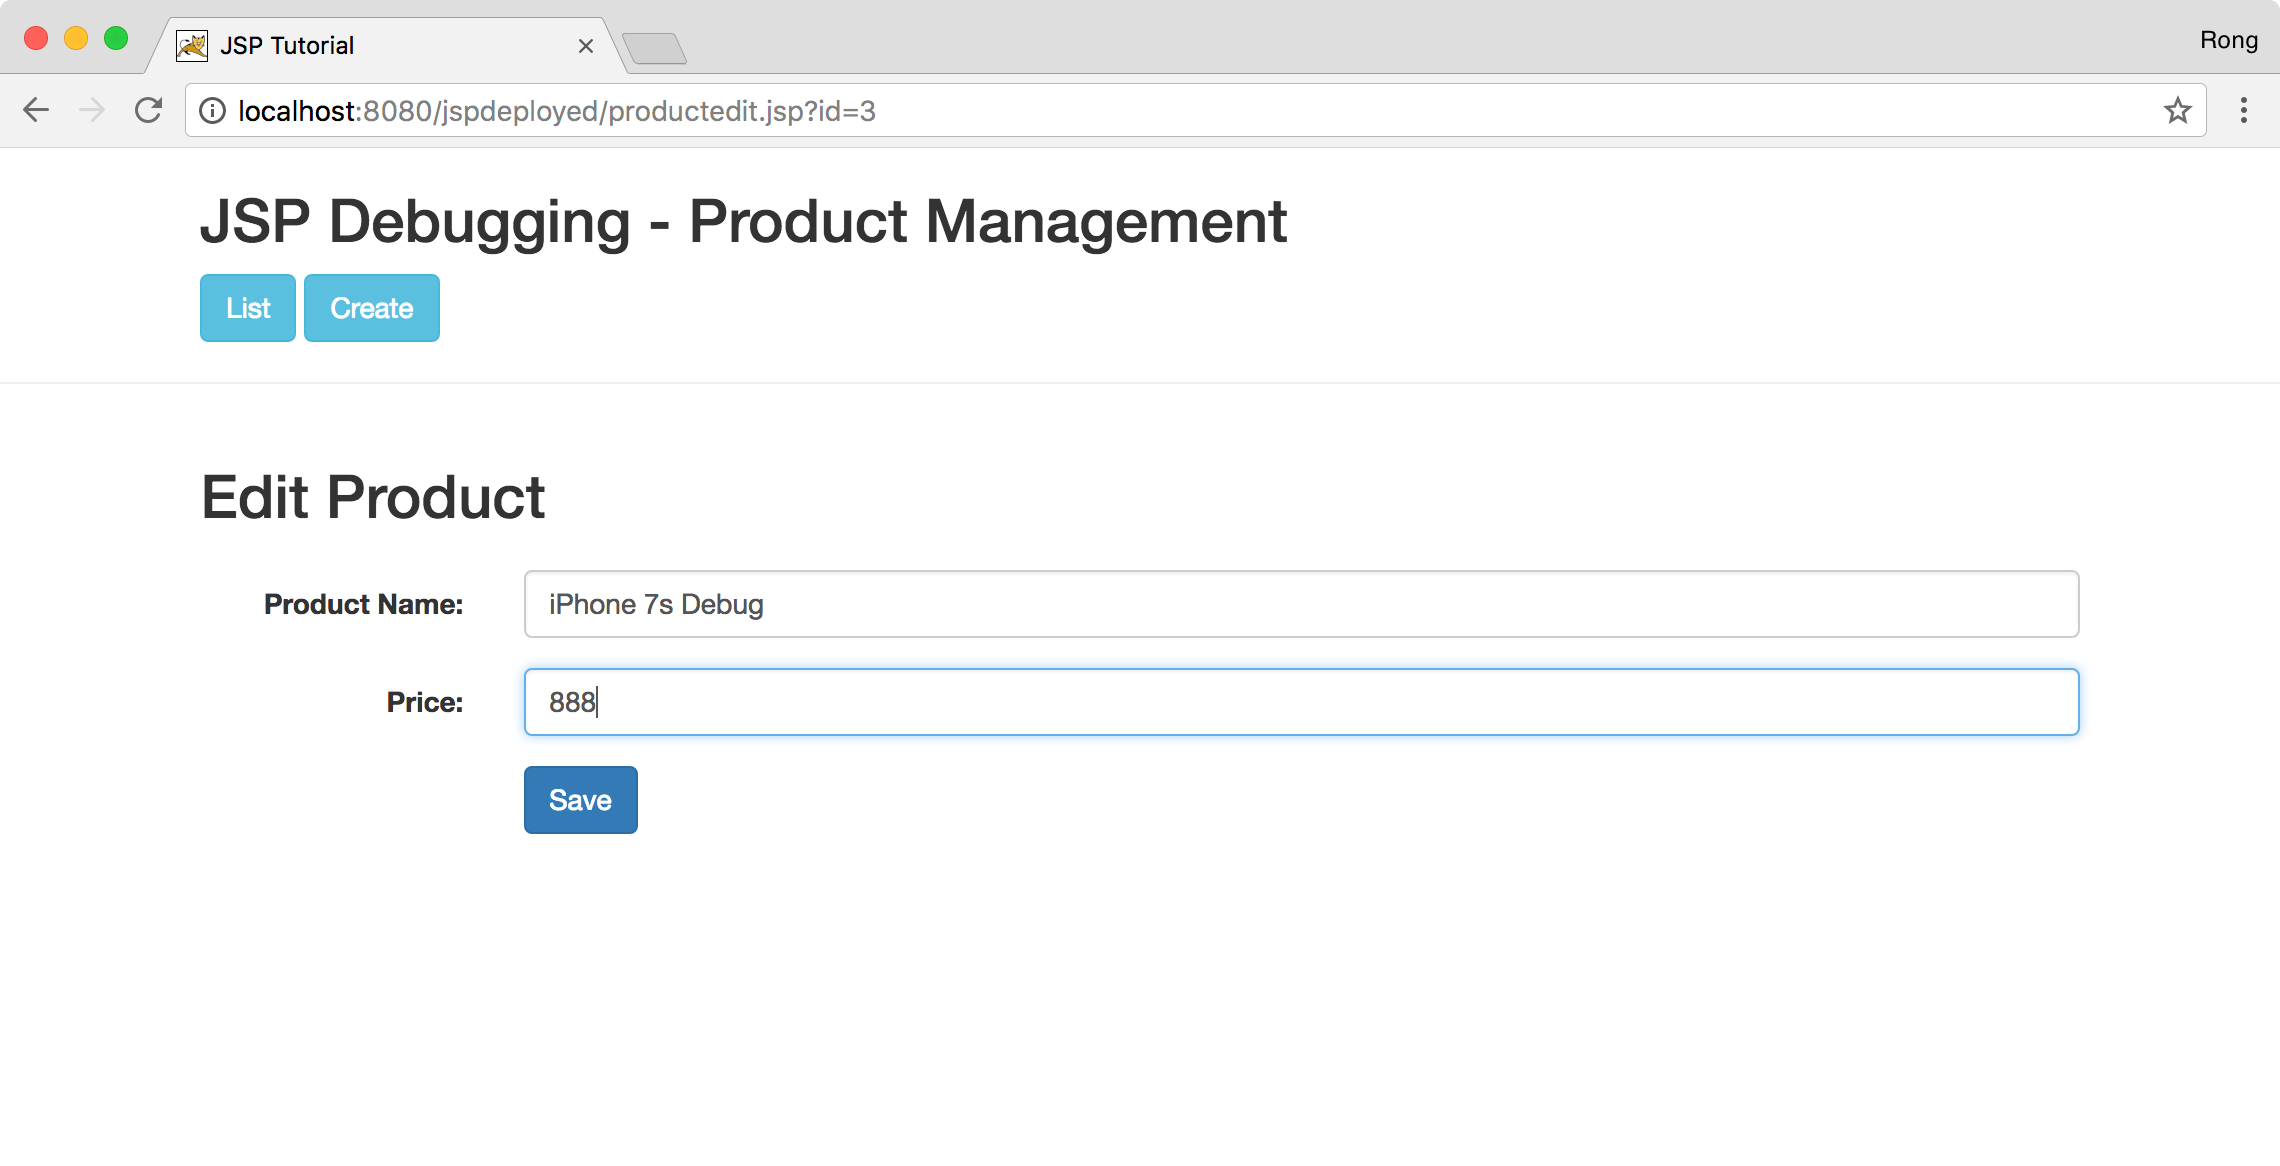
 Click the Edit button for line 3. Change the product name and price, click ‘Save’ button.
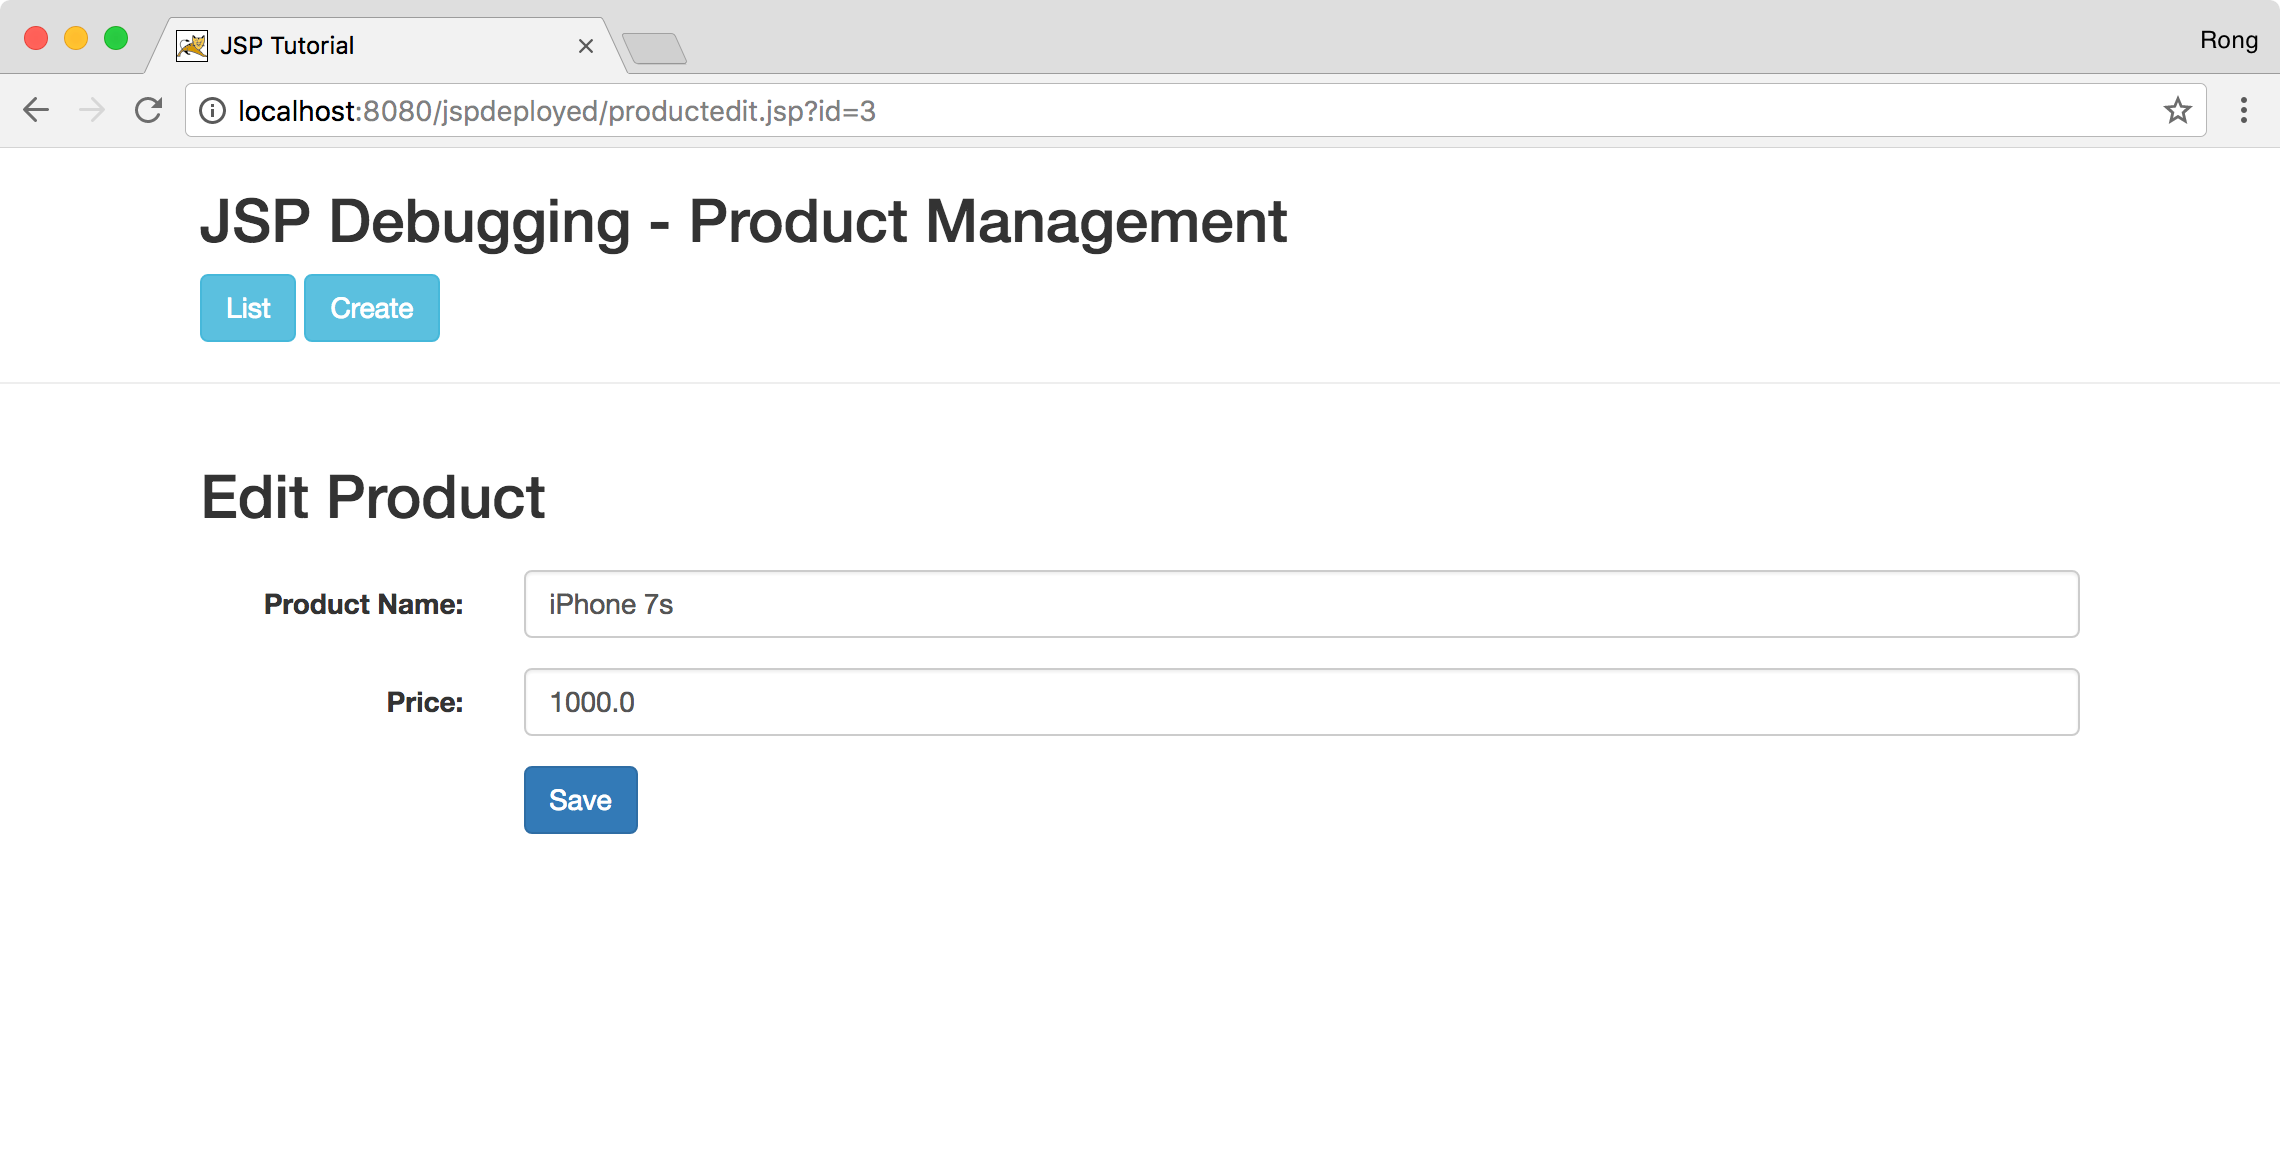 Nothing happened, the name and price of the third product are not changed. We need to find out why.

3.3 Restart Tomcat in Debug Mode
First, stop tomcat with following command.
$ /usr/local/apache-tomcat-9.0.1/bin/shutdown.sh
Run followings commands to start tomcat with enabling remote debugging.
$ export JPDA_ADDRESS=8028
$ export JPDA_TRANSPORT=dt_socket
$ /usr/local/apache-tomcat-9.0.1/bin/catalina.sh jpda start
4. Debugging in Eclipse
4.1 Creating Debug Configuration
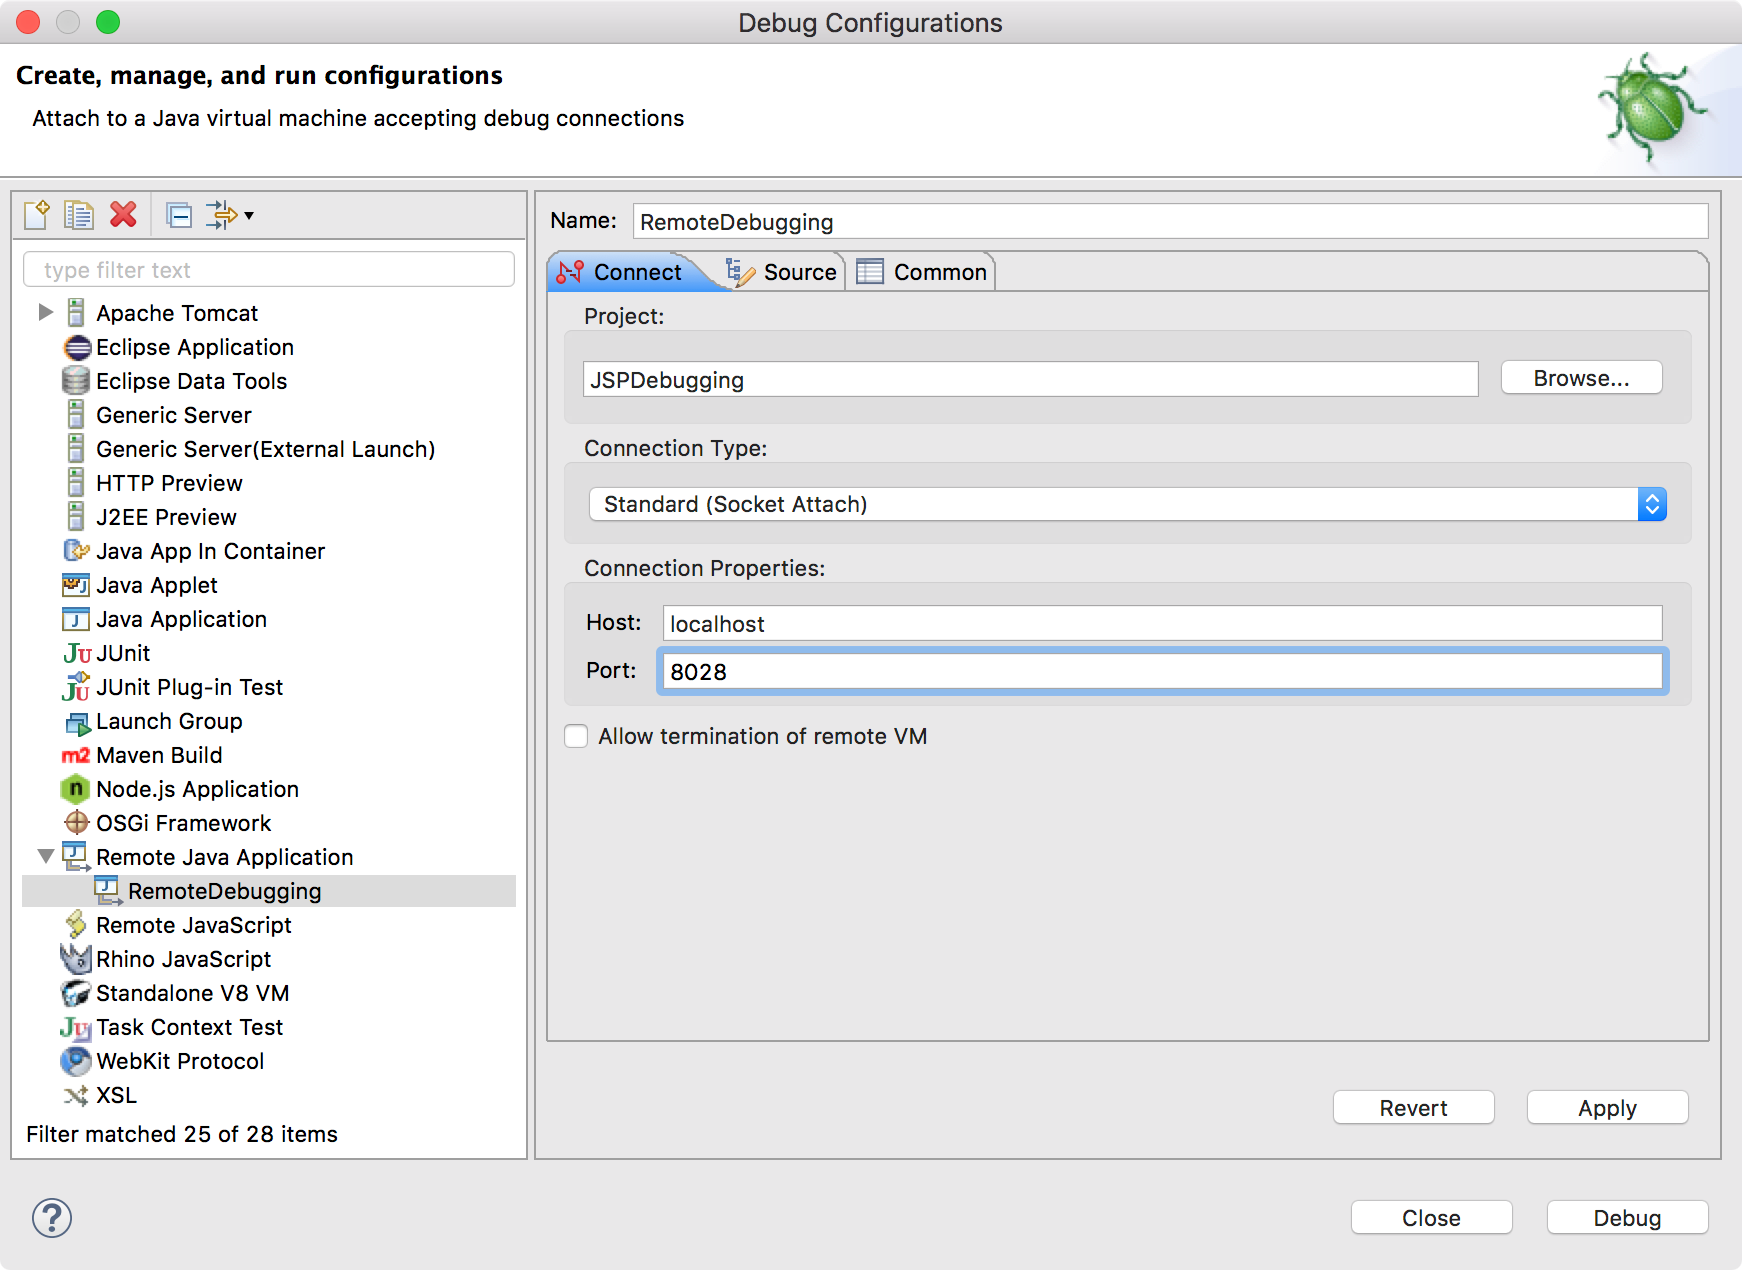
In Eclipse, Run -> Debug Configurations…, create a new ‘Remote Java Application’ named Remote Debugging. Specify the Host to localhost and Port to 8028.
4.2 Setting Breakpoint
In Eclipse, set breakpoint to line 58 of ProductDao.java, inspecting the update method.
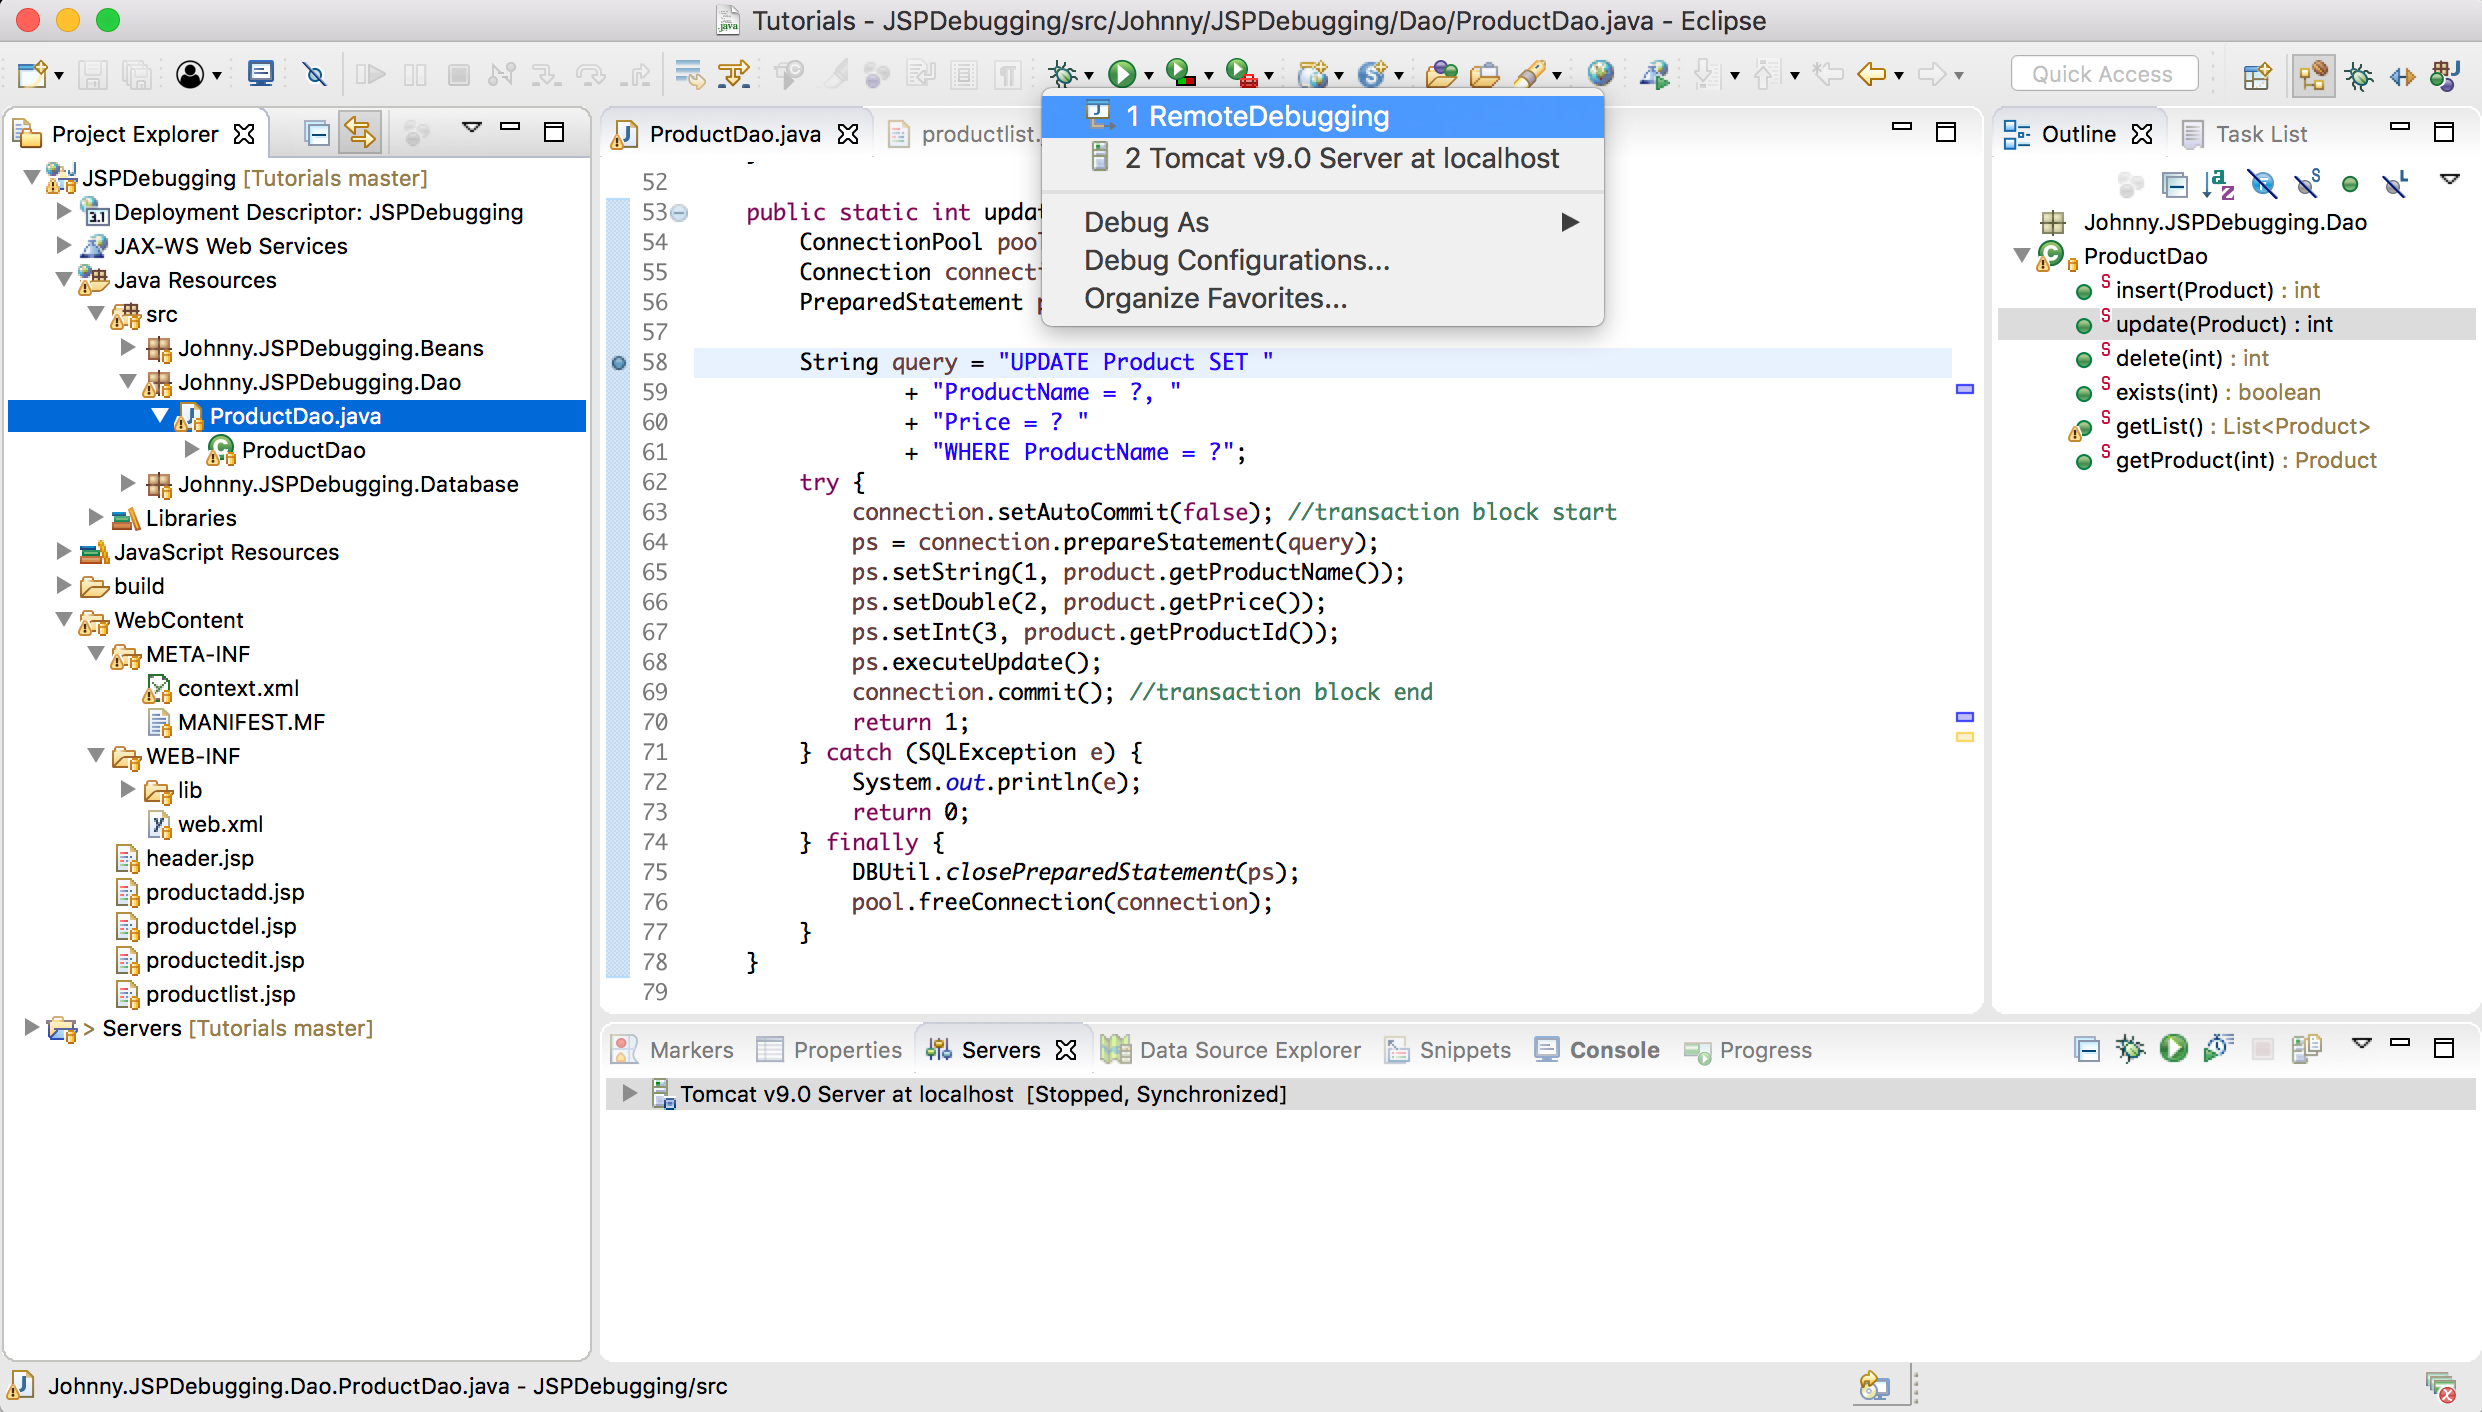
4.3 Starting Debugging
In Eclipse, click the Debug As.. button on toolbar and select RemoteDebugging.
 In web browser, try to update the third product again, click the Save button.
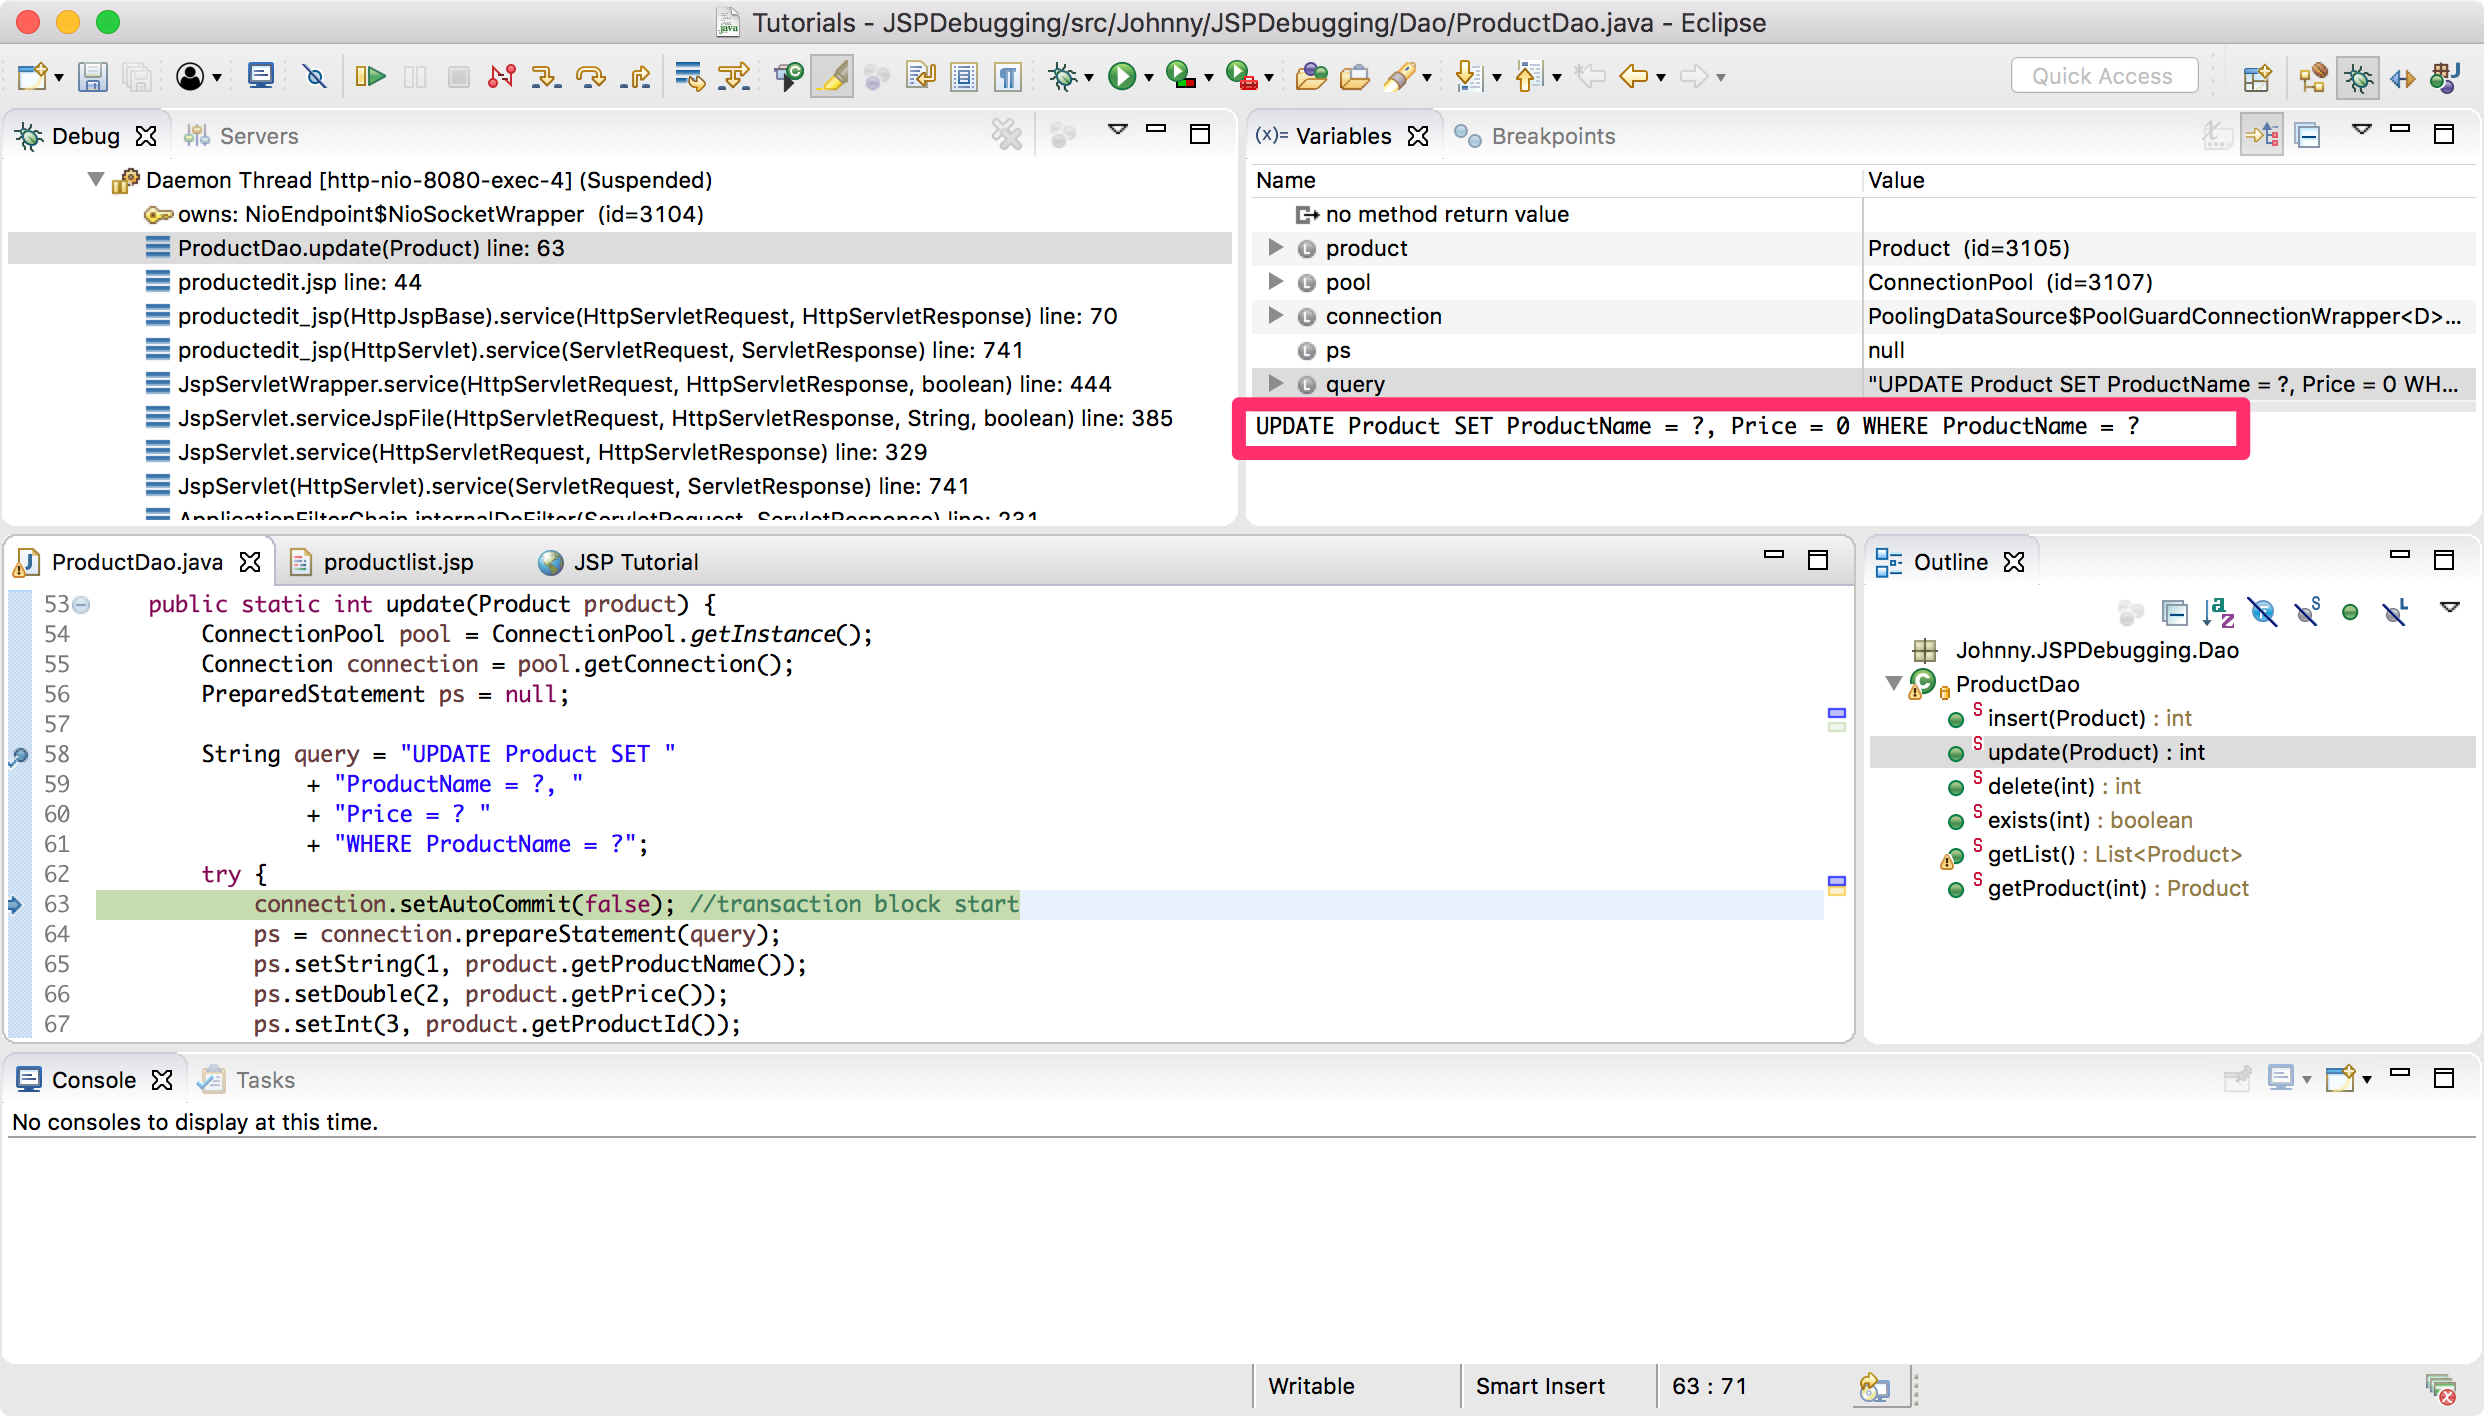
 In Eclipse, you will see the debugging is working now. The breakpoint in
 update method is activated.
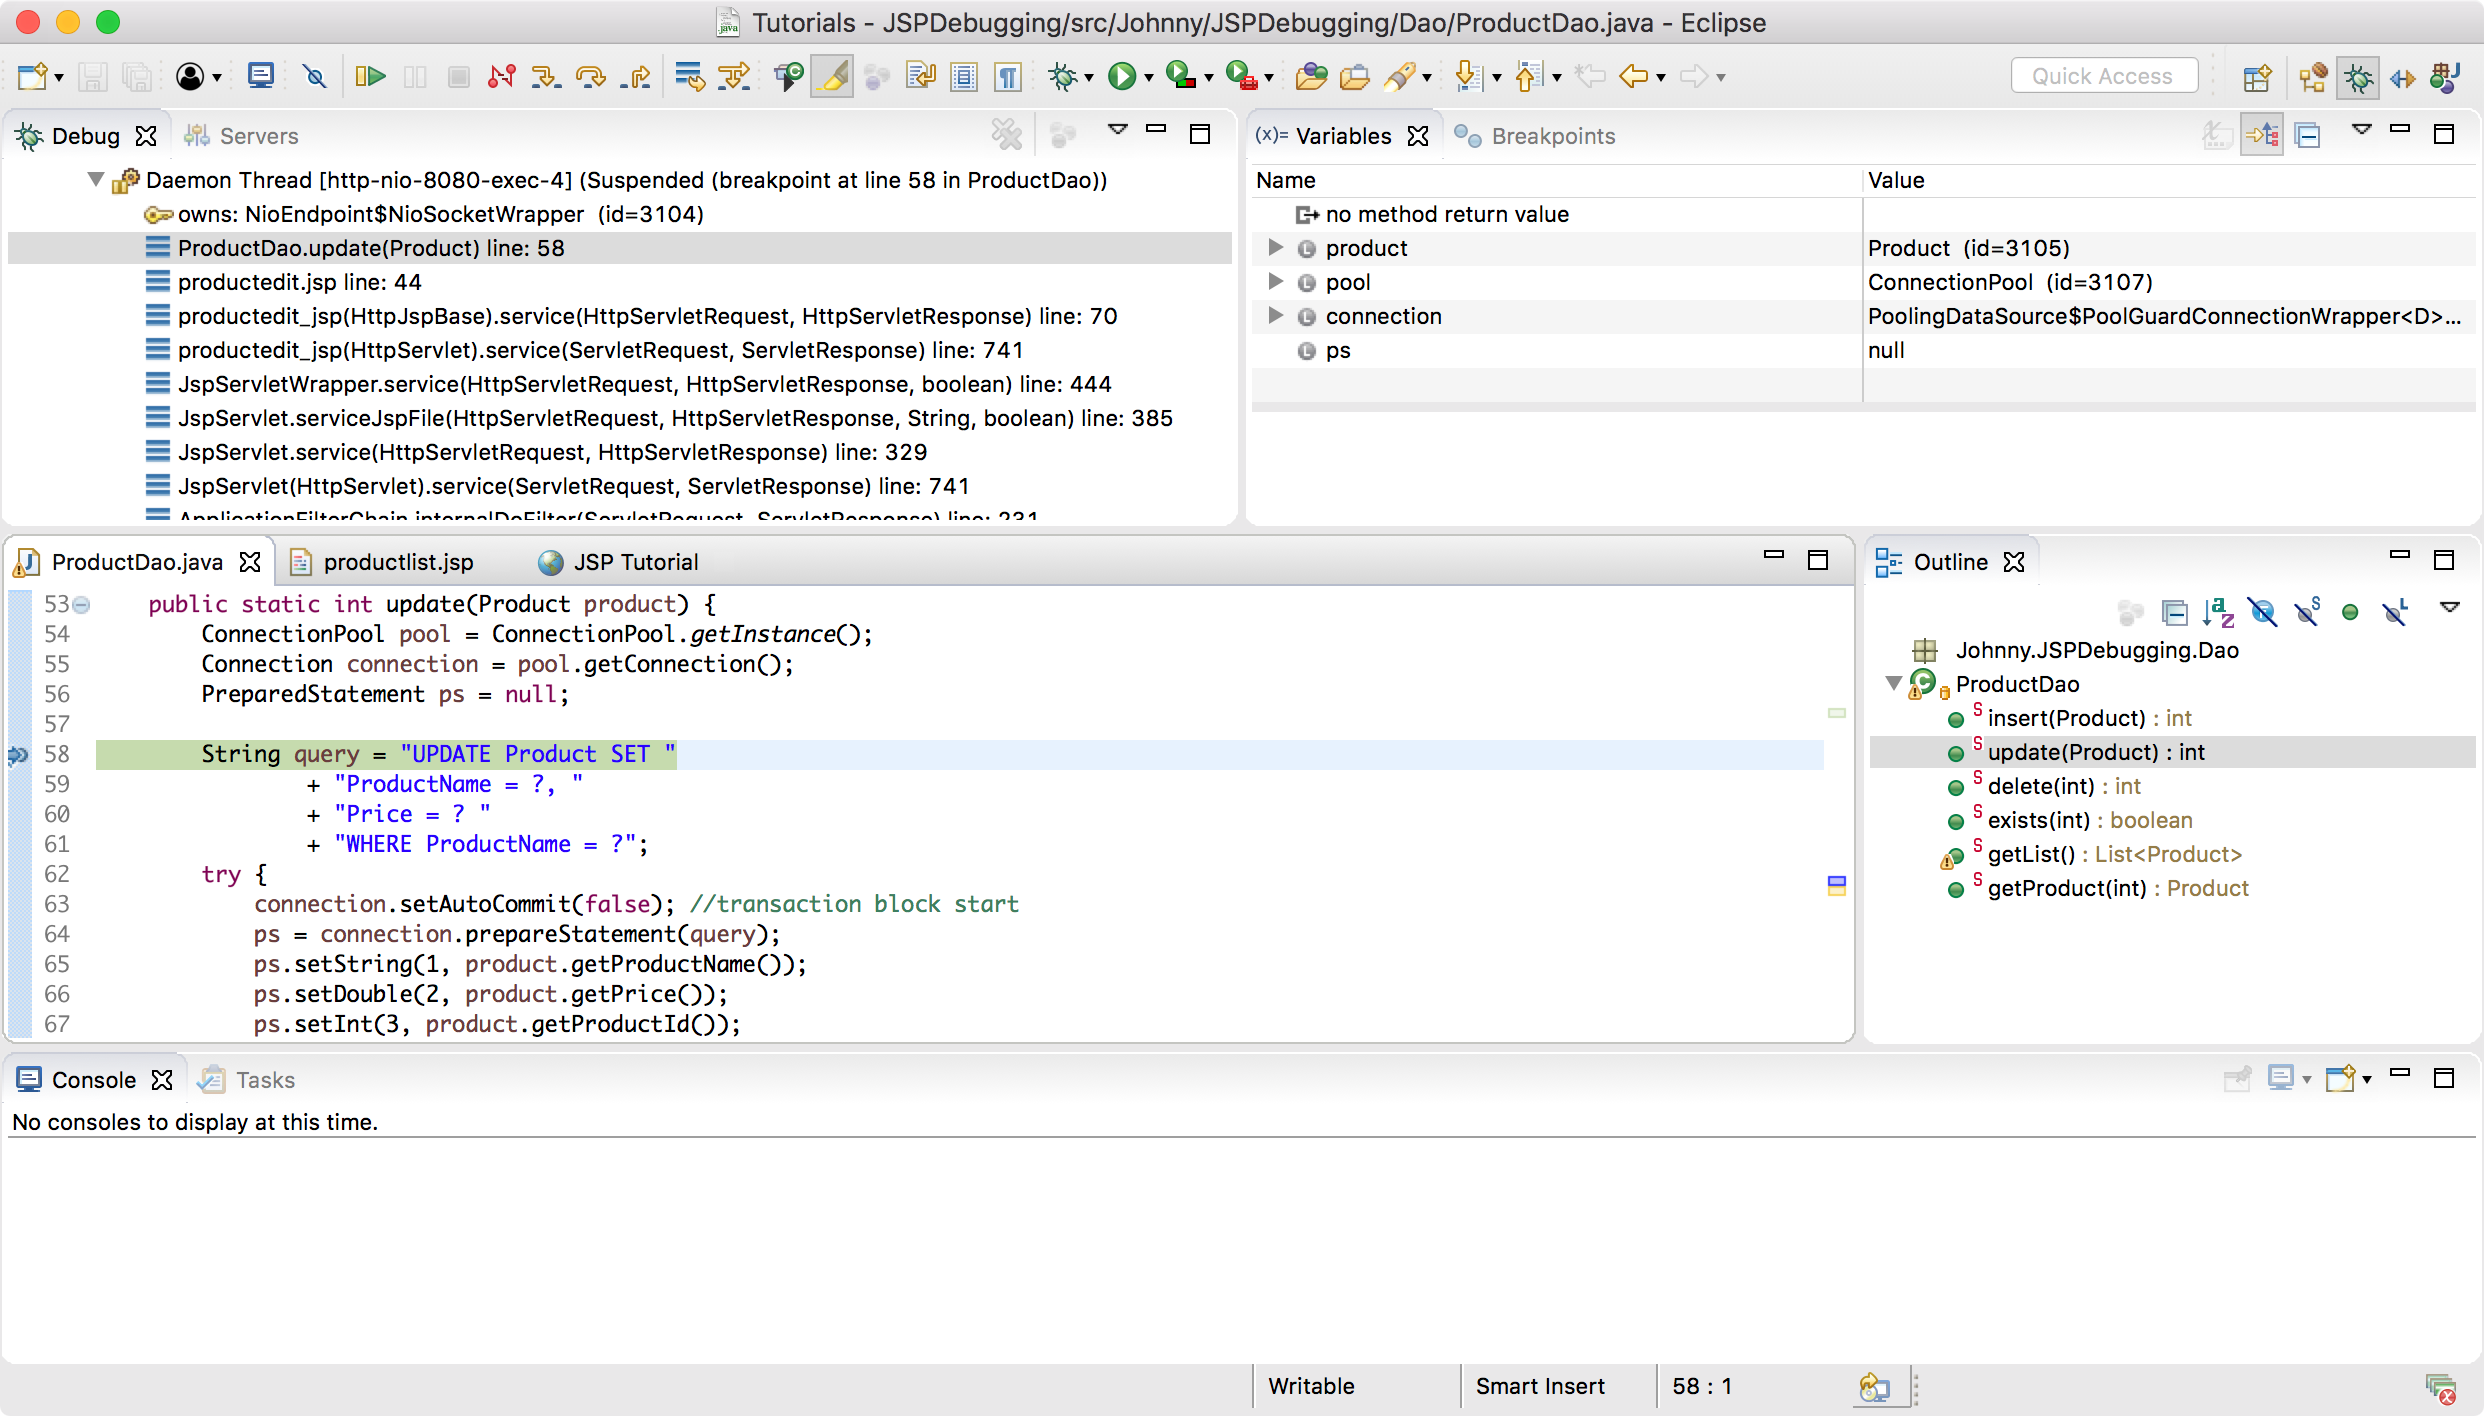 Click the
 Step Over button(F6) in the tool bar to step the execution to the next line. Meanwhile, you see the value of variable query is ‘UPDATE Product SET ProductName = ?, Price = 0 WHERE ProductName = ?’. However, the correct query should be ‘UPDATE Product SET ProductName = ?, Price = 0 WHERE ProductId = ?’. We find the root cause.
 Stop debugging, try to fix the bug by replacing
 ProductName with ProductId in the ‘Where’ clause. Compile the project and deploy the new classes into /webapps/jspdeployed/. Restart tomcat, then try to update the third product again. Refresh the product list page. You will see the product name and price have been updated properly.