8402. Basic Knowledge of ReactReact and React Developer Tools
Useful Knowledge for using ReactJS.
1. Core Concepts of React
1.1 Component
Components let you split the UI into independent, reusable pieces, and think about each piece in isolation. Define App component and include three other components, Header, Main and Footer.
import React from 'react';

class App extends React.Component {
   render() {
      return (
         <div>
            <Header/>
            <Main/>
            <Footer/>
         </div>
      );
   }
}
class Header extends React.Component {
   render() {
      return (
         <div>
            <h1>Header</h1>
         </div>
      );
   }
}
class Content extends React.Component {
   render() {
      return (
         <div>
            <h2>Main</h2>
            <p>Welcome to React Components!</p>
         </div>
      );
   }
}
class Footer extends React.Component {
   render() {
      return (
         <div>
            <h1>Footer</h1>
         </div>
      );
   }
}
export default App;
1.2 Component LifeCycle
Each component has following lifecycle methods.
componentWillMountis executed before rendering, on both the server and the client side.componentDidMountis executed after the first render only on the client side.componentWillReceivePropsis invoked as soon as the props are updated before another render is called.shouldComponentUpdateshould return true or false value. This will determine if the component will be updated or not. This is set to true by default. If you are sure that the component doesn’t need to render after state or props are updated, you can return false value.componentWillUpdateis called just before rendering.componentDidUpdateis called just after rendering.componentWillUnmountis called after the component is unmounted from the dom.
1.3 State
State is the place where the data comes from.
import React from 'react';

class App extends React.Component {
   constructor(props) {
      super(props);

      this.state = {
         header: "Header from state...",
         content: "Content from state..."
         footer: "Footer from state..."
      }
   }
   render() {
      return (
         <div>
            <h1>{this.state.header}</h1>
            <h2>{this.state.content}</h2>
            <h2>{this.state.footer}</h2>
         </div>
      );
   }
}
export default App;
To get state value, just read the attribute from the state.
let products = this.state.products;
To set state value, we need to call setState() method.
this.setState({products: this.props.products});
It’s important to note that setState() method is asynchronous. Don’t try to get state value right after calling it.
this.setState({title: this.props.tile});
let title = this.state.title; // title may still have the old value.
1.3 Props
Props are also used to store data for component. The main difference between state and props is that props are immutable. This is why the container component should define the state that can be updated and changed, while the child components should only pass data from the state using props.
Take a look the following example. We define three state attributes in App component, header, content and footer. And pass them to child components through headerProp, contentProp and footerProp as props.
import React from 'react';

class App extends React.Component {
   constructor(props) {
      super(props);
      this.state = {
         header: "Header from props...",
         content: "Content from props..."
         footer: "Footer from state..."
      }
   }
   render() {
      return (
         <div>
            <Header headerProp={this.state.header}/>
            <Content contentProp={this.state.content}/>
            <Content footerProp={this.state.footer}/>
         </div>
      );
   }
}
class Header extends React.Component {
   render() {
      return (
         <div>
            <h1>{this.props.headerProp}</h1>
         </div>
      );
   }
}
class Content extends React.Component {
   render() {
      return (
         <div>
            <h2>{this.props.contentProp}</h2>
         </div>
      );
   }
}
class Footer extends React.Component {
   render() {
      return (
         <div>
            <h2>{this.props.footerProp}</h2>
         </div>
      );
   }
}
export default App;
We can apply Typechecking with PropTypes. ‘title: PropTypes.string.isRequired’ validates that props title must be string type and with value assigned.
import PropTypes from 'prop-types';

class App extends React.Component {
  render() {
    return (
      <h1>{this.props.title}</h1>
    );
  }
}

App.propTypes = {
  title: PropTypes.string.isRequired
};
For performance reasons, PropTypes is only checked in development mode.
1.4 Refs and the DOM
Use ref to access controls defined in child component from parent component.
function CustomTextInput(props) {
  return (
    <div>
      <input ref={props.inputRef} />
    </div>
  );
}

class Parent extends React.Component {
  render() {
    return (
      <CustomTextInput
        inputRef={el => this.inputElement = el}
      />
    );
  }
}
2. Style in React
We can apply css style to components in four ways.
2.1 Inline Styling
import React from 'react';

const divStyle = {
  margin: '40px',
  border: '5px solid pink'
};
const pStyle = {
  fontSize: '15px',
  textAlign: 'center'
};

const Box = () => (
  <div style={divStyle}>
    <p style={pStyle}>Get started with inline style</p>
  </div>
);

export default Box;
2.2 CSS Stylesheet
import React from 'react';
import './Box.css';

const Box = () => (
  <div className="divStyle">
    <p className="pStyle">Get started with CSS styling</p>
  </div>
);

export default DottedBox;
2.3 CSS Modules
import React from 'react';
import styles from './Box.css';

const Box = () => (
  <div className={styles.divStyle}>
    <p className={styles.pStyle}>Get started with CSS Modules style</p>
  </div>
);

export default Box;
2.4 Styled-components
Styled-components is a library for React and React Native that allows you to use component-level styles in your application that are written with a mixture of JavaScript and CSS
import React from 'react';
import styled from 'styled-components';

const Div = styled.div`
  margin: 40px;
  border: 5px outset pink;
  &:hover {
   background-color: yellow;
 }
`;

const Paragraph = styled.p`
  font-size: 15px;
  text-align: center;
`;

const Box = () => (
  <Div>
    <Paragraph>Get started with styled-components </Paragraph>
  </Div>
);

export default Box;
3. Using Bootstrap in React
Bootstrap is the most popular HTML, CSS, and JavaScript framework for developing responsive, mobile-first web sites.
3.1 Using Bootstrap Directly
First, add Bootstrap CDN link to the index page.
<!DOCTYPE html>
<html lang="en">
  <head>
    <title>Game Store - React</title>
    <!-- Latest compiled and minified CSS -->
    <link rel="stylesheet" href="https://maxcdn.bootstrapcdn.com/bootstrap/latest/css/bootstrap.min.css">
  </head>
  <body>
    <div id="root"></div>
    <script src="/bundle.js"></script>
  </body>
</html>
Then, use Bootstrap tags and styles to create html controls in React components.
<button type="button" class="btn btn-success" onClick=someCallback>
  Save
</button>
3.2 React-Bootstrap
React-Bootstrap is a library of reusable front-end components. You’ll get the look-and-feel of Twitter Bootstrap, but with much cleaner code, via Facebook’s React.js framework.
First, install ‘react-bootstrap’.
$ npm install react-bootstrap --saves
And, import ‘react-bootstrap’ to React component.
import {Button} from 'react-bootstrap';
Then, use react-bootstrap controls as follows.
<Button bsStyle="success" onClick={someCallback}>
  Save
</Button>
View the React-Bootstrap library on the components page.
4. React Developer Tools
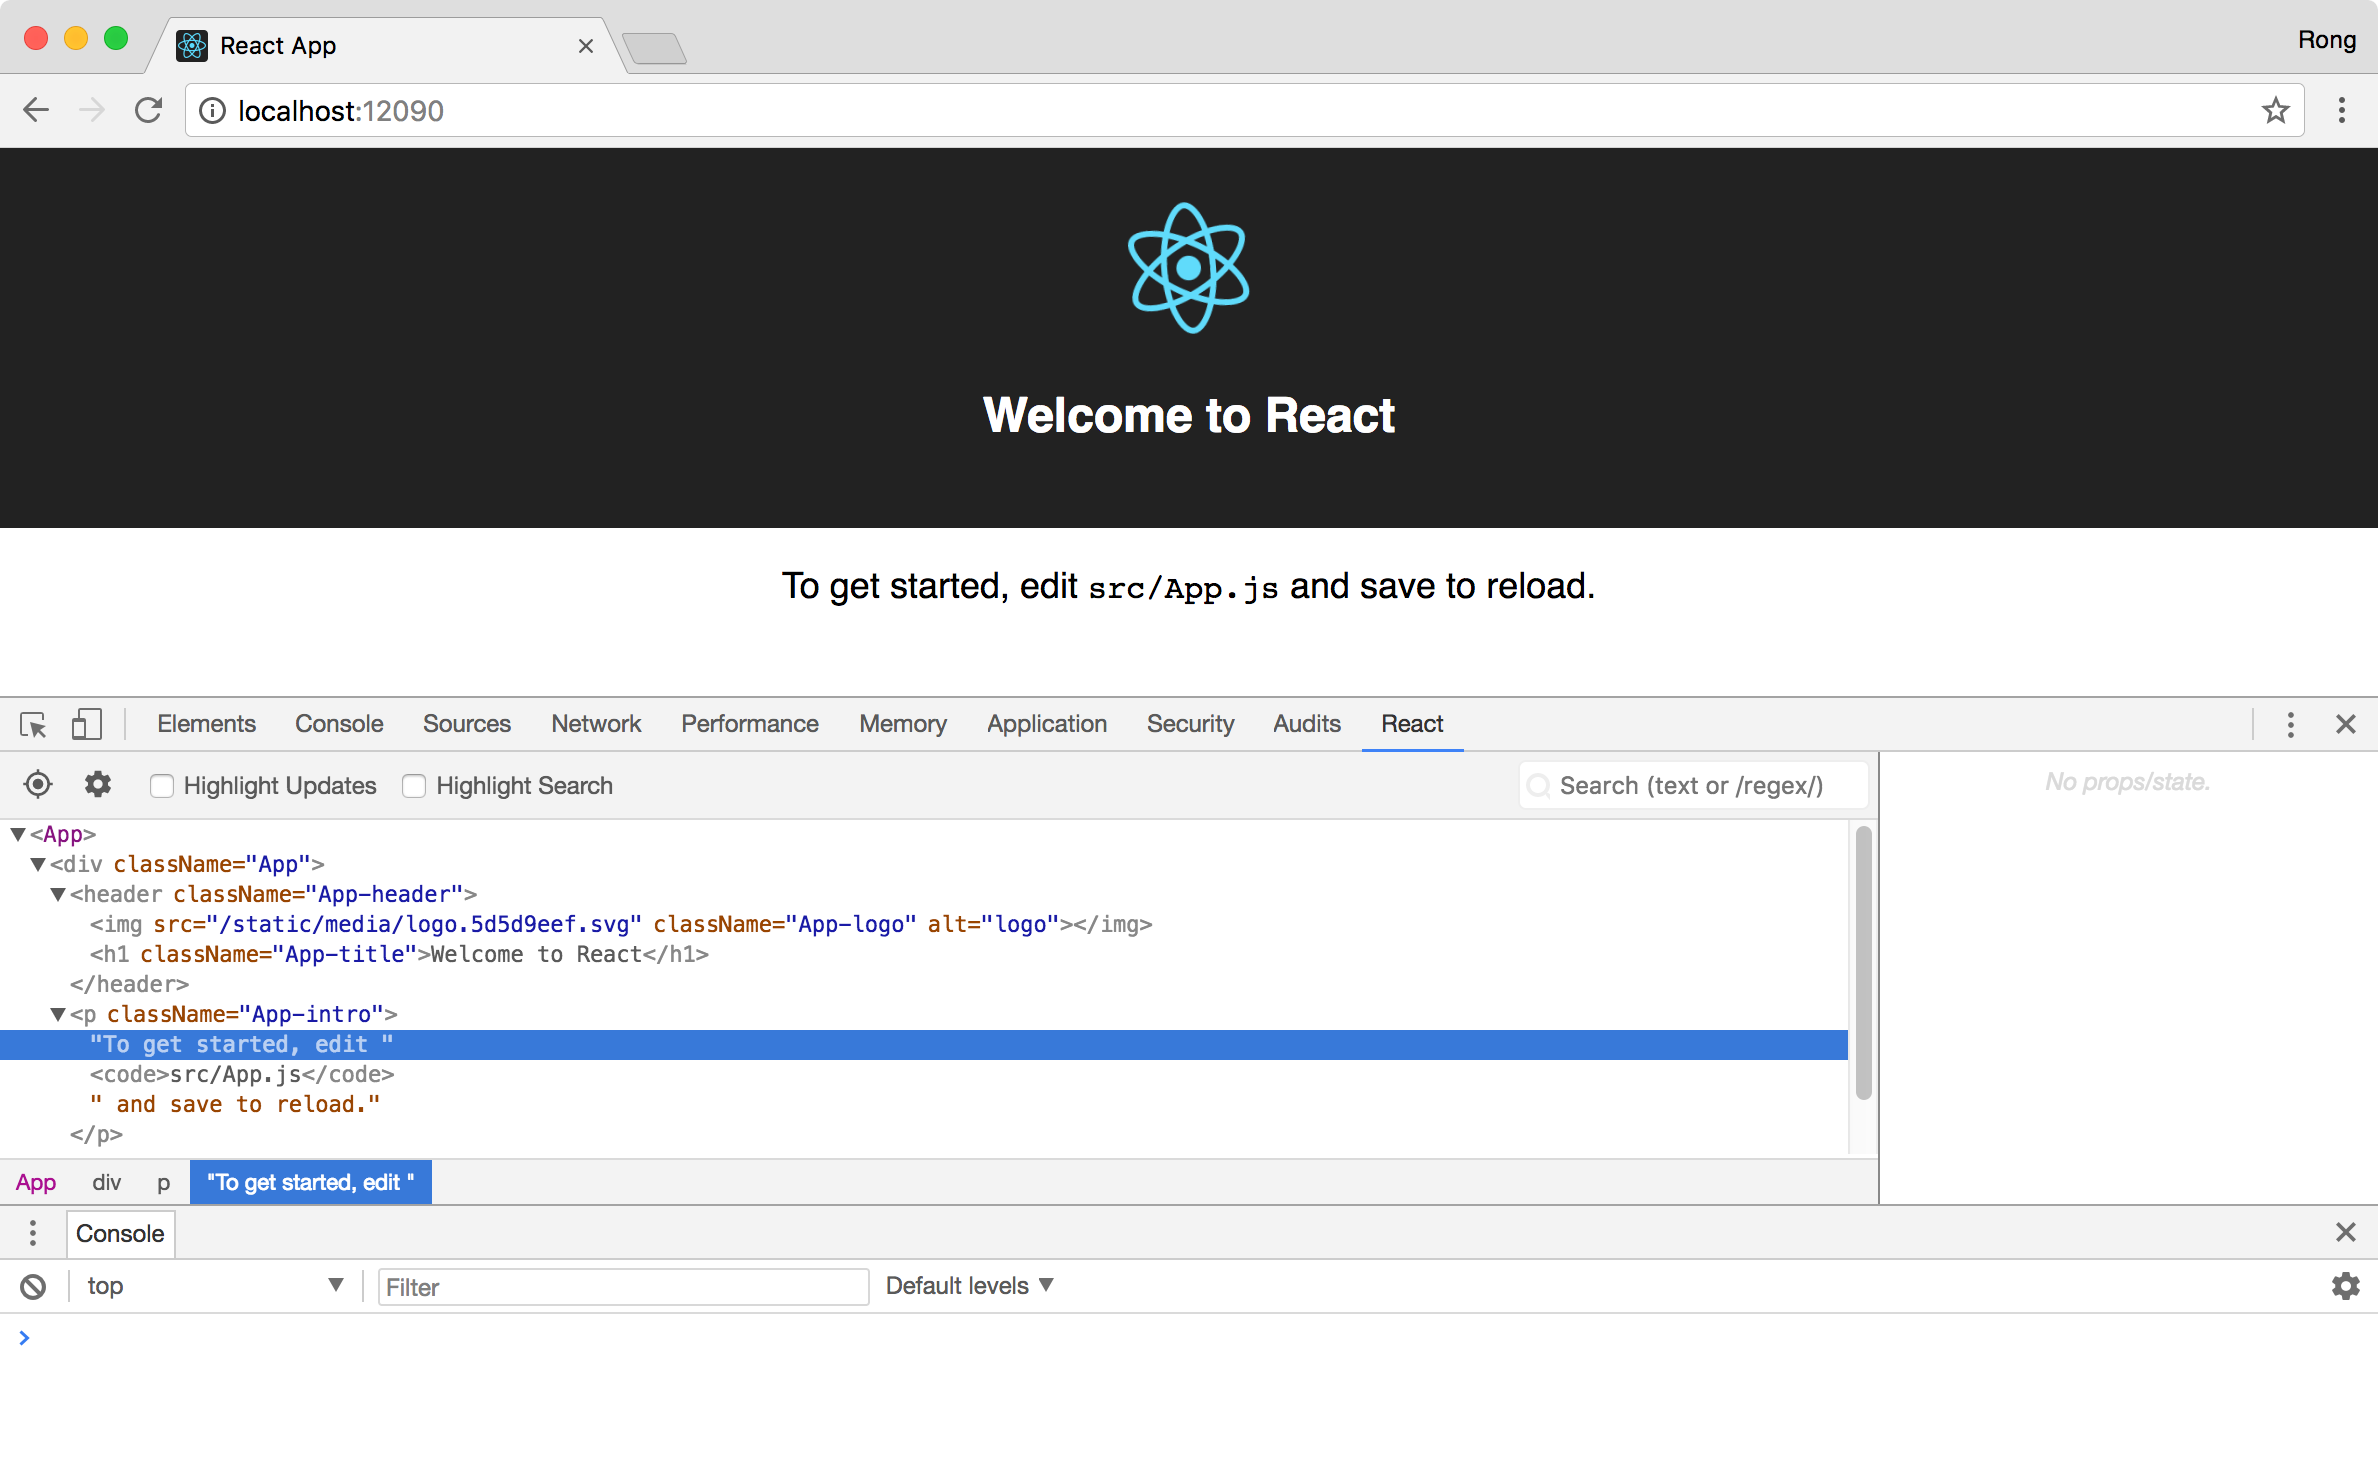
React Developer Tools is a Chrome DevTools extension for the open-source React JavaScript library. It allows you to inspect the React component hierarchies in the Chrome Developer Tools.
You will get a new tab called React in your Chrome DevTools. This shows you the root React components that were rendered on the page, as well as the subcomponents that they ended up rendering.
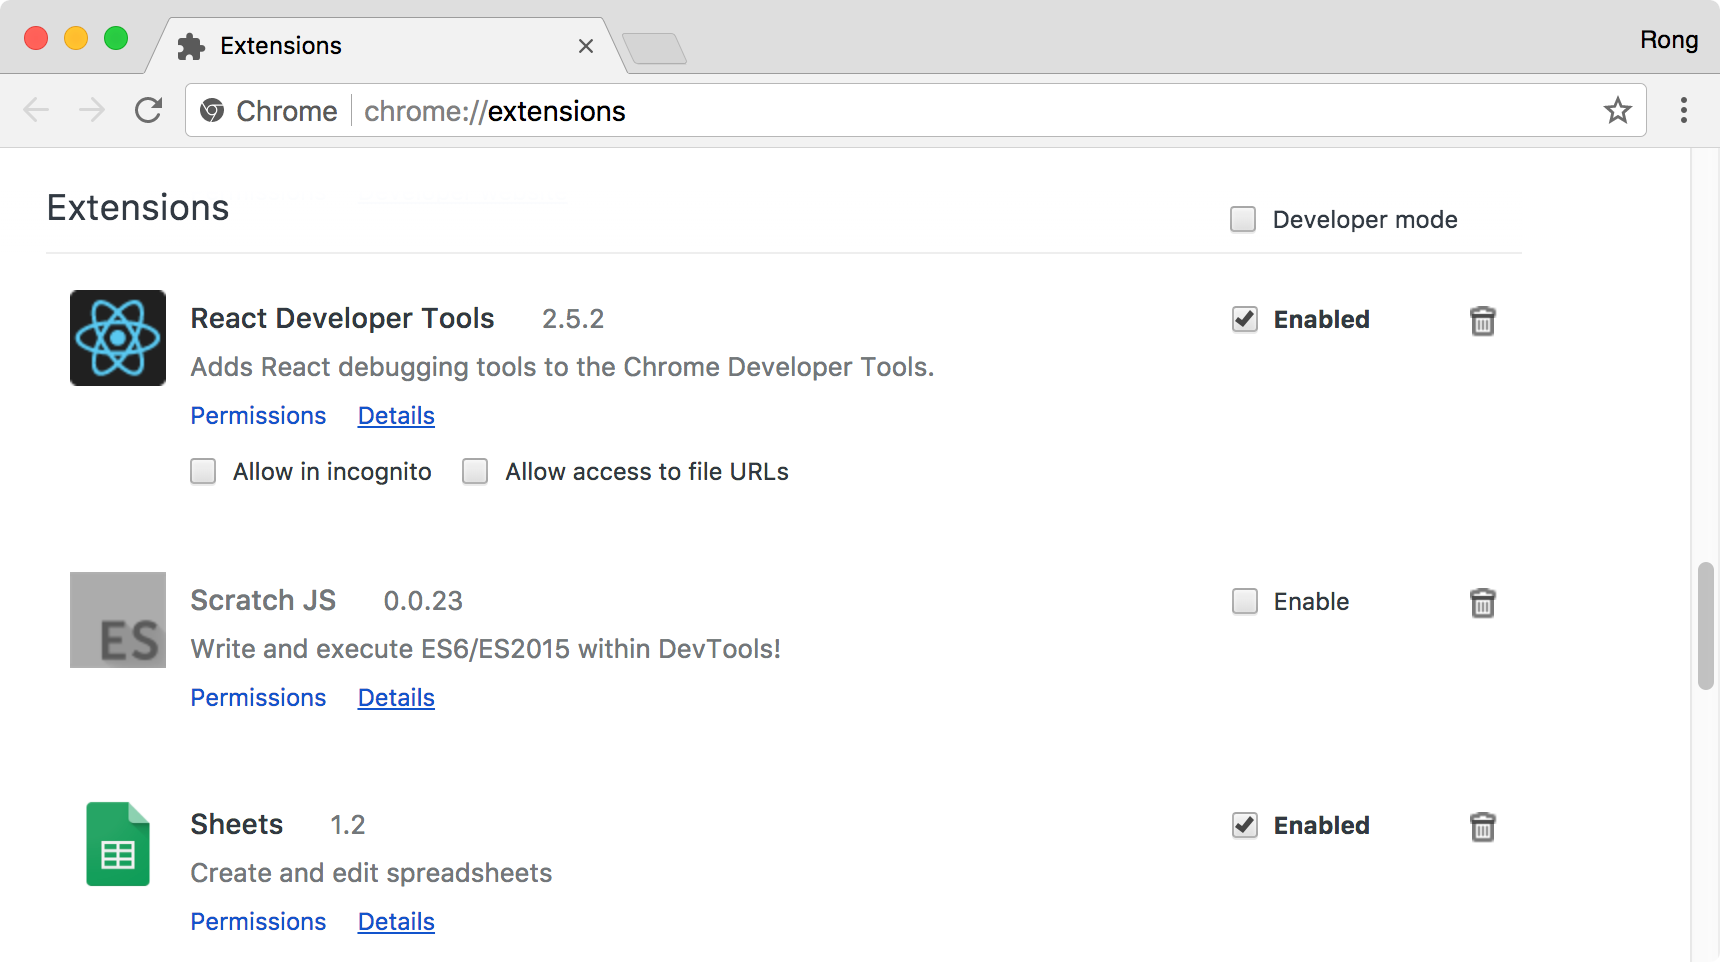
You can install it as Chrome extension.
 View your React app in Chrome. You will see a tab called
 React in Chrome Developer Tools.