8534. Building Android App with XamarinXamarin, Android, SQLite, and C#
Tutorial for how to build Android App with Xamarin and C#.
1. Android App
1.1 Requirement
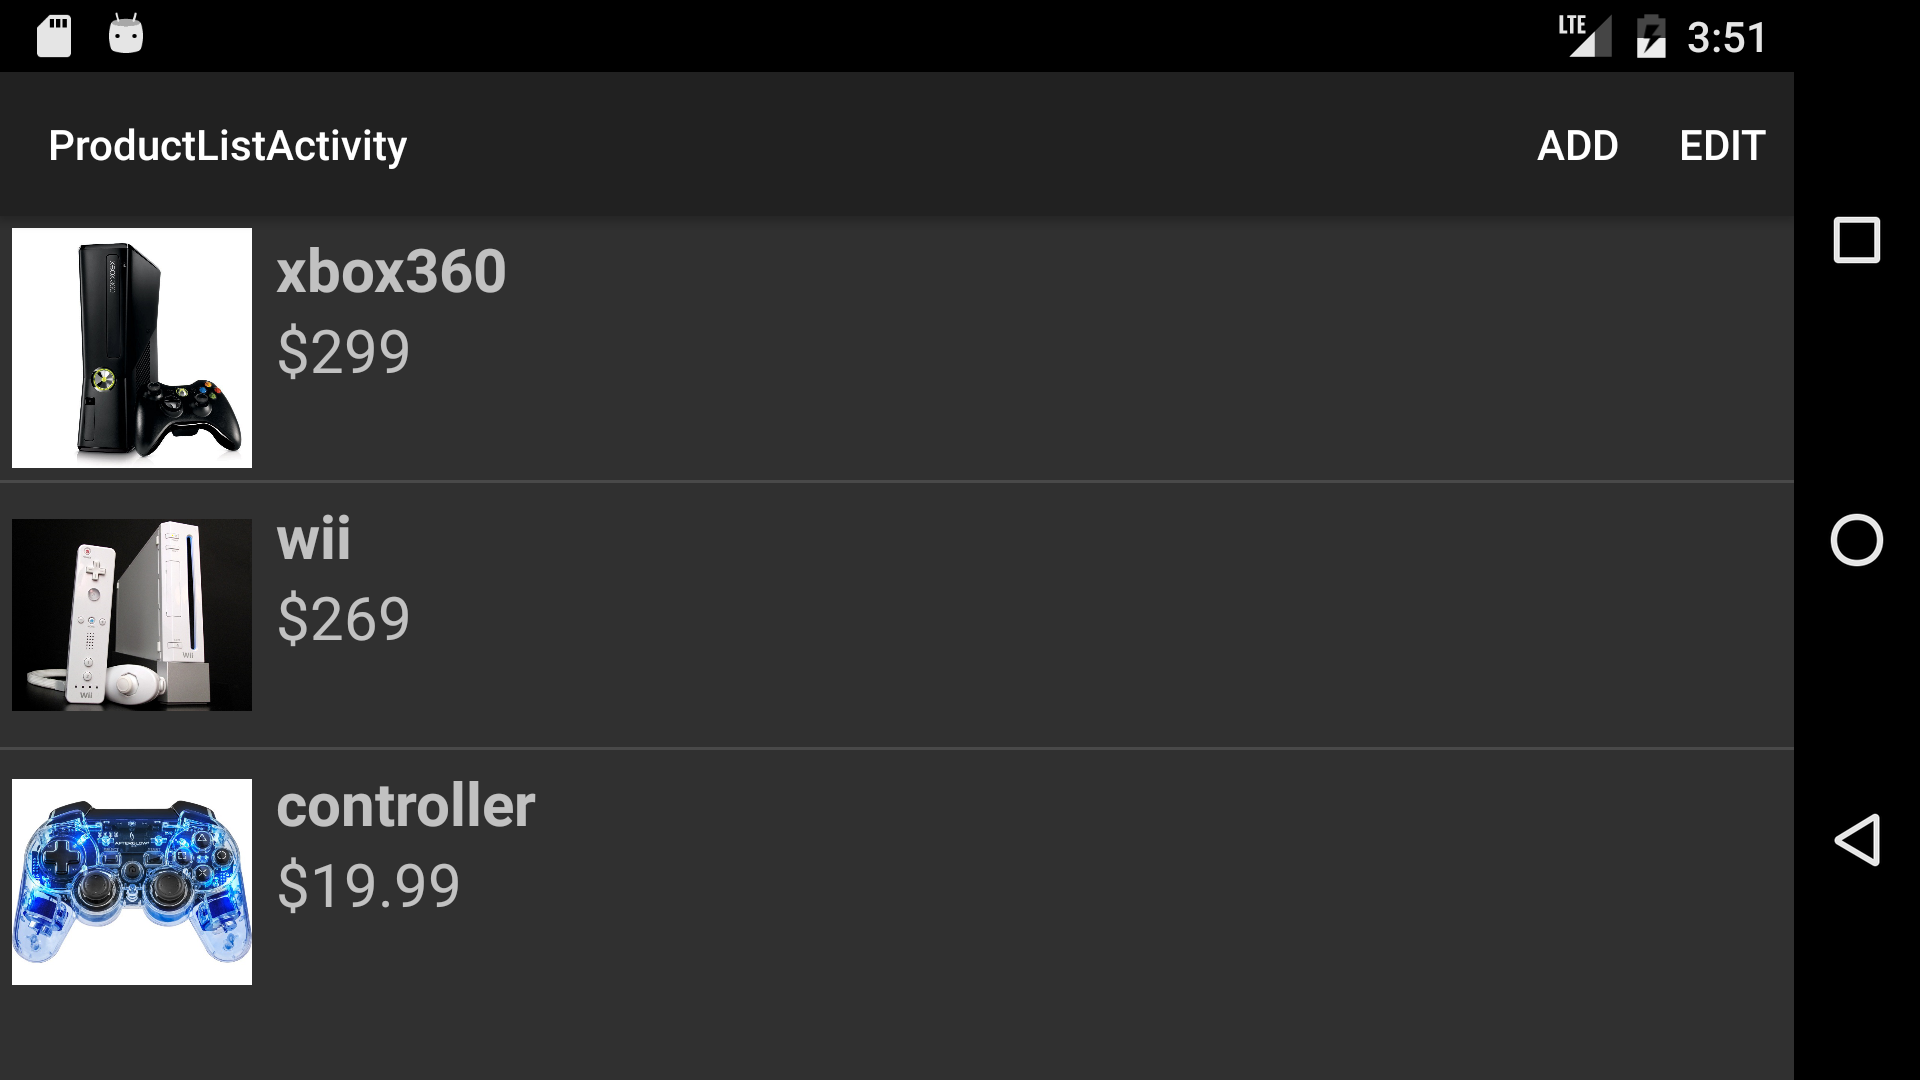
We will create an app named ‘Game Store’ to manage products. It has the similar layout and functions with the app we created with Android and Java. See more details in the posting Building Android App with Android Studio.
1.2 Android Project
In the blog Building iOS App with Xamarin, I introduce how to build iOS App with Xamarin. At that time, we created the Xamarin Android project along with the Core Portable project and Xamarin iOS project. In this blog, I will use this Android project to build the Game Store app.
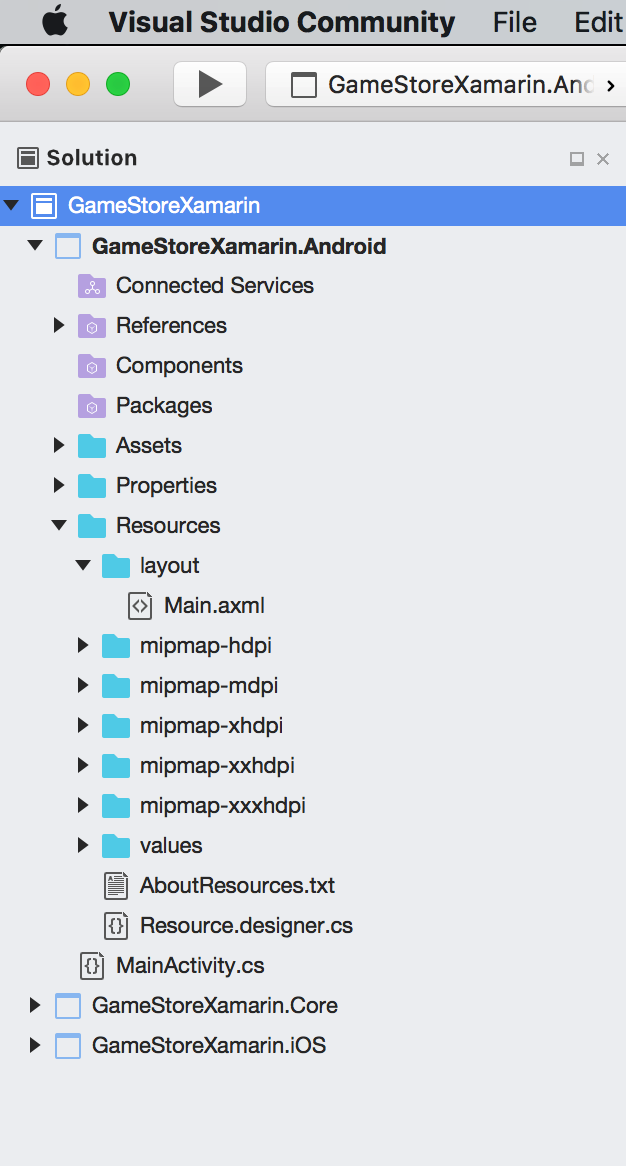
Delete file ‘Main.axml’ and ‘MainActivity.cs’.
1.3 Layouts
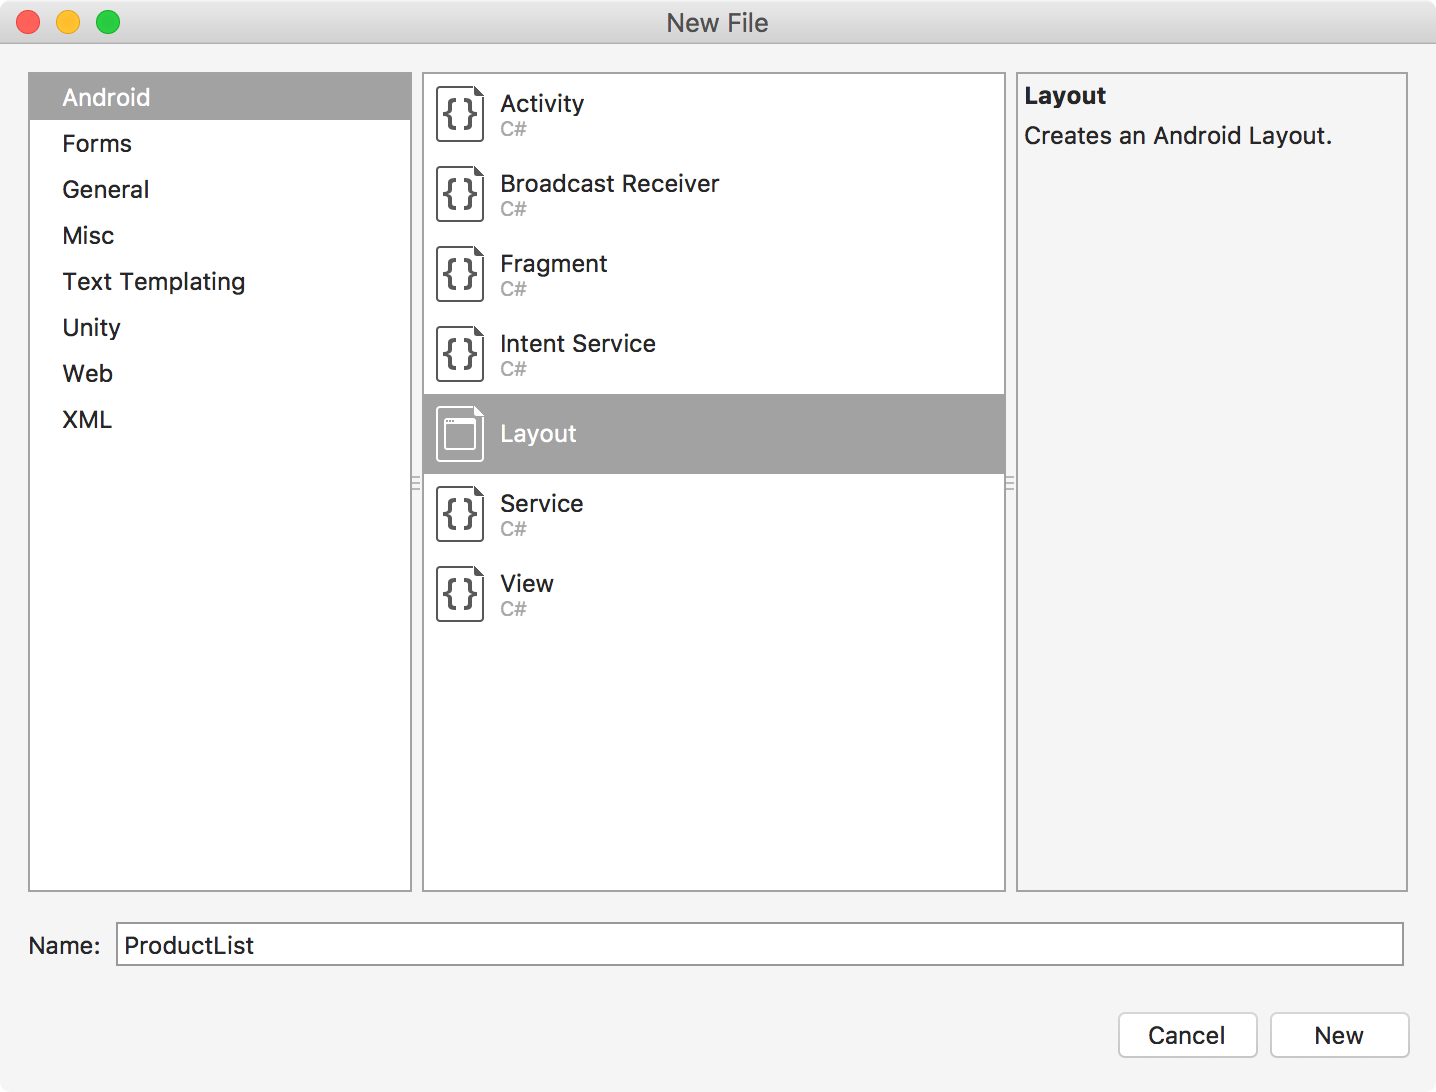
Right click on Resources->layout, Add->New File. Select Android->Layout, set name to ‘ProductList’.
Modify its content as follows.
<?xml version="1.0" encoding="utf-8"?>
<LinearLayout xmlns:android="http://schemas.android.com/apk/res/android"
    android:orientation="vertical"
    android:layout_width="match_parent"
    android:layout_height="match_parent">
    <ListView
        android:id="@+id/list_product"
        android:layout_width="wrap_content"
        android:layout_height="wrap_content" />
</LinearLayout>
Create another layout named ‘ProductListItem’. It’s used as line in list view, showing product’s name, price and photo. The checkbox displays only when the screen in edit mode. Use can check the box for products and delete them.
<?xml version="1.0" encoding="utf-8"?>
<LinearLayout xmlns:android="http://schemas.android.com/apk/res/android"
    android:orientation="horizontal"
    android:layout_width="fill_parent"
    android:layout_height="wrap_content">
    <CheckBox
        android:id="@+id/checkbox"
        android:layout_width="fill_parent"
        android:layout_height="wrap_content"
        android:checked="false"
        android:layout_margin="4dp"
        android:paddingTop="30dp"
        android:paddingLeft="30dp"
        android:paddingRight="0dp"
        android:paddingBottom="30dp" />
    <ImageView
        android:id="@+id/image"
        android:layout_width="80dp"
        android:layout_height="80dp"
        android:layout_margin="4dp" />
    <LinearLayout
        android:layout_width="match_parent"
        android:layout_height="wrap_content"
        android:orientation="vertical"
        android:layout_margin="4dp">
        <TextView
            android:id="@+id/productname"
            android:textSize="20sp"
            android:textStyle="bold"
            android:layout_width="fill_parent"
            android:layout_height="wrap_content" />
        <TextView
            android:id="@+id/price"
            android:textSize="20sp"
            android:layout_width="fill_parent"
            android:layout_height="wrap_content" />
    </LinearLayout>
</LinearLayout>
Create another layout named ‘ProductDetail’. It is used to display and edit product’s attributes.
<?xml version="1.0" encoding="utf-8"?>
<LinearLayout xmlns:android="http://schemas.android.com/apk/res/android"
    android:orientation="vertical"
    android:layout_width="match_parent"
    android:layout_height="match_parent"
    android:layout_margin="10dp">
    <EditText
        android:id="@+id/productname"
        android:layout_width="fill_parent"
        android:layout_height="wrap_content"
        android:hint="@string/hint_product_name"
        android:inputType="text" />
    <EditText
        android:id="@+id/price"
        android:layout_width="fill_parent"
        android:layout_height="wrap_content"
        android:hint="@string/hint_product_price"
        android:inputType="numberDecimal" />
    <Button
        android:id="@+id/loadimage"
        android:layout_width="match_parent"
        android:layout_height="match_parent"
        android:text="@string/button_load_image"
        android:layout_marginTop="10dp"
        android:layout_marginLeft="10dp"
        android:layout_marginRight="10dp"
        android:layout_marginBottom="30dp" />
    <ImageView
        android:id="@+id/image"
        android:layout_width="match_parent"
        android:layout_height="match_parent"
        android:layout_margin="4dp"
        android:visibility="invisible" />
</LinearLayout>
1.4 Activities
Activity works with layout. It control the behaviors of the layout.
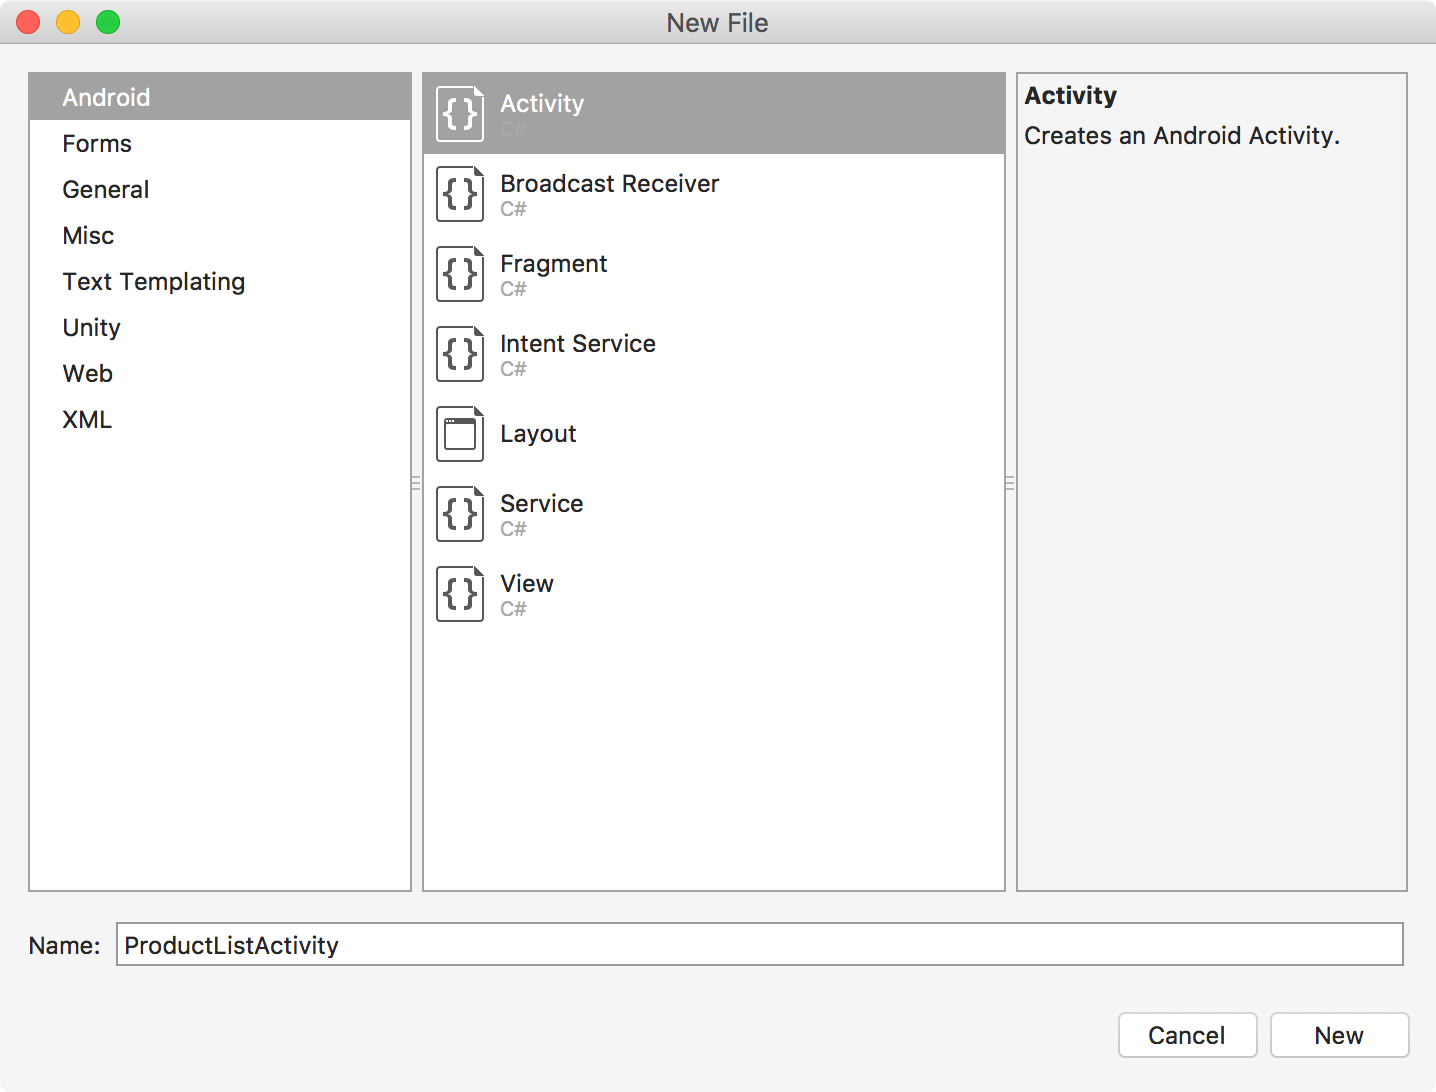
Right click the ‘GameStoreXamarin.Android’ project, Add->New File. Select Android->Activity, set name to ‘ProductListActivity’.
Add 'MainLauncher = true' to the Activity attribute to inform Android to run ‘ProductListActivity’ first when the app is launched.
[Activity(Label = "ProductListActivity", MainLauncher = true)]
public class ProductListActivity : Activity
{
    protected override void OnCreate(Bundle savedInstanceState)
    {
        base.OnCreate(savedInstanceState);

        // Create your application here
    }
}
Create another activity named ‘ProductDetailActivity’ through Add->New File->Android->Activity.
1.5 Installing Packages
Project->Add NuGet Packages, search and install two packages, ‘sqlite-net-pcl’ and ‘Xamarin.Forms’. Finally, the package.config file looks like below.
<?xml version="1.0" encoding="utf-8"?>
<packages>
  <package id="sqlite-net-pcl" version="1.4.118" targetFramework="monoandroid80" />
  <package id="SQLitePCLRaw.bundle_green" version="1.1.9" targetFramework="monoandroid80" />
  <package id="SQLitePCLRaw.core" version="1.1.9" targetFramework="monoandroid80" />
  <package id="SQLitePCLRaw.lib.e_sqlite3.android" version="1.1.9" targetFramework="monoandroid80" />
  <package id="SQLitePCLRaw.provider.e_sqlite3.android" version="1.1.9" targetFramework="monoandroid80" />
  <package id="Xamarin.Android.Arch.Core.Common" version="1.0.0" targetFramework="monoandroid80" />
  <package id="Xamarin.Android.Arch.Lifecycle.Common" version="1.0.1" targetFramework="monoandroid80" />
  <package id="Xamarin.Android.Arch.Lifecycle.Runtime" version="1.0.0" targetFramework="monoandroid80" />
  <package id="Xamarin.Android.Support.Animated.Vector.Drawable" version="26.1.0.1" targetFramework="monoandroid80" />
  <package id="Xamarin.Android.Support.Annotations" version="26.1.0.1" targetFramework="monoandroid80" />
  <package id="Xamarin.Android.Support.Compat" version="26.1.0.1" targetFramework="monoandroid80" />
  <package id="Xamarin.Android.Support.Core.UI" version="26.1.0.1" targetFramework="monoandroid80" />
  <package id="Xamarin.Android.Support.Core.Utils" version="26.1.0.1" targetFramework="monoandroid80" />
  <package id="Xamarin.Android.Support.Design" version="26.1.0.1" targetFramework="monoandroid80" />
  <package id="Xamarin.Android.Support.Fragment" version="26.1.0.1" targetFramework="monoandroid80" />
  <package id="Xamarin.Android.Support.Media.Compat" version="26.1.0.1" targetFramework="monoandroid80" />
  <package id="Xamarin.Android.Support.Transition" version="26.1.0.1" targetFramework="monoandroid80" />
  <package id="Xamarin.Android.Support.v4" version="26.1.0.1" targetFramework="monoandroid80" />
  <package id="Xamarin.Android.Support.v7.AppCompat" version="26.1.0.1" targetFramework="monoandroid80" />
  <package id="Xamarin.Android.Support.v7.CardView" version="26.1.0.1" targetFramework="monoandroid80" />
  <package id="Xamarin.Android.Support.v7.MediaRouter" version="26.1.0.1" targetFramework="monoandroid80" />
  <package id="Xamarin.Android.Support.v7.Palette" version="26.1.0.1" targetFramework="monoandroid80" />
  <package id="Xamarin.Android.Support.v7.RecyclerView" version="26.1.0.1" targetFramework="monoandroid80" />
  <package id="Xamarin.Android.Support.Vector.Drawable" version="26.1.0.1" targetFramework="monoandroid80" />
  <package id="Xamarin.Forms" version="2.5.0.91635" targetFramework="monoandroid80" />
</packages>
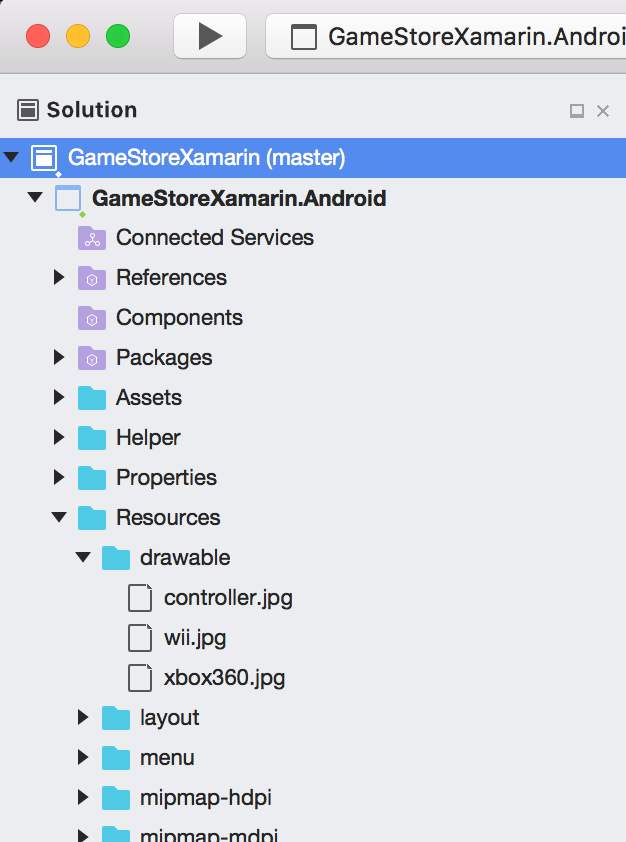
1.6 Importing Images
Add three images to Resources->drawable folder. These images are used as product’s photo.
1.7 Dummy Data
Create three products with images in drawable folder. If there is no data in SQLite database, call this method get initial products.
private void CreateDummyData()
{
    Product product = new Product();
    product.ProductName = "xbox360";
    product.Price = 299.00;
    product.Image = ImageHelper.BitmapToBytes(BitmapFactory.DecodeResource(Resources, Resource.Drawable.xbox360));
    DatabaseHelper.Database.SaveProduct(product);

    product = new Product();
    product.ProductName = "wii";
    product.Price = 269.00;
    product.Image = ImageHelper.BitmapToBytes(BitmapFactory.DecodeResource(Resources, Resource.Drawable.wii));
    DatabaseHelper.Database.SaveProduct(product);

    product = new Product();
    product.ProductName = "controller";
    product.Price = 19.99;
    product.Image = ImageHelper.BitmapToBytes(BitmapFactory.DecodeResource(Resources, Resource.Drawable.controller));
    DatabaseHelper.Database.SaveProduct(product);

    _productList = DatabaseHelper.Database.GetProducts();
}
2. Helper Classes
2.1 Location of Database File
Create a folder named ‘Helper’. And create a file named ‘FileHelper.cs’. Class FileHelper inherits the IFileHelper interface. Register implementation to DependencyService with a metadata attribute ‘[assembly: Dependency(xxx)]’.
using System;
using System.IO;
using GameStoreXamarin.Core;
using Xamarin.Forms;

[assembly: Dependency(typeof(GameStoreXamarin.Android.Helper.FileHelper))]
namespace GameStoreXamarin.Android.Helper
{
    public class FileHelper : IFileHelper
    {
        public string GetLocalFilePath(string filename)
        {
            string path = Environment.GetFolderPath(Environment.SpecialFolder.Personal);
            return Path.Combine(path, filename);
        }
    }
}
2.2 Image Handling
Create a file named ‘ImageHelper.cs’. Define two methods to convert Bitmap to byte array and vice versa.
using System;
using System.IO;
using Android.Graphics;

namespace GameStoreXamarin.Android.Helper
{
    public static class ImageHelper
    {
        /// Convert byte array to Bitmap
        public static Bitmap BytesToBitmap(byte[] imageBytes)
        {
            Bitmap bitmap = BitmapFactory.DecodeByteArray(imageBytes, 0, imageBytes.Length);
            return bitmap;
        }

        /// Convert Bitmap to byte array
        public static byte[] BitmapToBytes(Bitmap bitmap)
        {
            byte[] bitmapBytes;
            using (var stream = new MemoryStream())
            {
                bitmap.Compress(Bitmap.CompressFormat.Png, 0, stream);
                bitmapBytes = stream.ToArray();
            }
            return bitmapBytes;
        }
    }
}
3. Product List
3.1 Loading Screen
In ‘ProductListActivity.cs’, override ‘OnCreate()’ method, use ‘ProductList’ layout as content view. And display products to the list view.
protected override void OnCreate(Bundle savedInstanceState)
{
    base.OnCreate(savedInstanceState);
    Xamarin.Forms.Forms.Init(this, savedInstanceState);
    SetContentView(Resource.Layout.ProductList);

    mMode = ListViewMode.Display;
    mListView = (ListView)FindViewById(Resource.Id.list_product);

    updateUI();
}
3.2 Menu
Create a folder named ‘menu’ under Resources. Right click on Resources->menu, Add->New File. Select XML->Empty XML File, set name to ‘list_menu’.
<?xml version="1.0" encoding="utf-8"?>
<menu xmlns:android="http://schemas.android.com/apk/res/android"
    xmlns:app="http://schemas.android.com/apk/res-auto">
    <item
        android:id="@+id/action_addproduct"
        android:title="@string/menu_add"
        android:showAsAction="always" />
    <item
        android:id="@+id/action_editproduct"
        android:title="@string/menu_edit"
        android:showAsAction="always" />
</menu>
Create another menu named ‘edit_menu’. Edit menu items are displayed when list view is switched to Edit mode.
<?xml version="1.0" encoding="utf-8"?>
<menu xmlns:android="http://schemas.android.com/apk/res/android"
    xmlns:app="http://schemas.android.com/apk/res-auto">
    <item
        android:id="@+id/action_delete"
        android:title="@string/menu_delete"
        android:showAsAction="always" />
    <item
        android:id="@+id/action_cancel"
        android:title="@string/menu_back"
        android:showAsAction="always" />
</menu>
In ‘ProductListActivity.cs’, override method ‘OnCreateOptionsMenu()’ to display menu according to the view mode, either ‘Display’ or ‘Edit’.
public override Boolean OnCreateOptionsMenu(IMenu menu)
{
    if (mMode == ListViewMode.Display)
    {
        MenuInflater.Inflate(Resource.Menu.list_menu, menu);
        return base.OnCreateOptionsMenu(menu);
    }
    else
    {
        MenuInflater.Inflate(Resource.Menu.edit_menu, menu);
        return base.OnCreateOptionsMenu(menu);
    }
}
Override ‘OnOptionsItemSelected()’ method to take proper actions when menu items are clicked.
public override Boolean OnOptionsItemSelected(IMenuItem item)
{
    switch (item.ItemId)
    {
        case Resource.Id.action_addproduct:
            Log.Debug(TAG, "Add a new product");
            var intent = new Intent(this, typeof(ProductDetailActivity));
            intent.PutExtra(GameStoreConstants.ParamAction, GameStoreConstants.ParamActionAdd);
            this.StartActivity(intent);
            return true;
        case Resource.Id.action_editproduct:
            Log.Debug(TAG, "Switch to Edit mode");
            mMode = ListViewMode.Edit;
            updateUI();
            return true;
        case Resource.Id.action_delete:
            Log.Debug(TAG, "Delete selected products");
            if (DeleteSelectedItems() == false) {
                Toast.MakeText(this, "Select at least one item to delete", ToastLength.Long).Show();
                return false;
            }
            mMode = ListViewMode.Display;
            updateUI();
            return true;
        case Resource.Id.action_cancel:
            Log.Debug(TAG, "Cancel edit");
            mMode = ListViewMode.Display;
            updateUI();
            return true;
        default:
            return base.OnOptionsItemSelected(item);
    }
}
3.4 Customized Adapter
Create customized adapter with ViewHolder for the list view to show products.
// Product Adapter
public class ProductAdapter : BaseAdapter
{
    private Context context;
    private int resource;
    private List<Product> productList;
    private ListViewMode mode;
    private LayoutInflater inflater;

    public ProductAdapter(Context context, int resource, List<Product> productList, ListViewMode mode)
    {
        this.context = context;
        this.resource = resource;
        this.productList = productList;
        this.mode = mode;
        this.inflater = (LayoutInflater)context.GetSystemService(Context.LayoutInflaterService);
    }

    public override int Count
    {
        get { return productList.Count; }
    }

    public override Java.Lang.Object GetItem (int position)
    {
        return null;
        //return productList[position];
    }

    public override long GetItemId (int position)
    {
        return productList[position].ProductId;
    }

    public override View GetView(int position, View convertView, ViewGroup parent)
    {
        ViewHolder holder;
        View row = convertView;
        if (row == null)
        {
            row = inflater.Inflate(this.resource, parent, false);
            holder = new ViewHolder();
            holder.ProductName = (TextView)row.FindViewById(Resource.Id.productname);
            holder.Price = (TextView)row.FindViewById(Resource.Id.price);
            holder.Image = (ImageView)row.FindViewById(Resource.Id.image);
            holder.Selected = (CheckBox)row.FindViewById(Resource.Id.checkbox);
            row.Tag = holder;
        }
        else
        {
            holder = (ViewHolder)row.Tag;
        }

        Product product = productList[position];
        holder.ID = product.ProductId;
        holder.ProductName.Text = product.ProductName;
        holder.Price.Text = "$" + Convert.ToString(product.Price);
        holder.Image.SetImageBitmap(ImageHelper.BytesToBitmap(product.Image));
        if (mode == ListViewMode.Display)
        {
            holder.Selected.Visibility = ViewStates.Gone;
        }
        else
        {
            holder.Selected.Visibility = ViewStates.Visible;
        }
        row.SetOnClickListener(new ProductItemOnClickListener(context, product.ProductId));
        return row;
    }

    public class ViewHolder : Java.Lang.Object
    {
        public int ID { get; set; }
        public TextView ProductName { get; set; }
        public TextView Price { get; set; }
        public ImageView Image { get; set; }
        public CheckBox Selected { get; set; }
    }
}
3.5 Updating UI
Get data from SQLite database. Create dummy data if no entry exists in DB. Create ProductAdapter instance and assign it to list view to display products.
private void updateUI()
{
    _productList = DatabaseHelper.Database.GetProducts();
    if (_productList.Count == 0)
    {
        CreateDummyData();
    }

    mAdapter = new ProductAdapter(this, Resource.Layout.ProductListItem, _productList, mMode);
    mListView.Adapter = mAdapter;
    InvalidateOptionsMenu();
}
3.6 Navigating from List Screen to Detail Screen
Create a listener for row in the list view. Navigate user to the detail screen if he/she tap on the row.
class ProductItemOnClickListener : Java.Lang.Object, IOnClickListener
{
    private Context context;
    private int id;

    public ProductItemOnClickListener(Context context, int id)
    {
        this.context = context;
        this.id = id;
    }

    public void OnClick(View view)
    {
        var intent = new Intent(this.context, typeof(ProductDetailActivity));
        intent.PutExtra(GameStoreConstants.ParamAction, GameStoreConstants.ParamActionEdit);
        intent.PutExtra(GameStoreConstants.ParamId, id);
        this.context.StartActivity(intent);
    }
}
4. Product Detail
4.1 Menu
Create a menu named ‘detail_menu’ under Resources->menu folder. In the detail screen, there is a Save button on the menu bar.
<?xml version="1.0" encoding="utf-8"?>
<menu xmlns:android="http://schemas.android.com/apk/res/android"
    xmlns:app="http://schemas.android.com/apk/res-auto">
    <item
        android:id="@+id/action_save"
        android:title="@string/menu_save"
        android:showAsAction="always" />
</menu>
In ‘ProductDetailActivity.cs’, override method ‘OnCreateOptionsMenu()’ to display menu according to the view mode.
public override Boolean OnCreateOptionsMenu(IMenu menu)
{
    MenuInflater.Inflate(Resource.Menu.detail_menu, menu);
    return base.OnCreateOptionsMenu(menu);
}
4.2 Loading Screen
Override ‘OnCreate()’ method, use ‘ProductDetail’ layout as content view. Get product from SQLite database and assign its attributes to the textfield controls.
protected override void OnCreate(Bundle savedInstanceState)
{
    base.OnCreate(savedInstanceState);

    SetContentView(Resource.Layout.ProductDetail);

    Bundle extras = Intent.Extras;
    String actionText = extras.GetString(GameStoreConstants.ParamAction);

    EditText name = (EditText)FindViewById(Resource.Id.productname);
    EditText price = (EditText)FindViewById(Resource.Id.price);
    Button loadImage = (Button)FindViewById(Resource.Id.loadimage);
    ImageView image = (ImageView)FindViewById(Resource.Id.image);

    switch (actionText)
    {
        case GameStoreConstants.ParamActionAdd:
            mAction = DetailViewMode.Add;
            break;
        case GameStoreConstants.ParamActionEdit:
            mAction = DetailViewMode.Edit;
            break;
        default:
            break;
    }

    mProduct = new Product();
    if (mAction == DetailViewMode.Edit)
    {
        int id = extras.GetInt(GameStoreConstants.ParamId);
        mProduct = DatabaseHelper.Database.GetProduct(id);
        if (mProduct != null)
        {
            name.Text = mProduct.ProductName;
            price.Text = Convert.ToString(mProduct.Price);
            Bitmap bitmap = ImageHelper.BytesToBitmap(mProduct.Image);
            image.SetImageBitmap(bitmap);
            Drawable drawable = new BitmapDrawable(Resources, bitmap);
            loadImage.Background = drawable;
            loadImage.Text = "";
        }
    }
}
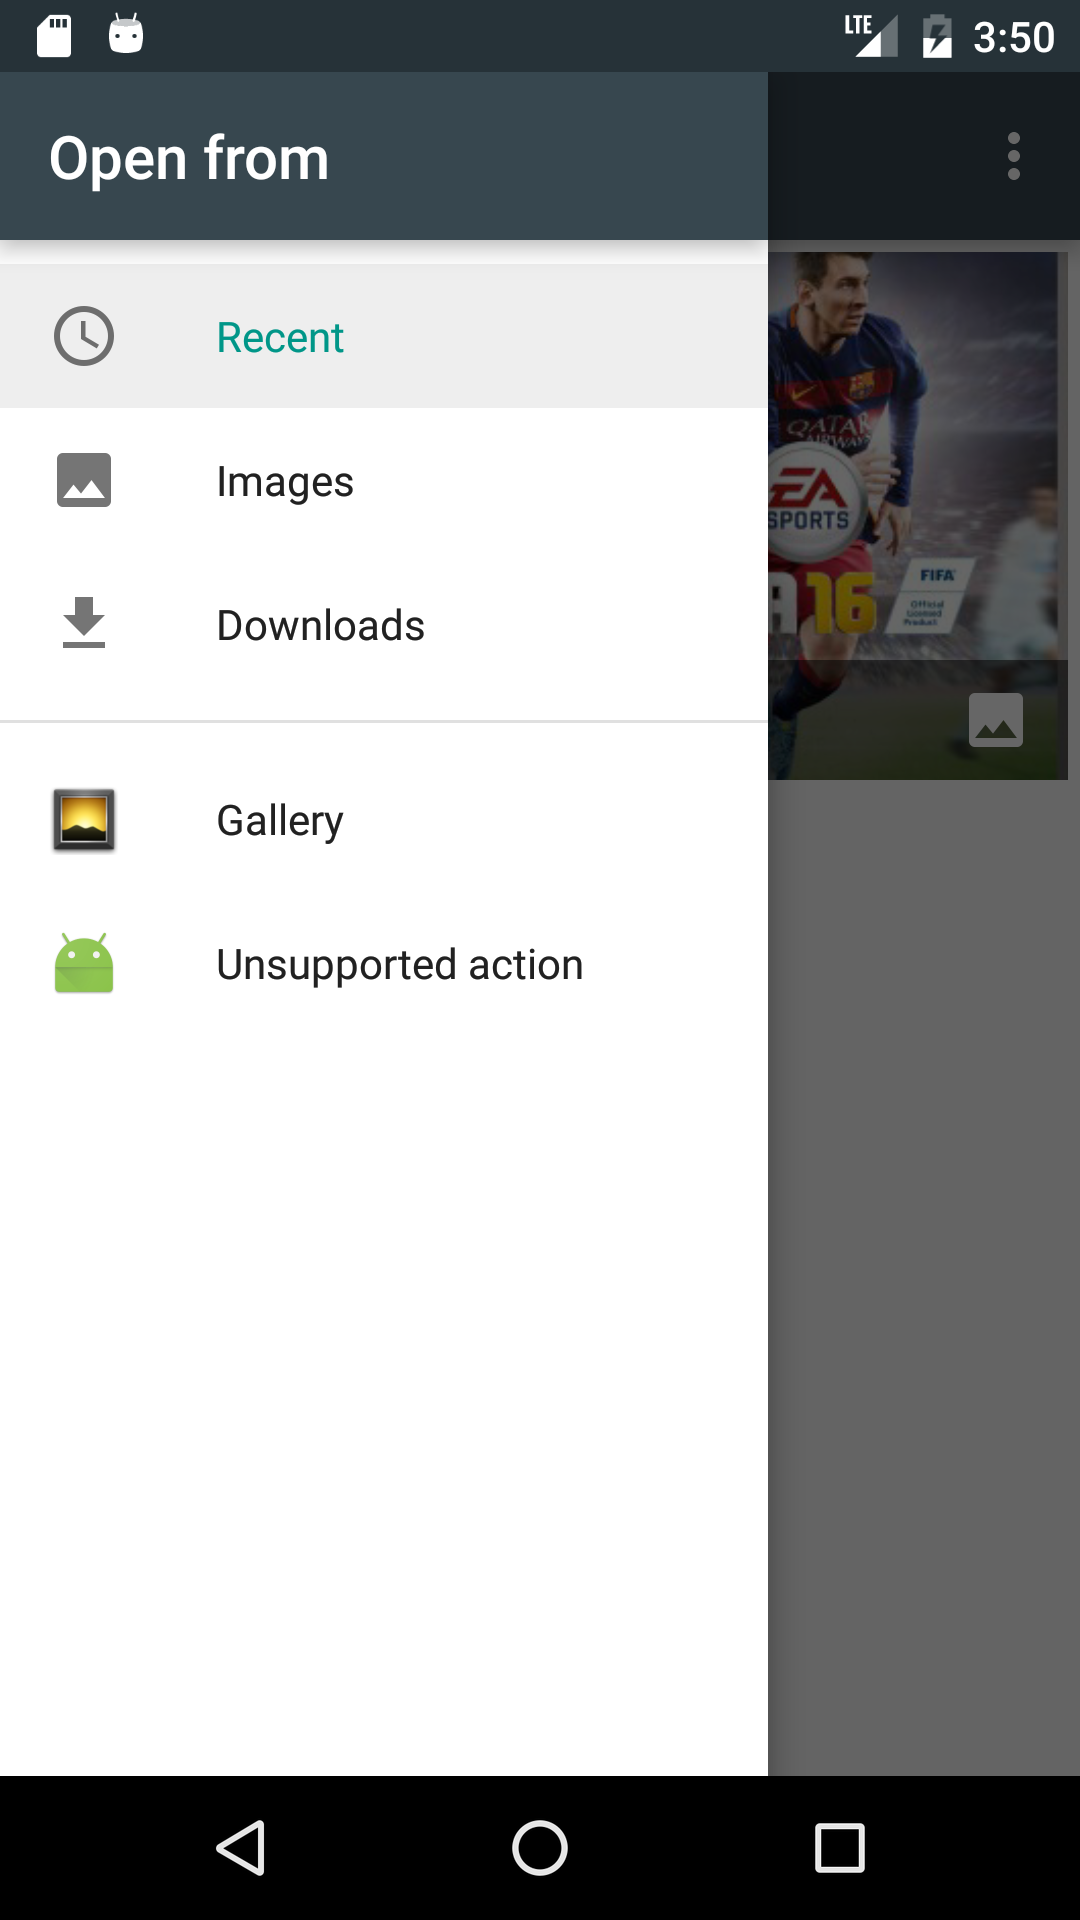
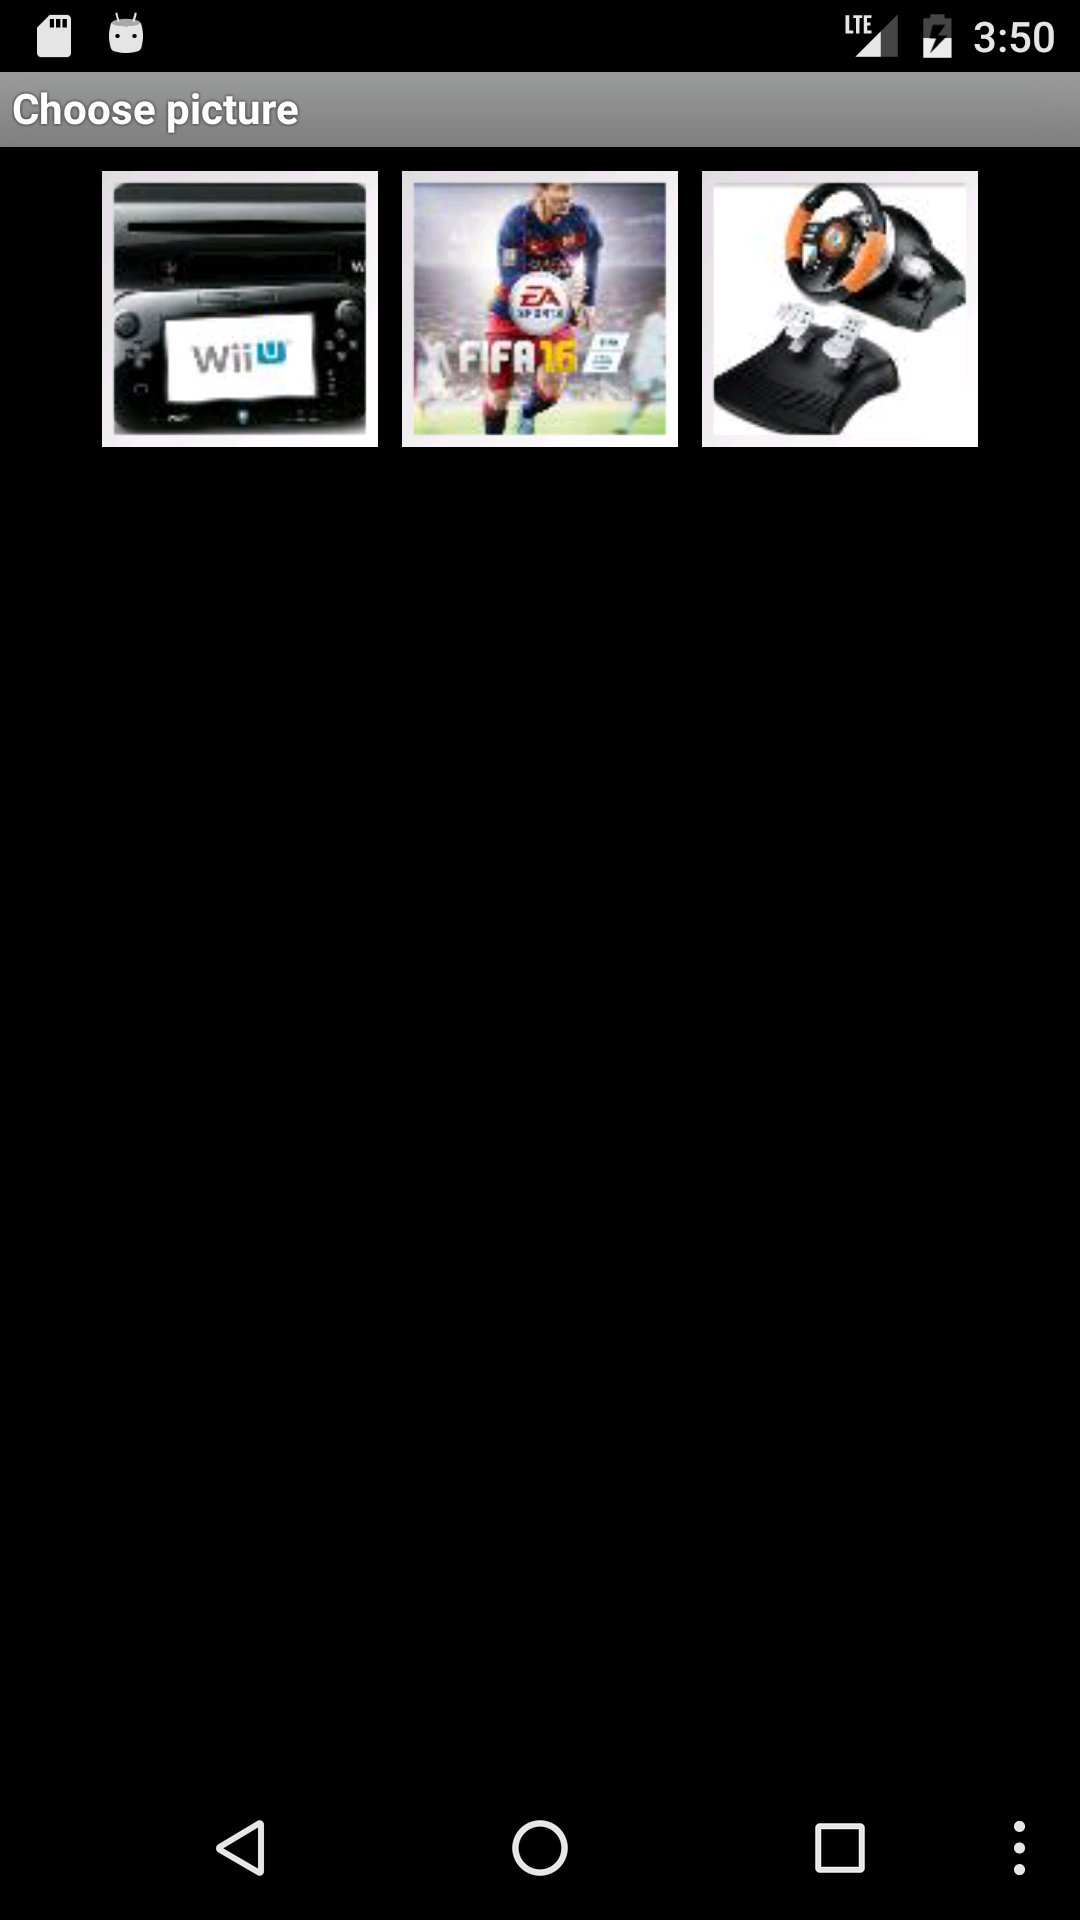
4.3 Loading Photo from Gallery
In the detail view, we need to enable user to select photos from gallery when he/she taps the button control(named ‘loadImage’). Use Intent to create photo chooser for the click event.
loadImage.Click += delegate
{
    var imageIntent = new Intent();
    imageIntent.SetType("image/*");
    imageIntent.SetAction(Intent.ActionGetContent);
    StartActivityForResult(
        Intent.CreateChooser(imageIntent, "Select photo"), 0);
};
In ‘ProductDetailActivity.cs’, override ‘OnActivityResult()’ method, load photo to image view controller and button as background.
protected override void OnActivityResult(int requestCode, Result resultCode, Intent data)
{
    base.OnActivityResult(requestCode, resultCode, data);

    if (resultCode == Result.Ok)
    {
        var imageView = FindViewById<ImageView>(Resource.Id.image);
        imageView.SetImageURI(data.Data);
        Button loadImage = (Button)FindViewById(Resource.Id.loadimage);
        loadImage.Background = imageView.Drawable;
        loadImage.Text = "";
    }
}
4.4 Navigation from Detail View to List View
In ‘ProductDetailActivity.cs’, override ‘OnOptionsItemSelected()’ method, save the change and navigate to list view.
public override Boolean OnOptionsItemSelected(IMenuItem item)
{
    EditText name1 = (EditText)FindViewById(Resource.Id.productname);
    EditText price1 = (EditText)FindViewById(Resource.Id.price);
    // dismiss soft keyboard
    InputMethodManager imm = (InputMethodManager)GetSystemService(Context.InputMethodService);
    imm.HideSoftInputFromWindow(name1.WindowToken, 0);
    imm.HideSoftInputFromWindow(price1.WindowToken, 0);

    switch (item.ItemId)
    {
        case Resource.Id.action_save:
            Log.Debug(TAG, "Save product");
            EditText name = (EditText)FindViewById(Resource.Id.productname);
            EditText price = (EditText)FindViewById(Resource.Id.price);
            Button loadImage = (Button)FindViewById(Resource.Id.loadimage);
            ImageView image = (ImageView)FindViewById(Resource.Id.image);

            String textName = name.Text;
            String textPrice = price.Text;
            Drawable drawable = image.Drawable;

            if (String.IsNullOrEmpty(textName))
            {
                Toast.MakeText(this, "Product Name is Empty", ToastLength.Long).Show();
                name.RequestFocus();
                return false;
            }
            if (String.IsNullOrEmpty(textPrice))
            {
                Toast.MakeText(this, "Price is Empty", ToastLength.Long).Show();
                price.RequestFocus();
                return false;
            }
            if (drawable == null)
            {
                Toast.MakeText(this, "Choose a image", ToastLength.Long).Show();
                loadImage.Focusable = true;
                loadImage.RequestFocus();
                return false;
            }

            mProduct.ProductName = textName;
            mProduct.Price = Convert.ToDouble(textPrice);
            mProduct.Image = ImageHelper.BitmapToBytes(((BitmapDrawable)drawable).Bitmap);
            DatabaseHelper.Database.SaveProduct(mProduct);

            var intent = new Intent(this, typeof(ProductListActivity));
            this.StartActivity(intent);

            return true;
        default:
            return base.OnOptionsItemSelected(item);
    }
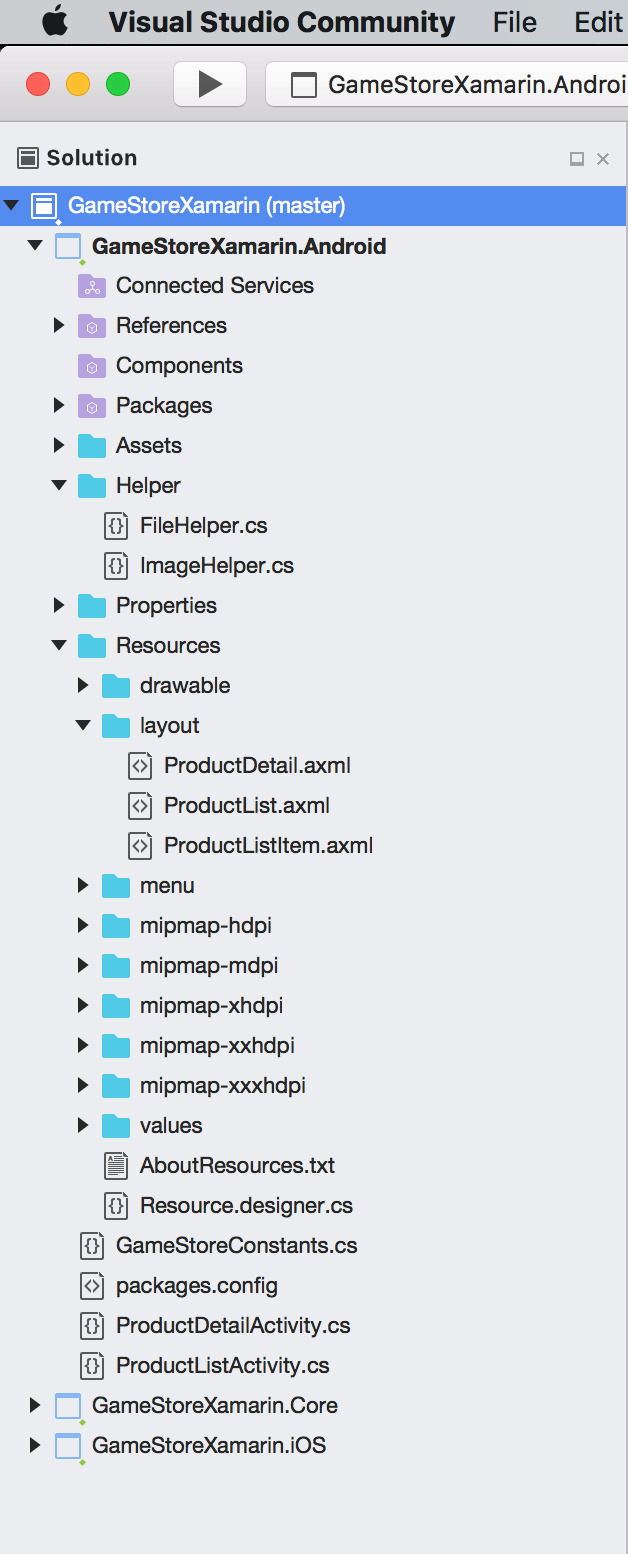
4.5 Final Project Structure
The final structure of the portable project.
5. Testing
In Visual Studio, click the arrow button(or Run->Start Without Debugging) to run the app in Android Emulator.
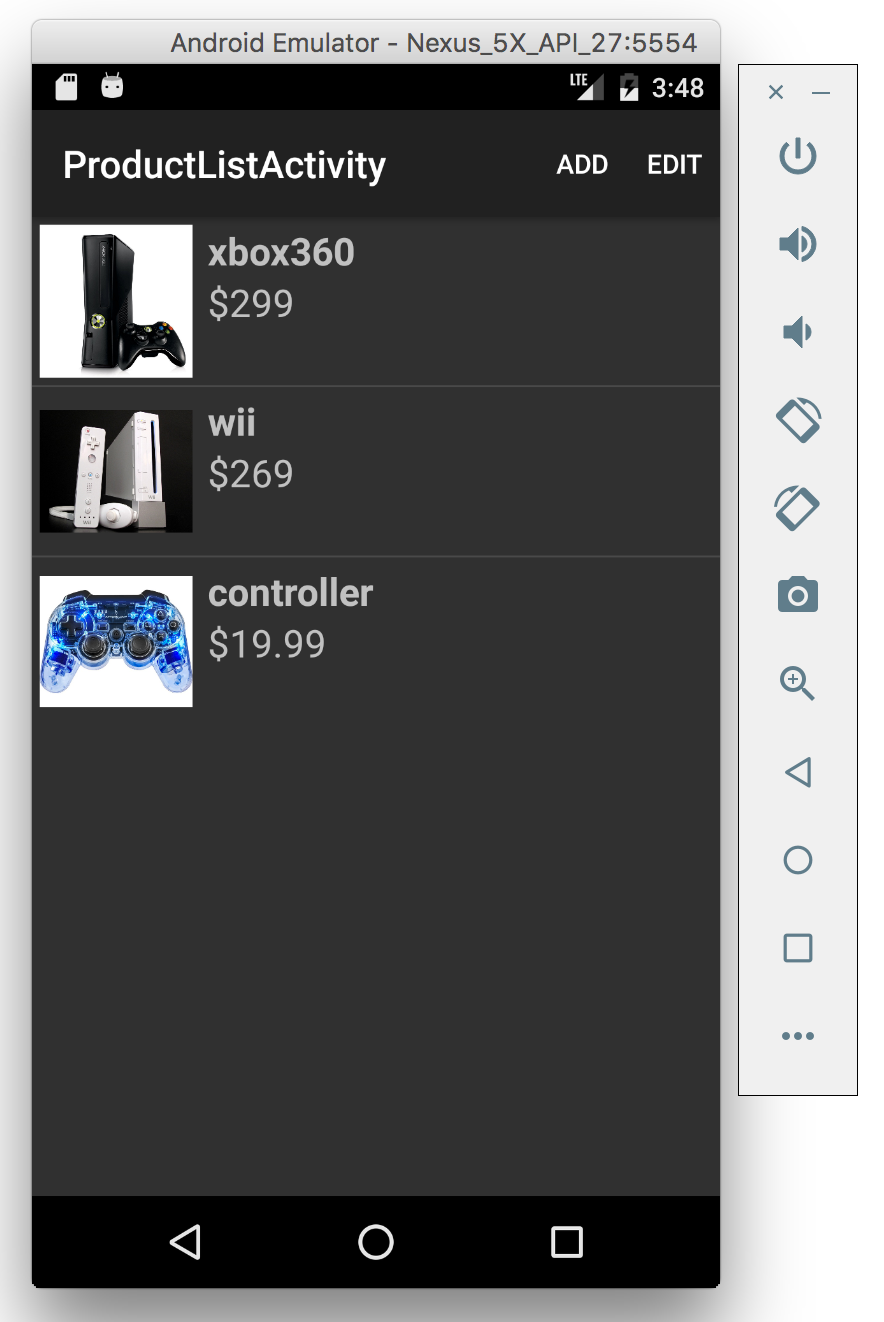
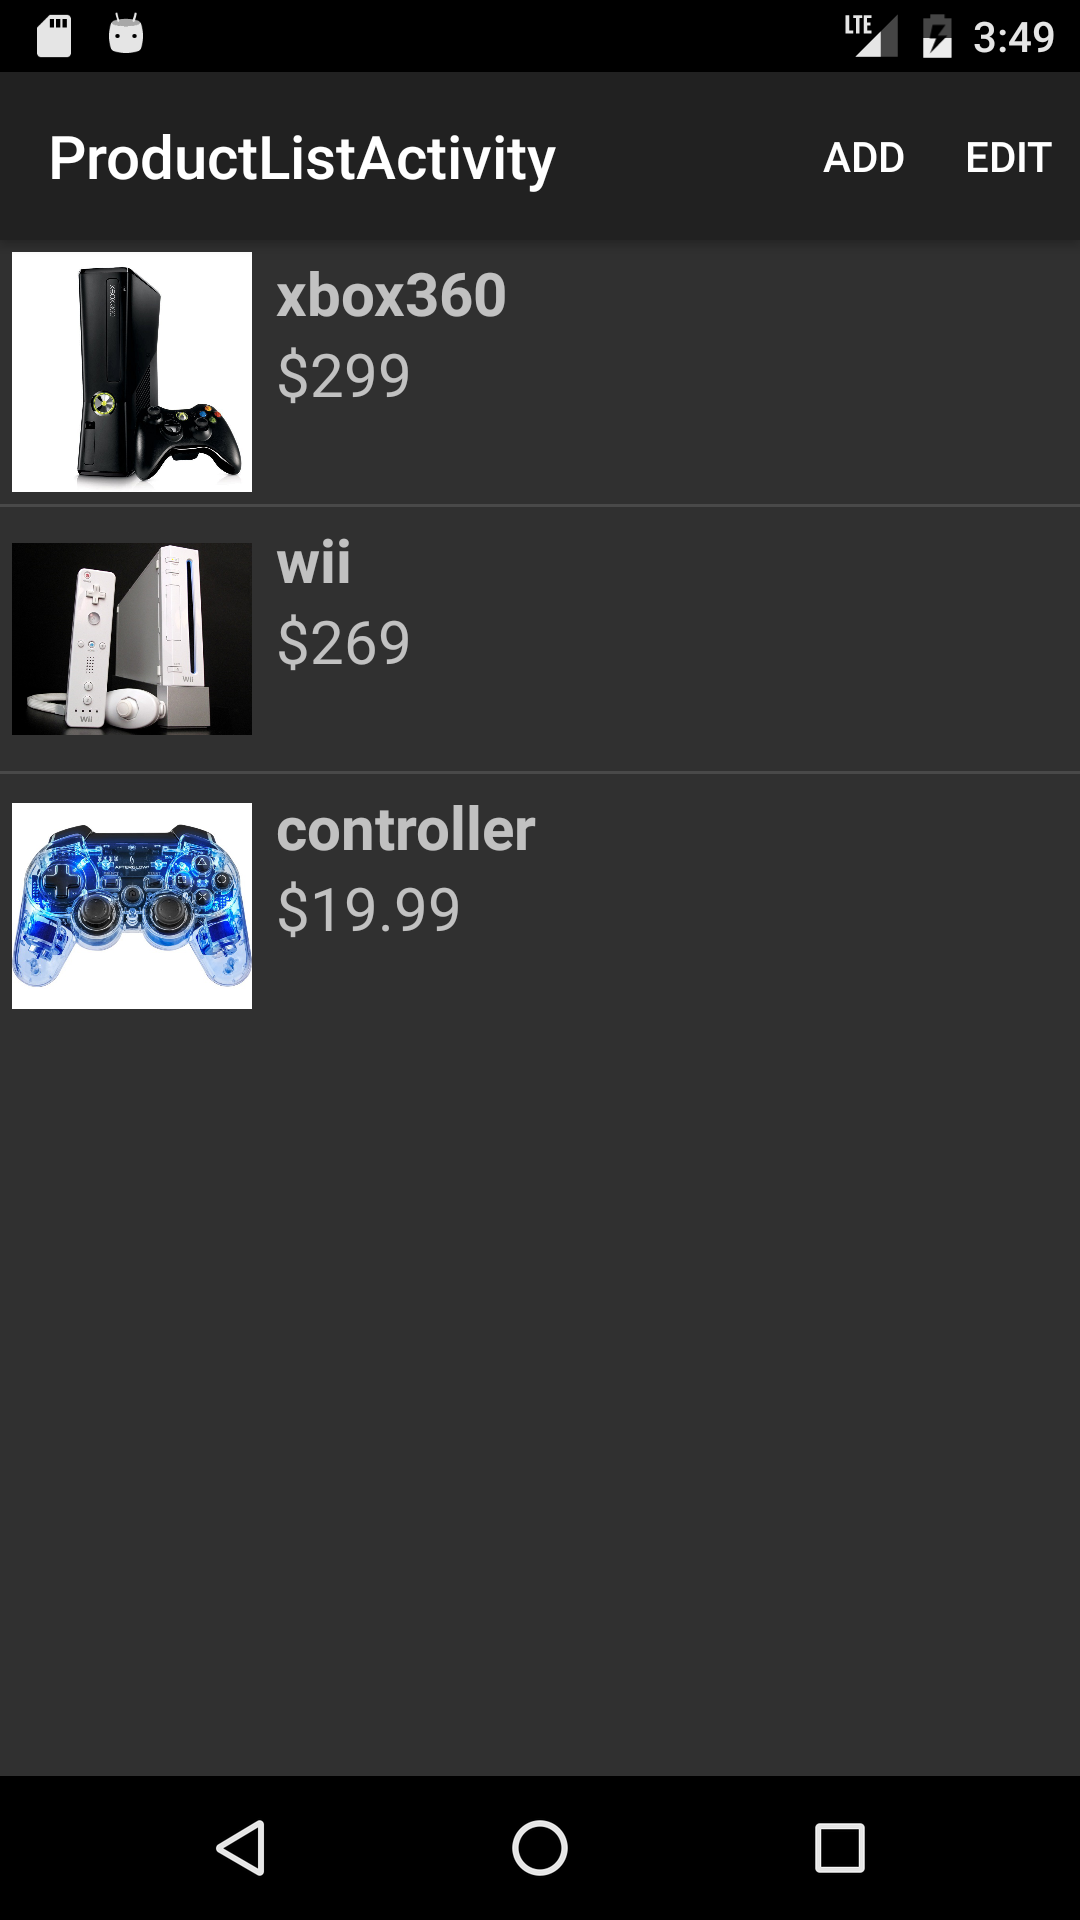
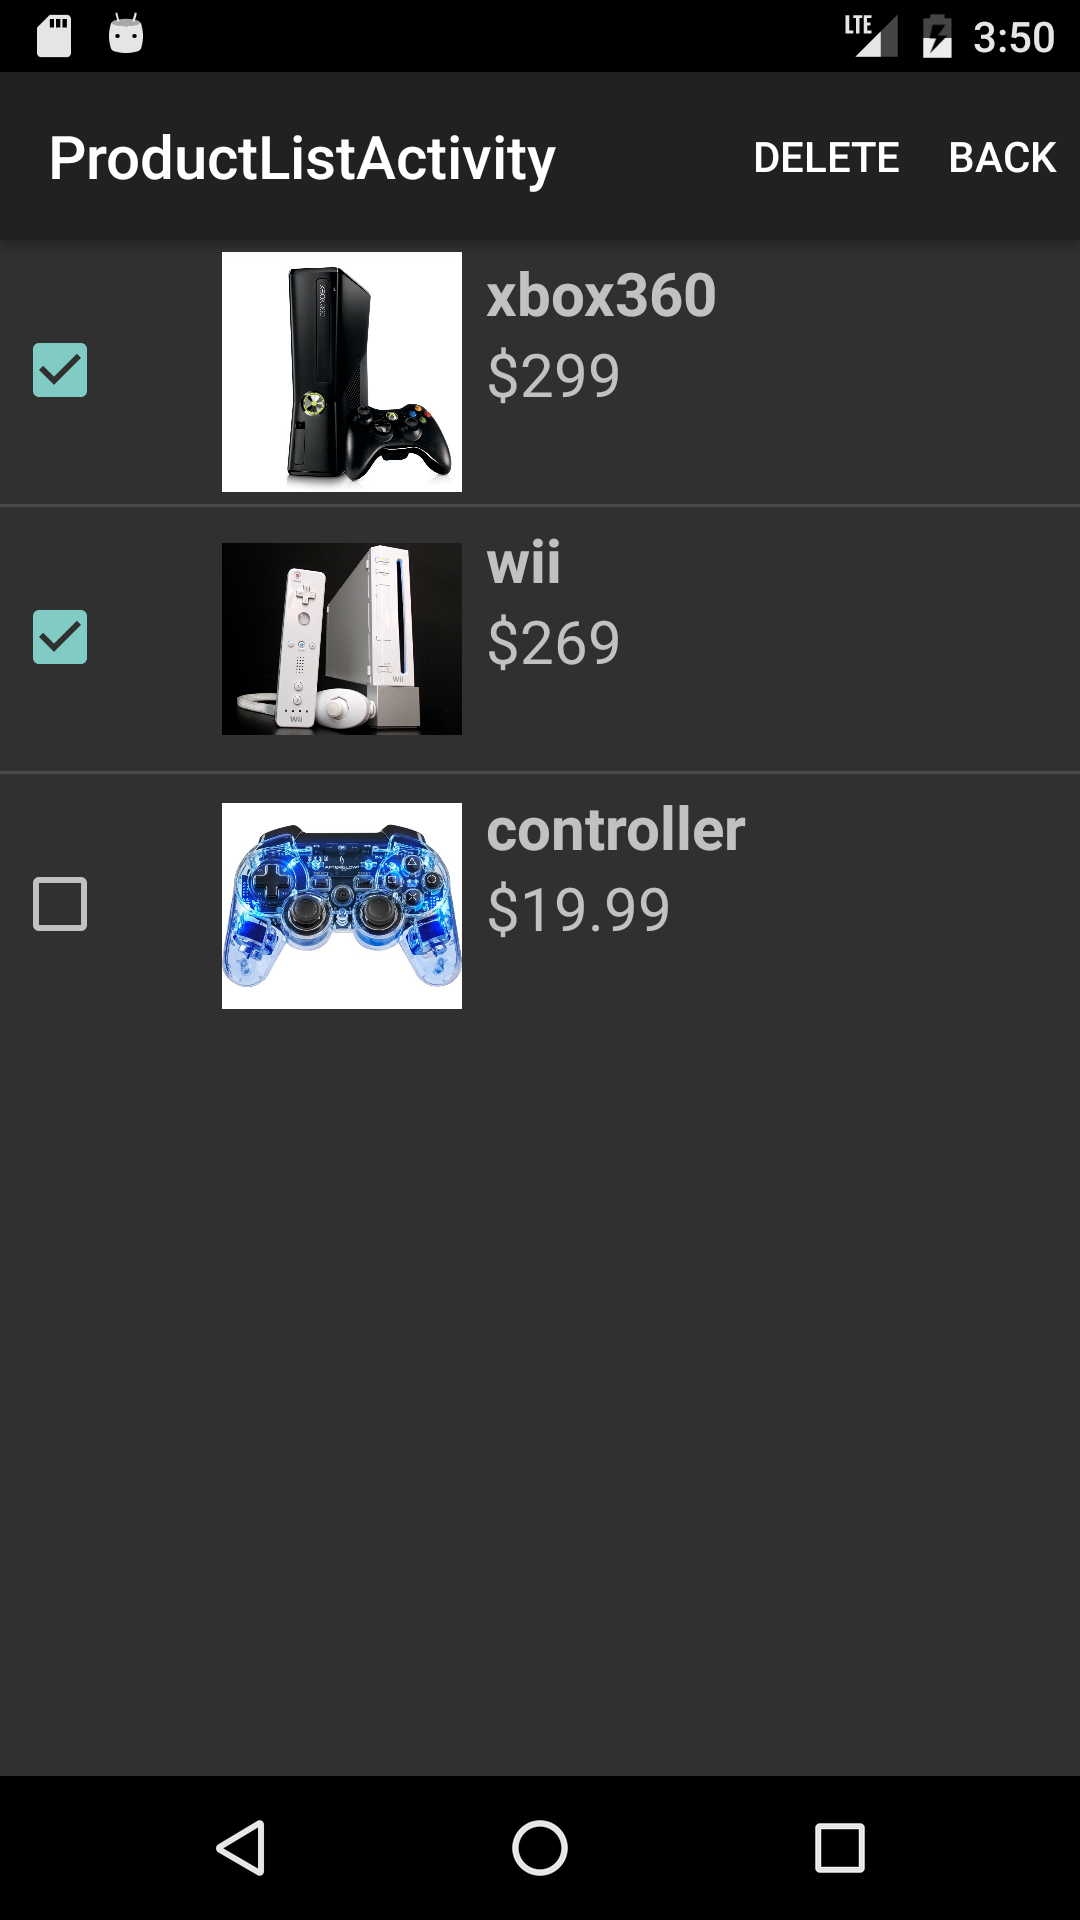
Product list.
Edit product.
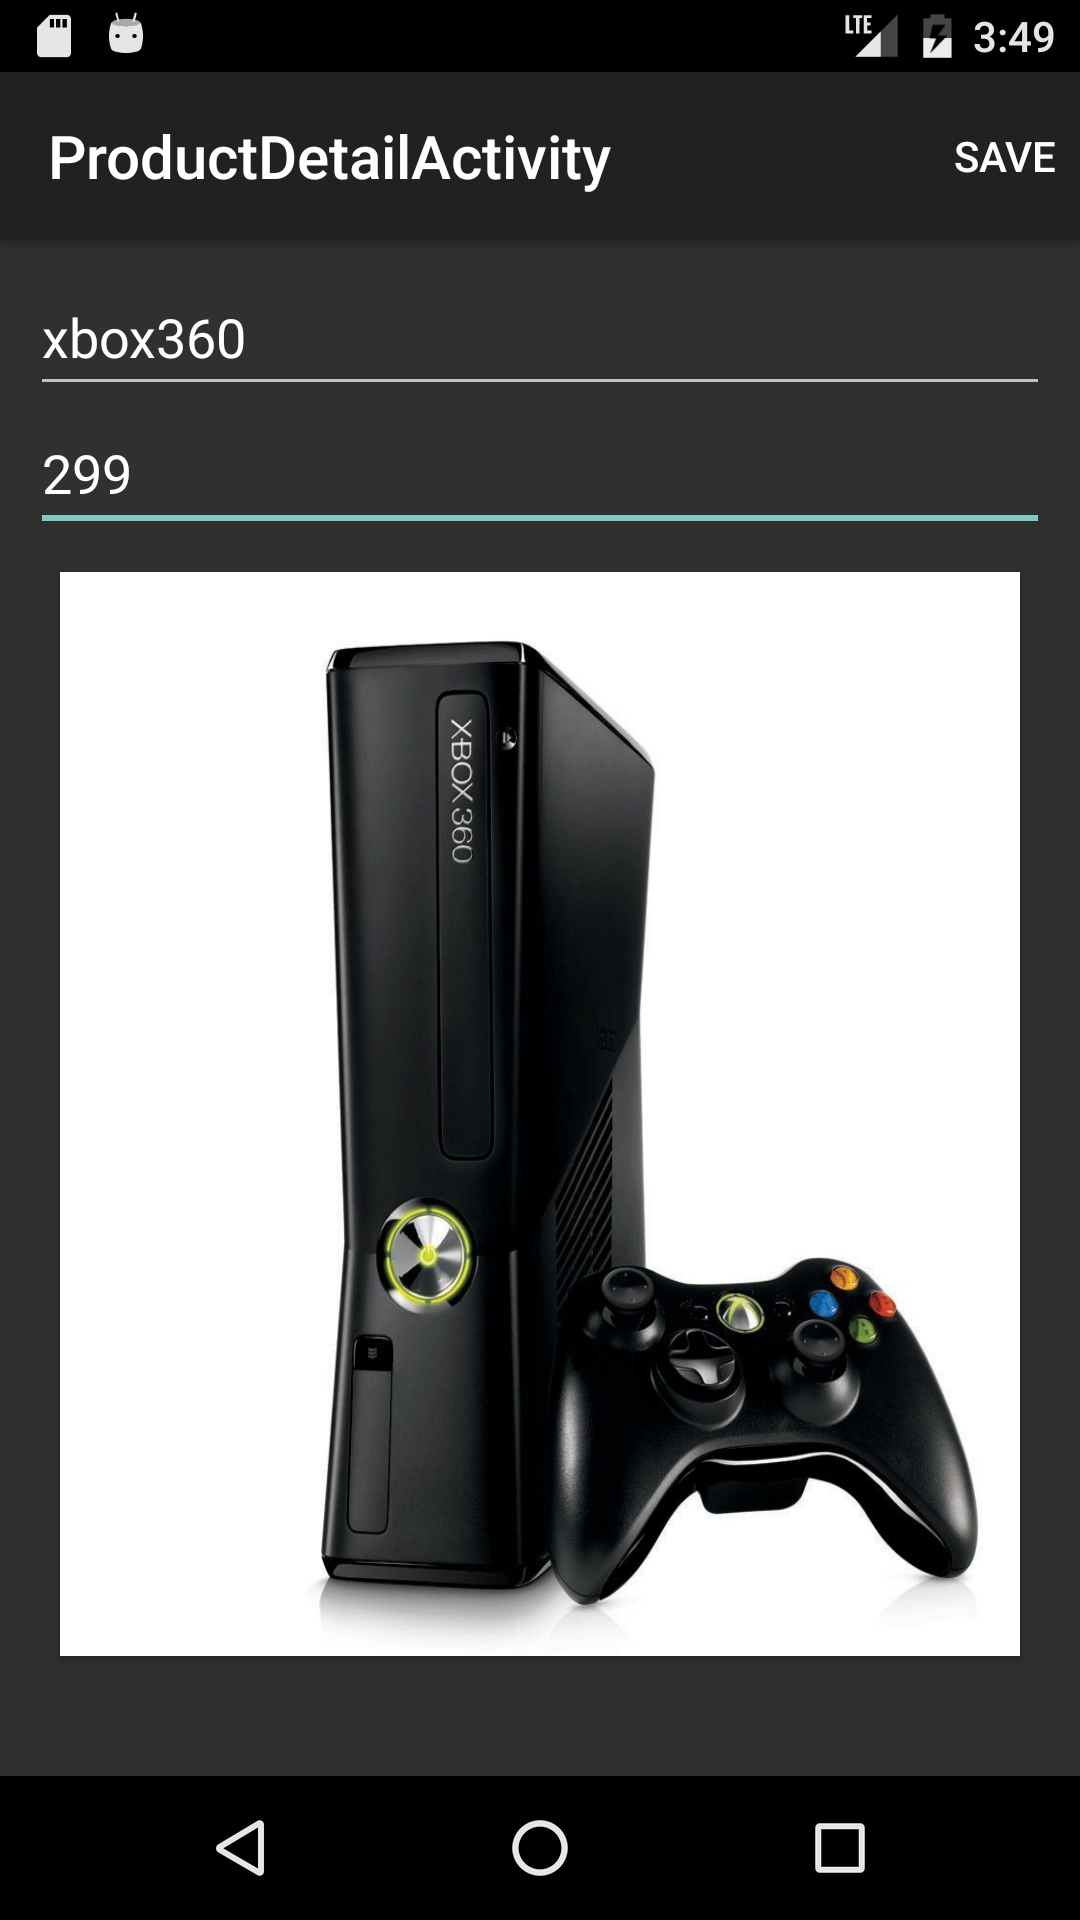
Select photo.
Delete product.
In landscape view.