8511. Building iOS App with XcodeiOS, Swift, and Xcode
Tutorial for how to develop iOS App with Xcode on Mac.
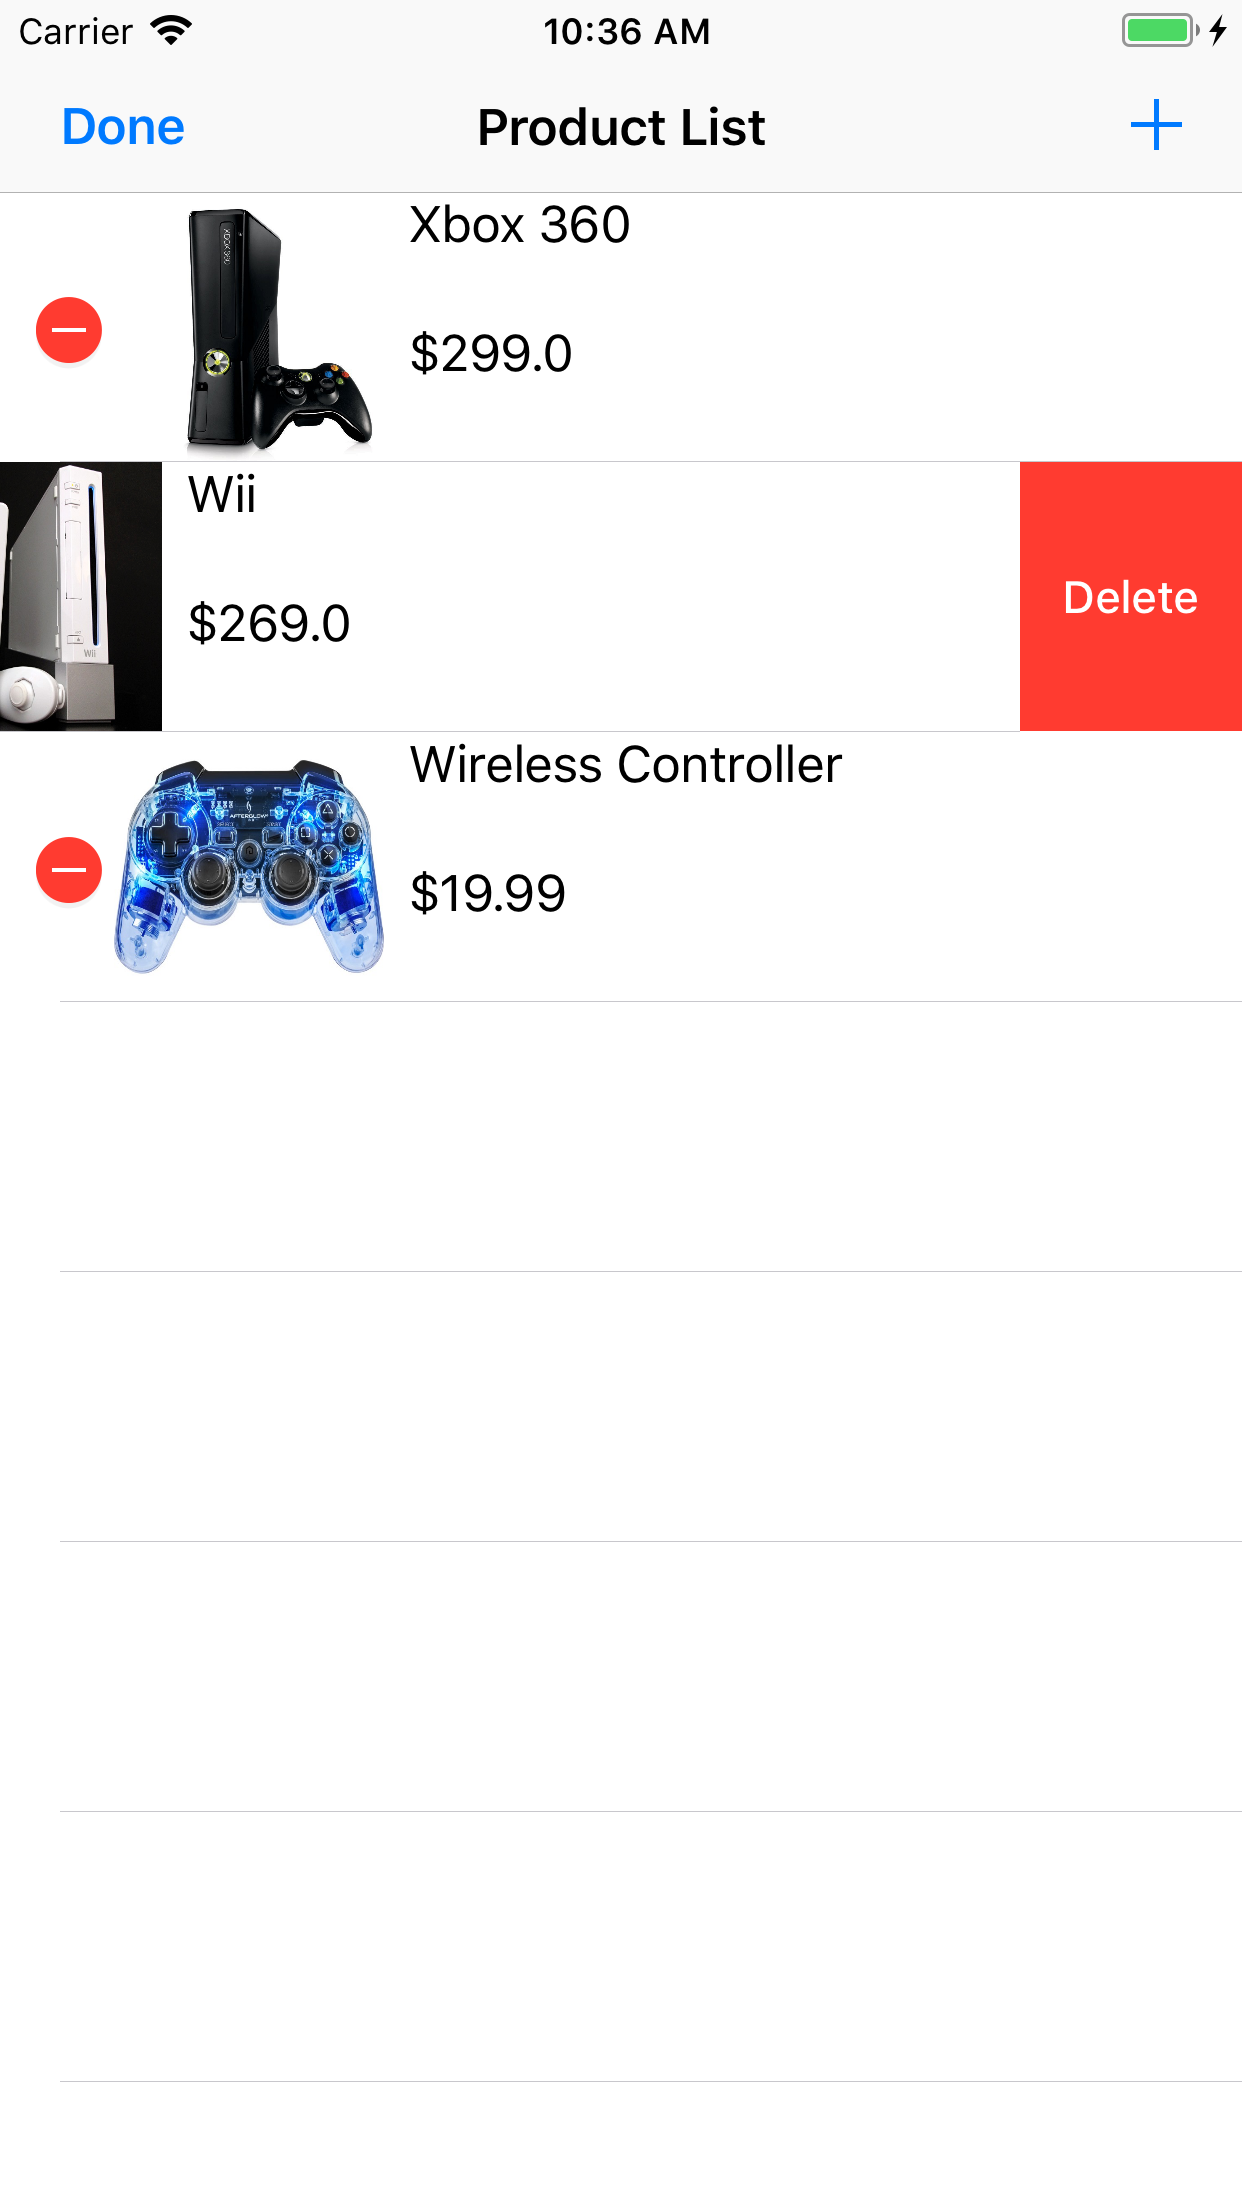
Build a simple product management app called GameStore. This app shows a list of products, including a product name, price, and photo. User can add, remove, or edit a product. To add a new product or edit an existing one, users navigate to a different screen where they can specify a name, price, and photo for a particular product.
1. Prerequisite
1.1 Xcode Installed
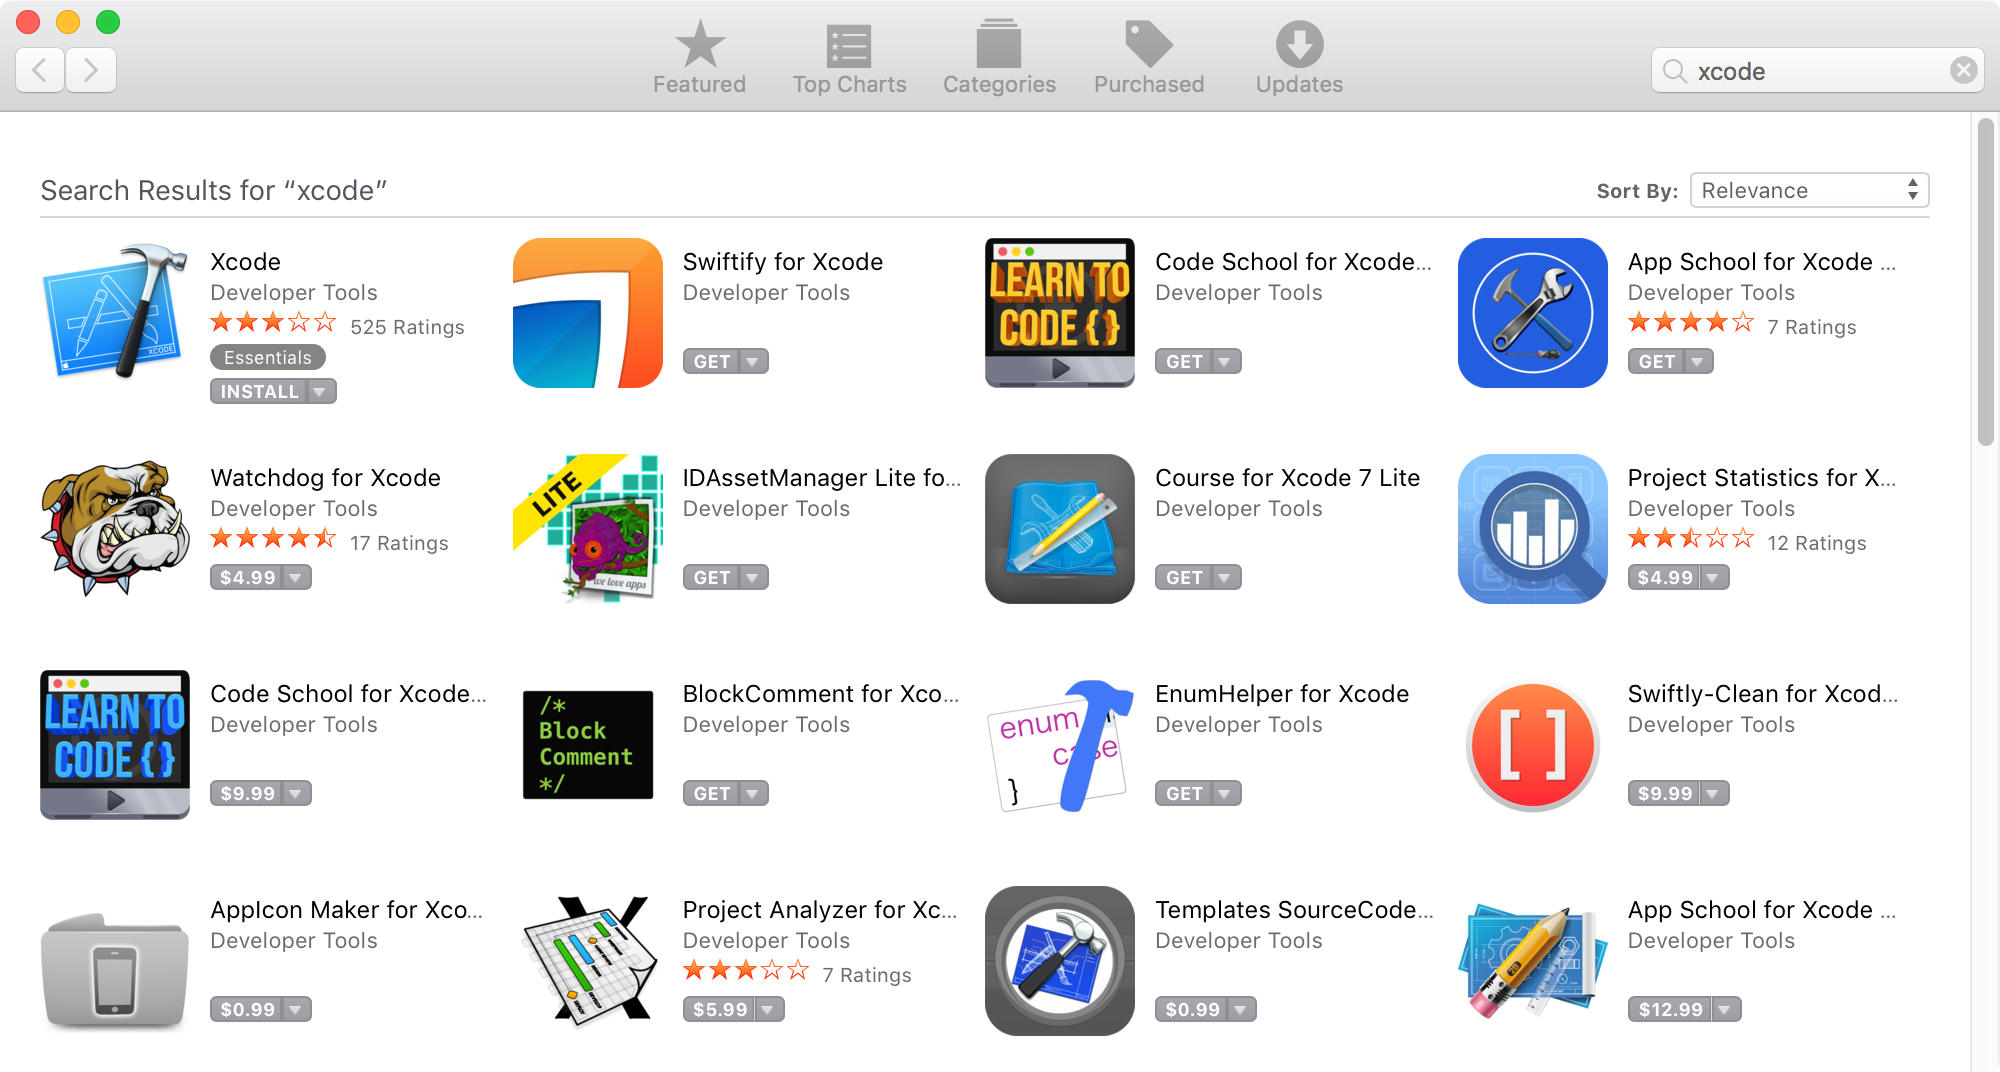
Xcode includes all the features you need to design, develop, and debug an app. It also contains the iOS SDK, which extends Xcode to include the tools, compilers, and frameworks you need specifically for iOS development. Go to App Store, search ‘xcode’, install.
1.2 iOS Simulator Installed
iOS simulator will be installed along with Xcode.
1.3 Knowledge of Swift
Go to The Swift Programming Language (Swift 4) to learn the basic concepts of Swift.
2. Creating New Project
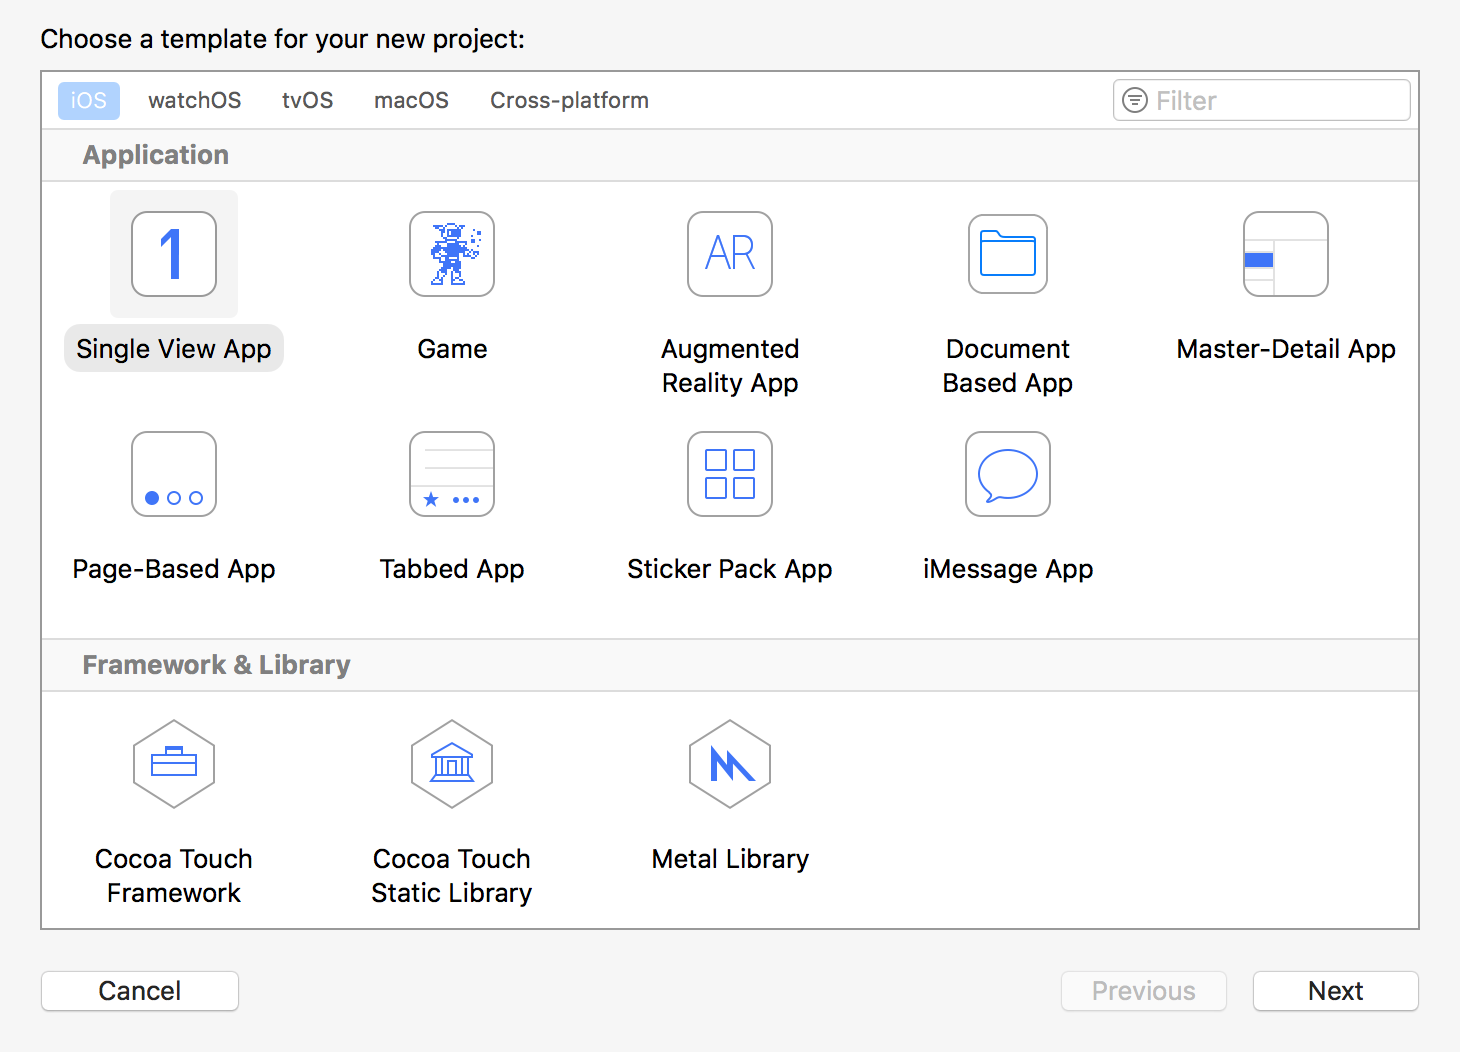
1) In Xcode, File->New-Project…, select 'Single View App' and click ‘Next’.
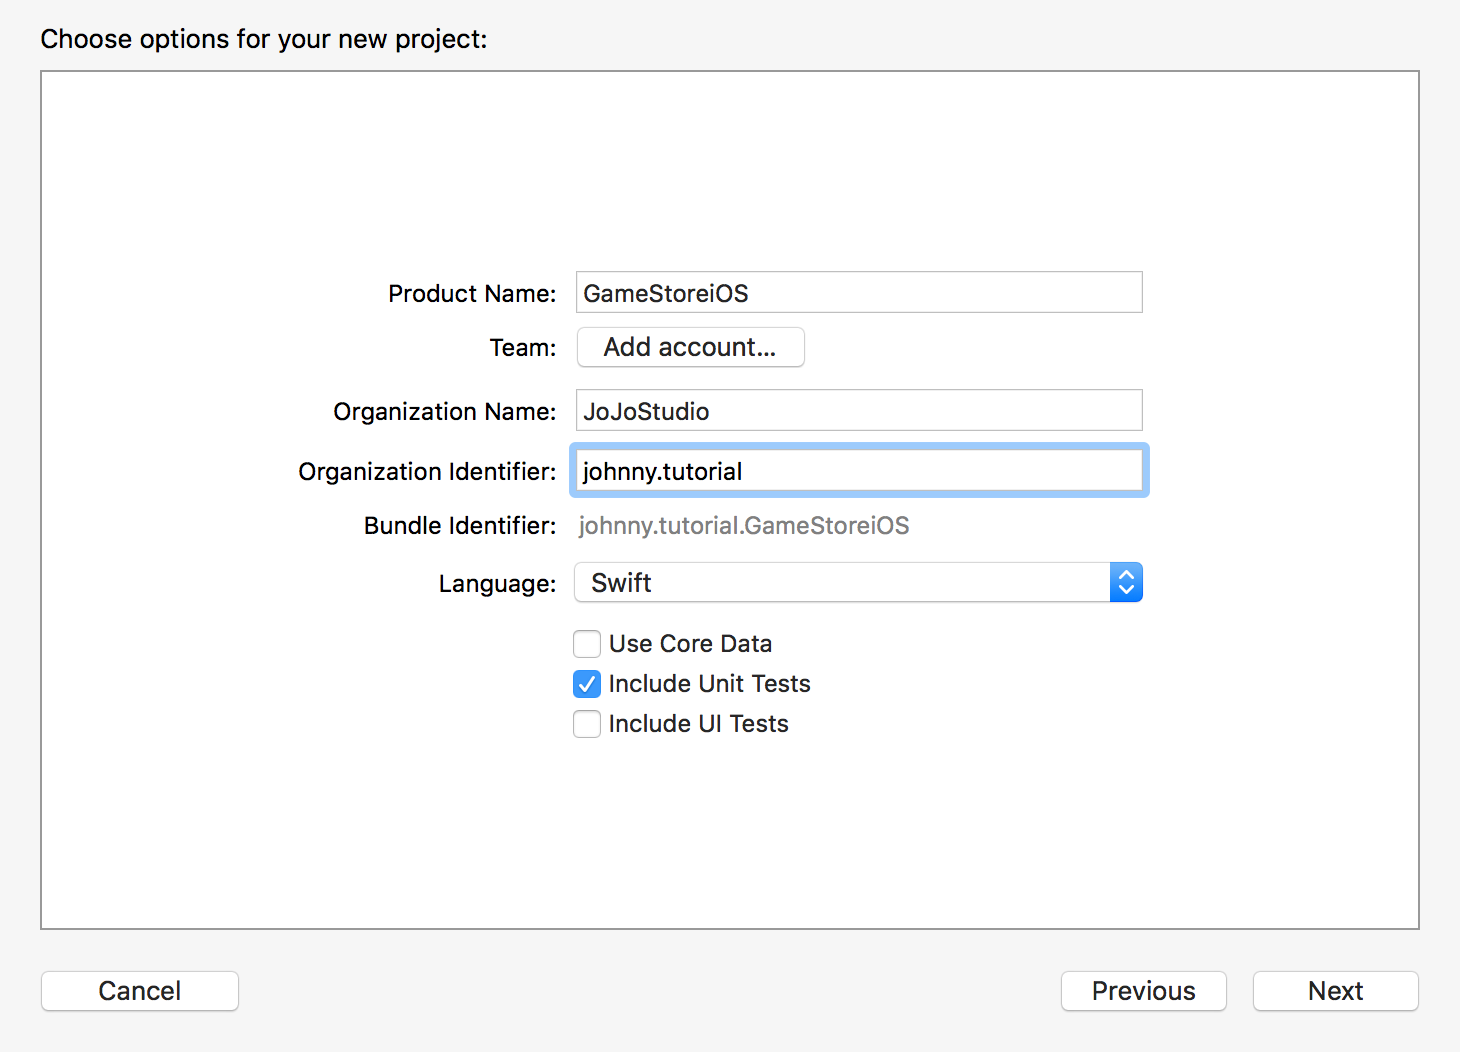
2) In the dialog that appears, use the following values to name your app and choose additional options for your project, click ‘Next’.
- Product Name: GameStoreiOS
- Team: None
- Organization Name: JoJoStudio
- Organization Identifier: johnny.tutorial
- Language: Swift
- Include Unit Tests: Selected.
3) In the next dialog, select a location to save your project and click Create. Xcode opens the new project in the workspace window.

3. UI Design
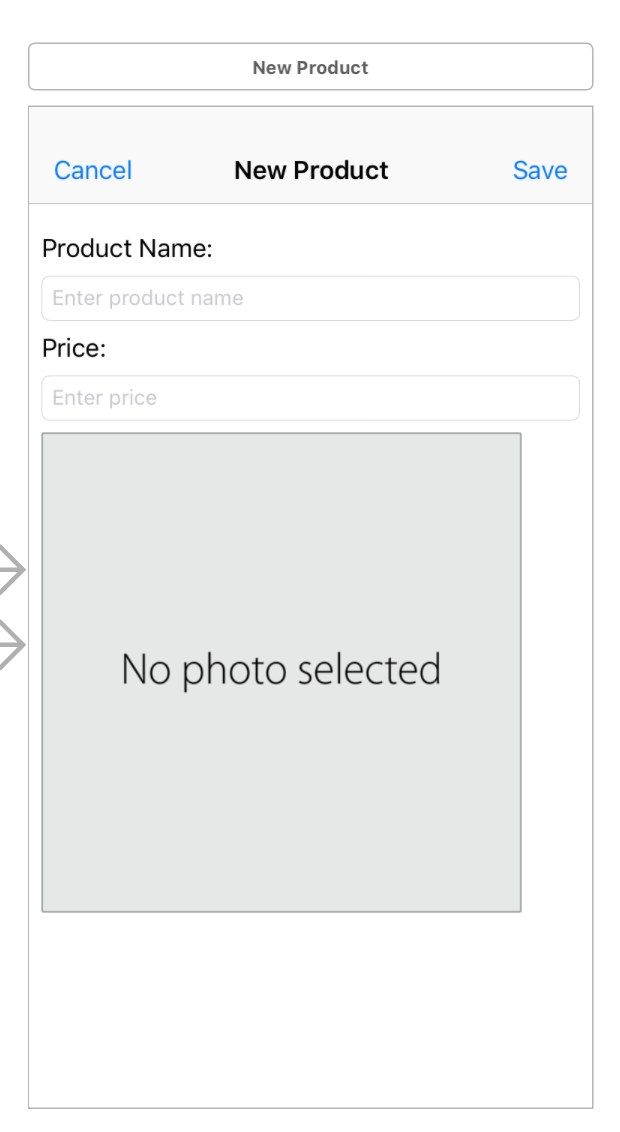
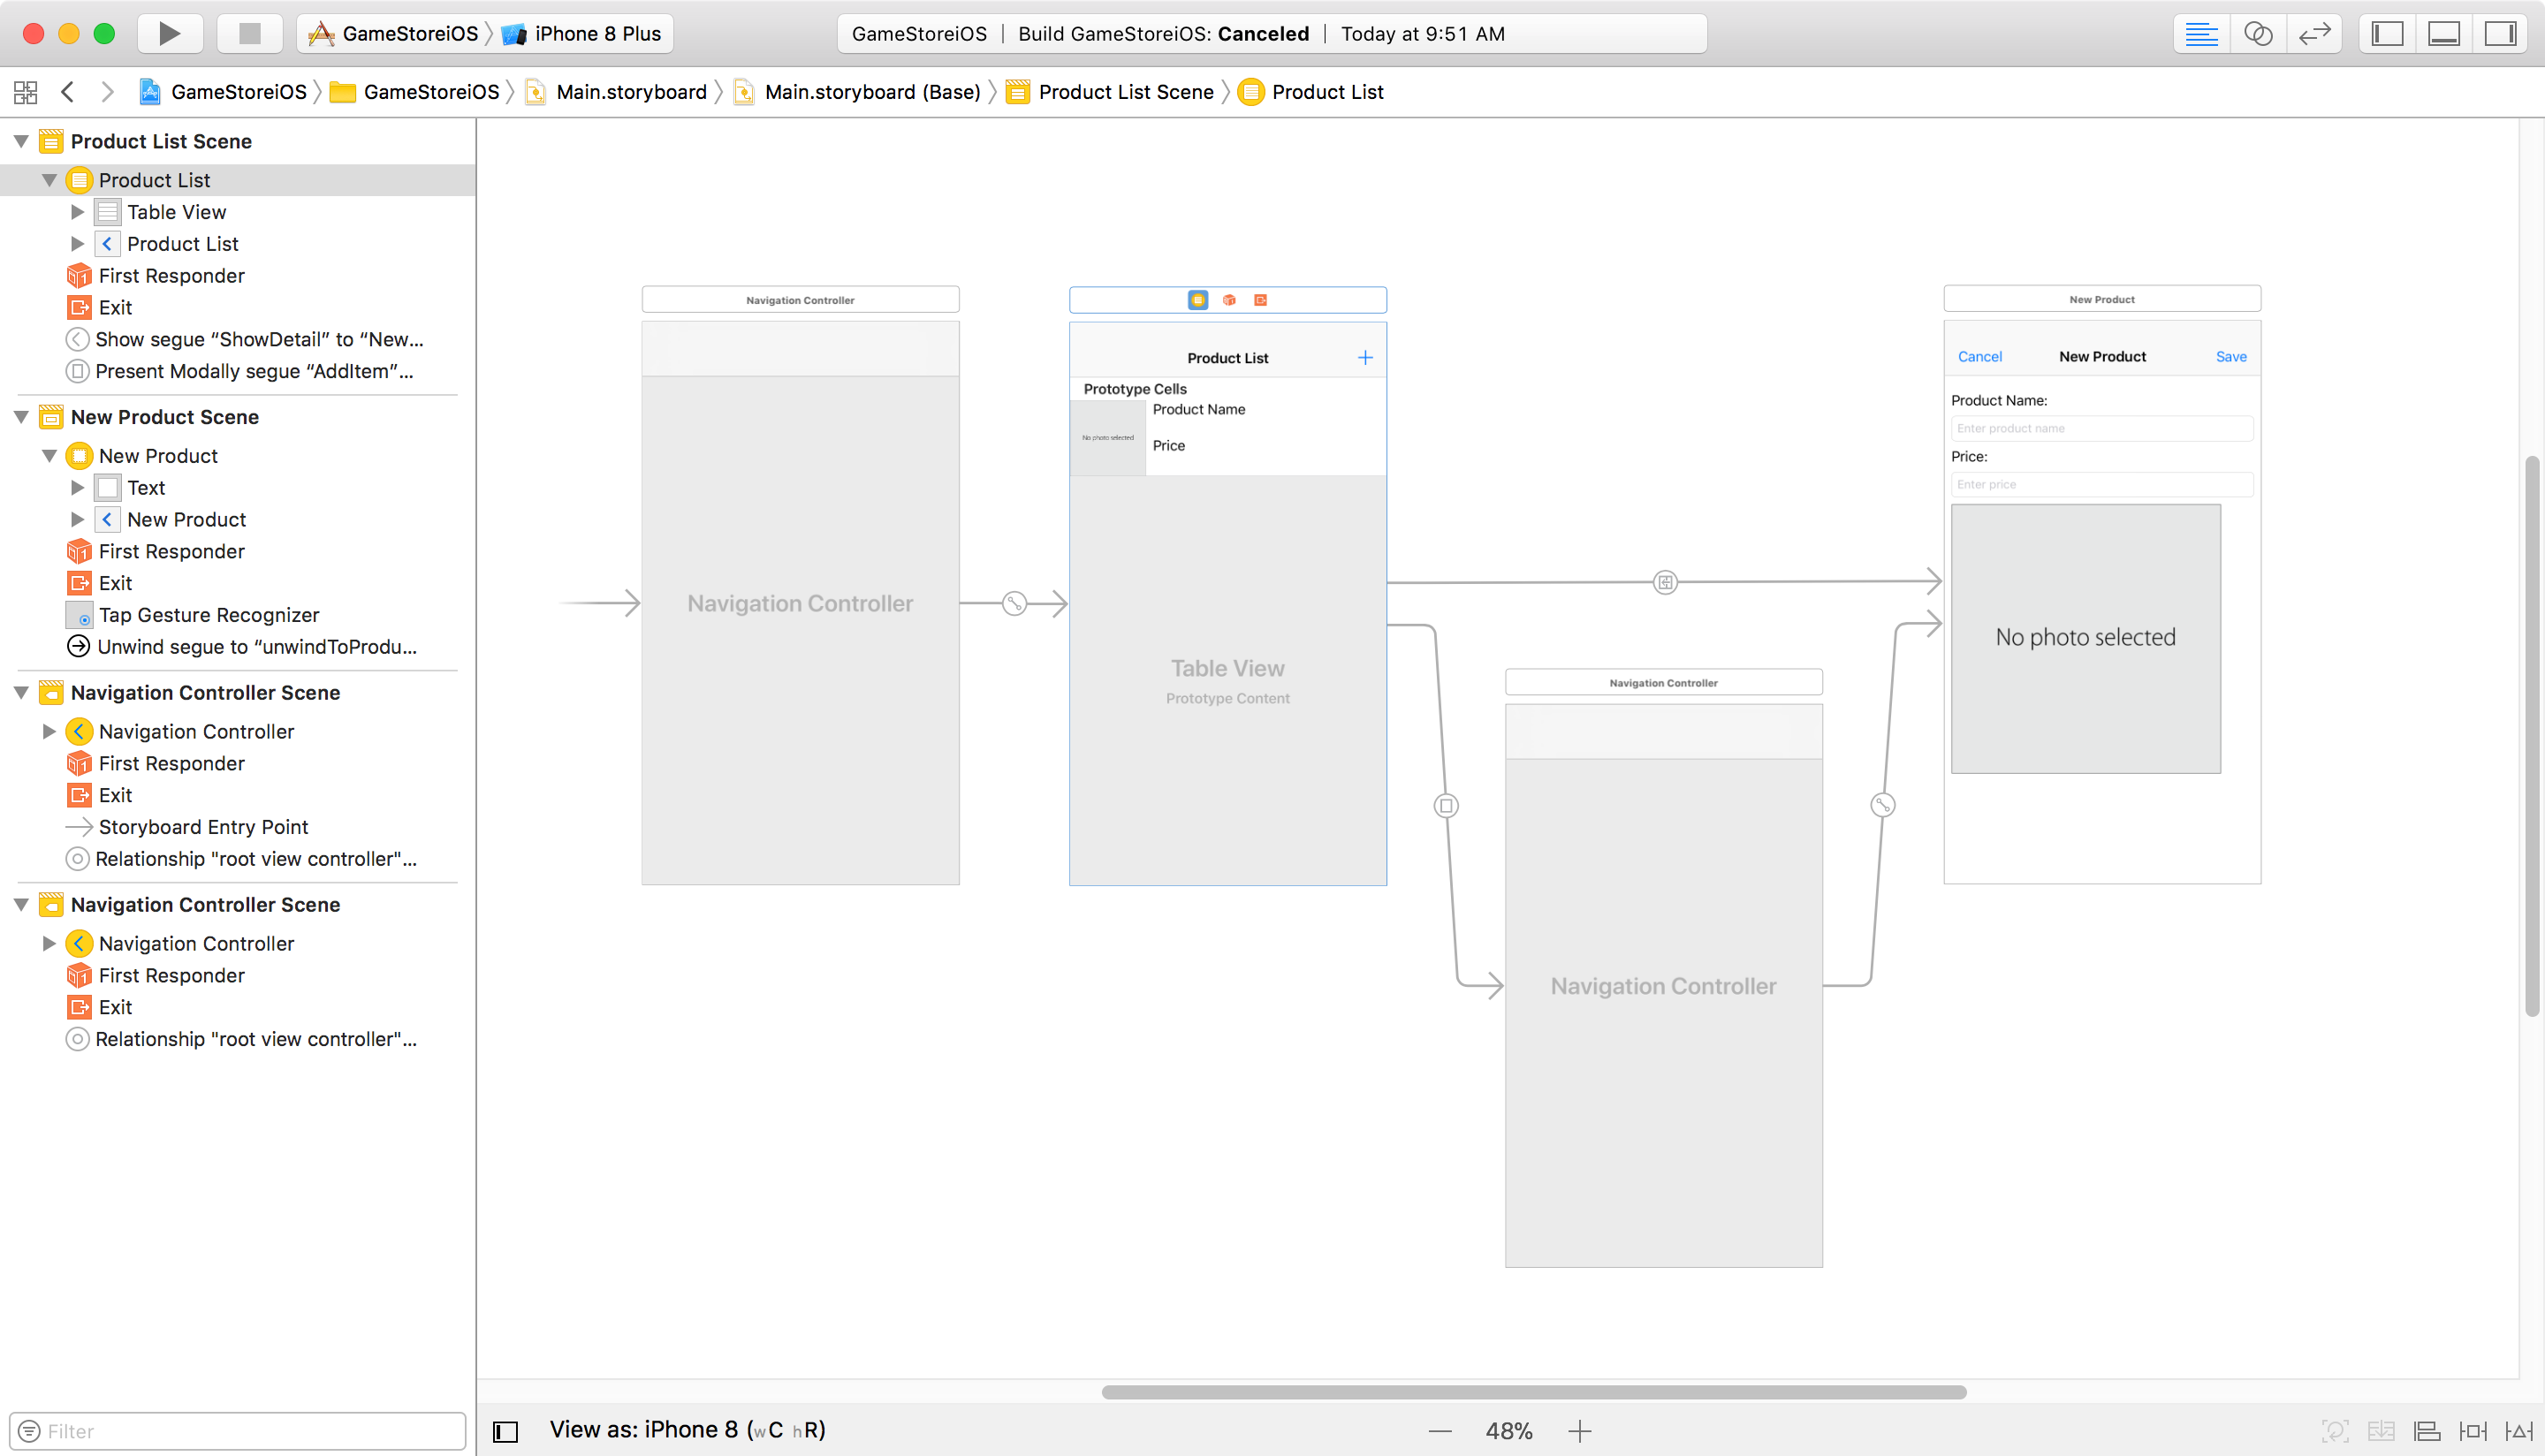
1) In Xcode, click on 'Main.storyboard', add one view controller for ‘New Product’.
2) Add another view controller for ‘Product List’.
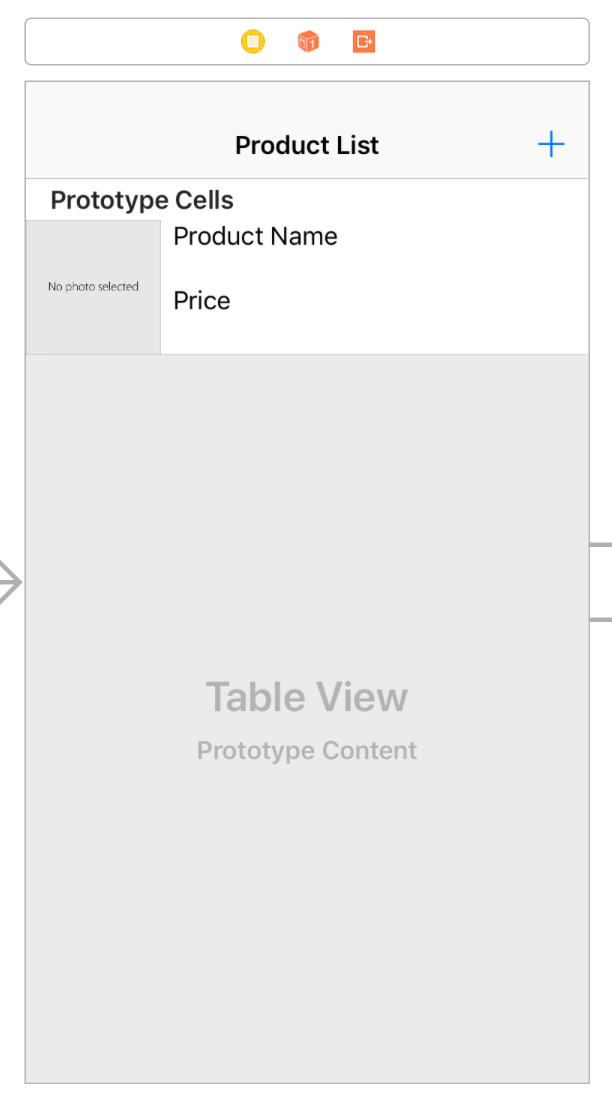
3) Then, add two navigation controllers, one points to ‘Product List’ controller, another points to ‘New Product’ controller. The final storyboard looks like below.
4. Creating Files
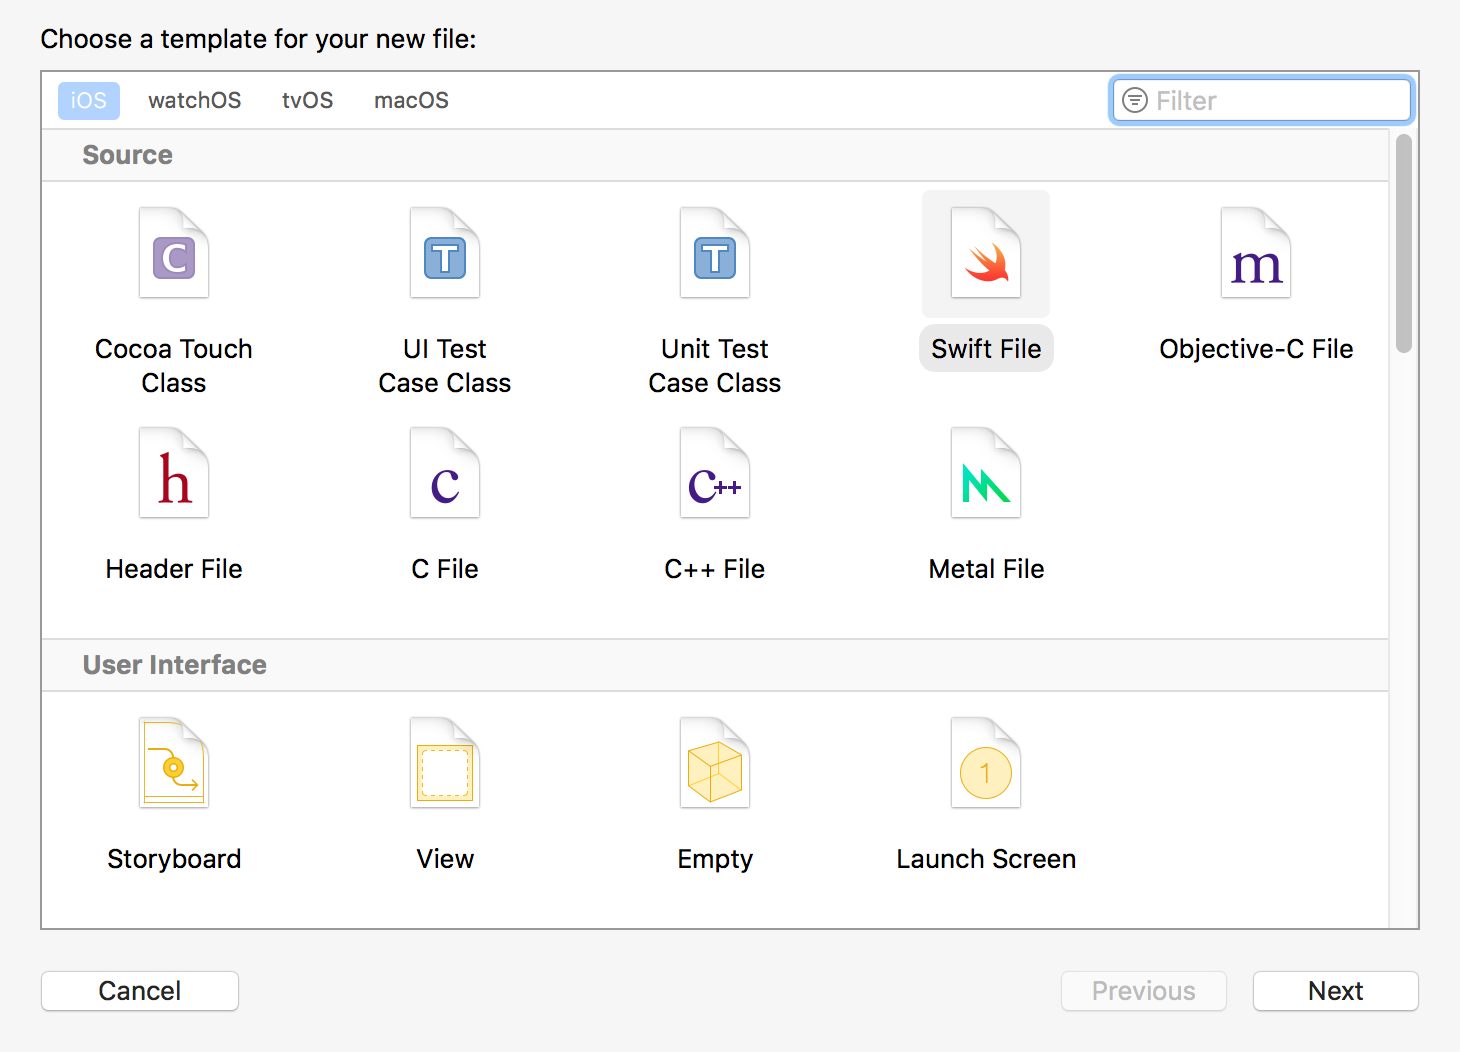
1) In Xcode, File->New-File…, select ‘Swift File’ and click ‘Next’. Specify the name to ‘Product.swift’ and Save.
2) Input the following content to Product.swift.
//
//  Product.swift
//  GameStoreiOS
//
//  Created by Johnny on 07/10/17.
//  Copyright © 2017 JoJoStudio. All rights reserved.
//

import UIKit
import os.log

class Product {

    //MARK: Properties

    var name: String
    var photo: UIImage?
    var price: Double

    init?(name: String, photo: UIImage?, price: Double) {

        // Initialization should fail if there is no name.
        if name.isEmpty {
            return nil
        }

        // Initialize stored properties.
        self.name = name
        self.photo = photo
        self.price = price
    }
}
3) Rename the ‘ViewController.swift’ to ProductDetailsViewController.swift and provide the following content to it.
//
//  ViewController.swift
//  GameStoreiOS
//
//  Created by Johnny on 07/10/17.
//  Copyright © 2017 JoJoStudio. All rights reserved.
//

import UIKit
import os.log

class ProductDetailsViewController: UIViewController, UITextFieldDelegate, UIImagePickerControllerDelegate, UINavigationControllerDelegate {

    var product: Product?

    @IBOutlet weak var nameTextField: UITextField!
    @IBOutlet weak var productNameLabel: UILabel!
    @IBOutlet weak var priceTextField: UITextField!
    @IBOutlet weak var priceLabel: UILabel!
    @IBOutlet weak var photoImageView: UIImageView!
    @IBOutlet weak var saveButton: UIBarButtonItem!

    override func viewDidLoad() {
        super.viewDidLoad()
        // Handle the text field’s user input through delegate callbacks.
        nameTextField.delegate = self

        // Set up views if editing an existing Product.
        if let product = product {
            navigationItem.title = product.name
            nameTextField.text = product.name
            priceTextField.text = String(describing: product.price)
            photoImageView.image = product.photo
        }

        // Enable the Save button only if the text field has a valid Product name.
        updateSaveButtonState()
    }

    func textFieldShouldReturn(_ textField: UITextField) -> Bool {
        // Hide the keyboard.
        textField.resignFirstResponder()
        return true
    }

    func textFieldDidEndEditing(_ textField: UITextField) {
        updateSaveButtonState()
        navigationItem.title = textField.text
    }

    override func didReceiveMemoryWarning() {
        super.didReceiveMemoryWarning()
        // Dispose of any resources that can be recreated.
    }

    @IBAction func selectImageFromPhotoLibrary(_ sender: UITapGestureRecognizer) {
        // Hide the keyboard.
        nameTextField.resignFirstResponder()
        priceTextField.resignFirstResponder()

        // UIImagePickerController is a view controller that lets a user pick media from their photo library.
        let imagePickerController = UIImagePickerController()

        // Only allow photos to be picked, not taken.
        imagePickerController.sourceType = .photoLibrary

        // Make sure ViewController is notified when the user picks an image.
        imagePickerController.delegate = self
        present(imagePickerController, animated: true, completion: nil)
    }

    func imagePickerControllerDidCancel(_ picker: UIImagePickerController) {
        // Dismiss the picker if the user canceled.
        dismiss(animated: true, completion: nil)
    }

    func imagePickerController(_ picker: UIImagePickerController, didFinishPickingMediaWithInfo info: [String : Any]) {

        // The info dictionary may contain multiple representations of the image. You want to use the original.
        guard let selectedImage = info[UIImagePickerControllerOriginalImage] as? UIImage else {
            fatalError("Expected a dictionary containing an image, but was provided the following: \(info)")
        }

        // Set photoImageView to display the selected image.
        photoImageView.image = selectedImage

        // Dismiss the picker.
        dismiss(animated: true, completion: nil)
    }

    @IBAction func cancel(_ sender: UIBarButtonItem) {
        let isPresentingInAddProductMode = presentingViewController is UINavigationController

        if isPresentingInAddProductMode {
            dismiss(animated: true, completion: nil)
        }
        else if let owningNavigationController = navigationController{
            owningNavigationController.popViewController(animated: true)
        }
        else {
            fatalError("The ProductViewController is not inside a navigation controller.")
        }
    }

    // This method lets you configure a view controller before it's presented.
    override func prepare(for segue: UIStoryboardSegue, sender: Any?) {

        super.prepare(for: segue, sender: sender)

        // Configure the destination view controller only when the save button is pressed.
        guard let button = sender as? UIBarButtonItem, button === saveButton else {
            os_log("The save button was not pressed, cancelling", log: OSLog.default, type: .debug)
            return
        }

        let name = nameTextField.text ?? ""
        let photo = photoImageView.image
        let price = Double(priceTextField.text ?? "0.0") ?? 0.0

        // Set the product to be passed to ProductTableViewController after the unwind segue.
        product = Product(name: name, photo: photo, price: price)
    }

    func textFieldDidBeginEditing(_ textField: UITextField) {
        // Disable the Save button while editing.
        saveButton.isEnabled = false
    }

    private func updateSaveButtonState() {
        // Disable the Save button if the text field is empty.
        let name = nameTextField.text ?? ""
        let price = priceTextField.text ?? ""
        saveButton.isEnabled = !name.isEmpty && !price.isEmpty
    }
}
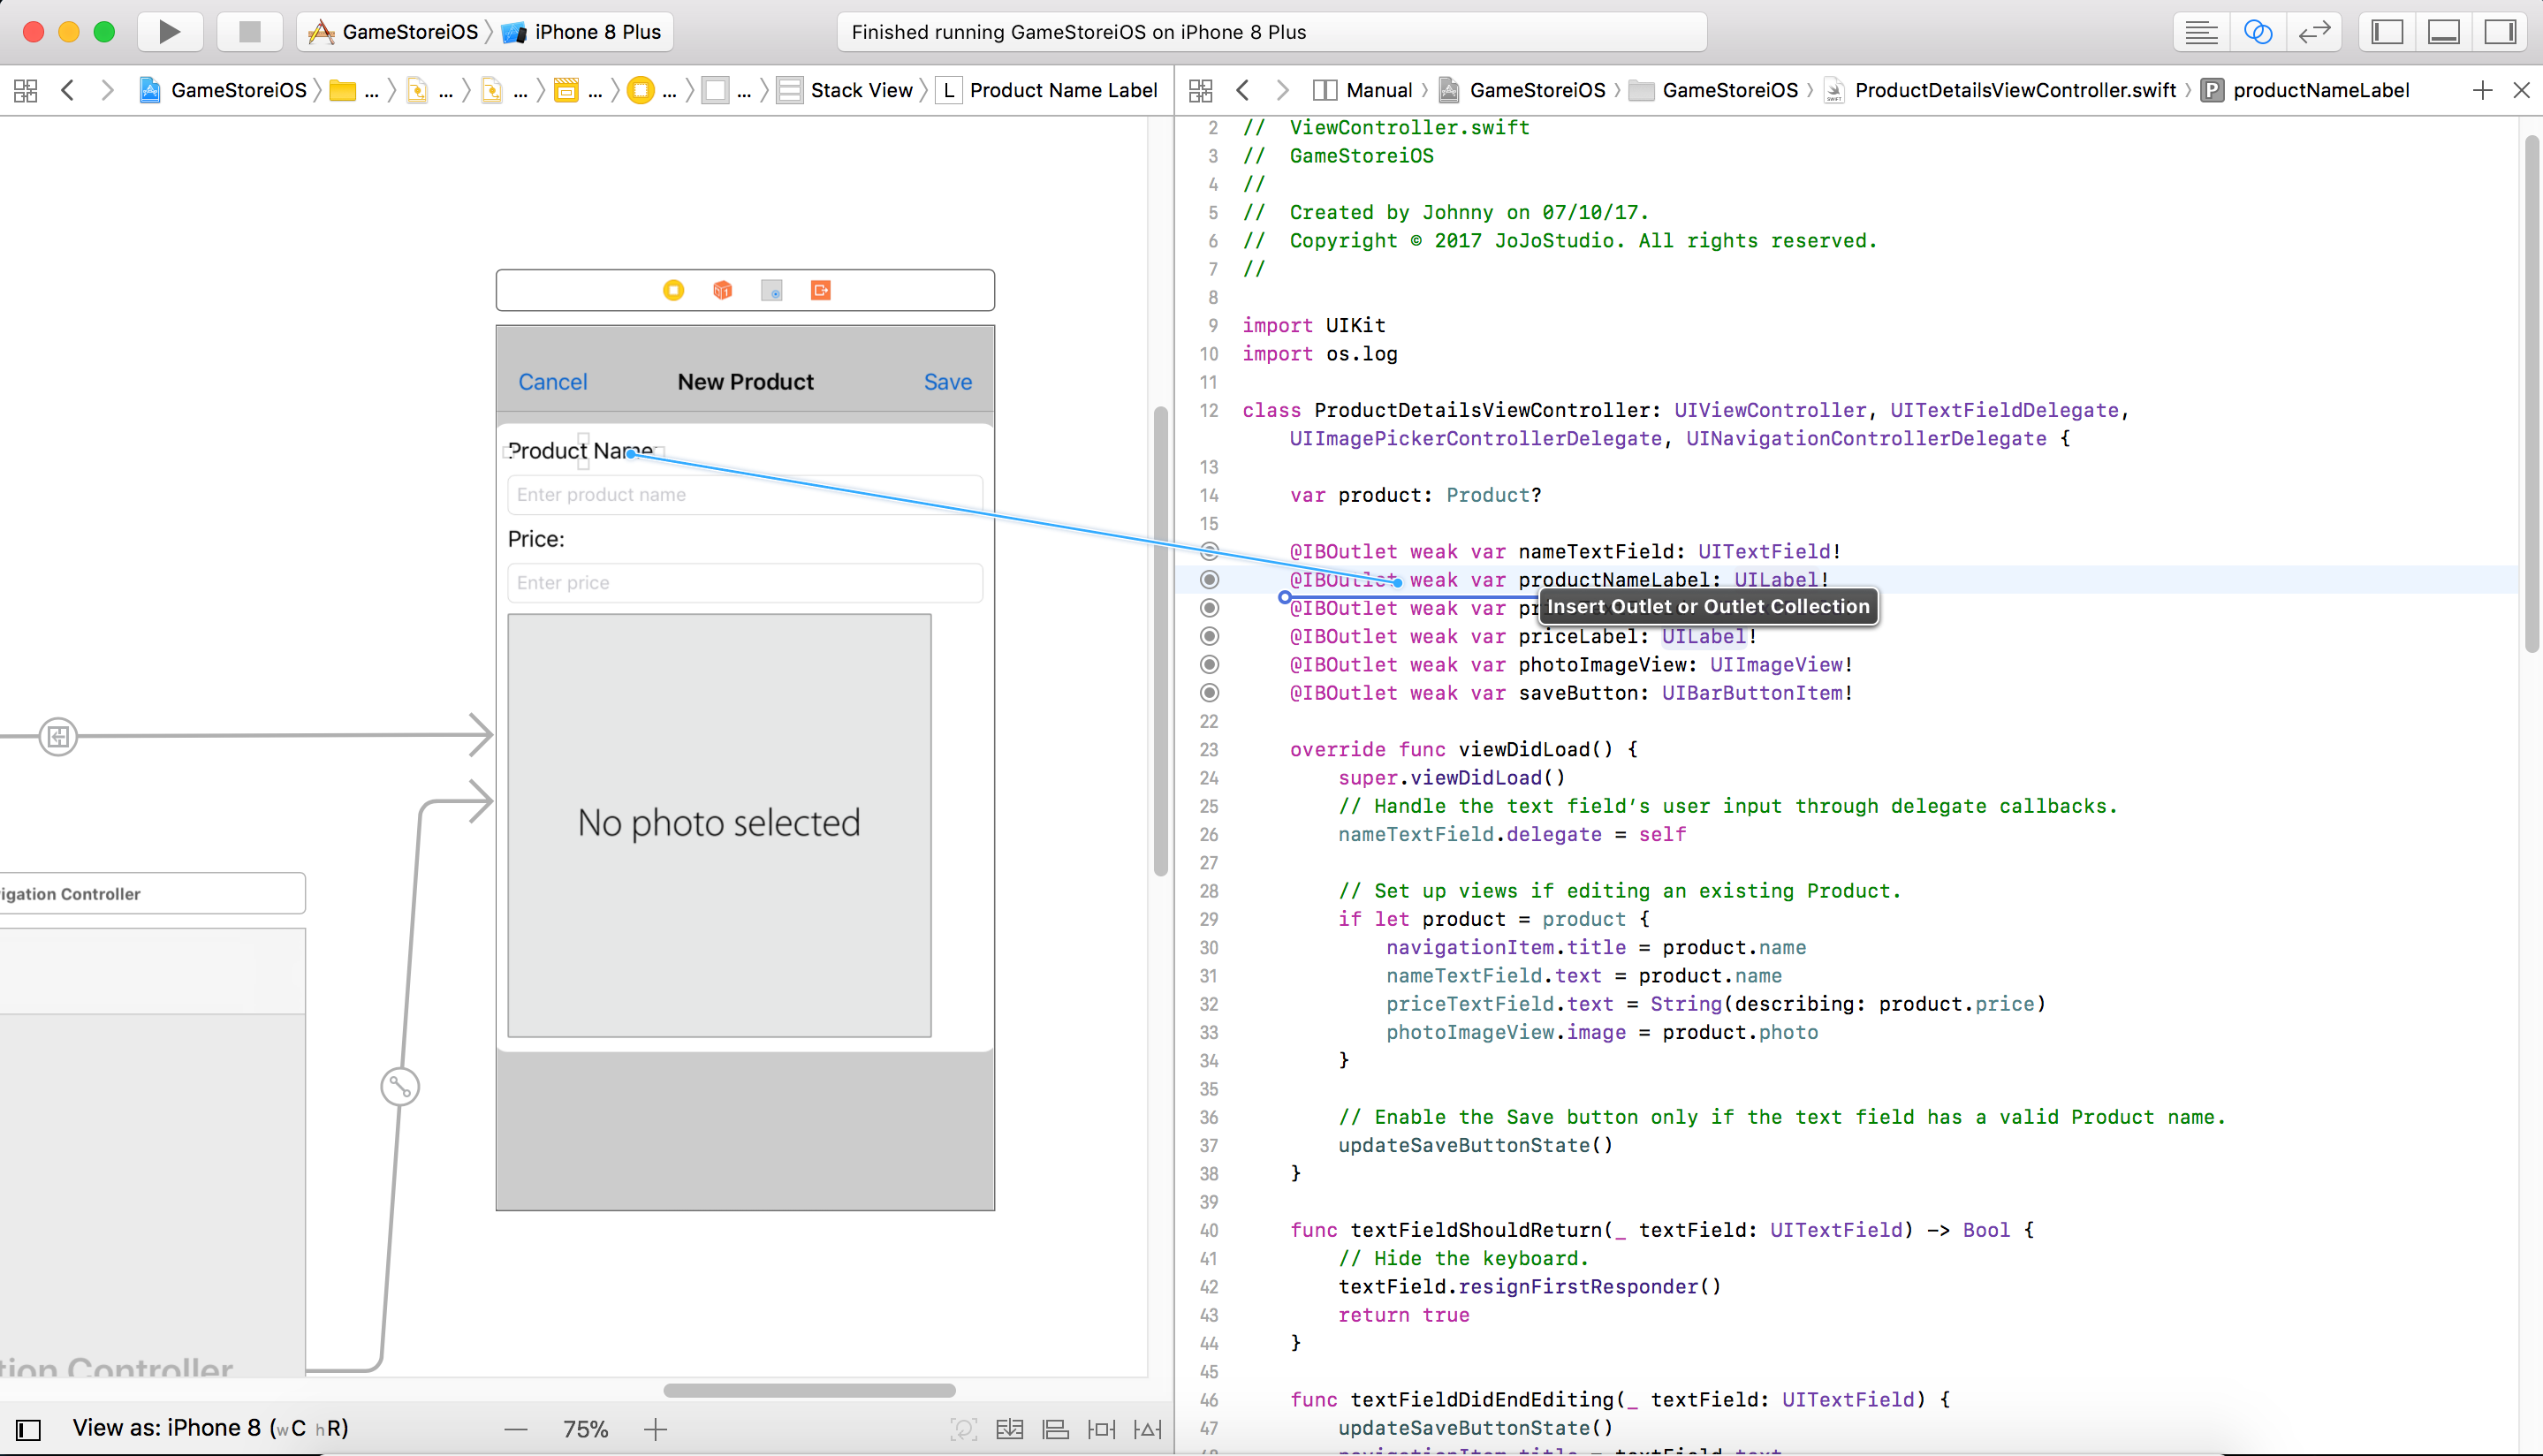
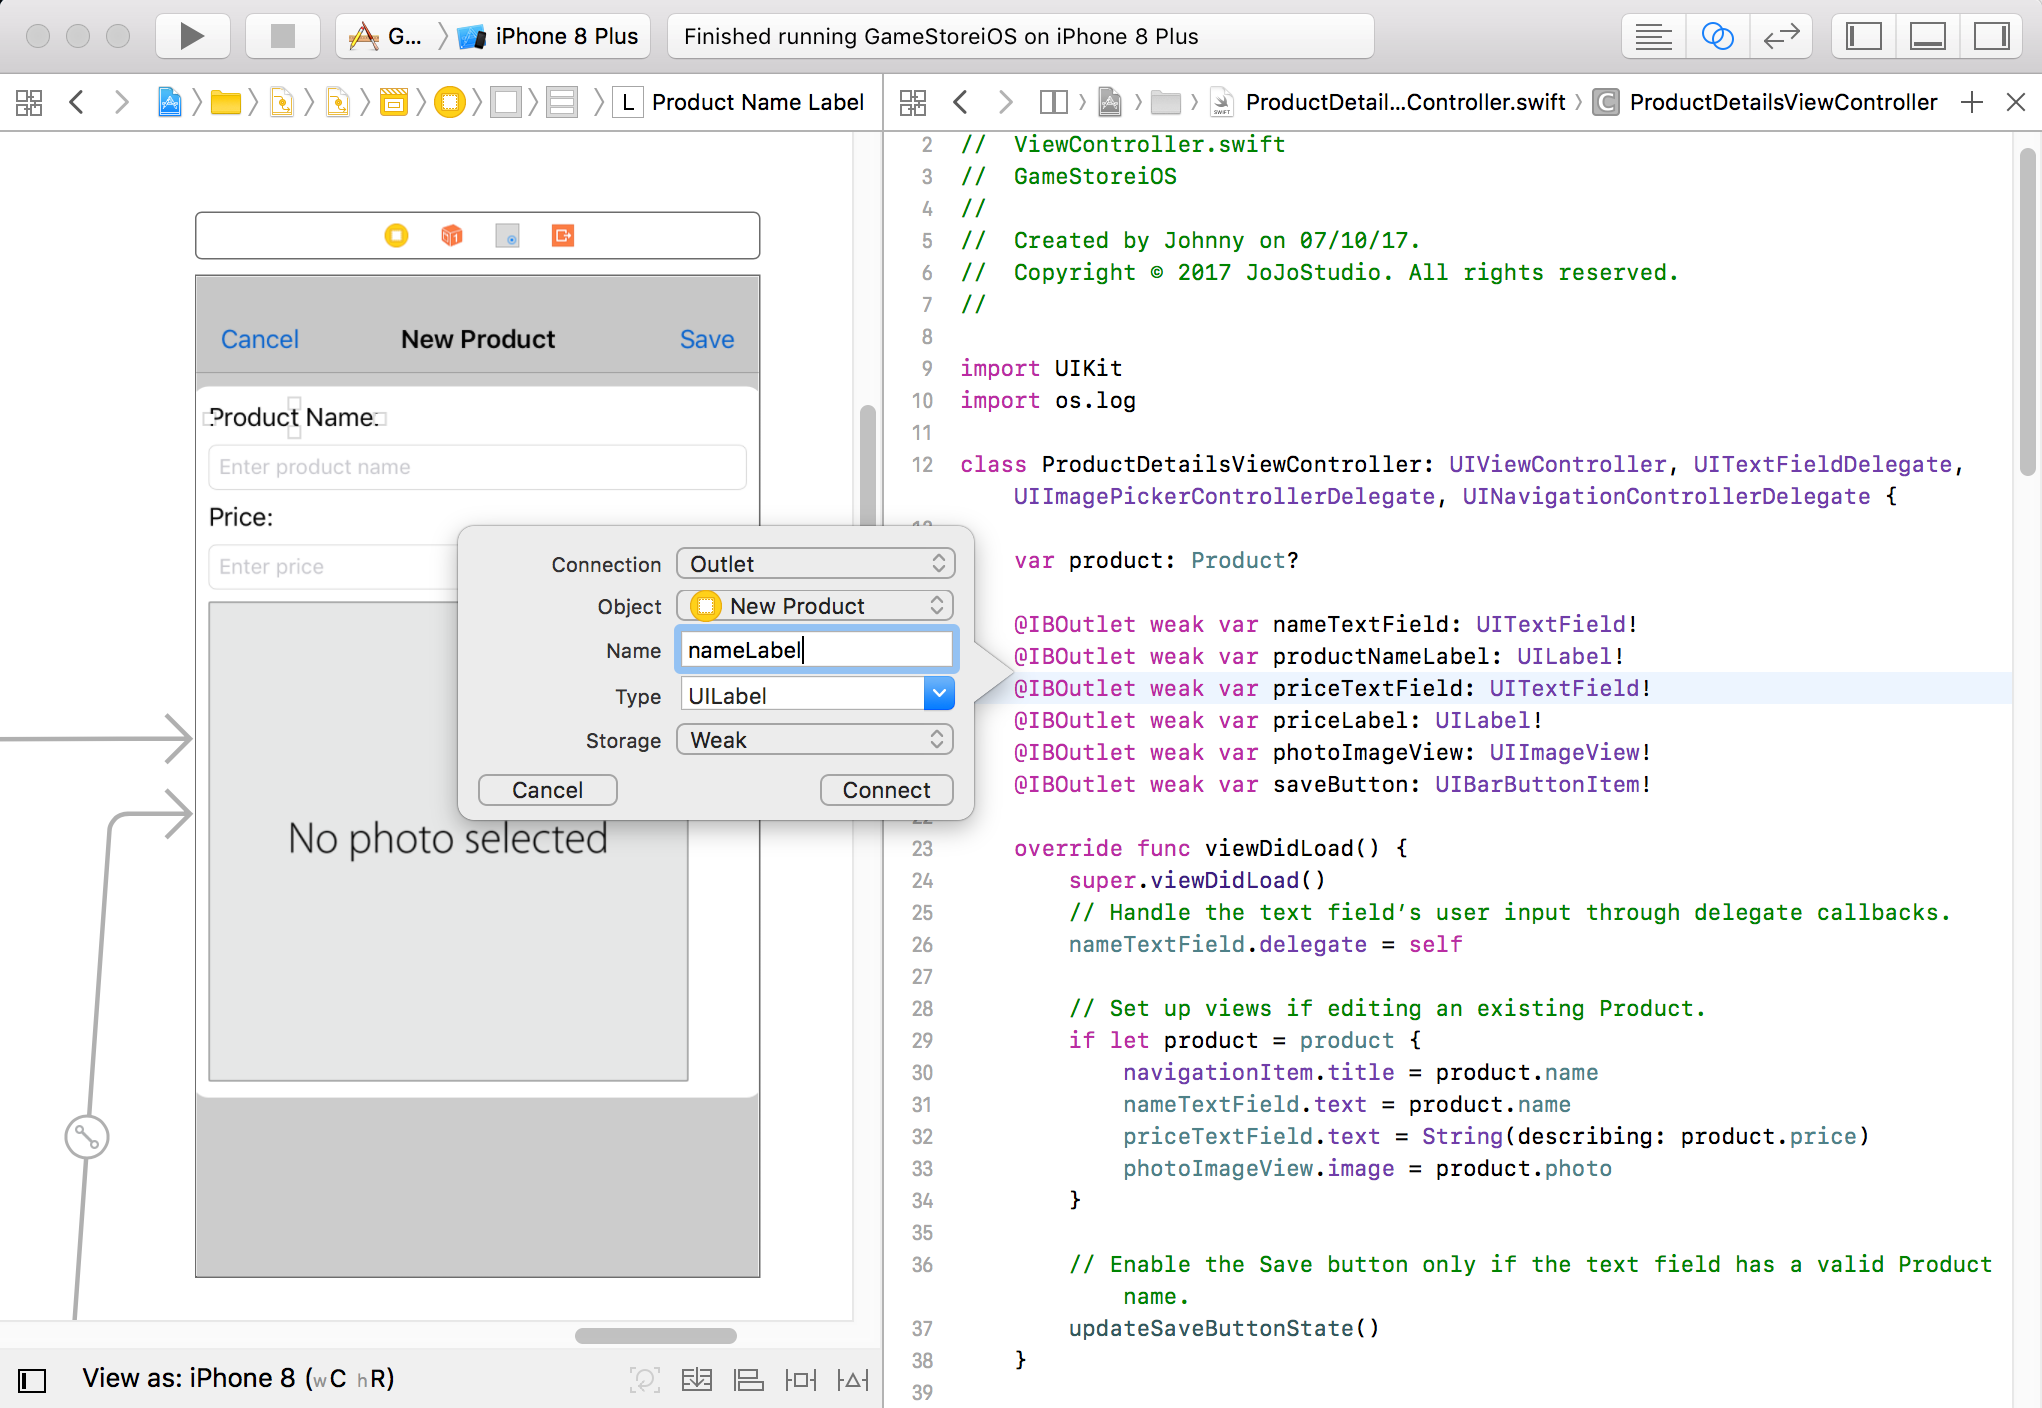
You may need to re-connect the controllers on canvas to swift code manually.
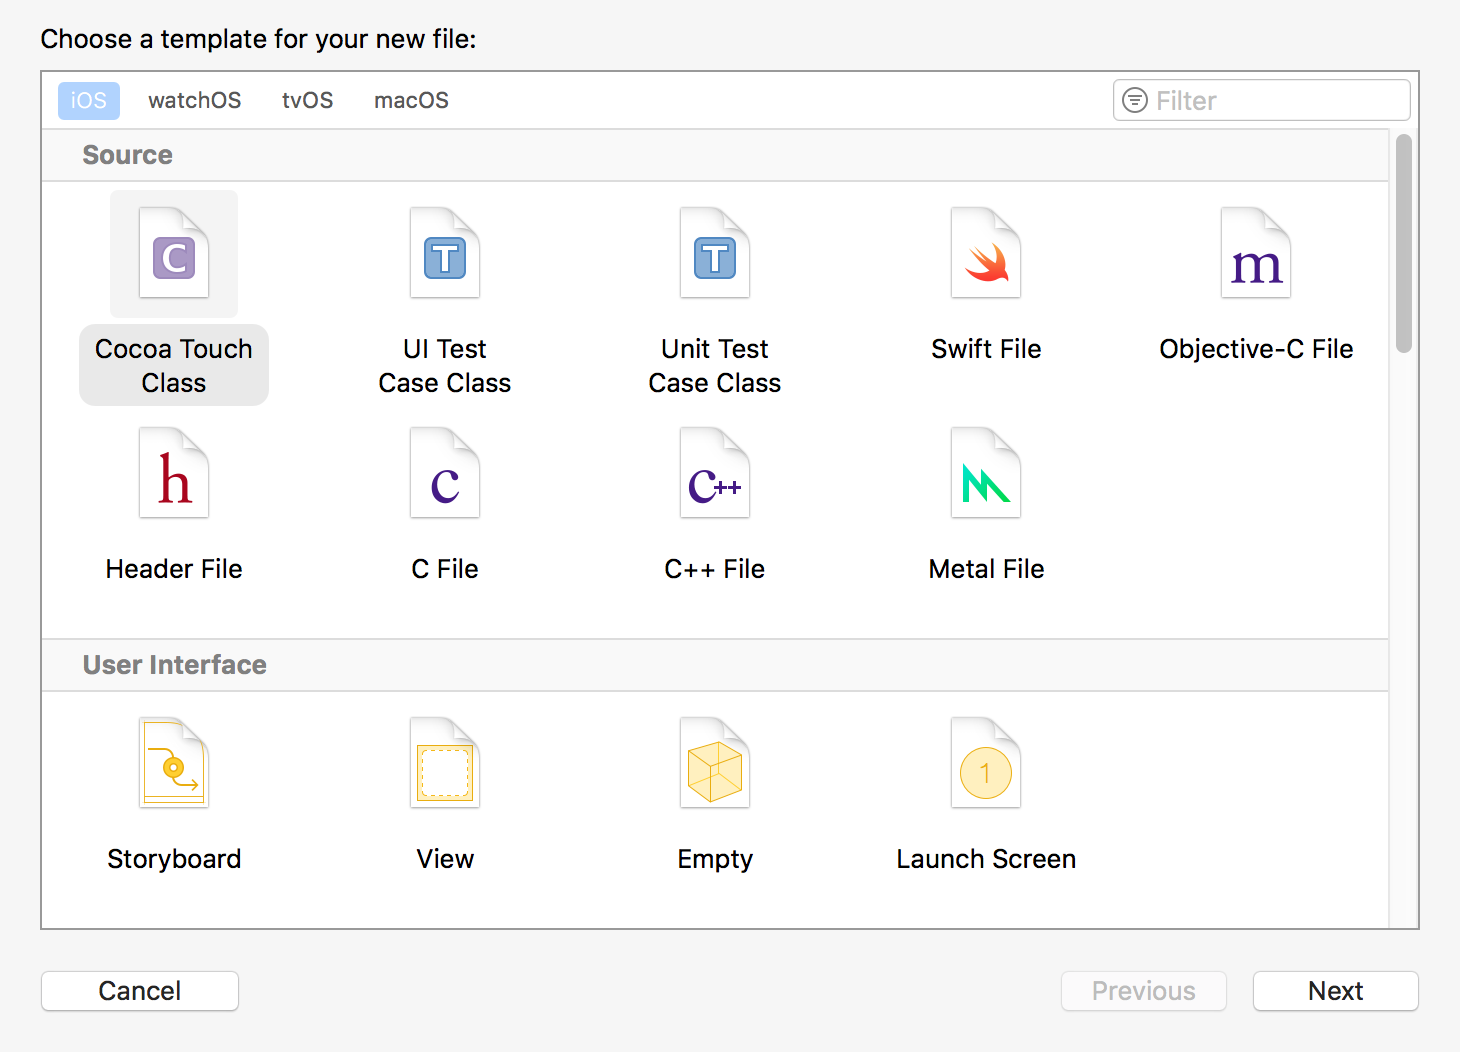
 4) In Xcode, File->New-File…, select ‘Cocoa Touch Class’ and click ‘Next’.
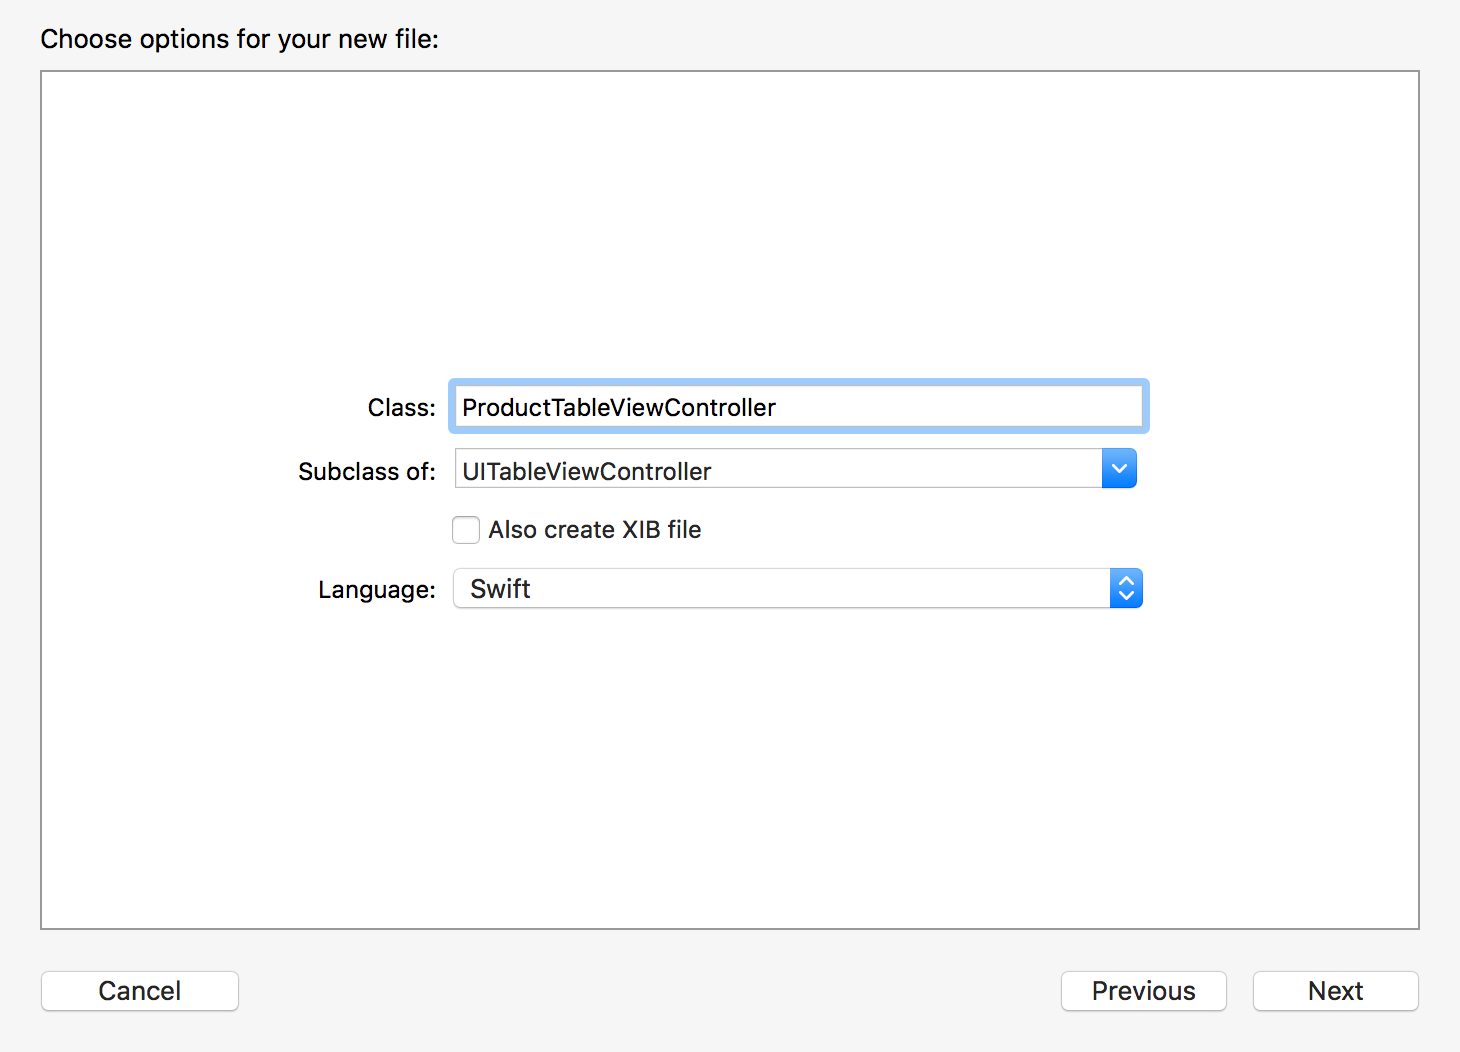
In the dialog that appears, use the following values, click ‘Next’.
- Class: ProductTableViewController
- Subclass of: UITableViewController
- Language: Swift
5) Provide the following content to ProductTableViewController.swift.
//
// ProductTableViewController.swift
// GameStoreiOS
//
// Created by Johnny on 07/10/17.
// Copyright © 2017 JoJoStudio. All rights reserved.
//
import UIKit
import os.log
class ProductTableViewController: UITableViewController {
var products = [Product]()
override func viewDidLoad() {
super.viewDidLoad()
// Display an Edit button in the navigation bar for this view controller.
navigationItem.leftBarButtonItem = editButtonItem
// Load any saved products, otherwise load sample data.
if let savedProducts = loadProducts() {
if (savedProducts.count == 0) {
loadSampleProducts()
} else {
products += savedProducts
}
}
else {
// Load the sample data.
loadSampleProducts()
}
}
override func didReceiveMemoryWarning() {
super.didReceiveMemoryWarning()
// Dispose of any resources that can be recreated.
}
// MARK: - Table view data source
override func numberOfSections(in tableView: UITableView) -> Int {
return 1
}
override func tableView(_ tableView: UITableView, numberOfRowsInSection section: Int) -> Int {
return products.count
}
override func tableView(_ tableView: UITableView, cellForRowAt indexPath: IndexPath) -> UITableViewCell {
// Table view cells are reused and should be dequeued using a cell identifier.
let cellIdentifier = "ProductTableViewCell"
guard let cell = tableView.dequeueReusableCell(withIdentifier: cellIdentifier, for: indexPath) as? ProductTableViewCell else {
fatalError("The dequeued cell is not an instance of ProductTableViewCell.")
}
// Fetches the appropriate product for the data source layout.
let product = products[indexPath.row]
cell.nameLabel.text = product.name
cell.priceLabel.text = "$" + String(describing: product.price)
cell.photoImageView.image = product.photo
return cell
}
// Override to support conditional editing of the table view.
override func tableView(_ tableView: UITableView, canEditRowAt indexPath: IndexPath) -> Bool {
// Return false if you do not want the specified item to be editable.
return true
}
// Override to support editing the table view.
override func tableView(_ tableView: UITableView, commit editingStyle: UITableViewCellEditingStyle, forRowAt indexPath: IndexPath) {
if editingStyle == .delete {
// Delete the row from the data source
products.remove(at: indexPath.row)
saveProducts()
tableView.deleteRows(at: [indexPath], with: .fade)
} else if editingStyle == .insert {
// Create a new instance of the appropriate class, insert it into the array, and add a new row to the table view
}
}
/*
// Override to support rearranging the table view.
override func tableView(_ tableView: UITableView, moveRowAt fromIndexPath: IndexPath, to: IndexPath) {
}
*/
/*
// Override to support conditional rearranging of the table view.
override func tableView(_ tableView: UITableView, canMoveRowAt indexPath: IndexPath) -> Bool {
// Return false if you do not want the item to be re-orderable.
return true
}
*/
@IBAction func unwindToProductList(sender: UIStoryboardSegue) {
if let sourceViewController = sender.source as? ProductDetailsViewController, let product = sourceViewController.product {
if let selectedIndexPath = tableView.indexPathForSelectedRow {
// Update an existing product.
products[selectedIndexPath.row] = product
tableView.reloadRows(at: [selectedIndexPath], with: .none)
}
else {
// Add a new product.
let newIndexPath = IndexPath(row: products.count, section: 0)
products.append(product)
tableView.insertRows(at: [newIndexPath], with: .automatic)
}
// Save the products.
saveProducts()
}
}
// MARK: - Navigation
// In a storyboard-based application, you will often want to do a little preparation before navigation
override func prepare(for segue: UIStoryboardSegue, sender: Any?) {
// Get the new view controller using segue.destinationViewController.
// Pass the selected object to the new view controller.
super.prepare(for: segue, sender: sender)
switch(segue.identifier ?? "") {
case "AddItem":
os_log("Adding a new product.", log: OSLog.default, type: .debug)
case "ShowDetail":
guard let productDetailViewController = segue.destination as? ProductDetailsViewController else {
fatalError("Unexpected destination: \(segue.destination)")
}
guard let selectedProductCell = sender as? ProductTableViewCell else {
fatalError("Unexpected sender: \(String(describing: sender))")
}
guard let indexPath = tableView.indexPath(for: selectedProductCell) else {
fatalError("The selected cell is not being displayed by the table")
}
let selectedProduct = products[indexPath.row]
productDetailViewController.product = selectedProduct
default:
fatalError("Unexpected Segue Identifier; \(String(describing: segue.identifier))")
}
}
private func saveProducts() {
let isSuccessfulSave = NSKeyedArchiver.archiveRootObject(products, toFile: Product.ArchiveURL.path)
if isSuccessfulSave {
os_log("Product successfully saved.", log: OSLog.default, type: .debug)
} else {
os_log("Failed to save products...", log: OSLog.default, type: .error)
}
}
private func loadProducts() -> [Product]? {
return NSKeyedUnarchiver.unarchiveObject(withFile: Product.ArchiveURL.path) as? [Product]
}
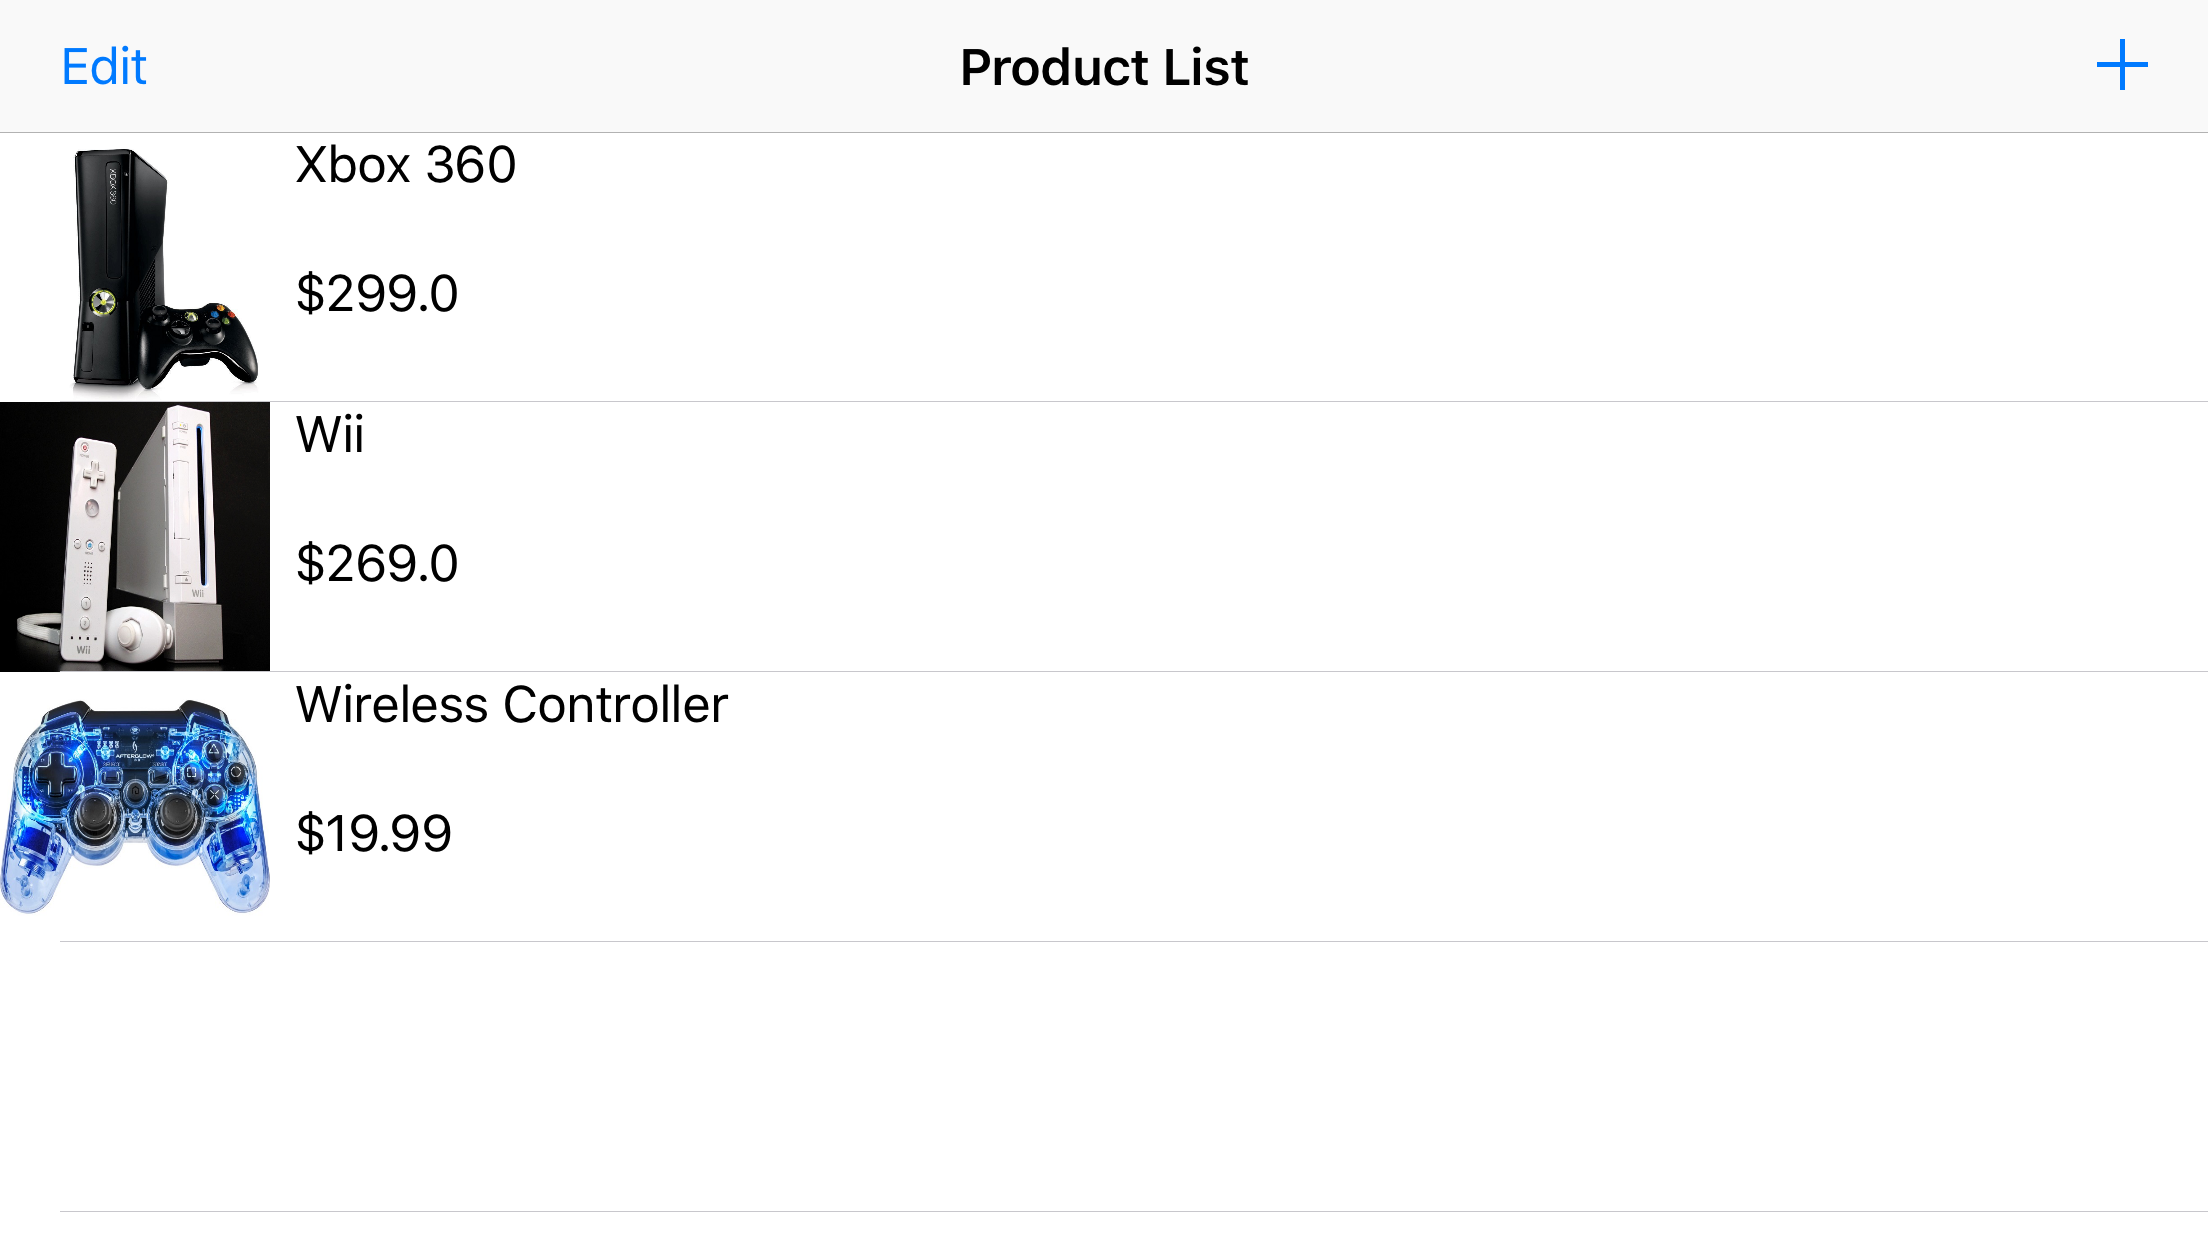
private func loadSampleProducts() {
let photo1 = UIImage(named: "xbox360")
let photo2 = UIImage(named: "wii")
let photo3 = UIImage(named: "controller")
guard let product1 = Product(name: "Xbox 360", photo: photo1, price: 299.00) else {
fatalError("Unable to instantiate product1")
}
guard let product2 = Product(name: "Wii", photo: photo2, price: 269.00) else {
fatalError("Unable to instantiate product2")
}
guard let product3 = Product(name: "Wireless Controller", photo: photo3, price: 19.99) else {
fatalError("Unable to instantiate product3")
}
products += [product1, product2, product3]
}
}
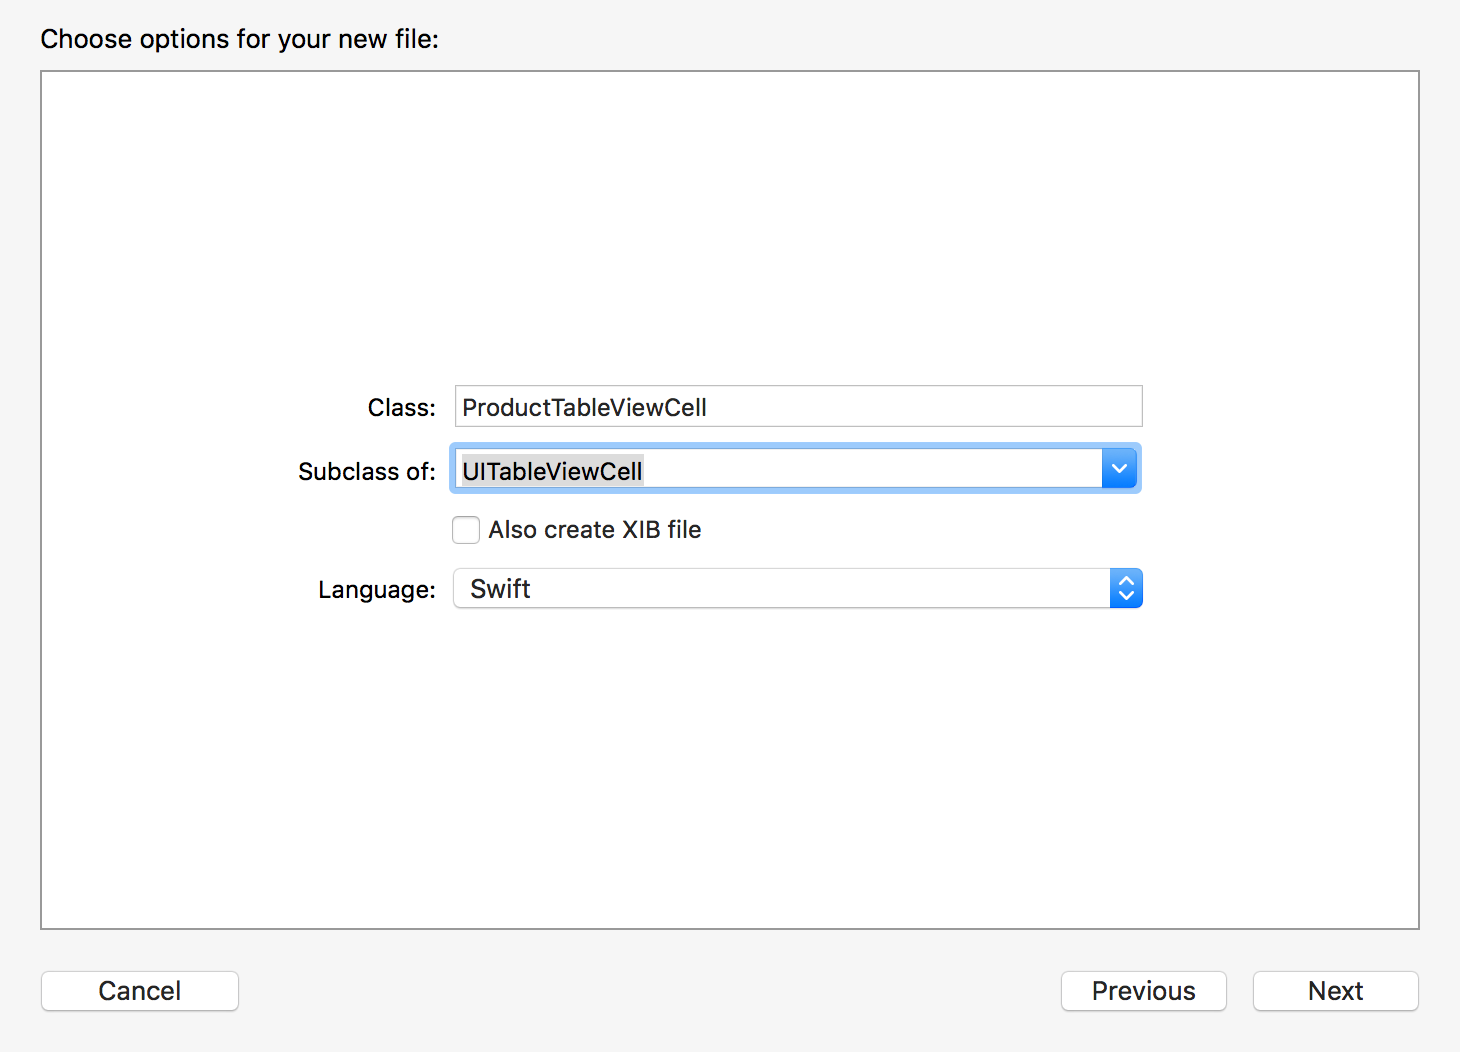
6) In Xcode, File->New-File…, select ‘Cocoa Touch Class’ and click ‘Next’. In the dialog that appears, use the following values, click ‘Next’.
- Class: ProductTableViewCell
- Subclass of: UITableViewCell
- Language: Swift
7) Provide the following content to ProductTableViewCell.swift.
//
//  ProductTableViewCell.swift
//  GameStoreiOS
//
//  Created by Johnny on 07/10/17.
//  Copyright © 2017 JoJoStudio. All rights reserved.
//

import UIKit

class ProductTableViewCell: UITableViewCell {

    @IBOutlet weak var nameLabel: UILabel!
    @IBOutlet weak var priceLabel: UILabel!
    @IBOutlet weak var photoImageView: UIImageView!

    override func awakeFromNib() {
        super.awakeFromNib()
        // Initialization code
    }

    override func setSelected(_ selected: Bool, animated: Bool) {
        super.setSelected(selected, animated: animated)

        // Configure the view for the selected state
    }

}
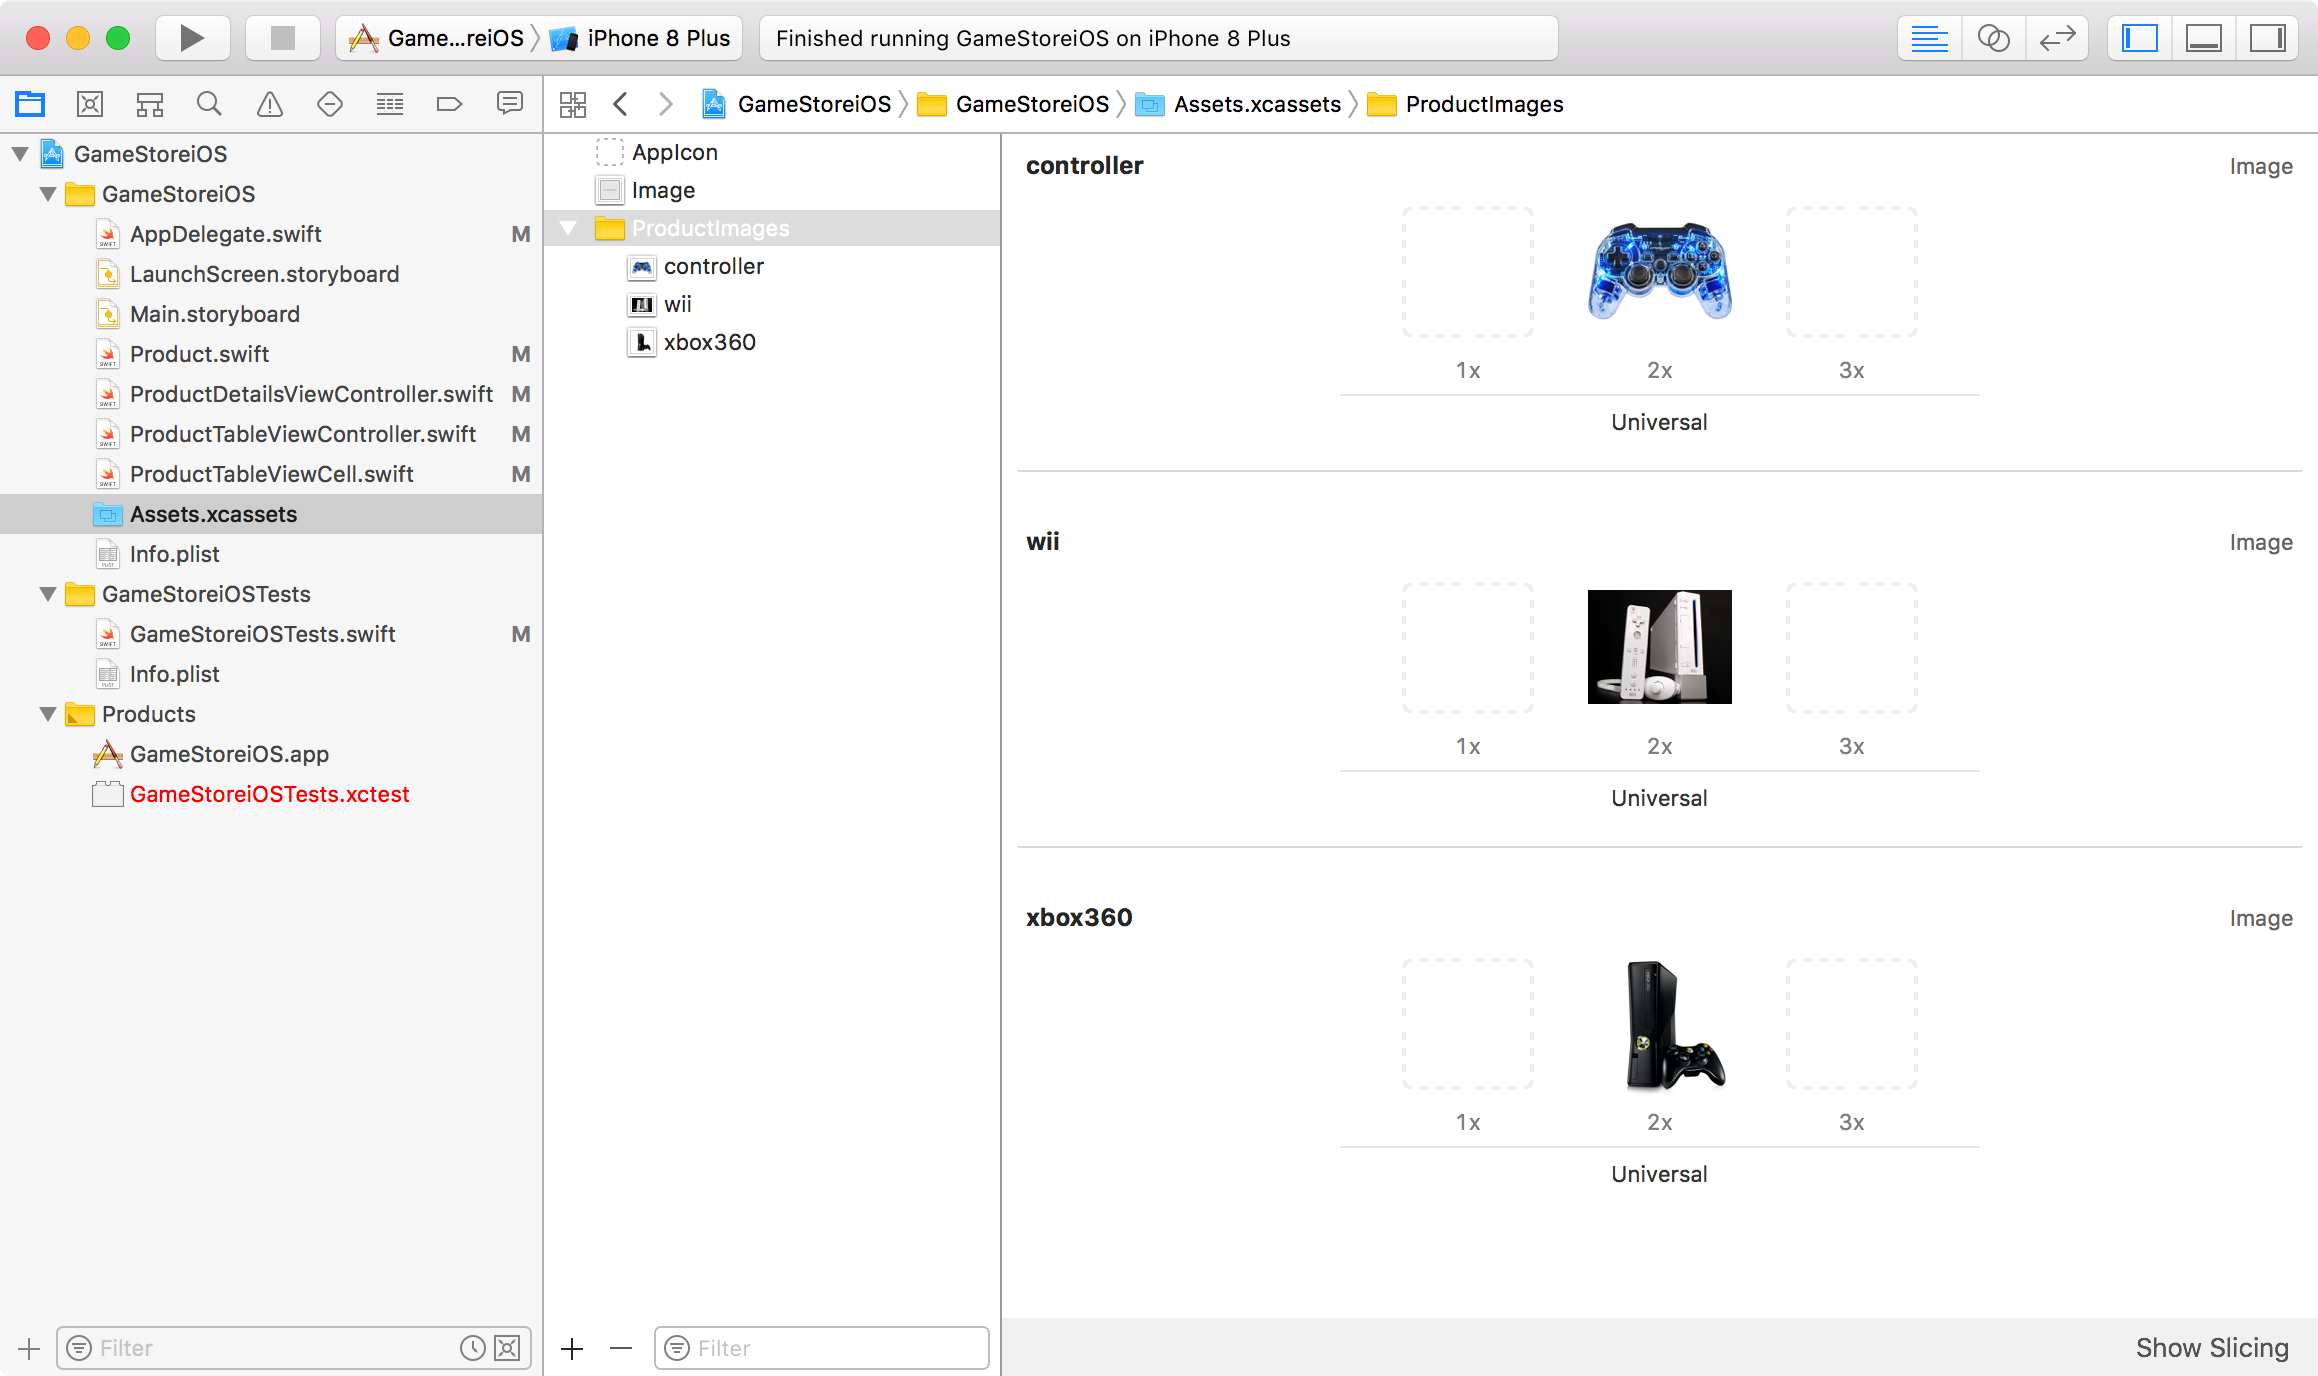
5. Adding Images
Add three images to Assets.xcassets.
- controller
- wii
- xbox360
6. Testing
In Xcode, click the arrow button to run the app in simulator.
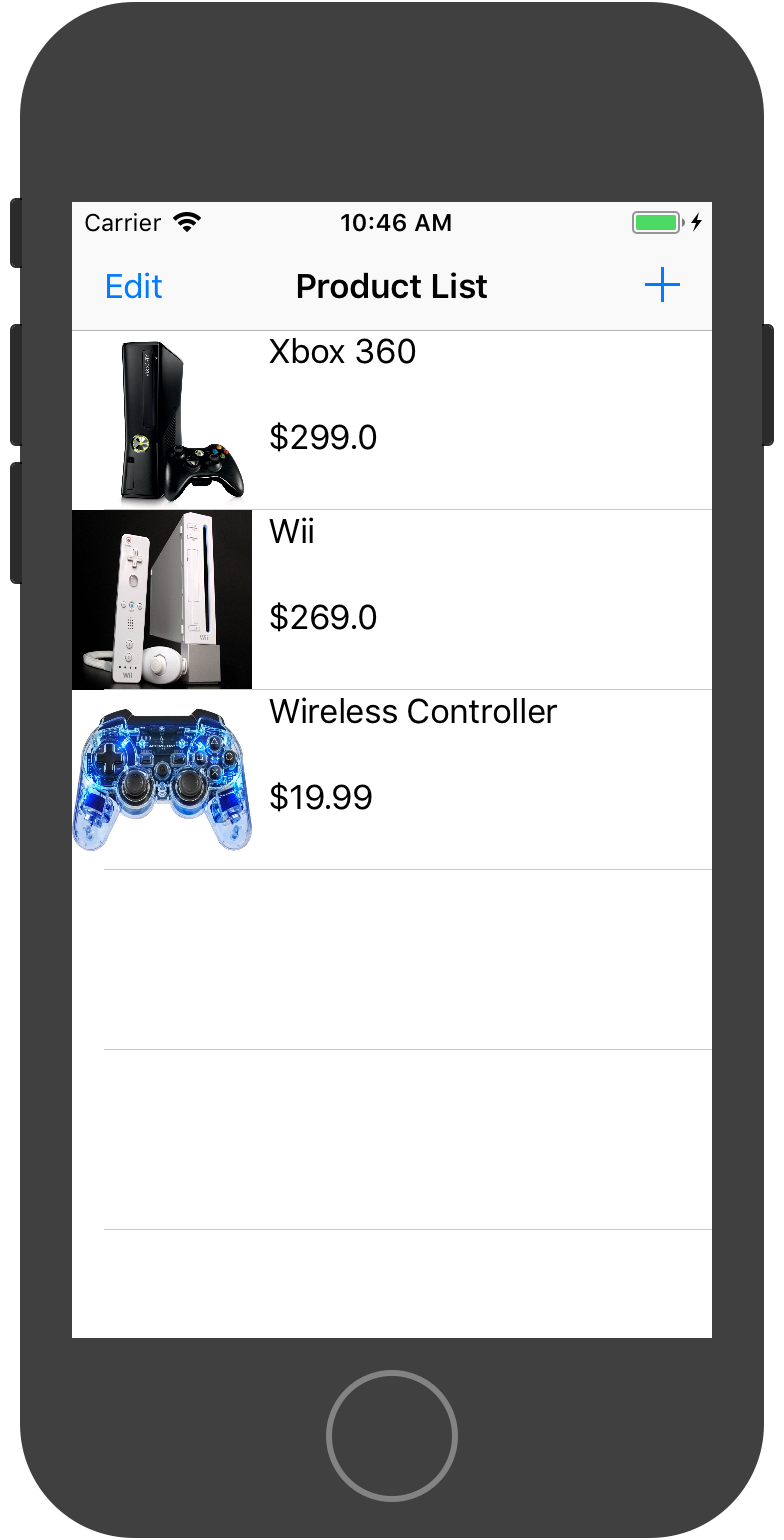
Product list.

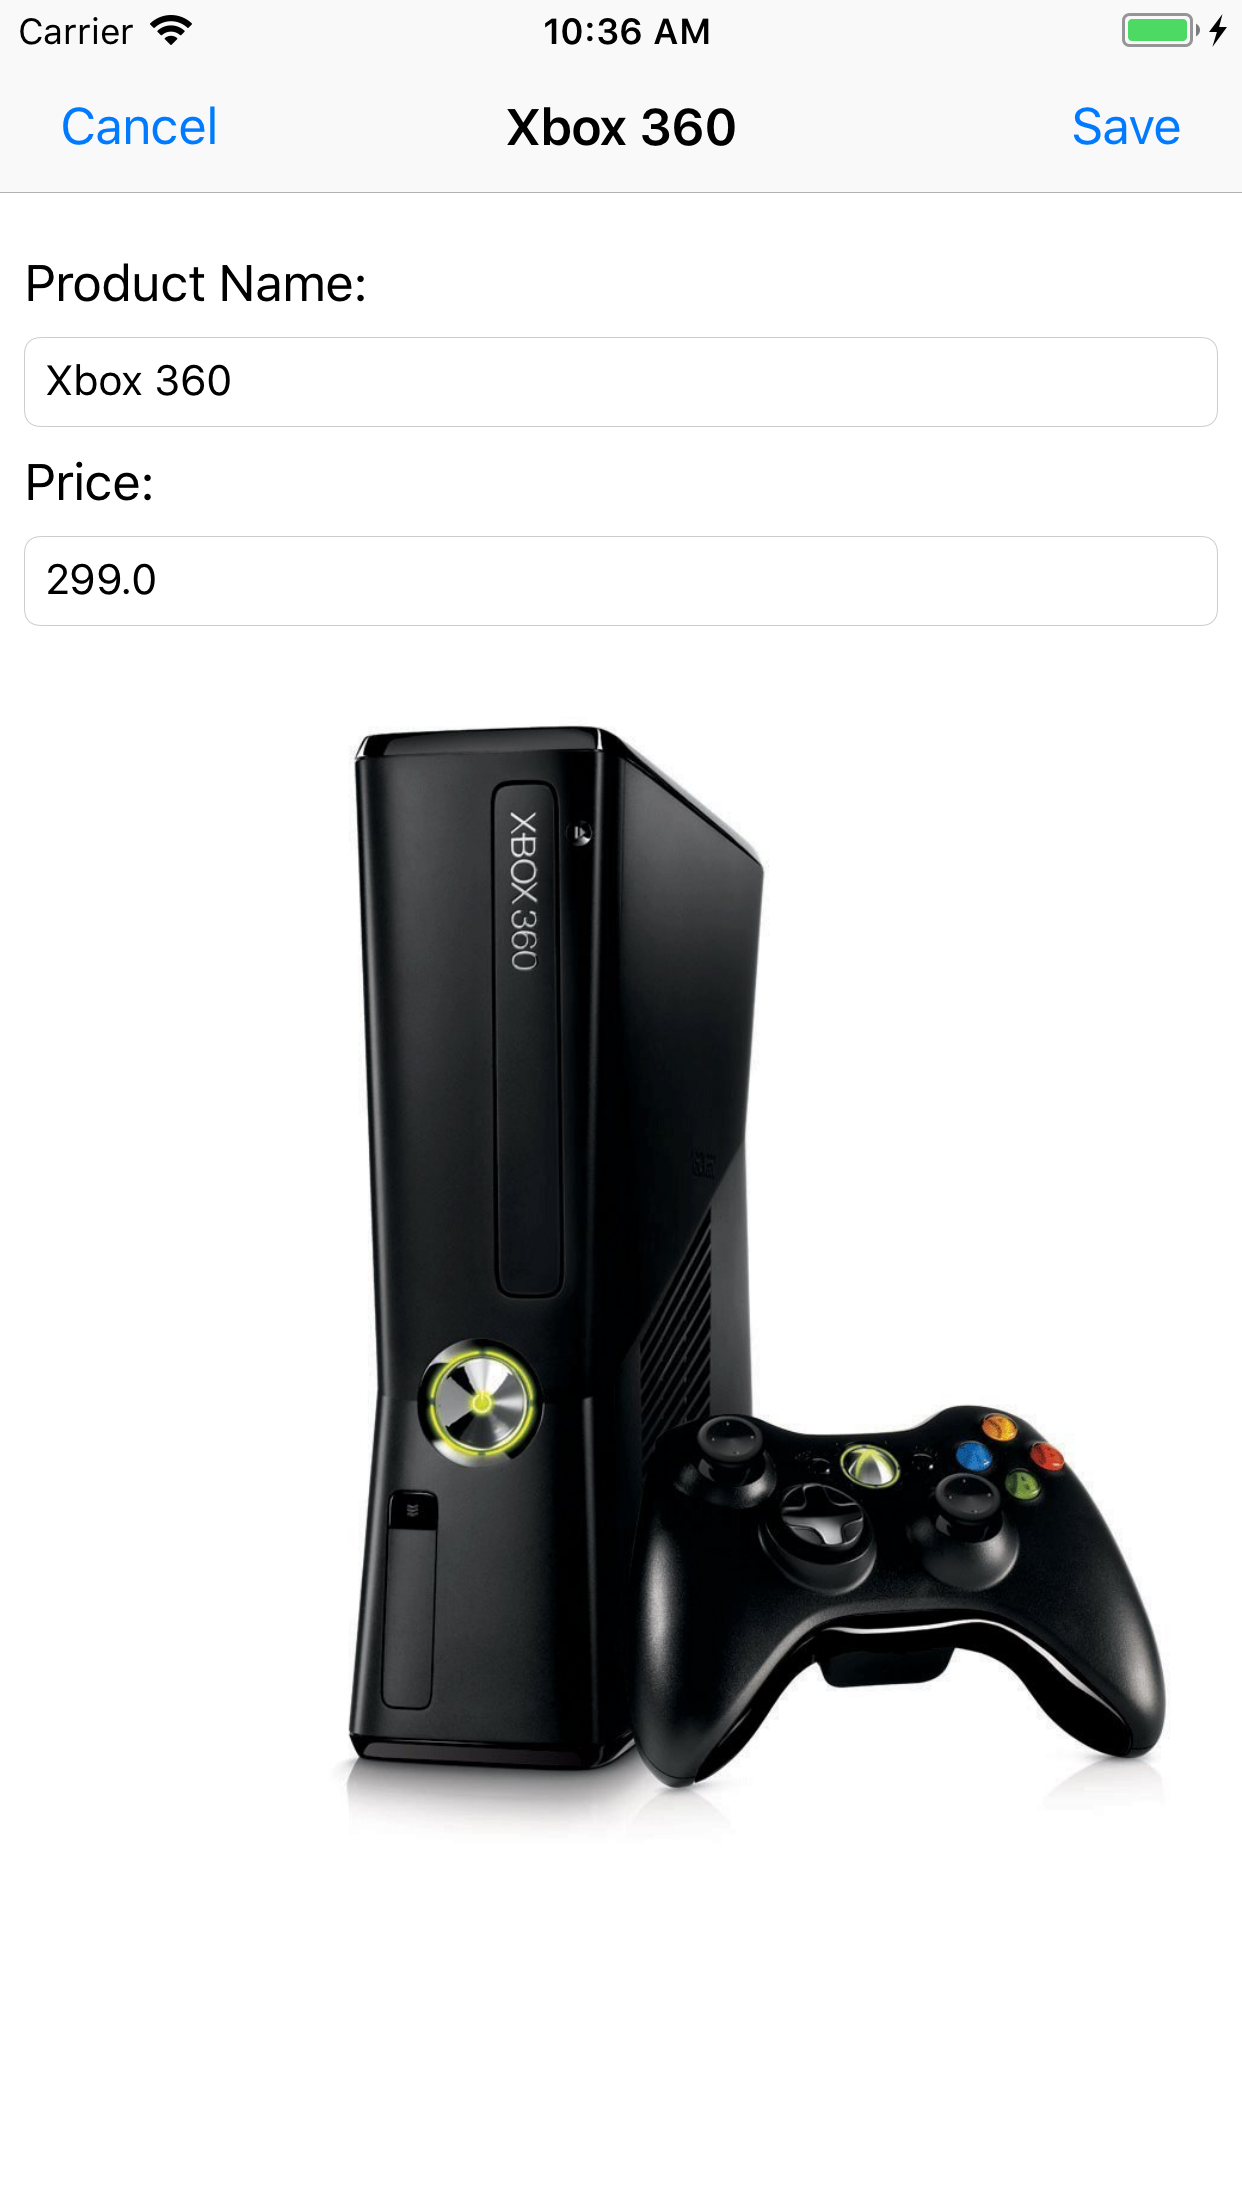
Edit product.
Delete product.
In landscape view.