8725. Deploying Node.js Application to Amazon EC2Amazon EC2, Node.js, and Putty
Introduce how to deploy Node.js application to Amazon Cloud Server, EC2.
Node.js application can be hosted by various web servers, Apache, IIS, Nginx, etc. In this post, I introduce how to deploy Node.js application to Amazon Cloud Server, EC2.
There are mainly 5 steps:
- Create EC2 Instance
- Use Putty to Connect EC2 Remote Server
- Setup Node.js environment in EC2 Instance
- Create simple node app and start Node server
- Deploy Local Node.js application to EC2 Instance
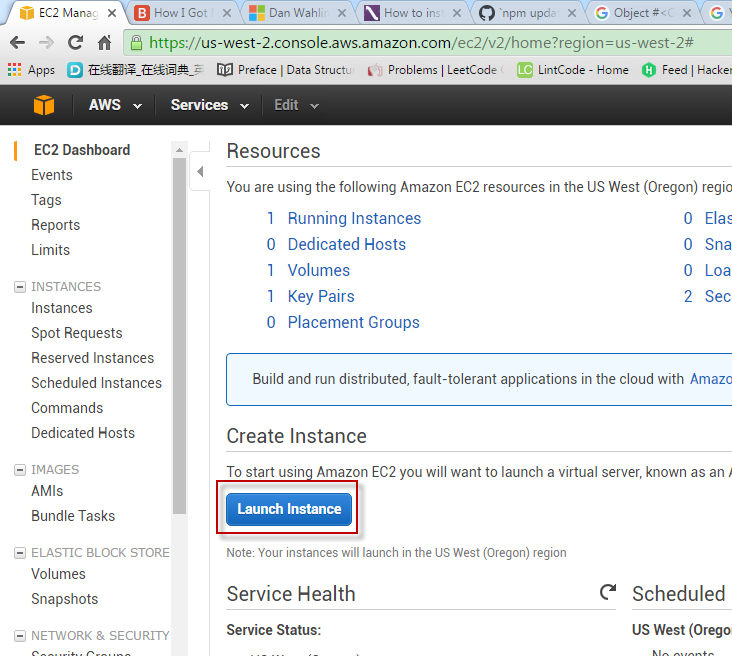
1. Creating EC2 Instance
1.1 Logging into Amazon EC2
Sign up ‘Amazons free micro instance of EC2’ if you have no AWS Account yet.
1.2 Creating Instance
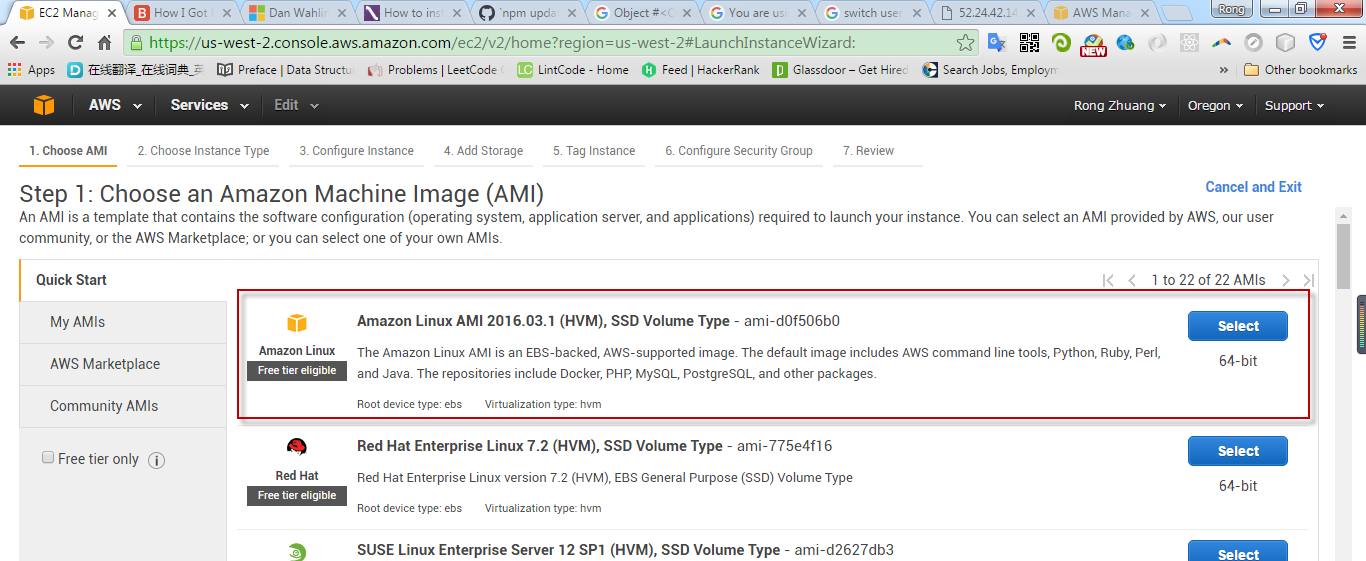
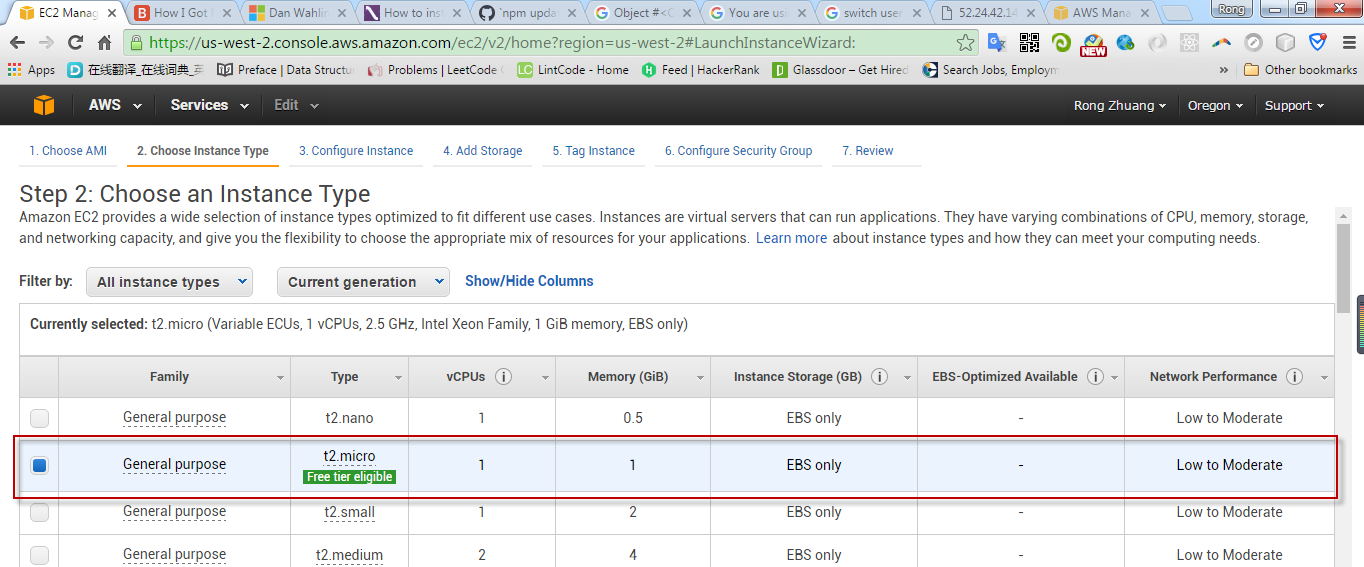
Finally, review and launch.
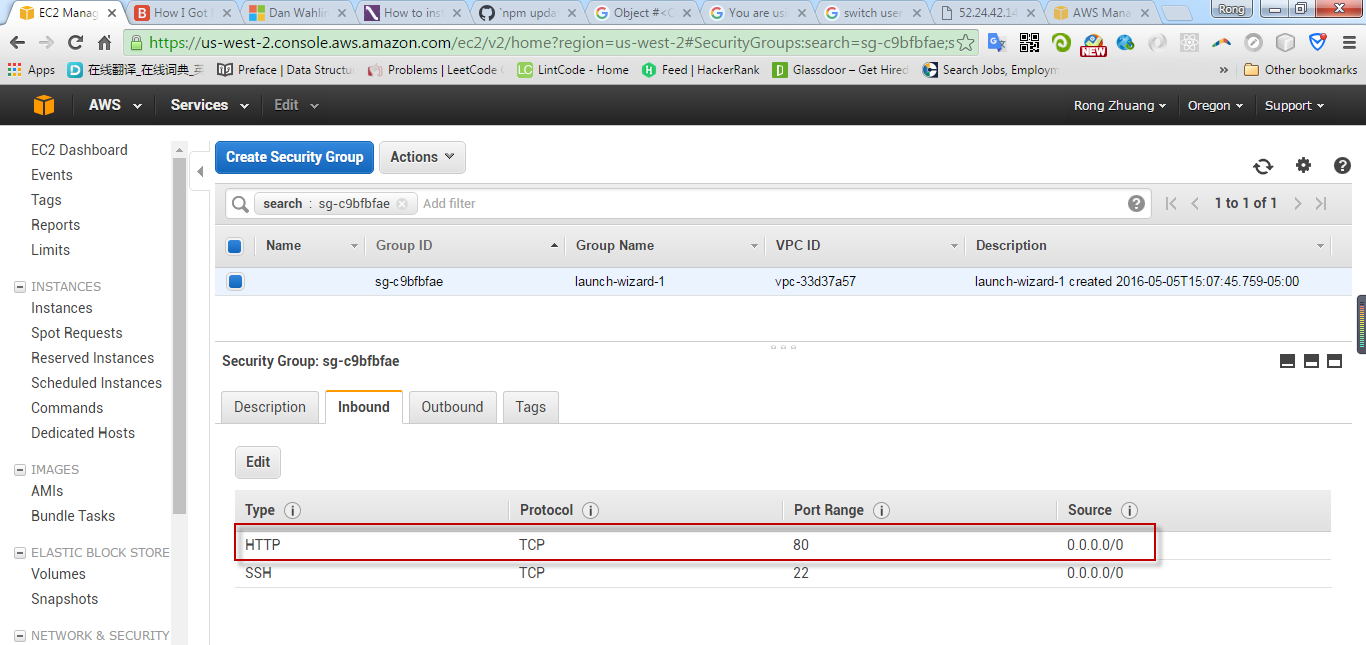
After the instance is generated, create security group.
1.3 Creating Key Pair
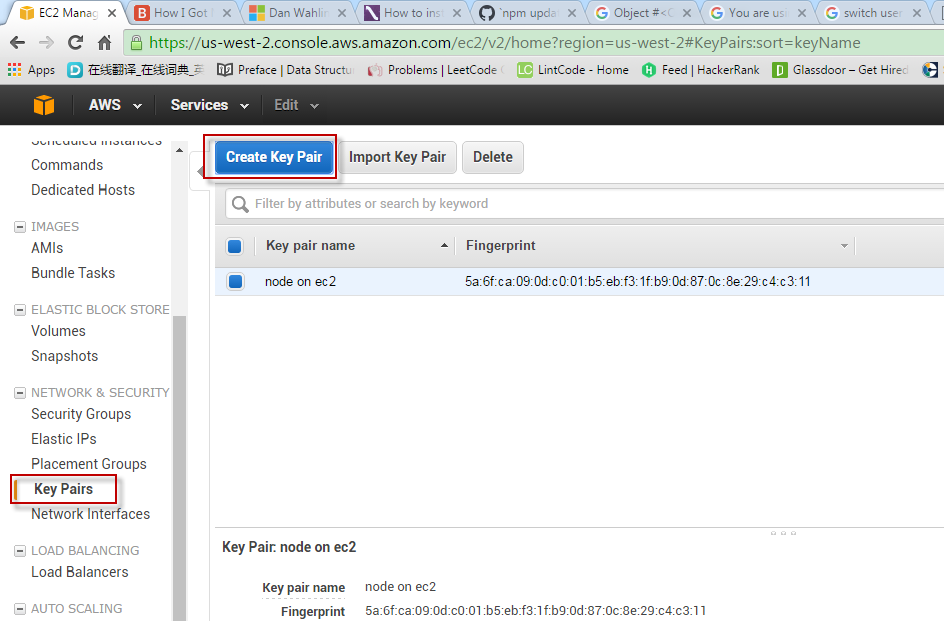
Download the private key to local machine, eg. nodeonec2.pem.
2. Using Putty to Connect EC2 Remote Server
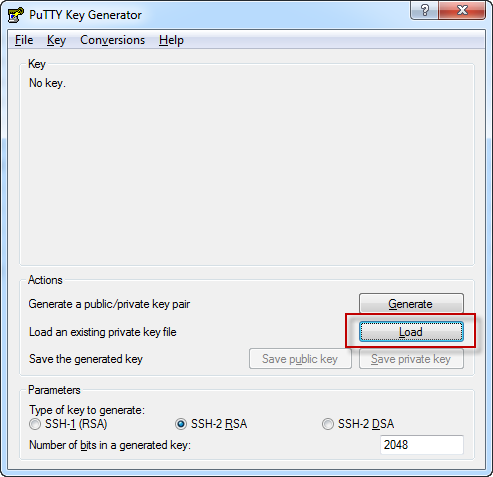
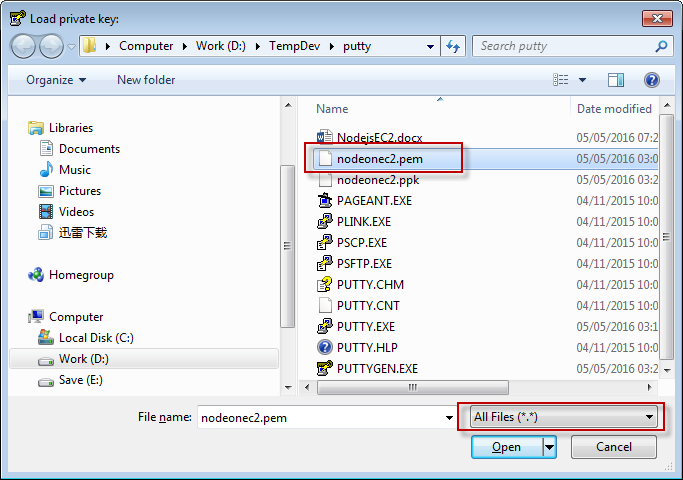
2.1 Using PUTTYGEN.EXE to convert key
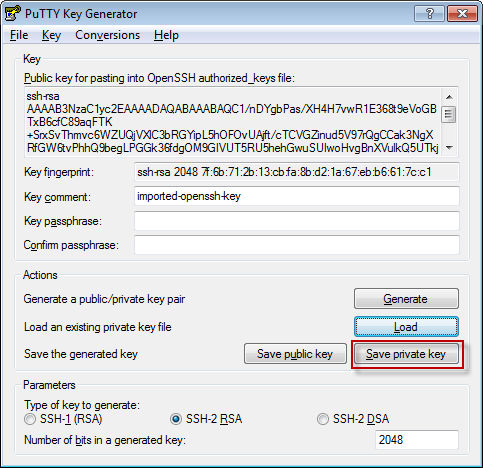
After save, nodeonec2.ppk is generated.
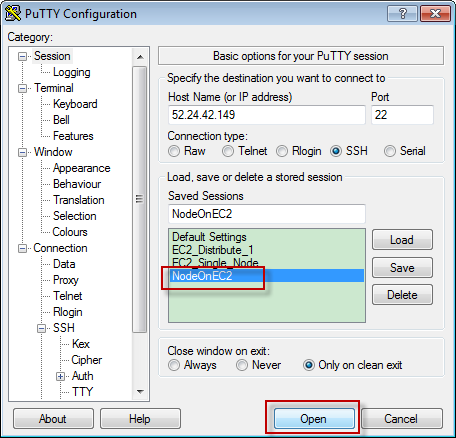
2.2 Configuring PUTTY.EXE
In session, provide IP address(The public ip of your EC2 instance) and session name.
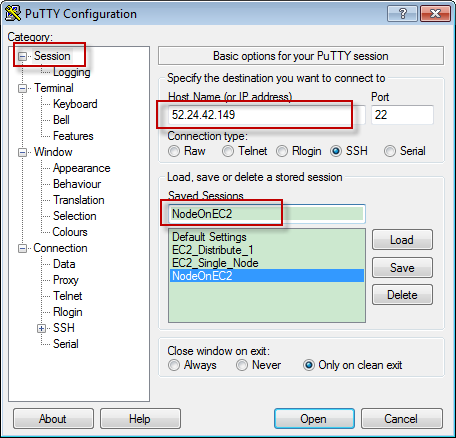
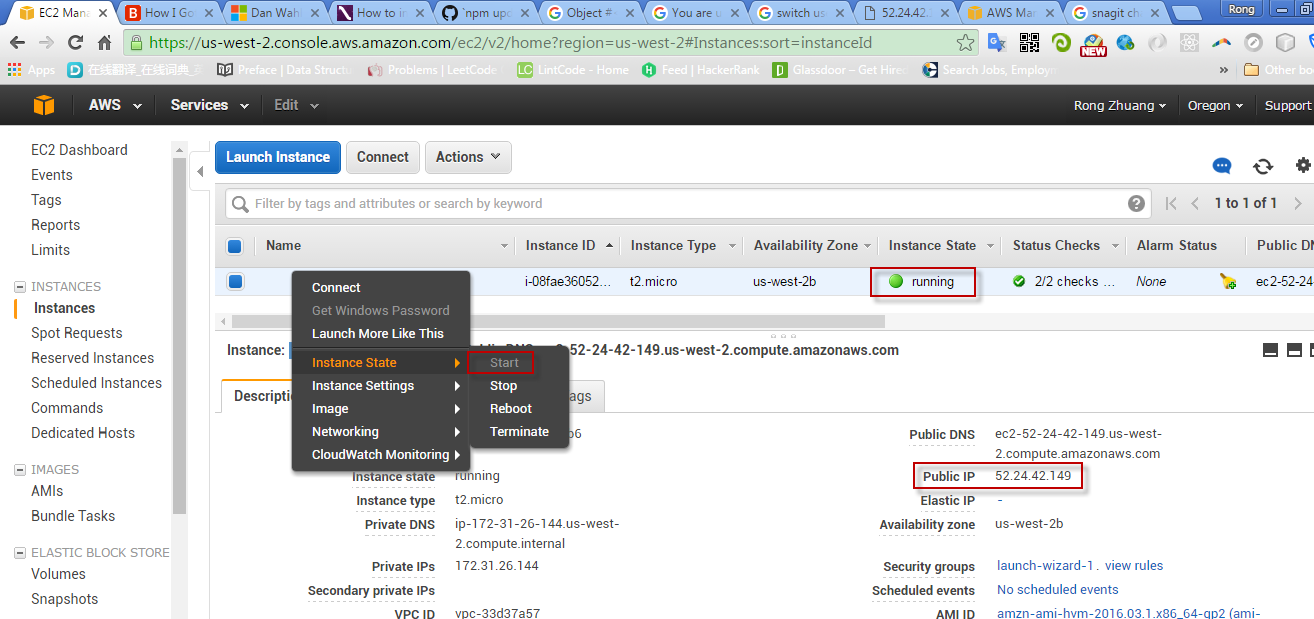
The IP is the Public IP of your EC2 instance. It is only available when the instance is running.
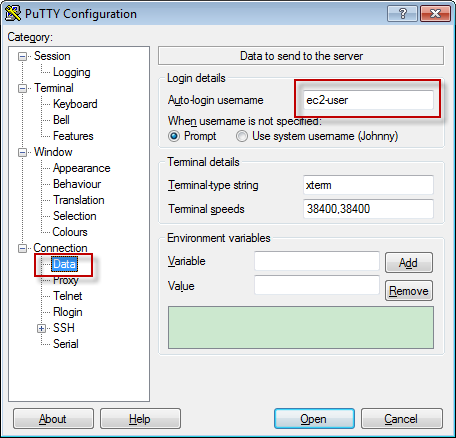
Connection->Data, add user, always ‘ec2-user’.
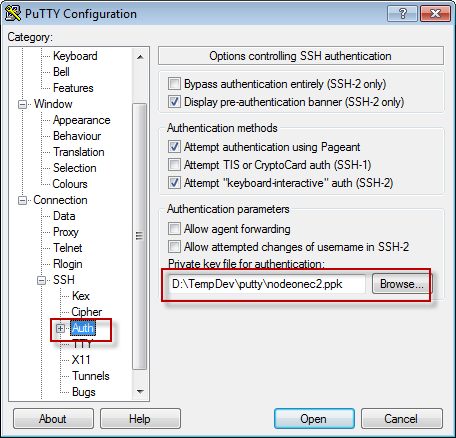
Connection ->SSH ->Auth, load the private key ppk file.
Back to session, save the configuration.
2.3 Connecting to EC2 remote server
Choose the newly created session, double click it or click the ‘Open’ button.
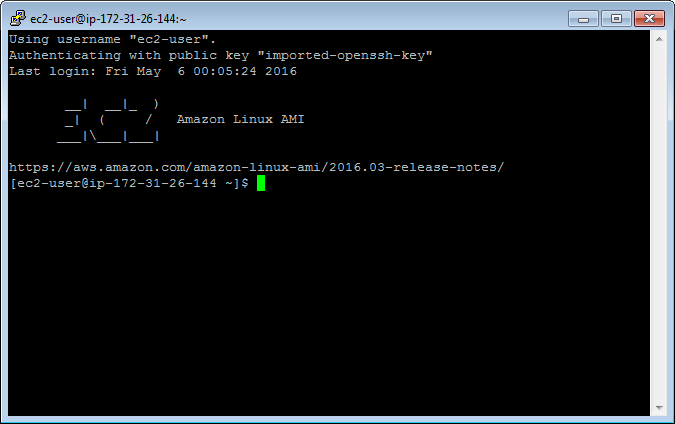
Note, the IP address here is internal IP. When using putty to connect EC2 remote server, make sure launch the instance first. You have to change the IP in putty every time if you reboot the instance. The Public IP address of the EC2 instance changes to different value once it restarts.
3. Setting up Node.js environment in EC2 Instance
3.1 Updating your EC2 Amazon Linux
$ sudo yum update
3.2 Installing GCC
$ sudo yum install gcc-c++ make
$ sudo yum install openssl-devel
3.3 Installing Node.js
$ sudo yum install git
$ git clone git://github.com/nodejs/node
$ cd node
$ ./configure
$ make //it may take long time to compile
$ sudo make install
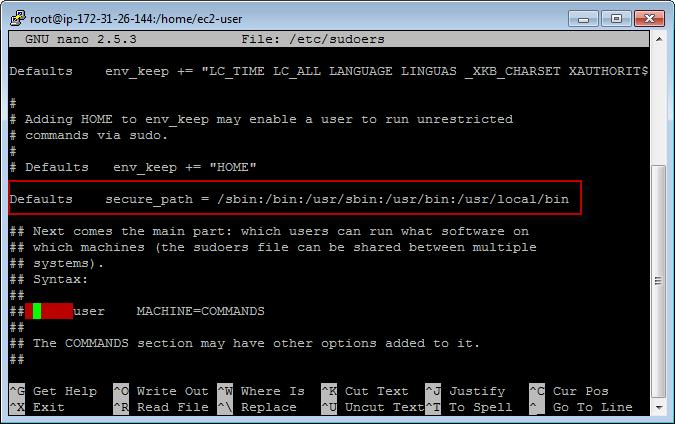
3.4 Adding node folder to secure_path
$ sudo su
$ nano /etc/sudoers
Append :/usr/local/bin to the end of secure_path
3.5 Installing npm
$ git clone https://github.com/npm/npm
$ cd npm
$ sudo make install
4. Creating simple node app and start Node server
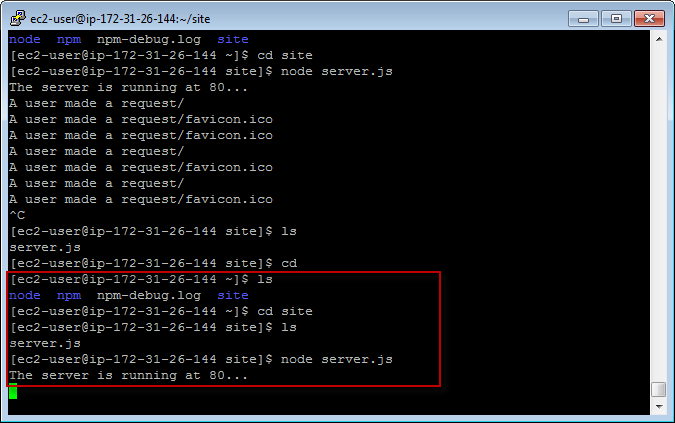
4.1 Creating folder ‘site’
$ mkdir site
4.2 Creating file ‘server.js’
$ nano server.js
Apend the following content to the file, save and exit.
var http = require('http');
function onRequest(request, response) {
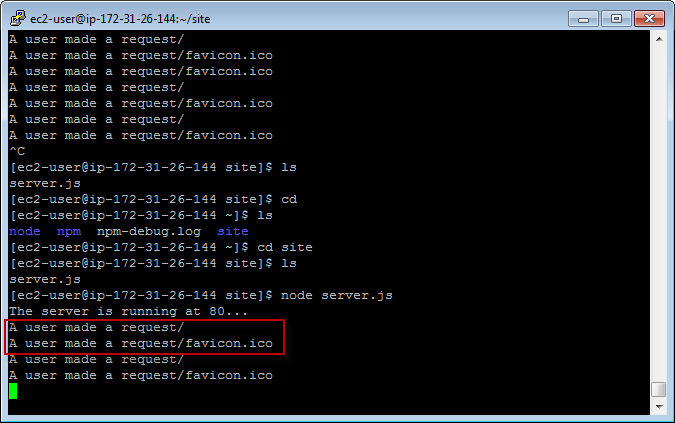
console.log("A user made a request" + request.url);
response.writeHead(200, {"Context-Type": "text/plain"});
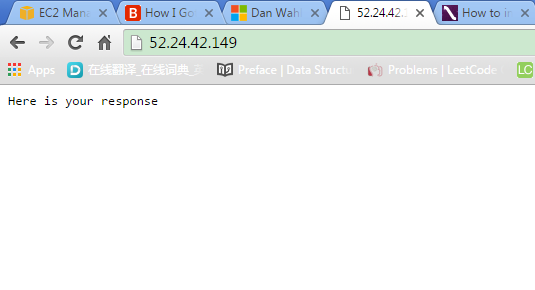
response.write("Here is your response");
response.end();
}
http.createServer(onRequest).listen(8080);
console.log("The server is running at 80...");

4.3 Redirecting Port
You cannot make node server listen to port 80. Run the following command to redirect requests from port 80 of EC2 server to port 8080 of our Node server. You must execute it in root role. And it needs to be reset each time your EC2 instnace is restarted.
$ iptables -t nat -A PREROUTING -p tcp --dport 80 -j REDIRECT --to 8080
4.4 Starting Node Server
4.5 Opening web browser, access the site with public IP.
5. Deploying Local Node.js application to EC2 Instance
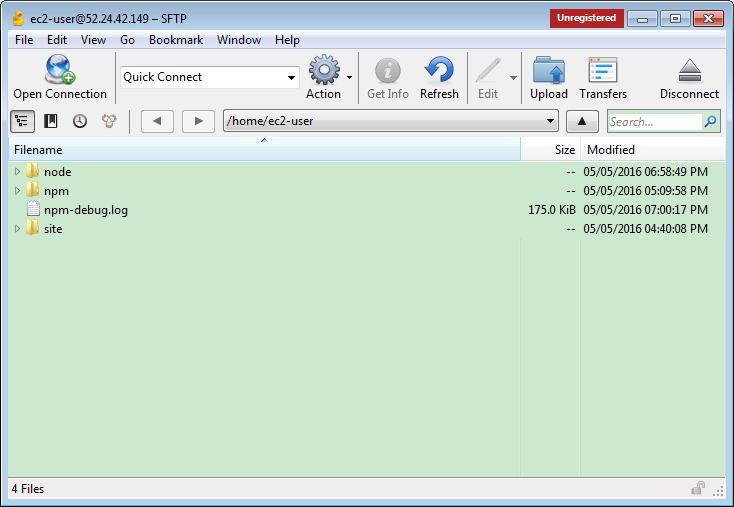
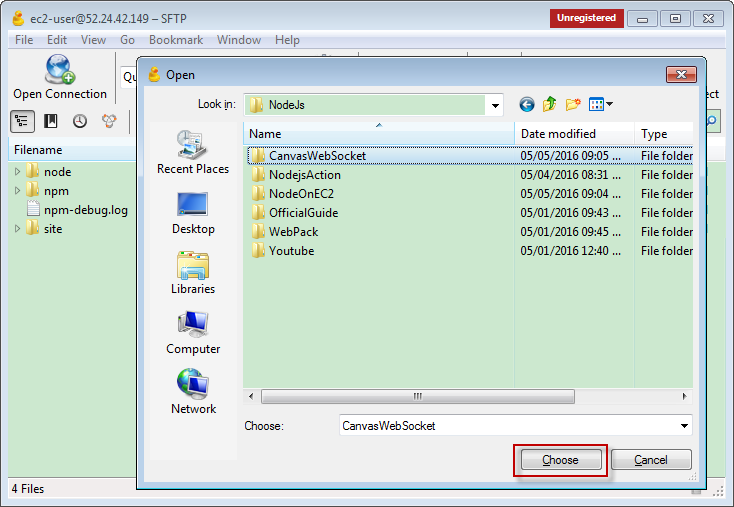
5.1 Installing CyberDuck
5.2 Launching CyberDuck and Upload

Select the folder, make sure delete all files in ‘node_modules’ folder.
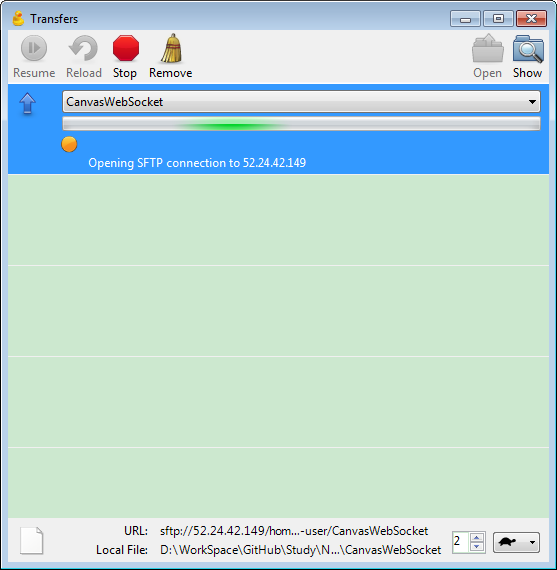
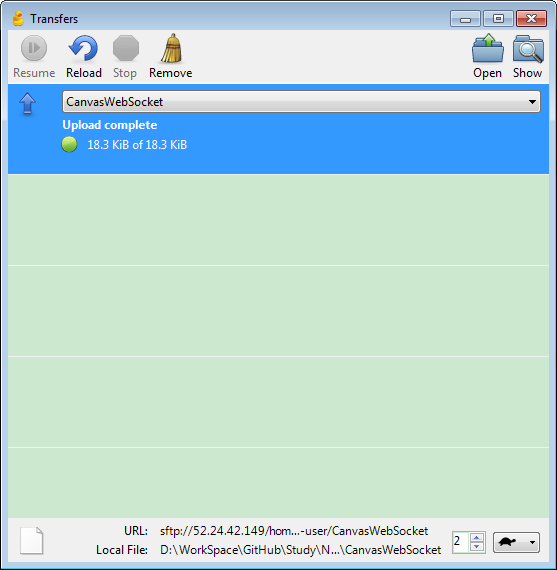
Refresh the folder in putty, the new folder exits.

5.3 Running the node application
Go into the folder, and run the following commands.
$ npm install
$ npm start
5.4 Testing the Node.js Application
This Node.js project is a drawing application. It uses Socket.IO to broadcast the changes from one client to other clients.
1) The first user opens it in Chrome, waits others to join and draws something later.
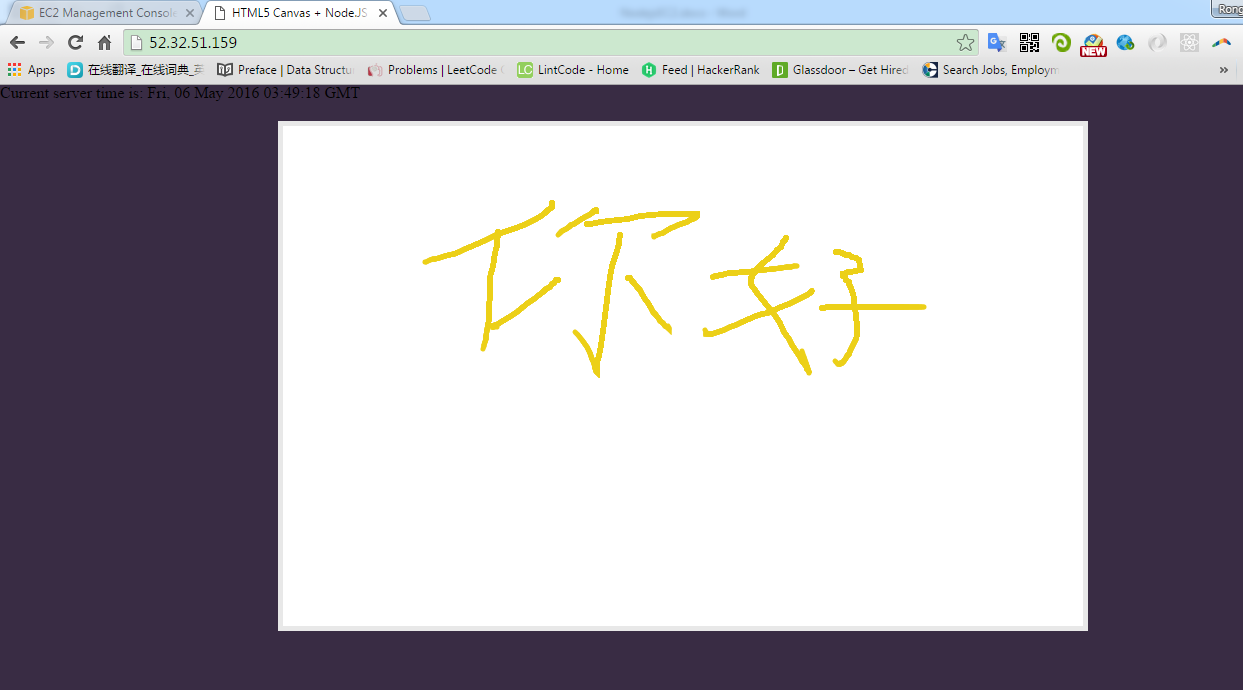
2) The second user opens it in Firefox. The same painting as the first user draws.
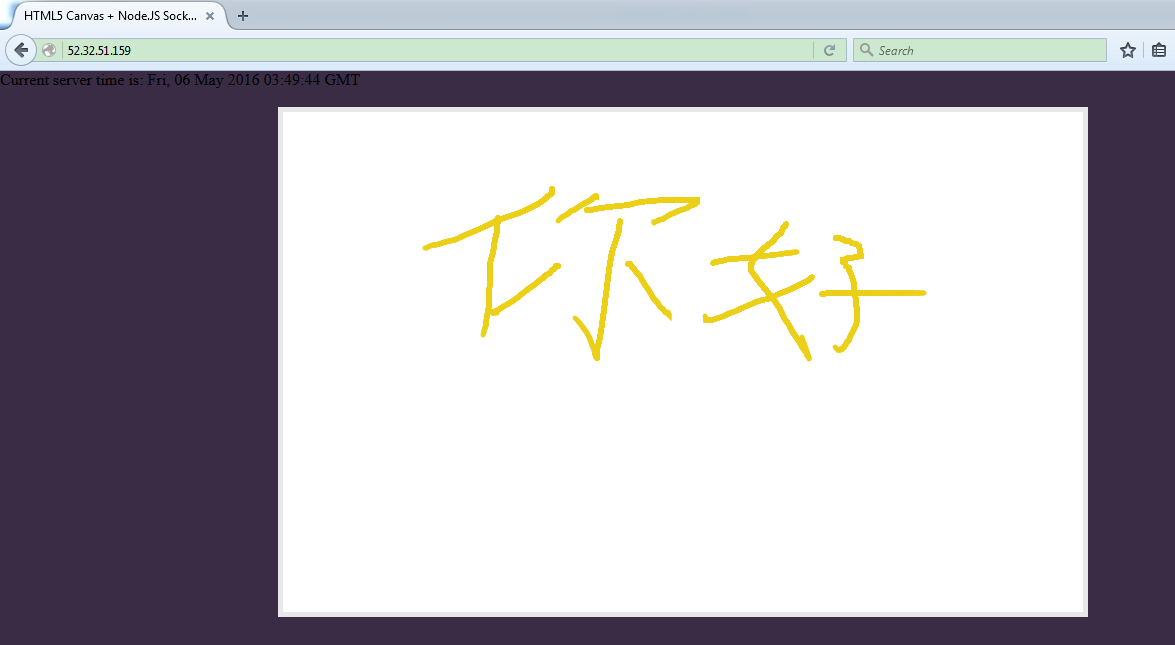
3) The third user open it on iPad.

4) The forth user opens it on iPhone.
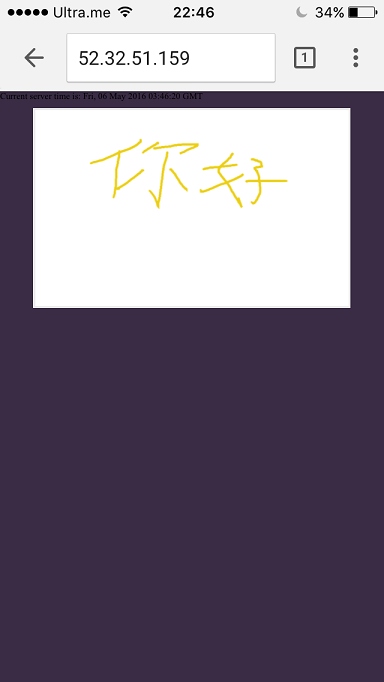
Until now, the application is running properly.
6. Useful commands in linux
| Command | Description |
|---|---|
| ls | Show files/directories under the current folder |
| sudo su | Switch to root user |
| sudo su – ec2-user | Switch to ec2-user |
| nano filename | Open/Create file with nano |
| mkdir foldername | Create folder |
| sudo make uninstall | Uninstall, go to the folder and run it. |
7. Reference
- How I Got Node.js Running On A Linux Micro Instance Using Amazon EC2
- How to install & setup Node.js on Amazon EC2 – complete guide
- Setup Node.Js Enviroment on Amazon EC2 linux
- Uninstall npm
8. Issues
8.1 Removing npm
Sometime, npm itself doesn’t work properly.
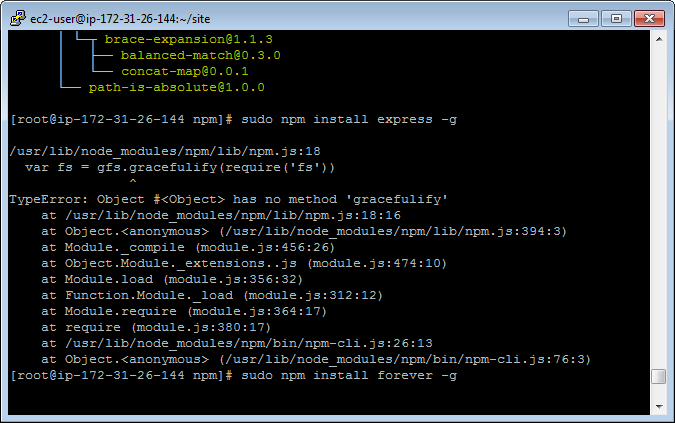
Then we have to uninstall and install it again.
$ sudo npm uninstall npm -g
If it doesn’t work, go the ‘npm’ folder, run:
$ sudo make uninstall